

Page 1
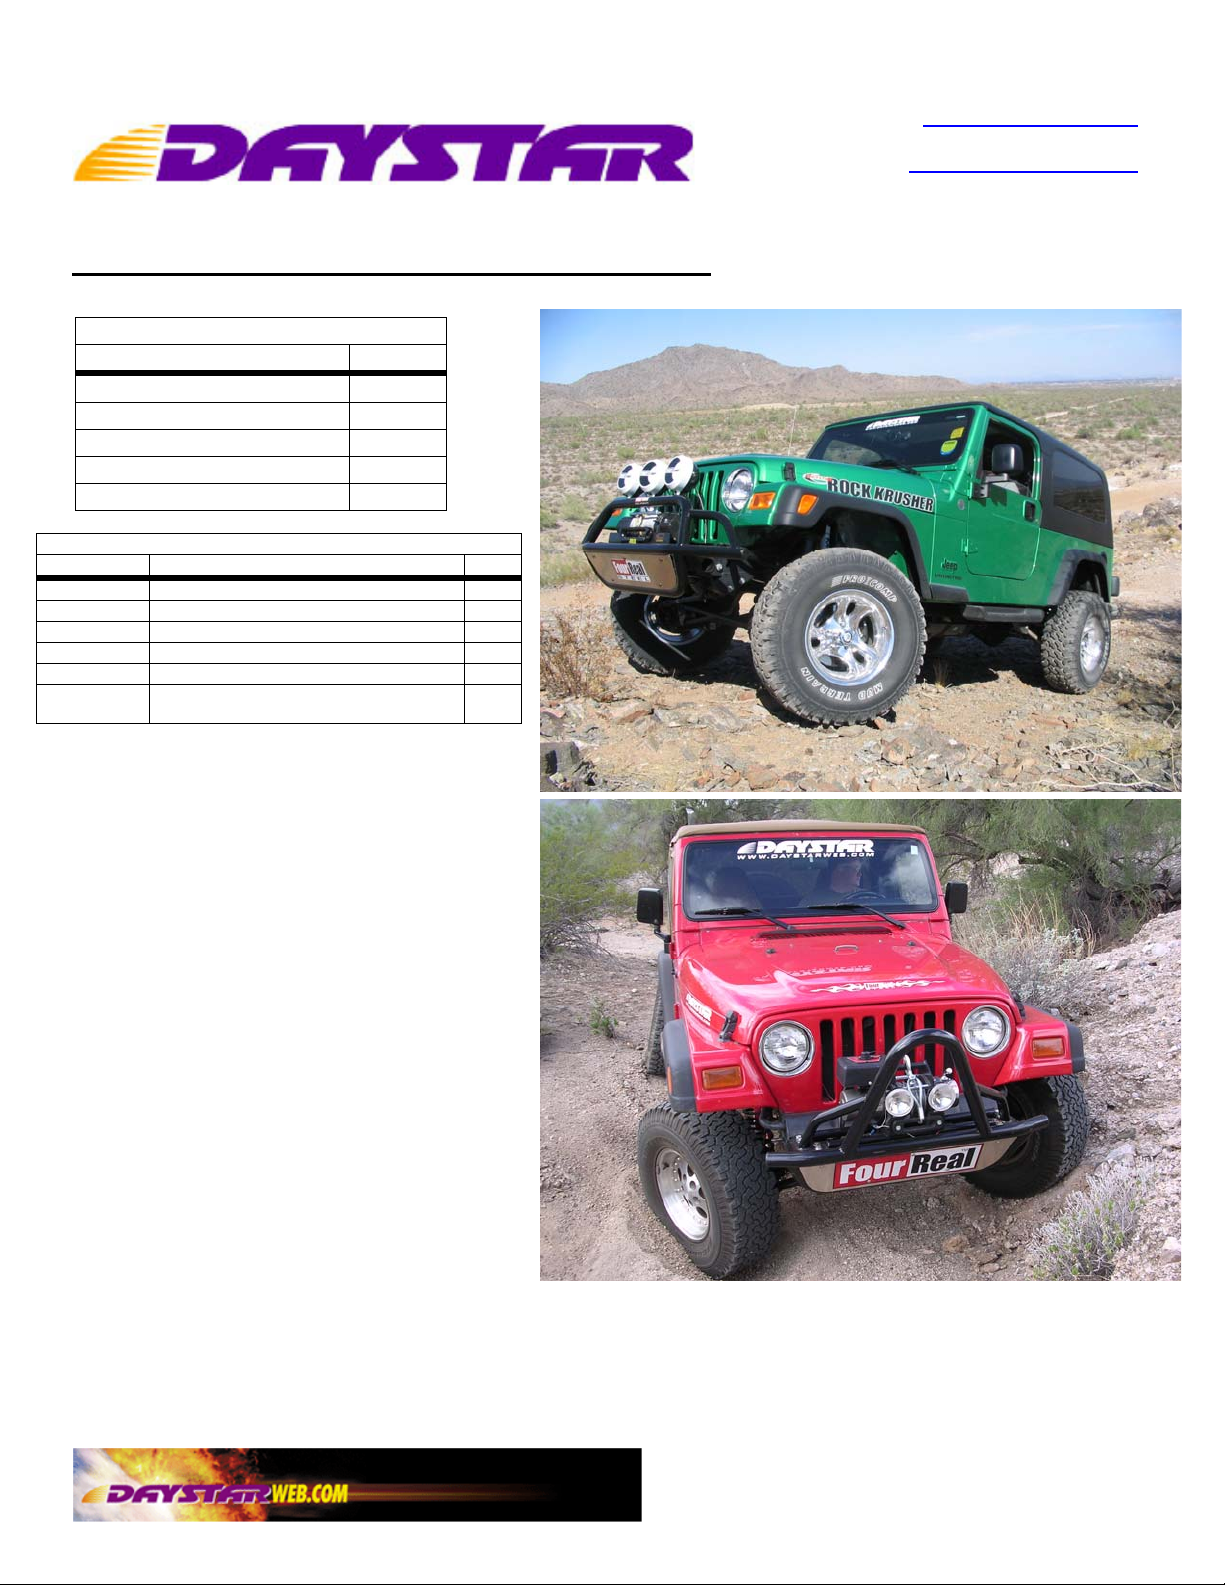
KJ09126 1997-2006 Jeep TJ/LJ Rock Krusher
3” Coil Spring Spacer Lift Kit
DO NOT COMBINE WITH ANY OTHER SUSPENSION KIT
Standard Hand Tools 1
Wrench Set & Socket Set 1
Coil Spring Compressor 1
Drill + 5/16-11/32 Bit 1
Floor Jacks / Jack Stands 2 per
Tools required
Description: Qty.
www.DaystarWeb.com
Tech Support Contact Info
Tech@DaystarWeb.com
Phone: 623.907.0081
Fax: 623.907.0088
841 South 71
Phoenix, AZ 85043
st
Avenue
Part No. Description Qty.
M03606 PU,COIL SPRING SPACER 2
M03520 PU,BUMP STOP W/BOLT INSERT 4
M02878 PU,COIL SPRING SPACER 2
S10922 BRACKET, TRACKBAR, REAR 1
BJ09126-B BAG KIT,SUSP LIFT, 3",JEEPTJ 1
BJ09126-A
(TRANSFERCASE DROP HARDWARE)
Bill of Materials
BAG KIT,SUSP LIFT, 3",JEEPTJ
1
Step(s)
TRANSFER CASE DROP INSTRUCTIONS
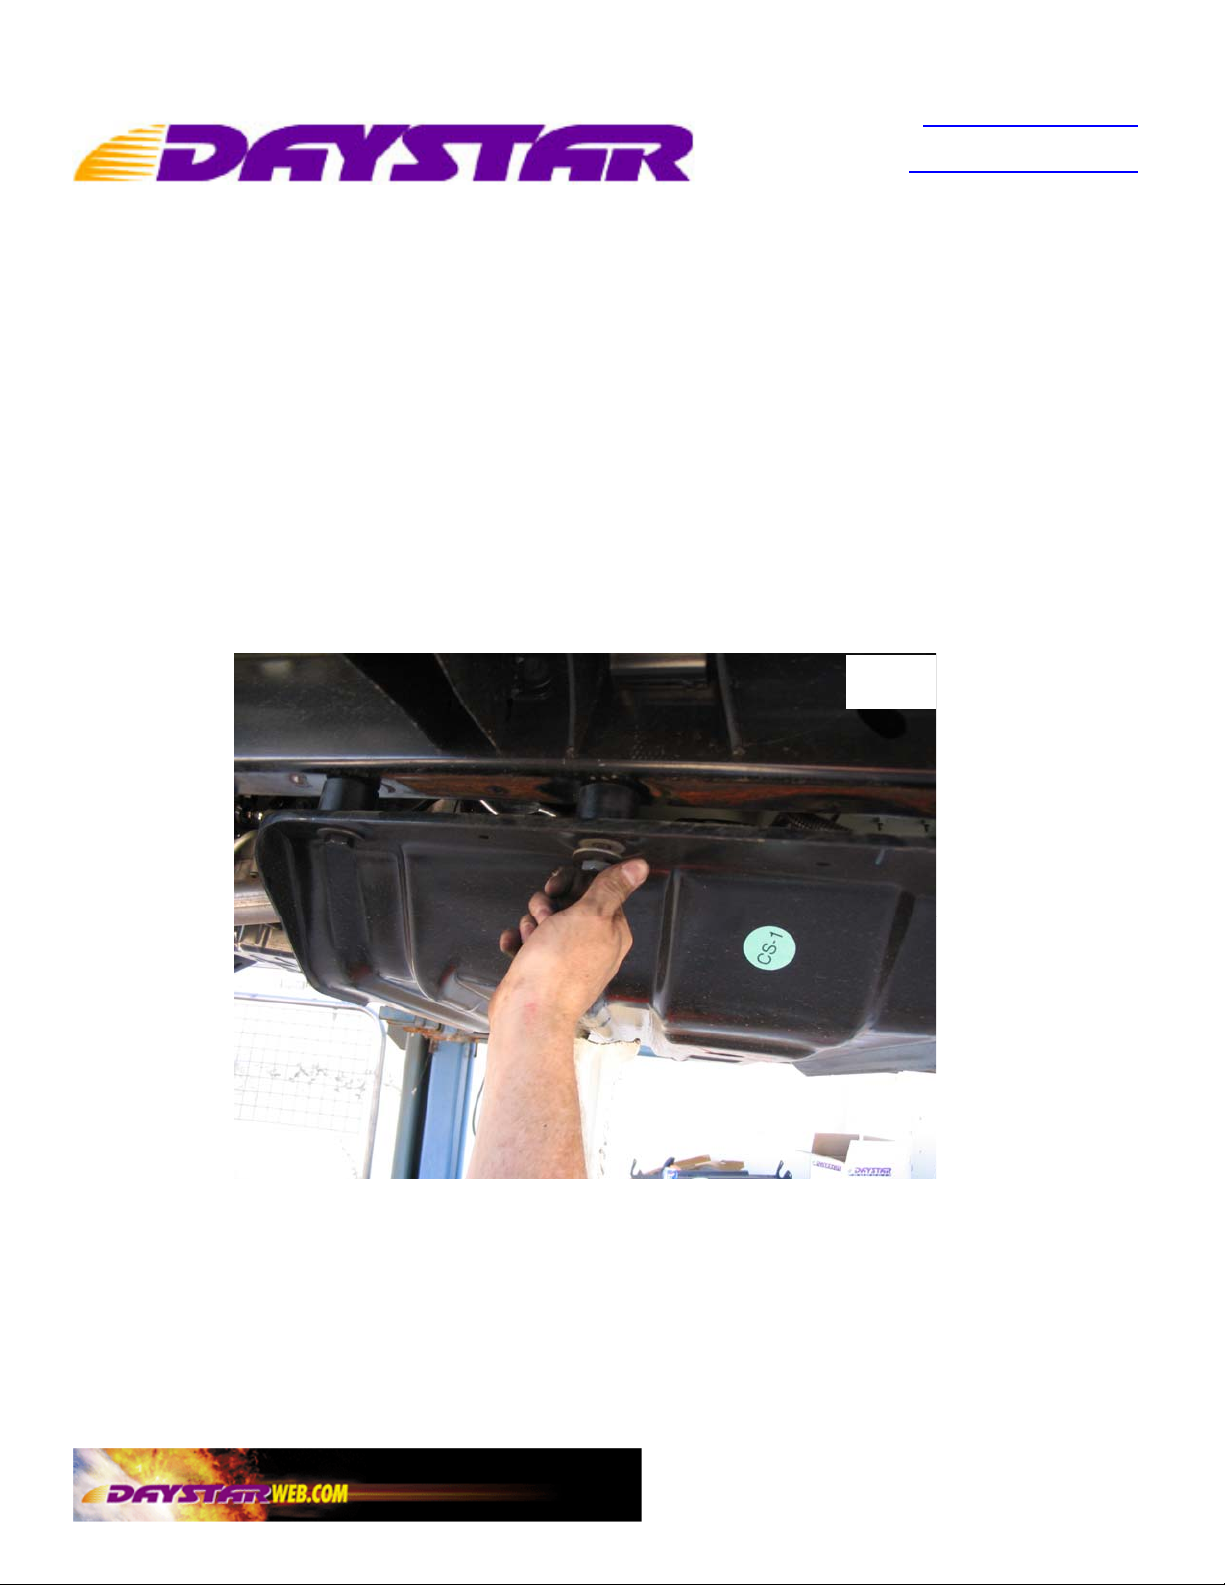
1. Place a floor jack under the transfer
case cover. Remove all bolts from one
side of the cover, lower the jack and put
supplied polyurethane spacers and steel
sleeves between the cover and the
frame. (supplied are 1/2-13 for 19972003 TJs and M12X1.75 bolts for 2004newer jeeps)
LIFT INSTRUCTIONS
2. Layout all parts and check quantities
against the Bill of Materials. Completely
read instructions before beginning
installation.
3. Make sure you are working on a level,
stable concrete surface or using a lift to
perform this work.
4. Either using a lift or floor jacks, lift the
front of the jeep to full droop (where
wheels are just off the ground). If a floor
jack is used, transfer the vehicle to jack
stands. Pull front wheels.
5. Place two floor jacks under the front axle and load (lift) the suspension 2”.
6. Pull shocks off, disconnect sway bar end links and unbolt the track bar. (Fig. 2, 3)
7. Lower the suspension to full droop again.
Instruction Sheet P10862-00
© 2008 Daystar Products International Inc.
Page 2
www.DaystarWeb.com
Tech Support Contact Info
Tech@DaystarWeb.com
KJ09126 1997-2006 Jeep TJ/LJ Rock Krusher
3” Coil Spring Spacer Lift Kit
8. Remove one spring (mark or note orientation before removal), take old bump stop off, and remove
steel bump stop mount and old OE spring isolator. Fig 4,5,6.
9. Install the new isolator (M03606)
10. Using the spring compressor compress spring enough that it can be placed back into position.
11. Install spring while holding new bump stop inside of spring. Install the new bump stop
when the spring is in place. Next, decompress the spring. Fig. 7
12. Repeat steps 7-10 for the other side of the vehicle.
13. Front track bar relocation. Drill a new 7/16 diameter mounting hole in the track bar’s axle bracket,
where shown. Shift the axle assembly as necessary to align the track bar eye with the new hole.
Insert the stock fastener and tighten. Fig 8 page 3
14. Repeat all installation steps on rear suspension. Fig. 9, and Page 4.
15. Torque all bolts to factory specifications. Re-torque all bolts after 500 miles
Fig.1
841 South 71
Phone: 623.907.0081
Fax: 623.907.0088
hoenix, AZ 85043 P
st
Avenue
Instruction Sheet P10862-00
© 2008 Daystar Products International Inc.
Page 3

KJ09126 1997-2006 Jeep TJ/LJ Rock Krusher
3” Coil Spring Spacer Lift Kit
16. t
17. t
18. t
Fig.5
Fig.3 Fig.4 Fig.2
Fig.6
www.DaystarWeb.com
Tech Support Contact Info
Tech@DaystarWeb.com
Phone: 623.907.0081
Fax: 623.907.0088
841 South 71
Phoenix, AZ 85043
st
Avenue
Fig.7
Install new bump stop after
spring is in place
Fig.8
Fig.9
Instruction Sheet P10862-00
© 2008 Daystar Products International Inc.
Page 4

KJ09126 1997-2006 Jeep TJ/LJ Rock Krusher
3” Coil Spring Spacer Lift Kit
www.DaystarWeb.com
Tech Support Contact Info
Tech@DaystarWeb.com
Phone: 623.907.0081
Fax: 623.907.0088
841 South 71
st
Avenue
Phoenix, AZ 85043
WARNING
This vehicle has been modified to enhance its performance.
The steering, braking and handling of this vehicle will differ
from standard passenger cars and trucks; this vehicle handles
differently from an ordinary vehicle in driving conditions which
may occur on streets, highways and off road.
Avoid unnecessary abrupt maneuvers, sudden stops, sharp
turns and other driving conditions that could cause loss of
control, possibly leading to a roll over or other accident that
could result in serious injury or death to driver and passengers.
If larger tires are installed the speedometer will read lower
than the vehicles actual speed.
DRIVE WITH CARE, REDUCE SPEED
AND WEAR SEAT BELTS AT ALL TIMES.
This kit should be installed by a professional mechanic.
© 2008 Daystar Products International Inc.
Instruction Sheet P10862-00
 Loading...