

Page 1
ADVANCE ADAPTERS INC. P/N: 716138-N
P.O. Box 247, 4320 Aerotech Center Way
Paso Robles, CA 93447 PAGE 1 OF 3
Telephone: (800) 350-2223 Fax: (805) 238-4201 Page Rev. Date: 06-28-10
JEEP 4.0L AUTOMATIC ADAPTER FLEX PLATE
SENSOR KIT 1997-2004
KIT CONSISTS OF:
No. Qty Part No. Description
1. 1 716138-N1 SENSOR FOR '97-'04 4.0 BLOCK
2. 1 716138-SB SENSOR MOUNTING BLOCK
3. 1 716012-S LOOM CONNECTOR
4. 1 722543 S.H.C.S. 1/4-20 X 1-1/2
5. 1 722544 F.H.C.S. 1/4-20 X 3/4
INSTALLATION INSTRUCTIONS:
The Crank Position Sensor Bracket retains the sensor in the stock Jeep location. This allows for the proper signal
for the 4.0L ignition timing. The stock GM automatic bellhousing must be modified prior to installation. This
is required for clearance of the sensor and bracket.
Installation:
1. This kit works with our adapter kit 716138 and 716138-1manufactured after June 1st 2010.
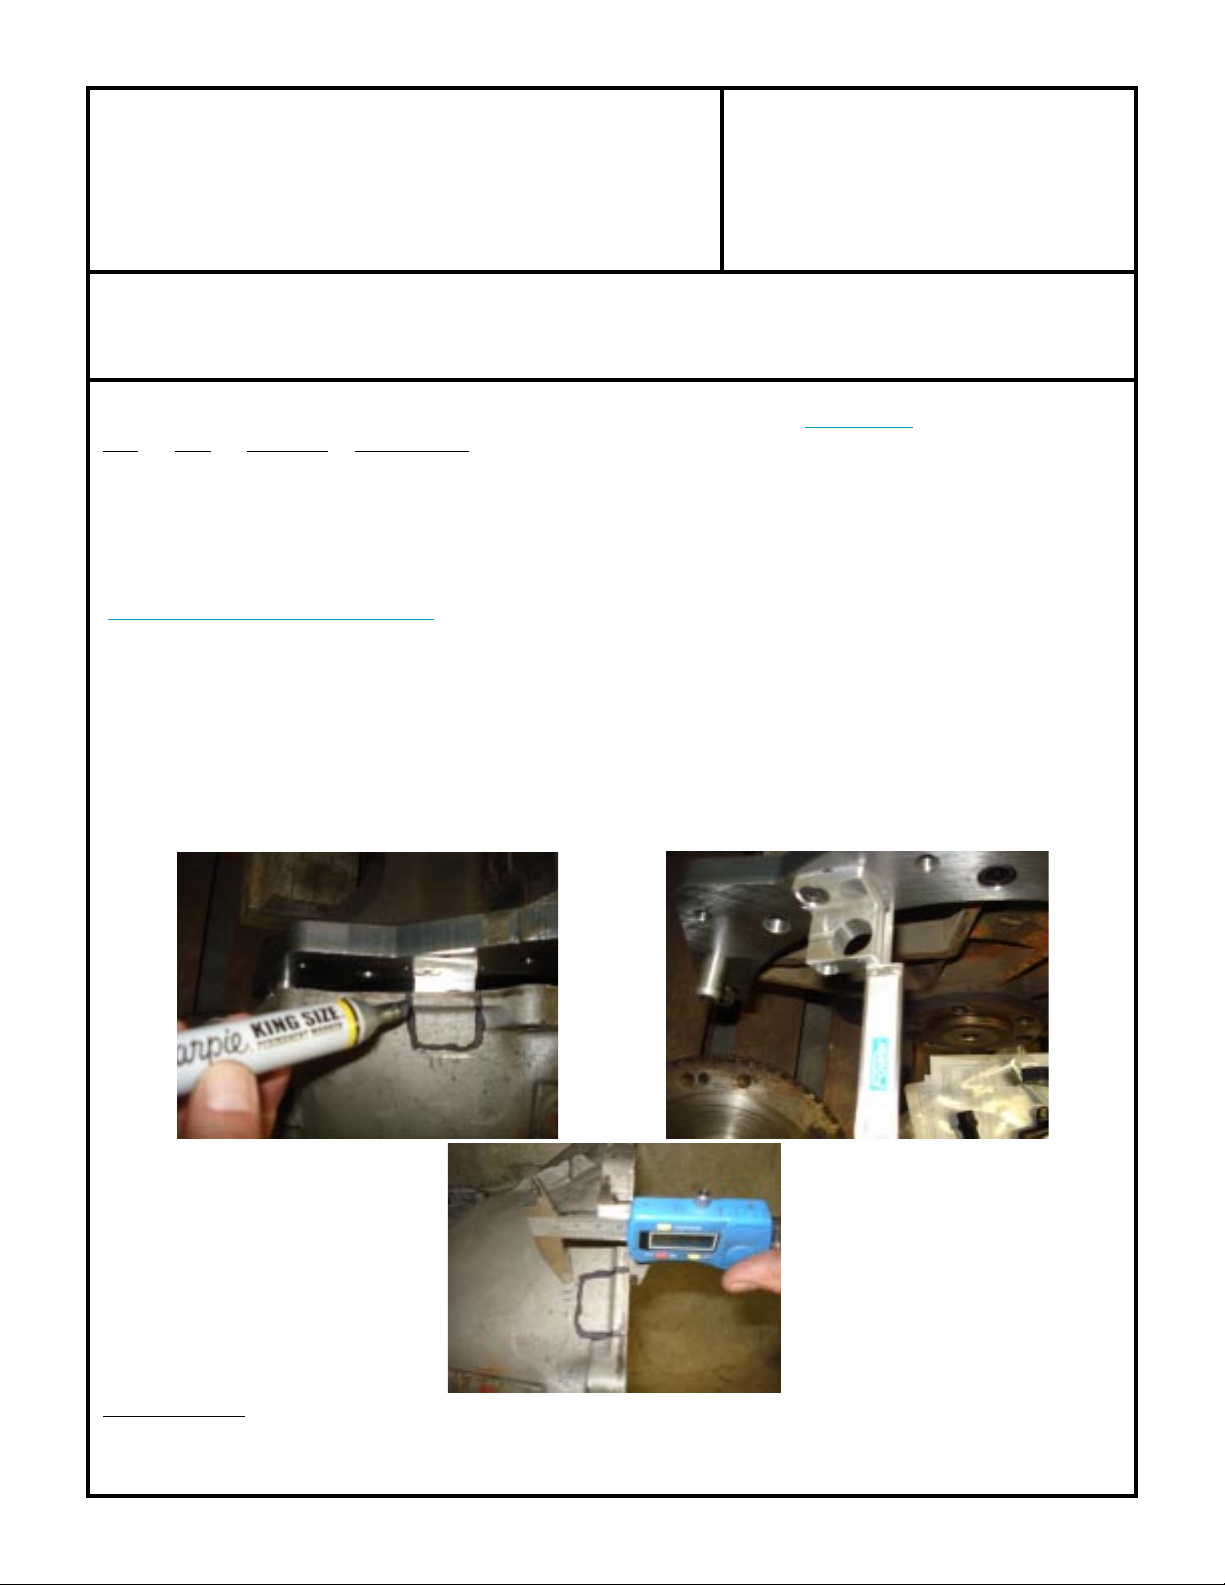
2. Mount the aluminum block to the adapter plate, test fit the GM transmission to the adapter plate and mark
the boundaries of the sensor block to the GM bellhousing. Measure and mark the distance that the sensor
block protrudes from the adapter plateand remove the square marked area for clearance of the aluminum
sensor block.
Warning:
Jeeps that were equipped with the
42RLE automatic will require custom PCM programing and wiring
modification. The 42RLE overdrive transmssion was used in 2003
and 2004 Jeeps.
SPECIAL NOTE: The components packaged in this kit have been assembled and machined for specific type of conversions. Modifications to any of
the components will void any possible warranty or return privileges. If you do not fully understand modifications or changes that will be required to complete
your conversion, we strongly recommend that you contact our sales department for more information. This instruction sheet is only to be used for the assembly
of Advance Adapter components. We recommend that a service manual pertaining to your vehicle be obtained for specific torque values, wiring diagrams
and other related equipment. These manuals are normally available at automotive dealerships and parts stores.
Page 2
ADVANCE ADAPTERS INC. P/N: 716138-N
P.O. Box 247, 4320 Aerotech Center Way
Paso Robles, CA 93447 PAGE 2 OF 3
Telephone: (800) 350-2223 Fax: (805) 238-4201 Page Rev. Date: 06-28-10
JEEP 4.0L AUTOMATIC ADAPTER FLEX PLATE
SENSOR KIT 1997-2004
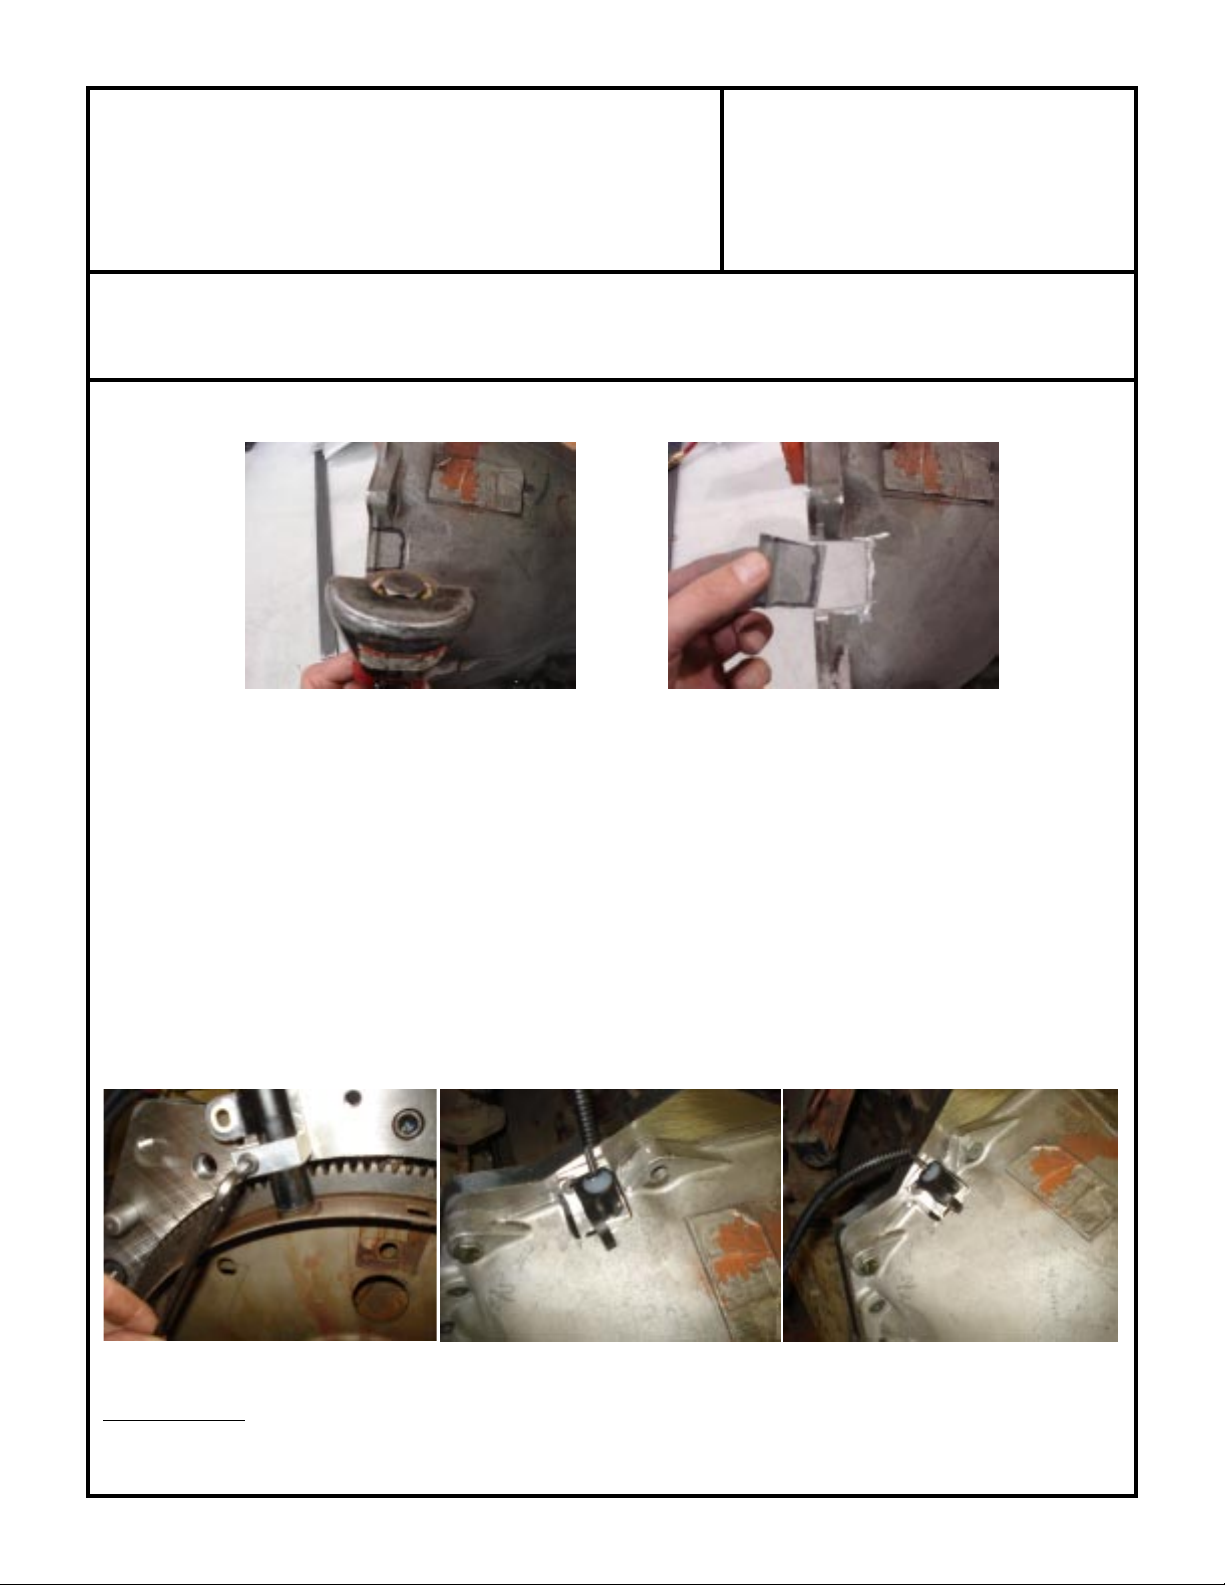
3. Use a cutting disc in an angle grinder or a saber saw, cut the window of the bellhousing. Please be careful not
to remove too much material. Always use proper safety gear while removing the material.
4. Test fit the clearance of the bellhousing indicated and the sensor bracket until proper clearance is achieved.
5. Mount the adapter kit to the engine as instructed on the 716138 instruction sheet. Install the flat head cap screw
to the sensor bracket with loctite, slip the sensor into the bracket and loosely install the socket head bolt in place
also with a touch of loctite on the threads.
6. We do not use the mounting hole on this sensor, it is a clamp fit; however, you will need to set the gap on the sensor
to the flex plate before tightening the sensor in place.
7. Some sensors have a felt pad glued to the bottom of the sensor, on these sensors the felt pad is the spacing
(air gap) that is required. So this sensor would be set by having the felt pad touching the flex plate. If the sensor
does not have the felt pad then you will need to set the air gap to .030 to .035" which is basically the thickness
of a credit card. Once the air gap is set, the sensor needs to be clamped into position. Note: since we are not
using the stock mounting hole on the sensor it can be cut off or it will need to be positioned so it is facing
towards the transmission. If the sensor is not clamped in this direction, it will not clear the bellhousing
modifications you made earlier.
8. Make sure the sensor is clamped in tight as the clamp screw is not accessible once the GM transmission is
bolted in place.
9. Connect the sensor plug to your stock computer lead. (2003 & 2004 Jeeps see notes page 3)
SPECIAL NOTE: The components packaged in this kit have been assembled and machined for specific type of conversions. Modifications to any of
the components will void any possible warranty or return privileges. If you do not fully understand modifications or changes that will be required to complete
your conversion, we strongly recommend that you contact our sales department for more information. This instruction sheet is only to be used for the assembly
of Advance Adapter components. We recommend that a service manual pertaining to your vehicle be obtained for specific torque values, wiring diagrams
and other related equipment. These manuals are normally available at automotive dealerships and parts stores.
Page 3

ADVANCE ADAPTERS INC. P/N: 716138-N
P.O. Box 247, 4320 Aerotech Center Way
Paso Robles, CA 93447 PAGE 3 OF 3
Telephone: (800) 350-2223 Fax: (805) 238-4201 Page Rev. Date: 06-28-10
JEEP 4.0L AUTOMATIC ADAPTER FLEX PLATE
SENSOR KIT 1997-2004
Extention loom wire colors
Orange = 5 volt supply
Gray = signal
Black with white tracer = ground
If your stock harness plug does not match the new sensor plug provided in
this kit, you can splice the new loom into your stock harness. Refer to the
diagrams for pin and wire locations of your factory harness, and make some
notes for your reference. Cut the stock engine plug from the engine side on
the harness and solder the new loom provided in the kit to the wires you
marked. Note: the colors on our extension loom may not match the factory
harness colors. DO NOT USE CRIMP CONNECTORS!
SPECIAL NOTE: The components packaged in this kit have been assembled and machined for specific type of conversions. Modifications
to any of the components will void any possible warranty or return privileges. If you do not fully understand modifications or changes that will
be required to complete your conversion, we strongly recommend that you contact our sales department for more information. This instruction
sheet is only to be used for the assembly of Advance Adapter components. We recommend that a service manual pertaining to your vehicle be obtained
for specific torque values, wiring diagrams and other related equipment. These manuals are normally available at automotive dealerships and parts
stores.
 Loading...