

Page 1
ADVANCE ADAPTERS INC. P/N: 713091
P.O. Box 247, 4320 Aerotech Center Way New Item: (08/02)
Paso Robles, CA 93447 PAGE 1 OF 4
Telephone: (800) 350-2223 Fax: (805) 238-4201 Page Rev. Date: 08-09-10
CHEVY V8 TO JEEP TJ WELD-IN MOUNT
REPLACING THE STOCK 6 CYL.
KIT CONSISTS OF:
No. Qty Part No. Description
1. 2 4980 STOCK GM MOUNTS
2. 1 713091L LEFT MOUNT
3. 1 713091R RIGHT MOUNT
4. 1 713090-BLK SADDLE MOUNT
5. 14 723122 5/16" FLAT WASHER (6 pcs. for block bolts)(8 pcs. saddle to frame mount)
6. 4 723703 3/8"-16 NYLON LOCK NUT (Saddle to frame mount bolts)
7. 6 723704 3/8" LOCK WASHER (Engine block)
8. 6 723721 3/8"-16 x 1" H.H.C.S. (Block bolts)
9. 4 723722 3/8"-16 x 1.25" H.H.C.S (Saddle to frame mount bolts)
10. 4 723735 3/8" FLAT WASHER (Saddle to rubber mount)
11. 2 724301 7/16"-14 NYLON LOCK NUT (Saddle to rubber mount)
12. 2 724311 7/16"-14 x 3.50" H.H.C.S. (Saddle to rubber mount)
These mounts can be used with LT1 engines but you must use the A/C replacement pulley from GM. see last page for infomation.
INSTALLATION PROCEDURES:
This mount kit is designed as a weld-in application. Cutting, grinding, and
welding is required. These mounts should only be used when replacing a
stock 6 cylinder engine. Jeep TJs with a 4 cylinder engine must use Part
No. 713090, which is a bolt-in mount. If this kit is used with a 4 cylinder,
the steering pillow block must be modified.
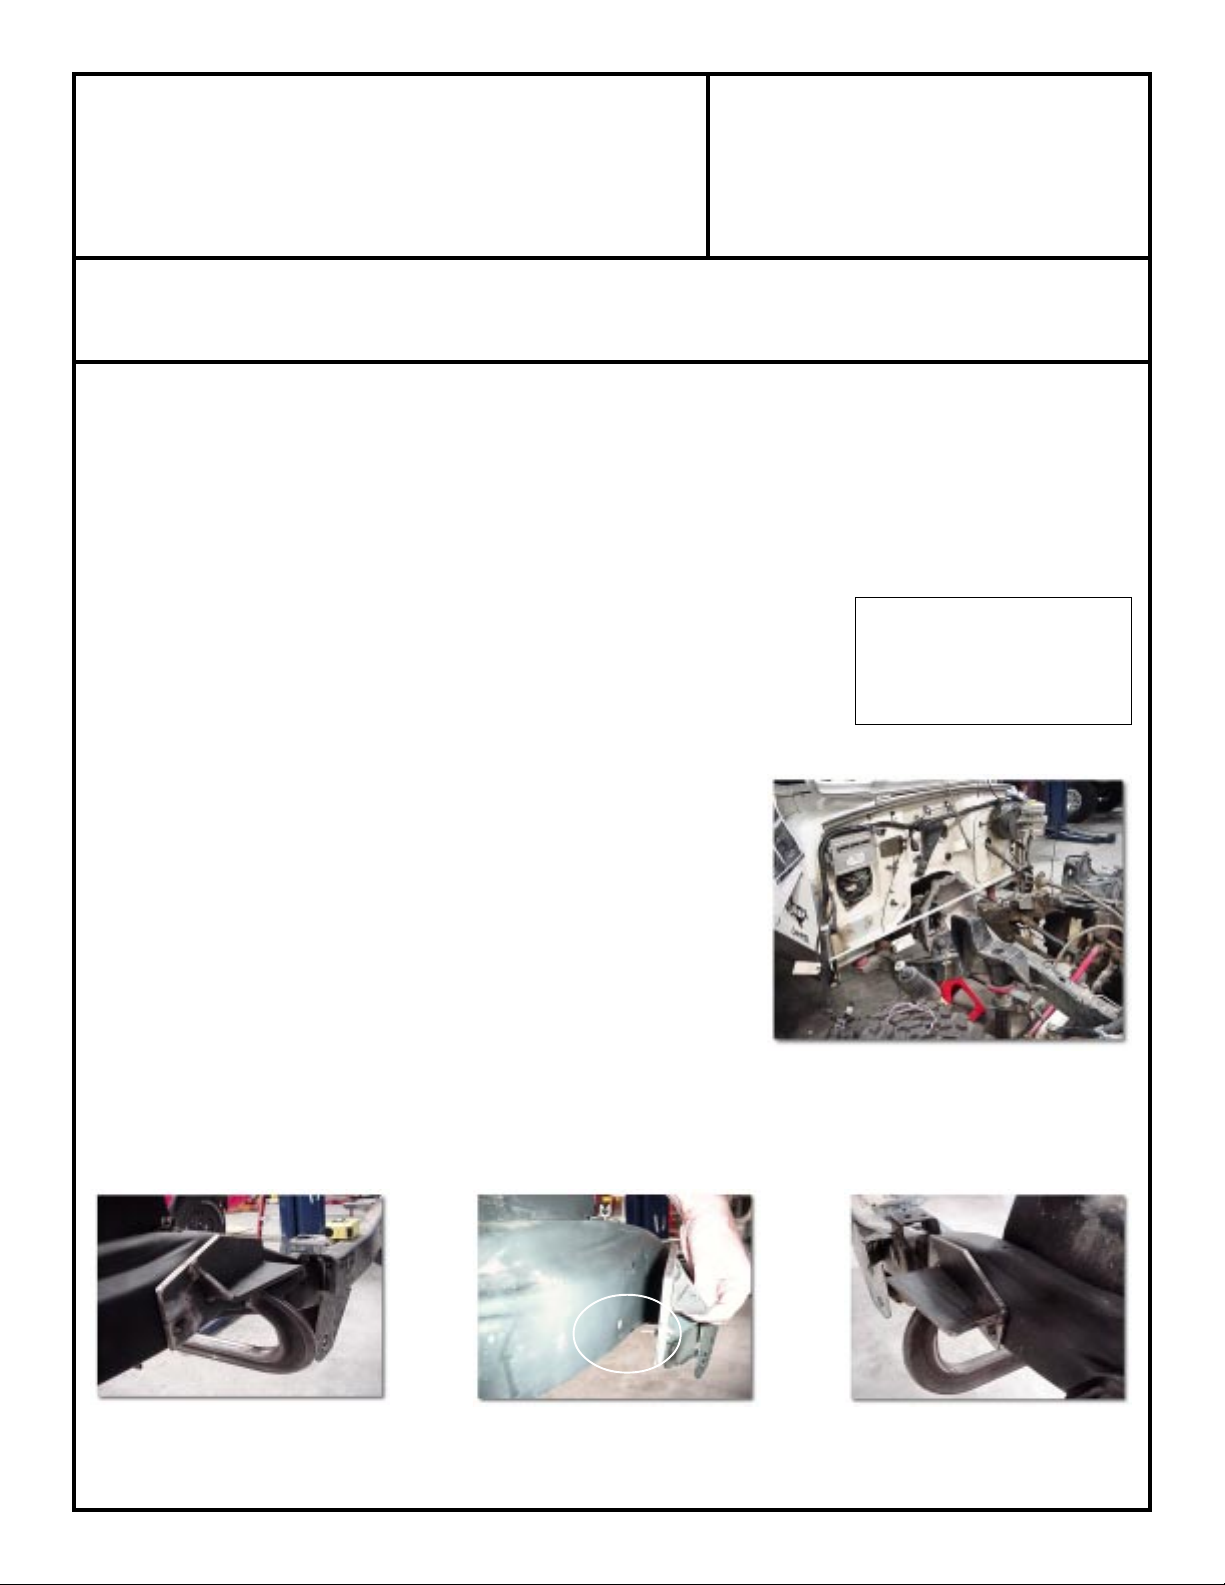
To install a Chevy V8 into a Jeep TJ, we recommend that the entire front
clip of the vehicle be removed for ease of installation. This would also
include the hood, grille, both fenders, and miscellaneous components.
Some of the components in the engine compartment may need to be
relocated (i.e. smog equipment, battery radiator, overflow, etc.). Once the
stock engine has been removed, you're ready to begin the new engine installation.
OPTIONAL ITEMS:
717090 Headers
716691-AA RADIATOR
716693-AA RADIATOR
714450 1"BODY LIFT
If you are using an aftermarket
oil pan, the maximum depth in
the front is 3-5/8". NOTE: This
motor mount will not work with
383 Stroker motors or 400 S.B.
Grind or torch off the stock frame mounts. Grind off all the welds, and make the frame rails smooth. Next, identify
the holes on each side of the frame which you will use to locate the mounts. They are located on the inside of the
frame, about 23" away from the front crossmember. Using the bolt that protrudes from the frame mount as a
SPECIAL NOTE: The components packaged in this kit have been assembled and machined for specific type of conversions. Modifications to any of the components will void
any possible warranty or return privileges. If you do not fully understand modifications or changes that will be required to complete your conversion, we strongly recommend that
you contact our sales department for more information. This instruction sheet is only to be used for the assembly of Advance Adapter components. We recommend that a service
manual pertaining to your vehicle be obtained for specific torque values, wiring diagrams and other related equipment. These manuals are normally available at automotive dealerships
and parts stores.
Page 2
ADVANCE ADAPTERS INC. P/N: 713091
P.O. Box 247, 4320 Aerotech Center Way New Item: (08/02)
Paso Robles, CA 93447 PAGE 2 OF 4
Telephone: (800) 350-2223 Fax: (805) 238-4201 Page Rev. Date: 09-18-02
CHEVY V8 TO JEEP TJ WELD-IN MOUNT
REPLACING THE STOCK 6 CYL.
alignment pin, C-clamp the mounts to the inside of the frame (the front-to-back angle of the mounts will be determined
later).
Install the new Chevy rubber mounts onto the engine block and install the saddle mount. As you set the Chevy block
into the TJ frame rails you'll notice that you will have about an inch window for front-to-rear mounting options.
Place the engine in the engine compartment. The forward-to-rear location of the engine is to be determined by you
and by the drivetrain you have chosen. Also, keep in mind header or manifold clearance when positioning the engine.
When a suitable location is found, rotate the doweled frame mounts so they hit parallel to the engine saddle mount
mounting flange. Tighten the C-clamp and/or tack weld them in place. The frame brackets must also have two holes
drilled for mounting to the saddle mount. Before removing the engine, mark the two hole locations on both frame
brackets where the saddle meets the frame brackets. These holes need to fit a 3/8" bolt. Remove the engine
assembly and fully weld the mounts to the frame, then drill the mounting holes.
Both the driver's side and
passengers side firewall to
tunnel seam will need to be
cut or folded over for both
transmission and exhaust
clearance.
Headers will require firewall modifications in the furthest back location, but work great in the forward location. Also,
the passenger side header may require some clearance with certain starters (on solenoid housing). A heat shield and/
or a mini hi-torque starter is recommended.
P/N 717090 headers installed.
SPECIAL NOTE: The components packaged in this kit have been assembled and machined for specific type of conversions. Modifications to any of the components will void
any possible warranty or return privileges. If you do not fully understand modifications or changes that will be required to complete your conversion, we strongly recommend that
you contact our sales department for more information. This instruction sheet is only to be used for the assembly of Advance Adapter components. We recommend that a service
manual pertaining to your vehicle be obtained for specific torque values, wiring diagrams and other related equipment. These manuals are normally available at automotive dealerships
and parts stores.
Page 3

ADVANCE ADAPTERS INC. P/N: 713091
P.O. Box 247, 4320 Aerotech Center Way New Item: (08/02)
Paso Robles, CA 93447 PAGE 3 OF 4
Telephone: (800) 350-2223 Fax: (805) 238-4201 Page Rev. Date: 8-15-11
CHEVY V8 TO JEEP TJ WELD-IN MOUNT
REPLACING THE STOCK 6 CYL.
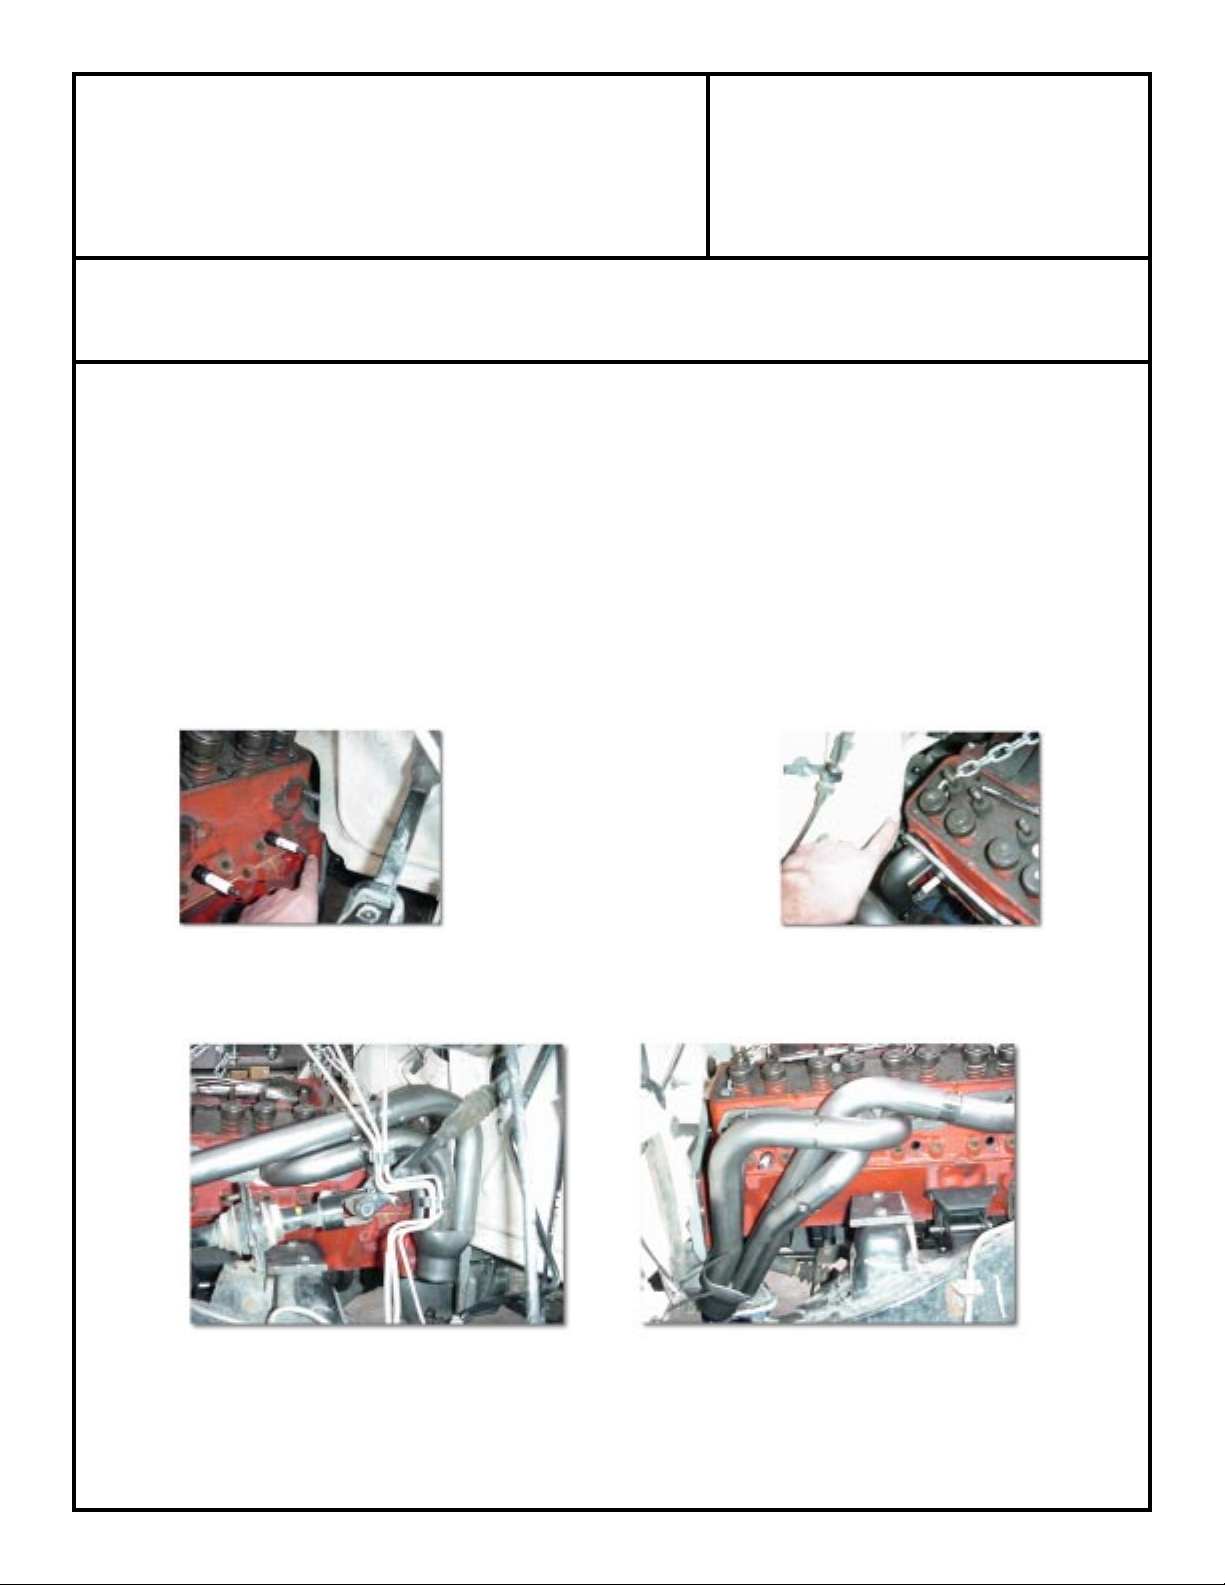
Stock style manifolds work well with the engine set in any position.
Some firewall clearance will be necessary when the engine is set back
to the rearward.
Due to the various drivetrain applications, driveline modifications may
be required. Keep in mind header or manifold selection when trying
to alleviate driveshaft modifications.
A thin flex-fan (with shroud) or electric fan will be needed for cooling.
LT1 manifold in the rear mount position
Camaro manifold in the rear mount position.
Camaro manifold in the rear mount position.
Retaining the stock transmission will normally require
driveline modifications due to firewall clearance issues
on the back of the block.
LT1 manifold in the rear mount position
SPECIAL NOTE: The components packaged in this kit have been assembled and machined for specific type of conversions. Modifications to any of the components will void
any possible warranty or return privileges. If you do not fully understand modifications or changes that will be required to complete your conversion, we strongly recommend that
you contact our sales department for more information. This instruction sheet is only to be used for the assembly of Advance Adapter components. We recommend that a service
manual pertaining to your vehicle be obtained for specific torque values, wiring diagrams and other related equipment. These manuals are normally available at automotive dealerships
and parts stores.
Page 4

ADVANCE ADAPTERS INC. P/N: 713091
P.O. Box 247, 4320 Aerotech Center Way New Item: (08/02)
Paso Robles, CA 93447 PAGE 4 OF 4
Telephone: (800) 350-2223 Fax: (805) 238-4201 Page Rev. Date: 08-06-10
CHEVY V8 T O JEEP TJ WELD-IN MOUNT
REPLACING THE STOCK 6 CYL.
The LT1 engine can be used with these mounts as long as you replace the A/C pump with the Chevy P/N 10115875.
This is a replacement pulley for the LT1 that removes the A/C pump. The replacement pulley is slightly smaller in diameter
and will require a new belt.
SPECIAL NOTE: The components packaged in this kit have been assembled and machined for specific type of conversions. Modifications to any of the components
will void any possible warranty or return privileges. If you do not fully understand modifications or changes that will be required to complete your conversion, we strongly
recommend that you contact our sales department for more information. This instruction sheet is only to be used for the assembly of Advance Adapter components.
We recommend that a service manual pertaining to your vehicle be obtained for specific torque values, wiring diagrams and other related equipment. These manuals
are normally available at automotive dealerships and parts stores.
 Loading...