

Page 1

ADV ANCE ADAPTERS INC. P/N: 712552
P.O. Box 247, 4320 Aerotech Center Way
Paso Robles, CA 93447 PAGE 1 OF 2
Telephone: (800) 350-2223 Fax: (805) 238-4201 Page Rev. Date: 09-29-00
GM DESIGN 1995 NV4500 TRANS TO
FORD 4.848" DIAMETER BELLHOUSING
KIT CONSISTS OF:
No. Qty Part No. Description
1. 1 52-0219 DODGE INPUT SHAFT (NV4500)
2. 1 712552-PLT ADAPTER PLATE
3. 1 716122 FORD PILOT BUSHING .750"
4. 4 723103 5/16" LOCK WASHERS
5. 4 723137 S.H.C.S.
6. 4 724303 7/16" LOCK WASHERS
7. 4 724317 S.H.C.S. 7/16"-14 x 1-1/4" LG
8. 4 724349 H.H.C.S. 7/16"-14" x 1-1/2" LG
9. 1 761019 FRONT BEARING RETAINER (4.848" Dia.)
GENERAL INFORMATION
1. This adapter plate can only be used with GM NV4500 transmissions that have the 5.61 gear ratio. The new input shaft
must have the same tooth count as the one being replaced. The original bearing will be retained along with the original
bearing retainer and seal.
2. This adapter kit is primarily for Ford 4.848" diameter bellhousings. The bolt pattern supplied on the adapter plate will
fit all Ford bellhousings 1966 & newer. The Ford bellhousing you select must be compatible with your vehicle. If your
vehicle requires a hydraulic clutch control, then we recommend a 1985 F150 bellhousing that has an external slave
cylinder design. Refer to the Advance Adapters Buyer's Guide in the section pertaining to Bronco II manual transmission
conversions for specific part numbers.
3. The clutch disc used in the Ford bellhousing must be 1-1/8"-10. There are several part numbers and designs and careful
consideration should be given to the appropriate part number.
4. The new pilot bushing supplied with the adapter kit will need to be installed into the Ford engine crank and it will be the
customer's responsibility to verify proper engagement and support of the new input shaft supplied with the adapter.
SPECIAL NOTE: The components packaged in this kit have been assembled and machined for specific type of conversions. Modifications to any of the components
will void any possible warranty or return privileges. If you do not fully understand modifications or changes that will be required to complete your conversion, we strongly
recommend that you contact our sales department for more information. This instruction sheet is only to be used for the assembly of Advance Adapter components.
We recommend that a service manual pertaining to your vehicle be obtained for specific torque values, wiring diagrams and other related equipment. These manuals are
normally available at automotive dealerships and parts stores.
Page 2
ADV ANCE ADAPTERS INC. P/N: 712552
P.O. Box 247, 4320 Aerotech Center Way
Paso Robles, CA 93447 PAGE 2 OF 2
Telephone: (800) 350-2223 Fax: (805) 238-4201 Page Rev. Date: 09-29-00
GM DESIGN 1995 NV4500 TRANS TO
FORD 4.848" DIAMETER BELLHOUSING
INSTALLATION INSTRUCTIONS
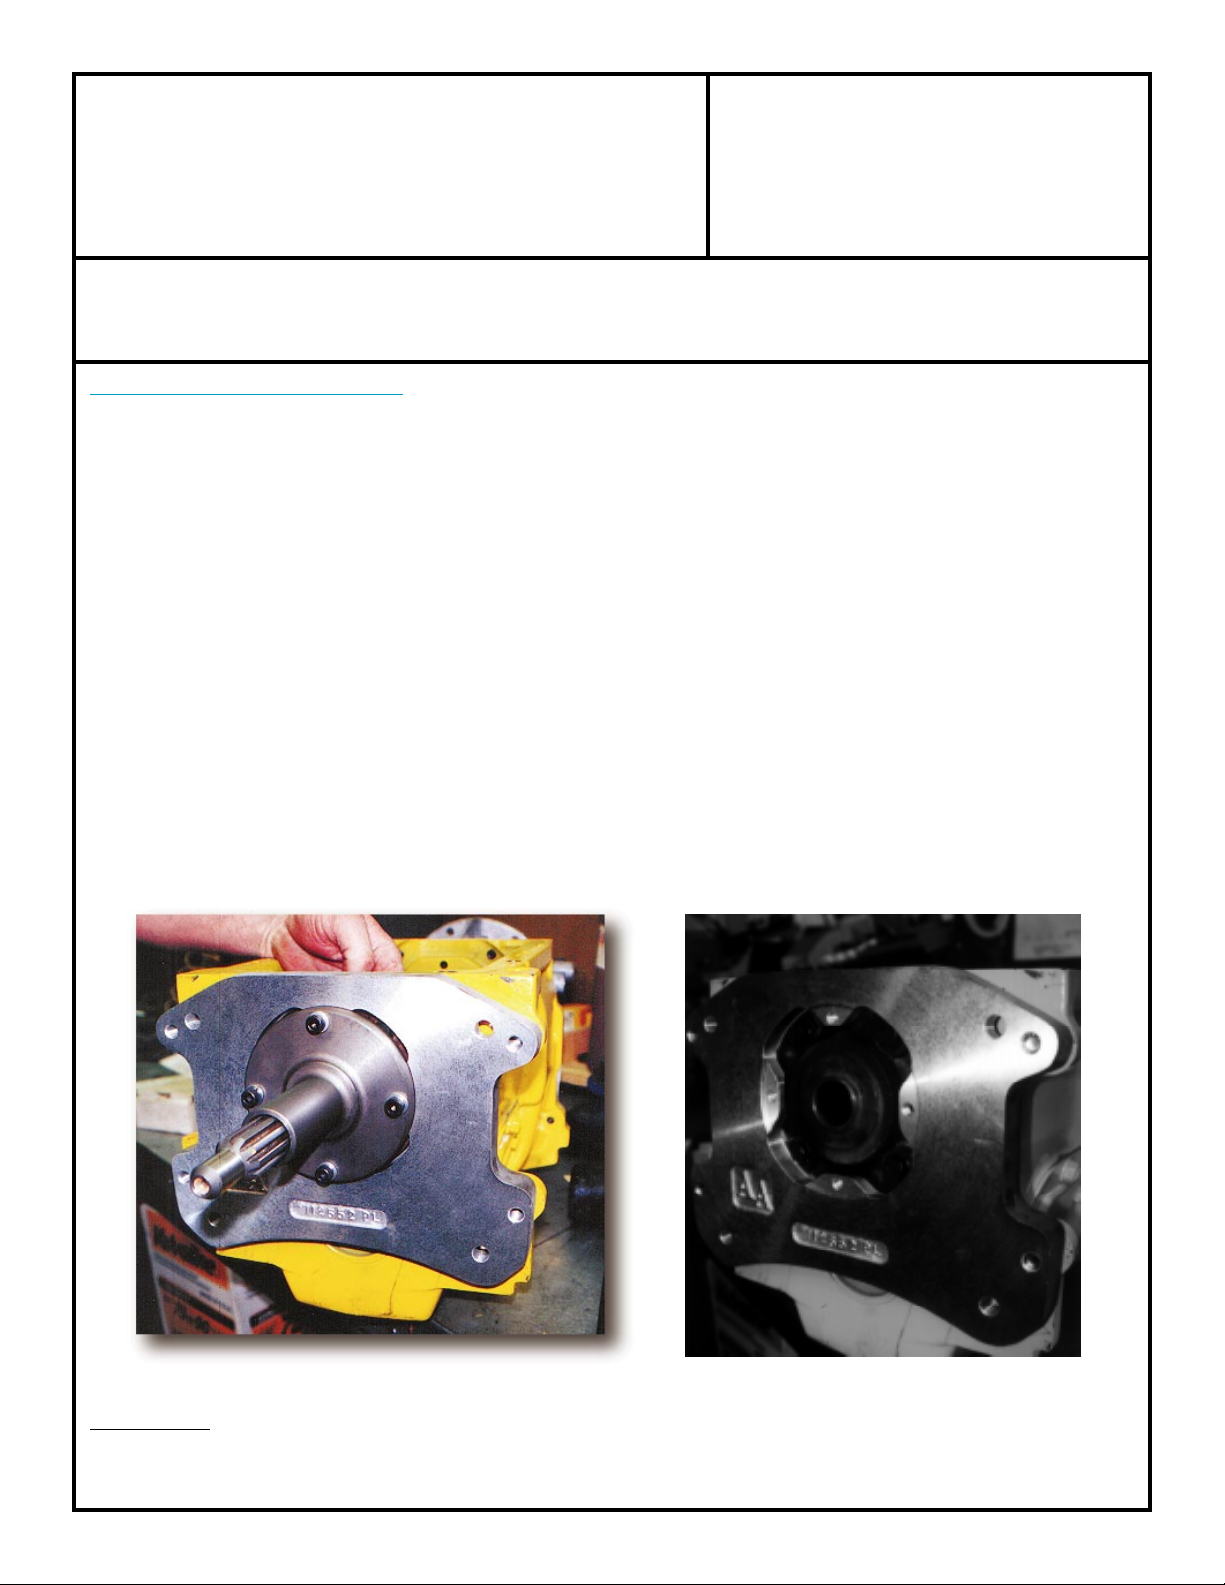
1. Remove the front bearing retainer on the front side of the GM NV4500 transmission. Inspect the tooth count to make
sure that it is identical to the new shaft that has been supplied with the adapter kit.
2. Cut the snout off as illustrated in the photographs. Make sure that the seal is not damaged or cut in any way.
3. Bolt the retainer and new input shaft back onto the NV4500 transmission. Make sure that the thrust needle bearings are
in the proper position. It may be necessary to change the main shaft shim load depending on the new input shafts grind
tolerances. The main shaft must have .002/.006 end play. The end play adjustment is made from the backside of the
transmission underneath the bearing retainer plate. FAILURE TO INSPECT END PLAY COULD RESULT IN SEVERE
TRANSMISSION DAMAGE.
4. Bolt the new bearing retainer to the front side of the Advance Adapter plate using the bolts and lock washers provided.
5. Bolt the adapter plate to your new Ford bellhousing using the socket head cap screws. Make sure that the registered
diameter of the bellhousing is the proper size for the new adapter bearing retainer.
6. The transmission can now be assembled to the adapter plate. Make sure that the modified bearing retainer does not interfere
with the new retainer on the front side of the adapter plate. Refer to the photos below for information.
SPECIAL NOTE: The components packaged in this kit have been assembled and machined for specific type of conversions. Modifications to any of the components
will void any possible warranty or return privileges. If you do not fully understand modifications or changes that will be required to complete your conversion, we strongly
recommend that you contact our sales department for more information. This instruction sheet is only to be used for the assembly of Advance Adapter components.
We recommend that a service manual pertaining to your vehicle be obtained for specific torque values, wiring diagrams and other related equipment. These manuals are
normally available at automotive dealerships and parts stores.
 Loading...