

Page 1
ADV ANCE ADAPTERS INC. P/N: 712543
P.O. Box 247, 4320 Aerotech Center Way New Item: (7/99)
Paso Robles, CA 93447 PAGE 1 OF 3
Telephone: (800) 350-2223 Fax: (805) 238-4201 Page Rev . Date: 09-09-11
AX15 TO FORD V8 ADAPTER
KIT CONSISTS OF:
No. Qty Part No. Description
1. 1 711543 ADAPTER PLATE
2. 1 716122 .750 PILOT BUSHING FOR LATE MODEL AX15
3. 1 716124 BRASS FITTING
4. 1 716153 .590 PILOT BUSHING FOR EARLY MODEL AX15
5. 1 716742 RETAINER SEAL
6. 9 720030 TRANSMISSION BOLTS - S.H.C.S.10mm x 1.25 x 40mm
7. 8 720040 RETAINER BOLTS - S.H.C.S. 8mm x 1.25 x 20mm
8. 4 723113 RETAINER BOLTS - S.H.C.S. 5/16"-18 x 7/8"
9. 4 724317 S.H.C.S. 7/16"-14 x 1-1/4" BOLTS
10. 1 761019 BEARING RETAINER - FORD 4.848"
NOTES:
This kit fits both the internal & external clutch release mechanisms on AX15 transmissions.
The F150 bellhousings from 1987-88 trucks should be used to best accommodate the new hydraulic clutch system.
Z & M Manufacturing offers a special slave cylinder bracket to assist in the installation of these bellhousings. The
Z & M bracket provides the adequate clearance for the Ford exhaust system.
Z & M's phone number is (408)-274-9011.
OPTIONAL NOTES:
Wrangler & TJ's
If you have a master cylinder
that has a pin retaining the hose
assembly (pin type), you will need
Advance Adapters Part # 716130
or 716130TJ (Identify which fit-
ting you will need - shown below). This fitting goes on your
master cylinder and gives you a
#3 male flare fitting to couple to.
We also offer a new braided stainless steel hose with #3 fittings
on both ends. This hose is P/N#
716130H.
To fit the F150 truck slave cylinder to the Jeep master cylinder, we have included a brass fitting that, when installed
on your slave cylinder, provides a #3 male fitting. We offer a new stainless steel braided hose (P/N #716130H)
that will couple your slave cylinder to your master cylinder. You can also purchase a generic hose assembly at
your local auto parts store. (See Optional Note above for YJ & TJ master cylinders).
CAUTION:
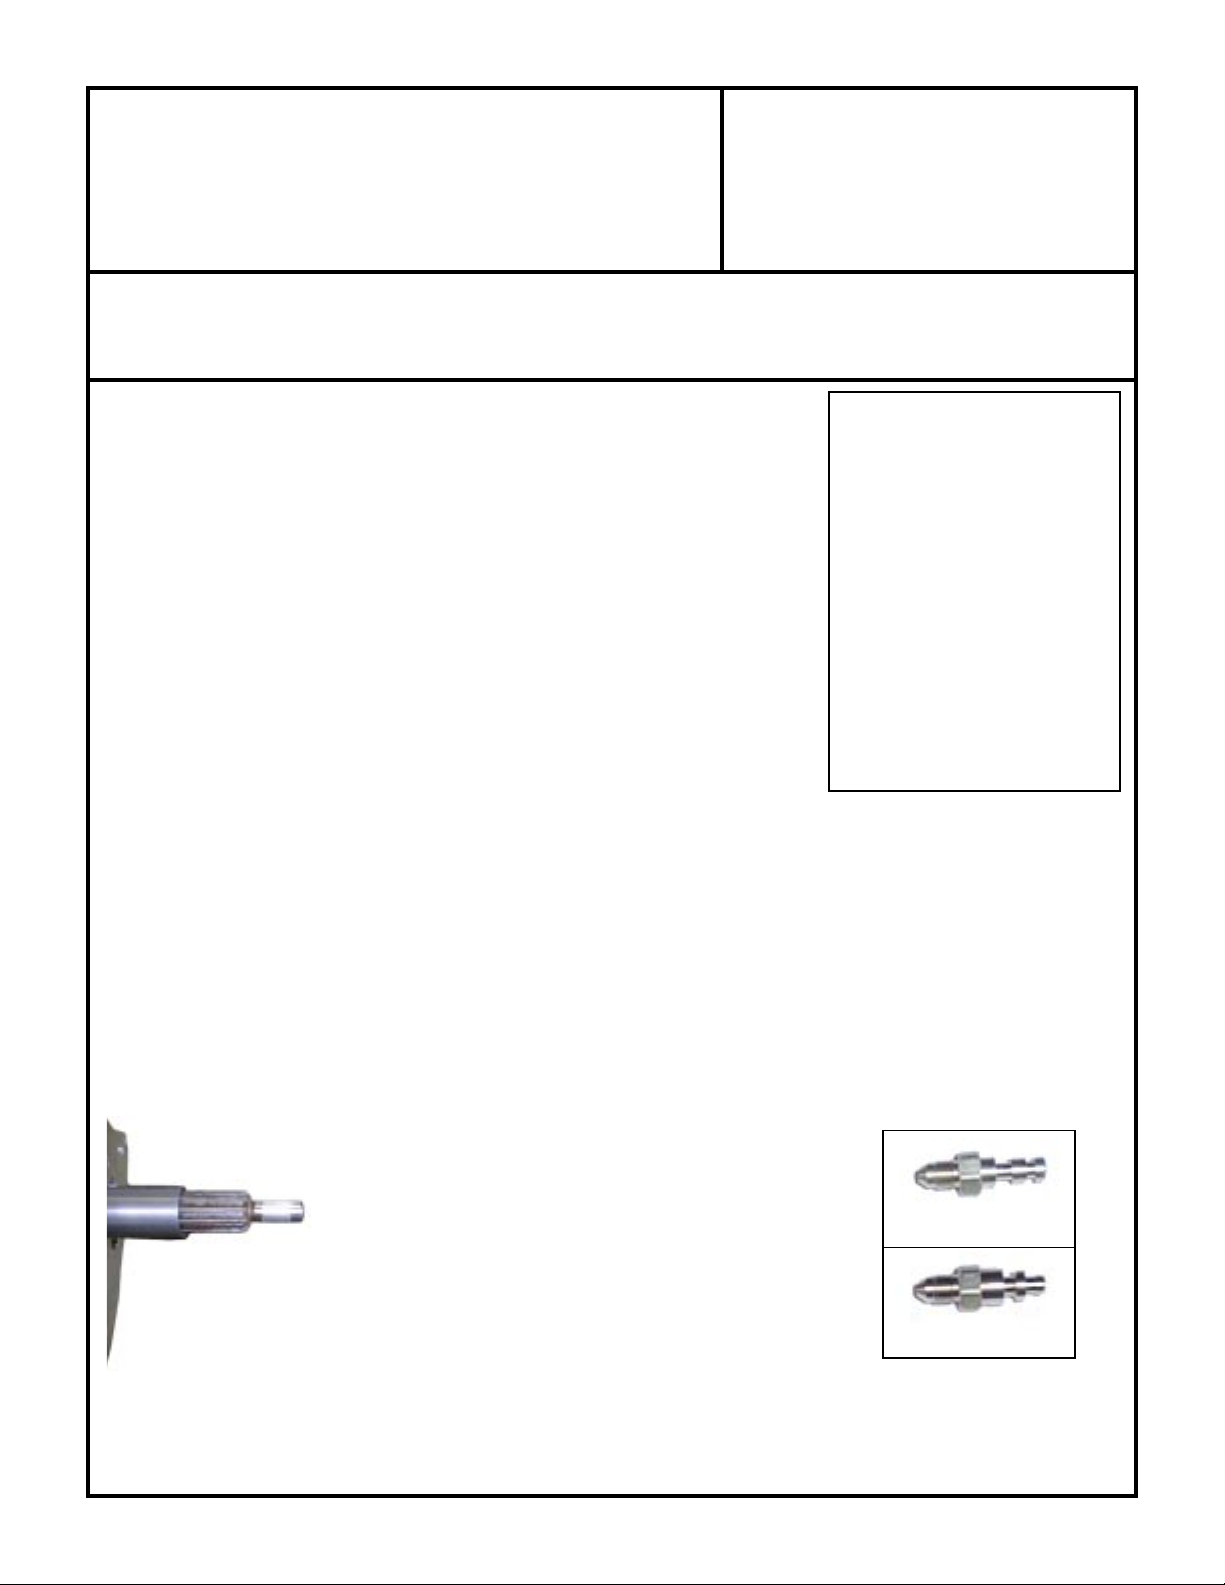
The input shaft pilot tip must be shortened 1/4"
to avoid bottoming out in the Ford crank.
716130
716130TJ
SPECIAL NOTE: The components packaged in this kit have been assembled and machined for specific type of conversions. Modifications
to any of the components will void any possible warranty or return privileges. If you do not fully understand modifications or changes that will be
required to complete your conversion, we strongly recommend that you contact our sales department for more information. This instruction sheet
is only to be used for the assembly of Advance Adapter components. We recommend that a service manual pertaining to your vehicle be obtained
for specific torque values, wiring diagrams and other related equipment. These manuals are normally available at automotive dealerships and parts
stores.
Page 2

ADV ANCE ADAPTERS INC. P/N: 712543
P.O. Box 247, 4320 Aerotech Center Way New Item: (7/99)
Paso Robles, CA 93447 PAGE 2 OF 3
Telephone: (800) 350-2223 Fax: (805) 238-4201 Page Rev . Date: 07-15-08
AX15 TO FORD V8 ADAPTER
INSTALLATION PROCEDURES:
This kit can be installed with the transmission and transfer case remaining in the vehicle. However, it will prove
to be an easier installation if the transmission and transfer case are removed and the new engine and AX15
assembly are installed as one unit.
Remove the stock engine and bellhousing assembly. Remove the bellhousing off the
transmission. The front bearing retainer should also be unbolted and removed. Clean
both surface areas of silicon or gasket debris. The new adapter plate indexes on the
transmission using the transmission front bearing. The two transmission dowel pins
are not used. We have oversized two holes in the adapter to clear these dowel pins.
q
Set the adapter plate on the transmission so that it
indexes on the bearing. The top two holes on the adapter
(for bolting to the bellhousing) require grinding on the
transmission case to allow clearance for the bolts to be
installed.
Mark the transmission where the clearance must be ground.
Remove the adapter plate and cover the two exposed bearings
with a rag.
Using a disc grinder (wearing the necessary safety
glasses), grind the necessary clearance for the bolt
p
Install the new seal (P/N 716742) into the
711543 adapter plate.
heads. Test fit if necessary.
q
SPECIAL NOTE: The components packaged in this kit have been assembled and machined for specific type of conversions. Modifications to any of
the components will void any possible warranty or return privileges. If you do not fully understand modifications or changes that will be required to complete
your conversion, we strongly recommend that you contact our sales department for more information. This instruction sheet is only to be used for the assembly
of Advance Adapter components. We recommend that a service manual pertaining to your vehicle be obtained for specific torque values, wiring diagrams
and other related equipment. These manuals are normally available at automotive dealerships and parts stores.
Page 3

ADV ANCE ADAPTERS INC. P/N: 712543
P.O. Box 247, 4320 Aerotech Center Way New Item: (7/99)
Paso Robles, CA 93447 PAGE 3 OF 3
Telephone: (800) 350-2223 Fax: (805) 238-4201 Page Rev . Date: 07-09-11
AX15 TO FORD V8 ADAPTER
Using RTV Silicon sealer, apply a thin layer on the face of the transmission. This should
be applied where the bellhousing and retainer were fastened. Set the
adapter onto the transmission. The adapter plate does not use the
dowel pin on the transmission, but indexes off of the front input shaft
bearing. Clearance holes have been provided to retain the dowel
pin.
Install the retainer bolts first, and torque to 10 ft/lbs. Next, using the
nine (9) S.H.C.S. transmission bolts (P/N 720030), bolt the plate to the
transmission and torque to 22 ft/lbs.
Install the new retainer using the four (4) S.H.C.S. retainer bolts (P/N 723113).
This retainer has a standard Ford index diameter of 4.848, and a standard release
bearing snout of 1.430. A standard Ford pressure plate, release lever and release
bearing should be used. A Chevy clutch disc is required;
Centerforce #383735, or a stock Chevy 11" disc.
Two pilot bushings have been supplied. The AX15 had
either a .750 or .590 tip on the input shaft. Install the
correct bushing for your transmission.
Once all the clutch components are installed and the
bellhousing is bolted to the block, you can now install the
transmission and adapter to the bellhousing. Use the
four (4) 7/16" S.H.C.S. (P/N 724317) to bolt these units together. Make sure the bellhousing and retainer index
properly. If the units (while sliding together) stop before surfaces are mated, DO NOT "SUCK UP" THE
SURFACES USING THE BOLTS. Check for clutch or pilot bushing alignment, or the input shaft may need
to be shortened a little more. Damage could occur if forced together.
SPECIAL NOTE: The components packaged in this kit have been assembled and machined for specific type of conversions. Modifications to any of
the components will void any possible warranty or return privileges. If you do not fully understand modifications or changes that will be required to complete
your conversion, we strongly recommend that you contact our sales department for more information. This instruction sheet is only to be used for the assembly
of Advance Adapter components. We recommend that a service manual pertaining to your vehicle be obtained for specific torque values, wiring diagrams
and other related equipment. These manuals are normally available at automotive dealerships and parts stores.
 Loading...