

Page 1

ADVANCE
PARIS
MyConnect 60
ALL IN ONE SYSTEM
CHAINE INTÉGRÉ ALL IN ONE
ALLES IN EINEM SYSTEM
QuickStart
UTUTTO IN UN SISTEMA
Page 2
RECYCLING IN EUROPEAN UNION COUNTRIES
Disposal of your old appliance
English
This symbol on the product or on its packaging means that
your electrical and electronic equipment should be
disposed at the end of life separately from your household
wastes. There are separate coilection systems for recycling in EU. For more information, please contact the local
authority or the dealer where you purchased the product.
French
Ce symbole figurant sur le produit ou son emballage
signifie que votre équipement électrique et électronique
doit être mis au rebut séparément de vos déchets
ménagers lorsqu’il atteint Ia fin de sa durée de vie.II existe
des systèmes de coilecte séparée pour le recyclage dans
l’UE. Pour pius d’informations, veuiliez prendre contact
avec les autorités locales ou lê revendeur auquel vous avez
acheté ce produit.
German
Das auf dem Produkt oder auf der Verpackung
angebrachte Symbol bedeutet, dass Ihre elektrischen
und elektronischen Geräte nicht mit dem Haushaltsmüll
entsorgt werden sollen. Es existieren separate RecyclingSammelsysteme in der EU. Für mehr Informationen
wenden Sie sich bitte an Ihre örtlichen Behörden
oder an den Fachhändier, bei dem Sie das Produkt
erworben haben.
Italian
Questo simbolo sul prodotto o sull’imballaggio
indica che 1’apparato elettrico o elettronico alia fine
dei suo periodo di vita dovrebbe essere smaltito
separatamente dai rifiuti domestici. Nell’UE
esistono altri sistemi di raccolta differenziata. Per ulteriori
infor-mazioni, contattare lê autorità locali o il rivenditore
presso il quale è stato acquistato il prodotto.
Spanish
Este simbolo en el producto o en su embalaje significa que
deberfa deshacerse de su equipo eléctrico o electrônico, al
final de su vida util, de forma separada del resto de los
residuos domésticos. Para estos productos hay sistemas
de recogida selectiva para reciclarlos en la Union Europea.
Para mas informaciôn, rogamos contacte con la autoridad
local o el distribuidor donde adquirio el producto.
Portuguese
Este sîmbolo no produto ou na respectiva embalagem,
significa que o equipamento eléctrico ou electrônico deverà
ser descartado no fim da sua vida util separadamente
do lixo doméstico. Existem diverses sistemas de recolha
separada para reciclagem na Uniào Europeia.Para mais
informaçôes, queira contactar as autoridades locais ou o
revendedor onde adquiriu o produto.
Swedish
Märkningen av produkter och fôrpackningar med denna
symbol betyder att elektrisk och elektronisk utrustning
maste tasom hand séparât fràn hushàlissopor nàr
utrustningen har förbrukats. EU har sàrskilda
àtervinningsanlàggningar för denna typ av utrustning.
Kontakta de lokala myndigheterna eller àterförsäijaren dàr
produkten har köpts för mer information.
Danish
Dette symbol pà produktet eller pâ emballagen betyder,
at dit elektriske og elektroniske udstyr ved afslutningen af
dets levetid ikke skaï bortskaffes sammen med dit
hushoidningsaffald. Derfindes separate
opsamiingssystemer til genbrug i EU. For mere information
bedes du venligst kontakte de lokale myndigheder eller
forhandieren, hvor du har kebt produktet.
Dutch
Dit symbool op het product of op zijn verpakking betekent
dat uw elektrische of elektronische apparatuur na het
verstrijken van de levensduur gescheiden van het huisvuil
moet worden weggegooid. Er zijn afzonderlijke ophaalsys-
temen voor recyclage in de E.U. Voor meer informatie neemt u contact op met de plaatselijke overheid
of de dealer waar u het product hebt gekocht.
Norwegian
Dersom produktet eller emballasjen er merket med
dette symbolet, bor ditt elektriske eller elektroniske
utstyr kasseres atskilt fra ditt hushoidningsavfall nàr
det er utsiitt. 1 Norgefinnes det egne innsamiings-
systemer for resirkulering. Venniigst ta kontakt med
lokale myndigheter eller forhandieren hvor du kjepte
produktet for mer informasjon.
Finnish
Jos tuotteessa tai sen pakkauksessa on tämä symboli, se
tarkoittaa, että kyseiset sähköisetja elektroniset laitteet
pitää hävittää niiden käytön loputtua erillään
kotitalousjätteistä. EU:ssa on erillisiä keräysjärjestelmiä. Jos
haluat lisätietoja, ota yhteyttä paikallisiin viranomaisiin tai
tuotteen myyjään.
Polish
Ten symbol na produkcie lub na jego opakowaniu oznacza,
ze. Pahstwa urzadzenie elektryczne lub elektroniczne po
zakohczeniu uzytkowania musi zostac poddane utylizacji
oddzieinie od odpadôw z gospodarstwa domowego. W
Unii Europejskiej istnieja^ oddzieine systemy zbierania
odpadô w poddawanych recykiingowi. Aby uzyskaô wiecej
informacji, proszç skontaktowac sic z lokainymi wtadzami
lub sprzedawca, u ktôrego zakupiono produkt.
Page 3
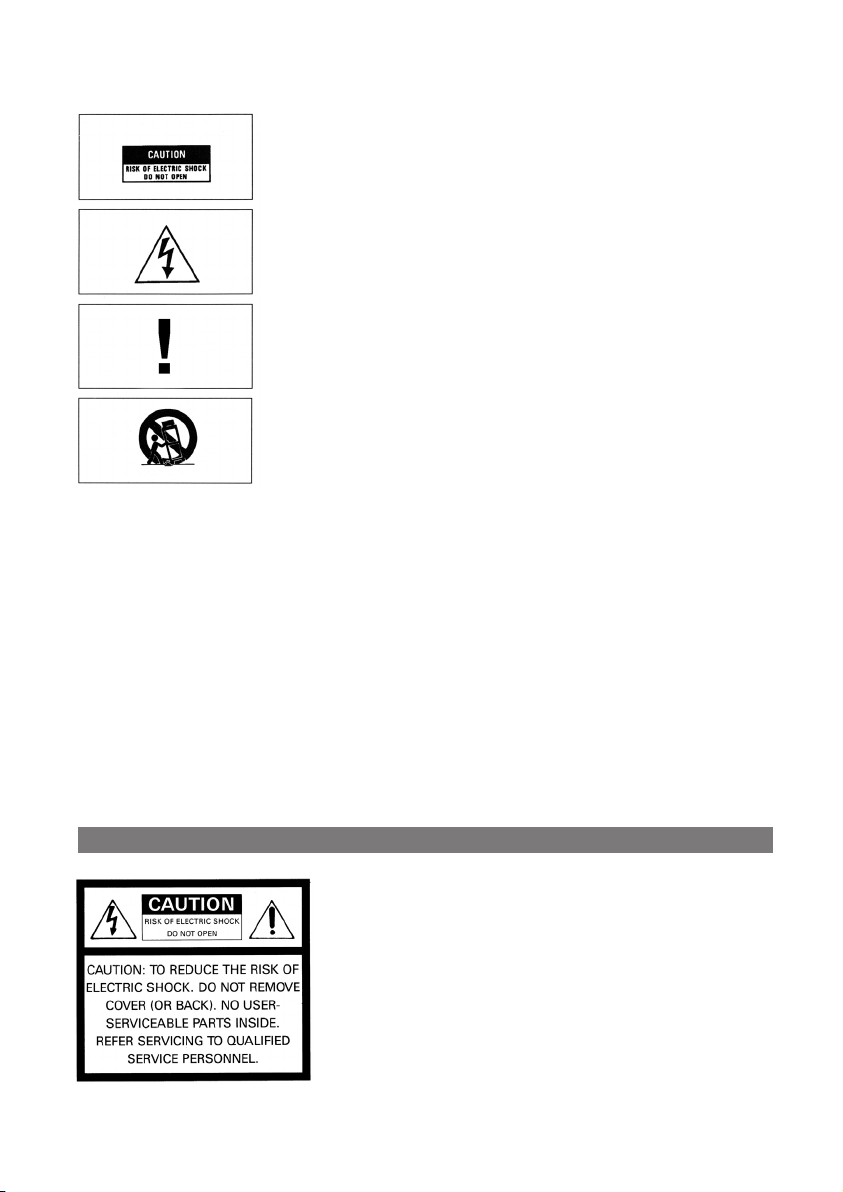
WARNING ATTENTION WARNUNG ATTENZIONE
ATTENTION: afin de réduire tout risques de chocs électriques ou de feu, ne pas exposer votre
appareil à l’humidité ou à toutes sortes de liquides
WARNING: to reduce the risk of fire or electric shock, do not expose this appliance to rain or
moisture.
WARNUNG: Um die Gefahr eines Brandes oder eines Stromschlags zu mindern, halten Sie das
Gerät von Nässe und Feuchtigkeit fern.
ATTENZIONE: per ridurre il rischio di incendi o scosse elettriche evitare di esporre l’apparecchio a pioggia o umidità.
AVERTISSEMENT
Pour prévenir tout risques de chocs électriques, ne pas ouvrir l’appareil. Si un problème apparait, faites réparer votre appareil par un technicien qualifié.
CAUTION: To prevent the risk of electric shock, do not remove cover (or back); no user serviceable parts inside. Refer servicing to qualified service personnel.
VORSICHT: Um die Gefahr eines Stromschlags zu vermeiden, sollte die Abdeckung (und die
Rückwand) nicht entfernt werden. Das Gerät enthält keine Teile, die vom Benutzer gewartet
werden können. Überlassen Sie die Wartung qualifiziertem Fachpersonal.
AVVERTENZE: Per prevenire il rischio di shock elettrici si fa divieto di aprire sia il coperchio
superiore che quello posteriore dell’apparecchio. Non ci sono parti all’interno riparabili o sostituibili dal’utente finale. Per problemi fare riferimento a personale qualificato.
niveau utilisation que maintenance de votre appareil.
THE LIGHTNING FLASH with arrow-head symbo is intended to alert the user to the presence of uninsulated «dangerous voltage»
within the product’s enclosure that may be of sufficient magnitude to constitute a risk of electric shock to persons.
Das Blitzsymbol in einem gleichschenkligen Dreieck warnt vor nicht isolierten Komponenten mit gefährlicher Stromspannung, die
zu ernsthaften Personenschäden führen kann.
Das Ausrufungszeichen in einem gleichschenkligen Dreieck kennzeichnet wichtige Hinweise für die Nutzung und Wartung Ihres
Gerätes.
IL PUNTO ESCLAMATIVO evidenzia pericolo di shock elettrici e la presenza di istruzioni importanti nel manuale per la manutenzione
o l’utilizzo dell’apparecchio.
Si vous souhaitez déplacer ou transporter votre appareil, nous vous conseillons dans le cas d’un déménagement, d’un retour pour
réparation, etc...de réemballer dans son emballage d’origine votre appareil.
An appliance and cart combination should be moved with care. Before any transportation, your product must be packed correctly
in order to avoid any damage.
Bei der Beförderung des Gerätes mit Transportwagen ist mit Vorsicht vorzugehen. Vor jeder Art von Transport muss das Produkt
ordnungsgemäß verpackt werden, um Beschädigungen zu vermeiden.
LE POINT D’EXCLAMATION vous indiquera la présence d’informations importantes, tant au
IMPORTANT
* POUR PREVENIR LES CHOCS ELECTRIQUES NE PAS UTILISER CETTE FICHE POLARISEE AVEC UN
PROLONGATEUR, UNE PRISE DE COURANT OU UNE AUTRE SORTIE DE COURANT, SAUF SI LES LAMES
PEUVENT ETRE INSEREES A FOND SANS EN LAISSER AUCUNE PARTIE A DECOUVERT.
* TO PREVENT ELECTRIC SHOCK, DO NOT USE THIS PLUG WITH AN EXTENSION CORD, RECEPTACLE OR
OTHER OUTLET UNLESS THE BLADES CAN BE FULLY INSERTED TO PREVENT BLADE EXPOSURE.
* UM DIE GEFAHR EINES STROMSCHLAGS ZU VERMEIDEN, VERWENDEN SIE DIESEN STECKER
NUR IN KOMBINATION MIT VERLÄNGERUNGSKABELN, KUPPLUNGEN UND STECKDOSEN,
IN DIE DIE STECKERKONTAKTE VOLLSTÄNDIG EINGEFÜHRT WERDEN KÖNNEN, SO DASS KEINE
SPANNUNGSFÜHRENDEN TEILE FREILIEGEN.
PER EVITARE SHOCK ELETTRICI NON UTILIZZARE LA SPINA IN DOTAZIONE CON UNA PROLUNGA, UNA
PRESA A MURO O ALTRO CHE NON CONSENTA IL COMPLETO INSERIMENTO DELLE LAMELLE, EVITANDO
ANCHE LA MINIMA ESPOSIZIONE.
Page 4

CONSIGNES DE SECURITE - ISTRUZIONI DI SICUREZZA
LIRE LES INSTRUCTIONS
Toutes les consignes de sécurité et instructions
quand à l’utilisation de notre produit doivent faire
l’objet d’une lecture attentive.
MEMORISER CES INSTRUCTIONS
Les consignes de sécurité et instructions doivent
être retenues pour un usage futur de votre produit
TENEZ COMPTE DES ALERTES
Les mises en garde inscrites sur votre appareil ou
imprimées dans ce manuel doivent être respectées.
SUIVRE LES INSTRUCTIONS
Toutes les instructions concernant l’utilisation et
le fonctionnement de votre appareils doivent être
suivies.
EAU ET MOISISSURE
Votre appareil ne doit pas être utilisé prés d’un point
d’eau ou dans un environnement trop humide.
VENTILATION
Votre appareil doit être installé de telle façon que
sa ventilation ne soit en aucun cas entravée. Il ne
faut pas l’utiliser sur un lit, un sofa ou une surface
similaire qui obstrurait ses grilles de ventilation. Dans
tous les cas, il convient de vérifier que votre appareil
puisse être ventilé naturellement. Ne pas l’encastrer.
SOURCES DE CHALEUR
Il est conseillé d’éloigner votre appareil d’une source
de chaleur type radiateur ou autres sources
produisant une source de chaleur.
ALIMENTATION ELECTRIQUE
Le branchement de votre appareil doit se faire
en respectant les indications contenues dans ce
manuel. Votre installation électrique doit être en
conformité afin de permettre une utilisation en toute
sécurité de votre appareil.
MASSE ET POLARITÉ
Des précautions doivent être prises afin de respecter
la polarité et la mise à la terre de votre appareil.
PROTECTION DU CORDON SECTEUR
Votre cordon d’alimentation doit être correctement
installée afin qu’il ne soit pas piétiner ou arracher.
NETTOYAGE
Votre appareil doit être néttoyée seulement avec les
produits préconisés par le fabricant. Des produits
trop agressifs contenant des acides peuvent
endommagés les différentes surfaces de votre
appareil.
AUTRES SOURCES D’ALIMENTATION
Dans le cas d’une utilisation d’une antenne externe,
vous devez l’éloigner d’une ligne électrique.
PERIODE D’INUTILISATION
Si vous quittez votre domicile pour une longue
pèriode, nous vous conseillons de débrancher votre
appareil.
PÉNÉTRATION D’OBJETS OU DE LIQUIDE
Des précautions doivent être prises afin d’empécher
la pénétration d’objets ou de liquide à l’intérieur de
votre appareil.
SERVICE
Votre appareil doit être impérativement dépanné par
du personnel compétent et qualifié. Afin de connaitre
la station technique la plus proche, merci de
contacter votre distributeur national.
LEGGERE ATTENTAMENTE TUTTE LE
ISTRUZIONI
sulla sicurezza e sul funzionamento prima di
utilizzare l’apparecchio.
CONSERVARE QUESTE ISTRUZIONI per
consultazioni future.
ATTENERSI ALLE AVVERTENZE E SEGUIRE
TUTTE LE ISTRUZIONI sul funzionamento
dell’apparecchio.
ACQUA E UMIDITÀ – L’apparecchio non deve
essere utilizzato vicino all’acqua, ad es. vasca da
bagno, al lavabo, in un seminterrato umido o vicino
ad una piscina, ecc.
VENTILAZIONE – Posizionare l’apparecchio in
modo che riceva una corretta ventilazione, non su
divani, tappeti o superfici simili, in scaffali o armadi
che impediscano il flusso d’aria.
RISCALDAMENTO ¬- Posizionare l’apparecchio
lontano da fonti di calore, come termosifoni,
radiatori termici, cucine o altri apparecchi (inclusi
amplificatori).
ALIMENTAZIONE – Collegare l’apparecchio
soltanto al tipo di alimentazione descritto nelle
istruzioni di funzionamento o indicato
sull’apparecchio stesso.
Messa a terra e polarizzazione – Assicurarsi che
l’apparecchio sia correttamente ed effettivamente
collegato alla massa di terra e sia osservata la
polarizzazione della spina.
PROTEZIONE DEL CAVO DI ALIMENTAZIONE
– Disporre i cavi di alimentazione in modo che non
vengano calpestati e quindi non sotto oggetti che
possano perforare l’isolante o comunque premerli.
Prestare molta attenzione ai cavi ed alle spine che
fuoriescono direttamente dall’apparecchio.
PULIZIA – L’apparecchio deve essere pulito solo
secondo le raccomandazioni del produttore.
LINEE ELETTRICHE – Montare l’antenna esterna
lontano dalle linee elettriche.
PERIODO DI NON-UTILIZZO – Staccare la spina
dell’apparecchio dalla presa quando non viene
utilizzato per un lungo periodo di tempo.
CADUTA DI OGGETTI E LIQUIDI – Non lasciar
cadere oggetti e non versare liquidi nelle aperture
dello chassis.
DANNI CHE RICHIEDONO MANUTENZIONE –La
manutenzione deve essere effettuata solo da
personale qualificato nei seguenti casi:
• Ilcavodialimentazioneolaspinasono
danneggiati , oppure
• Oggettioliquidisonocadutidentro
l’unità, oppure
• L’unitàèstataespostaapioggia,oppure
• L’unitànonfunzionanormalmenteole
sue prestazioni hanno subito un cambiamento
significativo, oppure
• L’unitàècadutaoilcontenitoreèstato
danneggiato.
MANUTENZIONE – L’utente non deve effettuare
alcuna manutenzione, eccetto quella descritta nelle
istruzioni per il funzionamento. Il resto deve essere
eseguito da personale autorizzato.
Page 5

SAFETY INSTRUCTIONS
READ INSTRUCTIONS
All the safety and operating instructions should be read before the appliance is operated.
RETAIN INSTRUCTIONS
The safety anil operating instructions should be retained for future use.
HEED WARNINGS
All warnings on the appliance and in the operating instructions should be adhered to.
FOLLOW INSTRUCTIONS
All operating and use instructions should be followed.
WATER AND MOISTURE
The appliance should not be used near water for example, near a bathtub, washbowl, kitchen sink, laundry tub, in a
wet basement, or near a swimming pool, etc.
VENTILATION
The appliance should be situated so that its location or position does not interfere with its proper ventilation. For
example, the appliance should not be situated on a bed. sofa, rug, or similar surface that may block the ventilation
openings; or, placed in a built-in installation, such as a bookcase or cabinet that may impede the flow of air through
the ventilation openings.
HEAT
The appliance should be situated away from heat sources such as radiators, heat registers, stoves, or other appliance
(including amplifiers) that produce heat.
POWER SOURCES
The appliance should be connected to a power supply only of the type described in the operating instructions or as
markedon the appliance.
GROUNDING OR POLARIZATION
Precautions should be taken so that the grounding or polarization means of anappliance is not defeated.
POWER-CORD PROTECTION
Power-supply cords should be routed so that they are not likely to be walked on or pinched by paying particular
attention to cords at plugs, convenience receptacles, and the point where they exit from the appliance.
CLEANING
The appliance should be cleaned only as recommended by the manufacturer.
POWER LINES
An outdoor antenna should be located away from power lines.
NON-USE PERIODS
The power cord of the appliance should be unplugged from the outlet when left unused for a long period of time.
OBJECT AND LIQUID ENTRY
Care should be taken so that objects do not fall and liquids are not spilled into the enclosure through openings.
DAMAGE REQUIRING SERVICE
The appliance should be serviced by qualified service personnel when:
•Thepower-supplycordortheplughasbeendamaged;or
•Objectshavefallen,orliquidshavespilledintotheappliance;or
•Theappliancehasbeen.exposedtorain:or
•Theappliancedoesnotappeartooperatenormallyorexhibitsamarkedchangeinperformance;or
•Theappliancehasbeendropped,ortheenclosuredamaged.
SERVICING
The user should not attempt to service the appliance beyond that described in the operating instructions. All other
servicing should be referred to qualified service personnel.
Page 6

SICHERHEITSHINWEISE
HINWEISE LESEN
Alle Sicherheits- und Bedienungshinweise
müssen gelesen werden, bevor das Gerät in
Betrieb genommen wird.
HINWEISE AUFBEWAHREN
Die Sicherheitshinweise und die Bedienungsanleitung müssen zur späteren Verwendung aufbewahrt werden.
WARNUNGEN BEACHTEN
Alle Warnungen auf dem Gerät und in der
Bedienungsanleitung müssen beachtet werden.
ANWEISUNGEN BEFOLGEN
Alle Anweisungen zur Bedienung und Verwendung müssen befolgt werden.
WASSER UND FEUCHTIGKEIT
Das Gerät darf nicht in der Nähe von Wasser,
z.B. in der Nähe von Badewannen, Waschbecken, Spülbecken, Waschwannen, in feuchten
Kellern oder an Swimmingpools, verwendet
werden. Achten Sie bitte darauf, dass keine
Gefäße, die Flüssigkeiten enthalten wie z.B.
Vasen, auf dem Gerät abgestellt werden.
BELÜFTUNG
Das Gerät muss so aufgestellt werden, dass eine
ordnungsgemäße Belüftung gewährleistet ist.
Beispielsweise darf das Gerät nicht auf einem
Sofa, Teppich oder einer ähnlichen Oberfläche
aufgestellt werden, die die Kühlkörper oder
Lüftungsöffnungen versperren könnten, und es
darf nicht in eine umschlossene Umgebung,
etwa in ein Bücherregal oder einen Schrank,
eingebaut werden, die den Luftstrom durch die
Belüftungsöffnungen behindert.
STANDSICHERHEIT
Verwenden Sie bitte ausschließlich Möbel und
andere Geräte zum Anbringen und Draufstellen
der Produkte, die beim Hersteller erhältlich sind
oder von Ihm empfohlen werden. Beachten Sie
bitte, dass fahrbare Tischgeräte oder Regale,
auf denen die Produkte platziert werden, sehr
vorsichtig zu bewegen sind, um Schäden oder
Verletzungen durch ein Umkippen zu vermeiden.
WARNUNG
Dieses Produkt muss auf einer festen, ebenen
Oberfläche aufgestellt werden. Legen Sie das
Gerät nicht auf die Seite, da auf die einzelnen
Seiten eine starke Belastung ausgeübt wird.
Hierdurch kann das Gehäuse beschädigt werden.
Beachten Sie bitte die Abbildung.
WÄRME
Das Gerät ist von Wärmequellen, wie Heizkörpern, Heißluftschächten, Öfen und anderen
Wärme erzeugenden Geräten (einschließlich
Verstärkern) entfernt aufzustellen. Setzen Sie das
Gerät nicht direkter Sonneneinstrahlung aus.
STROMQUELLEN
Das Gerät darf nur an Stromnetzen
angeschlossen werden, die in der
Bedienungsanleitung
beschrieben oder auf dem Gerät angegeben
sind.
ERDUNG UND POLUNG
Es ist dafür zu sorgen, dass die Mittel zur
ordnungsgemäßen Erdung und Polung des
Geräts nicht beeinträchtigt werden.
SCHUTZ DER KABEL
Alle Anschlusskabel müssen so verlegt
werden, dass sie nicht betreten oder gequetscht
werden oder auch zu Stolperfallen werden.
Auf das Netzkabel ist besonders an Steckern,
Mehrfachsteckdosen und an der Anschlusstelle
des Gerätes zu achten.
REINIGUNG
Das Gerät sollte nur entsprechend der
Empfehlung des Herstellers gereinigt werden.
ÜBERLANDLEITUNGEN
Eine etwaige Außenantenne darf keinesfalls in
der Nähe von Überlandleitungen installiert
werden.
AUßERBETRIEBNAHME
Der Netzstecker sollte bei Gewitter, oder wenn
das Gerät längere Zeit nicht verwendet wird, aus
der Steckdose entfernt werden.
EINDRINGENDE GEGENSTÄNDE UND
FLÜSSIGKEITEN
Achten Sie darauf, dass in die Öffnungen des
Gehäuses keine Gegenstände fallen und keine
Flüssigkeiten laufen.
VERPACKUNG
Bitte heben Sie die Verpackung für einen
eventuell späteren Transport auf, und halten
Sie die Polybeutel von Kindern fern, da hier bei
unsachgemäßem Umgang ein Erstickungsrisiko
besteht.
REPARATURBEDÜRFTIGE
BESCHÄDIGUNGEN
Das Gerät muss von qualifiziertem Fachpersonal gewartet werden, wenn einer der
folgenden Punkte zutrifft:
•DasNetzkabeloderderNetzstecker
beschädigt ist.
•IndasGerätFremdkörperoderFlüssigkeiten
eingedrungen sind.
•DasGerätderNässeausgesetztwurde.
•DasGerätnichtordnungsgemäßfunktioniert
oder Auffälligkeiten hinsichtlich der Leistung
aufweist.
•DasGeräteinemSturzschadenunterlag,oder
das Gehäuse beschädigt ist.
WARTUNG
Eine Wartung des Geräts durch den Benutzer
darf nur in dem in der Bedienungsanleitung
beschriebenen Umfang erfolgen. Alle
weiteren Wartungsarbeiten müssen von
qualifiziertem Fachpersonal durchgeführt
werden.
Page 7
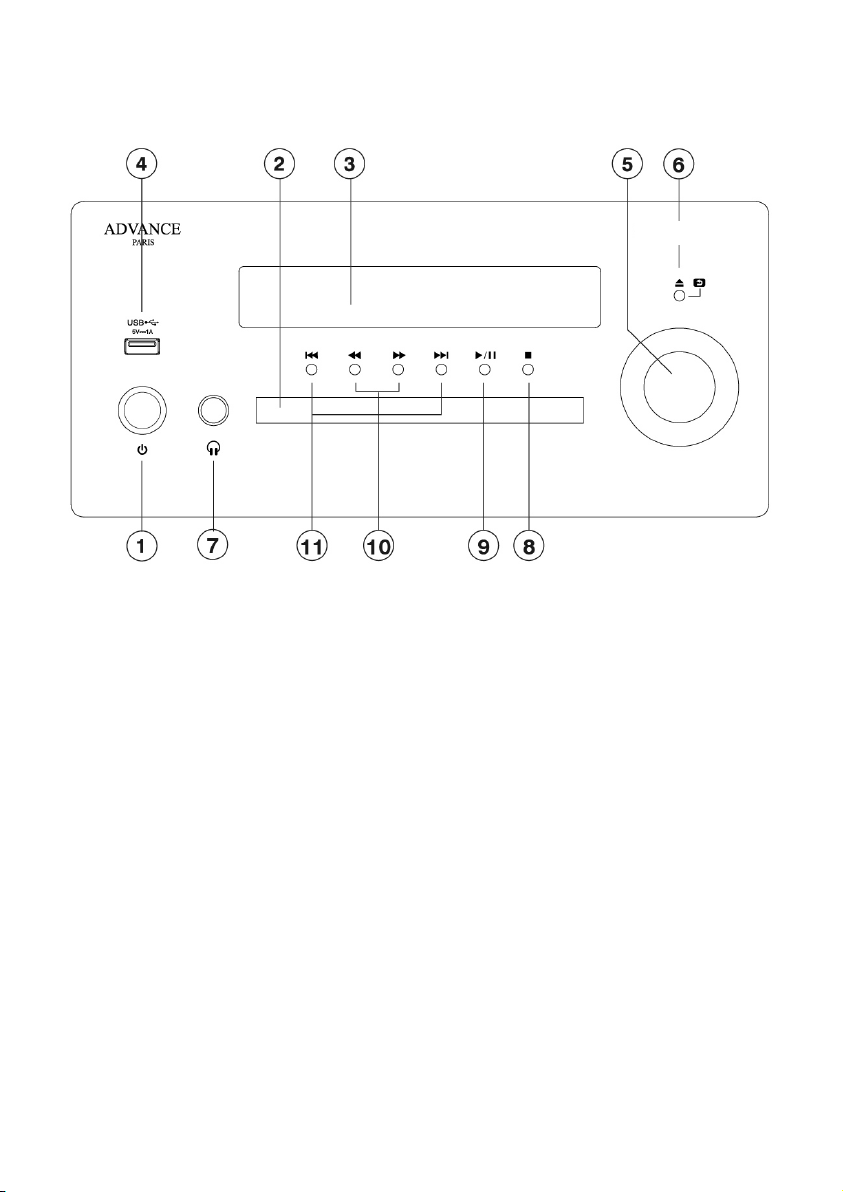
RÉGLAGES FACE AVANT - FRONT PANEL CONTROLS
FRONTSEITIGE ANZEIGEN - PANNELLO FRONTALE
MyConnect 60
A BA B
q
BOUTON STANDBY ON / OFF
Appuyez sur ce bouton pour mettre en marche votre appareil (éclairage blanc de votre bouton après
sa temporisation). La mise en marche de votre appareil ne peut se faire que si le bouton Marche/
Arrêt général situé sur la face arrière est en position ON. En mode STANDBY OFF, l’alimentation
principale est coupée à l’exception du micro-contrôleur servant à activer l’état de veille de l’appareil.
Le bouton est allumé en rouge.
STANDBY ON / OFF POWER BUTTON
Press this button to turn ON your appliance, power is supplied to your unit and it becomes
operational, the STANDBY button’s light becomes white. (The main power switch is located on the
back panel and must be ON in order to use STANDBY function).
When set to STANDBY OFF, the main power is cut-off and the unit is no longer fully operational
except for the micro controller. The standby indicator’s light becomes red.
STANDBY ON / OFF-Taste
Drücken Sie diese Taste, um Ihr Gerät einzuschalten. Die Beleuchtung Standby-Taste wird weiß.
(Der Netzschalter auf der Rückseite muss dazu auf Stellung ON stehen).
Wenn Gerät in Standby geschaltet ist, schaltet die Beleuchtung der Standby-Taste auf rot. Nur der
Mikrokontroller ist noch aktiv.
PULSANTE ON/OFF
Premere questo tasto per accendere l’apparecchio e renderlo operativo. L’indicatore standby si
illuminerà di bianco dopo qualche secondo. (Il pulsante generale di alimentazione è localizzato
posteriormente e deve essere su ON per l’utilizzo della funzione Standby). Premere una ulteriore
volta per mettere l’unità in standby. L’indicatore di standby si illuminerà di rosso in questa modalità.
Page 8

w
e
TIROIR D’INSERTION DU DISQUE
Placez un CD ou tout autre disque compatible après avoir appuyé sur la touche pour ouvrir le tiroir.
Placez le disque sur le plateau en le centrant, l’étiquette sur la face
supérieure.
DISC TRAY
Push this button to open the tray then, insert a CD or other compatible media disc face down onto
the tray. Place the disc in the drawer with its label facing up.
DISC INSERT SCHUBLADE
Legen Sie eine CD oder eine andere kompatible Disc ein, nachdem Sie die Taste gedrückt haben,
um das Fach zu öffnen Legen Sie die Disc auf das Fach, zentrieren Sie sie, das Etikett auf der
Vorderseite
höher.
DISC INSERIRE CASSETTO
Collocare un CD o un altro disco compatibile dopo aver premuto il pulsante per aprire il vassoio.
Posizionare il disco sul vassoio centrandolo, l’etichetta sulla parte anteriore
più alto.
AFFICHEUR
Cet écran indique de nombreuses informations, en fonction des paramètres du menu choisi. Par
défaut, il affiche la source sélectionnée et le niveau de volume lorsque vous tournez le bouton
multifonction.
DISPLAY
This display will indicate different information depends on chosen menu. By default, it will
indicate the source input.
r
t
DISPLAY
Dieser Bildschirm zeigt viele Informationen an, abhängig von den Einstellungen des
gewählten Menüs. Standardmäßig zeigt es die gewählte Quelle und Lautstärke an, wenn Sie den
Multifunktionsregler drehen.
DISPLAY
Questa schermata mostra molte informazioni, a seconda delle impostazioni del menu scelto. Per
impostazione predefinita, visualizza la sorgente selezionata e il livello del volume quando si ruota la
manopola multifunzione.
ENTRÉE USB A AUDIO
Permet de lire des fichiers audio MP3, WAV, FLAC, ALAC et AAC à partir de baladeur ou clé USB.
USB A INPUT AUDIO
Allows you to play MP3, WAV, FLAC, ALAC and AAC audio files from a player or USB stick.
USB A EINGANG (AUDIO)
Ermöglicht die Wiedergabe von MP3-, WAV-, FLAC-, ALAC- und AAC-Audiodateien von einem USB-
Stick.
INGRESSO USB (AUDIO)
Ti consente di riprodurre file audio MP3, WAV, FLAC, ALAC e AAC da una chiavetta USB.
BOUTON MULTIFONCTIONS
Vous pouvez naviguer aisément dans les menus de votre MyConnect 60 grâce à ce bouton multifonctions. Vous pouvez configurer votre appareil en appuyant sur ce bouton.
Page 9

y
Ce bouton gère les appuis courts, les appuis longs, la rotation à droite et la rotation à gauche.
Ce bouton permet aussi le réglage du volume de sortie de l’appareil.
MULTIFUNCTIONS BUTTON
You can easily navigate in the menus of your MyConnect 60 with this multifunction button. You can
configure your device by pressing this button.
This button handles short presses, long presses, right rotation and left rotation.
This button allows you to control the general level of volume of the unit.
MULTIFUNKTIONSKNOPF
Mit dieser Multifunktionstaste können Sie ganz einfach in den Menüs Ihres MyConnect 60 navigieren.
Sie können Ihr Gerät konfigurieren, indem Sie diese Taste drücken.
Mit dieser Taste können Sie kurze Drucktasten drücken, lange drücken, nach rechts drehen und
nach links drehen.
Mit dieser Schaltfläche können Sie den allgemeinen Lautstärkepegel des Geräts steuern.
TASTO MULTIFUNZIONE
Puoi facilmente navigare nei menu del tuo MyConnect 60 con questo pulsante multifunzione. È
possibile configurare il dispositivo premendo questo pulsante.
Questo pulsante gestisce brevi pressioni, lunghe pressioni, rotazione destra e rotazione sinistra.
Questo pulsante consente di controllare il livello generale del volume dell’unità.
BOUTON EJECT ET FONCTION RETOUR MENU
Appuyez rapidement sur ce bouton pour que le tiroir du CD s’ouvre. (Appui court).
Appuyez environ 2 secondes pour revenir au menu précédent lorsque vous naviguez
dans l’arborescence des menus à l’aide du bouton multifonction. (Appui long).
EJECT BUTTON AND BACK MENU FUNCTION
Push this button to open the tray of the cd player. (Short press).
Push this button about 2 seconds to go back to the previous menu when you navigate in the general
options and menu arborescence through the multifunctions button (general menu). (Long press).
u
AUSWAHLTASTE UND FUNKTION ZURÜCK MENU
Drücken Sie diese Taste schnell, um das CD-Fach zu öffnen. (Kurz drücken).
Drücken Sie etwa 2 Sekunden lang, um zum vorherigen Menü zurückzukehren, wenn Sie mit der
Multifunktionstaste im Menübaum navigieren. (Lang drücken)
EJECT BUTTON E FUNZIONE BACK MENU
Premere rapidamente questo pulsante per aprire il vassoio del CD. (Pressione breve).
Premere per circa 2 secondi per tornare al menu precedente quando si naviga nella struttura del
menu usando il tasto multifunzione. (Pressione lunga)
PRISES CASQUE STEREO 6,35 mm
Ces sorties stéréo délivrent suffisamment de puissance pour alimenter tous les casques stéréo
conventionnels, à l’exception des modèles électrostatiques qui nécessitent généralement des
signaux de plus haut niveau. (Casques non fournis).
6,35 mm STEREO JACK HEADPHONES
The headphone terminal provides a stereo audio signal sufficient for driving all conventional
stereo headphones except electrostatic headphones which generally require signal from a high level
ouputs. (Headphones not included)
KOPFHÖRER-BUCHSE (6,35 mm Stereo-Klinke)
Der Kopfhörer-Anschluss bietet ein Stereo-Audiosignal für den Betrieb aller herkömmlichen StereoKopfhörer außer elektrostatischer Kopfhörer, die in der Regel einen höheren Signalpegel erfordern. (
Page 10

PRESA CUFFIA 3.5 mm
Questeduepresepermettonol’utilizzodiqualsiasicuastereofonicaconvenzionale(manon
elettrostatica) con presa jack .
STOP
Appuyez sur ce bouton pour arrêter la lecture
i
STOP
Press button to stop playback
STOP
Drücken Sie die Taste zum Starten
STOP
Premere il pulsante per interrompere la riproduzione
FONCTION LECTURE ET PAUSE
Appuyez sur ce bouton pour démarrer la lecture ou pour reprendre la lecture après une Pause. Si
o
le plateau de disque est ouvert, appuyez sur cette touche pour fermer automatiquement le plateau
et lancer la lecture si le disque est chargé. Lorsque votre CD est en mode lecture, une pression sur
cette touche met la lecture en mode PAUSE.
PLAY / PAUSE
Press to start play or to resume play after Pause. If the disc tray is open, press this button to
automatically close the tray and start playback if a disc is loaded. When your CD player is in play
mode, if you make a short press on this button, then the player goes in PAUSE mode.
FUNKTION PLAY UND PAUSE
Drücken Sie, um die Wiedergabe zu starten oder um die Wiedergabe nach der Pause fortzusetzen.
Wenn das Disc-Fach geöffnet ist, drücken Sie diese Taste
Schließen Sie das Fach automatisch und starten Sie die Wiedergabe, wenn eine CD eingelegt ist.
Wenn sich Ihr CD-Player im Wiedergabemodus befindet, wenn Sie diese Taste kurz drücken,
wechselt der Player in den PAUSE-Modus.
PLAY E PAUSA FUNZIONI
Premere per avviare la riproduzione o per riprendere la riproduzione dopo la pausa. Se il vassoio del
disco è aperto, premere questo pulsante
chiude automaticamente il vassoio e avvia la riproduzione se viene caricato un disco. Quando il
lettore CD è in modalità di riproduzione, se si preme brevemente questo pulsante, il lettore entra in
modalità PAUSA.
TOUCHE PREVIOUS / MORCEAU PRECEDENT
Appuyez sur ce bouton pour sélectionner le morceau musical précédent. Vous pouvez appuyer
a
A
plusieurs fois sur cette touche pour accéder à l’ensemble des morceaux
précédents.
PREVIOUS / PREVIOUS TRACK
Press this button to go to the previous track. You also can press several times this
button in order to jump to all previous track of your disc.
Page 11

TITELSPRUNG ZURÜCK
Durch Betätigung dieser Taste springt die Wiedergabe zum Anfang des laufenden Titels. Durch
mehrmaliges Betätigen springt die Wiedergabe entsprechend weiter zurück.
PULSANTE PRECEDENTE / TRACCIA PRECEDENTE
Premere questo pulsante per andare alla traccia precedente. Puoi anche premere più volte
pulsante per saltare a tutte le tracce precedenti del disco.
TOUCHE NEXT / MORCEAU SUIVANT
B
Appuyez sur ce bouton pour sélectionner le morceau musical suivant. Vous pouvez appuyer
a
plusieurs fois sur cette touche pour accéder à l’ensemble des morceaux suivants.
NEXT / NEXT TRACK
Press this button to go to the next track. You also can press several times this button in order to jump
to all next track of your disc.
TITELSPRUNG VORWÄRTS
Durch Betätigung dieser Taste springt die Wiedergabe zum nächsten Titel. Durch mehrmaliges
Betätigen springt die Wiedergabe entsprechend weiter vor.
PROSSIMA / PROSSIMA TRACCIA
Premi questo pulsante per andare alla traccia successiva. È inoltre possibile premere più volte questo
pulsante per passare a tutte le tracce successive del disco.
TOUCHE RETOUR RAPIDE
Si vous appuyez sur cette touche pendant que votre lecteur est en mode lecture, vous
A
s
passerez en lecture arrière rapide.
FAST REVERSE
During playback, each time you press the button, the fast reverse function will switch on.
SCHNELLER RÜCKLAUF
Durch Drücken und Halten dieser Taste läuft die Wiedergabe schneller zurück.
RITORNE VELOCE
Durante la riproduzione, ogni volta che si preme il pulsante, si attiva la funzione di riavvolgimento
rapido.
TOUCHE AVANCE RAPIDE
B
Si vous appuyez sur cette touche pendant que votre lecteur est en lecture, vous
s
passerez en mode lecture rapide arrière.
FAST FORWARD
During playback, each time you press this button, the fast forward function will switch on.
SCHNELLER VORLAUF
Durch Drücken und Halten dieser Taste läuft die Wiedergabe schneller vor.
AVANTI VELOCE
Durante la riproduzione, ogni volta che si preme questo pulsante, si attiva la funzione di avanzamento rapido.
Page 12
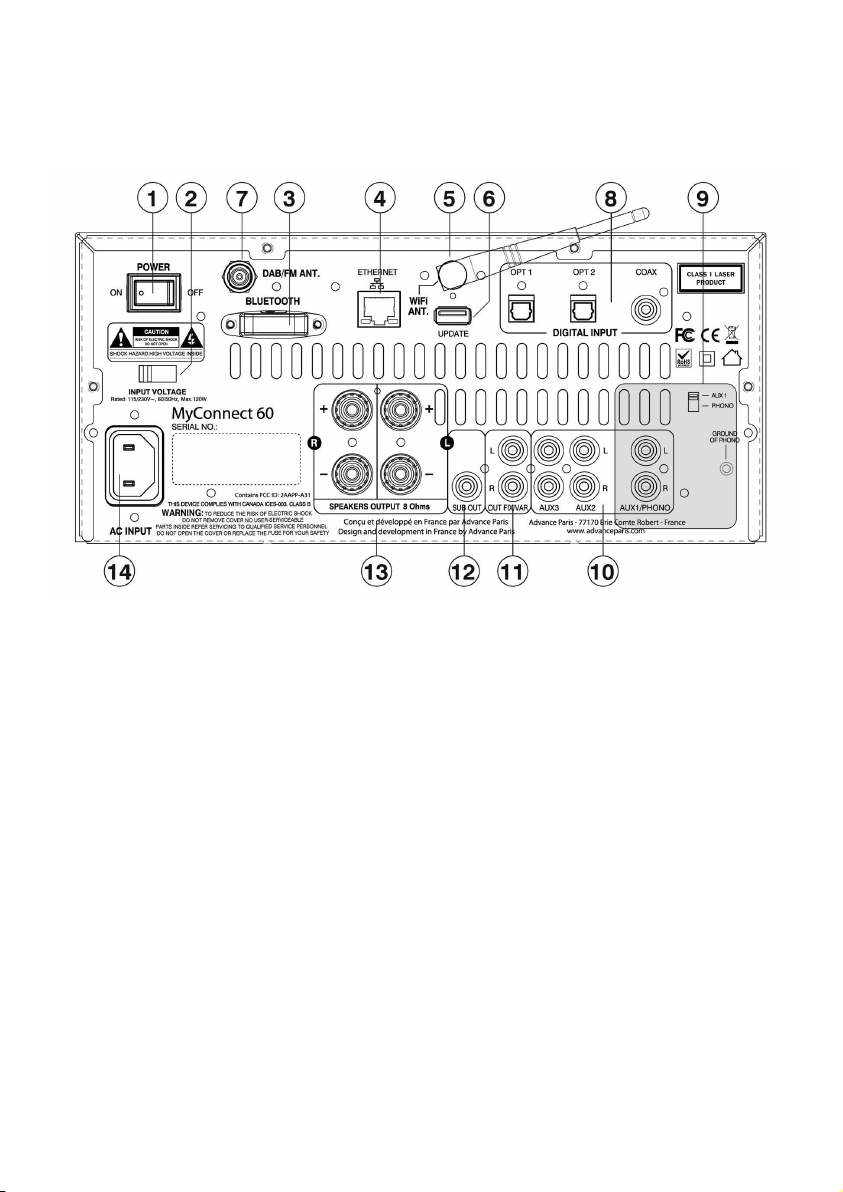
CONNEXIONS FACE ARRIÈRE - REAR PANEL CONNECTIONS
RÜCKSEITIGE ANSCHLÜSSE - PANNELLO POSTERIORE COLLEGAMENTI
CÂBLE SECTEUR / SÉLECTEUR DE TENSION / COMMUTATEUR GÉNÉRAL D’ALIMENTATION
Vous devez vous assurer de la bonne tension secteur de votre pays. Par défaut et par sécurité, le
q
sélecteur a été configuré pour 230 V. Avant de relier le MyConnect 60 au secteur, vérifiez que le
commutateur général est sur “OFF”.
w
POWER CORD / VOLTAGE SELECTOR / GENERAL ON OFF SWITCH
g
You need to be sure about the voltage of your country. In case that you need to use your appliance in
115V, you need to change the position of the voltage on the rear panel.
Before plugging in the MyConnect 60, its master power switch must be in the OFF position.
STROMANSCHLUSS / SPANNUNGSSCHALTER / GERÄTESCHALTER
Stellen Sie sicher das der Spannungswahlschalter auf die Spannung eingestellt ist, die in Ihrem Land
Standard ist. Der Hauptschalter muss vor dem Anschließen an das Stromnetz auf OFF stehen.
CAVO DI ALIMENTAZIONE/SELETTORE DI VOLTAGGIO/ INTERRUTTORE GENERALE
In questa collocazione troviamo la presa di alimentazione, il selettore del voltaggio e
l’interruttore di accensione.
Prima di inserire il cavo nella presa attiva, l’interruttore principale deve essere su OFF ed allo stesso
tempo accertarsi della tensione del proprio paese.
RECEPTEUR BLUETOOTH
Capteur pour la réception Bluetooth.
e
BLUETOOTH RECEIVER
Bluetooth sensor
Page 13

BLUETOOTH-EMPFÄNGER
Sensor für Bluetooth-Empfang
RICEVITORE BLUETOOTH
Sensore per la ricezione Bluetooth.
CONNEXION A UN RESEAU DOMESTIQUE LAN
Vous devez disposer d’une connexion Internet haut débit, un modem ou box ADSL (certains intégrent
r
un routeur. Votre routeur doit être équipé des fonctions suivantes: serveur DHCP intégré (affecte
automatiquement une adresse IP au LAN), commutateur 100BASE-TX intégré ayant une vitesse d’au
moins 100 Mbps. Raccorder une extrémité de ce cable sur l’entrée LAN du MyConnect 60 et l’autre
sur votre routeur.
CONNECTING TO A HOME NETWORK (LAN)
The MyConnect 60 require a broadband internet connection, a modem or ADSL box or a device that
connects to the broadband circuit and conducts communications on the Internet. DHCP and 100Mbps
are necessary. Use an ethernet cable (CAT. min.) between your MyConnect 60 and your router.
ANSCHLUSS AN EIN LAN-DOMESTIC-NETZWERK
Sie benötigen eine Breitband-Internetverbindung, ein Modem oder eine ADSL-Box (einige haben
einen Router integriert) Ihr Router muss mit folgenden Funktionen ausgestattet sein: eingebauter
DHCP-Server (weist dem LAN automatisch eine IP-Adresse zu), integrierter 100BASE-TX-Switch
eine Geschwindigkeit von mindestens 100 Mbps Verbinden Sie ein Ende dieses Kabels mit dem
LAN-Eingang des MyConnect 60 und das andere Ende mit Ihrem Router.
CONNESSIONE A UNA HOME NETWORK (LAN)
Il MyConnect 60 richiede una connessione Internet a banda larga, un modem o una casella ADSL o
un dispositivo che si connetta al circuito a banda larga e conduca comunicazioni su Internet. Sono
necessari DHCP e 100 Mbps. Utilizzare un cavo Ethernet (CAT. Min.) Tra il MyConnect 60 e il router.
PRISE D’ANTENNE WIFI
Votre MyConnect 60 dispose d’une entrée antenne pour la transmission WiFi. Utiliser l’antenne livrée
t
avec votre MyConnect 60. Vissez l’antenne sur le connecteur et positionner le fouet de l’antenne en
position
verticale pour optimiser la réception. La portée du signal WiFi peut varier en fonction des conditions
d’utilisation.
WIFI ANTENNA
We supply with your MyConnect 60 a WiFi antenna that you can plug on the antenna
connector. In order to fix properly this antenna, please turn the screw on the connector. The
antenna must be used vertically in order to obtain the best WiFi signal as possible. The quality of
a wireless connection may varied.
WIFI ANTENNE
Wir liefern mit Ihrem MyConnect 60 eine WiFi-Antenne, die Sie an die Antenne anschließen können
Verbinder. Um diese Antenne richtig zu befestigen, drehen Sie bitte die Schraube am Stecker. Das
Die Antenne muss vertikal verwendet werden, um das bestmögliche WLAN-Signal zu erhalten. Die
Qualität von eine drahtlose Verbindung kann variieren.
WIFI ANTENNA
Forniamo con il tuo MyConnect 60 un’antenna WiFi che puoi collegare all’antenna
connettore. Per fissare correttamente questa antenna, girare la vite sul connettore. Il
l’antenna deve essere utilizzata verticalmente per ottenere il miglior segnale WiFi possibile.
La qualità di una connessione wireless può variare.
PORT USB POUR LES MISES A JOUR
Ce connecteur est dédié aux mises à jour du système d’exploitation du MyConnect par un
y
Page 14

revendeur agréé. Ne tentez pas de mettre vous-même à jour votre MyConnect 60 sous peine de
l’endommager !
UPGRADE PORT
This connector is dedicated to the MyConnect 60 operating system updates from an authorized
reseller. Do not attempt to update your MyConnect 60 yourself, otherwise it may be damaged !
UPGRADE PORT
Dieser Anschluss ist für die Aktualisierung des MyConnect 60-Betriebssystems von einem
autorisierten Händler bestimmt. Versuchen Sie nicht, Ihren MyConnect 60 selbst zu aktualisieren, da
er sonst beschädigt werden kann!
INGRESSO USB A & UPGRADE PORT
Questo connettore è dedicato agli aggiornamenti del sistema operativo THE MyConnect 60 da un
rivenditore autorizzato. Non tentare di aggiornare MyConnect 60 da soli, altrimenti potrebbe essere
danneggiato!
PRISE D’ANTENNE FM/DAB/DAB+
Votre MyConnect 60 dispose d’une entrée antenne pour la réception des signaux FM et DAB. Visser
u
le connecteur de l’antenne FM/DAB puis déterminer avec le fil d’antenne la meilleure position
possible, là où le signal de réception sera maximum.
FM/DAB ANTENNA
Your MyConnect 60 has an antenna input for receiving FM/DAB signals. Screw on the connector of
the FM/DAB antenna and determine with the antenna wire the best position possible, where the recep-
tion signal will be maximum
FM/DAB ANTENNE
Ihr MyConnect 60 verfügt über einen Antenneneingang zum Empfang von FM/DAB-Signalen.
Schrauben Sie den Stecker der UKW-Antenne an und bestimmen Sie dann mit der Antennenleitung
die bestmögliche Position, an der das Empfangssignal maximal sein wird
FM ANTENNA
Il tuo MyConnect 60 ha un ingresso antenna per ricevere segnali FM/DAB. Avvitare il connettore
dell’antenna FM/DAB e quindi determinare con il filo dell’antenna la migliore posizione possibile, dove
il segnale di ricezione sarà massimo
ENTRÉES DIGITALES COAXIALES (1), OPTIQUES (2)
Votre MyConnect 60 est équipé de d’une entrée coaxiale et deux entrées optiques. Vous pouvez
i
connecter sur ces entrées, la sortie numérique de votre lecteur Cd, MD, etc... et profiter de
l’excellente qualité du convertisseur intégré.
OPTICAL (2), COAXIAL (1) DIGITAL INPUTS
Your MyConnect 60 integrates a DAC (Digital audio converter) with one coaxials inputs and two
optical input. You can connect the digital output of your CD, MD, etc... and use the high quality DAC
converter of your amplifier in order to obtain a better sound result.
OPT., COAX (2+1) DIGITALEINGÄNGE
Ihr MyConnect 60 enthält einen DAC (Digital Audio Converter) mit einem Koaxialeingang und zwei
optische Eingabe. Sie können den digitalen Ausgang Ihrer CD, MD usw. anschließen und den
hochwertigen DAC verwenden
Konverter Ihres Verstärkers, um ein besseres Klangergebnis zu erzielen.
INGRESSI DIGITALI COASSIALE (1) E OTTICO (2)
MyConnect 60 integra un DAC (convertitore audio digitale) con due ingressi coassiali e due
ingresso ottico. È possibile collegare l’uscita digitale del proprio CD, MD, ecc. E utilizzare il DAC di
alta qualità convertitore del tuo amplificatore per ottenere un risultato sonoro migliore.
Page 15

ENTRÉE AUX1 / PHONO
Vous pouvez connecter sur cette entrée AUX1/PHONO une source audio au niveau d’entrée normali-
o
sé de type auxiliaire, lecteur CD, tuner, PC, etc... ou une platine disque avec cellule MM. Positionnez
le commutateur sur l’entrée sélectionnée, AUX1 ou Phono.
AUX1 / PHONO INPUT
You can connect this AUX1 / PHONO audio source to the standard auxiliary input level type CD
player, tuner, PC, etc ... or a turntable with MM cartridge. Set the switch to the selected input, AUX1.
AUX1 / PHONO / PHONO EINGANG
Sie können dieses AUX1 / PHONO / Phono-Audio an den CD-Player, Tuner, PC usw. des
Standardeingangs oder an einen Plattenspieler mit MM-Kassette anschließen. Stellen Sie den
Schalter auf den Eingang AUX1 oder Phono.
AUX1 / PHONO INGRESSO
È possibile collegare questo audio AUX1 / PHONO al lettore CD di tipo standard, al sintonizzatore,
al PC, ecc. O ad un giradischi con cartuccia MM. Impostare l’interruttore sull’ingresso di ingresso,
AUX1 o Phono.
ENTRÉES DES SOURCES
Vous devez connecter vos sources sur les entrées stéréophoniques correspondantes. Toutes ces
a
entrées sont normalisées, elles conviennent à toutes sources standards
comme des tuners, des lecteurs CD, des lecteurs MP3, des lecteurs DVD, etc...
Remarque : Ces entrées conviennent uniquement à des signaux audio analogiques. Elles ne doivent
pas être raccordées à la sortie numérique d’un lecteur de CD ou d’un autre appareil à sortie
numérique.
INPUTS
You can connect your stereo sources on those inputs. These inputs are suitable for any line level
source equipment such as tuners, CD players, DVD, MP3 players, etc.
Note: These inputs are only for analogue audio signals. They should not be connected to the digital
output of a CD player or any other digital device.
AUDIO EINGÄNGE
Diese RCA-Eingänge dienen zum Anschluss Ihrer Signalquellen wie Tuner, CD-Player, MP3-Player,
DVD-Player, etc ...Hinweis: Diese Eingänge sind nur für analoge Audiosignale.
INGRESSI
A queste prese si possono collegare i Vostri apparecchi stereo. Questi ingressi sono adatti a tutte
le sorgenti linea quali Cd, Dvd, lettori MP3,ecc e per segnali di tipo analogico. Non devono essere
collegati a uscite digitali.
SORTIE OUT FIX/VAR
Cette sortie audio stéréo peut être paramétrée soit en sortie fixe, soit en sortie à niveau variable. Ce
s
choix se fait via le menu SYSTEM SETTING.
FIXED / VARIABLE OUTPUT
This stereo audio output can be set either as a fixed output or as a variable level output. This choice
is made via the SYSTEM SETTING menu.
FESTER ODER VARIABLER STEREOAUSGANG
Dieser Stereo-Audioausgang kann entweder als fester Ausgang oder als variabler Ausgangspegel
eingestellt werden. Diese Auswahl erfolgt über das Menü SYSTEMEINSTELLUNG.
USCITA STEREO FISSA O VARIABILE
Questa uscita audio stereo può essere impostata come uscita fissa o come uscita a livello variabile.
Questa scelta viene effettuata tramite il menu SYSTEM SETTING.
Page 16

d
f
SORTIE SUBWOOFER / CAISSON DE GRAVE
Permet de connecter un caisson de grave
SUBWOOFER OUTPUT
To connect an active subwoofer
SUBWOOFER OUT
Zu active subwoofer anschließen
SUBWOOFER TERMINALI
Permette di collegare subwoofer
BORNIER HAUT-PARLEURS
Brancher des enceintes ayant une impédance minimale de 4 ohms. Brancher l’enceinte droite aux
bornes repérées ‘R +’ et ‘R-’ en s’assurant que ‘R+’ est reliée à la borne ‘+’ de l’enceinte et ‘R-’
est reliée à la borne ‘-’ de cette même enceinte. Brancher le haut-parleur gauche aux bornes repérées ‘L+’ et ‘L-’ en procédant de la même manière.
On peut utiliser les bornes serre-fils pour courants élevés comme bornes à vis pour les câbles
comportant des cosses plates, des broches, des prises “banane“, ou pour des câbles comportant
des fils nus.
Les fils nus et les broches s’insèrent dans le trou diamétral percé dans la tige de la borne.
Desserrer la bague en plastique jusqu’à ce que le trou dans la tige soit visible. Insérer la
broche ou le fil nu dans le trou, puis fixer le câble en vissant la bague de la borne.
Eviter tout risque que le métal nu des câbles de haut-parleurs ne touche la face arrière ou
un autre connecteur. S’assurer que la longueur dénudée ou la longueur de la broche ne
dépasse pas 1/2” (1 cm) et qu’il n’y a aucun brin libre.
SPEAKER TERMINALS
Connect speakers with impedance of 4 Ohms or greater. Connect the right
speaker to the terminals market ‘R +’ and ‘R-’ ensuring that the ‘R+’ is connected to the
‘+’ terminal on your loudspeaker and the ‘R-’ is connected to the loudspeaker’s ‘-’ terminal.
Connect the terminals marked ‘L+’ and ‘L-’ to the left speaker in the same way.
The high current binding post terminals can be used as a screw terminal for cables
terminating in spade or pin connectors or for cables with bare wire ends.
SPADE CONNECTORS
These should be slotted under the terminal’s screw bushing, which is then fully tightened.
Ensure the connector is tightly secured and there is no danger of bare metal from spade
connectors touching the back panel or another connector as this may cause damage.
BARE WIRES AND PIN CONNECTORS
Bare wires and pin connectors should be inserted into the hole in the shaft of the terminal.
Unscrew the speaker terminal’s plastic bushing until the hole in the screw shaft is revealed. Insert
the pin or bare cable end into the hole and secure the cable by tightening down the terminal’s
bushing.
BANANA CONNECTORS
You also can use banana connectors on the speakers terminal.
Avoid any danger of bare metal from the speaker cables touching the back panel o ranother
connector.
LAUTSPRECHERANSCHLÜSSE
Für ein unverfälschtes Klangerlebnis stellen Sie bitte einen verpolungsfreien
Lautsprecheranschluss sicher!
Verwenden Sie Lautsprecher mit einer Impedanz von 4 Ohm oder größer. Verbinden Sie den rechten Lautsprecher an den Klemmen + und -.
Die Hochstrom-Schraubterminals können als Schraubklemmen für Kabel mit oder ohne
Kabelschuhen oder Pin-Anschlüssen verwendet werden.
FLACHSTECKER können unter die Mutter des Terminals gesteckt werden, die dann fest
angezogen werden muss. Bitte beachten Sie, dass der Stecker fest sitzen muss. Es darf nicht die
Gefahr bestehen, dass blankes Metall des Flachsteckers die Rückwand sitzen oder eine anderen
Anschluss berührt, da es hierdurch zu Beschädigungen kommen kann.
BLANKE DRÄHTE UND PIN-ANSCHLÜSSE sollten in das Loch im Gewindes des Terminals
eingesetzt werden.
Page 17
Lösen Sie die Mutter des Terminals bis das Loch im Gewinde sichtbar wird. Setzen Sie den Stift
oder das blanke Kabel in das Loch und sichern Sie die Verbindung durch Anziehen der Mutter.
BANANENSTECKER können mit diesen Terminals ebenfalls verwendet werden.
TERMINALI DEI DIFFUSORI
Collegare i diffusori da 4 Ohm o superiori e collegare il diffusore destro ai terminali marcata + e -
accertandosi che + sia collegato al terminale “+” sul diffusore e che - sia collegato al
terminale “-“ del diffusore.
I terminali ad alta corrente dei diffusori possono essere collegati ai cavi tramite le forcelle, pin
oppure direttamente al cavo spellato.
Connettori a forcella: devono scivolare sotto la vite del terminale che viene poi avvitato a fondo,
assicurandosi che non vi siano parti in metallo scoperte a contatto con il pannello posteriore o
con altri connettori a rischio di cortocircuito.
Cavi spellati o pin: dovrebbero essere inseriti nel foro presente sul terminale che viene scoperto
svitando la protezione di plastica sul terminale. Inserire il cavo spellato nel foro e fissarlo avvitando
la boccola del terminale.
Banane: è possibile utilizzare anche terminali a banana per i collegamenti.
MyConnect 60
UN ALL-IN-ONE AUDIOPHILE VRAIMENT UNIVERSELLE !
A REALLY UNIVERSAL ALL-IN-ONE !
EINE WIRKLICH UNIVERSELLE !
UNA VERA ALL-IN-ONE UNIVERSALE !
Le MyConnect 60 est un All-In-One connectée intégrant un
amplicateur en classe AB, un lecteur réseau avec son application Advance
Playstream téléchargeable sur l’AppStore et sur GooglePlay, un lecteur CD, un
tuner FM/DAB, une entrée Bluetooth et 3 entrées numériques.
The MyConnect 60 is a connected All-In-One incorporating a class AB
amplier, a network player with its Advance Playstream application
downloadable from the AppStore and GooglePlay, a CD player, an FM/DAB
tuner, a Bluetooth input and 3 digital inputs.
Der MyConnect 60 ist ein angeschlossener All-In-One, der einen
Verstärker der Klasse AB, einen Netzwerkplayer mit seiner herunterladbaren
Advance Playstream-App, einen CD-Player, einen FM/DAB-Tuner, einen
Bluetooth-Eingang und 3 digitale Eingänge enthält.
MyConnect 60 è un dispositivo All-in-One collegato che incorpora un
class AB amplicatore, un lettore di rete con l’applicazione Advance Playstream
scaricabile da AppStore e GooglePlay, un lettore CD, un sintonizzatore
FM/DAB, un ingresso Bluetooth e 3 ingressi digitali.
Page 18
Arborescence des menus et options
Options and menus arborescence
Menüstruktur und Optionen
Menu e le opzioni
WHEN SWITCHING ON THE MyConnect 60 FOR THE FIRST TIME
A LA PREMIÈRE MISE EN MARCHE DE VOTRE MyConnect 60
WENN DER MyConnect 60 ERSTMALS EINSCHALTET
QUANDO SI ACCENDE MyConnect 60 PER LA PRIMA VOLTA
Power ON
MyConnect 60
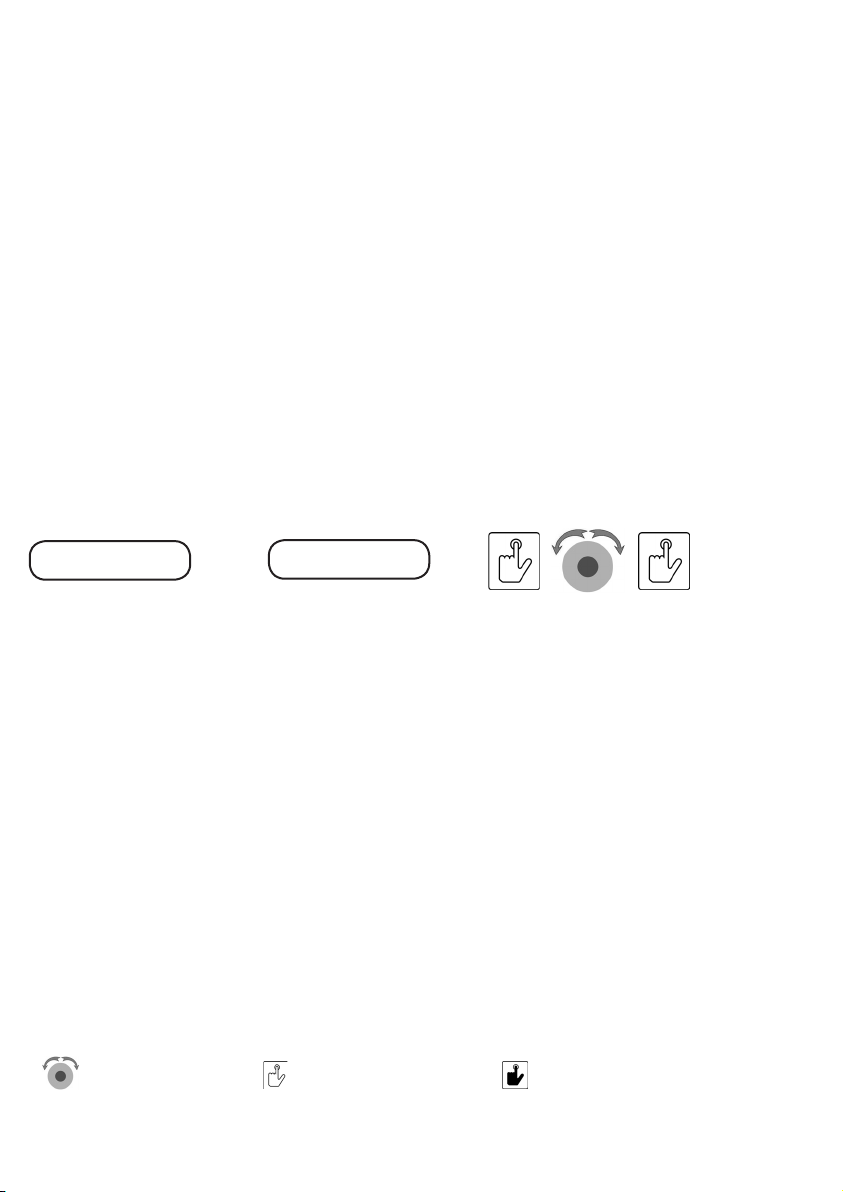
SELECT THE SOURCE BY TURNING THE BUTTON AND PUSH IT
SELECTIONNEZ VOTRE SOURCE ET APPUYEZ POUR VALIDER
WÄHLEN SIE IHRE QUELLE UND DRÜCKEN SIE, UM ZU BESTÄTIGEN
SELEZIONA LA TUA FONTE E PREMI PER CONVALIDARE
N
CD n Streaming n DIGITAL INPUTS n ANALOG INPUTS
g g
CD
NO DISC
Push
during 2 sec.
before turning
USB n FM n DAB n Bluetooth n SYSTEM SETTING
Turn the button
Tourner le bouton
Den Knopf drehen
ruotare la manopola
Push the button
Pousser sur le bouton
Den Knopf drücken
Premere il tasto
Push the button min. 2 sec.
Pousser sur le bouton min. 2 sec.
Den Knopf drücken min. 2 sec.
Premere il tasto min. 2 sec.
g
Selected
source
O
Page 19
A
QUICK LEARNING
PLAY CD
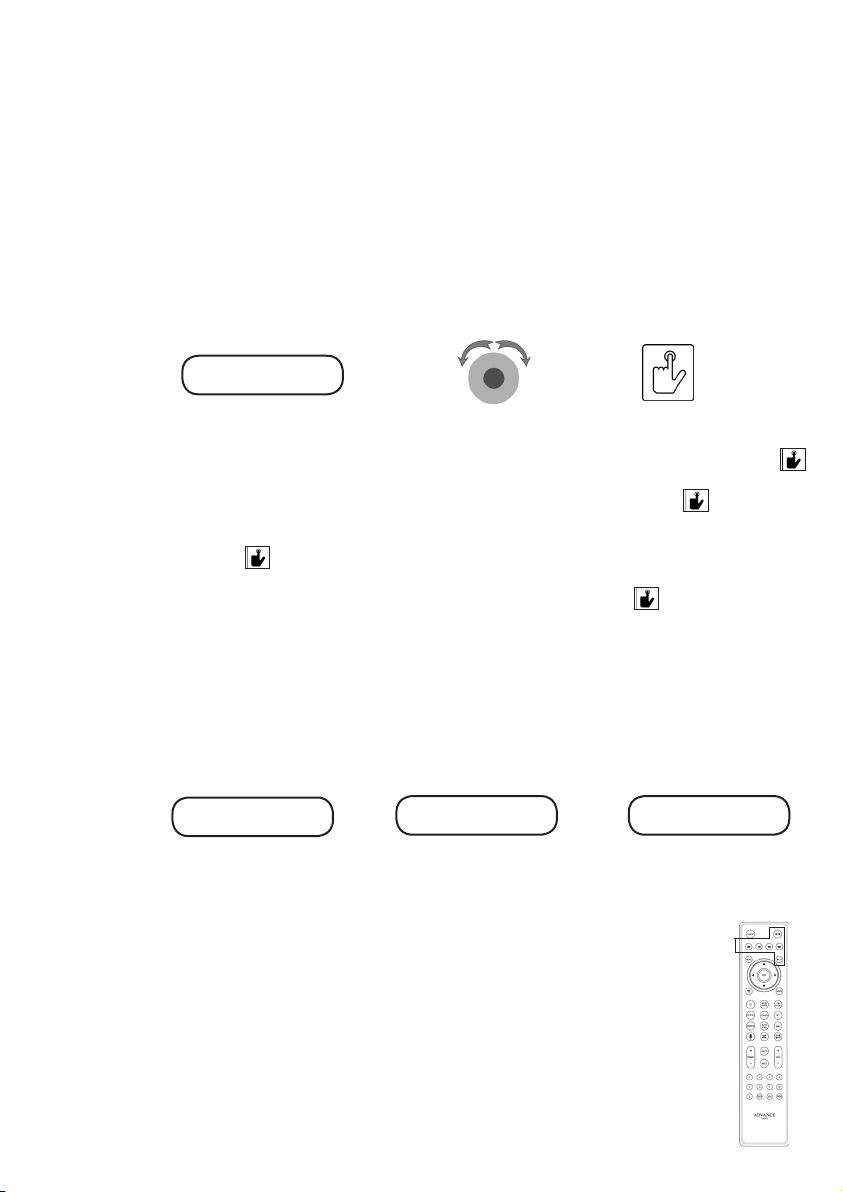
A partir du menu des sources sélectionner le CD en conrmant votre choix par un appui court
sur le bouton multifonction.
From the sources menu, select CD and conrm your choice with a short press on the
multifunction button.
Wählen Sie im Quellenmenü CD und bestätigen Sie Ihre Auswahl mit einem kurzen Druck auf
die Taste multifunktionstaste.
Dal menu delle fonti, selezionare CD e confermare la scelta con una breve pressione sul
tastopulsante multifunzione.
t
t
t
t
B
C
g
g
CD player
control button
g
g
g
Loading CD > 1 00:21
>CD
Streaming
Si vous avez fait un choix erroné (par exemple une autre source), vous pouvez revenir au
menu principal des sources par un appui long (environ 2 sec.) sur le bouton multifonction.
If you have done a wrong choice, for exemple if you have chosen another source, you can go
back to the main source menu with a long press on the multifunction button.
Wenn Sie eine falsche Wahl getroffen haben, z. B. wenn Sie eine andere Quelle gewählt
haben, können Sie durch langes Drücken der Multifunktionstaste zum Hauptquellenmenü
zurückkehren.
Se hai fatto una scelta sbagliata, ad esempio se hai scelto un’altra fonte, puoi tornare al menu
principale della sorgente premendo a lungo il pulsante multifunzione.
Ouvrir le tiroir du CD et poser votre disc sur le plateau. Appuyez sur le bouton lecture ou eject
et la lecture démarrerra.
Open the CD tray and insert a disc. Push the eject or play button and the cd player will start.
Öffnen Sie das CD-Fach und legen Sie eine Disc ein. Drücken Sie die Auswurftaste oder die
Wiedergabetaste, um den CD-Player zu starten.
Aprire il vassoio del CD e inserire un disco. Premi il pulsante di espulsione o di riproduzione e
il lettore CD inizierà.
CD
NO DISC
Pour contrôler les différentes fonctions de votre
lecteur, nous vous conseillons d’utiliser votre
télécommande.
To control the different functions of your player,
we suggest you to use your remote control
Um die verschiedenen Funktionen Ihres
CD-Players zu steuern, Wir empfehlen Ihnen,
Ihre Fernbedienung zu benutzen
Per controllare le diverse funzioni del tuo
lettore CD, ti suggeriamo di usare il tuo
telecomando.
Page 20
A
QUICK LEARNING NETWORK SETUP
Streaming
RÉGLAGES RÉSEAU
La première étape consiste à congurer les différents réglages réseau de votre MyConnect50.
NETWORK SETUP
The rst step is to make the various network settings of your MyConnect 60.
NETZWERKEINRICHTUNG
Der erste Schritt besteht darin, die verschiedenen Netzwerke Ihres MyConnect 60 zu
erstellen.
CONFIGURAZIONE DI RETE
Il primo passo è creare le varie reti del tuo MyConnect 60.
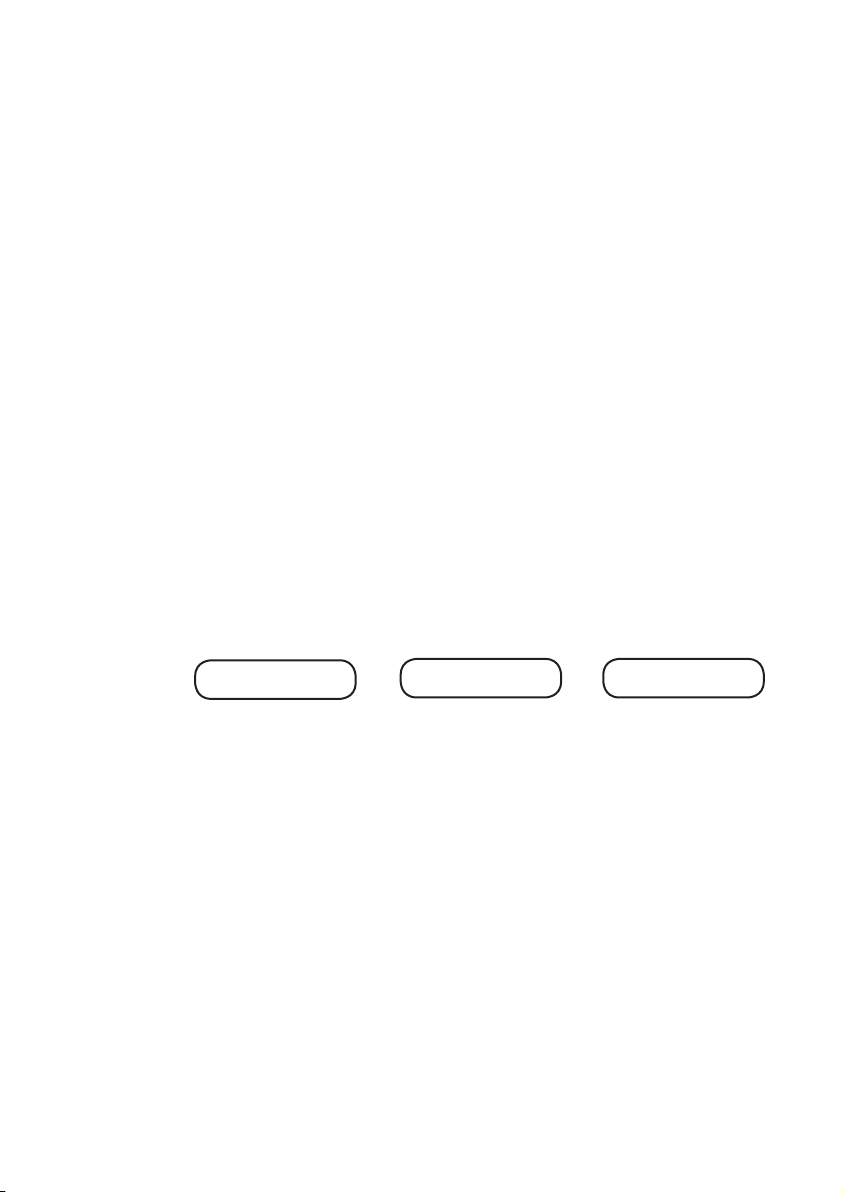
A partir du menu des sources sélectionner System setting puis Network Setup et enn
Network Wizard en conrmant vos choix par un appui court sur le bouton multifonction après
chaque sélection.
From the menu of sources select System setting then Network Setup and nally Network
Wizard conrming your choices by a short press on the multifunction button after each
selection.
Wählen Sie im Menü der Quellen die Option Systemeinstellung, dann Netzwerkeinrichtung
und schließlich den Netzwerkassistenten, der Ihre Auswahl bestätigt, indem Sie nach jeder
Auswahl kurz auf die Multifunktionstaste drücken.
Dal menu delle sorgenti selezionare Impostazioni di sistema, quindi Impostazioni di rete e
inne Procedura guidata di rete che conferma le proprie scelte premendo brevemente il tasto
multifunzione dopo ciascuna selezione.
B
g
Bluetooth
>System setting
Si vous avez fait un choix erroné (par exemple une autre source), vous pouvez revenir au
menu principal des sources par un appui long (environ 2 sec.) sur le bouton multifonction.
If you have done a wrong choice, for exemple if you have chosen another source, you can go
back to the main source menu with a long press on the multifunction button.
Wenn Sie eine falsche Wahl getroffen haben, z. B. wenn Sie eine andere Quelle gewählt
haben, können Sie durch langes Drücken der Multifunktionstaste zum Hauptquellenmenü
zurückkehren.
Se hai fatto una scelta sbagliata, ad esempio se hai scelto un’altra fonte, puoi tornare al menu
principale della sorgente premendo a lungo il pulsante multifunzione.
Sélectionner votre réseau WiFi personel (dans notre exemple ADVANCE) puis taper le mot
de passe de celui-ci. Votre MyConnect 60 tente de se connecter à celui-ci (écran connecting
puis connecté). Le paramétrage est terminé lorsque l’écran afche la source Streaming/USB.
Vous êtes prêts à utiliser votre lecteur réseau après avoir télécharger sur votre smartphone ou
tablette l’application ADVANCE PLAYSTREAM disponible sur l’AppStore ou GooglePlay.
Select your personal WiFi network (in our example ADVANCE PARIS) and then enter the
password of this one. Your MyConnect 60 is trying to connect to it (connecting display
then connected display). The setting is complete when the display shows the Streaming /
USB source. You are ready to use your network player after downloading the ADVANCE
PLAYSTREAM apps available on the AppStore or GooglePlay to your smartphone or tablet.
System setting
>Network Setup
g
Network setup
>Network Wizard
Page 21
Wählen Sie Ihr persönliches WLAN-Netzwerk (in unserem Beispiel ADVANCE PARIS) und
geben Sie das Passwort ein. Ihr MyConnect 60 versucht, eine Verbindung zu ihm herzustellen
(Verbindungsanzeige und angeschlossene Anzeige). Die Einstellung ist abgeschlossen, wenn
auf dem Display die Streaming / USB-Quelle angezeigt wird. Sie können Ihren Netzwerk-
Player nach dem Herunterladen der im AppStore oder Google Play verfügbaren ADVANCE
PLAYSTREAM-Apps auf Ihrem Smartphone oder Tablet verwenden.
Seleziona la tua rete WiFi personale (nel nostro esempio ADVANCE PARIS) e inserisci la
password di questo. Il tuo MyConnect 60 sta tentando di connettersi ad esso (collegando
il display e poi il display collegato). L’impostazione è completa quando il display mostra la
sorgente
Streaming / USB. Sei pronto per utilizzare il tuo lettore di rete dopo aver scaricato le app
ADVANCE PLAYSTREAM disponibili su AppStore o GooglePlay sul tuo smartphone o tablet .
C
Network Wizard
Scanning
MÉTHODES ALTERNATIVES DE RÉGLAGES RÉSEAU
Le MyConnect 60 est compatible avec la majorité des protocoles réseau et méthodes
d’encryptage incluant le WiFi Protected Setup plus connu sous l’abrévation WPS. Si vous ne
souhaitez pas utiliser la méthode Network Wizard, vous pouvez utiliser le WPS qui permet à
votre MyConnect 60 de s’appairer avec votre box en appuyant sur le bouton WPS de cette
dernière.
Votre MyConnect 60 dispose aussi d’un port RJ45 pour une connexion laire (LAN) ethernet.
ALTERNATIVE METHODS OF NETWORK SETTINGS
The MyConnect 60 is compatible with most network protocols and encryption methods
including WiFi Protected Setup, better known as WPS. If you do not want to use the Network
Wizard method, you can use the WPS that allows your MyConnect 60 to pair with your box by
pressing the WPS button on your box.
Your MyConnect 60 also has an RJ45 port for wired Ethernet (LAN).
ALTERNATIVE METHODEN DER NETZWERKEINSTELLUNGEN
Die MyConnect 60 ist mit den meisten Netzwerkprotokollen und Verschlüsselungsmethoden
kompatibel, einschließlich WiFi Protected Setup, besser bekannt als WPS. Wenn Sie die
Netzwerkassistent-Methode nicht verwenden möchten, können Sie den WPS verwenden, mit
dem Ihr MyConnect 60 mit Ihrer Box gekoppelt werden kann, indem Sie die WPS-Taste auf
Ihrer Box drücken.
Ihre MyConnect 60 verfügt außerdem über einen RJ45-Anschluss für kabelgebundenes
Ethernet (LAN).
METODI ALTERNATIVI DELLE IMPOSTAZIONI DI RETE
MyConnect 60 è compatibile con la maggior parte dei protocolli di rete e dei metodi di crittograa,
incluso WiFi Protected Setup, meglio noto come WPS. Se non si desidera utilizzare il metodo
di Procedura guidata di rete, è possibile utilizzare il WPS che consente all’unità MyConnect 60
di accoppiarsi con la propria casella premendo il pulsante WPS sulla confezione.
Il tuo MyConnect 60 ha anche una porta RJ45 per Ethernet cablata (LAN).
g
Network Wizard
1:ADVANCE
Audio Player
Streaming
g
0123456789abcd.
PWD
Page 22
QUICK LEARNING ADVANCE PLAYSTREAM APP
Streaming
Télécharger l’application ADVANCE PLAYSTREAM
STEP
1
Download ADVANCE PLAYSTREAM apps
Lade ADVANCE PLAYSTREAM-Apps herunter
Scarica le app ADVANCE PLAYSTREAM
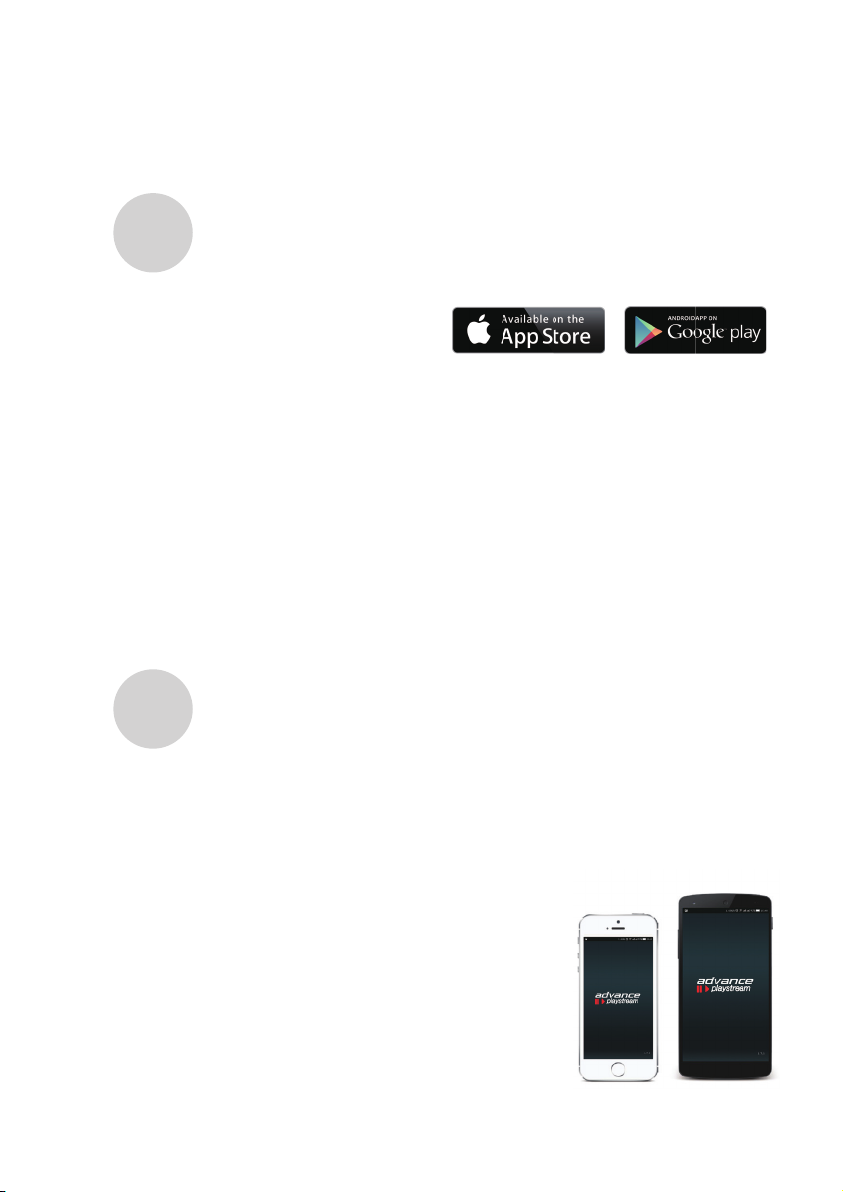
Pour contrôler votre MyConnect 60, vous devez télécharger
sur l’App Store (Apple) ou sur Google Play (Android) l’application
Advance Playstream.
To control your MyConnect 60, please download the app ADVANCE PLAYSTREAM
on the App Store (if you are using Apple devices) or on Google Play (if you are using
an Android device).
Um Ihren MyConnect 60 zu steuern, müssen Sie herunterladen
im App Store (Apple) oder in der Google Play (Android) App
Advance-Spielstrom
Per controllare il tuo MyConnect 60, devi scaricare
sull’App Store (Apple) o sull’app Google Play (Android)
Advance Playstream.
STEP
2
Lancer l’application
Launch the app
Starten Sie die App
Avvia l’app
- L’application Advance Playstream
fonctionne sous iOS pour les utilisateurs
d’iPhone et d’iPad (Apple) et sous Android
pour les smartphones et tablettes des
autres marques.
- Our Advance Playstream App is working
under iOS for Apple iphones and iPads or
under Android for others smartphones and
tablets.
- Die App Advance Playstream funktioniert
unter iOS für iPhone und iPad (Apple)
und Android-Nutzer für Smartphones und
Tablets anderer Hersteller.
- L’app Advance Playstream funziona con
iOS per iPhone e iPad (Apple) e Android
per smartphone e tablet di altre marche.
Page 23
STEP
3
Device 1
Device 2
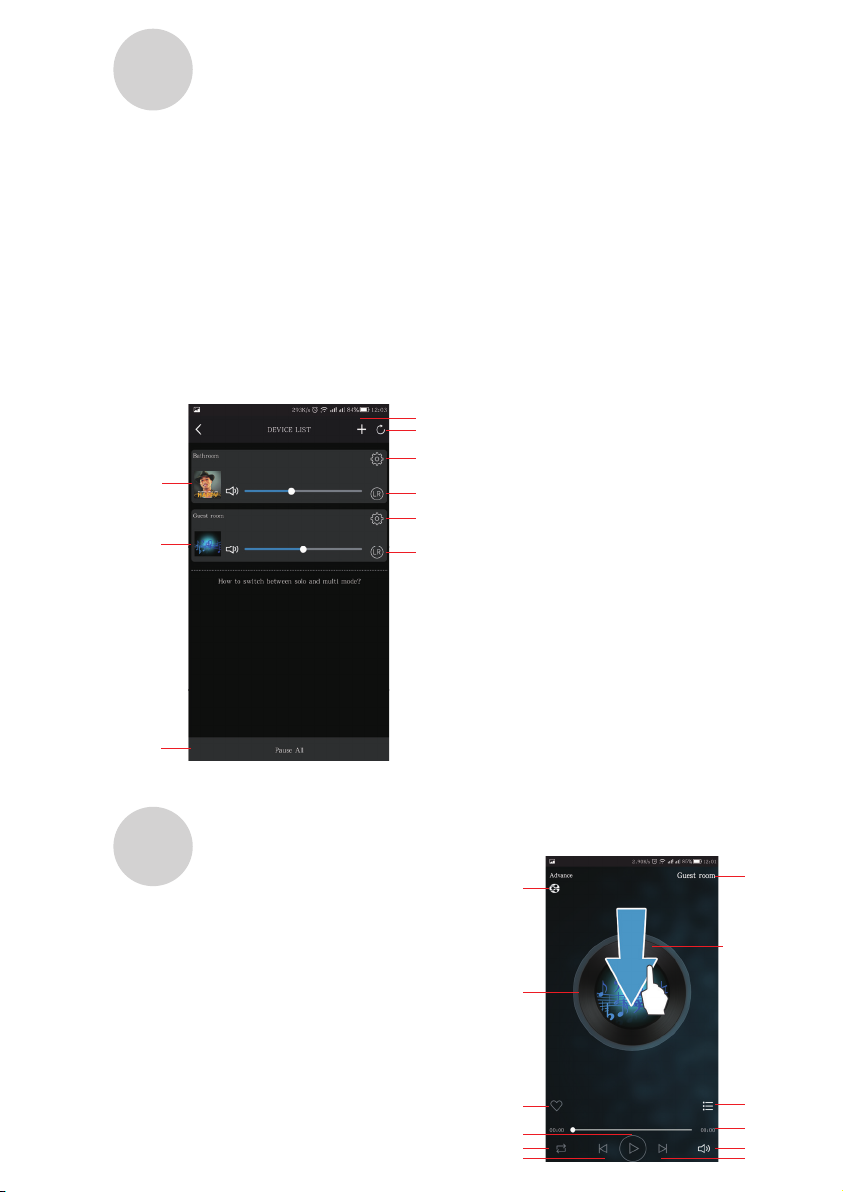
L’application Advance Playstream contrôle votre
lecteur réseau MyConnect 60
Advance Playstream app controls the MyConnect 60 network player
Die Advance Playstream App steuert den
MyConnect 60 Network Player
L’app Advance Playstream controlla il lettore di rete MyConnect 60
L’application permet d’accéder aux réglages, renommage, des infos des HPs, des
mots de passe, langues, timer, alarme, multiroom.
Advance playstream includes device settings, device rename, speaker info,
passwordsetup,languagesetting,timingpowero,musicalarm,multiroom.
Advance Playstream umfasst Geräteeinstellungen, Geräteumbenennung,
Lautsprecherinformationen,Passwort-Setup,Spracheinstellung,TimingPowerO,
Musikalarm, Multiroom.
Illmatoavanzatoincludeleimpostazionideldispositivo,larinominadel
dispositivo,leinformazionisuidiusori,impostazionedellapassword,impostazione
della lingua, spegnimento della sincronizzazione, allarme musicale, multiroom.
Add a new device
Refresh the screen
Settings
Choose L+R (stereo)
or L (Left) or R (Right)
Settings
Choose L+R (stereo)
or L (Left) or R (Right)
Play/Pause ALL
STEP
Ecran de contrôle de l’MyConnect 60
Control screen of your MyConnect 60
Steuerbildschirm Ihres MyConnect 60
Schermo di controllo del tuo MyConnect 60
Menu lecture
4
Playback menu
Musikmenü abspielen
Source indicator
Room
Menu di riproduzione
L’interface de l’application
Advance PlayStream est facile à
utiliser.Ilachetouteslesinformations concernant la source
en cours de lecture, la pièce
(périphérique), les informations
musicales avec le coverart, les
favoris, votre liste de lecture
et toutes les fonctions de
contrôles: Play / Pause, boucle,
précédent et suivant .
Coverart
Favorites
Play/Pause
Loop
Previous
Slide down for playlist
Playing list
Progress bar
Volume
Next
Page 24
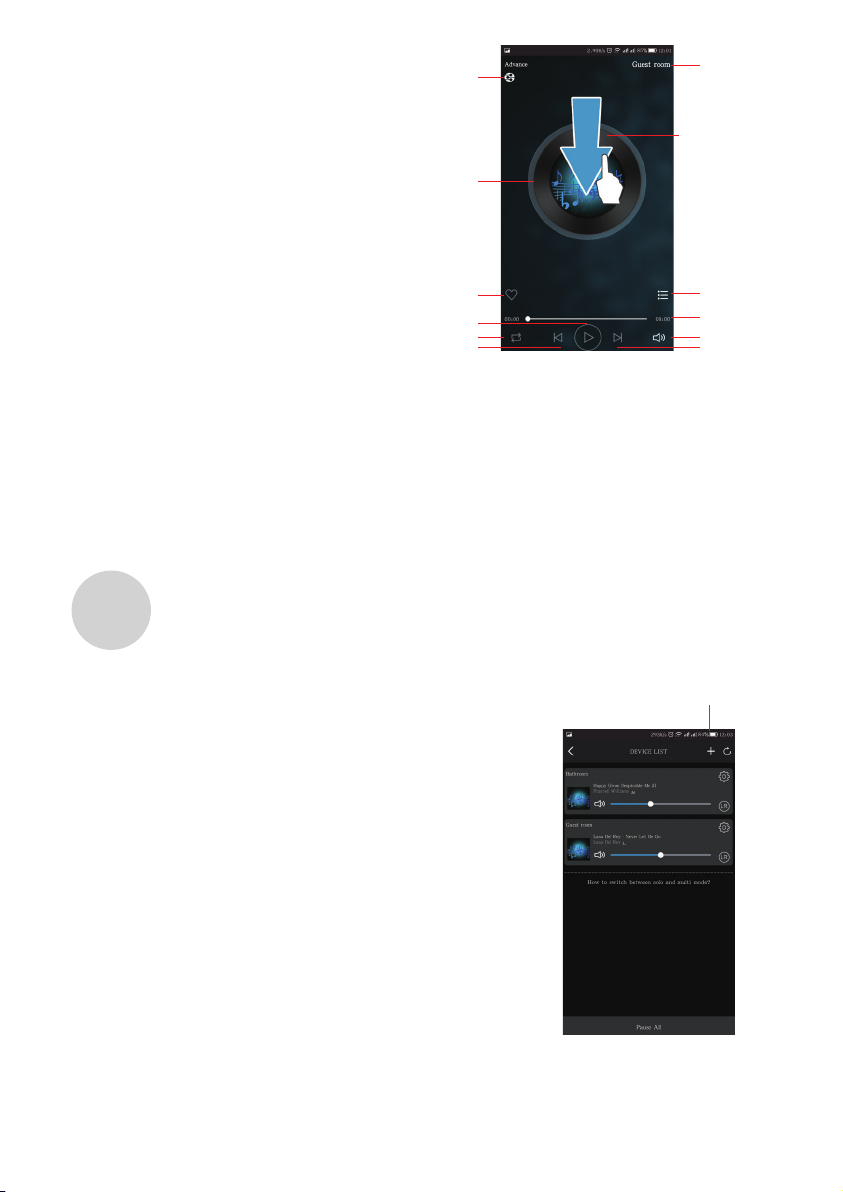
The interface of the Advance
PlayStream app is easy to
use. It displays all informations
Source indicator
Room
concerning the source which
is playing, the room (device),
the music informations with the
Slide down for playlist
coverart, the favorites, your
playing list and all controls
functions: Play/Pause, loop,
Coverart
previous, next, progress bar and
volume level.
Die Benutzeroberäche der
Advance PlayStream App ist
einfach zu bedienen. Es zeigt
alle Informationen über die
abzuspielende Quelle, den
Raum (Gerät), die
Favorites
Play/Pause
Loop
Previous
Playing list
Progress bar
Volume
Next
Musikinformationen mit dem
Cover, die Favoriten, Ihre Wiedergabeliste und alle Steuerfunktionen an: Wiedergabe
/ Pause, Schleife, Vorheriges, Nächstes, Fortschrittsbalken und Lautstärke .
L’interfaccia dell’applicazione Advance PlayStream è facile da usare. Mostra tutte
le informazioni riguardanti la sorgente che sta suonando, la stanza (dispositivo),
le informazioni musicali con coverart, i preferiti, la tua playlist e tutte le funzioni di
controllo: Play / Pause, loop, precedente, successivo, barra di avanzamento e livello
del volume .
STEP
5
Utilisation du multiroom
Multiroom streaming control
Multiroom-Streaming-Kontrolle
Controllo streaming multiroom
L’application Advance Playstream vous permet
de jouer différentes musiques dans différentes
pièces. Pour créer une nouvelle pièce, appuyer
sur le + et démarrer sa création.
The Advance Playstream app allows you to
play different music in different rooms. To
create a new piece, press the + and start
creation.
Mit der Advance Playstream App können Sie
verschiedene Musik in verschiedenen Räumen
spielen. Um ein neues Stück zu erstellen,
drücken Sie + und starten Sie die Erstellung.
L’app Advance Playstream ti consente di
riprodurre musica diversa in stanze diverse.
Per creare un nuovo pezzo, premi il + e inizia la
creazione.
La version actuelle de du MyConnect 60 intègre le multiroom mais pas le multimode.
The current version of the MyConnect 60 integrates the multiroom but not the multimode.
Die aktuelle Version des MyConnect 60 integriert das Multiroom aber nicht den
Multimode.
L’attuale versione dell’MyConnect 60 integra il multiroom ma non il multimode .
Add a new device
Page 25
STEP
6
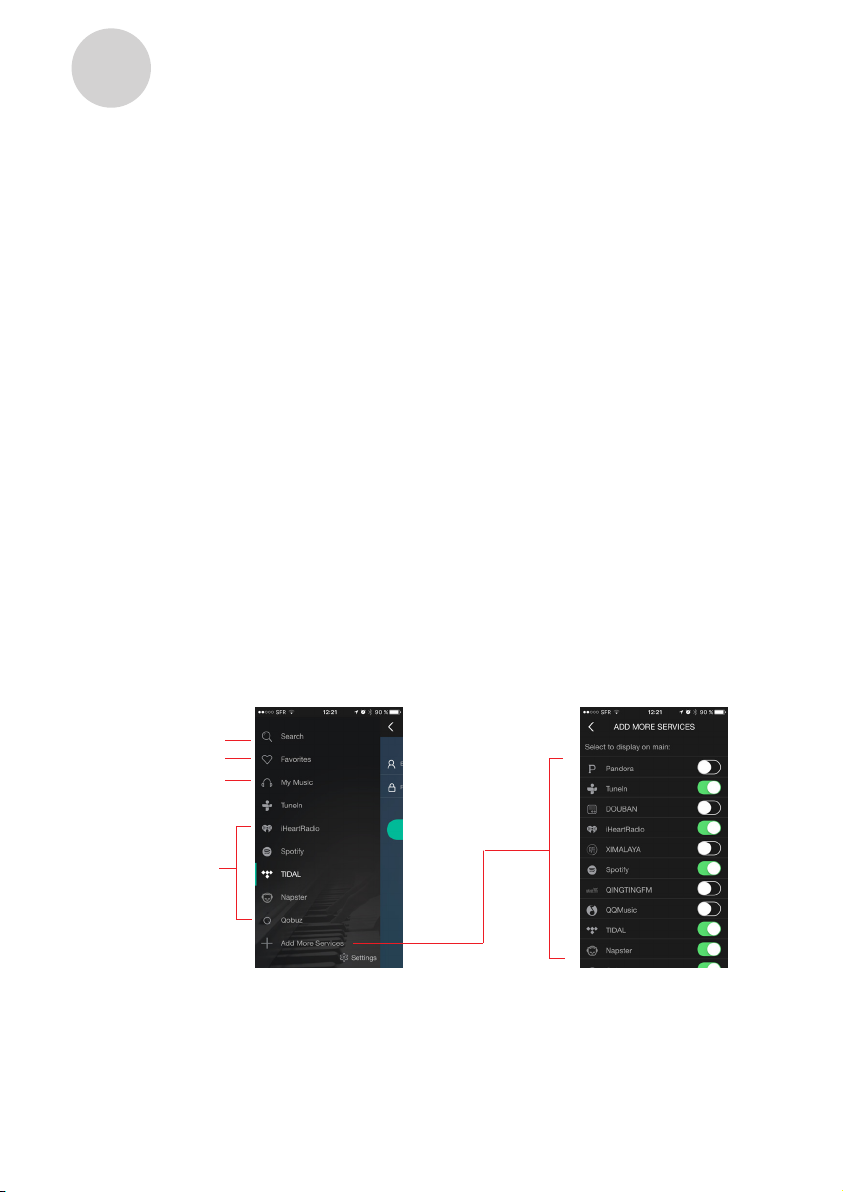
Vos sources audio
Your audio sources
Deine Audioquellen
Le tue fonti audio
Ma musique: Votre musique locale, musique partagée, listes de lecture. Vos
musiques en réseau n’apparaissent que si elles sont connectées et visibles sur le
réseau. Certains services de streaming nécessitent la souscription d’un abonnement
pour l’utilisation sur service (Qobuz, Deezer, Spotify, etc...)
L’utilisation de Spotify se fait via Spotify connect.
My Music: Local stored music/Home Music Share/PlayList will be shown under this
menu. MicroSD and network share will be only shown after connected and found.
Some streaming services require an subscription Spotify, Qobuz, Deezer, etc...
Spotify: Spotify streaming require an subscription with premium account, then use
spotify connect button to stream.
Meine Musik: Lokale gespeicherte Musik / Home Music Share / PlayList wird
unter diesem Menü angezeigt werden. MicroSD und Netzwerkfreigabe werden sein
wird erst nach dem Verbinden angezeigt und gefunden. Einige Streaming-Dienste
erfordern ein Abonnement Spotify, Qobuz, Deezer, etc ...
Spotify: Spotify Streaming erfordert ein Abonnement mit Premium Konto, dann
spotify connect-Taste verwenden, um zu streamen.
My Music: musica memorizzata locale / Home Music Share / PlayList essere
mostrato sotto questo menu. MicroSD e condivisione di rete saranno mostrato solo
dopo collegato e trovato.
Alcuni servizi di streaming richiedono un abbonamento Spotify, Qobuz, Deezer, ecc
Spotify: lo streaming Spotify richiede un abbonamento premium account, quindi
utilizzare il pulsante di connessione Spotify per lo streaming.
Search
Favorites
Your music
Music share
Playlist
Smartphone
Favorites
Additional services
Page 26

STEP
7
PC
Utilisation avec un PC sous Windows
Use of the network player with your PC (Windows)
Verwendung des Netzwerk-Players mit Ihrem
PC (Windows)
Uso del lettore di rete con il PC (Windows)
-1- Activez le Wi sur votre PC
-2- Ouvrir votre lecteur Windows média
-3- Cliquez sur « Diffuser en continu » - Plus d’option de diffusion en continu »
Sélectionnez votre MyConnect 60 qui doit être autorisé dans la liste des périphériques Réseau Local – ok
-4- Refermez le Lecteur Windows Media et l’ouvrir à nouveau puis cliquer sur l’onglet
lecture en haut à droite de votre lecteur. Un petit symbole de lecteur média apparaît
maintenant en haut à droite
-5- Cliquez sur ce symbole, apparait une petite fenêtre : Effectuer une conversion de
type (transtypage) vers l’appareil.
-6- Positionnez votre curseur dessus et cliquez sur votre MyConnect 60 qui apparaît
sur la gauche, une fenêtre s’ouvre et vous propose la lecture de votre musique.
Votre musique est jouée sur votre système audio
Spotify Pourra également transmettre la musique sur votre MyConnect 60
Pour d’autre service streaming, il vous faudra télécharger un logiciel payant ( ex :
Airfoil, Jamcast etc… )
-1- Activate Wi on your PC
-2- Open your Windows Media Player
-3- Click «Streaming Stream» - More Streaming Option »
Select your MyConnect 60 to be allowed in the Local Network Devices list - ok
-4- Close the Windows Media Player and open it again and click on the reading tab
at the top right of your player. A small media player symbol now appears at the top
right
-5- Click on this symbol, appears a small window: Perform a conversion of type
(cast) to the device.
-6- Place your cursor on it and click on your MyConnect 60 which appears on the
left, a window opens and proposes to you the reading of your music. Your music is
played on your sound system
Spotify Can also transmit music on your MyConnect 60
For other streaming service, you will need to download paid software (ex: Airfoil,
Jamcast etc ...)
-1- Aktivieren Sie WLAN auf Ihrem PC
-2- Öffnen Sie Ihren Windows Media Player
-3- Klicken Sie auf «Streaming Stream» - Weitere Streaming Option »
Wählen Sie Ihre MyConnect 60, um in der Liste der lokalen Netzwerkgeräte zugelassen zu werden - ok
-4- Schließen Sie den Windows Media Player und öffnen Sie ihn erneut. Klicken Sie
auf den Lese-Tab oben rechts auf Ihrem Player. Ein kleines Media Player Symbol
erscheint nun oben rechts
-5- Klicken Sie auf dieses Symbol, erscheint in einem kleinen Fenster: Führen Sie
eine Umwandlung des Typs (Cast) in das Gerät durch.
-6- Platziere den Cursor darauf und klicke auf dein MyConnect 60, das auf der linken
Seite erscheint, ein Fenster öffnet sich und schlägt dir das Lesen deiner Musik vor.
Ihre Musik wird auf Ihrem Soundsystem wiedergegeben
Spotify Kann auch Musik auf Ihrem MyConnect 60 übertragen
Page 27

MAC
Für andere Streaming-Dienste müssen Sie kostenpichtige Software herunterladen
(zB: Airfoil, Jamcast usw.)
-1- Attivare Wi sul PC
-2- Apri il tuo Windows Media Player
-3- Fai clic su «Streaming Stream» - Altre opzioni di streaming »
Seleziona il tuo MyConnect 60 per essere ammesso nell’elenco dei dispositivi di rete
locali - ok
-4- Chiudere Windows Media Player e aprirlo nuovamente e fare clic sulla scheda di
lettura in alto a destra del lettore. Un piccolo simbolo di media player ora appare in
alto a destra
-5- Fare clic su questo simbolo, appare una piccola nestra: Eseguire una
conversione di tipo (cast) sul dispositivo.
-6- Posiziona il cursore su di esso e fai clic sul tuo MyConnect 60 che appare a sinistra, una nestra si apre e ti propone la lettura della tua musica. La tua musica viene
riprodotta sul tuo sistema audio
Spotify Può anche trasmettere musica sul tuo MyConnect 60
Per altri servizi di streaming, è necessario scaricare software a pagamento (es:
Airfoil, Jamcast, ecc ...)
Pour utiliser votre MAC avec un MyConnect 60, rien de plus simple grâce à Airplay.
Cliquer sur Airplay, sélectionner votre MyConnect 60 et jouez votre musique.
To use your MAC with a MyConnect 60, nothing more simple thanks to Airplay. Click
on Airplay, select your MyConnect 60 and play your music.
Um Ihren MAC mit einem MyConnect 60 zu verwenden, gibt es nichts einfacheres
als Airplay. Klicken Sie auf Airplay, wählen Sie Ihre MyConnect 60 und spielen Sie
Ihre Musik.
INFO
Per usare il tuo MAC con un MyConnect 60, niente di più semplice grazie ad Airplay.
Fai clic su Airplay, seleziona il tuo MyConnect 60 e ascolta la tua musica.
A propos des services additionnels
About additional services
Über zusätzliche Dienste
Informazioni sui servizi aggiuntivi
L’application Advance Playstream est en constante évolution. De nouveaux services,
fonctionalités et améliorations du logiciel seront proposés. Ces mises à jour pourront
être téléchargées automatiquement via l’AppStore ou GooglePlay.
The Advance Playstream app is constantly evolving. New services, features and
software enhancements will be offered. These updates can be downloaded
automatically via the AppStore or GooglePlay.
Die Advance Playstream App wird ständig weiterentwickelt. Neue Dienste,
Funktionen und Software-Erweiterungen werden angeboten. Diese Updates können
automatisch über den AppStore oder GooglePlay heruntergeladen werden.
L’app Advance Playstream è in continua evoluzione. Verranno offerti nuovi servizi,
funzionalità e miglioramenti del software. Questi aggiornamenti possono essere
scaricati automaticamente tramite AppStore o GooglePlay.
Page 28
QUICK LEARNING
PLAY DIGITAL INPUTS
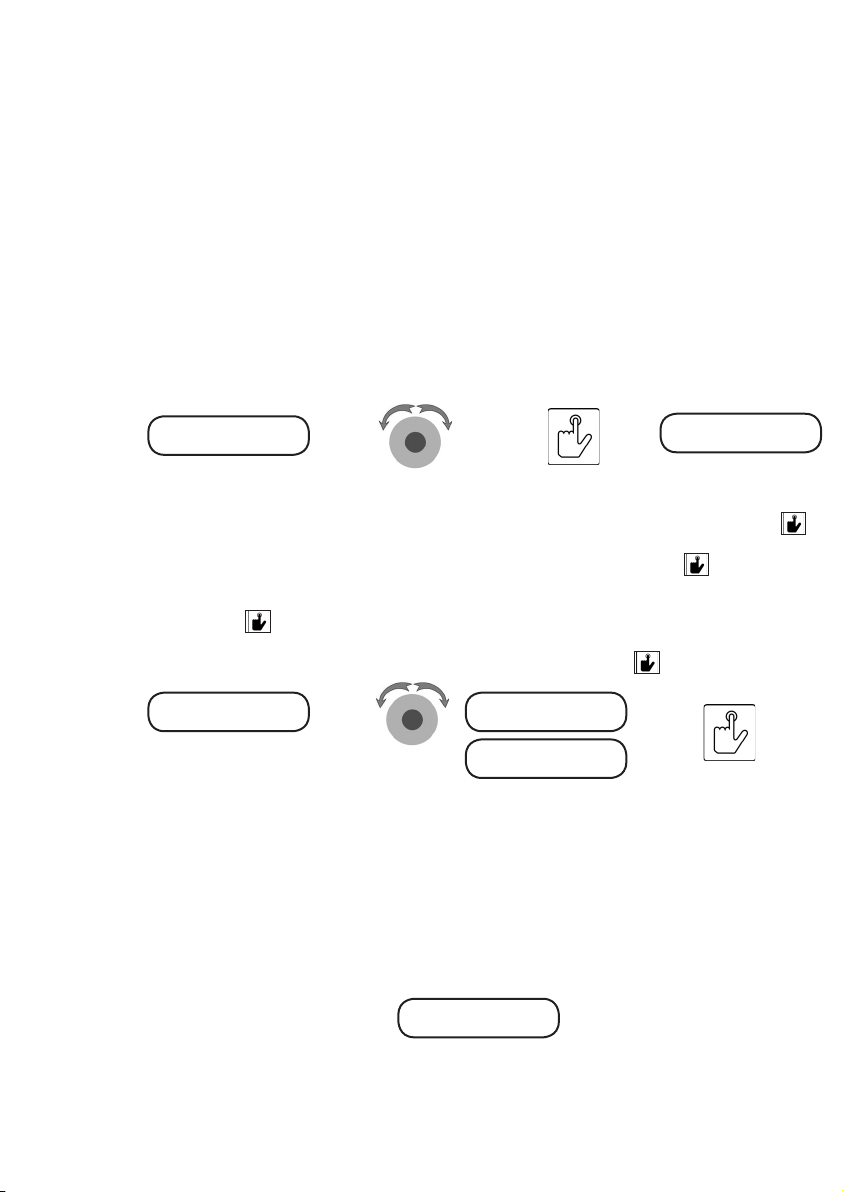
A partir du menu des sources sélectionner DIGITAL INPUTS en conrmant votre choix par un
A
appui court sur le bouton multifonction.
From the sources menu, select DIGITAL INPUTS and conrm your choice with a short press
on the multifunction button.
Wählen Sie im Quellenmenü DIGITAL INPUTS und bestätigen Sie Ihre Auswahl mit einem
kurzen Druck auf die Taste multifunktionstaste.
Dal menu delle fonti, selezionare DIGITAL INPUTS e confermare la scelta con una breve
pressione sul tasto pulsante multifunzione.
t
t
t
t
B
Streaming
>Digital inputs
Si vous avez fait un choix erroné (par exemple une autre source), vous pouvez revenir au
menu principal des sources par un appui long (environ 2 sec.) sur le bouton multifonction.
If you have done a wrong choice, for exemple if you have chosen another source, you can go
back to the main source menu with a long press on the multifunction button.
Wenn Sie eine falsche Wahl getroffen haben, z. B. wenn Sie eine andere Quelle gewählt
haben, können Sie durch langes Drücken der Multifunktionstaste zum Hauptquellenmenü
zurückkehren.
Se hai fatto una scelta sbagliata, ad esempio se hai scelto un’altra fonte, puoi tornare al menu
principale della sorgente premendo a lungo il pulsante multifunzione.
Digital inputs
>OPT1
Après avoir sélectionné les entrées numériques, choisissez l’une des trois entrées proposées
parmi les 2 entrées optiques et l’entrée coaxiale. L’afcheur indiquera la source sélectionnée.
After selecting the digital inputs, choose one of the 3 inputs from the 2 optical inputs and the
coaxial input.
Nachdem Sie die digitalen Eingänge ausgewählt haben, wählen Sie einen der 3 Eingänge von
den 2 optischen Eingängen und dem koaxialen Eingang.
Dopo aver selezionato gli ingressi digitali, scegliere uno dei 3 ingressi dai 2 ingressi ottici e
l’ingresso coassiale.
g
g
g
Digital inputs
>OPT2
Digital inputs
>COAX
g
Digital inputs
g
>OPT1
YOUR
CHOICE
Page 29
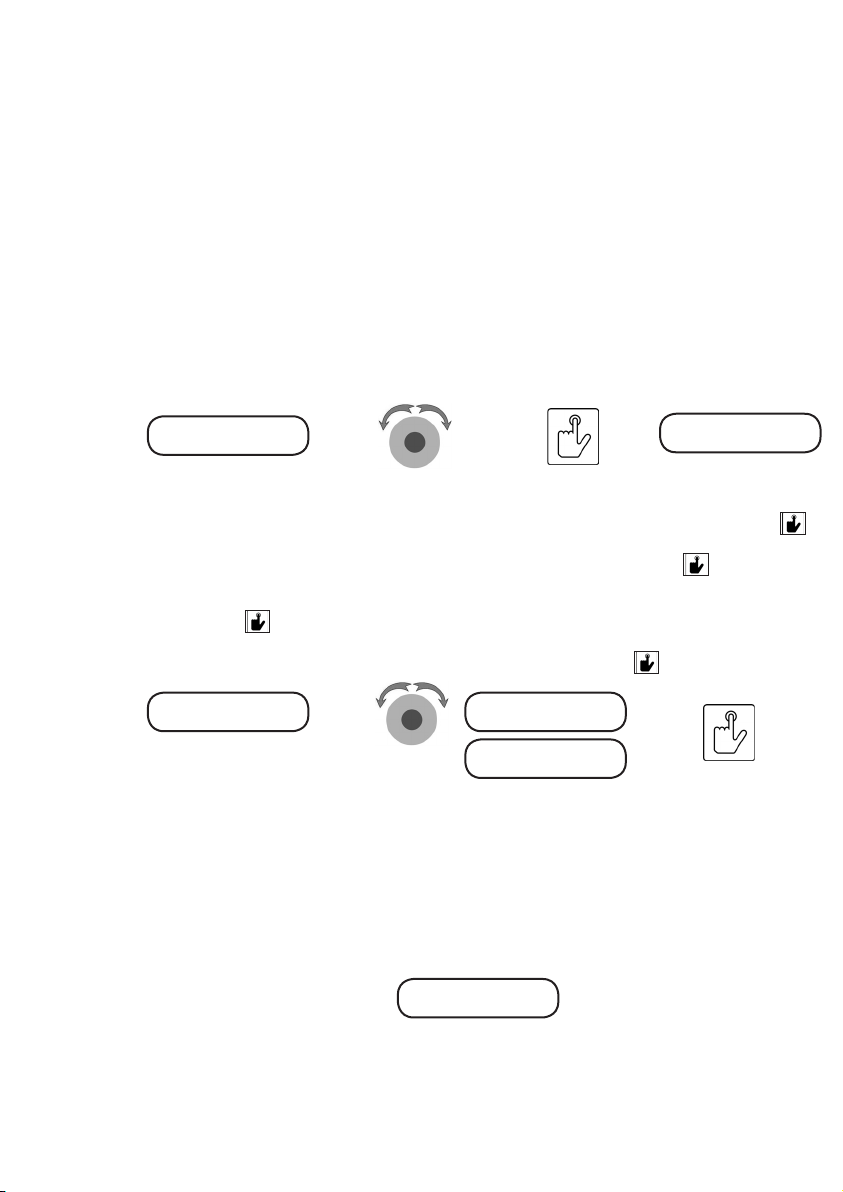
QUICK LEARNING
PLAY ANALOG INPUTS
A partir du menu des sources sélectionner Analog inputs en conrmant votre choix par un
A
appui court sur le bouton multifonction.
From the sources menu, select Analog inputs and conrm your choice with a short press on
the multifunction button.
Wählen Sie im Quellenmenü Analog inputs und bestätigen Sie Ihre Auswahl mit einem kurzen
Druck auf die Taste multifunktionstaste.
Dal menu delle fonti, selezionare Analog inputs e confermare la scelta con una breve pressione sul tasto pulsante multifunzione.
t
t
t
t
B
Digital inputs
>Analog inouts
Si vous avez fait un choix erroné (par exemple une autre source), vous pouvez revenir au
menu principal des sources par un appui long (environ 2 sec.) sur le bouton multifonction.
If you have done a wrong choice, for exemple if you have chosen another source, you can go
back to the main source menu with a long press on the multifunction button.
Wenn Sie eine falsche Wahl getroffen haben, z. B. wenn Sie eine andere Quelle gewählt
haben, können Sie durch langes Drücken der Multifunktionstaste zum Hauptquellenmenü
zurückkehren.
Se hai fatto una scelta sbagliata, ad esempio se hai scelto un’altra fonte, puoi tornare al menu
principale della sorgente premendo a lungo il pulsante multifunzione.
Analog inputs
>AUX1/PHONO
Après avoir sélectionné les entrées analogiques, choisissez l’une des trois entrées proposées
AUX1/PHONO*, AUX2 ou AUX. L’afcheur indiquera la source sélectionnée.
After selecting the analog inputs, choose one of the 3 inputs from the AUX1/PHONO*, AUX2
or AUX3.
Wählen Sie nach Auswahl der analogen Eingänge einen der 3 Eingänge
von AUX1 / PHONO*, AUX2 oder AUX3.
Dopo aver selezionato gli ingressi analogici, scegliere uno dei 3 ingressi da AUX1 / PHONO*,
AUX2 o AUX3.
* L’entrée AUX1/PHONO vous permet de brancher soit un appareil auxiliaire (AUX1), soit un phono équipé d’une cellule à
aimant mobile. La sélection de l’entrée se fait par le sélecteur AUX1/PHONO.
* The AUX1 / PHONO input allows you to connect either an auxiliary device (AUX1) or a phono equipped with a moving
magnet cell. Input selection is via the AUX1 / PHONO selector.
* Über den AUX1 / PHONO-Eingang können Sie entweder ein Zusatzgerät (AUX1) oder einen Phono mit einer beweglichen
Magnetzelle anschließen. Die Eingangswahl erfolgt über den AUX1 / PHONO-Wahlschalter.
* L’ingresso AUX1 / PHONO consente di collegare un dispositivo ausiliario (AUX1) o un fono dotato di una cella magnetica
mobile. La selezione dell’ingresso avviene tramite il selettore AUX1 / PHONO.
g
g
g
Analog inputs
>AUX2
Analog inputs
>AUX3
YOUR
CHOICE
g
Analog inputs
>AUX1/PHONO
g
Page 30
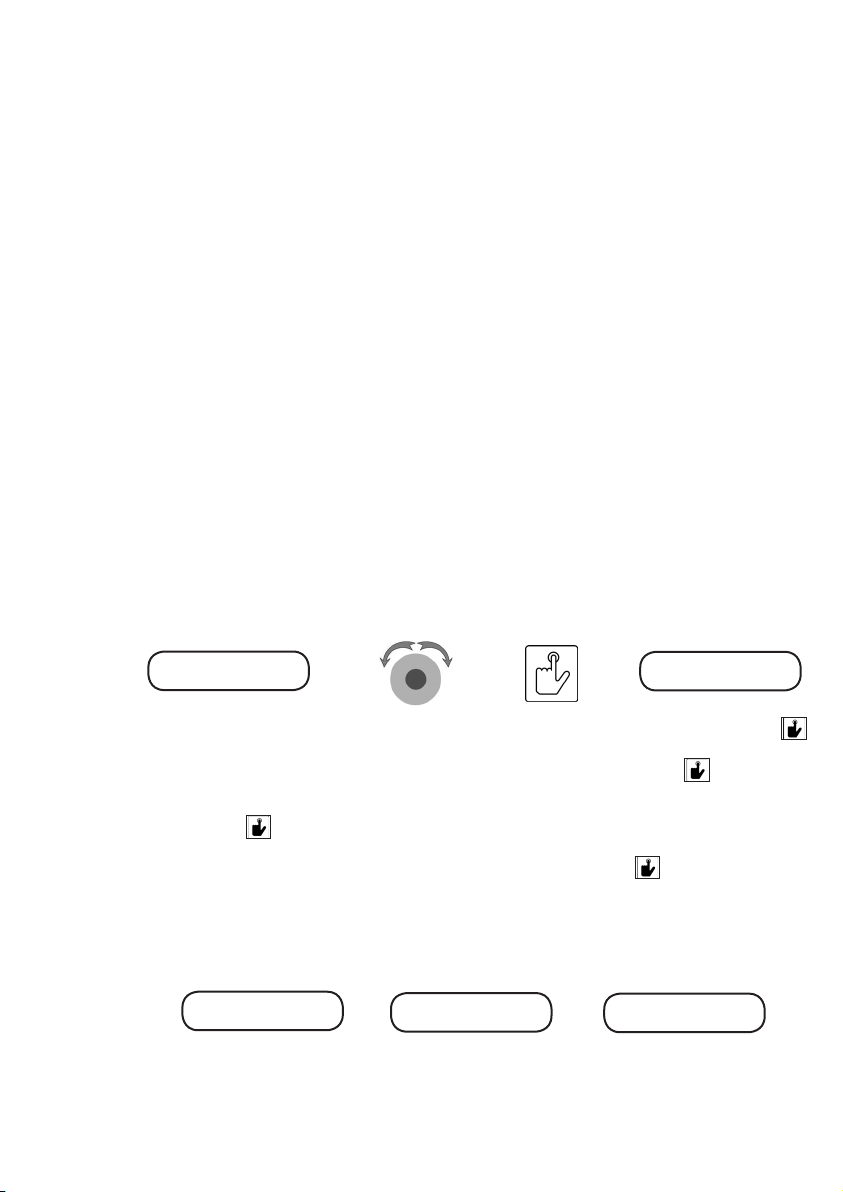
QUICK LEARNING
PLAY USB STORAGE
A
Ce port USB-A est multifonction. Il permet à la fois de lire un
fichier contenu dans une clé USB via l’entrée USB ou via l’application
Advance PlayStream.
This USB-A port is multifunction. It allows both to read a file
contained in a USB key via the USB input or via the Advance PlayStream app.
Dieser USB-A-Anschluss ist multifunktional. Es ermöglicht sowohl
das Lesen einer Datei auf einem USB-Stick über den USB-Eingang als auch
die Advance PlayStream App.
Questa porta USB-A è multifunzione. Consente sia di leggere
un file contenuto in una chiave USB tramite l’ingresso USB o tramite l’app
Advance PlayStream.
* Service seulement / For service only / Nur für Service / Sólo sirve para tareas de mantenimiento.
A partir du menu des sources sélectionner USB en conrmant votre choix par un appui court
sur le bouton multifonction.
From the sources menu, select USB and conrm your choice with a short press on the multi-
function button.
Wählen Sie im Quellenmenü USB und bestätigen Sie Ihre Auswahl mit einem kurzen Druck
auf die Taste multifunktionstaste.
Dal menu delle fonti, selezionare USB e confermare la scelta con una breve pressione sul
tasto pulsante multifunzione.
Analog Inputs
t
>USB
INFORMATION
t
t
t
g
g
g
USB
B
Si vous avez fait un choix erroné (par exemple une autre source), vous pouvez revenir au
menu principal des sources par un appui long (environ 2 sec.) sur le bouton multifonction.
If you have done a wrong choice, for exemple if you have chosen another source, you can go
back to the main source menu with a long press on the multifunction button.
Wenn Sie eine falsche Wahl getroffen haben, z. B. wenn Sie eine andere Quelle gewählt
haben, können Sie durch langes Drücken der Multifunktionstaste zum Hauptquellenmenü
zurückkehren.
Se hai fatto una scelta sbagliata, ad esempio se hai scelto un’altra fonte, puoi tornare al menu
principale della sorgente premendo a lungo il pulsante multifunzione.
USB
No USB
Utilisation d’une clé USB:
insérez la clé dans le port USB-A et la lecture démarrera automatiquement. Vous pouvez
choisir le morceau suivant ou précédent via la télécommande ou via Advance PlayStream.
g
USB
Loading
g
USB> 1 00:42
Way in Paris
Page 31
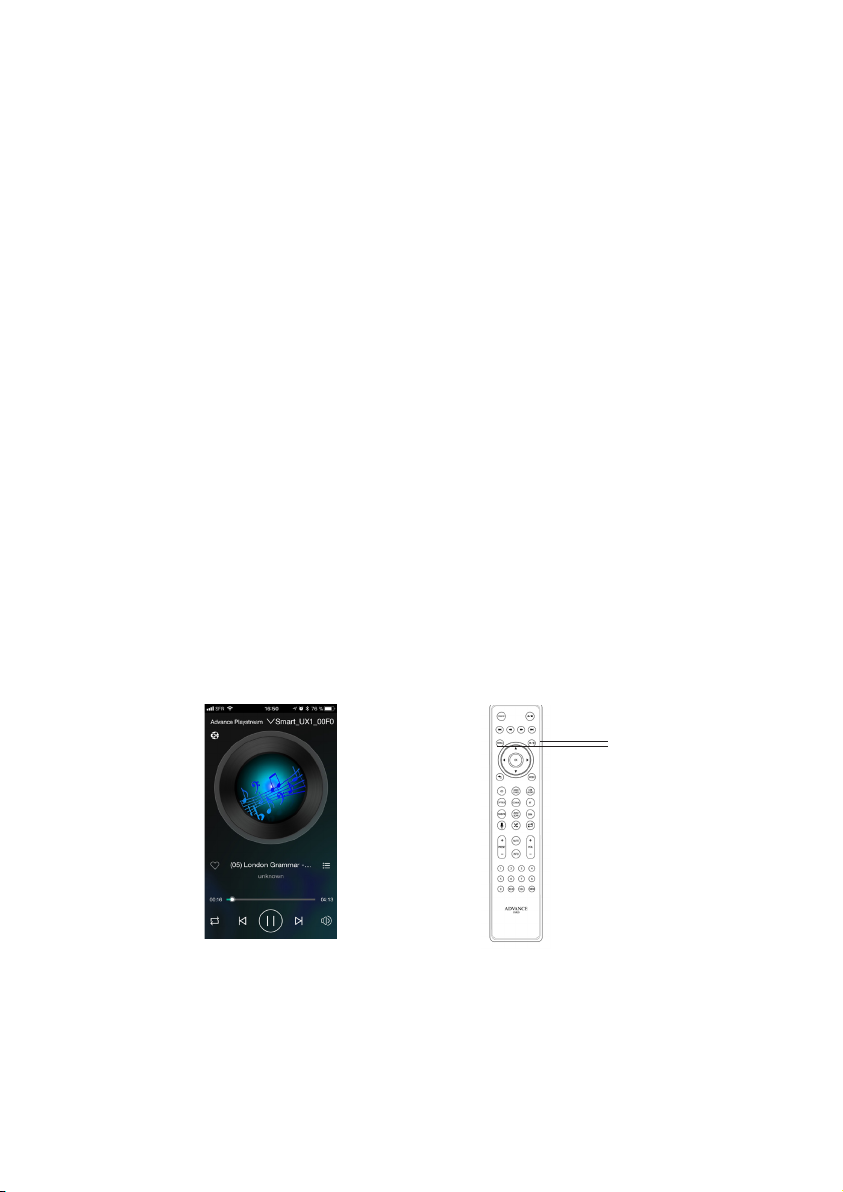
Utilisation d’un disque dur USB ou disque dur réseau NAS:
connecter votre disque dur formaté en FAT32 d’une capacité maximum de 128Go. Dans le cas où vous
souhaiteriez une capacité supérieure, vous devez unitiliser un disque réseau de type NAS. La lecture des
différents morceaux de musique stockés sur ce NAS se fait via l’application Advance PlayStream.
Using a USB key:
insert the key into the USB-A port and playback will start
automatically. You can choose the next or previous song via the remote control or via Advance
PlayStream.
Using a USB hard disk or NAS network hard disk:
connect your hard disk formatted in FAT32 with a maximum capacity of 128GB. In case you want a
higher capacity, you need to unify a network disk type NAS. The various pieces of music stored on this
NAS are played via the Advance PlayStream application..
Verwenden eines USB-Sticks:
Stecken Sie den Schlüssel in den USB-A-Anschluss und die Wiedergabe beginnt
automatisch. Sie können den nächsten oder vorherigen Song über die Fernbedienung oder über
Advance PlayStream auswählen.
Verwenden einer USB-Festplatte oder einer NAS-Netzwerkfestplatte:
Verbinden Sie Ihre Festplatte in FAT32 formatiert mit einer maximalen Kapazität von 128 Go. Für den
Fall, dass Sie eine höhere Kapazität wünschen, müssen Sie einen Netzwerkfestplatten-NAS
vereinen. Die verschiedenen Musikstücke, die auf diesem NAS gespeichert sind, werden über die
Advance PlayStream-Anwendung wiedergegeben.
Utilizzando una chiave USB:
inserisci la chiave nella porta USB-A e inizierà la riproduzione
automaticamente. È possibile scegliere la canzone successiva o precedente tramite il telecomando o
tramite Advance PlayStream.
Utilizzando un disco rigido USB o un disco sso della rete NAS:
collega il tuo disco rigido formattato in FAT32 con una capacità massima di 128 GB. Nel caso in cui si
desideri una capacità superiore, è necessario unire un tipo di disco di rete NAS. I vari brani musicali
memorizzati su questo NAS vengono riprodotti tramite l’applicazione Advance PlayStream.
Next track
Previous track
You can control your music with Advance PlayStream app (all functions) or with remote (only previous
and next track functions).
You can control your music with Advance PlayStream (all functions) or with remote (only previous and
next track functions).
Sie können Ihre Musik mit Advance PlayStream (alle Funktionen) oder mit Fernbedienung (nur vorherige
und nächste Titelfunktionen) steuern.
Puoi controllare la tua musica con Advance PlayStream (tutte le funzioni) o con il telecomando (solo le
funzioni di traccia precedenti e successive).
Page 32
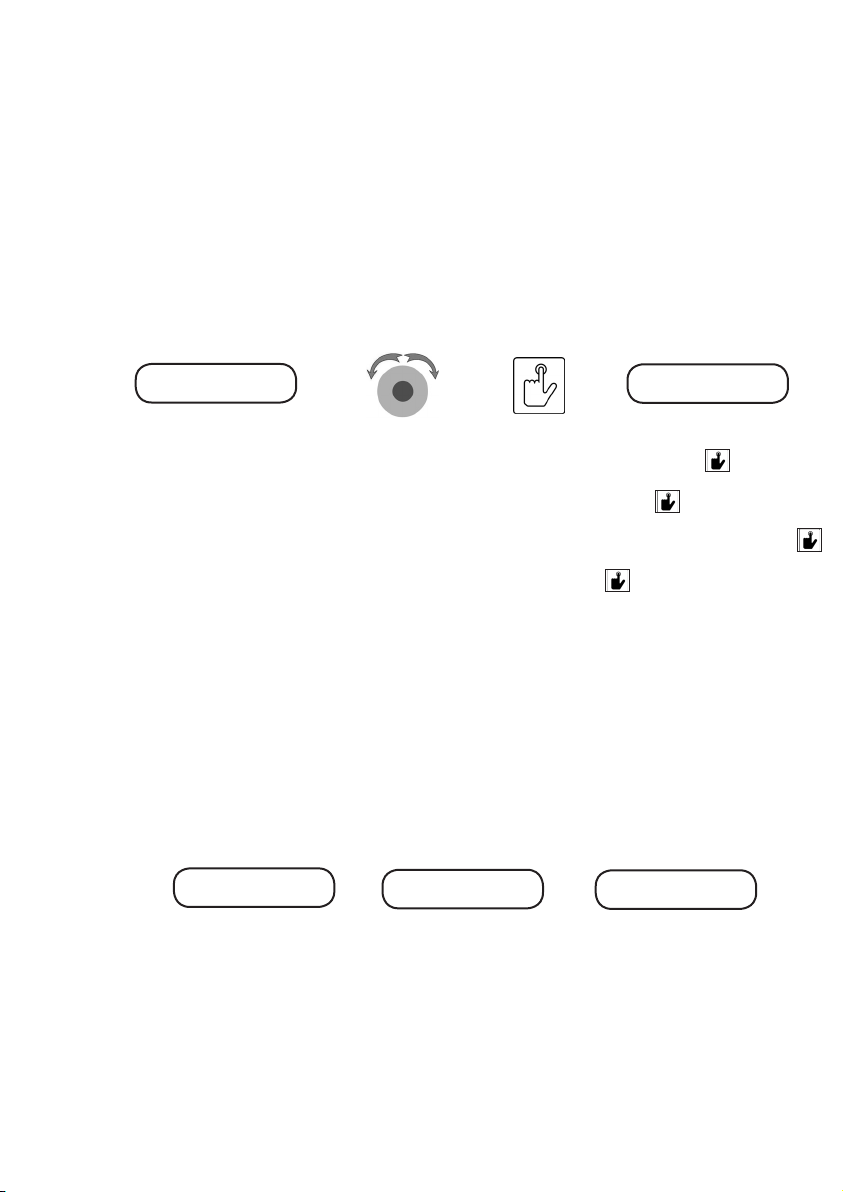
A
QUICK LEARNING
FM RADIO
A partir du menu des sources, sélectionner FM en conrmant votre choix par un appui court sur le
bouton multifonction.
From the sources menu, select FM and conrm your choice with a short press on the
multifunction button.
Wählen Sie im Quellenmenü FM und bestätigen Sie Ihre Auswahl mit einem kurzen Druck auf die
Taste multifunktionstaste.
Dal menu delle fonti, selezionare FM e confermare la scelta con una breve pressione sul tasto
pulsante multifunzione.
t
t
t
t
B
USB
>FM
Si vous avez fait un choix erroné (par exemple une autre source), vous pouvez revenir au menu
principal des sources par un appui long (environ 2 sec.) sur le bouton multifonction.
If you have done a wrong choice, for exemple if you have chosen another source, you can go
back to the main source menu with a long press on the multifunction button.
Wenn Sie eine falsche Wahl getroffen haben, z. B. wenn Sie eine andere Quelle gewählt haben,
können Sie durch langes Drücken der Multifunktionstaste zum Hauptquellenmenü zurückkehren.
Se hai fatto una scelta sbagliata, ad esempio se hai scelto un’altra fonte, puoi tornare al menu
principale della sorgente premendo a lungo il pulsante multifunzione.
Appuyez sur la touche “AUTOSCAN“ de votre télécommande, l’appareil passe alors
automatiquement en mode recherche des stations FM. Lorsque la recherche est terminée, les
stations trouvées sont automatiquement mise en mémoire de 1 à 20.
Select FM source then short press «AUTOSCAN» on the remote control. The unit will
automatically enter into the search mode. After the search nished, the stations which has been
searched will automatically be stored in the memory from 1 to 20.
Wählen Sie die FM-Quelle und drücken Sie dann kurz «AUTOSCAN» auf der Fernbedienung. Das
Gerät wechselt automatisch in den Suchmodus. Nachdem die Suche beendet wurde, werden die
Stationen, die durchsucht wurden, automatisch im Speicher zwischen 1 und 20 gespeichert.
Selezionare la sorgente FM quindi premere brevemente «AUTOSCAN» sul telecomando. L’unità
entrerà automaticamente nella modalità di ricerca. Al termine della ricerca, le stazioni che sono
state cercate verranno automaticamente salvate nella memoria da 1 a 20.
FM 87,50MHz
g
g
FM27 107,90MHz
g
Stored preset
g
g
FM 1 87,80MHz
Radio Jazz
FM Input
C
ECOUTER LES RADIOS
Vous pouvez utiliser deux solutions pour écouter les stations de radio mises en mémoire. A partir
de votre télécommande, appuyer sur la touche du pavé numérique correspondant à la station
mémorisée que vous souhaitez écouter (solution 1) ou appuyer sur la touche
“PRESET +/-) pour faire déler les radios par ordre puis écouter celle sélectionnée.
LISTEN THE RADIO
You can use two methods to listen the radio:
-1- Using the numeric keys on the remote control to select the stored station, for exemple, press
number 2 key, then the display will display Preset 2 and play this preset radio. If you want to select
preset station 12, please press 10+ key, then the display will show “--“, then press the key of “1“
and “2“. The display of the unit will show “Preset 12“.
-2- Press the “PRESET +/-“ key on the remote to select the preset radio station in order.
Page 33

D
HÖREN SIE DAS RADIO
Sie können zwei Methoden verwenden, um das Radio zu hören:
-1- Wählen Sie mit den Zifferntasten auf der Fernbedienung den gespeicherten Sender
aus, drücken Sie zum Beispiel die Zifferntaste 2, dann zeigt das Display Preset 2 an und
spielt dieses voreingestellte Radio ab. Wenn Sie den voreingestellten Sender 12 auswählen
möchten, drücken Sie bitte die Taste 10+, dann zeigt das Display «-» an, dann drücken Sie die
Taste «1» und «2». Auf dem Display des Geräts wird «Preset 12» angezeigt.
-2- Drücken Sie die Taste «PRESET +/-» auf der Fernbedienung, um den voreingestellten
Radiosender der Reihe nach auszuwählen.
ASCOLTA LA RADIO
È possibile utilizzare due metodi per ascoltare la radio:
-1- Utilizzando i tasti numerici sul telecomando per selezionare la stazione memorizzata, ad
esempio, premere il tasto numero 2, quindi il display visualizzerà Preset 2 e riprodurrà questa
radio preimpostata. Se si desidera selezionare la stazione preselezionata 12, premere il
tasto 10+, quindi il display mostrerà «-», quindi premere il tasto «1» e «2». Il display dell’unità
mostrerà «Preset 12».
-2- Premere il tasto «PRESET +/-» sul telecomando per selezionare la stazione radio
preimpostata in ordine.
RECHERCHE MANUELLE ET MISE EN MÉMOIRE DE STATIONS DE RADIO
Vous pouvez mettre en mémoire manuellement une radio en vous déplaçant sur la bande des
fréquences FM via le bouton 9 ou : de votre télécommande. Lorsque la fréquence trouvée
correspond à celle que vous recherchez, appuyez sur la touche MEM de la télécommande
puis affecter un numéro de preset à la radio sélectionnée.
MANUAL SEARCH AND STORING RADIO STATIONS
You can manually store a radio by moving to the FM frequency band using button 9 ou : on
your remote control. When the frequency found matches the one you want, press the MEM
button on the remote control and then assign a preset number to the selected radio.
MANUELLES SUCHEN UND SPEICHERN VON FUNKSTATIONEN
Sie können ein Radio manuell speichern, indem Sie mit der 9 oder : auf der Fernbedienung
zum UKW-Frequenzband wechseln. Wenn die gefundene Frequenz mit der gewünschten
Frequenz übereinstimmt, drücken Sie die MEM-Taste auf der Fernbedienung und weisen Sie
dem ausgewählten Radio eine voreingestellte Nummer zu.
RICERCA MANUALE E STORZIONI DI STAZIONI RADIO
È possibile memorizzare manualmente una radio spostandosi sulla banda di frequenza FM
utilizzando il tasto 9 o : sul telecomando. Quando la frequenza trovata corrisponde a quella
desiderata, premere il tasto MEM sul telecomando e quindi assegnare un numero preimpostato alla radio selezionata.
E
ORGANISER VOS RADIOS MÉMORISÉES
Vous souhaitez changer l’ordre des présélections, par exemple affecter la radio actuellement
mémorisée en position 17 sur la préselection 2. A l’aide de la télécommande, sélectionner la
radio 17 puis appuyez sur le bouton MEM et 2.
ORGANIZE YOUR STORED RADIOS
You want to change the order of the preset, for example to assign the currently memorized
radio to position 17 on the presets 2. Using the remote control, select the radio 17 then press
the MEM button and 2.
ORGANISIEREN SIE IHRE GESPEICHERTEN RADIOS
Vie möchten die Reihenfolge der Voreinstellungen ändern, um z. B. das aktuell gespeicherte
Radio an Position 17 auf Voreinstellung 2 zuzuweisen. Wählen Sie mit der Fernbedienung
Radio 17 aus und drücken Sie dann die Taste MEM und 2.
ORGANIZZATE I VOSTRI RADIO MEMORIZZATI
Si desidera modicare l’ordine dei preset, ad esempio per assegnare la radio attualmente
memorizzata alla posizione 17 sul preset 2. Utilizzando il telecomando, selezionare la radio 17
quindi premere il pulsante MEM e 2.
Page 34
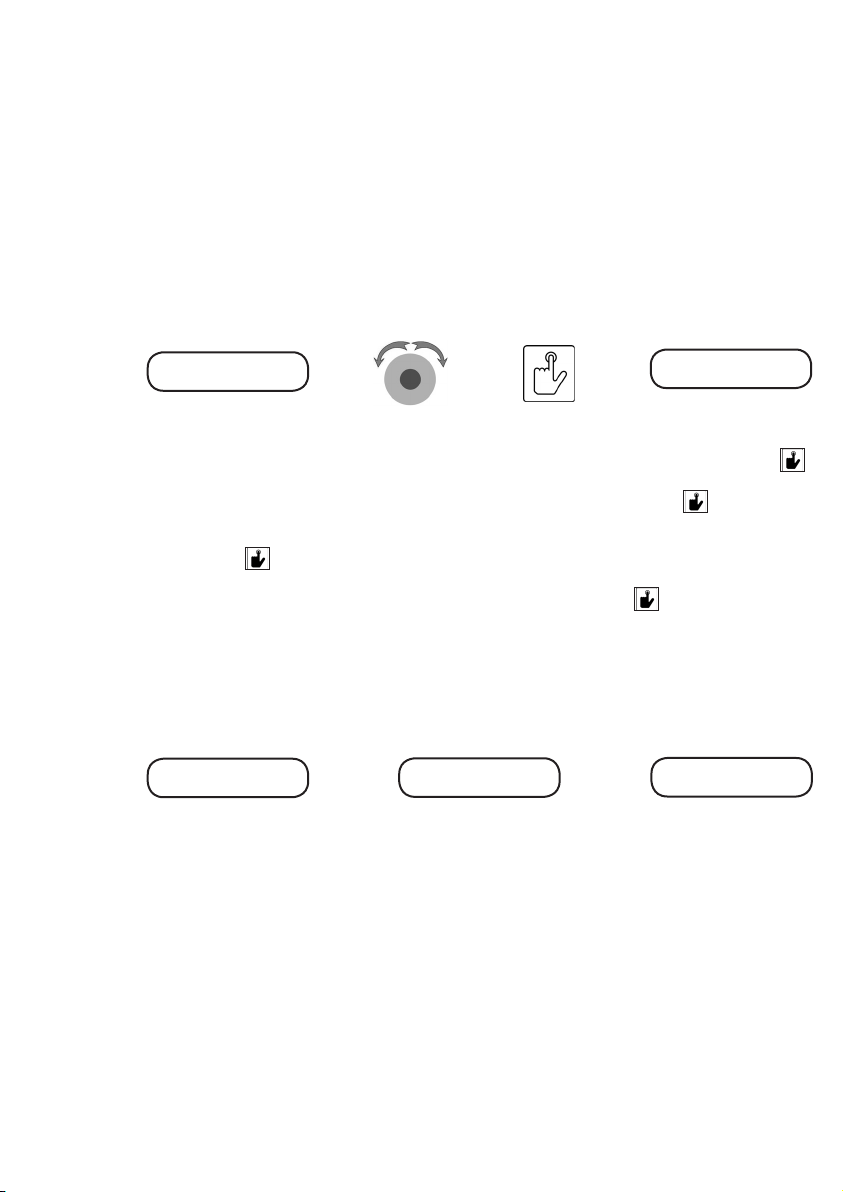
QUICK LEARNING
PLAY DAB RADIO
A partir du menu des sources sélectionner DAB en conrmant votre choix par un appui court
A
sur le bouton multifonction.
From the sources menu, select DAB and conrm your choice with a short press on the
multifunction button.
Wählen Sie im Quellenmenü DAB und bestätigen Sie Ihre Auswahl mit einem kurzen Druck
auf die Taste multifunktionstaste.
Dal menu delle fonti, selezionare DAB e confermare la scelta con una breve pressione sul
tasto pulsante multifunzione.
t
t
t
t
B
USB
>DAB
Si vous avez fait un choix erroné (par exemple une autre source), vous pouvez revenir au
menu principal des sources par un appui long (environ 2 sec.) sur le bouton multifonction.
If you have done a wrong choice, for exemple if you have chosen another source, you can go
back to the main source menu with a long press on the multifunction button.
Wenn Sie eine falsche Wahl getroffen haben, z. B. wenn Sie eine andere Quelle gewählt
haben, können Sie durch langes Drücken der Multifunktionstaste zum Hauptquellenmenü
zurückkehren.
Se hai fatto una scelta sbagliata, ad esempio se hai scelto un’altra fonte, puoi tornare al menu
principale della sorgente premendo a lungo il pulsante multifunzione.
Lors de la première utilisation, votre tuner DAB se met automatiquement en mode recherche.
When rst used, your DAB tuner will automatically go into search mode.
Bei der ersten Verwendung wechselt Ihr DAB-Tuner automatisch in den Suchmodus.
Al primo utilizzo, il sintonizzatore DAB passa automaticamente alla modalità di ricerca.
Scanning ...
51% 11A
Si aucune radio DAB DAB+ n’a été trouvée, vous pouvez relancer une recherche en appuyant
sur le bouton AUTOSCAN de votre télécommande. L’absence de radio peut avoir plusieurs
raisons, une mauvaise réception (vérier la position de l’antenne) ou une absence de radio
DAB/DAB+ sur votre territoire.
If no DAB DAB + radio has been found, you can restart a search by pressing the AUTOSCAN
button on your remote control. The absence of radio can have several reasons, a bad
reception (check the position of the antenna) or an absence of radio DAB / DAB + on your
territory.
Wenn kein DAB DAB + Radio gefunden wurde, können Sie die Suche durch Drücken der
Taste AUTOSCAN auf der Fernbedienung neu starten. Das Fehlen von Radio kann mehrere
Gründe haben, einen schlechten Empfang oder das Fehlen von Radio DAB / DAB + auf Ihrem
Territorium.
Se non è stata trovata alcuna radio DAB DAB +, è possibile riavviare una ricerca premendo
il pulsante AUTOSCAN sul telecomando. L’assenza di radio può avere diverse ragioni, una
cattiva ricezione o l’assenza di radio DAB / DAB + sul proprio territorio.
g
g g
g
CLASSIC MUSIC
Connecting...
g
DAB INPUT
CLASSIC MUSIC
Mozart - 40e
Page 35

C
ECOUTER LES RADIOS
Après l’étape de recherche des radios DAB/DAB+, les radios trouvées seront
automatiquement mises en mémoire de 1 à 40. Pour se déplacer dans la liste des stations
trouvées, utiliser les boutons 9 ou 7pour accéder à la station précédente et8ou : pour la
station suivante. Vous pouvez aussi utiliser directement votre télécommande avec le bouton
PRESET + ou -. Nous allons voir ensuite comment présélectionner vos stations favorites
dans l’ordre souhaitée dans la prochaine étape et ainsi pouvoir les appeler à partir de la
télécommande.
LISTEN THE RADIO
After the step of searching for DAB / DAB + radios, the radios found will be
automatically stored from 1 to 40. To move through the list of stations found, use buttons 9
ou 7 to access the previous station and 8ou : for the next station. You can also directly use
your remote control with the PRESET + or - button. Next step, we will see how to
enter your favorite stations in a preset list, in the desired order, in order to select them with the
remote control.
HÖREN SIE DAS RADIO
Nach dem Schritt der Suche nach DAB / DAB + -Radios werden die gefundenen Radiosender
angezeigt automatisch von 1 bis 40 gespeichert. Um durch die Liste der gefundenen Sender
zu blättern, verwenden Sie die Tasten 9 oder 7, um auf den vorherigen Sender zuzugreifen,
und 8 oder : für den nächsten Sender. Sie können Ihre Fernbedienung auch direkt mit der
Taste PRESET + oder - bedienen.
Im nächsten Schritt werden wir sehen, wie es geht
Geben Sie Ihre Lieblingssender in einer voreingestellten Liste in der gewünschten Reihenfolge ein, um sie mit der Fernbedienung auszuwählen.
ASCOLTA LA RADIO
Dopo la fase di ricerca delle radio DAB / DAB +, le radio trovate saranno
memorizzato automaticamente da 1 a 40. Per spostarsi nell’elenco delle stazioni trovate,
utilizzare i pulsanti 9 ou 7 per accedere alla stazione precedente e 8ou : per la stazione
successiva. È inoltre possibile utilizzare direttamente il telecomando con il tasto PRESET + o
-. Il prossimo passo, vedremo come inserisci le tue stazioni preferite in un elenco
preselezionato, nell’ordine desiderato, per selezionarle con il telecomando.
D
CRÉATION DES PRÉSÉLECTIONS ACCESSIBLES AVEC VOTRE TÉLÉCOMMANDE
Dans la liste des radios trouvés lors de la recherche , sélectionner la 1ère radio que vous
souhaitez mettre en mémoire puis appuyez brièvement sur MEM de la télécommande. A l’aide
du pavé numérique, appuyez sur 1. Lorsque la source sélectionnée sur votre MyConnect 150
sera le DAB, il vous sufra d’appuyer sur le bouton 1 de votre télécommande pour écouter
la radio correspondante. Vous devez répéter cette opération pour toutes les radios que vous
souhaitez présélectionner.
CREATE ACCESSIBLE PRESELECTIONS WITH YOUR REMOTE CONTROL
In the list of radios found during the search, select the rst radio you want to store and briey
press MEM on the remote control. Using the numeric keypad, press 1. When the source
selected on your MyConnect 150 is the DAB, all you have to do is press button 1 on your
remote control to listen to the corresponding radio. You must repeat this operation for all the
radios you want to preset.
ERSTELLEN SIE ZUGÄNGLICHE VORAUSWAHLEN MIT IHRER FERNBEDIENUNG
Wählen Sie in der Liste der während der Suche gefundenen Radios das erste Radio aus, das
Sie speichern möchten, und drücken Sie kurz MEM auf der Fernbedienung. Drücken Sie auf
der Zehnertastatur 1. Wenn die auf Ihrem MyConnect 150 ausgewählte Quelle DAB ist,
müssen Sie nur die Taste 1 auf Ihrer Fernbedienung drücken, um das entsprechende Radio
zu hören. Sie müssen diesen Vorgang für alle Radios wiederholen, die Sie speichern
möchten.
B
Page 36
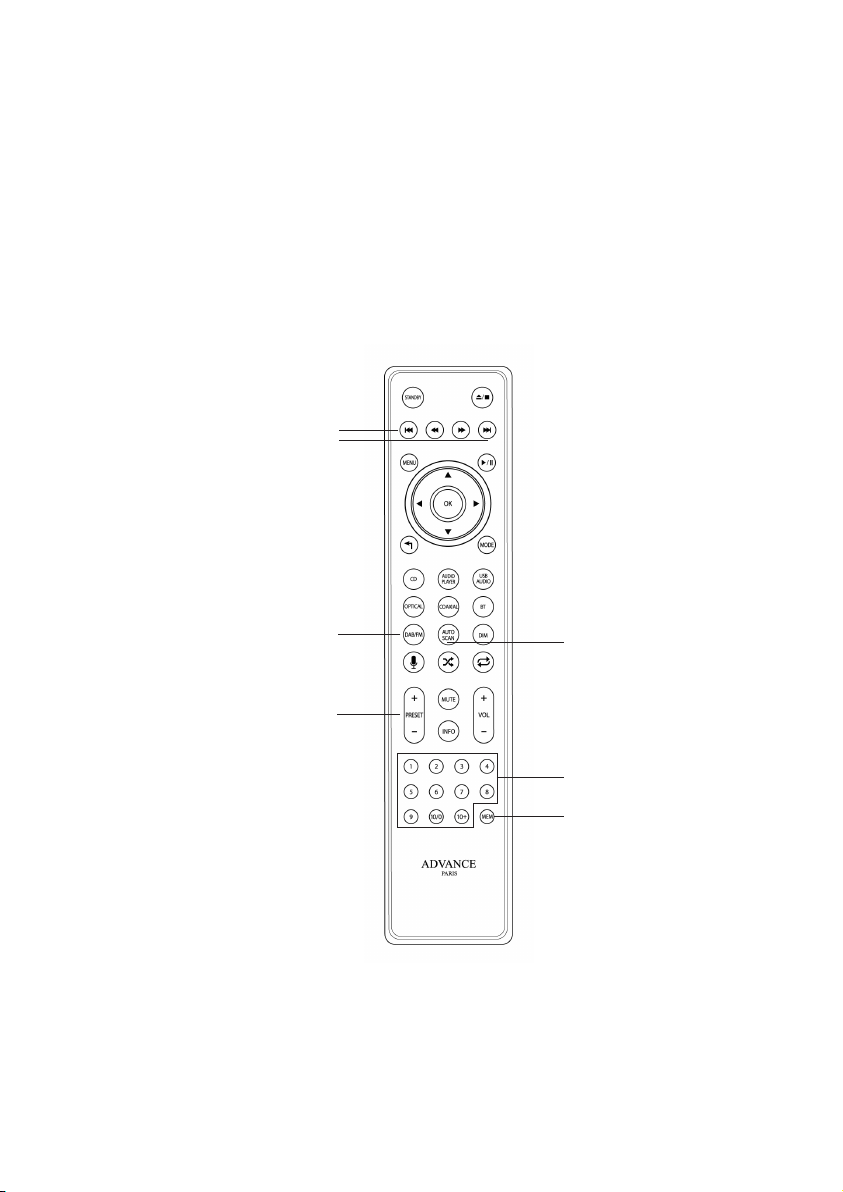
REMOTE FUNCTIONS
DAB / FM
Manual scan
DAB/FM source selector
Selection of presets
(Preset + and preset -)
Autoscan
Numeric keypad
Numeric keypad
Page 37
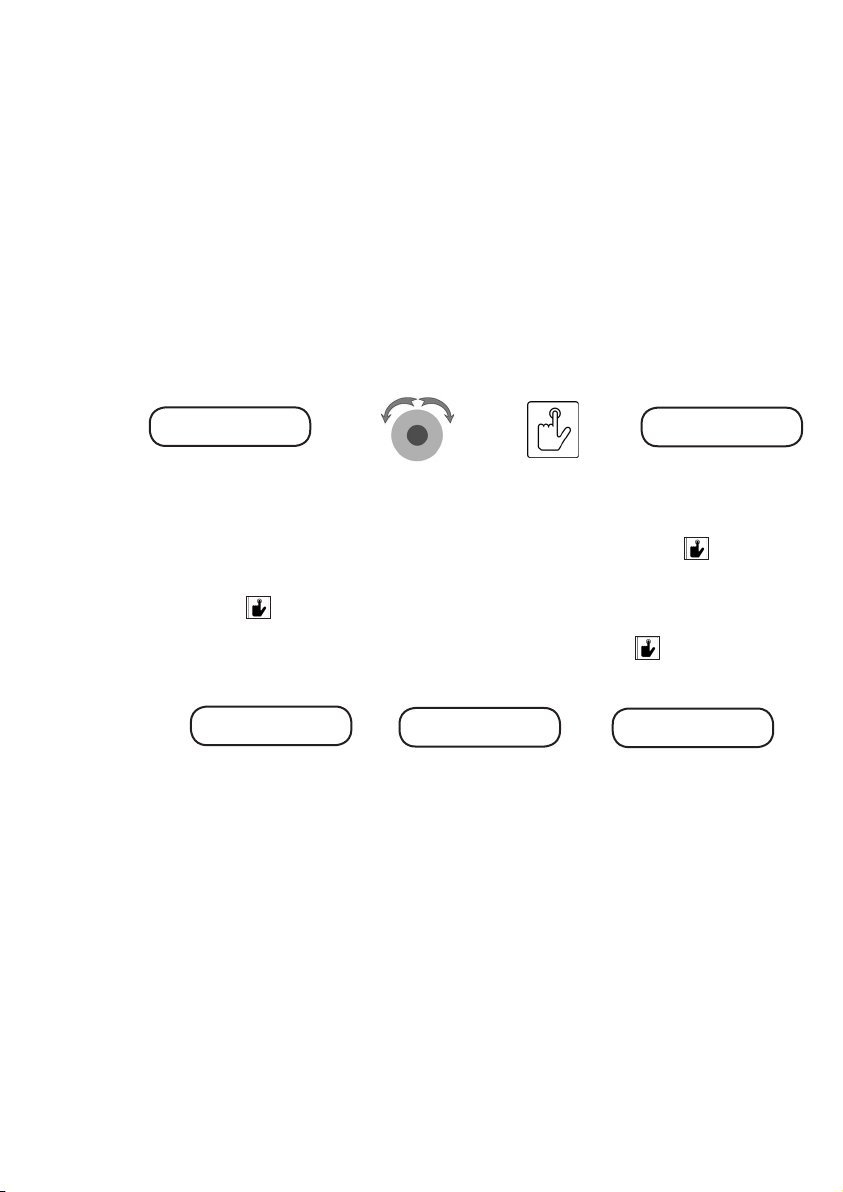
QUICK LEARNING
PLAY BLUETOOTH
A partir du menu des sources sélectionner Bluetooth en conrmant votre choix par un appui
A
court sur le bouton multifonction.
From the sources menu, select Bluetooth and conrm your choice with a short press on the
multifunction button.
Wählen Sie im Quellenmenü Bluetooth und bestätigen Sie Ihre Auswahl mit einem kurzen
Druck auf die Taste multifunktionstaste.
Dal menu delle fonti, selezionare Bluetooth e confermare la scelta con una breve pressione
sul tastopulsante multifunzione.
t
t
t
t
B
FM
>Bluetooth
Si vous avez fait un choix erroné (par exemple une autre source), vous pouvez revenir au
menu principal des sources par un appui long (environ 2 sec.) sur le bouton multifonction.
If you have done a wrong choice, for exemple if you have chosen another source, you can go
back to the main source menu with a long press on the multifunction button.
Wenn Sie eine falsche Wahl getroffen haben, z. B. wenn Sie eine andere Quelle gewählt
haben, können Sie durch langes Drücken der Multifunktionstaste zum Hauptquellenmenü
zurückkehren.
Se hai fatto una scelta sbagliata, ad esempio se hai scelto un’altra fonte, puoi tornare al menu
principale della sorgente premendo a lungo il pulsante multifunzione.
BLUETOOTH
Disconnected
Allez dans le menu réglage Bluetooth de votre périphérique (smartphone, tablette, PC ou
Mac), puis sélectionnez MyConnect 60 pour activer l’appairage.
Go to the Bluetooth setup menu of your device (smartphone, tablet, PC or Mac) and select
MyConnect 60 to enable pairing.
Rufen Sie das Bluetooth-Setup-Menü Ihres Geräts (Smartphone, Tablet, PC oder Mac) auf
und wählen Sie MyConnect 60, um die Kopplung zu aktivieren.
Vai al menu di impostazione Bluetooth del tuo dispositivo (smartphone, tablet, PC o Mac) e
seleziona MyConnect 60 per abilitare l’associazione.
g
g
g
BLUETOOTH
iPhone
g
iPhone 44.1KHz
BLUETOOTH
Disconnected
BLUETOOTH
Page 38
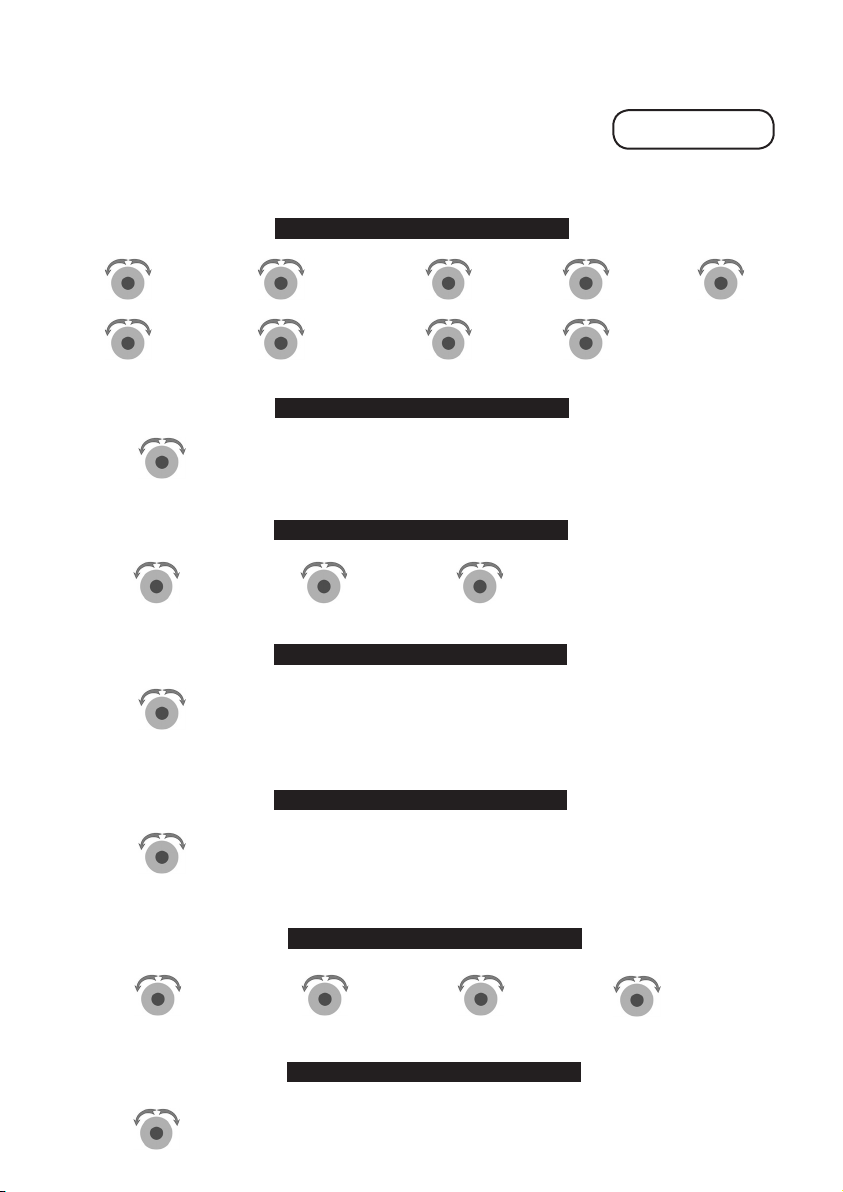
SYSTEM SETTING
System info
IP2 Adress
0.0.0.0
Network Setup
Network Wizard
System Setting
Software Update
Arborescence des menus System Setting
System Setting menus arborescence
System Einstellung Menüs Arboreszenz
Menu di impostazione del sistema arborescenza
System info MENU
Device Name
MyConnect 60
IP1 Adress
0.0.0.0
Network Setup
Network WPS
Software Update
MCU Upgrade
Firmware Version
3.6.5002
MAC Address
00:22:6c:82:FE:A
MCU Version
Network Setup MENU
Software Update MENU*
Software Update
CD Upgrade
Factory Reset MENU
1.2
SSID APP Version
Software Update
BT Upgrade
Bluetooth
>System Setting
MCU Version
1.2
V 1.52
* Exclusivement réservé aux
services techniques
* Only for service department
* Nur für Serviceabteilung
* Solo per il reparto assistenza
BT Version
0101
N
System Setting
Factory Reset
System Setting
APD Setting
System Setting
Tone Setting
System Setting
Volume Setting
Factory Reset
(YES) NO
APD OFF
(YES) NO
Tone Setting
Treble
Volume Setting
Fixed (Var)
* Retour aux reglages usine
* Reset the unit. Default factory settings
* Setzen Sie das Gerät zurück. Standard
Werkseinstellungen
* Resetta l’unità. Impostazioni di fabbrica predenite
APD MENU
* Mise en veille automatique au bout de 30 minutes
* Automatic shutdown after 30 minutes
* Automatische Abschaltung nach 30 Minuten
Werkseinstellungen
* Spegnimento automatico dopo 30 minuti
Tone Setting MENU
Tone Setting
Bass
Tone Setting
Balance
Volume Setting MENU
Tone Setting
Loudness
Page 39
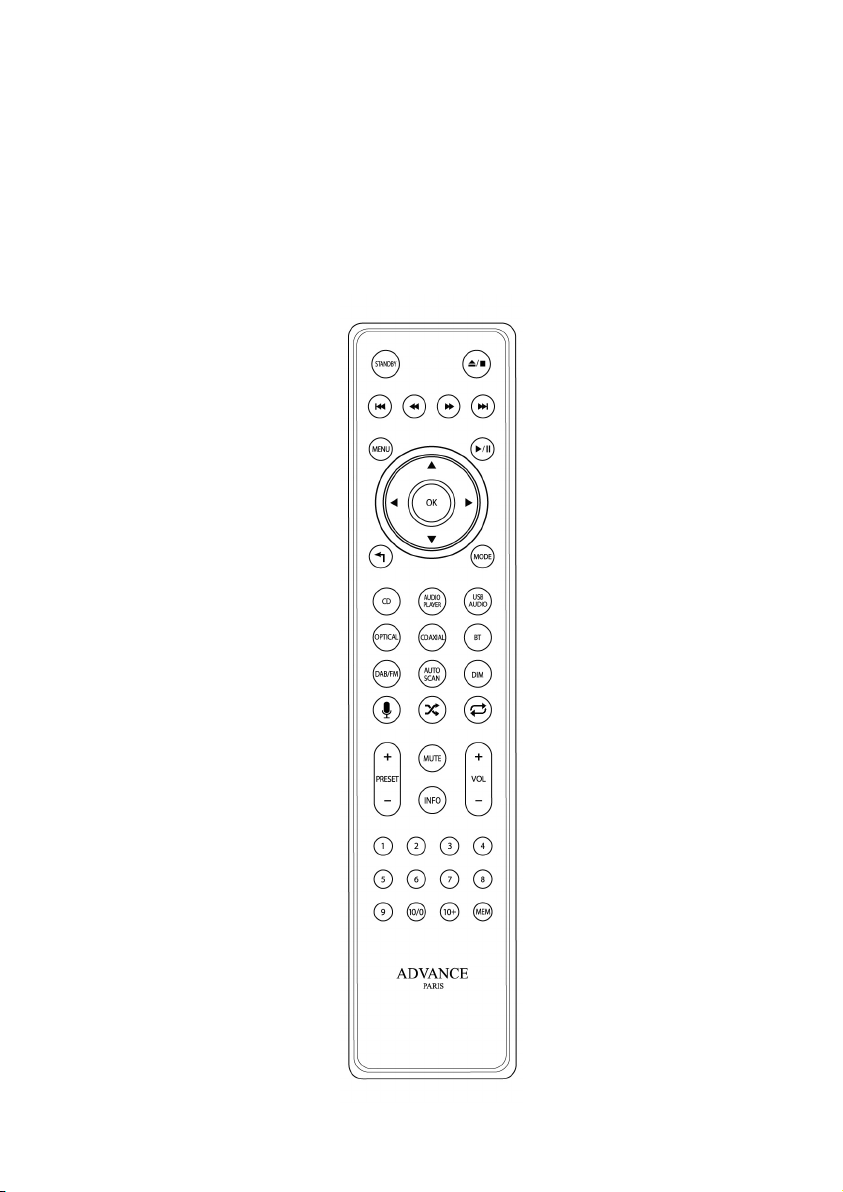
TELECOMMANDE
REMOTE CONTROL
Page 40

SPECIFICATIONS
POWER OUTPUT 48/70 Watts CLASS AB
OUTPUT POWER
OUTPUT LEVEL Unbalanced 2 volts
NIVEAU DE SORTIE Asymétrique
FREQUENCY RESPONSE (+/-3dB) 20Hz - 45 kHz
RÉPONSE EN FRÉQUENCE (+/-3dB)
DISTORTION < 0.1%
DISTORSION
OUTPUT IMPEDANCE 10KΩ
IMPEDANCE DE SORTIE
CHANNEL SEPARATION > 90dB
SÉPARATION DES CANAUX
S/N RATIO > 92dB
RAPPORT SIGNAL / BRUIT
DAC DIGITAL AUDIO TI PCM 5101
CIRCUIT DE CONVERSION
AC INPUT 115 or 230V
TENSION SECTEUR
POWER CONSUMPTION MAX Max 30W
CONSOMMATION MAXIMALE
DIMENSIONS H. 136 x l. 265 x D. 385
NET WEIGHT 5,5 kg
POIDS NET
Bluetooth
• Bluetooth is a technology for wireless communication between devices within an area of about 10
meters (33 ft) employing the 2.4 GHz frequency band, a band which can be used without a license.
Page 41

DECLARATION
OF CONFORMITY
DECLARATION OF CONFORMITY
We declare under our sole responsibility that this product, to which this
declaration relates, is in conformity with the council RoHS2 2011/65/EU, LVD
directive 2014/35/UE, EMC directive 2014/30/UE and RED 2014/53/EU.
DECLARATION DE CONFORMITE
Nous déclarons sous notre seule responsabilité que l’appareil, auquel se
réfère cette déclaration, est conforme à la règlementation européenne
concernant les directives suivantes :
RoHS2 2011/65/EU, LVD directive 2014/35/UE, EMC directive 2014/30/UE et
RED 2014/53/EU.
KONFORMITÄTSERKLÄRUNG
Wir erklären in alleiniger Verantwortung, dass das Gerät, auf das sich diese
Erklärung bezieht, sich in Übereinstimmung mit den folgenden Europäischen
Richtlinien bendet:
RoHS2 2011/65/EU, LVD directive 2014/35/UE, EMC directive 2014/30/UE
und RED 2014/53/EU.
DICHIARAZIONE DI CONFORMITÀ
Si dichiara sotto la nostra responsabilità che questo prodotto, la cui
dichiarazione fa riferimento, è conforme alle normative europee RoHS2
2011/65/EU, LVD directive 2014/35/UE, EMC directive 2014/30/UE e RED
2014/53/EU.
The Bluetooth frequency band is 2.402GHz~2.480GHz ISM Band. RF TX Output
Power is 4dBm (Class II).
Advance Paris Sarl, 13 rue du coq gaulois - 77170 Brie Comte Robert - France
Page 42
ADVANCE
PARIS
Design and development in France by Advance Paris Sarl
13 rue du coq gaulois - 77390 Brie Comte Robert - FRANCE
Tel. +33 (0) 160 185 900 - Fax +33 (0) 160 185 895
email: [email protected]
www.advanceparis.com
 Loading...