

Page 1
InstaMedia 2
English/German
ADS Tech
North America Office
Cerritos, CA 90703, USA
Fax: 562.926.0518
European Office
Unit 1B, Shannon Industrial Estate
Shannon Co. Clare, Ireland
Phone: +353.61.702042
Fax: +353.61.702001
Southern Europe and MEA Office
51-55 rue Hoche
94200 Ivry sur Seine, France
Phone: +33 1.43.90.19.20
Fax: +33 1.46.58.67.06
Quick Guide
370-528
Introduction
Welcome to Ulead®InstaMedia™Digital Home Theater, the complete multimedia entertainment software for your
digital lifestyle. With its simple user interface, InstaMedia lets you enjoy viewing your photos, listening to radio, and
watching TV without the hassle of switching between programs. InstaMedia's remote control support makes digital
entertainment more convenient and fun.
Getting Started
This section introduces you to the basics of InstaMedia. Once you know how to use the software's features and
functions, multimedia entertainment will become that much more enjoyable.
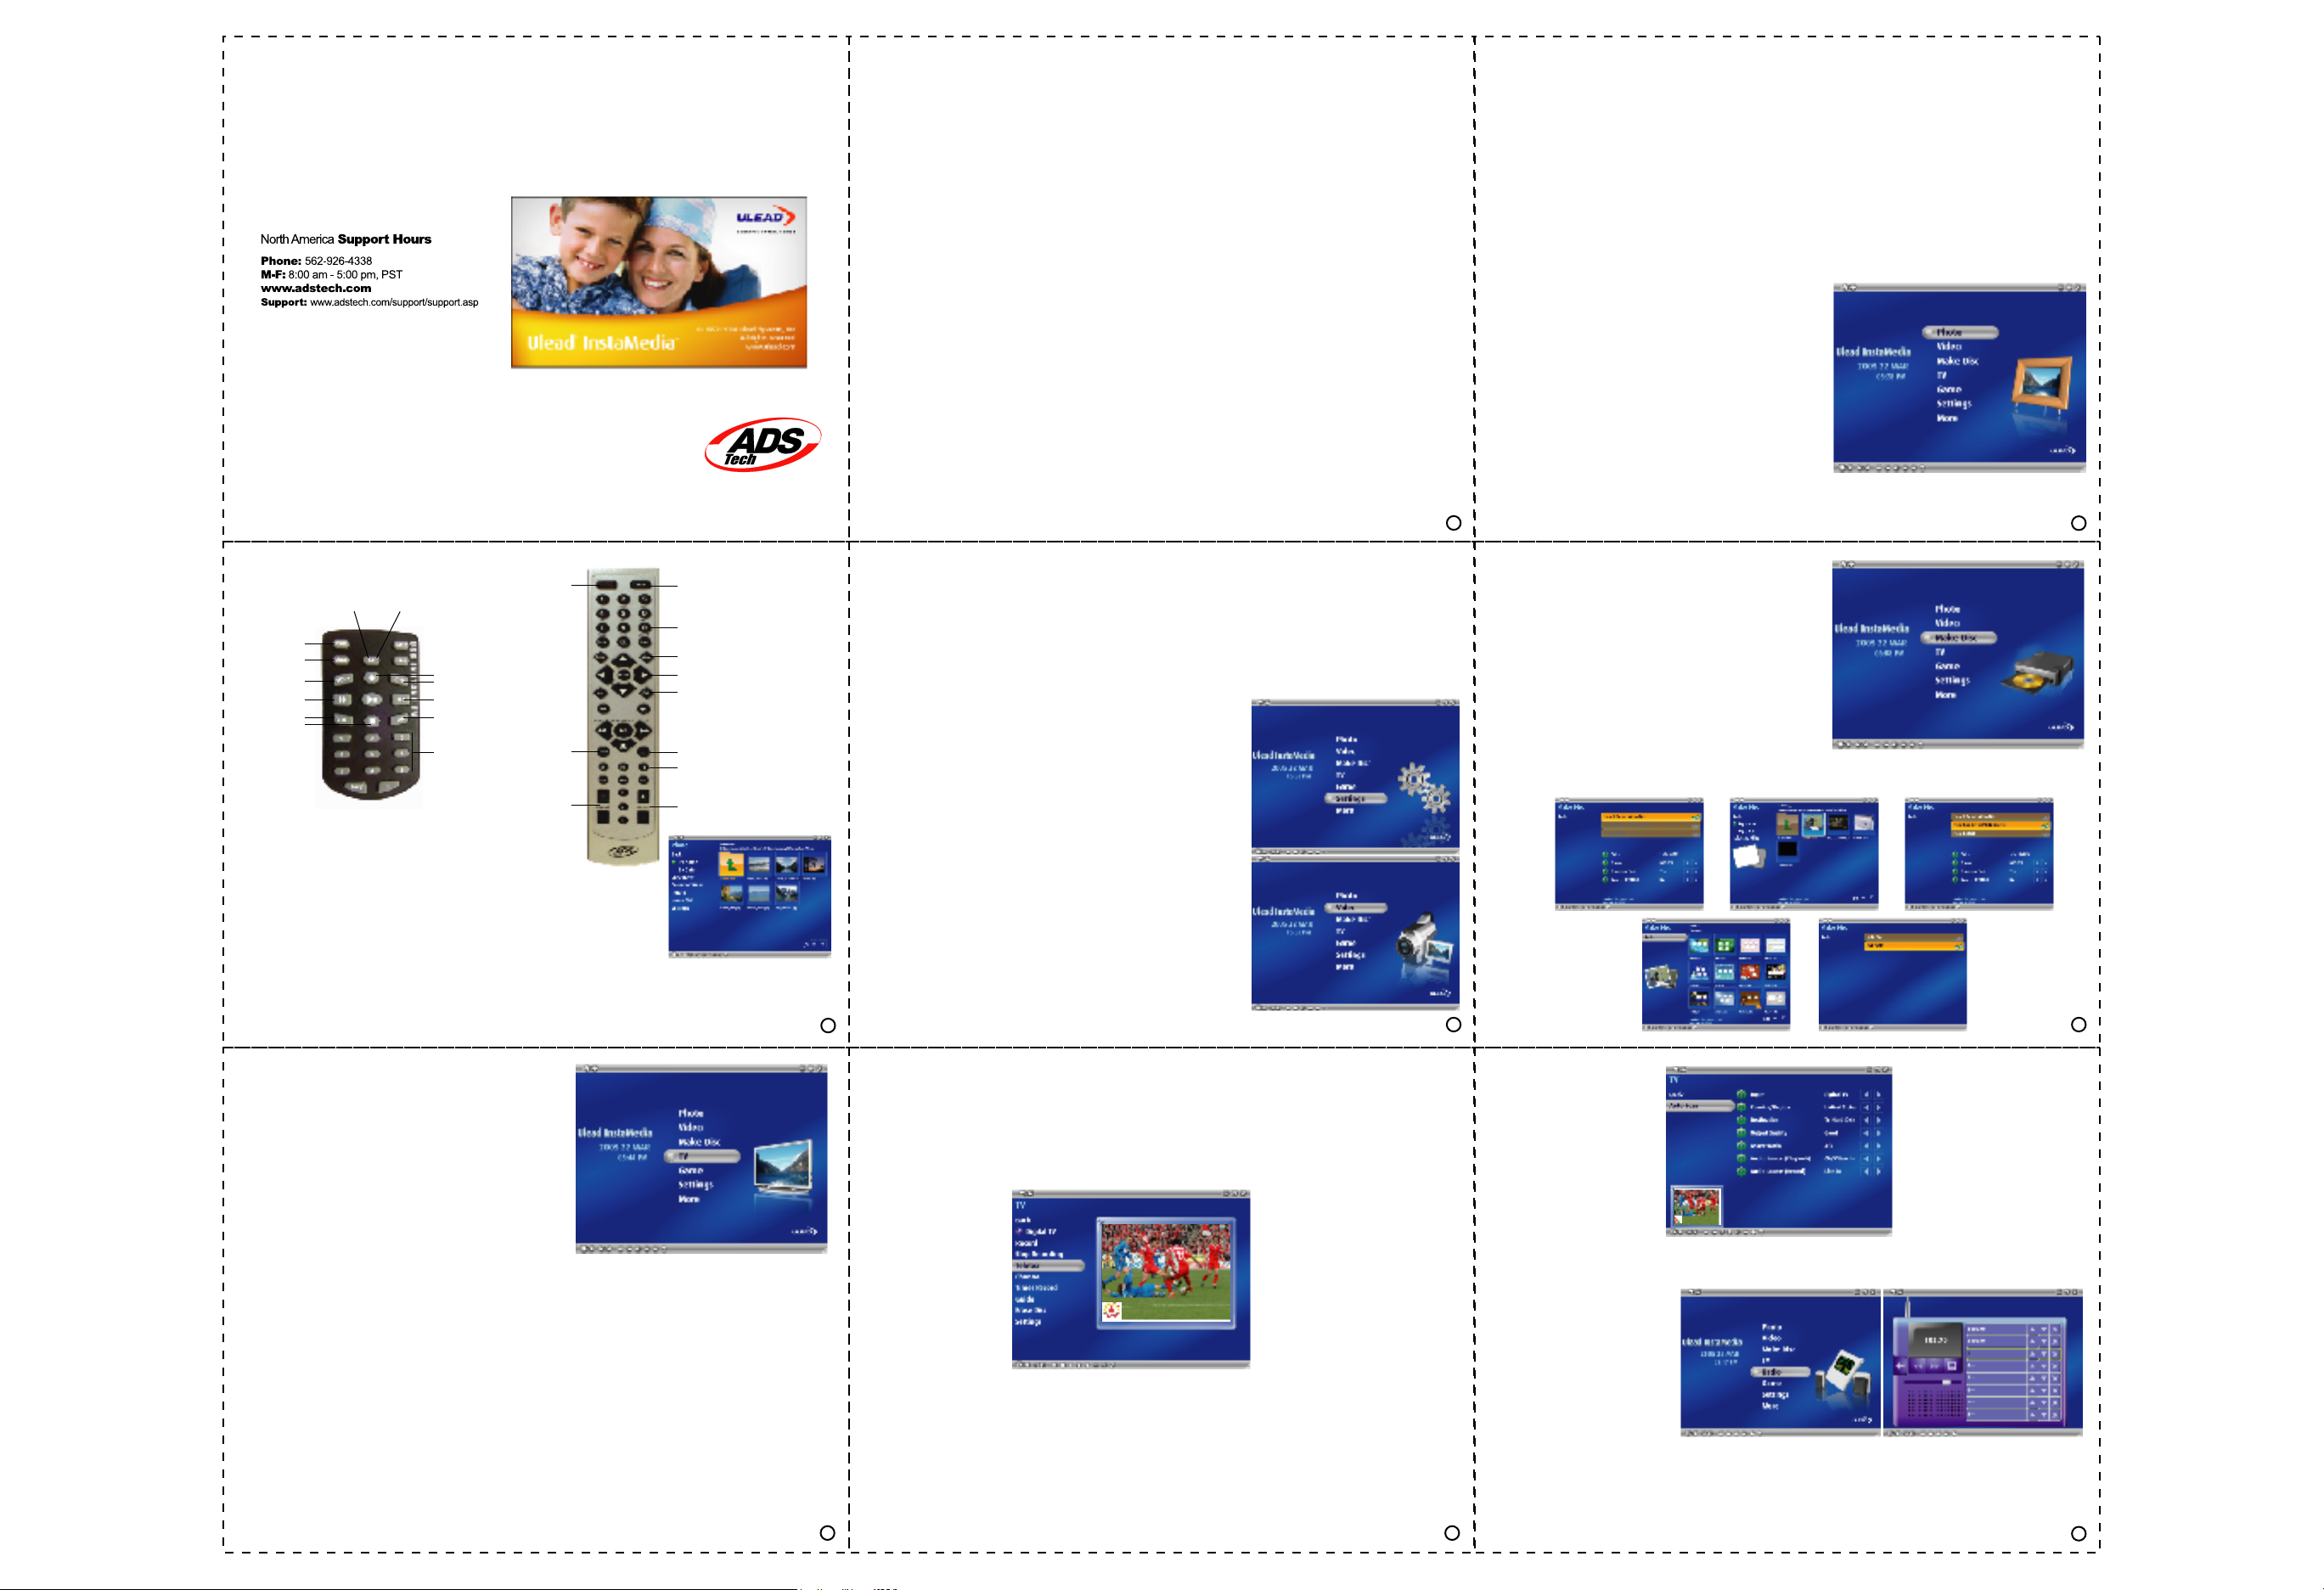
Using the Remote Control
One of InstaMedia's main features is remote control support. This allows you to control your PC from a distance.
The following are the basic functions of a remote control when using InstaMedia:
• Enter Activates an option or plays a video/audio file.
• Arrows Navigates through the user interface.
• Play/Pause Pauses or resumes video, TV, or slideshow playback.
• Stop Ends video, TV, or slideshow playback.
• Volume Controls Increases or decreases the volume level of a video, TV shows, or slideshow.
• Channel Up/Down Browses for TV channels.
Note: This user guide mainly focuses on the use of a remote control rather than a mouse and keyboard.
The User Interface
InstaMedia's simple user interface allows you to control the program with ease. This makes viewing and listening to
your media files more relaxing because you do not have to worry about the technical aspects of the program. The
System Panel When you are using a mouse instead of a remote control, the System Panel appears. This panel
contains buttons that you can use to minimize, maximize or restore the program window, as well as close the
program. You can also click Menu to go to the Menu page where you can select InstaMedia's main functions.
The Navigation Panel
The Navigation Panel contains buttons that you can use to play back video. It also includes volume control buttons
that allow you to adjust the volume level of the media you are currently playing. Just like the System Panel, the
Navigation Panel only appears when you are using a mouse instead of a remote control. The Navigation Panel
contains the following buttons:
• Play/Pause Pauses or resumes video, TV shows, or slideshow playback.
• Stop Ends video, TV, or slideshow playback.
• Home Goes to the start of a video file.
• End Goes to the end of a video file.
• Forward Goes forward through a video file.
• Rewind Goes back through a video file.
• Mute Temporarily removes the sound attributes of a video file or slideshow during playback.
• Volume Controls Increases or decreases the volume level of a video file or slideshow.
The Selection Menu
The Selection Menu contains options and functions for each program section or "page". In the Menu Page, the
Selection Menu allows you to go to the pages where you can view images, play video, as well as specify settings.
The View Port
InstaMedia has multi-tasking capabilities that allow you to view
a Slideshow or watch a video while browsing for files. This is done
through the View Port. While viewing your slideshow or video in
full screen, press Back on the remote control to minimize the video
to the View Port. You can then switch to another function and
browse for media files while the current video is still playing.
Note: The contents of the Selection Menu vary depending on the
page you are on.
1 2
To navigate around InstaMedia or use the TV functions
you will need to press the T/S button on the remote to
toggle between system navigation and TV functions.
TV Function
power
mute
volume up
left/ rewind
volume down
down/ stop
Photo
The Photo page allows you to easily browse and view your
favorite photos and other image files. To view an image,
select a thumbnail from the image file list and then press Enter.
Viewing images as a slideshow
A more entertaining way of viewing your image files is to watch them
in a slideshow. Select Play Slideshow in the Selection Menu and
then press Enter. All image files in the current folder and subfolders are included in the slideshow.
Using the Calendar View
In Calendar View, the Selection Menu lists the dates on which the images were taken. To go to Calendar View, select
Calendar View in the Selection Menu and then press Enter. In Calendar View, dates when the images were taken
are listed in the Selection Menu. Select a specific year, month, or day to list all images that were taken during that
time period in the image list.
toggle
System Navigation
up/ record
channel up
right/ fast forward
channel down
number pad
channel up & down
power
record
Remote Control
mute
number pad
navigation system
exit
time shifting
full screen and mininimize screen
volume
To rotate an image:
1. Select Rotate from the image list and then press Enter.
2. Select the image you want to rotate in the image list.
3. Select Rotate +90 or Rotate -90 and then press Enter to rotate the image clockwise or counterclockwise.
Tip: Select Next and Prev to browse through the images within the folder.
Specifying image and slideshow settings
Specify preferences for viewing your image or slideshow in the Photo Settings page. This page allows you to add
transition effects and background music when viewing your images as a slideshow. You can also set your slideshow
to repeat after playing. When viewing image files, you can set InstaMedia to display the file name and the date when
the image was taken.
Photo Settings
The Photo Settings page contains the following options:
• Slide duration Specify how long each image is displayed in the slideshow.
• Transition effects Specify a transition effect to use in the slideshow.
• Enable Animation Specify whether or not to add motion attributes to each
image when viewing them as a slideshow.
• Show image in random order Specify whether or not to display the images
in random sequence.
• Display file name Specify whether or not to include the file name when the
image is displayed.
• Display taken date Specify whether or not to display the creation date
when viewing an image.
• Repeat playback Specify whether or not to repeat the slideshow after
playback.
• Restore Default Settings Allows you to restore InstaMedia's original settings.
Video
Watch video files that are stored in your hard drive in the Video page.
Select a video file from the video file list and then press Enter. The selected
video is displayed in full screen. You can use the remote control's playback
buttons to pause, resume, or navigate through the video. When using a
mouse instead of a remote control, you can use the Navigation Panel as well.
3
Make Disc
Burn your favorite home videos or tv programs you captured onto
a disc that you can share with your family and friends. InstaMedia's
Make Disc feature allows you to create VCDs, SVCDs, and DVDs
in just a few simple steps.
To create a VCD, SVCD, or DVD:
1. Select Step 1: Select Video File, and then press Enter.
2. Select the video files to include in your disc. Select Back and
then press Enter.
3. Select Step 2: Select Menu Template, and then press Enter.
4. Select a menu template to use for the disc. Select Back and then
press Enter.
5. Select Step 3: Start to begin burning the disc.
Note: You can select Selected files, and then press Enter to go to the page where you can remove and rearrange
the order of video files.
4
5
TV
Watch your favorite sitcoms, game shows, sport events, and news
programs using InstaMedia's TV feature. InstaMedia also provides
special features such as pausing and recording video feeds.
Before you can use InstaMedia's TV feature, you must first install
a TV tuner in your computer. This device allows you to connect
your computer to a TV antenna or your CATV provider. Your
computer can then receive video feeds and decode them for viewing.
Setting up TV channels
Just like a regular TV set, to be able to browse TV channels,
you must first scan for available networks and save them in the
system. To set up TV channels, select TV settings in the TV page
and then press Enter. In the TV settings page, select Auto scan
and then press Enter. InstaMedia automatically detects available network channels in your area and then saves
them in the program.
Pausing video feeds
Watching TV has become an integral part of our everyday lives. So much so that sometimes, you find it very hard
stay away from your TV set until you finish watching your favorite TV program. With Ulead InstaMedia, it is now
possible to pause the TV program that you are watching to make sure that you don't miss anything while you're
away. When you click Pause on the remote control or the Navigation Panel, InstaMedia automatically switches to
time-shift mode. In time-shift mode, the broadcast feed is saved on a recycle buffer. This buffer acts the same way
as a temporary folder where the broadcast feed is recorded allowing you to view the whole program when you come
back.
Note: When you switch channels while in time-shift mode, the recording will stop and InstaMedia will automatically
return to preview mode.
Recording TV programs
InstaMedia allows you to capture TV footage using a TV tuner. Capture a segment of your favorite television show
from a regular TV or cable network then save it on your hard drive in MPEG2 format. To record a TV program,
select To Hard Disk or To Disc in the TV page to choose between recording the program to your hard drive or
directly to disc. Select Record and then press Enter to start capturing the video feed.
Scheduling a TV recording session
In addition to the pause feature, InstaMedia allows you to schedule a recording session for your favorite TV
program. When a program is scheduled for recording, a scheduling agent will invoke InstaMedia and then
automatically switches to the TV page to start recording.
TeleText:
A Teletext is a one-way information retrieval service. A fixed number of
information pages are repetitively broadcast on unused portions of a TV
channel bandwidth. (This feature is offered only in Europe)
TV settings
• Input source Select whether to receive video feed from an antenna, CATV provider, or analog device connected
through a composite or S-video cable.
• Country Select the country you are in. This will determine which TV system (NTSC or PAL) to use.
• TV system Select whether to use NTSC or PAL system when viewing video from an S-video or composite source.
• Aspect ratio Select whether to display video feed in standard TV (4:3) or widescreen (16:9) mode.
• Record destination Select whether to save recorded video feed in your hard disk or burn them directly onto a disc.
• Record quality Select the quality of video files to be saved when recording
to your hard disk.
• Disc output format Select whether to create a DVD-Video, DVD+/-VR, VCD,
or SVCD when burning recorded video directly onto a disc.
6
Radio (For Instant TV+FM only)
The Radio page is where you can listen to your favorite radio stations.
Tune to the desired radio station: There are 2 different ways to tune to your radio station.
1. With the slider bar you can move
from left to right to the station you
want to listen to.
2. You can click on the left or right
button on the radio to adjust to
the radio station desired.
To save your favorite radio stations:
1. Once you have the radio station
tuned in, click on the save button.
[image] Repeat till you have all
your favorite stations saved.
7 8
 Loading...