

Page 1
INSTALLATION
USE AND CARE
PARTS REPLACEMENT
Evaporative cooling works on the principle of heat absorption by moisture evaporation.
Your evaporative cooler draws outside air into specially made pads soaked with water, where the air is
cooled by evaporation, then circulated into your home.
Your MasterCool evaporative cooler has been designed to provide more efficient, consistent cooling
through use of a long-life MasterCool pad. It is a cellulose fiber treated with stiffening and wetting agents
to provide the most reliable evaporative pad ever devised.
Your cooler has two modules - wet and dry - which may be separated for service and cleaning, and
incorporates the most reliable components for long, trouble-free life.
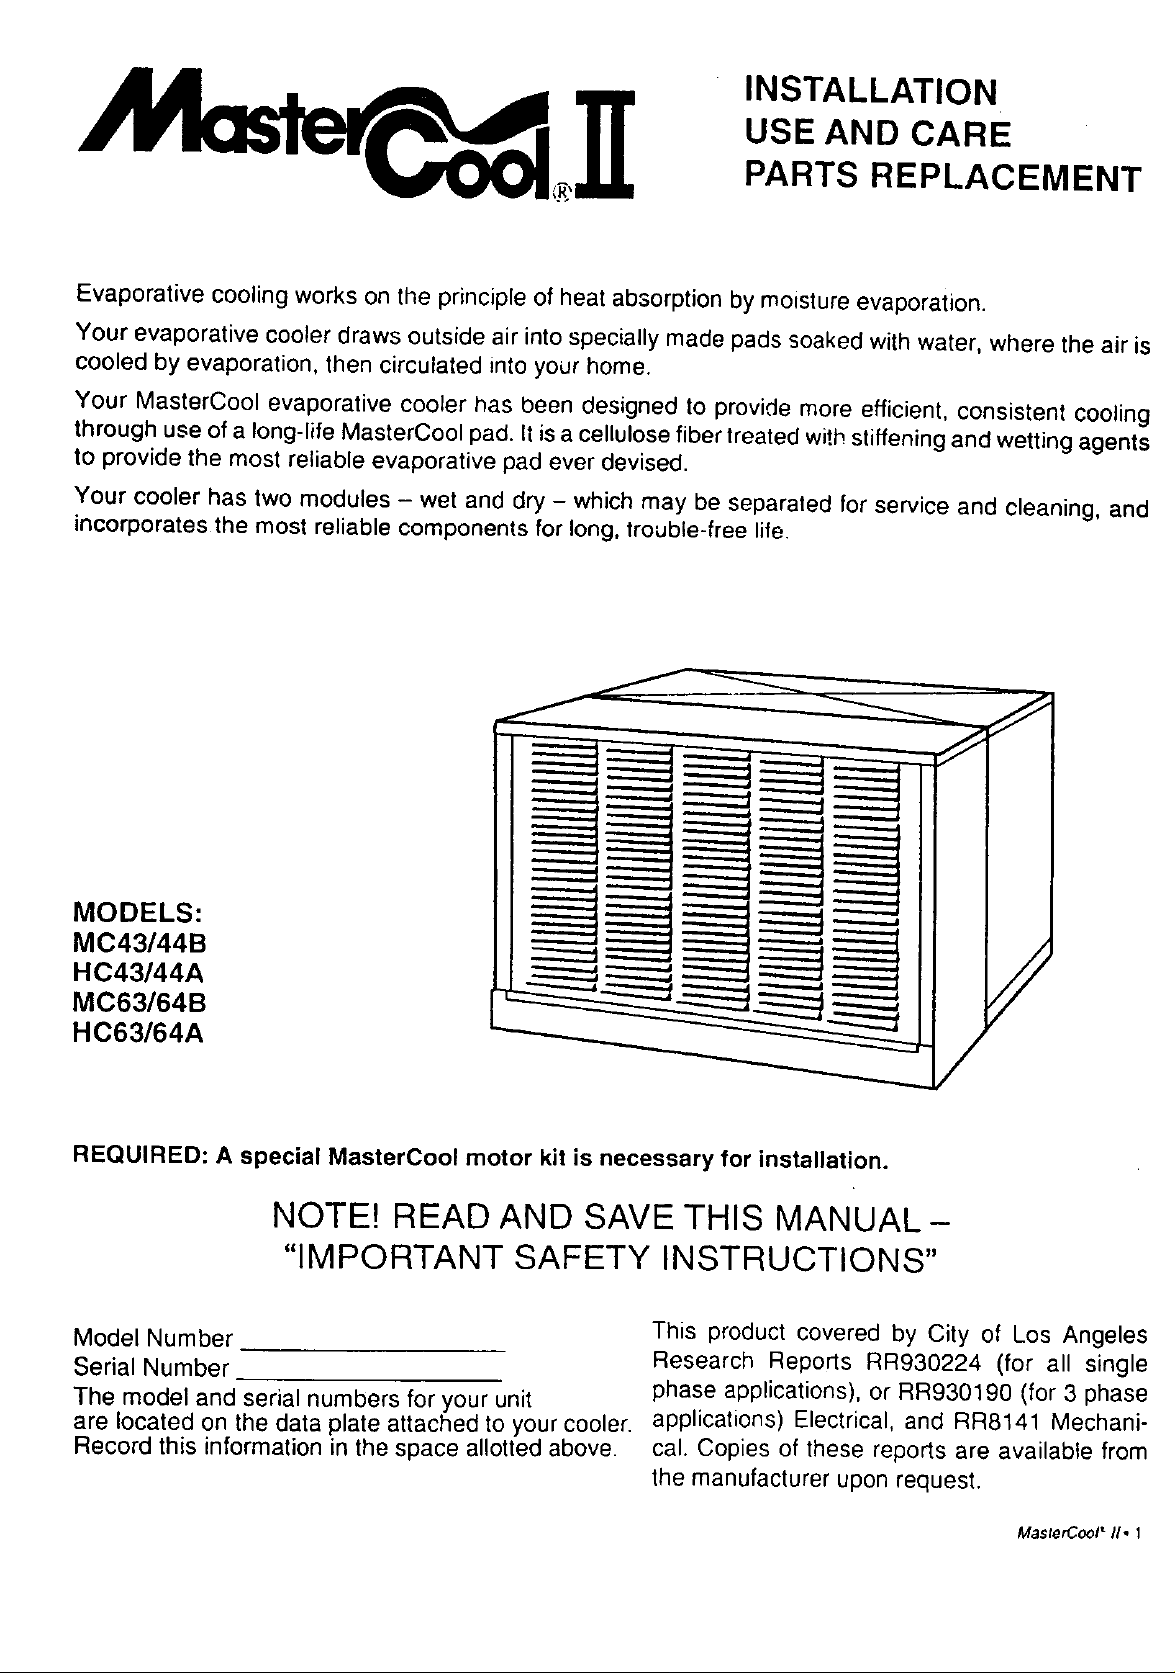
MODELS:
MC43/44B
HC43/44A
MC63/64B
HC63/64A
REQUIRED: A special MasterCool motor kit is necessary for installation.
NOTE! READ AND SAVE THIS MANUAL -
"IMPORTANT SAFETY INSTRUCTIONS"
Model Number
Serial Number
The model and serial numbers for your unit
are located on the data plate attached to your cooler.
Record this information in the space allotted above.
This product covered by City of Los Angeles
Research Reports RR930224 (for all single
phase applications), or RR930190 (for 3 phase
applications) Electrical, and RR8141 Mechani-
cal. Copies of these reports are available from
the manufacturer upon request.
MasterCool" II, 1
Page 2
Installation and Start-Up ............................................................ ................................
Mounting and Securing ....................................................................... 3
Electrical Connections ........................................................................ 3
Grounding ............................................................. '.............................. 3
Installing Motor ................................................................................... 3
Installing Overflow Standpipe and Drain Line ...................................... 4
Connecting Water Supply ................................................................... 4
Faucet Use ......................................................................................... 4
Adjusting Water Level and Float Valve ............................................... 4
Installing Bleed-Off ............................................................................. 4
Installing Float Shield ......................................................................... 4
Maintenance Schedule
Annual Start-Up/Shut-Down ............................................................... 5
Required Exhaust Openings ............................................................... 5
Pre Start-Up Inspection ...................................................................... 5
Periodic Inspection ............................................................................. 5
Checklist ............................................................................................. 5
Cabinet Cleaning & Touch-Up ............................................................ 5
Scratches & Bare Metal ...................................................................... 5
Changing Pad ..................................................................................... 5
Adjusting Belt Tension ........................................................................ 6
Lubrication .......................................................................................... 6
Cleaning Water Pump ........................................................................ 6
Snugging Down Set Screws and Nuts ................................................ 6
Washing Pad ...................................................................................... 6
Parts Replacement
Troubleshooting ........................................................................................................ 7
Getting the most from your cooler ...................... t................................................... 7
2 • MastetCooP II
Motor .................................................................................................. 6
Pump .................................................................................................. 6
Float .................................................................................................... 6
Bleed-Off ........................................................................................... 6
Maintenance ....................................................................................... 7
Add-On Coolers .................................................................................. 7
Insulation ............................................................................................ 7
Multi-Speed Motor .............................................................................. 7
Attic Vents .......................................................................................... 7
Thermostat Control .......................................................................... 3,7
Page 3
Installation. and Start-Up
Read carefully before =nstalhng your MasterCo'bl evaporative cooler.
To install the unit the following tools are
needed:
• 5132" hax key allen wrench
Channel locks
• Pliers
• Adjustable wrenches
Tubing cutter
Screwdrivers
• Hammer
114"Socket wrench
• 7/16" Socket wrench
Before attempting to install the cooler,
make sure the following preparations have
been made:
• Assure that the mounting sudace is
strong enough to bear the weight of the
cooler when in use; remember that
when the system fills with water, the
cooler will be much heavier than when
dry. The operating weight for MC units is
250 pounds, and for HC units is 295
pounds.
Make sure you have adequate means
for liftingthe cooler in place.
Make sure the mounting sudt_ceis level
in all directions.
• Makesure anyductworkandelectrical
needscomplywithlocal,state,county,
and federalcodes.
Caution: Aft electrical in-
with local buflding and
safety codes, and must be
stallations must comply
performed by qualified
personnel only. ,
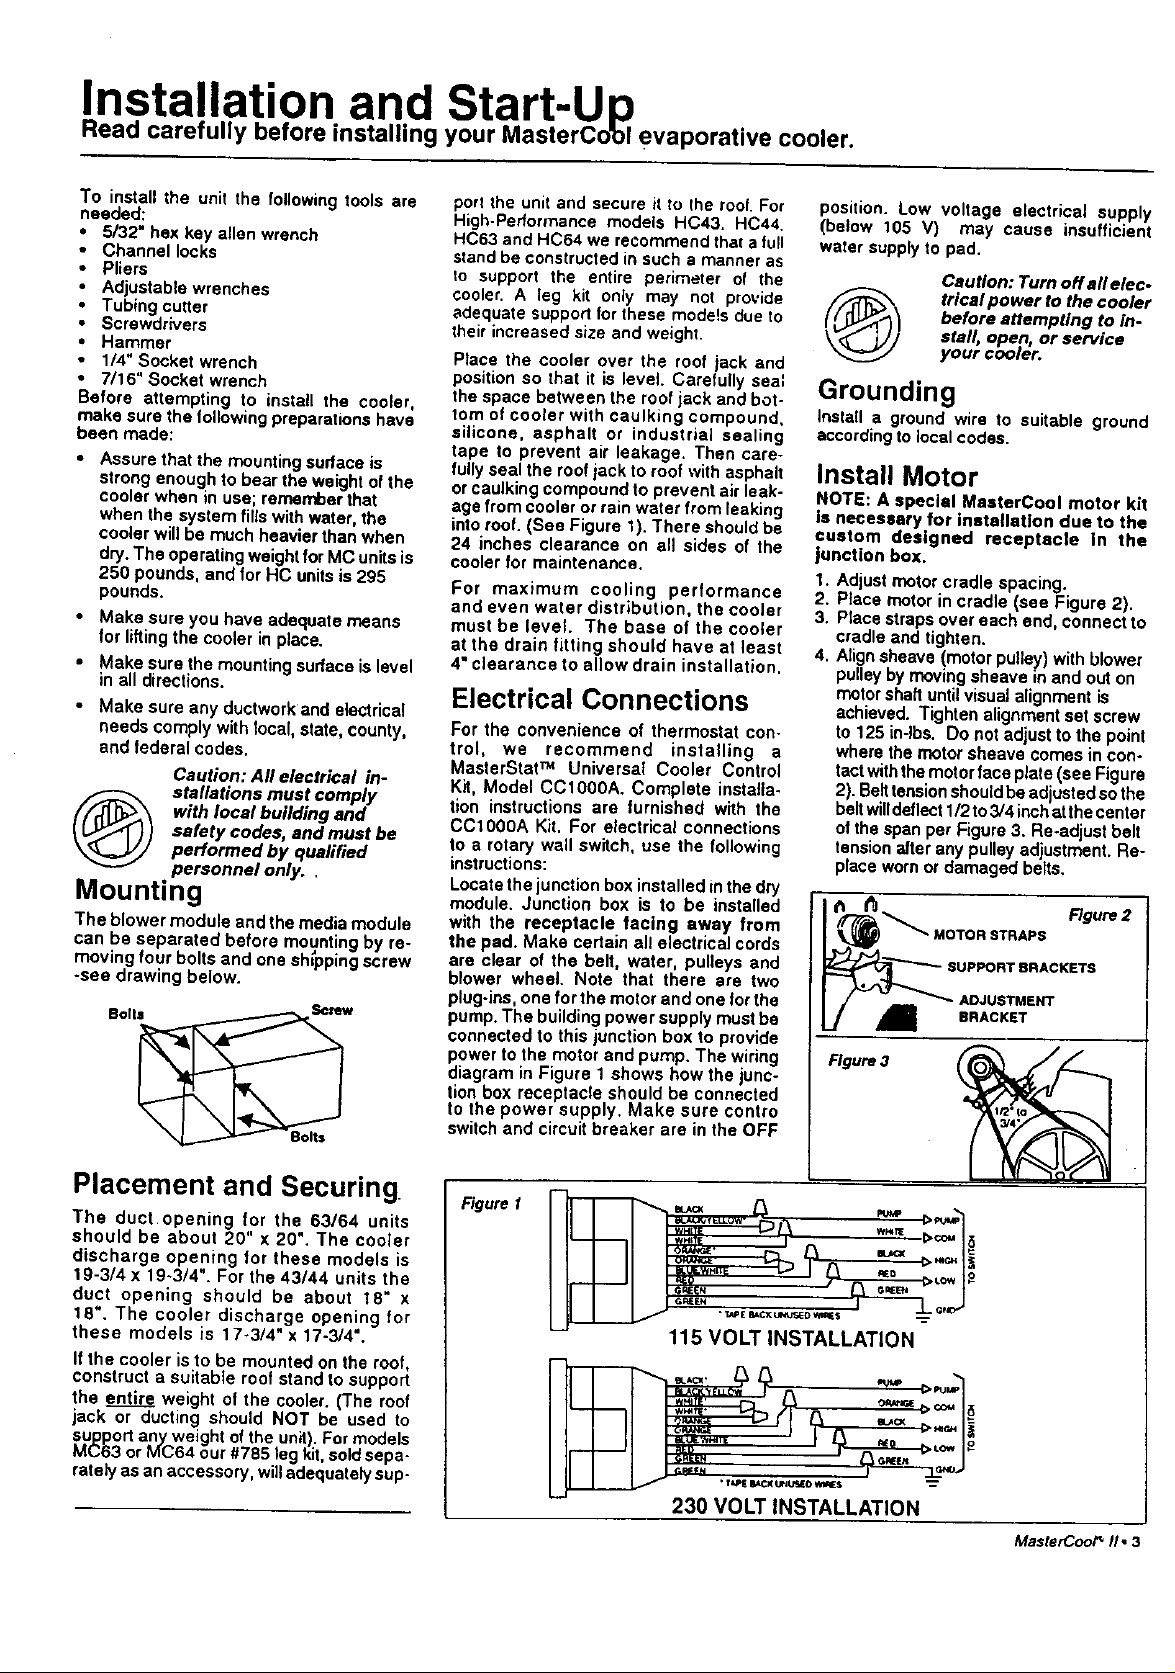
Mounting
The blower module and the media module
can be separated before mounting by re-
moving tour bolts and one sh_ppingscrew
-see drawing below.
port the unit and secure it to the roof. For
High-Performance models HC43. HC44.
HC63 and HC64 we recommend that a full
stand be constructed in such a manner as
to support the entire perimeter of the
cooler. A leg kit only may not provide
adequate support forthese mode!s due to
their increased size and weight.
Place the cooler over the roof jack and
position so that it is level. Carefully seal
the space between the roof jack and bot-
tom of cooler with caulking compound,
silicone, asphalt or industrial sealing
tape to prevent air leakage, Then care-
fully seal the roof jack to roof with asphalt
or caulking compound to prevent air leak-
age from cooler or rain water from leaking
into mot. (See Figure 1). There should be
24 inches clearance on all sides of the
cooler for maintenance.
For maximum cooling performance
and even water distribution, the cooler
must be level. The base of the cooler
at the drain fitting should have at least
4" clearance to allow drain installation.
Electrical Connections
For the convenience of thermostat con-
trol, we recommend installing a
MasterStat TM Universal Cooler Control
Kit, Model CC1000A. Complete installa-
tion instructions are furnished with the
CC1000A Kit. For electrical connections
to a rotary wall switch, use the following
instructions:
Locate the junction box installed inthe dry
module. Junction box is to be installed
with the receptacle facing away from
the pad. Make certain all electrical cords
are clear of the belt, water, pulleys and
blower wheel. Note that there ere two
plug-ins, one for the motor and one for the
pump. The building power supply must be
connected to this iunction box to provide
power to the motor and pump. The wiring
diagram in Figure 1 shows how the junc-
lion box receptacle should be connected
to the power supply. Make sure contro
switch and circuit breaker are in the OFF
position. Low voltage electrical supply
(below 105 V) may cause insufficient
water supply to pad,
Caution: Turn off afi elec-
trical power to the cooler
before attempting to in-
®
stall, open, or service
your cooler.
Grounding
Install a ground wire to suitable ground
according to local codes.
Install Motor
NOTE: A special MesterCool motor kit
Is necessary for installation due to the
custom designed receptacle In the
junction box.
1. Adjust motor cradle spacing.
2. Place motor in cradle (see Figure 2).
3, Place straps over each end, connect to
cradle and tighten.
4, Align sheave (motor pulley) with blower
pulley by moving sheave in and out on
motor shaft until visual alignment is
achieved. Tighten alignment set screw
to 125 in-lbs. Do not adjust to the point
where the motor sheave comes in con-
tact withthe motorface plate (see Figure
2). Belttensionshould be ad usted sothe
beltwi defect 1/21o3/4 nchatthecenter
of the span per Figure 3. Re-adjust belt
tensionafter any pulley adjustment. Re-
place worn or damaged belts.
MOTOR STRAPS
_---'"-___U PPORT BRACKETS
F/gure 3
AE_IUSTNENT
BRACKET
Placement and Securing
The duct opening for the 63/64 units
should be about 20" x 20"+ The cooler
discharge opening for these models is
19-3/4 x 19-3/4". For the 43/44 units the
duct opening should be about 18" x
15". The cooler discharge opening for
these models is 17-3/4" x 17-3/4".
If the cooler is to be mounted on the roof,
construct a suitable roof stand to support
the entire weight of the cooler. (The roof
jack or ducting should NOT be used to
support any weight of the unit). For models
MC63 or MC64 our #785 leg kit, soldsepa-
rately as an accessory, willadequately sup-
Figure t
230 VOLT INSTALLATION
MasterCoot _ I/, 3
Page 4

Caution: Disconnect all
electrical power to the
cooler and insure that belt
is not rotating before ad-
justing belt tension. Do
not adjust belt tension by
changing dlamefer of ad-
justable sheave. Adjust
belt tension only by ad-
justing motor brackeL
Rotate blower wheel by hand to see that it
moves freely without rubbing against
housing.
Check motor mountinq to be sure all
screws and nuts are tightened down.
If cooler is connected to ductwork, air
delivery and motor amperage will be de-
creased due to increased duct resistance.
To compensate for this, the motor pulley is
adjusted out or in. using an ammeter to
check motor amperage. For maximum air
flow check motor amperage with all ser-
vice panels in place. To prevent overload-
ing of the motor, check amperage with all
windows and doors open and all relief
systems operating. Tighten pulley set
screw to 125 in-lbs.
A qualified serviceman is required to ad-
just motor before start-up.
maximum amperage out-
put as stamped on the mo-
Caution: Do not exceed
tor specification plate or
qualified persons with proper electrical
equipment and knowledge should ad-
just variable pitch sheaves. Do not allow
water to get on the motor, as it will burn
out the windings.
motor can overload. Only
Note on multi-speed switches: A switch
with separate terminals for the pump is
recommended.
Install Overflow
Standpipe and Drain Line
Install overflow drain bushing in bottom
wet section onthe right side. Screw plastic
overflow standpipe into the drain bushing
and tighten snugly. Slide rubber washer
over drain bushing, push through bottom
of cooler, and tighten nut, Connect a per-
manent drain (copper/pvc/garden hose) to
the drain bushing for draining the unit and
overflow protection. Drain should be in
accordance with local plumbing codes.
FTgure4
Connect Water Supply
Connect water line to cooler as follows:
• A water valve should be installed at a
convenient location, to allow the water
supply tobe turned onand off. 1/4"tubing
is used to provide water to the cooler. A
water connector kit, availubte from your
dealer provides the necessary items.
• Install float valve in the side panel of the
wet section opposite the pump.
• Place tube nut and ferrule over end of
tubing.
• Insert tube intofloat valve, and tighten to
Secure.
qOTE: Soft water equipment should not be
mttached to any water lines going "to a
ooler. "Soft Water" will cause corrosion
md decrease effective life of cooler.
Figure $
COMPRESSION NUT
FERRULE • _.
_RULE___
Fasten 1/4 inch water supply line to cooler
stand using tubing clamp and self-drilling
screw. Locate tubing clamp 18 inches or
less from water supply line entry intocabi-
net. (See Figure 5A)
f
SI_LF-DRtLUNG
1/4" WATER
SUPPlyLINE
Faucet Use
Connect water line to water supply, as fol-
lows (refer to Figure 6).
• Install a sillcock and water valve on
faucet, as shown. Place tubing nut and
ferrule on tube end and insed in valve.
Tighten nuts on valve and tube.
l( faucet is notto be used for water supply,
installvalve on water lineto be used. Follow
instructions above for securing tubing to
valve.
Figure6 .,_,_ |t_--TUBING FROM
FAUCET , • "
SCREW
Adjusting Water Level
and Float Valve
Fillreservoir as follows:
• Turn water supply on. Check for good
pressure and flow from float valve.
• When float valve shuts off. check water
level. Water level should be from 1/2 to
1 inch below top edge of overflow
standpipe. It may be necessary toadjust
float valve by bending the rod (refer to
Figure 5).
• Check reservoir and all connections for
leaks.
Install Bleed-Off
A bleed-off system is provided with your
MastsrCoo| cooler. We recommend the
bleed-off be installed and maintained
while operating this unit. Its purpose is to
eliminate a small quantity of water from
recirculatlon thus reducing scale build-up.
Rgure 7
Adjust bleed-off by shorteningsmalltube to
get the proper bleed rate shown below.
Disposal ofbleed-off water shouldcomply
with local codes.Use of chemical additives
or any water treatment otherthan bleed-off
isnot recommended for thiscooler. Failure
to use the bleed-off with MasterCool pad
greatly increases the mineral deposits and
reduces the expected life of the
MasterCool pad. and could result in early
replacement of pad at your expense.
SECONDSTOFILLA12OZ.CAN
Model
MC43/44
MC43/44
HC43144
HC43/44
MC63;64
MC63/64
HC63/64
HC63/64
Install bleed-off as
follows:
• Install 1/4" black
plastic tubing into
pump as shown in
Figure 7.
• Insert smaller
black plastic
tubing into 114"
tubing as shown
in Figure 7.
Motor Hp Seconds to fill
1/2 100
3/4 80
1/2 80
3/4 65
3i4 70
1,0 60
314 60
1.0 50
Install Float Shield
• Installshieldoverfloatvalveas shown in
F)gure 8.
• Loop of cotter pin fits into hole in shield.
• Cotter pin loop and hole must face
MasterCool pad.
4 • MesterCooP II
WASHER
F.nau.E
vW',v .
IEIIT'_p R PIN
SILLCOCK
Page 5

Required Exhaust
Openings
Using standard CFM ratings, a common [[_.L_
method of determining howmuch to open
doors or windows for proper exchange is:
2 square feet per 1000 CFM.
Pre-Start-Up Inspection
Assure that:
• Cooler mounting is level; duct is sealed.
• Cabinet issecurely fastennd tomounting.
• Cooler cabinet is grounded. Electrical
connections are safe and secure.
• Motor, pump, and float installed. Motor
and pump plugged into junction box.
• Pump impeller turnsfreely. Remove pump
and basket. Remove impeller cover (see
FigurelO and spin the impeller to assure
free rotation).
• Water lineconnectedsecurelywithout
leaks.Water supplyturnedon.
• Floatadjusted forproperwaterlevel.
• Blower, shaft, collar, and pulley set bolts
are snug (do not overllghtan pulley boll).
• Pulley alignment okay; belt tension okay
(see page 3 for instructions).
• Blowerbearingsarelubricated.Filloilcup
witha goodgradeSAE2OWor30W oil
• Pad is pre-soaked. Check to see that
pump starts and pad is evenly Wet.
• Open windows or vents in house.
• In case of trouble in any oi these stag_,
refer to the Troubleshooting Chad on
page 7.
Periodic Inspection
In addition to the planned maintenance
schedule, regular inspection of your
MasterCool cooler willenhance the chance
for longtrouble-free service life.
Checklist
Check for leaks
0 Is cooler level?
0 Are there dry spots on the pad when
cooler isin operation?
CI Does blower turn freely?
0 Isthere 25 Ibs.tension (models 63/64)
20 It=. tension (models 43/44) on drive
belt?
0 Are bolts, nuts, and set screws snug?
0 Is float set correctly?
0 Iswater pan clean?
Caution: Never operate unit
with service panels, pad
or inlet _ter removed This
will result In amoverloaded
€ondition and may damage
the blower motor.
Cabinet Cleaning and
Touch-up
The cabinet and all internal parts except
blower and drivesare fumlehed with a hard
appliance-type Polybond• coating. This
surface is highlyresistant to scale and cor-
rosion.A softcloth, warm water, and a mild
cleanser will bdng all surfaces back to like
new appearance. Avoidsteel wool or sand-
paper in normalcleaning of the cabinet.
Scratches and Bare Metal
In the unlikelyevent that scratches or bare
metal areasoccur, sand orrubthearea with
steel wool to prepare the finish. Paint with
standard paint or touch-up paint available
through your dealer.
Changing Pad
This should be done after 5 years or if
passages are clogged.
NOTE: Hosing off inlet face of pad can
unclog passages of dust, and minerals ac-
cumulated there. Light ecrapinge of the in-
take edges of the pad will not harm its
openings and will remove more stubborn
scale.
Caution: Avoid splashing
water on blower motor.
• Remove wet section top.
• Remove water distdbutor assembly,
disconnecting hose.
• Lift out used pad sections.
• Replace wllh new MastarCool pad only,
available from your dealer. Aspen and
other evaporative pads WILL NOT
WORK.
Maintenance Schedule
Regular maintenance isa key to long successful service ofyour MasterCool cooler. The selvice schedule willhelp you maintain an efficient
unit with good appearance.
NOTES:
MAINTENANCE REQUIREMENTS ANNUAL ANNUAL
(LOCATION IN MANUAL) START-UP SHUT DOWN
Changing pad (p. 5) At beginning of 6th
year or if passages
are blocked.
Cleaning & touch-up (p. 5) X
Cleaning water pump (!o.6) X
Lubrication (p. 6) X
Adjusting bell tehsion (p. 6) X As needed
Periodic inspection (p. 5) Duringcoolingseason Duringcoolingseason
Snugging downset screws & nuts(p. 6) X
Adjustingblend-off(p.4) X
Washing down pad withhose (p. 6) X
Drain allwaterlines toand fromthe
cooler toprevent freezing X
DO NOT UNDERCOAT THE WATER
RESERVOIR.
Your MastarCoolII cooler'swater reser-
voirisfinishedwithaPolybond®appliance
type finish. It is so hard, asphalt type
coolerundercoatwillnotstickto it.Under-
coat will break free and clog pumpand
waterdistributor.
Do not use cooler cleaners,
cooler treatments, or other
additives in this evaporative
cooler. The use of any of
these products will void your
warranty and may impair the
life of your evaporative cooler.
MasterCooP II* 5
Page 6

Adjust Belt Tension
Each timeyou inspect your cooler, be sure to
check belt tension on motor/blower assem-
bly. Check belt condition and replace it if
frays or defects appear: Check alignment of
blower pulley with motor pulley.
Lubrication
Blower shaft bearings need periodic lubri-
cation. The oil cups on the blower shaft
bearings should be filled with a good grade
SAI= 20W or30W oilwhen necessary. Under
normal use, oiling is required every three
months of operation. DO NOT OVER OIL.
The pump and blower motor do not require
lubrication.
Four
tabs
Rgure 9
Cleaning Water Pump
Disassemble and clean water pump as
follows:
• Disconnect pump from electrical box.
• Remove pump
• To Prevent breakage, carefully release
the four snap-out tabs, and lift impeller
base plate from the pump body.
• Using a mild detergent solution, wash
all deposits from inside around impeller
and impeller base plate.
• Spin impeller to dislodge any foreign
material.
• Rinse and reinstall impeller base.
• Reinstall pump.
• Make sure to usa a pump screen or
basket. Check to sea if old one needs
replacing due to clogging
Caution: Do not allow pump
to topple over and become
®
submerged; water will
damage pump motor.
Snugging Down Set
Screws and Nuts
Location of set screws and hardware that
should be snugged down.
• Pulley set screw (150 in-lbs)
• Blower set screws (150 in-lbs)
• Wet and dry module connection bolts
Washing Pad
Annually, mineral a.ccumulation and dust
should be washed off the intake sudsce of
the pad. Use garden hose and nozzle. A
paint scrapper may be used to remove hard-
ened scale from edges of intakepassages in
pad.
Parts Replacement
Motor
Removingold motor
• Disconnectpowertocooler
• Unplugfromjuncflonbox-4pinplug
• Loosenalignmentset_:mw on
motorpuney(onmotorsideofpulley)
andmmevebaitandmotorpulley,
• Flemovemotorstrap6.
• Pul motorfrombrackets,
Pump
Removing old pump
• Disconnectpowertocooler.
• Unplugfromju_ box(3pinping),
• Unscrewpumpbracket.
• Liftoutpump.
Replacing motor
• Reverseproceduretoinstall
new motor,
Replacing pump
• Remove impeller base plate at
bottom or pump by releasing tour
tabs,
• Spin impeller to assure free
rotation.
• Reinstall impeller base plata.
• Clean old pump basket or replace.
• Race pump in basket.
• Attach bracket tocabinet.
• Connect pump plug to junction
box (3 pin receptacle).
• Connect pump hose to hose
fitting.
Bleed-off
Removal of old bleed-off
• Replacebleedlineif necessary.
Float
Removing old float
• Removefloatshield
• Removenutand ferrulefrom
waterline.
• Removelockwasherand nutfrom
valve.
• Liftfloatout o!cabineL
Installation of bleed-off
assembly
• To installbleedlinetopumpsee
Rgere7.
• Bleedllneshouldfilla 12ounse
beveragecanasindicatedinchart
onpage4.
• Adjustblasdrateby shoriening
smallbleedtuba.
Replacing or installing float
valves:
• Secure nutand lockwasher
holdingfloatto cabinet.
• Placetubanutandferruleoverend
oftubing.
• Inserttubeintofloat valveand
tightentosecure.
• Turnon lauoatallowingwaterto
enterthroughvalve,
• Fill from1/2 to I inchbelowtop
edgeof overflewstandpipe.
• Adjustfloatballby banding the
float armwitha pairol pliersto
achieve correctangle.
• Reinstallfloatshield.
Page 7

Troubleshooting
Symptom Possible Causes
• Unit fells to Itart of deliver NO elactrlcal power io unit
Ilr • Fuse blown
• _N breaker_ed
• Co_s) damagedor
unplugged
• Bel too looseortoo tlgnt
• M_ cve_ andfrozen
• _t_m
• Blowerwileelbeadngsd_y
• Meleeoverloaded
• Fauly wiriogm _lofts
• Unit lUlrts but eir delivery
Inidequete
• I_dequete cooling
• .ot_ cycles on and off Exceesk,e b_dllenslon
• Wear dmlnl_ from • FIO_[arm Improperly • Ad_sl
overflow standpipe e_Justed
• Knocking or banging Bearings dr/ Lubd_e blowerbea/_lgs
sound • Wbeelrul_r,gt_v,w * Irebedblowxabet.eol_,
• Blower shakes or rattles Bck orpulley loose Inspectbelland ad_ I needed.
• Excessive humldl_ In _a_e e_lau_ Op_ _x_ Or_ la
harms vengei_on.
i Mu_y or unpleasant odor _ain _ s_ wal_ In _oir Dm_ Ilush and dean re_wo_
_ _ s_e_ U exheu_
Motor
Be4ioo bose
MamrCo¢padp_
_lao ex_uM In house,
Alrreg_siers_robe_
pos_oned.
Insufnclari w_. liow Io pad. pad
r_o(weA.
:Pad
_'_n h_ _
• Loose¢o_¢fk_ In_ler
mm
• _ b_fl w_
• Blow_ •heirtighto_frozen
Meleeoverloaded
Incormd sheaveadjustment
P_eys mba_gned
_panels, padorInio_liter
• ,_-_eatioIInatvalveleak_g *_ lanai',_ve
• _r_t_ ._e_
hous_orro_k_o_beJ_ce _ e_ puky.N_vner_an_
• L_ • R_o_ _d
• Pad _ldewed orclogged • Checkbleed-_ seeing
• Padnotcomplatel)'v_t beiore D_ypadanclbogotapan
coolerIsturnedon *Turnonwale_beioms_adlngu_
• Newpad * NOTE:Themwillbea sl_l ode€"
Remedy
Checkpower
• Replacetuse"
• Resetbreaker"
•ffcondition_s, can
eleclrk_n
• PlugIn co_ or replaceIf
damaged
• Adjust_n ten_
• Replacemotor
• Adjustbel tensionorreplace
• Lubdc=sblowerbearlr_s
• Us_g=nm_ef, adlua
rnolcrio lull bad amps(see
motetnamep_e).
• cal einctddan
alum windows or doors to
Increaseventkellon
Usingamm_er,aclu_ motorto
lull_ (seemotornamep_e)
AdJu_be#lanslonm replaceN
needed
R_seormp_cepad
O_oen w_dows or door to
InceNse ventliollon.
AdJusl to direct air as _slmd.
Check water Q_n wstem
• Rinseorrep_ce pad
• C_ _Ins
• U_ pump.Cban Im_Uer
_ ofaNfo_ m_er
• Checkfor leeksandcorre_
• Rasel orreplacebleed-offkit
• Cio;mbasket
Adjustbelttension
• Lubrk:atebk)werbeadngsand
rotatesha_by hand(poweroff)
Correct-donotexceedname
plataamps.
Servlcernanshouldadjust
Ct_eckaNgnment
Neveroperateu_t withsauce
paneb,pador'_et flllarremoved.
INs wiNresultIn an evade•bed
€o_dl_ andmaydamagemeier.
,,wt_ben_-rit_acepuny.
noticedonInNlaJs_-up. Tbeodo¢
wEdlsappeaJ-vAhhthe11mtk_v
dayso_opera_bnI bleedolfIsused.
Getting the most
from your cooler
Your evaporative cooler is a finely crafted, eco-
nomically operating unit built on decades of
know-how and reseamh. It serves as the head of
an overall air cooling and moving system for your
home. But there are a number of ways you can
maximize the comfort, efficiency, economy and
convenience of your total cooling system.
Maintenance
Regular maintenance as recommended in this
manual, is essential for cooling comfort, extend-
ingthe life of yourcooler, and avoiding unneces-
se_/pads replacements. Start-up and shutdown
servicing should never be ovedooked.
Add-On Coolers
Coolers come in a wide array of sizes, horse-
power, and capacities, suitable forpatio, garage,
guestroom, and sofodh, More than one cooler in
a single home improves the cooling effective-
ness of the system. Owners of refrigerated air
conditioning have found that the addition of an
evaporative cooler vastly reduces their electric
bills.
Insulation
Once your cooler forces cooled air into your
home and pushes the hot air out, good insulation
around your ductworkwill keep the air as coolas
possible. Whola-house insulation will prevent
heat from seeping in and will also improve cool-
ing comfort.
Multi-Speed Motor
The cooling rate can be controlled by increasing
and reducing the amount of cooled air blowninto
your home. Two-speed motors allow you to use
higher speeds during the hottest pad ofthe day,
lower speeds for milder temperatures.
Attic Vents
By exhausting cool air through the attic, you can
reduce the temperature ofthishotspotand make
your home more comfodable.
Thermostat Control
The addition of automatic control makes your
system convenient and efficient. We recommend
the MasterStat TM, Model CC1000A, Universal
Evaporative Cooler Thermostat and Control Kit.
MasterCooP I1.7
Page 8

AdobeAir, Inc. * 500 S. 15th Street • Phoenix, AZ85034
L411004A • 1/96
 Loading...