

Admiral Craft COH-3100WPRO Owner's Manual
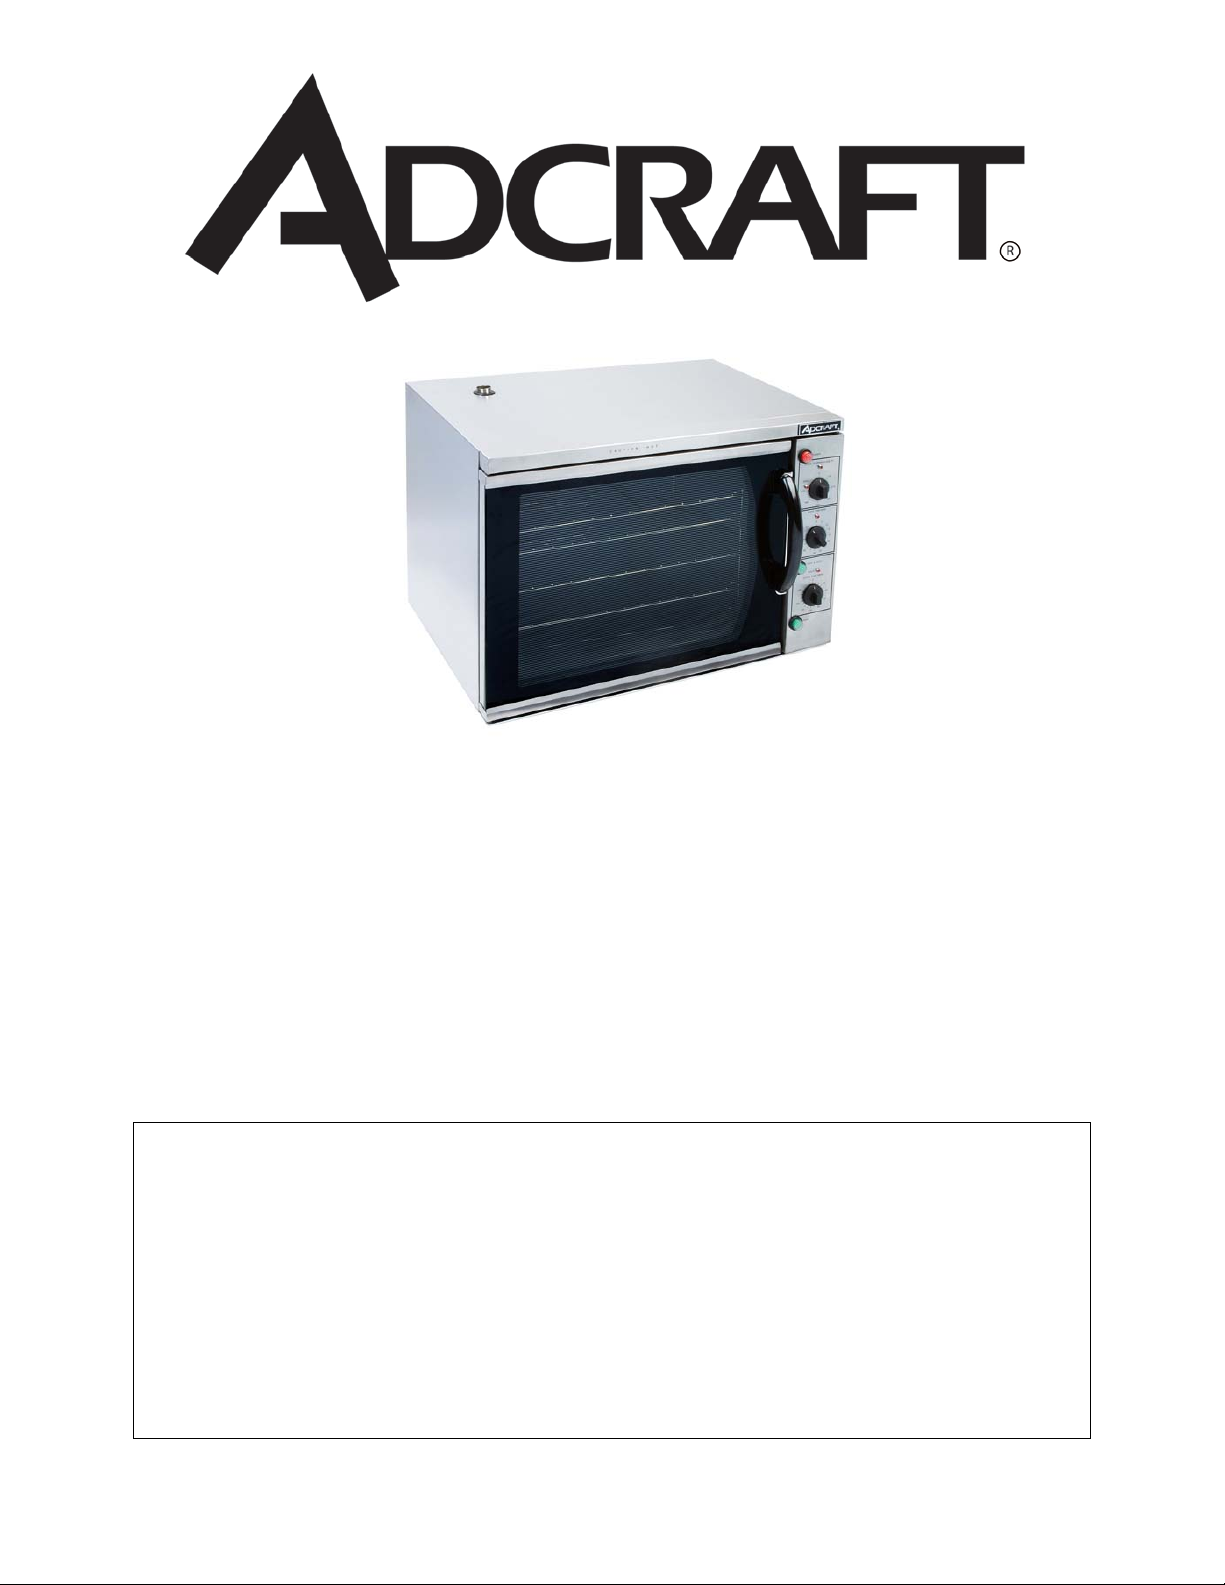
COH-3100WPRO
Half Size Convection Oven PRO
This manual contains important information regarding
your Admiral Craft unit. Please read the manual
thoroughly prior to equipment set-up, opera t ion an d
maintenance. Failure to comply with regular
maintenance guidelines outlined in this manual may
void the warrant y. PLEASE READ!!!

WARNINGS
• Do not touch any hot surfaces
• Plug only i nt o a 3-hole grounded electrical outlet
• Do not immerse unit, cord or plug in liquid at any time
• Unplug cord from outlet when not in use and before cleaning
• Do not operate unattended
• Do not use thi s unit for an ything other than intended use
• Do not use outdoors
• Do not clean unit with a water stream or jet
• Always use on a firm, dry and level surface at least 12” from walls or any other obstruction
• Do not use if unit has a damaged cord or plug, in the event the appliance malfunctions, or has been damaged in any manner
• Keep children and animals away from unit
• Any incorrect installation, alterations, adjustments and/or i mp r oper maintenance can lead to pr op e rty loss and injury.
All repairs should be done by authorized professionals only
• Ensure that the designated power supply is adequate for continual usage and the voltage is correct
BEFORE USE
- Remove all packing and protective plast ic coating from th e side panels
- Operate the oven for 1 hour at 400 degrees F
Baking
1. Turn power on. Once on, the power switch will illuminate.
2. Set thermostat to desired temperature.
3. Once the oven is up to temperature, place product in side oven . Av oid dela y s i n l oading th e oven w ith the door op en a s
this will delay the ovens temperature recovery.
*Note: the ovens fan will switch off and the oven lights will illuminate when the door is opened.
4. Set baking timer by turning the knob clockwise to the required time. The tim e can be adjusted in ei ther direction
throughout baking. For baking less than 10 minutes, first set to greater setting, then turn down to the required time period.
*Not e: This 60 minutes time is completely independent of the oven control.
5. To view the product while baking, press the light switch down on the control panel. The light will stay on while latched in
this position.
6. When the time reached 0 minutes the buzzer w ill sound and the indicator illum in ates. To cancel t he buzzer tu rn the t ime
to the off position.
7. Remove product from oven .
*Note: The ovens fan will switch off and the oven light will illuminate when the door is opened.
Cook & Hold
1. Turn power on. Once on, the power switch will illuminate.
2. Set thermostat to desired temperature.
3. Once the oven is up to temperature, place product inside oven. Avoid delays in loading the oven with the door open as
this will delay the ovens temperature recovery.
4. Set Cook an d Hold timer to desired time. 3 hour time is electrically driven and is set by turning the timer knob in either
direction to the required time. The time can be set when convenient, but will not start working until the oven control is set
and the Roast ‘n Hold switch is depressed.
5. Depress the Roast ‘n Hold switch. The switch will illuminate and the time will begin to count down.
6. To view the product while baking, press the light switch down on the control panel. The light will stay on while latched in
this position.
7. When the time reached the hold position, th e m ain oven therm ostat is turn ed off an d a pre-set hold thermostat located
behind the control panel will control the oven to keep the food warm at the serving temperature as long as required until
the Roast ‘n Hold switch is turned off.
*Note: The hold light will illuminate when the timer reaches hold until the Cook & Hold switch is turned off. The
hold light may co me on br iefl y w hen th e Cook & Hold control is first switched on until the oven heats up beyond the
pre-set holding temperature.
Grilling / Broiling
1. Turn thermostat fully clockwise until the grill/broil position is reached. The grill/broil indicator will illuminate indicating
that the grill/broil function has been set. The heating indicator will also illuminate whenever the element is on. It is also
recommended that the grill/broil mode is only used with the oven door open as the oven fan is then automatically off. If
however the grill/broil mode is used with the door closed, the elements will cycle on/off when oven temperature rises above
300 degrees C (5 70 de gree s F) to prevent the damage to the oven.
2. Place oven rack normally on the top position. When th e element has reach ed brigh t re d (5 m i nutes ), posi tion th e dis h un der
the grill/broil element. Heat food on one side and then turn on the other side. It is not recom m ended t o cl ose door when
grilling/broiling.
3. Set baking timer by turning the knob clockwise t o th e requ ired t ime. The time can be adjusted in either direction throughout
baking. For baking less than 10 minutes, first set to greater setting, then turn down to the required time period.
Note: This 60 minute oven time is completely independent of the oven control
4. When the timer reaches 0 minutes the bu zzer sounds and indicator illum in ates. To cancel the bu zzer tu rns the timer to the
off position .
5. Remove product from oven. This convecti on oven wi ll cook a greater quan tity of food faster, at a low er temperature an d
more evenly than an ordinary oven. When the door is opened the fan will switch off but elements will remain on to provide
quick heat recovery. A high powered t op element is fitted for toasting or broiling.
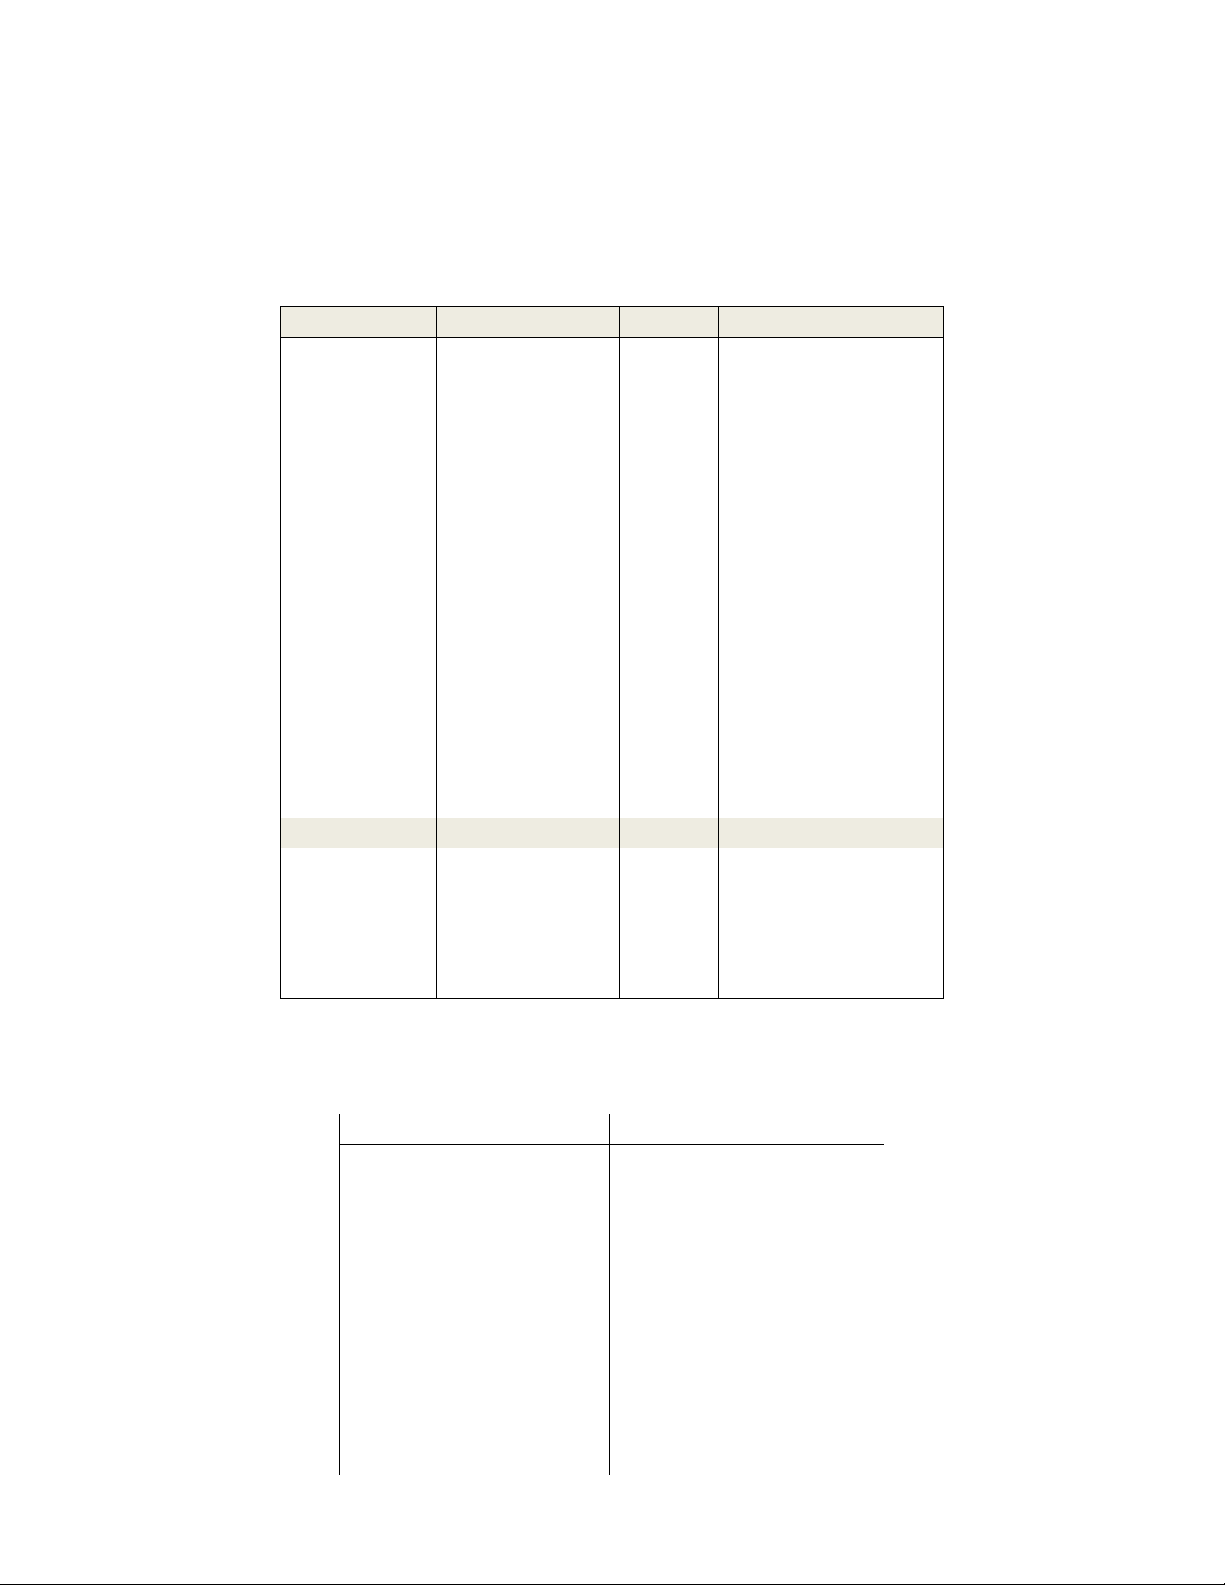
FOOD TEMP C TEMP F TIME
Sponges
Small Cakes
Butter Cakes
Fruit Loaf
Macaroons
Biscuits
Shortbread
Scones
Madeira
Bread
Plain Fruit Cake
Rich Fruit Cake 130 265 2-3 hrs
Gingerbread 140 285 35-50 mins
Baked Custard 130 265 50 mins
Souffle 165 330 25 mins
Rice Pudding 130 265 2-3 hrs
Pastry
Puff 220 430 8-12 mins
Short 175 350 8-12 mins
Flakey 205 400 8-12 mins
Jam 185 365 12-20 mins
Fruit 185 365 35 mins
Roasting
Set the oven temperature to 150-170 degrees C (3 00 degre es F -340 degrees F). The hot air circul ating in the oven reduces
moisture loss and shrinkage. Roasti ng times are reduced by approx imately 10 minutes per kg .
MEAT TIME per kg
Beef - Rare
Beef - Medium 40-50 min
Beef - Well Done 50-60 min
Veal 50-70 min
Lamb 30-40 min
Duck 50 min
Goose 50 min
Turkey 30-40 min
Chicken
-under 1 kg 50-60 min
-over 1 kg 40 min
165 330 10-12 mins
165 330 8-12 mins
160 320 35 mins
150 300 40-50 mins
160 320 15-20 mins
140 285 12-20 mins
130 265 15-20 mins
200 390 10-12 mins
165 330 35-50 mins
175 350 25-35 mins
165 330 1-11/2 hrs
30-40 min
 Loading...