

Adman Technologies Pvt. Ltd.
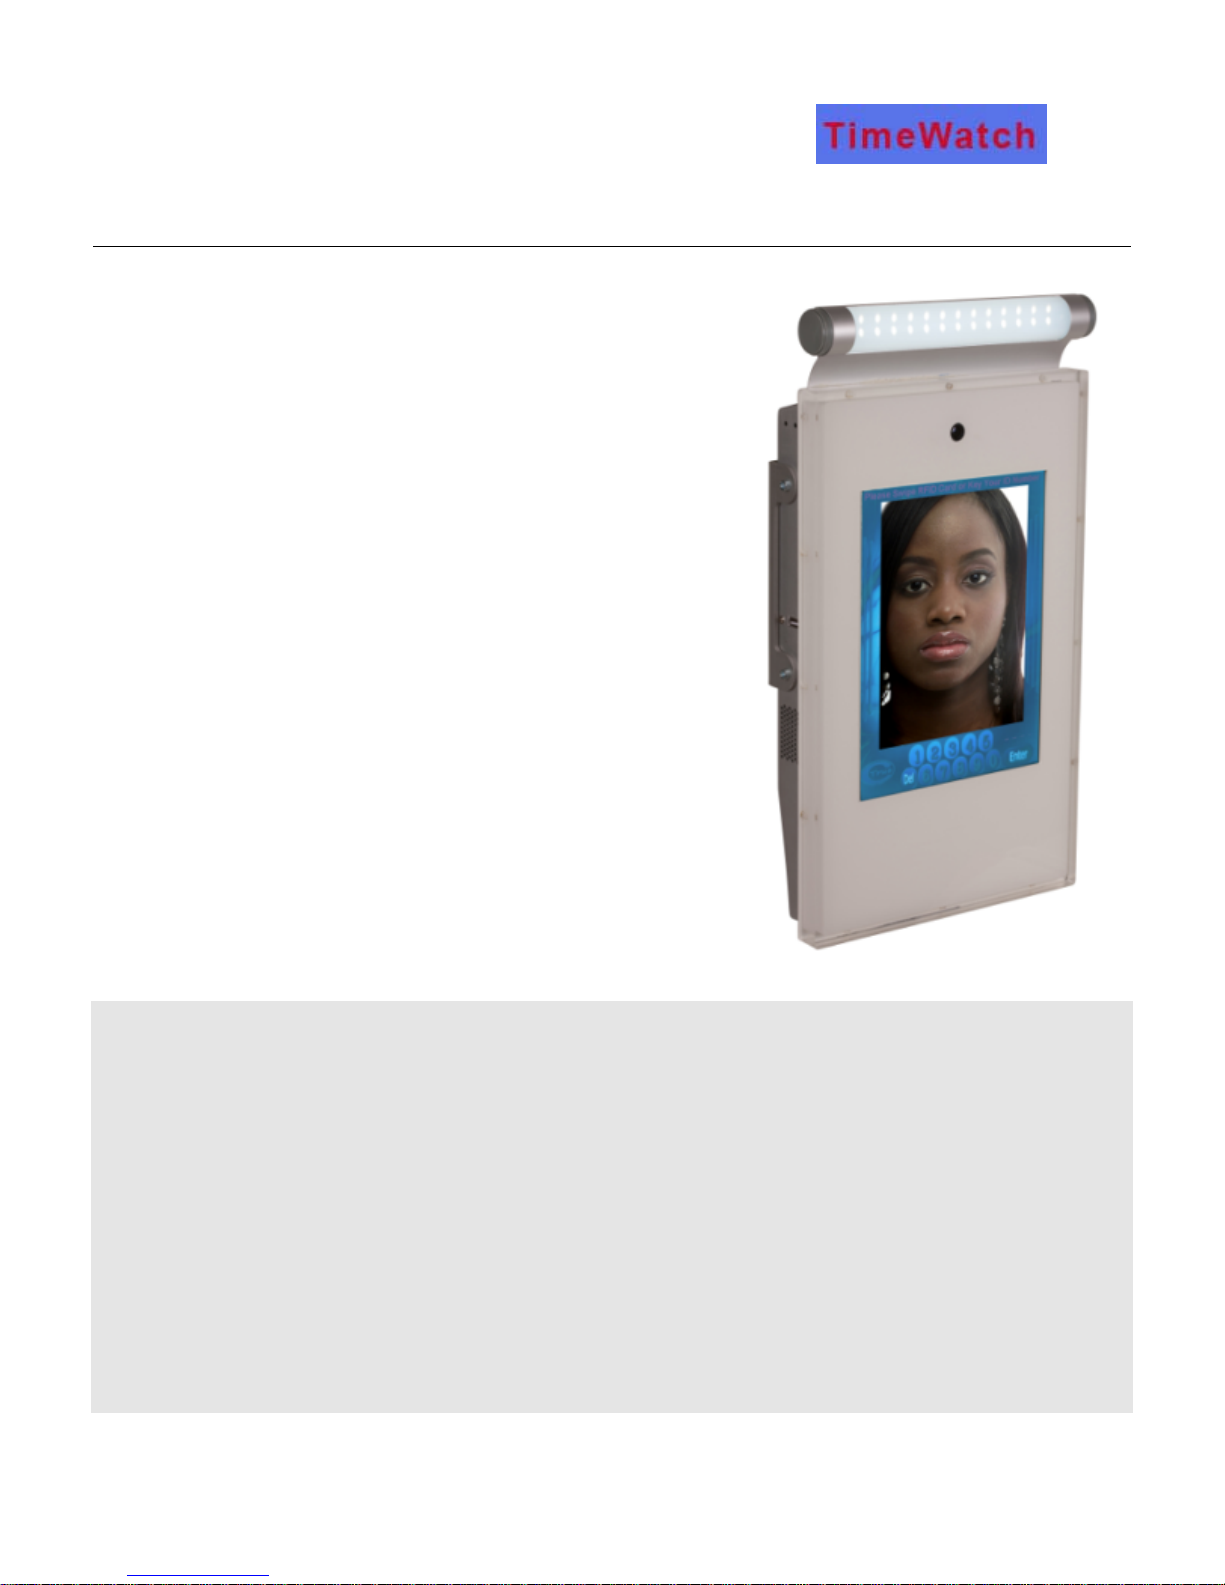
Face-Entry
Face Recognition based Access Control
System Model DH -1(Stand Alone system)
Face - Entry
User Manual

Adman Technologies Pvt. Ltd.
Face-Entry
User Manual
Adman Technologies Pvt. Ltd.
A-53, DDA Shed, Okhla Phase – II
Phone: 011-43119696 * Fax: 011-43119634
E-Mail
Catalog no. CTE0011
28-May-2009
info@admantechnologies.com
New Delhi – 20

Table of Contents
Introduction ........................................................................................................4
Safety instructions..............................................................................................5
Face-Entry operation modes..............................................................................6
System Activation...............................................................................................7
Enroll process ....................................................................................................9
Show personal data .........................................................................................16
Update personal data.......................................................................................17
Delete employee..............................................................................................18
Reports.............................................................................................................19
Administrator Login..........................................................................................24
Logout Administrator........................................................................................25
Remote support................................................................................................26
Face-Entry User Manual V1.1 3

Introduction
ime Watch would like to thank you for purchasing Face-Entry face recognition system.
We in TimeWatch are using all our resources and energy to supply you with an advanced state
T
This manual will instruct you via simple operation guidelines for short and successful assimilation of
the system in your organization.
Face recognition concept is fairly new and people might need some specific instruction how to pose
in front of the system.
Please study the guidelines and help them get verified in the system in the first few times.
of the art face recognition system.
Please contact us on any issue you may need assistance.
For technical issues please contact support@admantechnologies.com
For commercial issues please contact
sales@admantechnologies.com
Face-Entry User Manual V1.1 4

Safety instructions
1. The system has a permanent connection to power line.
Hence, for security reasons it should have an external
standard power circuit breaker for 110/220Vac,
10A current trip, located near the system.
2. Readily accessible disconnect device (two pole circuit breaker) should be incorporated external
to the equipment
3. Appropriate short-circuit backup protection should be provided in the building installation.
Protective devices shall have adequate breaking (rupturing) capacity to interrupt the maximum
fault current (including short circuit current) which can flow
4. There is a danger of explosion in case the lithium battery, embedded in Face-Entry system, is
incorrectly replaced or handled. When the battery is replaced, the same type or an equivalent
type, recommended by the manufacturer, must be used.
Used batteries must be disposed of according to the manufacturer's instructions.
5. System operating temperature range 0˚C to +35˚C
System storage temperature range -20˚C to +50˚C
6. System package gross weight is 8 Kg
System net weight is 5.5 Kg
5

Face-Entry opera tion modes
Face-Entry system operates in three modes:
1. Match mode – This is the normal daily mode, which allows users/employees face recognition
based authentication.
2. Administrator mode - This mode enables enrolling new users/employees, updating the database
and producing reports.
3. Service mode – Reserved mode for TimeWatch's Technical Support team.
6
System Activation
Face-Entry activation process designed to be as simple as possible, however since we have to secure
the biometric information only authorized person may activate the system.
Please perform the following steps to activate the system:
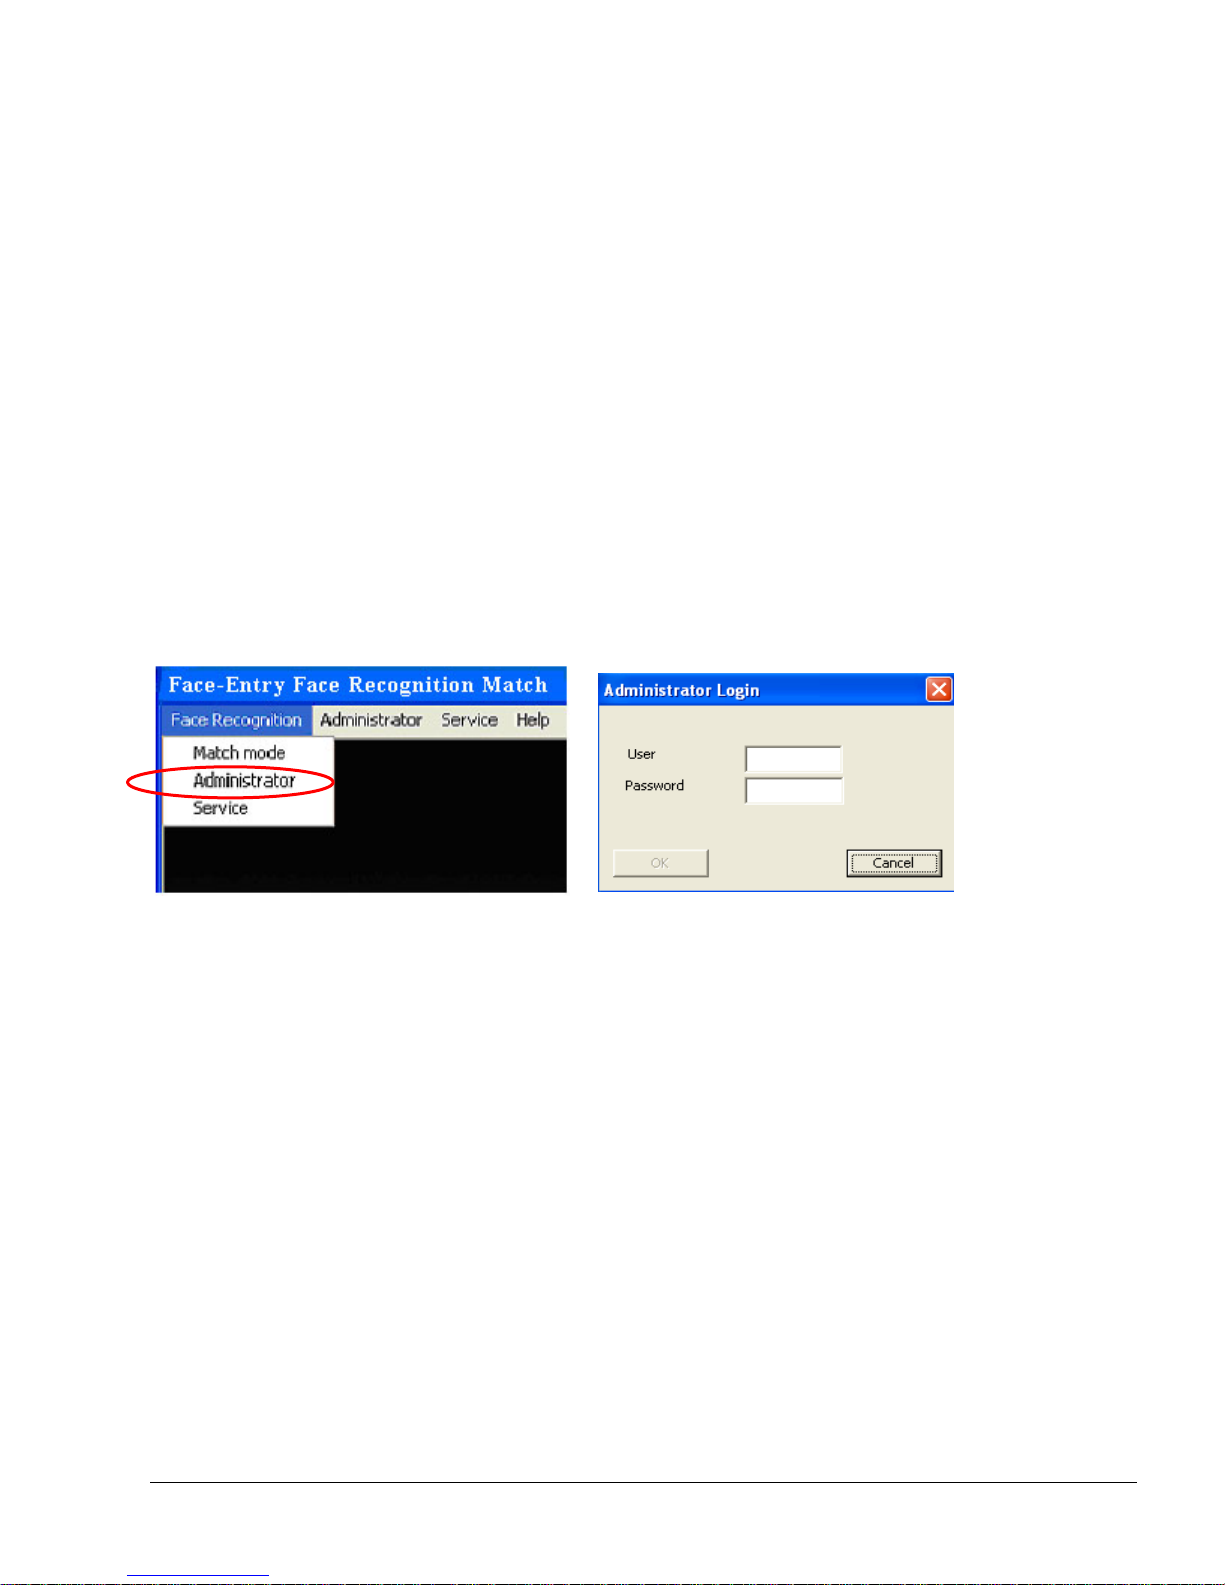
1. Using included wireless keyboard press the Escape button to exit Face-Entry main application.
2. In the main menu select > Face Recognition
3. In the dropdown menu select > Administrator
4. Login using the default username and password:
User: TIMEWATCH
Password: TIMEWATCH
NOTE! Username and Password are key sensitive.
5. You are now able to enroll new users to the system for authentication as described in page
number 9.
7

6. After system activation you can change default username and password by selecting
Administrator dropdown menu > Change Username and Password
7. Important! Logout Administrator every time you finish using it.
8
Enroll process
NOTE! Only Administrator has the privilege to Enroll.
The unique identifier of each user can be one of the following:
1. RFID card - A new card should be allocated to the new employee and his/her name printed on
the card. Please make sure the RFID card you are using is compatible to the system RFID reader
as described in system specifications.
2. 4 digits employee ID entered using the touch screen keypad.
3. Please perform the following 5 steps:
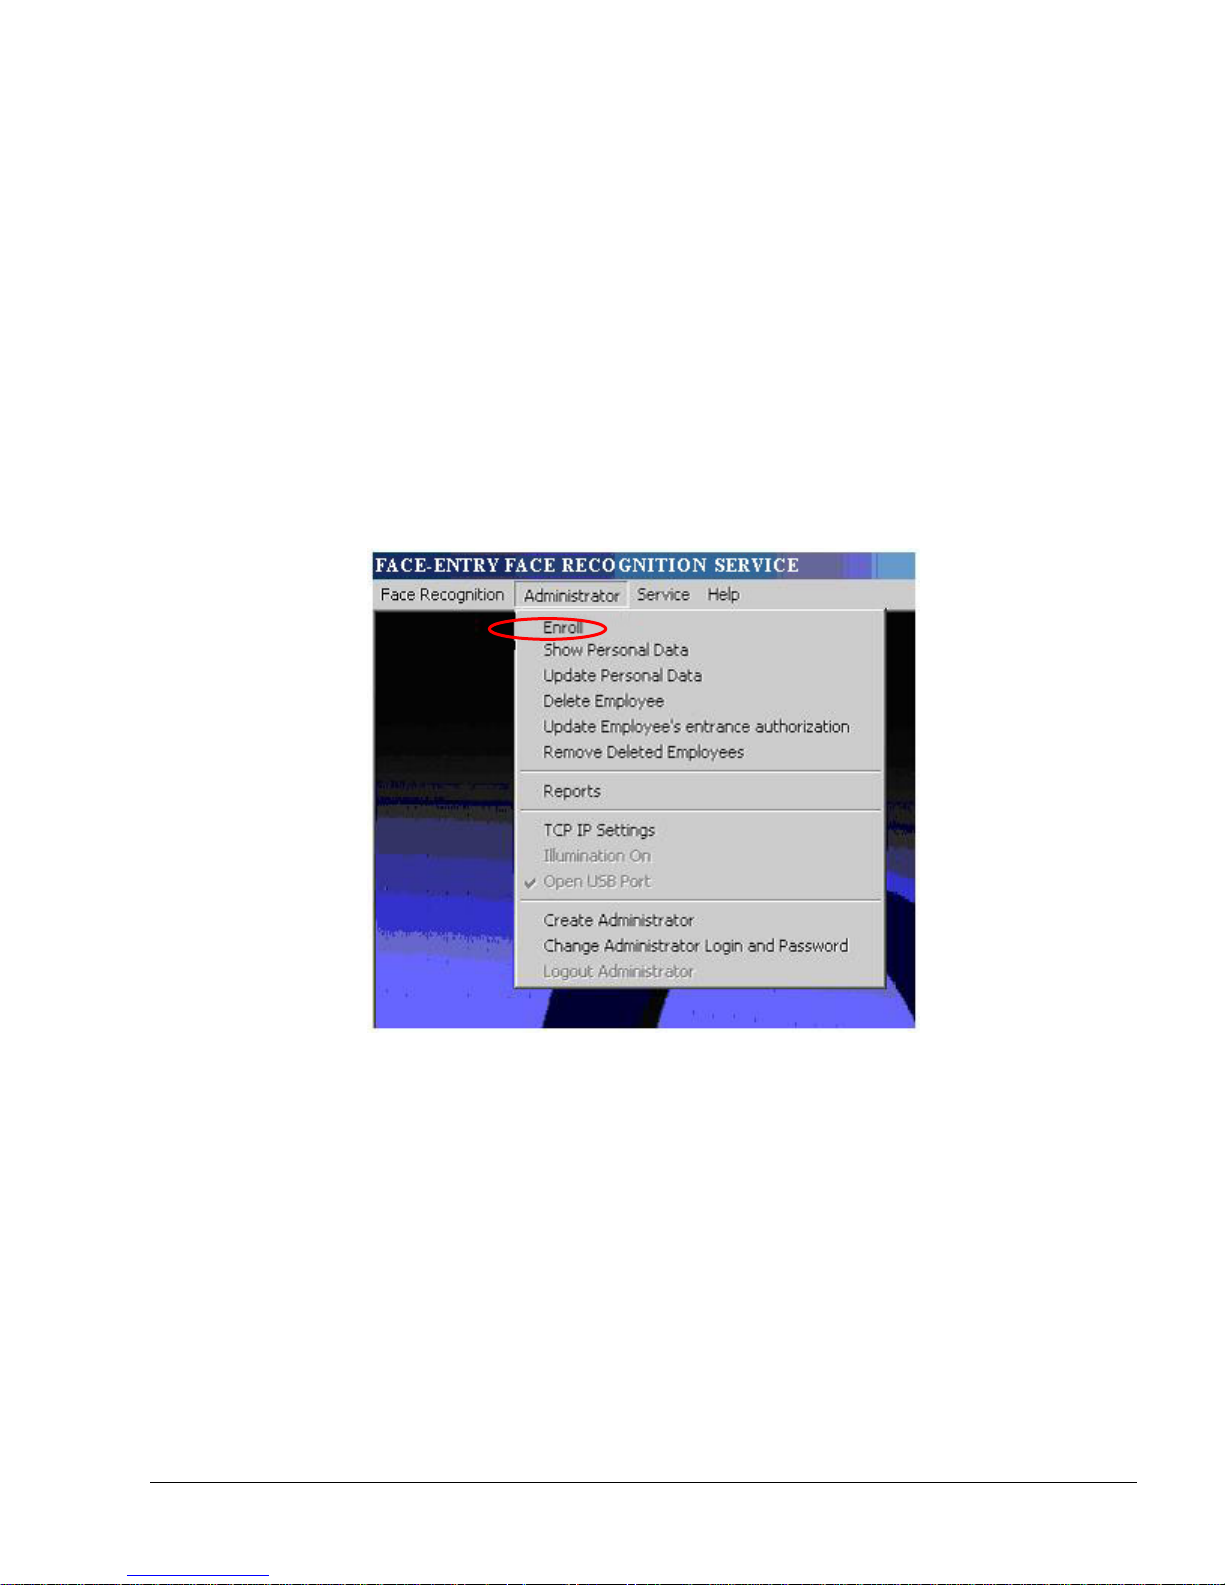
4. Select “Enroll” from Administrator dropdown menu
9

5. Present the new employee RFID card as shown in the picture below
or type the 4 digits employee's number and press “Enter” using the
touch screen key pad.
6. If the RFID card or the 4 digits employee number is already in use following question will appear:
7. Press “Yes” if you would like to reassign the specified ID and “No” if you wouldn’t
8. The system is waiting for the enrollee to look at the camera for capturing the
face for future authentication.
The user should stand steady in front of the camera (~60 cm) and look straight to the camera
when the face is fully exposed without tilting the face.
Face-Entry instructs the user interactively how to pose in front of the camera and uses a smart
interactive interface, which helps the enrollee to get enrolled quickly.
A red square around the face symbolizes that the system detected a face in front of it but needs
more information for the process completion.
Once the red square turns into green information is sufficient and the enrollment could be
performed. A successful capture is performed within 1 second ended with a message "Capture
succeeded".
10
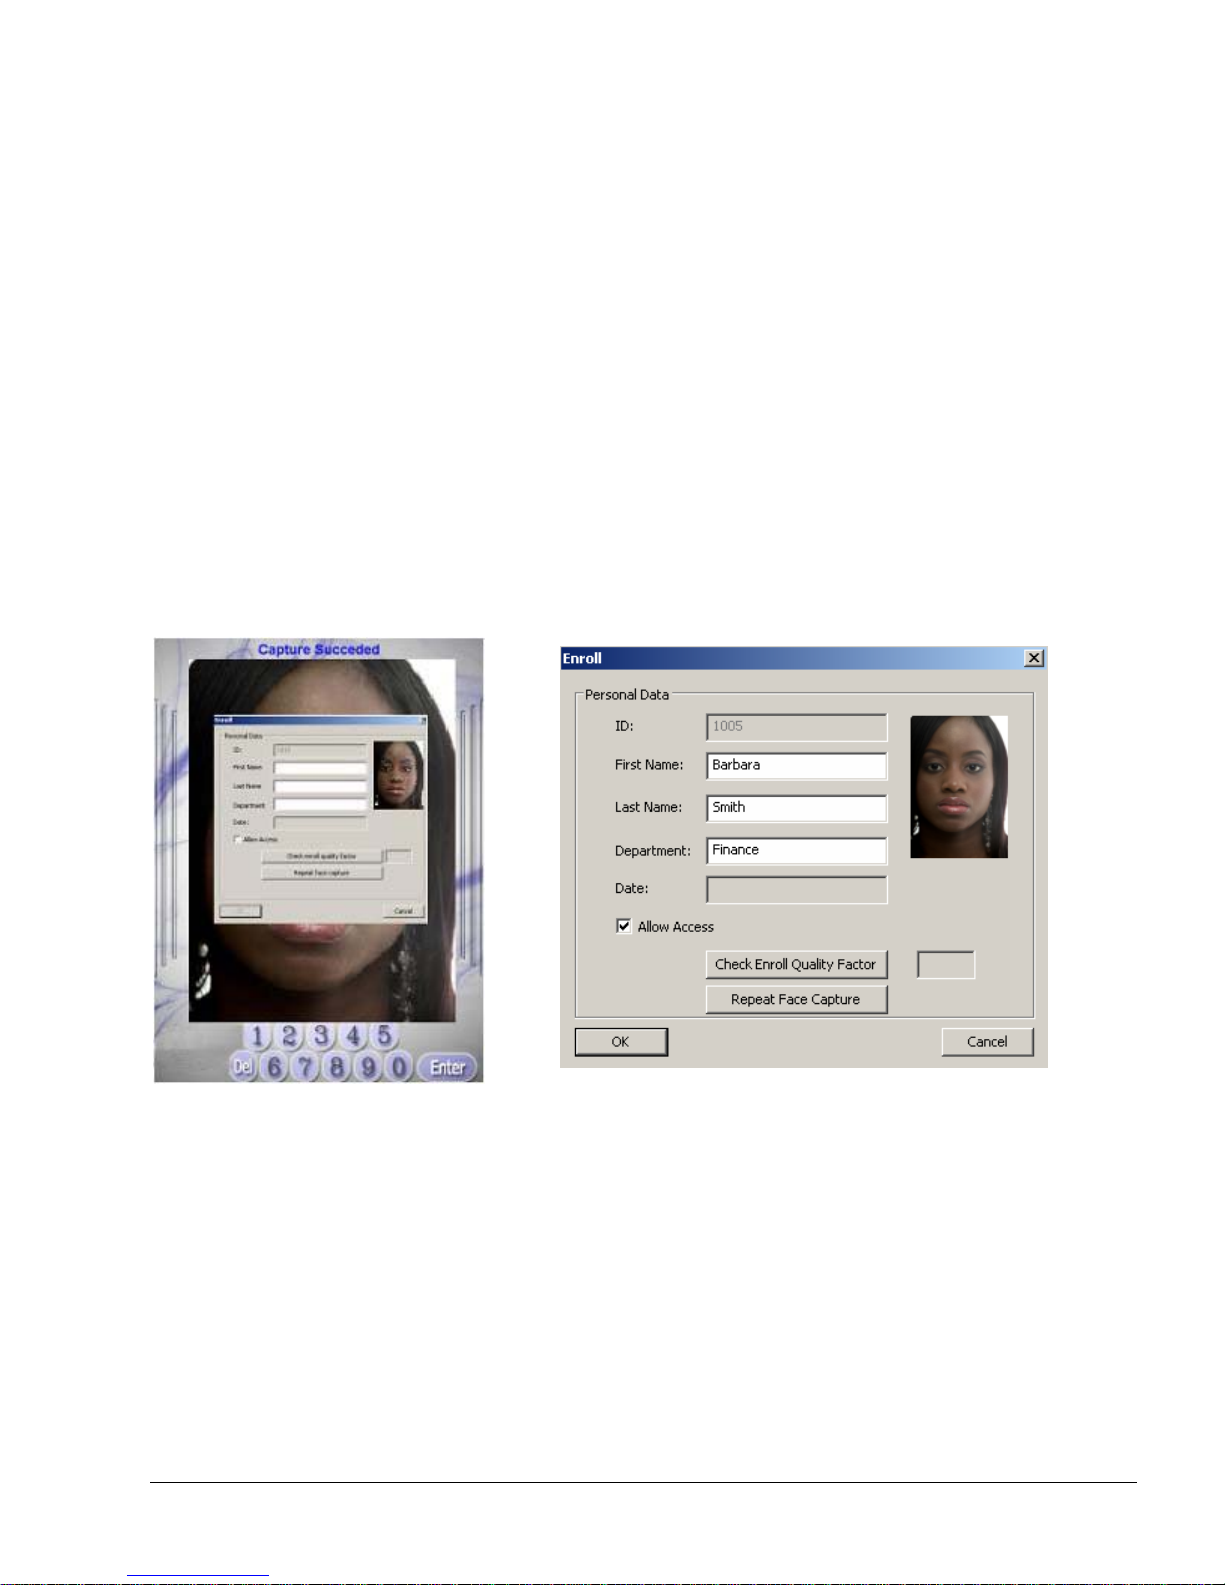
9. An Enroll screen will be displayed for entering the personal
details.
10. Checking the “Allow Access” checkbox will grant access to user, leaving this checkbox unchecked
won’t grant access to the user despite the successful face recognition.
Note! All details in the enroll screen are mandatory to enter.
11. Click on the “Check Enroll Quality Factor” so the system will
authenticate your identity and display the quality of your enrollment.
A quality grade of 98% or higher is an adequate result.
12. Press OK to save.
13. If the quality grade below 98% press “Repeat Face Capture” button in order to reenroll user –
repeat from step 5
11

1. Please refrain from situations as shown in the pictures below
Look straight to the camera – stand with your face looking towards the camera
The face should be fully exposed and not covered by any other object that may hide crucial face
characteristics during the image acquiring.
Wearing sunglasses for example is prohibited during the face recognition process.
12

Get closer! – you are too far from the camera
Too many people! – verify that there are no people standing near you in front of the camera
Note! Fully frontal and well aligned image will promise an efficient verification process.
13

Match mode (normal operation mode)
Please perform the following steps to switch the system mode to Match mode:
1. Press on Escape to exit C-Entry main application.
2. In the main menu select > Match mode
Please perform the following step for user authentication.
1. Please present the RFID card or type your ID number using the touch screen keypad
2. Look straight at the camera and follow the system’s instructions – refer to instructions on
pages 10-11, paragraph 10
Note! The aligning instructions that appears in the enroll process are the same for match
mode
3. Welcome message appears in case of successful authentication
14
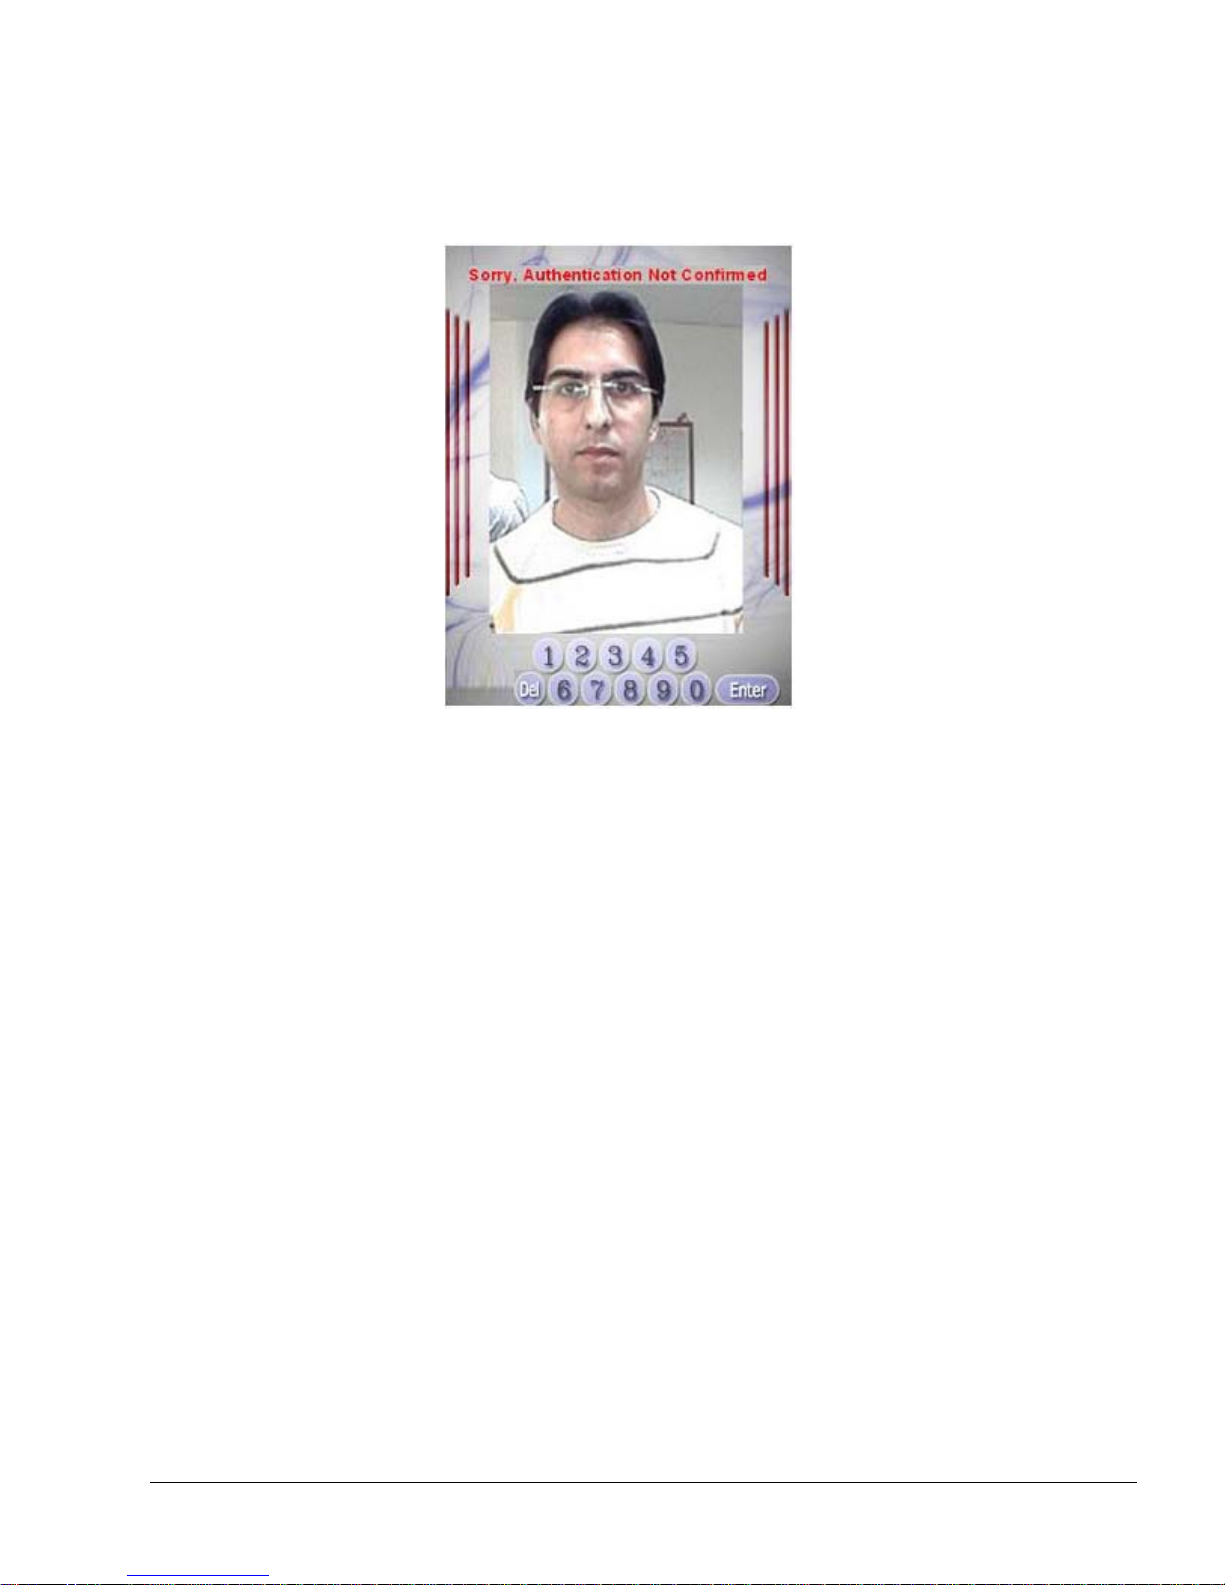
4. In case the user authentication is not confirmed access will be denied and “Sorry,
Authentication Not Confirmed” message will be displayed as shown in the picture below
.
15
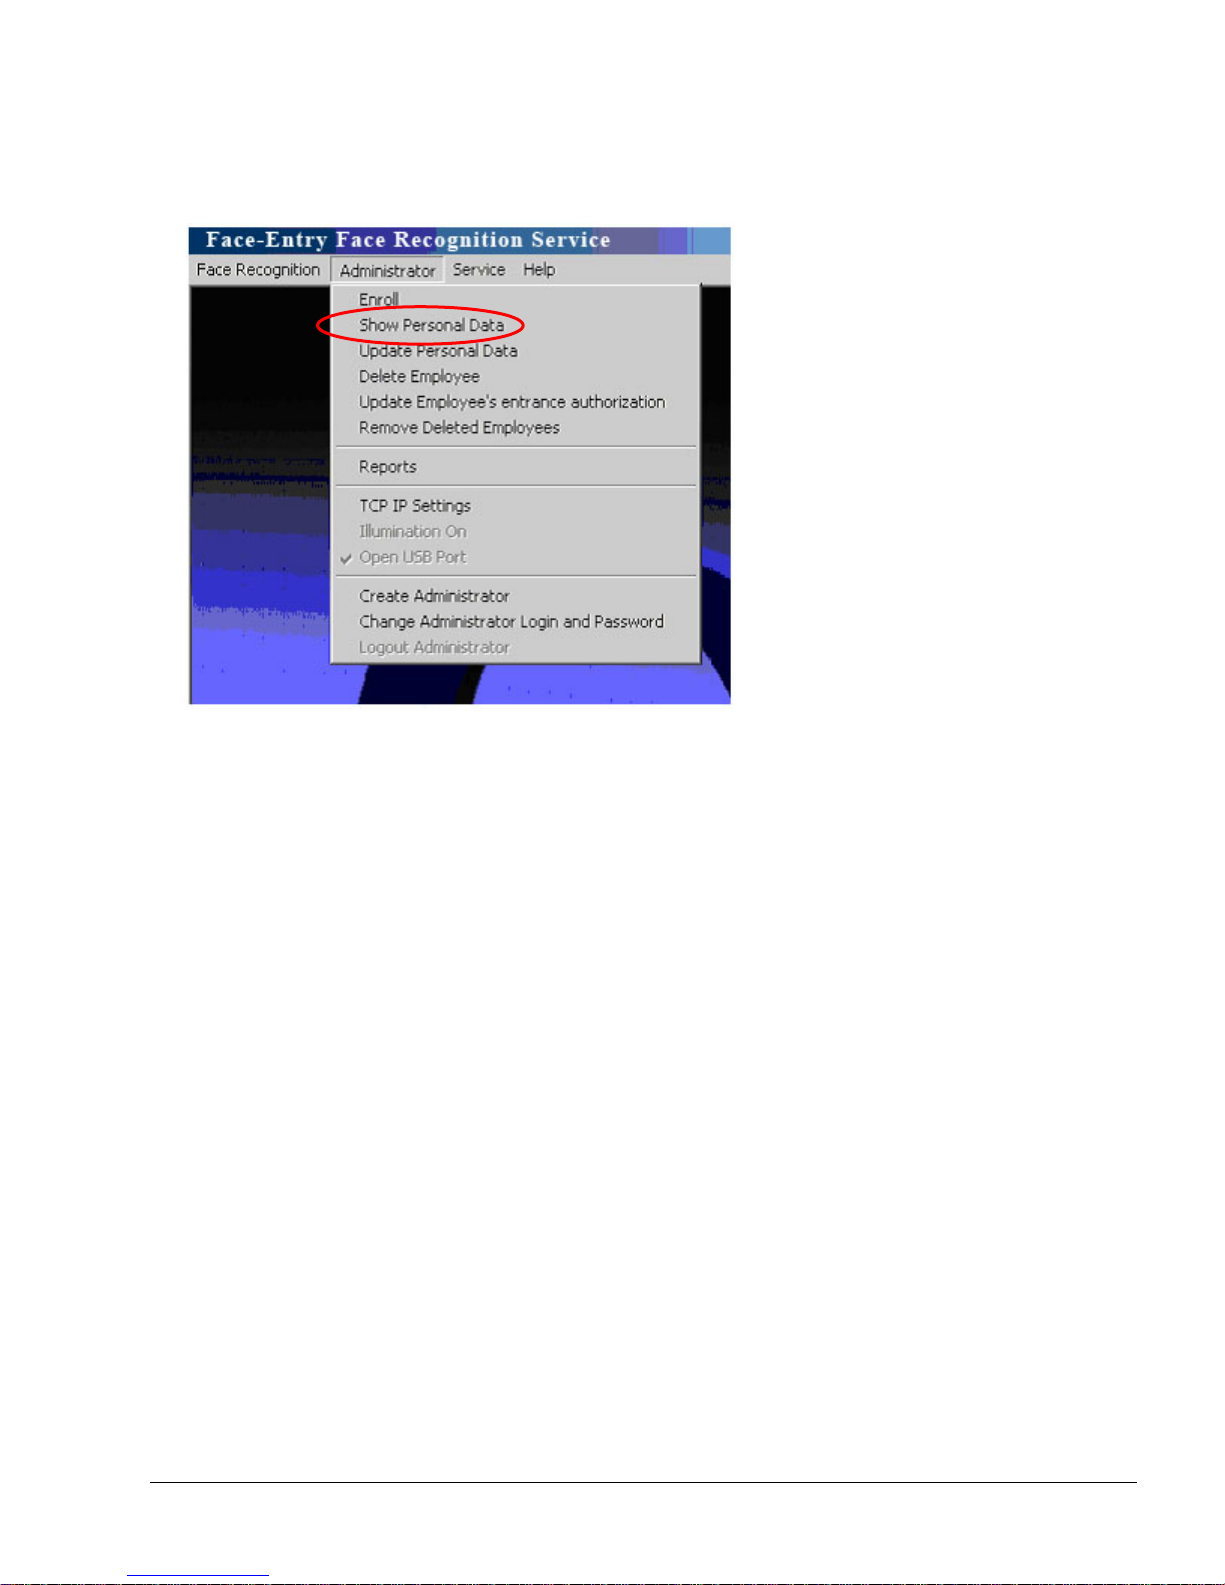
Show personal data
Please perform the following steps to display employee’s personal data
1. Login as Administrator to the system
2. In Administrator drop down menu select “Show Personal Data”
3. Present the employee’s RFID card or type employee's ID number.
The employee’s personal data will be presented
NOTE! The Personal Data can not be modified at this stage, for updating Personal Data go to
next page
4. In order to exit the Show Personal Data press on Escape button
16
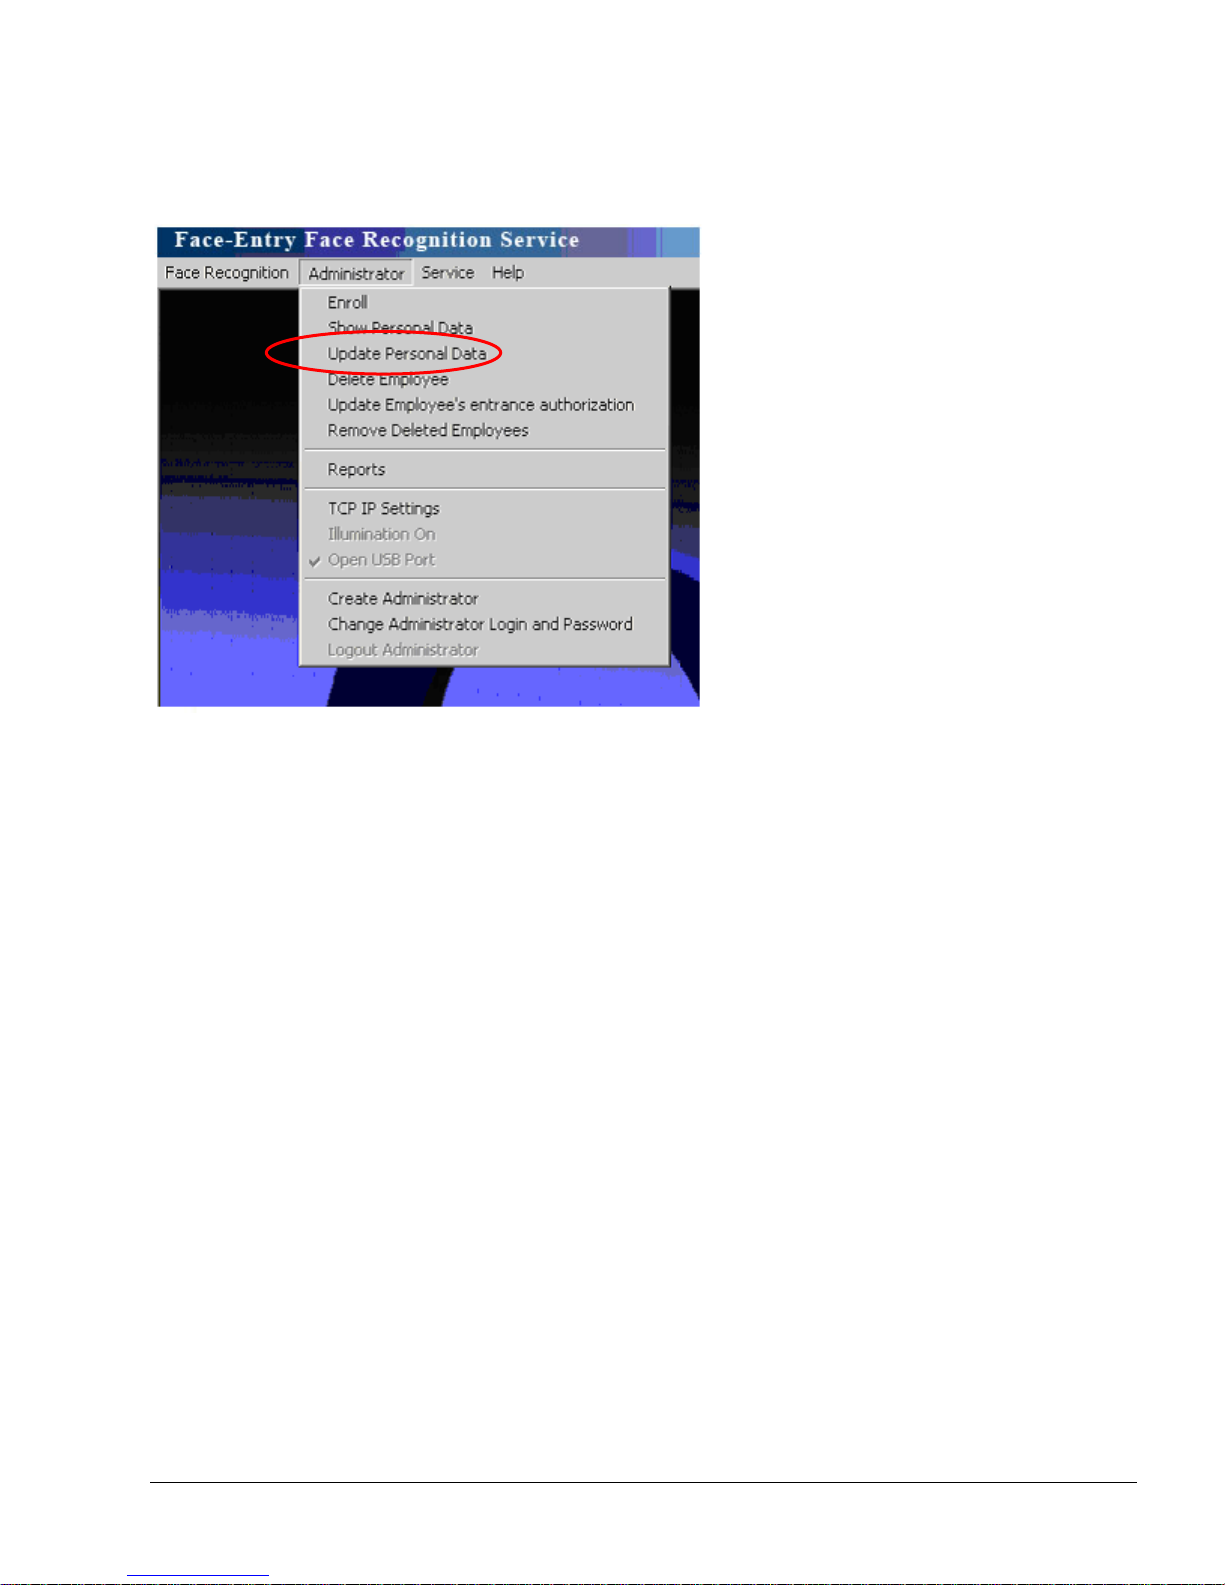
Update personal data
Please perform the following steps to update Employee’s personal data in the system database:
1. Login as Administrator to the system
2. In Administrator drop down menu select “Update Personal Data” bar
3. Present the Employee’s RFID card or type employee's ID number and the employee’s
personal data will available for editing.
4. In order to exit the Update Personal Data press on Escape button
17
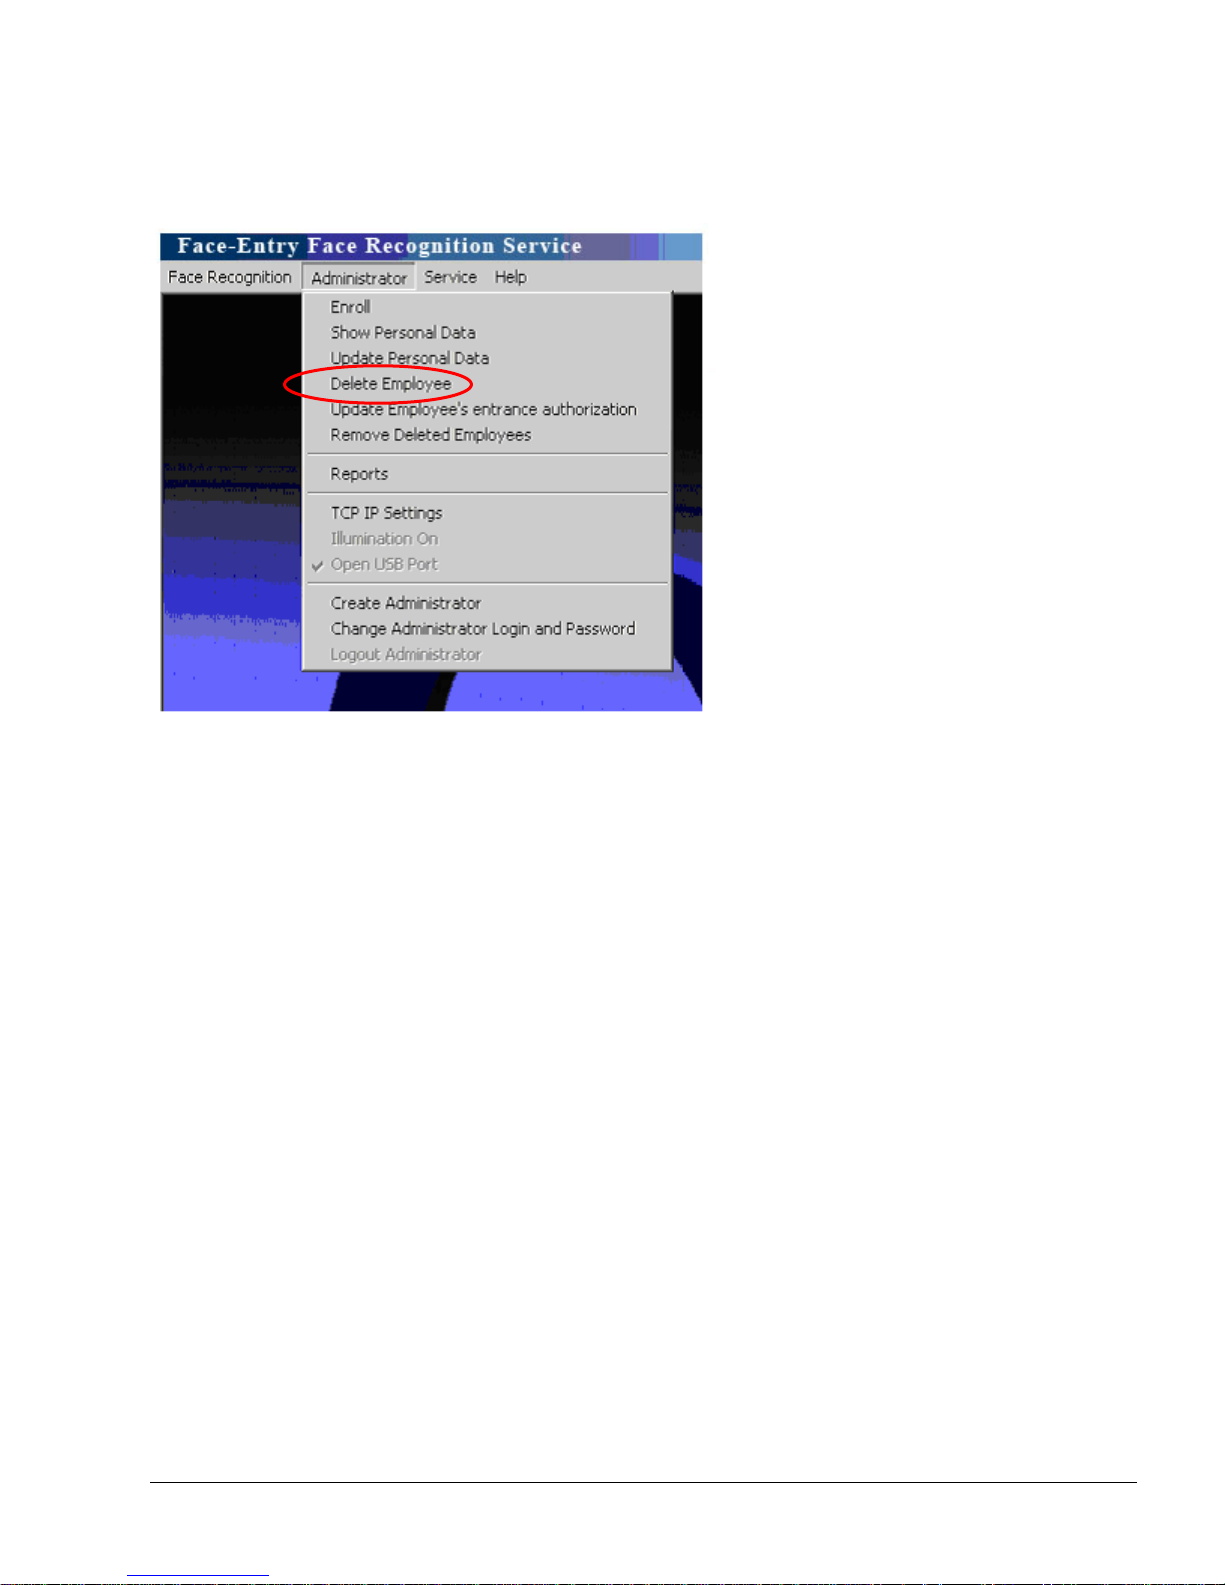
Delete employee
Please perform the following steps to delete an employee from the system database
1. Login as Administrator to the system
2. In Administrator drop down menu select “Delete employee” bar
3. Present the Employee’s RFID card or type employee's ID number
4. Select OK to delete the Employee from the database
5. In order to exit the Delete employee menu press on Escape button
18

Reports
Please perform the following steps to generate reports:
1. Login as Administrator to the system
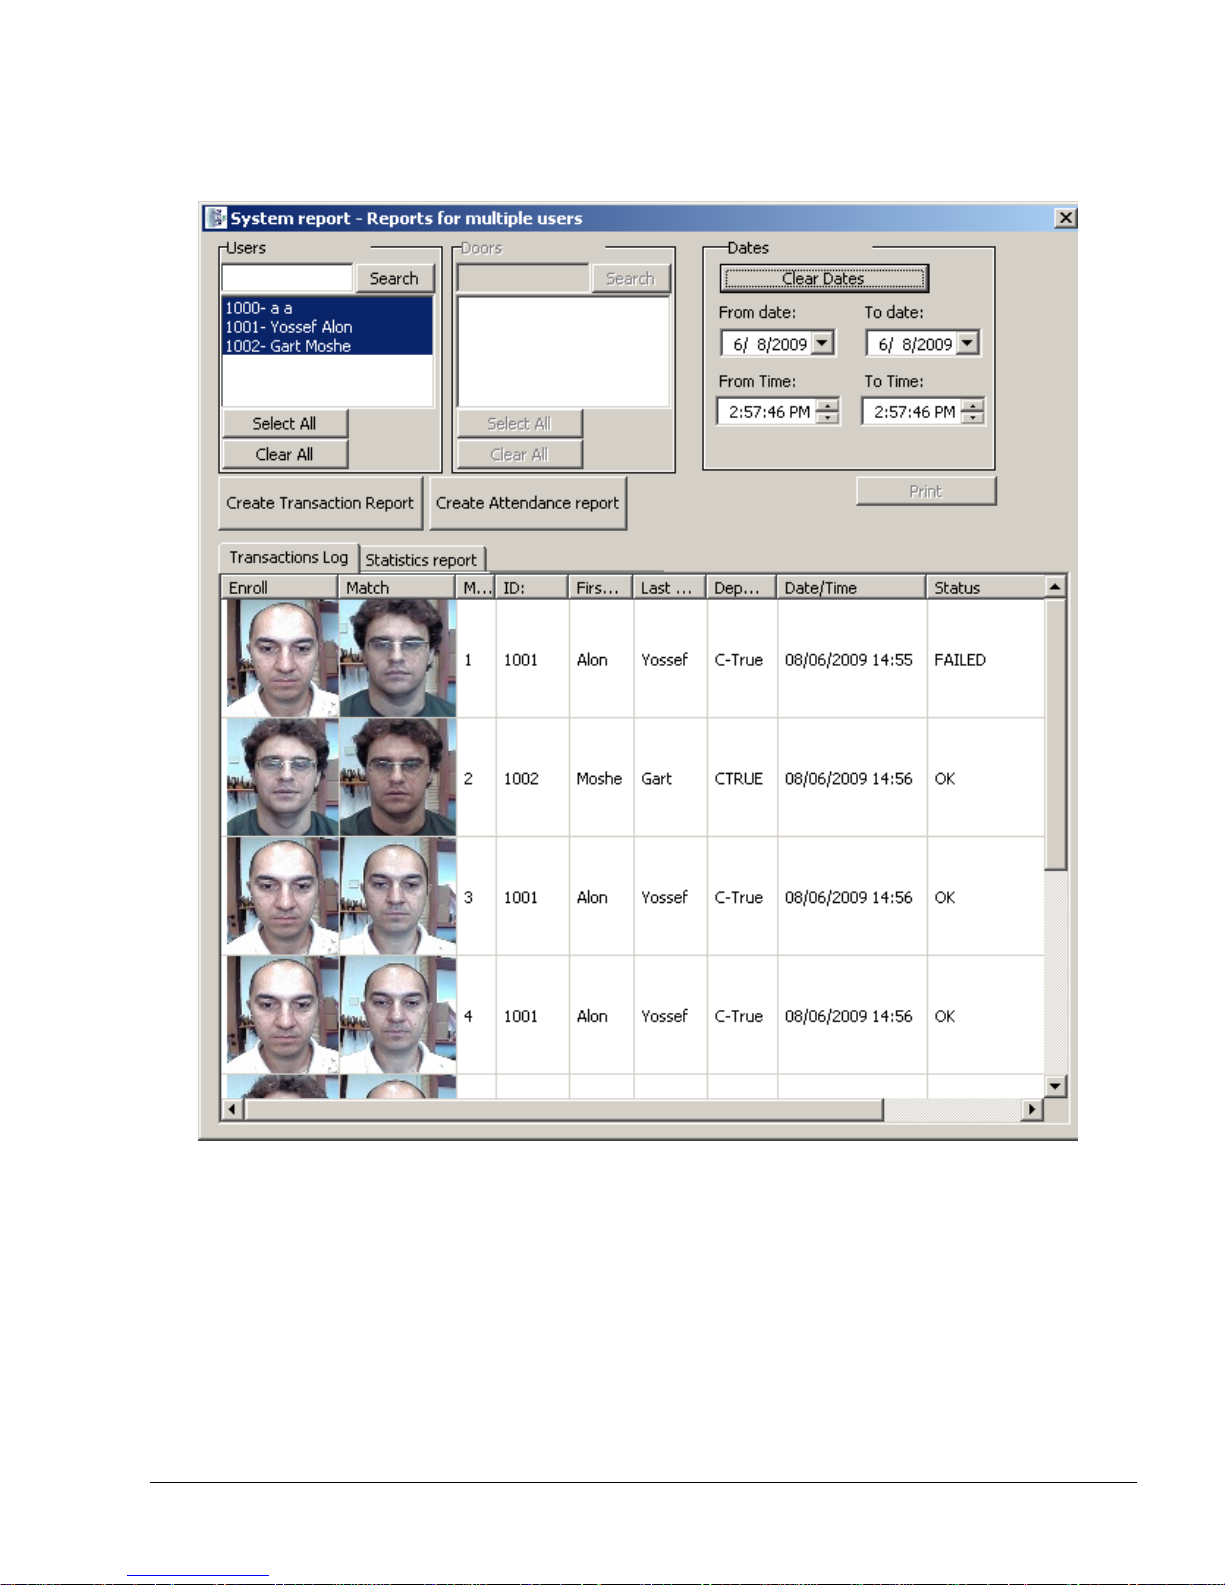
2. Select “Reports” bar. The administrator can produce report of all transactions in the system
for all users or per specific user/s and per specific dates.
19
3. Selecting the users or/and the required dates and click the “Create transaction
Report” button.
20
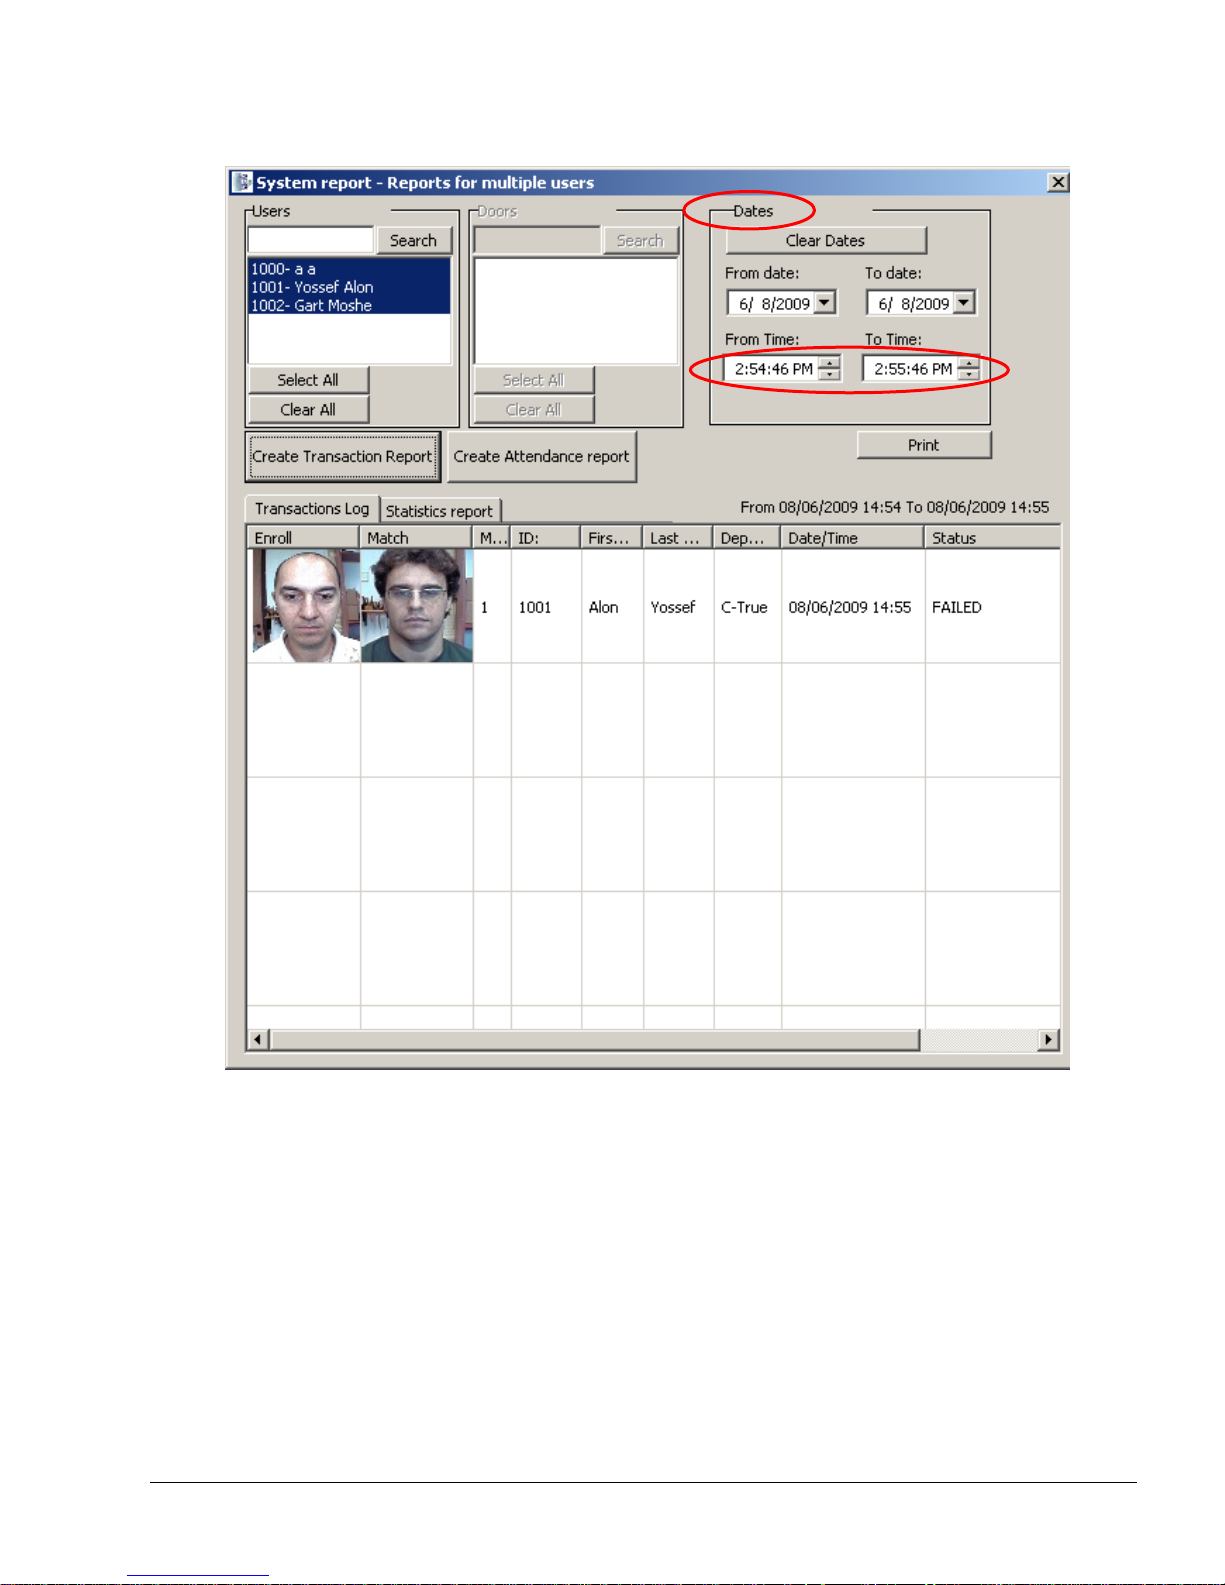
4. By selecting Date/Time in “Dates” you can filter the report
21
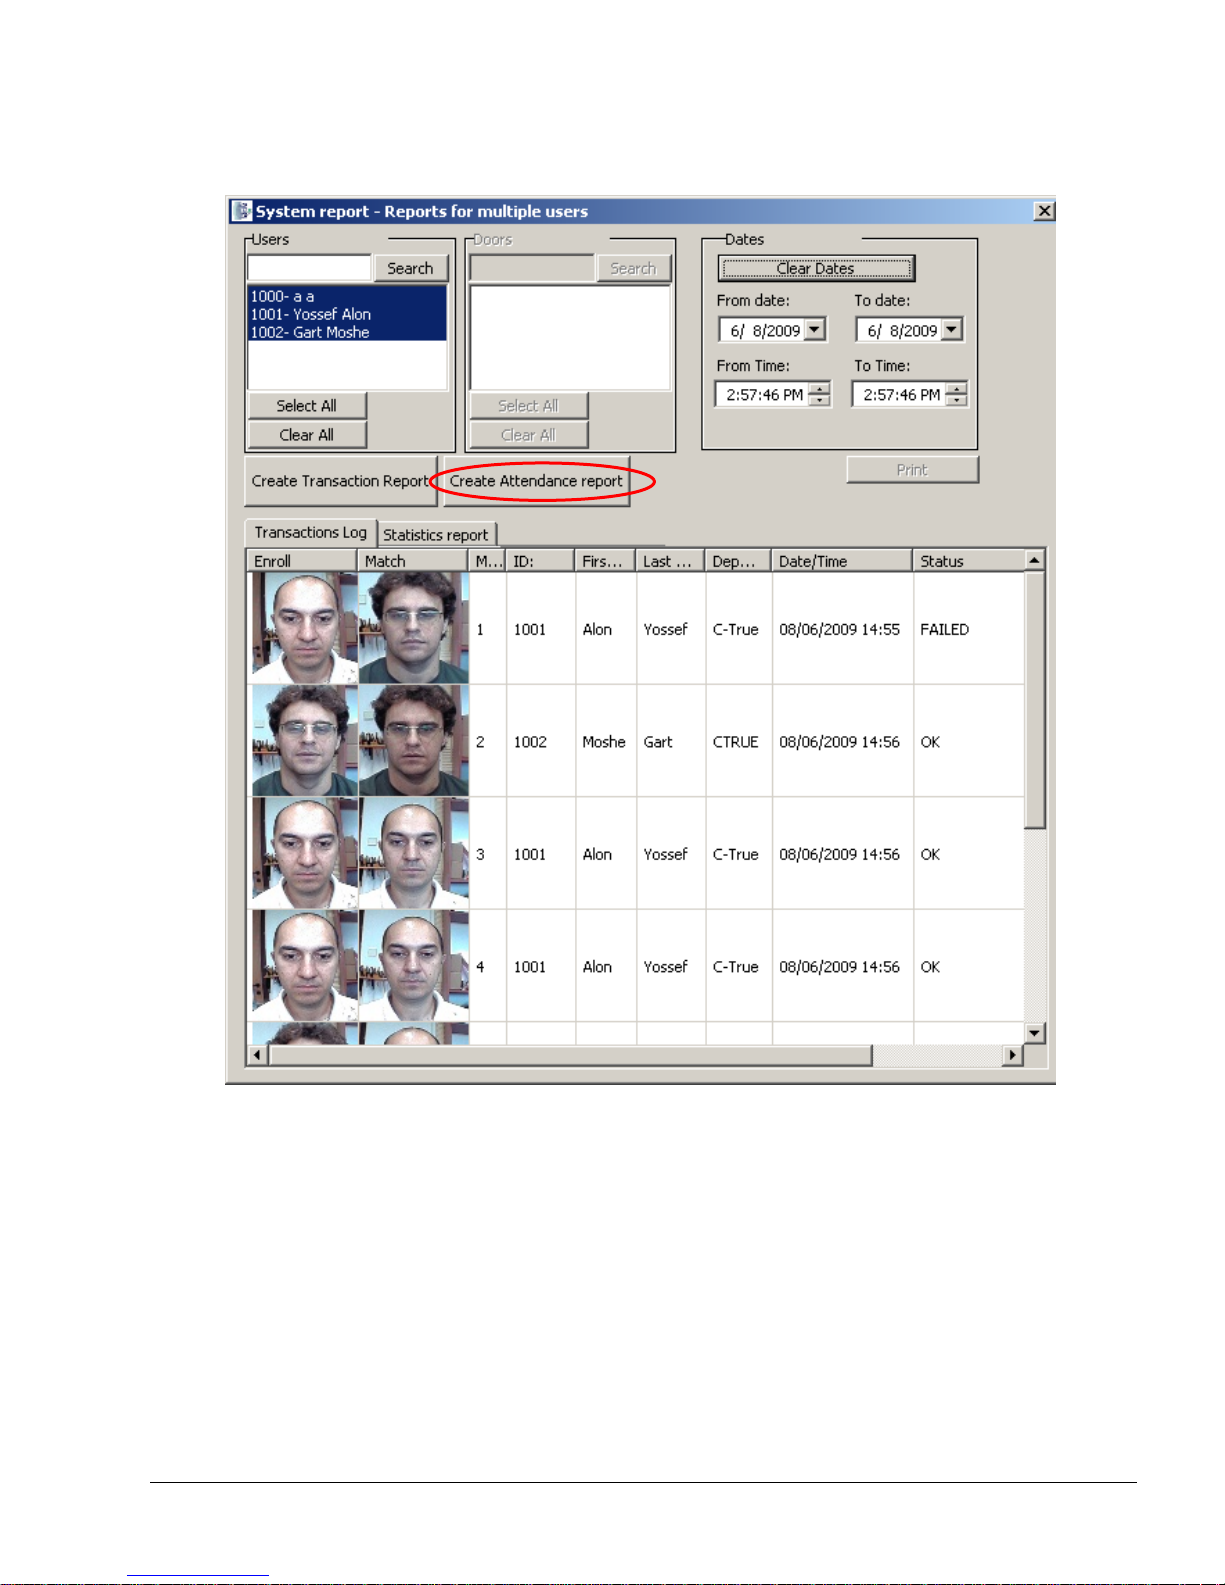
5. In order to generate Attendance reports press “Create Attendance Reports” button. The
reports will be generated in “T_A Report” on your system’s desktop.
The Time and Attendance reports in two modes:
Default Mode:
a. Press “Clear Dates” button to disable “From date:”, “To date:”.
b. Press “Create Attendance report”
If present date before 15 you will get the report for previous month (the whole month
from the beginning until the end of the month)
22

If present date after 15 you will have the report from 1 same month till the present date
Selected Period mode
a. Press “Use Dates” button to enable “From date:”, “To date:”, “From Time:”, “To Time:”.
b. Select a report period in “From date:” “To date:” boxes.
c. Press “Create Attendance report”
Remark: “From Time:” options “To Time:” are unused for attendance report.
6. To close the report please click the on the upper right side of the window.
23
Administrator Login
C-Entry system offers two options to login as administrator:
1. User name and password login:
In the main menu select > Face Recognition and login as administrator with user name and
password as described in page no.4.
The system allows only one administrator of that type in the system.
2. Face authentication login.
The system allows multiple administrators of that type in the system.
Please perform the following steps to create a new face authentication based administrator:
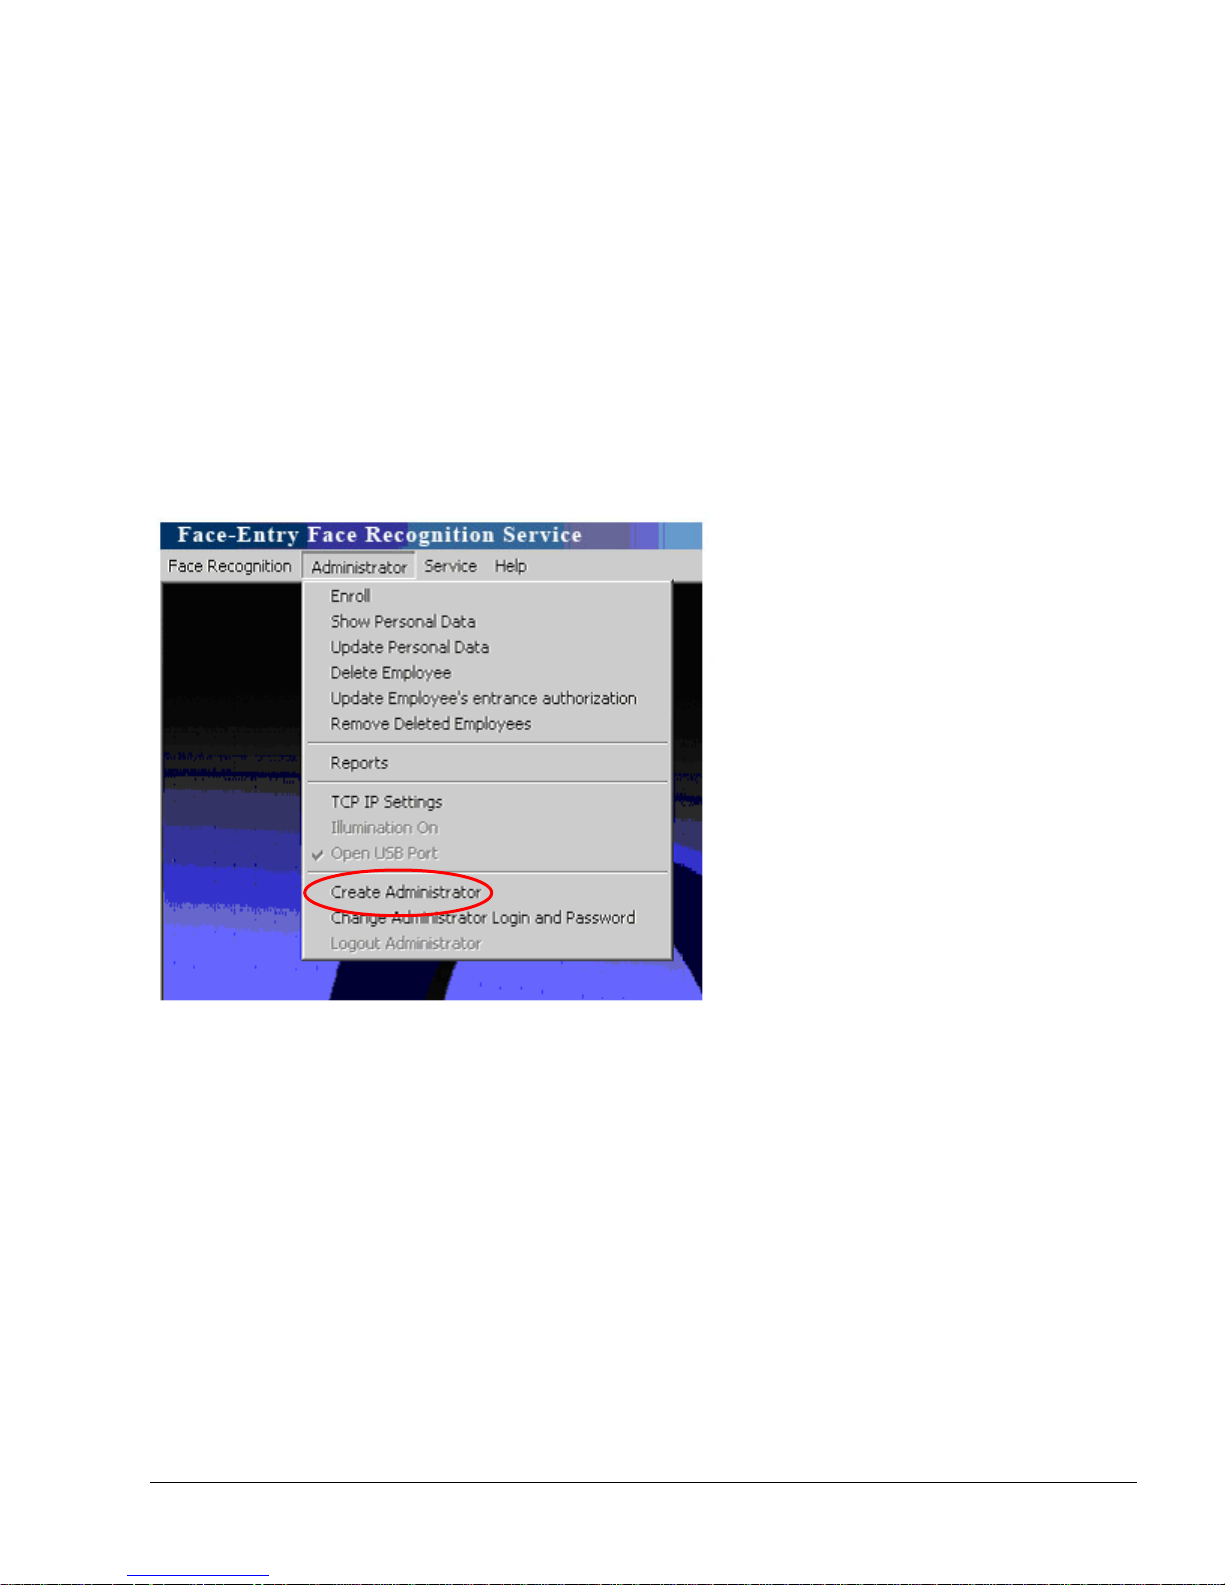
1. Login as Administrator to the system
2. In Administrator drop down menu select “Create Administrator”
3. Follow the instructions as described in page no. 7 (Enroll new user).
Note: After the administrator is face authenticated, pressing the escape will enable the
administrator menu in the main application window to allow enrolling new users and producing
reports.
24

Logout Administrator
Although when switching from Administrator mode to Match mode the system automatically logs out
from Administrator mode, it is highly recommended that the administrator will logout by selecting
“Logout Administrator”.
25

Remote support
Please perform the following steps for having remote technical support:
1. In the main menu select > Face Recognition
2. Login as administrator
3. Press on Windows key + D to minimize Face-Entry application
4. Verify the system is connected to the internet
5. Run “TimeWatch Remote Support” application from the desktop
6. Supply your ID and Password to TimeWatch support team for remote technical support.
26
 Loading...