

Page 1
©American DJ Supply
American DJ World Headquarters:
4295 Charter Street Los Angeles, CA 90058 USA
Tel: 323-582-2650 / Fax: 323-582-2610
Web: www.americandj.com / E-mail: [email protected]
User Instructions
American DJ
4295 Charter Street
Los Angeles Ca. 90058
www.americandj.com
Page 2
Electra™ Introduction
Electra™ Specifications
Introduction:
Thank you for purchasing the American DJ Electra.™ To optimize the
performance of this product, please read these operating instructions
carefully to familiarize yourself with the basic operations of this unit.
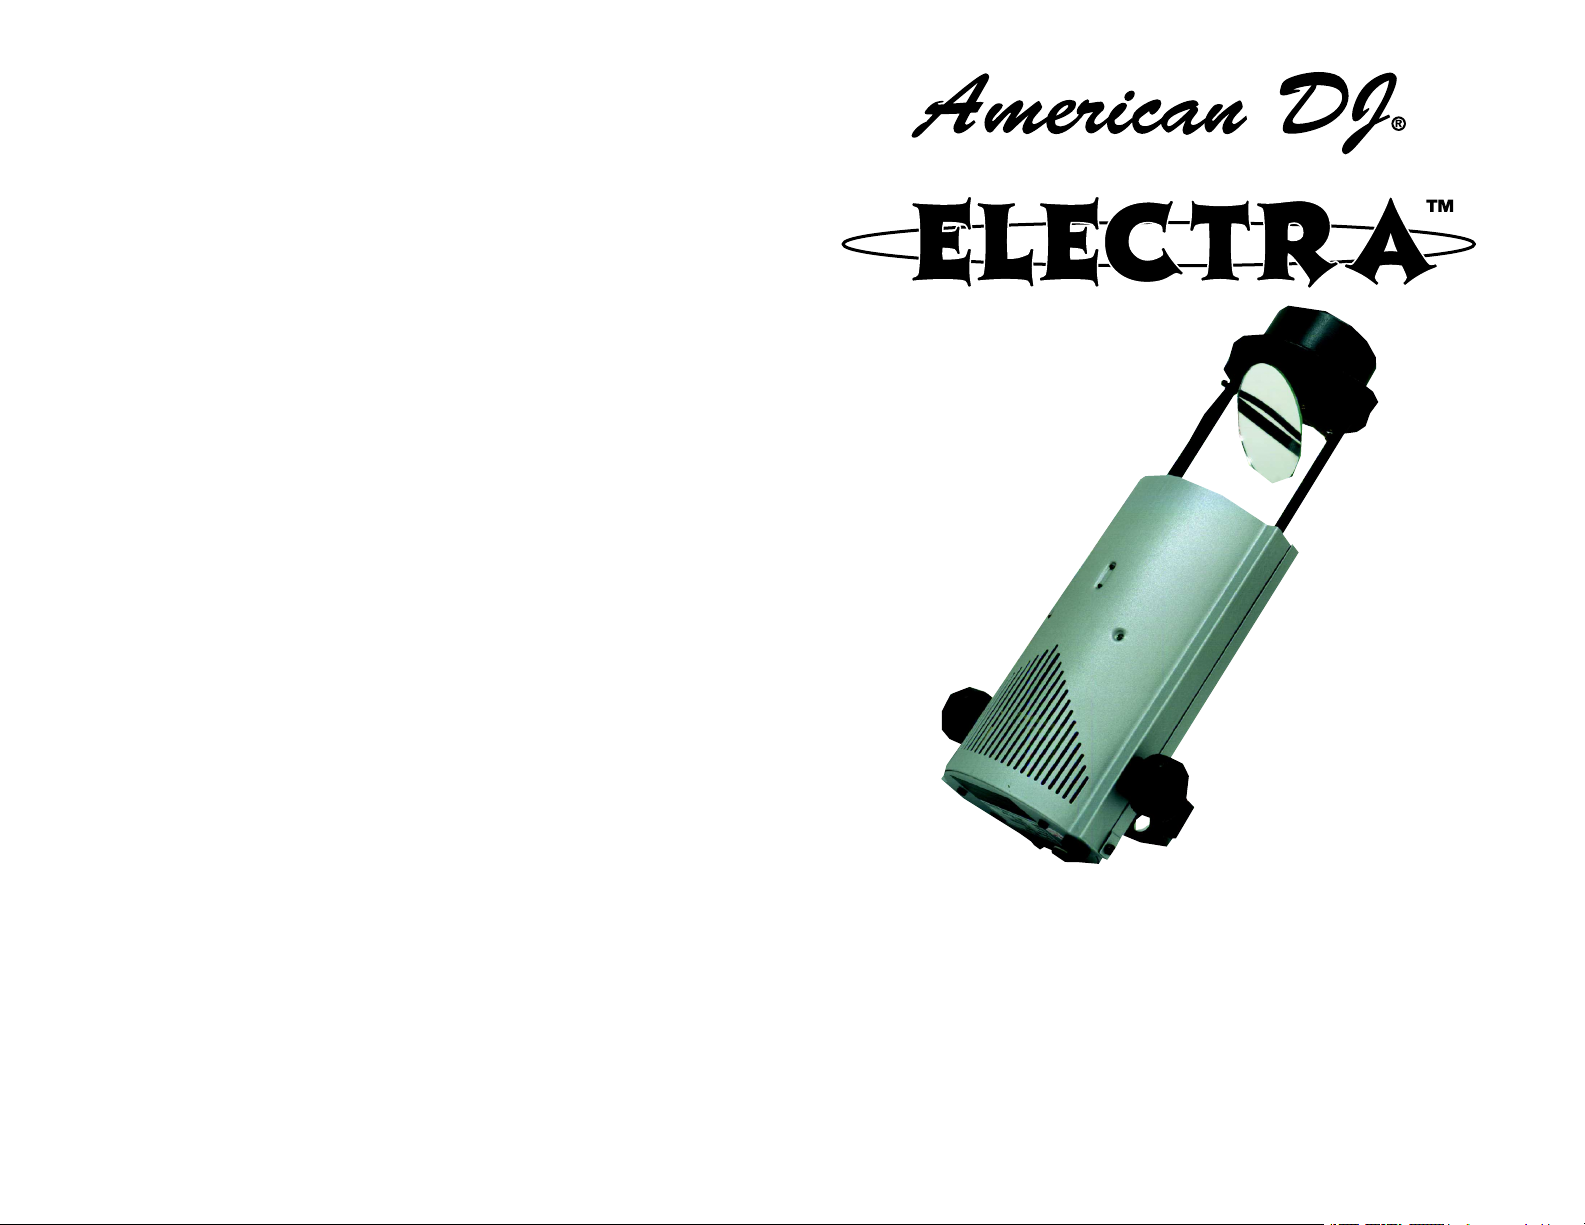
This unit is a miniture version of our Sapphire 4™ a multicolored rotating moon ower effect. The American DJ® Electra™ is sound active and
has three different operating modes (Sound Active, Continuous Rotation, and Static).
Customer Support:
American DJ® provides a toll free customer support line, to provide set
up help and to answer any question should you encounter problems
during your set up or initial operation. You may also visit us on the web
at www.americandj.com for any comments or suggestions.
Service Hours are Monday through Friday 9:00 a.m. to 6:00 p.m. Pacic
Standard Time.
Voice: (800) 322-6337
Fax: (323) 582-2610
E-mail: [email protected]
Warning! To prevent or reduce the risk of electrical shock or re, do
not expose this unit to rain or moisture.
Technical Specifications:
Model: Electra™
Lamp: ZB-BRL 12v/50w
Voltage: 110~120v
Dimensions: 9H x 11W x 12L
Colors: Multi-colored dichroic dish
Gobos: None
Weight: 6 Lbs.
Fuse: 3 Amp GMA
Duty Cycle: 15min on/off
Optics: High Quality Glass Lens
Reflective Surface mirror
Ventilation: Fan Cooled
Operating Mode: 3-position Mode Switch (Static,
Sound Active, & Continuous)
Caution! There are no user serviceable parts inside this unit. Do not
attempt any repairs yourself, doing so will void your manufactures warranty. In the unlikely event your unit may require service please contact
your nearest American DJ dealer.
Do not discard the shipping carton in the trash. Please recycle when
ever possible.
HALOGEN LAMP WARNING!
This fixture is fitted with a halogen lamp which is highly susceptible
to damage if improperly handled. Never touch lamp with your bare
fingers as the oil from your hands will shorten lamp life. Also, never
move the fixture until the lamp has had ample time to cool. Remember,
lamps are not covered under warranty conditions.
©American DJ Supply® - www.americandj.com - Electra™ Instruction Manual Page 2
Please Note: Specications and improvements in the design of
this unit and this manual are subject to change without any prior
written notice.
©American DJ Supply® - www.americandj.com - Electra™ Instruction Manual Page 7
Page 3
Electra™ Trouble Shooting
Electra™ Operation
Trouble Shooting:
Listed below are a few common problems that you may
encounter, with solutions.
No light output from the unit;
1. Be sure you have connected your unit into a standard
110V wall outlet.
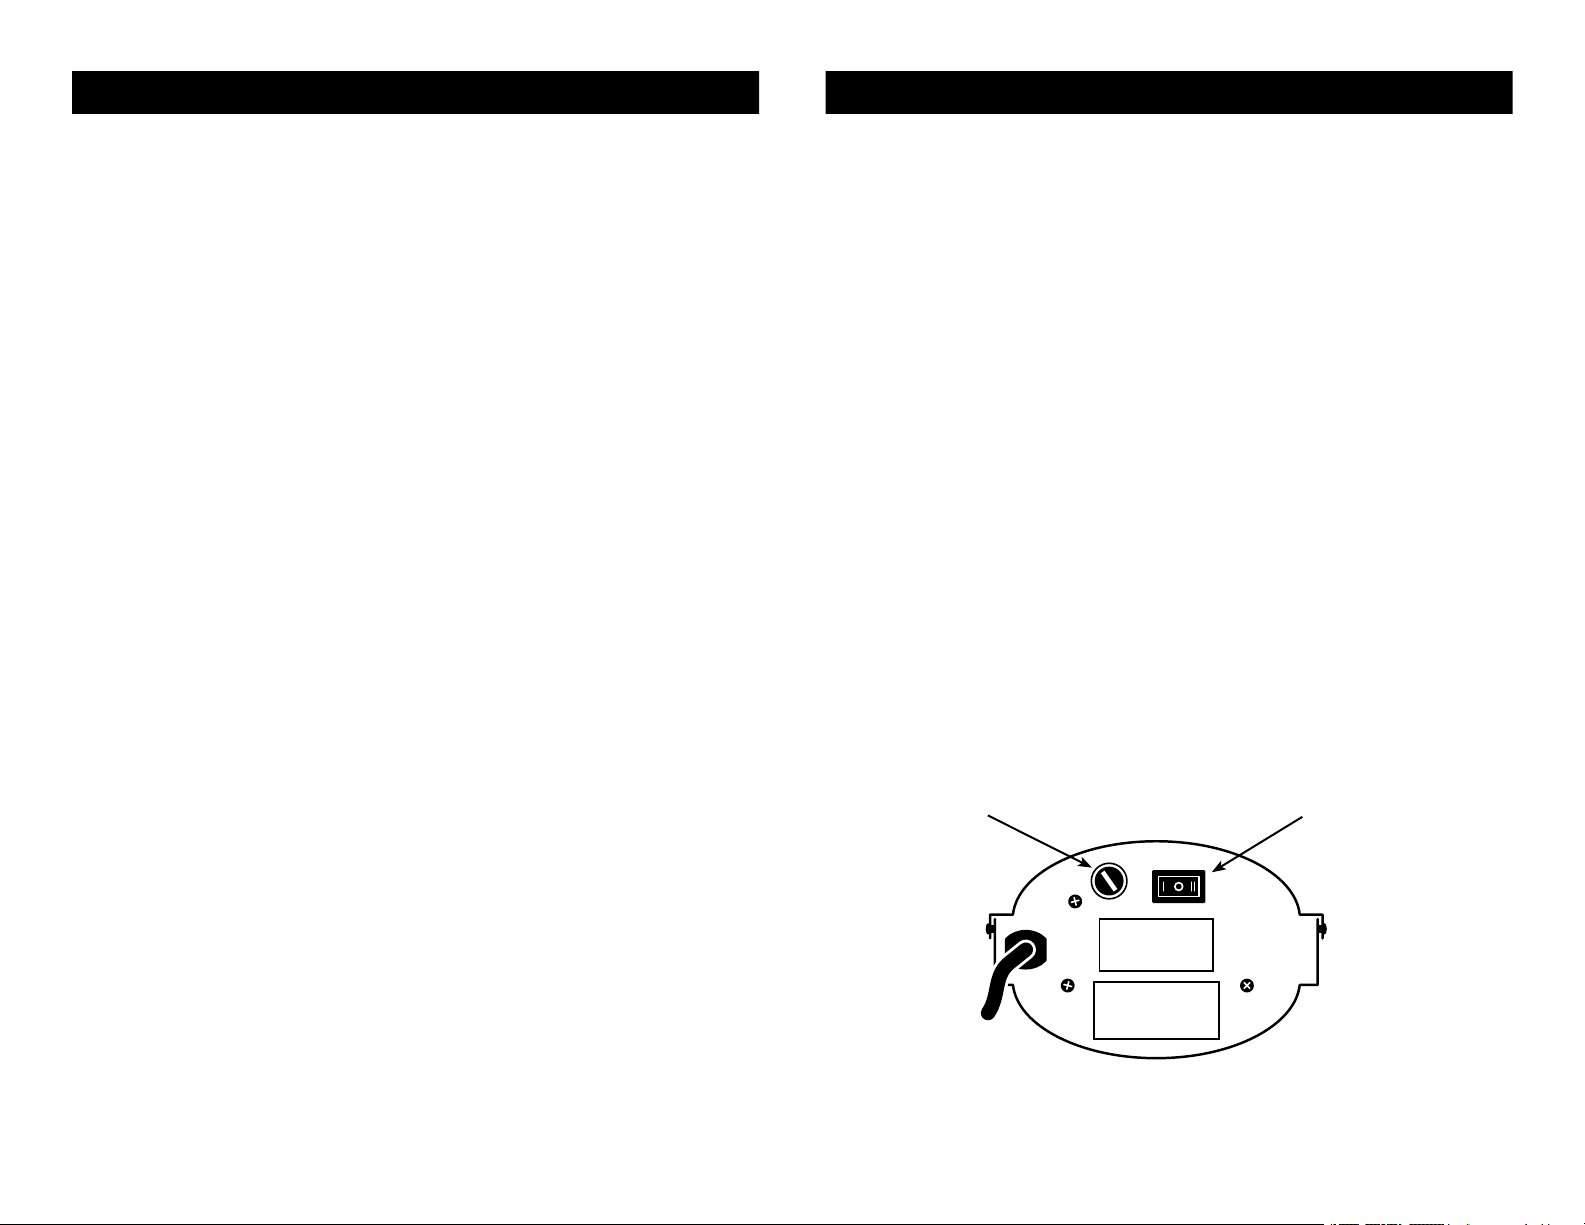
2. Be sure the external fuse has not blown. The fuse is
located on the rear panel.
3. Remove the lamp cover and be sure the lamp is seated
in its socket properly. Occasionally lamps become loose
during shipping be sure the lamp is push in to its socket
all the way.
Unit does not respond to sound;
1. Be sure the unit's mode switch is in the "I" position, this is
the only mode that allows the unit to operate in sound
active mode.
2. Low frequencies (bass) should cause the unit to react to
sound. Tapping on the microphone, quiet or high
pitched sounds may not activate the unit.
General Operation:
This fixture is designed to operate as a stand alone unit, there is
no need of a controller. It has been tested and lamped at the
factory there is no assembly necessary. The Electra™ is ready to
be plugged in, out of the box. There is no power switch, after
plugging the unit if there is no lamp output check the fuse and
bulb. If the fuse and bulb are good, please return the unit for
servicing. After plugging this fixture in, the units X-axis mirror
will move back and forth. The Electra™ features a multi-color
dichroic dish that will also rotate. This fixture features a light
weight case design and a hanging bracket. This unit can be
operated in three different modes. This fixture is designed for
mobile DJ’s, clubs, bands, roller rinks and any arena that requires
a compact, light weight, easy to use fixture.
Operating Modes:
This unit comes with a 3-way multi-operating switch located on
the rear of the unit. The switch controls three (3) different operating modes; Static, Sound Active, and Continuous Rotation. When
the switch is in the "I" position the internal dichoric dish spin
continously and the mirror will react to sound, via its internal
microphone. When the unit is in the "0" position the internal
dichoric dish is static (does not rotate) and the mirror will react
to sound. When the switch is in the "II" position the unit's internal
dichoric color wheel and mirro will react to sound.
©American DJ Supply® - www.americandj.com - Electra™ Instruction Manual Page 6
3 Position Mode SwitchFuse Holder
Electra Bottom Housing
©American DJ Supply® - www.americandj.com - Electra™ Instruction Manual Page 3
Page 4
Electra™ Cleaning
Electra™ Cleaning
Fixture Cleaning:
Due to fog residue, smoke, and dust cleaning the internal and
external optical lenses must be carried out periodically to
optimize light output.
1. Use normal glass cleaner and a soft cloth to wipe down the
outside casing.
2. Use a brush to wipe down the fan grill.
3. Clean the external optics with glass cleaner and a soft
cloth every 20 days.
4. Clean the internal optics with glass cleaner and a soft cloth
every 30-60 days.
5. Always be sure to dry all parts completely before plugging
the unit back in.
Cleaning frequency depends on the environment in which the
fixture operates (I.e. smoke, fog residue, dust, dew). In heavy
club use we recommend cleaning on a monthly basis. Periodic
cleaning will ensure longevity, and crisp output.
Fuse Replacement:
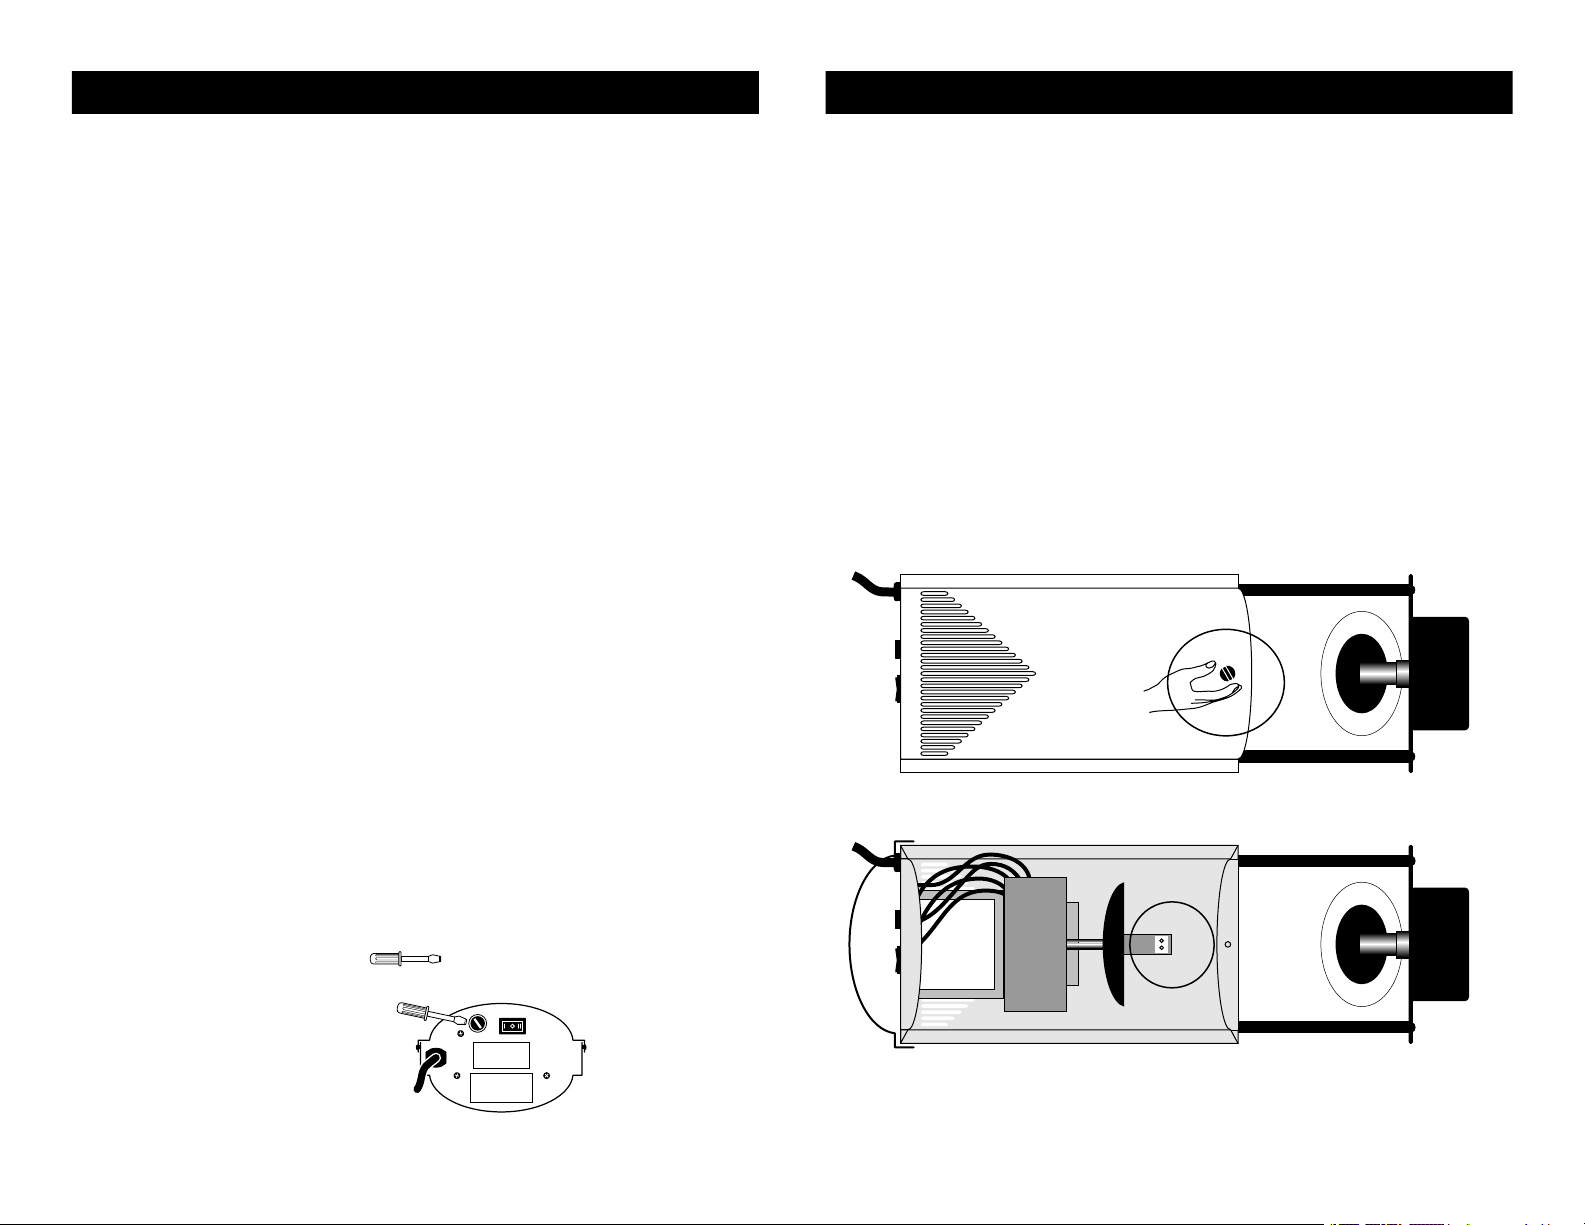
Disconnect from the main power supply. Insert a standard flat
head screw driver in to the fuse holder housing as illustrated in
figure two. Turn the screwdriver in counter-clockwise direction
to remove the fuse holder. Remove the old fuse and discard it,
replace the fuse with the same type. Insert the fuse back into
it’s housing.
If you continue to blow fuses, STOP using the unit. Returning the
unit for servicing. Continuing to use the unit may cause serious
damage.
Lamp Replacement:
Disconnect from the main power supply. Be sure the unit has
had ample time to cool before attempting to replace the lamp.
On the front of the unit there is a single thumb screw. Remove
the thumb screw and pull back the front case housing. The housing is hinged which allows it to pull back without being removed.
Remove the old lamp from the socket assembly. Carefully install
the new lamp, be sure to follow all the installation guide lines
that are included with your new lamp. Close the front cover and
replace the thumb screw.
Caution: Always replace with the exact same type lamp and
fuse, unless otherwise specified by an authorized American DJ®
technician.
Remove the thumb screw on the front of the unit as illustrated below.
Caution: Always replace with the exact same type lamp and
fuse, unless otherwise specified by an authorized American DJ®
technician.
Use a at head screwdriver
to remove the fuse holder
©American DJ Supply® - www.americandj.com - Electra™ Instruction Manual Page 4
Remove the lamp from the socket and insert a new one as illustrated above.
©American DJ Supply® - www.americandj.com - Electra™ Instruction Manual Page 5
 Loading...