

Page 1

SNMS
StorNext® Management Suite
Installation Guide
SNMS 2.3
Document Number: 6-00360-04 Rev A
Page 2

Copyright Notice
© 2002, 2003, 2004 ADIC
The information contained in this document is subject to change without notice.
This document contains proprietary information which is protected by copyright. All rights are reserved. No part
of this document may be photocopied, reproduced, or translated to another language without prior written
consent of ADIC.
ADIC shall not be liable for errors contained herein or for incidental or consequential damages (including lost
profits) in connection with the furnishing, performance or use of this material whether based on warranty,
contract, or other legal theory.
All trademarks within this document are the property of their respective owners.
®
Copyright Notice (Europe)
© 2002, 2003, 2004 ADIC Europe
All rights reserved. No part of this document may be copied or reproduced in any form or by any means, without
prior written permission of ADIC Europe, ZAC des Basses Auges, 1 rue Alfred de Vigny, 78112 Fourqueux,
France.
ADIC Europe assumes no responsibility for any errors that may appear in this document, and retains the right
to make changes to these specifications and descriptions at any time, without notice.
This publication may describe designs for which patents are pending, or have been granted. By publishing this
information, ADIC Europe conveys no license under any patent or any other right.
ADIC Europe makes no representation or warranty with respect to the contents of this document and
specifically disclaims any implied warranties of merchantability or fitness for any particular purpose. Further,
ADIC Europe reserves the right to revise or change this publication without obligation on the part of ADIC
Europe to notify any person or organization of such revision of change.
Every effort has been made to acknowledge trademarks and their owners. Trademarked names are used
solely for identification or exemplary purposes; any omissions are made unintentionally.
ADIC is a registered trademark and ADIC Europe is a trademark of Advanced Digital Information Corporation.
TM
ADIC USA
Tel.: +1 303-705-3900
Fax: +1-303-792-2465
ATAC: 1-800-827-3822
http://www.adic.com
ADIC Europe
ZAC des Basses Auges
1, rue Alfred de Vigny
78112 Fourqueux, France
Tel.: +33.1.3087.5300
ADIC Germany Beteiligungs
GmbH, KG
Eschenstraße 3
D-89558 Böhmenkirch, Germany
Tel:+00.800.9999.3822
Fax: +33.1.3087.5301
Published: January 2004 Printed in the USA
ADIC CORPORATE • 11431 WILLOWS ROAD, NE • REDMOND, WASHINGTON, USA • 1-800-336-1233
ADIC • 8560 UPLAND DRIVE • ENGLEWOOD, COLORADO, USA • 1-800-827-3822
ADIC • 10 BROWN ROAD • ITHACA, NEW YORK, USA • 1-607-241-4800
Page 3
SNMS
Advanced Digital Information Corporation Software Licenses
Agreement
This Software License is entered into and effective as of this _____, day
of_____________ 2003 ("Effective Date"), by and between:
and
Advanced Digital
Information Corporation
PO Box 97057
Redmond, WA 98073-9757
(Referred to as “ADIC")
This License sets forth the terms and conditions under which ADIC agrees to grant and
Licensee agrees to accept a license to use certain of ADIC's proprietary software and
related documentation. Any software programs or related materials provided to Licensee
by ADIC will be subject to the terms and conditions of this License.
Company: _______________________
Located at: _______________________
_______________________
_______________________
(Referred to as “Licensee")
Definitions
“Designated Computer(s)” means that computer equipment, identified to ADIC in Exhibit
A by serial number, upon which the Software is installed.
“Documentation” means ADIC provided materials related to the Software, including, but
not limited to operator and user manuals, training materials, guides, listings,
specifications, or other written documentation.
"Release" means a modification to the Software that does not change ADIC's base version
number, but may add functionality. New Releases are provided to the Licensee at no
charge when Licensee maintains a current Software Maintenance Agreement with ADIC.
“Software” means only the current version of those software products specified in Exhibit
A hereto, in object code form only, and the Documentation provided by ADIC in
connection therewith or any portions thereof, and any subsequent Releases.
License Agreement iii
Page 4

SNMS
"Upgrade" means a modification to the Software that adds significant features and/or
functionality and causes a change in ADIC's base version number. Upgrades may have a
new initial License fee or upgrade charge associated with it.
Software License
a. License. In consideration of Licensee's full payment of the License fees and subject to
the terms and conditions of this License, ADIC hereby grants to Licensee a personal,
non-exclusive, non-transferable license to use and copy the Software. A separate
license is required for use of each Software program on each Designated Computer.
b. Use. Licensee is authorized hereby to use the Software on the Designated
Computer(s) only, or on backup equipment if the Designated Computer is inoperative
until such time as the Designated Computer is restored to operation and processing on
the back-up equipment is completed. This grant is specifically limited to use by the
Licensee for normal, customary internal data processing, and specifically excludes
Licensee's time-sharing or the rental of the Software or use of the Software in the
development or marketing of a competitive or compatible product. No right to use,
print, copy or display the Software or Documentation, in whole or in part, is granted
hereby except as expressly provided in this License.
c. Copying. Licensee may make one (1) copy of the Software in a non-printed, machine-
readable form for archival and back-up purposes only. In order to protect ADIC's
trade secret and copyrights in the Software, Licensee agrees to reproduce and
incorporate Licensee's trade secret or copyright notice in any copy or partial copy, and
will maintain appropriate records of the location of such copy.
d. Transfer Rights. The Software will be installed initially on Licensee's Designated
Computer(s) set forth in Exhibit A. Licensee may thereafter transfer the Software to
another one of its computers of the same machine architecture, provided that the
Software is installed on one (1) Designated Computer at a time, b) is covered under a
current maintenance support plan with ADIC, and c) provides ADIC with written
notice thirty (30) days prior to the transfer. If Licensee transfers the Software to a
machine of a different architecture, Licensee may be subject to a transfer fee.
iv 6-00360-04 Rev A
Page 5
SNMS
e. US Government Rights. If the Licensee is the United States government, Licensee
understands and agrees that ADIC Software and documentation are provided as
"Commercial Items" as defined at 48 CFR 2.101 and are being licensed to U.S.
Government end users consistent with 48 CFR 12.212.
Price and Payment
Licensee will make payment to ADIC for the Software license pursuant to those fees set
forth in the agreement of the parties. The Licensee must pay any such fees within thirty
(30) days of the date of ADIC's invoice.
Software Ownership and Protection
a. ADIC's Warranty. ADIC warrants that it is the owner of the Software and all portions
thereof, except for any embedded third party software for which ADIC holds a license
that is not inconsistent with the license granted under this agreement, and that it has
the right to modify the Software and to grant this License for its use.
b. Title to Software. The Software and all copies thereof (except for any embedded third
party software) are proprietary to ADIC and title thereto remains in ADIC. All
applicable rights to patents, copyrights, trademarks, trade secrets or other proprietary
rights in the Software and any modifications made at Licensee's request are and will
remain in ADIC.
c. Restrictions. Licensee will not itself or permit others to:
i. sell, sublicense, transfer, publish, disclose, display, provide access via a network or
otherwise make or allow available the Software or any copy thereof, in any form
whatsoever, to others;
ii. remove, obscure, or alter any copyright, trade secret, trademark, patent or other
proprietary rights notice affixed to or displayed on the Software or Documentation
or affixed to or printed on any of its factory packaging;
iii. modify, merge with other programs or translate any portion of the Software into
any other assembly or foreign language; and
License Agreement v
Page 6

SNMS
iv. reverse-assemble, reverse-compile or attempt to derive a source code equivalent of
the Software.
d. Protections. Licensee agrees to secure and protect the Software, the Documentation
and copies thereof in a manner consistent with ADIC's rights therein and to take
appropriate action to satisfy its obligations in this Article by instruction or agreement
with its employees, agents, subcontractors or others who are permitted access to the
Software. All programs or copies developed by or for the Licensee in violation of this
License, including translations, compilations, partial copies with modifications and
up-dated works, are the property of ADIC.
e. Responsibility. Licensee has sole responsibility for use of the program and any
information entered, used, or stored thereon. This responsibility includes protection of
data from modification, destruction, or disclosure, and for the accuracy and integrity
of the results from improper use. ADIC assumes no responsibility for Licensee's
negligence or failure to protect data from modification, destruction, or disclosure.
Installation
Installation. Licensee will, at its own expense, ensure that the installation site conforms to
the requirements of the Software and, at its own expense, prepare and maintain the
environmental conditions at the installation site in accordance with the requirements of the
relevant hardware manufacturer. ADIC will be responsible for reasonable support during
the initial installation process.
Use and Training
Licensee will limit the use of the Software to those individuals who have been
appropriately trained. ADIC will make training for the Software available to Licensee
pursuant to its standard training procedures. Unless otherwise mutually agreed, any
additional training will be provided at ADIC's Englewood, Colorado facility at ADIC's
then current rates.
vi 6-00360-04 Rev A
Page 7

SNMS
Warranty and Warranty Servicing
a. Warranty. ADIC warrants that for a period of ninety (90) days from installation the
Software will conform to all substantial operational features in ADIC's current
published specifications and will be free of defects which substantially affect
performance of the Software. ADIC does not warrant that the Software will meet the
Licensee’s requirements or that the operation of the Software will be uninterrupted or
error free.
b. Compatibility. It is the intent of ADIC to provide Software which is compatible with
the current releases of common computer operating systems, however, ADIC does not
warrant that the Software is compatible with the current releases of all operating
systems, nor that the Software, including any future Releases, will be made
compatible with new releases of the operating system within a specified amount of
time, or at all. At Licensee's request, ADIC will notify Licensee of the version level
of the operating system with which the current version of the Software is intended to
be compatible, and the version level of operating systems for which a subsequent
release of the Software is intended to be compatible.
c. Warranty Servicing. The Licensee must notify ADIC in writing, within ninety (90)
days after installation of the Software of Licensee’s claim of any defect. If the
Software is found defective by ADIC, ADIC’s sole obligation under this warranty is
for ADIC, at its option, either to correct, in a manner consistent with ADIC's regular
support practices, any defect in the Software or to accept the return of the Software.
Where Software is returned for claims made during the warranty period, Licensee
will be provided a full refund for the Software and related products sold under the
same Purchase Agreement.
d. Warranty Exclusions. This warranty is made void if the Licensee or any other third
party makes any modifications to the Software. Licensee will pay ADIC for
corrections necessitated by difficulties or defects traceable to Licensee's errors or
system changes in accordance with ADIC's then current standard time and material
charges.
License Agreement vii
Page 8
SNMS
e. Warranty Disclaimer. EXCEPT FOR THE EXPRESS LIMITED WARRANTY
STATED ABOVE, ADIC MAKES NO WARRANTIES, EXPRESS OR IMPLIED,
FOR THE SOFTWARE, INCLUDING THE WARRANTIES OF
MERCHANTABILITY AND FITNESS FOR A PARTICULAR PURPOSE.
f. Third Party Warranties. No reseller or distributor of the Software who may have
participated in offering, demonstrating, promoting or delivering the Software subject
to this License makes any warranty whatsoever. All limitations and exclusions of
warranty, disclaimers of warranty, limitations of damages and remedies are as set
forth hereinabove and the terms of all portions of this License apply to such reseller or
distributor to the full extent applicable to ADIC.
Maintenance
Maintenance, enhancements and Updates for the Software are not covered under this
License. If desired by the Licensee, such services must be provided for under separate
agreement.
Infringement Indemnification
a. ADIC will defend, indemnify, save, and hold Licensee harmless against claims,
demands, liability, damages, and judgments which are finally adjudicated, including
attorney's fees and court costs arising or resulting directly from any claim, suit or
litigation brought against Licensee based on infringement of any U. S. patent or
copyright by the Software (except that indemnification does not apply to any third
party software which may be embedded therein), provided, however, that such
indemnity is conditioned upon receipt by ADIC of prompt notification in writing of
such claim and that Licensee provides continuing information and reasonable
assistance for the defense and settlement of any claim. ADIC will retain attorneys, as
deemed necessary, and conduct the defense and settlement of such claim. ADIC may,
at its own expense and at its option, either (1) procure for Licensee the right to
continue using the Software, or (2) replace the same with non-infringing software, or
(3) modify the Software so that it becomes non-infringing provided such modified
intellectual property will reasonably meet Licensee's needs.
viii 6-00360-04 Rev A
Page 9
SNMS
b. Upon failure of (1), (2) or (3) above, despite the reasonable efforts of ADIC, Licensee
may terminate this License only with respect to the Software adversely affected by
such action or claim. Upon such termination ADIC will promptly refund to Licensee
any License Fees paid and other payments made for the adversely affected Software.
ADIC may deduct from the refund a fair market value for usage, which will be a
pro rata share of the License charge for the time period used, assuming a three (3)
year straight line depreciation with no salvage value.
c. Notwithstanding the foregoing ADIC has no liability if any such claim or suit is based
upon or arises out of: 1) alterations of the Software by Licensee or any third party; 2)
Licensee's failure to install updated Software provided by ADIC for avoiding such
infringement; 3) use of the Software in combination with apparatus or software not
furnished by ADIC; 4) use of the Software in a manner for which it was neither
designed nor contemplated; 5) third party software embedded in the Software; 6)
Software modified by ADIC for Licensee in accordance with Licensee's
specifications or requests; or 7) a patent, trademark or copyright in which Licensee or
any of its affiliates or subsidiaries has a direct or indirect interest by license or
otherwise.
Term and Termination
a. Ter m. The term of this License is perpetual, unless terminated by ADIC as provided
herein.
b. Termination. This License commences on the Effective Date and will continue in
perpetuity unless Licensee fails to comply with any of the material conditions of this
License. ADIC may, after allowing Licensee a reasonable time to cure its default,
terminate this License upon written notice to the Licensee. Within thirty (30) days
after termination of this License, Licensee will certify, in writing, to ADIC, that
Licensee has discontinued the use of all Software; and either destroyed or, at ADIC’s
election, returned to ADIC the original and all copies of the Software and
Documentation in any form maintained by Licensee.
c. Termination for Cause. A violation of any provision of Paragraph 3. above will be
deemed a material breach and the basis for immediate termination of this License.
License Agreement ix
Page 10
SNMS
d. Termination upon Insolvency. This License may be terminated by ADIC if the
Licensee (i) terminates or indefinitely suspends its business; (ii) becomes subject to
any bankruptcy or insolvency proceeding under governmental statute; or (iii)
becomes insolvent or becomes subject to direct control by a trustee, receiver or
similar authority.
e. Remedies upon Termination. If this License is terminated by ADIC, ADIC will have
the right to take immediate possession of the Software, Documentation, and all copies
wherever located, without demand or notice. Termination of this License is in
addition to and not in lieu of any equitable or legal remedies available to ADIC.
Notices and Correspondence
All notices and correspondence sent by one party to the other in all matters will be sent to
the addresses listed in the initial paragraph hereof, except as otherwise requested in
writing.
DISCLAIMER AND LIMITATION OF LIABILITY
THE LICENSEE HAS THE SOLE RESPONSIBILITY FOR THE ADEQUATE
PROTECTION AND BACK-UP OF ITS DATA USED IN CONNECTION WITH THE
SOFTWARE. IN NO EVENT WILL ADIC BE LIABLE FOR SPECIAL, INDIRECT,
INCIDENTAL OR CONSEQUENTIAL DAMAGES OR ANY DAMAGES
WHATSOEVER RESULTING FROM THE LOSS OF USE, DATA OR PROFITS,
RERUN TIME, INACCURATE INPUT OR WORK DELAYS, OR ANY PERSONAL
OR PROPERTY DAMAGE ARISING OUT OF OR IN CONNECTION WITH THIS
LICENSE OR THE USE, PERFORMANCE OR NON-PERFORMANCE OF THE
SOFTWARE, WHETHER IN ACTION, IN CONTRACT, OR TORT INCLUDING
NEGLIGENCE, EVEN IF ADIC KNEW, SHOULD HAVE KNOWN OR HAS BEEN
ADVISED OF THE POSSIBILITY OF SUCH DAMAGES. ADIC's LIABILITY FOR
DAMAGES HEREUNDER WILL IN NO EVENT EXCEED THE AMOUNT OF FEES
PAID BY LICENSEE UNDER THIS LICENSE.
x 6-00360-04 Rev A
Page 11
SNMS
General
a. No Assignment. This License is not assignable. None of the Software or
Documentation may be sublicensed, assigned, or transferred to any other party
without ADIC’s prior written consent. Any effort contradictory with this is null and
void.
b. Modification. This License or any Exhibit hereto can only be modified by a written
agreement executed by Licensee and ADIC.
c. Governing Law. The laws of the state of Washington will govern this license. All
litigation between the parties, including all applications for injunctive relief, must be
conducted before a court of competent jurisdiction within King County, Washington,
USA and both parties consent to personal jurisdiction of such court. If any of the
provisions of this License are held to be invalid under any applicable statute or law,
they are, to that extent, deemed omitted.
d. Enforcement Costs. The party prevailing in any litigation or legal proceeding,
including arbitration, arising out of any dispute under this Agreement will be entitled
to recover reasonable attorneys’ fees and costs from the other party.
e. Limitations on Actions. Any action, regardless of form, arising out of the transactions
under this License, may not be brought by either party more than one (1) year after
the cause of action has accrued, except that an action for nonpayment may be brought
within four (4) years after the last payment date.
Entirety
Licensee acknowledges that it has read this Software License, understands it, and agrees
to be bound by its terms and conditions. Further, Licensee agrees that this is the complete
and exclusive statement of the agreement between the parties and supersedes all proposals
or prior agreements, oral or written and all other communications between the parties
relating to the subject matter of this License. Any variance from the terms and conditions
of this License or any supplement in any Licensee purchase order or other written
notification or agreement will be of no effect.
License Agreement xi
Page 12

SNMS
xii 6-00360-04 Rev A
Page 13
SNMS
Contents
Introduction
Intended Audience . . . . . . . . . . . . . . . . . . . . . . . . . . . . . . . . . . . . . . . . . . . . . . . . . . . . . . . . . 1-1
How This Book is Organized . . . . . . . . . . . . . . . . . . . . . . . . . . . . . . . . . . . . . . . . . . . . . . . . . 1-1
Explanation of Symbols . . . . . . . . . . . . . . . . . . . . . . . . . . . . . . . . . . . . . . . . . . . . . . . . . . . . . 1-2
Conventions . . . . . . . . . . . . . . . . . . . . . . . . . . . . . . . . . . . . . . . . . . . . . . . . . . . . . . . . . . . . . . 1-3
Installing SNMS
Determining Installation Requirements . . . . . . . . . . . . . . . . . . . . . . . . . . . . . . . . . . . . . . . . . . 2-1
Using the Optional Pre-Installation Configuration . . . . . . . . . . . . . . . . . . . . . . . . . . . . . . . . . . 2-1
Installing SNMS Software . . . . . . . . . . . . . . . . . . . . . . . . . . . . . . . . . . . . . . . . . . . . . . . . . . . . 2-2
Configuring SNMS Software . . . . . . . . . . . . . . . . . . . . . . . . . . . . . . . . . . . . . . . . . . . . . . . . . . 2-6
Using the Initial Configuration Wizard . . . . . . . . . . . . . . . . . . . . . . . . . . . . . . . . . . . . . . . . 2-8
Entering a License . . . . . . . . . . . . . . . . . . . . . . . . . . . . . . . . . . . . . . . . . . . . . . . . . . . . . . 2-9
Adding File Systems . . . . . . . . . . . . . . . . . . . . . . . . . . . . . . . . . . . . . . . . . . . . . . . . . . . . 2-11
Adding Libraries . . . . . . . . . . . . . . . . . . . . . . . . . . . . . . . . . . . . . . . . . . . . . . . . . . . . . . . 2-13
Adding Tape Drives . . . . . . . . . . . . . . . . . . . . . . . . . . . . . . . . . . . . . . . . . . . . . . . . . . . . 2-14
Adding Media . . . . . . . . . . . . . . . . . . . . . . . . . . . . . . . . . . . . . . . . . . . . . . . . . . . . . . . . . 2-15
Contents xiii
Page 14
SNMS
Adding Storage Policies . . . . . . . . . . . . . . . . . . . . . . . . . . . . . . . . . . . . . . . . . . . . . . . . . 2-17
Scheduling a Backup . . . . . . . . . . . . . . . . . . . . . . . . . . . . . . . . . . . . . . . . . . . . . . . . . . . 2-18
Using a Web Browser . . . . . . . . . . . . . . . . . . . . . . . . . . . . . . . . . . . . . . . . . . . . . . . . . . . 2-21
Downloading Client Software . . . . . . . . . . . . . . . . . . . . . . . . . . . . . . . . . . . . . . . . . . . . . . . . 2-21
Using FTP . . . . . . . . . . . . . . . . . . . . . . . . . . . . . . . . . . . . . . . . . . . . . . . . . . . . . . . . . . . . 2-22
Installing Client Software . . . . . . . . . . . . . . . . . . . . . . . . . . . . . . . . . . . . . . . . . . . . . . . . . . . 2-23
Installing on Windows . . . . . . . . . . . . . . . . . . . . . . . . . . . . . . . . . . . . . . . . . . . . . . . . . . . 2-23
Installing on SGI IRIX . . . . . . . . . . . . . . . . . . . . . . . . . . . . . . . . . . . . . . . . . . . . . . . . . . . 2-24
Installing on Sun Solaris . . . . . . . . . . . . . . . . . . . . . . . . . . . . . . . . . . . . . . . . . . . . . . . . . 2-25
Installing on Linux . . . . . . . . . . . . . . . . . . . . . . . . . . . . . . . . . . . . . . . . . . . . . . . . . . . . . . 2-26
Installing on IBM AIX . . . . . . . . . . . . . . . . . . . . . . . . . . . . . . . . . . . . . . . . . . . . . . . . . . . 2-27
Installing StorNext FS on UNIX
Determining Installation Requirements . . . . . . . . . . . . . . . . . . . . . . . . . . . . . . . . . . . . . . . . . . 3-1
Using the Optional Pre-Installation Configuration . . . . . . . . . . . . . . . . . . . . . . . . . . . . . . . . . . 3-1
Installing StorNext FS Software . . . . . . . . . . . . . . . . . . . . . . . . . . . . . . . . . . . . . . . . . . . . . . . 3-2
Configuring StorNext FS Software . . . . . . . . . . . . . . . . . . . . . . . . . . . . . . . . . . . . . . . . . . . . . 3-5
Using the Initial Configuration Wizard . . . . . . . . . . . . . . . . . . . . . . . . . . . . . . . . . . . . . . . . 3-6
Entering a License . . . . . . . . . . . . . . . . . . . . . . . . . . . . . . . . . . . . . . . . . . . . . . . . . . . . . . 3-8
Adding File Systems . . . . . . . . . . . . . . . . . . . . . . . . . . . . . . . . . . . . . . . . . . . . . . . . . . . . 3-10
Using a Web Browser . . . . . . . . . . . . . . . . . . . . . . . . . . . . . . . . . . . . . . . . . . . . . . . . . . . 3-12
Downloading Client Software . . . . . . . . . . . . . . . . . . . . . . . . . . . . . . . . . . . . . . . . . . . . . . . . 3-12
Using FTP . . . . . . . . . . . . . . . . . . . . . . . . . . . . . . . . . . . . . . . . . . . . . . . . . . . . . . . . . . . . 3-13
xiv 6-00360-04 Rev A
Page 15
SNMS
Installing Client Software . . . . . . . . . . . . . . . . . . . . . . . . . . . . . . . . . . . . . . . . . . . . . . . . . . . 3-13
Installing on SGI IRIX . . . . . . . . . . . . . . . . . . . . . . . . . . . . . . . . . . . . . . . . . . . . . . . . . . . 3-14
Installing on Windows . . . . . . . . . . . . . . . . . . . . . . . . . . . . . . . . . . . . . . . . . . . . . . . . . . . 3-14
Installing on Sun Solaris . . . . . . . . . . . . . . . . . . . . . . . . . . . . . . . . . . . . . . . . . . . . . . . . . 3-15
Installing on Linux . . . . . . . . . . . . . . . . . . . . . . . . . . . . . . . . . . . . . . . . . . . . . . . . . . . . . . 3-16
Installing on IBM AIX . . . . . . . . . . . . . . . . . . . . . . . . . . . . . . . . . . . . . . . . . . . . . . . . . . . 3-17
Installing StorNext FS on Windows
Determining Installation Requirements . . . . . . . . . . . . . . . . . . . . . . . . . . . . . . . . . . . . . . . . . . 4-1
Installing StorNext FS Software . . . . . . . . . . . . . . . . . . . . . . . . . . . . . . . . . . . . . . . . . . . . . . . 4-1
Obtaining a License . . . . . . . . . . . . . . . . . . . . . . . . . . . . . . . . . . . . . . . . . . . . . . . . . . . . . . . . 4-2
Labeling Drives . . . . . . . . . . . . . . . . . . . . . . . . . . . . . . . . . . . . . . . . . . . . . . . . . . . . . . . . . . . . 4-3
Simple Configuration . . . . . . . . . . . . . . . . . . . . . . . . . . . . . . . . . . . . . . . . . . . . . . . . . . . . 4-4
Configuring StorNext FS Software . . . . . . . . . . . . . . . . . . . . . . . . . . . . . . . . . . . . . . . . . . . . . 4-4
Custom Configuration . . . . . . . . . . . . . . . . . . . . . . . . . . . . . . . . . . . . . . . . . . . . . . . . . . . . 4-5
Mapping StorNext FS Drives . . . . . . . . . . . . . . . . . . . . . . . . . . . . . . . . . . . . . . . . . . . . . . . . . 4-6
Contents xv
Page 16
SNMS
Customer Assistance
Technical Assistance . . . . . . . . . . . . . . . . . . . . . . . . . . . . . . . . . . . . . . . . . . . . . . . . . . . . . . . 5-1
Contacting Support . . . . . . . . . . . . . . . . . . . . . . . . . . . . . . . . . . . . . . . . . . . . . . . . . . . . . . . . . 5-1
Training . . . . . . . . . . . . . . . . . . . . . . . . . . . . . . . . . . . . . . . . . . . . . . . . . . . . . . . . . . . . . . . . . . 5-1
Publications . . . . . . . . . . . . . . . . . . . . . . . . . . . . . . . . . . . . . . . . . . . . . . . . . . . . . . . . . . . . . . 5-1
Web site . . . . . . . . . . . . . . . . . . . . . . . . . . . . . . . . . . . . . . . . . . . . . . . . . . . . . . . . . . . . . . . . . 5-2
xvi 6-00360-04 Rev A
Page 17
SNMS
Introduction
StorNext Management Suite (SNMS) is a scalable, high performance, data management solution
that ensures the long-term safety and recoverability of data in SAN environments, while optimizing
the use of storage resources. The result is high speed data sharing, improved productivity, and
reduced network bottlenecks.
SNMS contains the StorNext Storage Manager (StorNext SM) and the StorNext File System
(StorNext FS).
other types of connections) in a serverless environment that enables heterogeneous clients to
access data and share files. Although StorNext FS is the core file system technology used in SNMS,
ADIC supports StorNext FS as a standalone product.
Intended Audience
This guide is intended for system administrators and service personnel that would install the SNMS
and StorNext FS software.
1
StorNext FS primarily provides Fibre Channel (FC) connections (but also supports
How This Book is Organized
To accommodate the installation and configuration differences between SNMS and StorNext FS,
this guide is divided into three main chapters: Installing SNMS, Installing StorNext FS on UNIX, and
Installing StorNext FS on Windows.
If you purchased the SNMS product, follow the instructions in the Installing SNMS chapter. The
chapter also guides you through the steps for adding a file system, so you do not need to follow the
instructions for installing StorNext FS in the other chapters of this guide.
If you purchased the StorNext FS product, and depending on your operating system, follow the
instructions in either the Installing StorNext FS on UNIX or the Installing StorNext FS on Windows
chapters. The chapters only explain how to install the file system, so if you decide to purchase the
SNMS product at a later time, you will need to contact your ADIC sales representative or ADIC
Technical Assistance Center (ATAC) for assistance.
1
StorNext SM consists of two components formerly known as FileServ (TSM) and VolServ (MSM). StorNext SM provides
high-performance file migration and management services, and manages automated and manual media libraries,
including library volumes. StorNext FS consists of a single component, formerly known as CentraVision (DSM).
Introduction 1-1
Page 18
SNMS
This guide provides basic setup and installation procedures for using SNMS and StorNext FS.
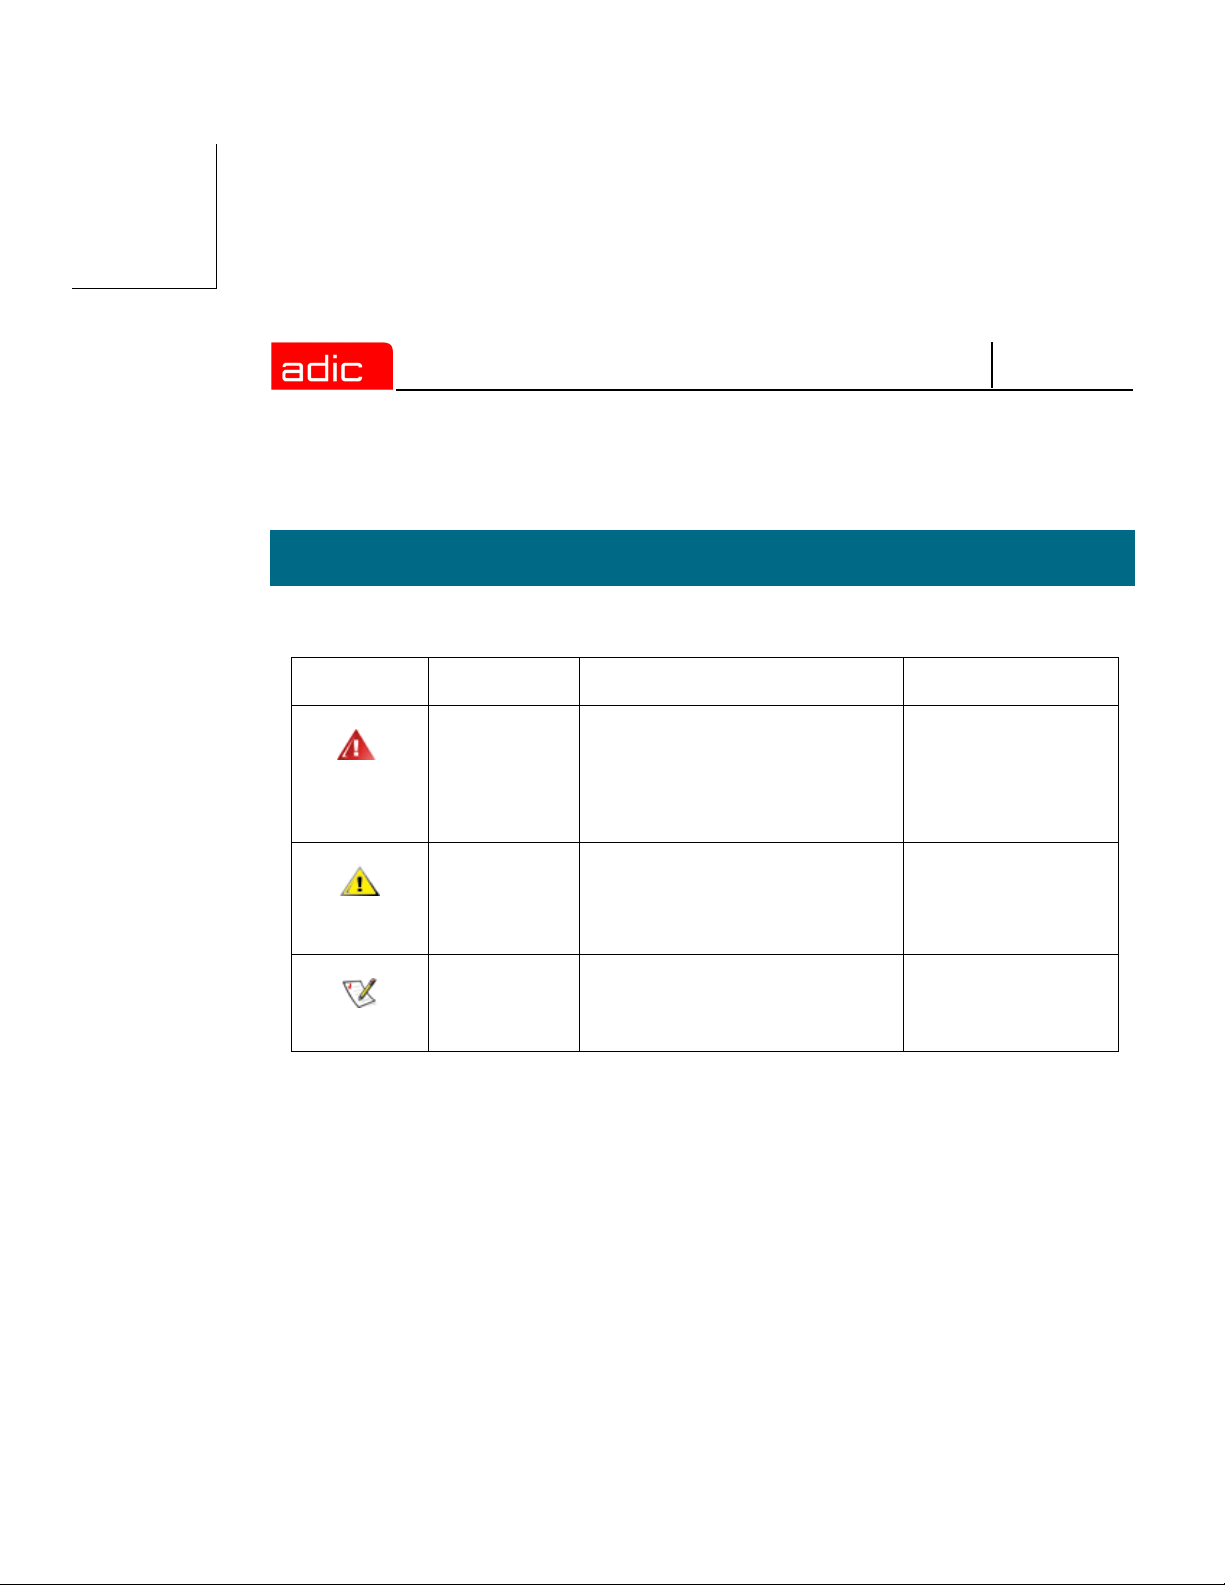
Explanation of Symbols
The following symbols indicate important information.
Symbol Description Definition Consequence
WARNING : Advises you to take or avoid a
specified action
CAUTION: Advises you to take or avoid a
specified action
NOTE: Indicates important information
that helps you make better use of
the software
Failure to take or
avoid this action
could result in
physical harm to the
user or hardware
Failure to take or
avoid this action
could result in loss of
data
No hazardous or
damaging
consequences
1-2 6-00360-04 Rev A
Page 19
SNMS
Conventions
The conventions used throughout this book are listed below.
Convention Example
For all UNIX-based commands, the
# prompt is implied, although it is not shown.
Screen text, file names, program names, and
commands are in Courier font.
The root prompt for UNIX is shown as a number
symbol.
Site-specific variables are enclosed within
brackets < > .
Pressing Return or Enter after each command is
assumed.
A menu name with an arrow refers to a sequence
of menus.
Red Hat and SuSE are inclusive whenever Linux
is mentioned.
/usr/cvfs/bin/cvlabel -l
is the same as
# /usr/cvfs/bin/cvlabel -l
mkdir -p <mount point>
tar xvf <filename>
chmod 777 <mount point>
Programs > StorNext File
System > Help
Introduction 1-3
Page 20
SNMS
1-4 6-00360-04 Rev A
Page 21

SNMS
Installing SNMS
You can install the StorNext Management Suite (SNMS) software on a server that uses an SGI
IRIX, Sun Solaris, or Linux operating system. When you have successfully installed the SNMS
software, use the Initial Configuration Wizard (ICW) to configure the software. (After initial
configuration, you can use the SNMS GUI to change your configuration parameters.) You are then
ready to use the SNMS software.
You can also run the SNMS software on a client machine by downloading the client files from the
server and then installing them on your client. You can install client files on machines that use an
IRIX, Solaris, Linux, IBM AIX, or Windows (2000 and NT) operating system.
CAUTION
If you purchased the StorNext Management Suite (SNMS) product,
you must use the installation instructions in this chapter to
successfully install SNMS on your machine. You do not need to use
the installation instructions in the other chapters of this guide.
Determining Installation Requirements
Before installing SNMS on any machine, refer to the StorNext Management Suite Release Notes
to verify that you have complied with all the necessary requirements for running the software on
your specific operating systems.
To learn more about advanced configuration and features such as failover, refer to the
StorNext Management Suite System Administrator Guide.
Installing SNMS 2-1
Page 22
SNMS
Using the Optional Pre-Installation Configuration
SNMS requires the user accounts tdlm and www to exist in the passwd file, and the group account
adic to exist in the group file. During installation, SNMS uses a system utility to create these
accounts if it cannot find them.
• If you want the system utility to create the accounts, skip this section and go to the
Installing SNMS Software section in this document.
• If you prefer to manually add these accounts, use the procedure described here. You must
not only perform this procedure for each machine where you install the SNMS software, but
also on each machine that you set up as a client (refer to the
section in this document). After you have completed this optional step, continue to the
Installing SNMS Software section in this document.
Step 1 Add the following user accounts tdlm and www.
Username UserID GroupID Login Shell Home Directory
Installing Client Software
tdlm 100 100 /bin/ksh /usr/adic
www 101 100 /bin/ksh /usr/adic/www
Step 2 Add the group account adic.
Group Name GroupID Members List
adic 100 root, tdlm, www
2-2 6-00360-04 Rev A
Page 23
SNMS
Installing SNMS Software
If you purchased the SNMS product, use the following procedure to install the SNMS software in
your operating environment. Both server and client files are loaded on your machine during the
installation process.
Step 1 Designate one machine as your server.
Step 2 Load the CD that is appropriate for your operating system.
Step 3 Double-click the StorNext folder.
Step 4 Double-click inst.StorNext.
The following menu opens.
StorNext INSTALL 2.3.1(xxx) MAIN MENU
1) Installation Configuration
2) Install StorNext
3) Show Status
4) Quit
Enter your choice <#>:
Figure 2-1 StorNext Install Main Menu
Step 5 Type 1 to display a list of parameters that can be modified.
Installing SNMS 2-3
Page 24
The following menu appears. The software is installed into the directory
(in this example, <usr>) containing the greatest amount of space.
StorNext Install 2.3.1 (xx) Configuration Menu
SNMS
0)
1)
2)
3)
4)
5)
6)
7)
8)
9)
10)
11)
12)
_____VALUE________
/<usr>/adic/perl
/<usr>/adic/database
/<disk2>/database_bkp
/<disk2>/database_jnl
/<usr>/adic/MSM
/<usr>/adic/TSM
LTO
LTO
/<usr>/adic/TCM
/<usr>/adic/www
/<usr>/adic/apache
/<usr>/cvfs
RETURN
____DESCRIPTION________
Perl installation directory
Database installation directory
Database backup directory
Database journal directory
Media Manager installation directory
Tertiary Manager installation directory
Default media type
Default backup type
Trashcan Manager installation directory
GUI installation directory
Apache installation directory
Disk Manager installation directory
Returns to previous menu
Enter parameter to modify or other selection <12>:
Figure 2-2 StorNext Install Configuration Menu
Step 6 To modify the default parameters, type the parameter number.
If you do not need to modify the parameters, skip this step and go to Step 8.
NOTE
If you do not use LTO2 media in your library, you need to change parameter
numbers 6 and 7 to match the media type that is located in your library. For mixed
media or multiple libraries, you need to change the parameter numbers to match
the media type that you use as your primary backup.
For increased reliability, install the database backup directory (database_bkp)
and the database journal directory (database_jnl) on a disk that is different
from the one on which the database installation directory is stored.
Step 7 When you are satisfied with the parameter settings of the installation configuration, press
Enter or type 12 to return to the Install Main Menu (see
Figure 2-1).
Step 8 Type 2 to install the SNMS software.
2-4 6-00360-04 Rev A
Page 25

SNMS
The following menu appears showing eight steps of component-level status. As the
software is being installed, it displays a submenu for each step. When the step is
complete, its status changes from “To do” to “Complete.”
This menu contains the same content for all operating systems except IRIX. On IRIX, you
will see additional text on the screen that instructs you to reboot your machine. (Refer to
the note in
StorNext INSTALL 2.3.1(xx) Status
1) Install perl Complete
2) Install database Complete
3) Install MSM Complete
4) Install TSM Complete
5) Install TCM Complete
Step 10).
6) Install GUI Complete
7) Install apache Complete
8) Install DSM Complete
When the installation has completed you will point your browser at
the following address and port# to access the StorNext home page:
http://<machinename:port#>
Please make a note of this information.
---------------------------------------------------------------------------------
Some operations have been performed which require the machine to be
restarted. For these changes to take effect please reboot the machine
at your convenience.
Hit the enter key to continue.
Figure 2-3 StorNext Install Status
Installing SNMS 2-5
Page 26

SNMS
NOTE
Step 9 When the installation is complete, return to the Install Main Menu (see Figure 2-1).
To review the screen that displays the component-level status of the SNMS software
installation (see
Step 10 Type 4 to quit the installation process and exit the menu.
NOTE
Please make note of the machine name and port number in the Install Status
screen (see Figure 2-3
StorNext Management Suite GUI.
Figure 2-3), type 3 from the Install Main Menu.
Before configuring the StorNext FS software, reboot your system if you are using
an IRIX operating system.
). You will need this information to access the
Configuring SNMS Software
Use the following procedure to configure the SNMS software that you have installed on your
machine.
Step 1 Open your Web browser.
NOTE
Refer to the StorNext Management Suite Release Notes for information about
browsers that are supported by SNMS.
Step 2 Type the full address of your machine and its port number (http://<machine name>:
<port number>) in the Address field and press Enter. Use the name of the machine and
port number that you copied when you installed the SNMS software.
If you did not remember to copy the name of your machine and its port number, you can
still access the SNMS software. By default, the software runs on port number 81.
However, if this port number is being used by another application, then use the next higher
number. For instance, if port number 81 is not available, then use port number 82; if port
number 82 is not available, then use port number 83.
2-6 6-00360-04 Rev A
Page 27

SNMS
The following screen appears.
Figure 2-4 StorNext Logon
Step 3 Type admin in the User ID field and press Tab.
Step 4 Type admin in the Password field and click OK.
NOTE
You will be prompted to start non-running components see Figure 2-5) and the initial
StorNext GUI (for either StorNext Management Suite or the StorNext File System) will
appear.
Figure 2-5 StorNext Run Components Prompt
Step 5 Click OK to start the (SNMS or SNFS) components.
To change your password or to set up additional users, refer to the StorNext
Management Suite System Administrator Guide for more information.
Installing SNMS 2-7
Page 28

SNMS
The Initial Configuration Wizard (ICW) screen (see Figure 2-6) appears and will guide
you through the complete configuration of the StorNext software.
CAUTION
You should first complete the ICW for licensing and configuring your
software before you use the StorNext Management Suite GUI. If you
work on the GUI before completing the ICW, file system failures will
occur.
Using the Initial Configuration Wizard
The Initial Configuration Wizard (ICW) guides you step-by-step through the process of configuring
the SNMS software. The first page of the ICW lists seven configuration steps that must be
completed in sequence. Text for the active step appears in a different color. It is followed by the
word Completed when the step is done. Until all seven configuration steps are completed, the ICW
opens every time the StorNext Management Suite GUI is refreshed.
Each configuration step also contains its own wizard that leads you through a set of screens for that
step. You must continue through all the screens for a configuration step before the step is
completed. For example, you must complete all the screens associated with Step 1: Enter License
before you can continue to Step 2: Add File System. When you are finished with a step, click Done
to continue to the next step. After a step is completed, you cannot return to the previous step.
2-8 6-00360-04 Rev A
Page 29

SNMS
Once all the steps are completed, click Finish from the ICW screen. The ICW screen is no longer
available—it is designed for initial configuration only.
Figure 2-6 Initial Configuration Wizard
Click Next to begin Step 1: Enter License. The Enter License - Introduction screen appears
(see Figure 2-7
).
Entering a License
You must accept the SNMS license agreement and provide a valid license string to go to the next
configuration step.
The SNMS software comes with a temporary license that allows you to use the software for
30 days. If you have not received a license string, you will see the 30 day temporary license check
box on the Enter License String screen. To use the temporary license, select this check box and
proceed through resetting the wizard. Before the temporary license expires, you should contact the
ADIC Technical Assistance Center (ATAC) at 1-800-827-3822 or at support@adic.com
a permanent license.
Installing SNMS 2-9
to obtain
Page 30

SNMS
You may receive your license in one of the following ways.
• If you receive your license string electronically, paste the license string into the file
/<usr>/adic/DSM/config/license.dat. This allows SNMS to automatically detect
your license string when going through the ICW.
• If you receive your license string as a hard copy, type the license string exactly as it appears
into the field on the Enter License String screen. The following is an example of a license
string.
server 1 83000C82 AAAAAAAAAWAJDA2R7UBAM7RA974VNBRFFANXECXZW2E9DAYBQ5HA
Figure 2-7 Enter License - Introduction
Step 1 Click Next to continue through all the screens for the Enter License wizard.
Once the Status screen appears displaying successful completion of adding the license
information, click Next to return to the Enter License - Introduction screen.
Step 2 Click Done when you are ready to start the next step of the software configuration
process.
2-10 6-00360-04 Rev A
Page 31

SNMS
The ICW screen appears and displays the word Completed after Step 1: Enter License
(see
Figure 2-6).
Step 3 Click Next to begin Step 2: Add File System.
The File System - Introduction screen appears (see Figure 2-8).
Adding File Systems
The Add File System wizard configures one or more file systems, along with the following options
and additional screen information.
• Enable Data Migration—This option appears on the Add New File System screen. If
checked, SNMS becomes a managed file system and enables automatic data movement
between the tape library and disk storage. If unchecked, SNMS remains an unmanaged file
system and never moves any data to the tape storage library.
• Enable Trashcan—This option appears on the Add New File System screen and is only
available for managed file systems. If checked, you can delete files from the Trashcan.
CAUTION
Installing SNMS 2-11
If you are using the SNMS client software with Windows, you need to
turn off the Recycle Bin within the StorNext File Systems mapped on
your Windows machine to ensure the file systems will work properly.
To turn off the Recycle Bin, perform the following steps on your Windows
client machine.
Step 1 Right-click the Recycle Bin icon located on your desktop and
click Properties.
Step 2 Click the Global tab.
Step 3 Click Configure drives independently.
Step 4 Click the Local Disk tab onto which you have mapped SNMS.
Step 5 Select the Do not move files to the Recycle Bin. Remove files
immediately when deleted check box.
Step 6 Click Apply and OK.
Page 32

SNMS
• Affinities —You must first install SNMS before you can add affinities to a file system that
you have added. (Refer to “Adding an affinity” in the StorNext Management Suite
Administrator Guide for instructions on performing this task.)
• Customize Stripe Group screen—When entering a name for the stripe group, selecting a
disk, and entering the stripe breadth for a file system on this screen, all disks in the stripe
group must have the same number and size of sectors.
than one stripe group, the first stripe group will contain the meta-data and journal.
By default, if you configure more
Figure 2-8 File System - Introduction
Step 1 Click Next to continue through all the screens for the Add File System wizard.
CAUTION
Once the Status screen appears displaying successful completion of configuring one or
more file systems, click Next to return to the File System - Introduction screen.
2-12 6-00360-04 Rev A
The default settings for each step of the Add File System wizard
screens are optimized for most configurations. If you decide to
change the default settings, your changes could negatively impact
system performance.
Page 33

SNMS
Step 2 Click Done when you are ready to start the next step of the software configuration
process.
The ICW screen appears and displays the word completed after Step 2: Add File System.
Step 3 Click Next to begin Step 3: Add Library.
The Library Introduction screen appears (see Figure 2-9).
Adding Libraries
The Add Library wizard configures one or more tape libraries.
Figure 2-9 Library Introduction
Step 1 Click Next to continue through all the screens for the Add Library wizard.
NOTE
Installing SNMS 2-13
On the Library Introduction screen, fabric-attached libraries should be
configured as SCSI libraries.
Page 34

SNMS
Once the Status screen appears displaying successful completion of configuring one or
more tape libraries, click Next to return to the Library Introduction screen.
Step 2 Click Done when you are ready to start the next step of the software configuration
process.
The ICW screen appears and displays the word Completed after Step 3: Add Library.
Step 3 Click Next to begin Step 4: Add Tape Drive.
The Tape Drive Introduction screen appears (see Figure 2-10).
Adding Tape Drives
The Add Tape Drive wizard configures drives in the archive.
Figure 2-10 Tape Drive Introduction
2-14 6-00360-04 Rev A
Page 35

SNMS
CAUTION
Step 1 Click Next to continue through all the screens for the Add Tape Drive wizard.
NOTE
Once the Status screen appears displaying successful completion of adding tape drives,
click Next to return to the Tape Drive Introduction screen.
Step 2 Click Done when you are ready to start the next step of the software configuration
process.
The ICW screen appears and displays the word Completed after Step 4: Add Tape Drive.
Step 3 Click Next to begin Step 5: Add Media.
If you plan to set up one or more software applications to share a
library, your media may be overwritten. Therefore, before proceeding
to Step 1 of Adding Tape Drives, refer to
applications on page 4-104 of the StorNext Management Suite
Installation Guide for instructions on how to properly set up your
software to prevent this situation.
For SCSI, network, or fibre-attached libraries, the device must be matched with
the correct slot on the Matched Devices With Slots screen. For direct SCSIattached disks that are not fibre channel, you do not need to match the device
with the correct slot because the matching is automatically done. If you need help
with slot-to-drive associations, contact ATAC at 1-800-827-3822 or at
support@adic.com.
Sharing a library between
The Add Media - Introduction screen appears (see Figure 2-11).
Installing SNMS 2-15
Page 36

SNMS
Adding Media
The Add Media wizard enters media information in the database and groups media into a single
pool to be available for use as needed. The time required to complete this process varies depending
on the number of media you are adding and the speed of your processor. A rough estimate is one
minute per 15 media.
NOTE
Before you run this wizard, all of your media should be labeled with barcodes and
placed in the library.
Figure 2-11 Add Media - Introduction
Step 1 Click Next to continue through all the screens for the Add Media wizard.
NOTE
2-16 6-00360-04 Rev A
When you are at the Select Media Backup screen, you should keep the default
setting of two backup media as a minimum to provide primary and secondary
backup copies.
Page 37

SNMS
Once the Status screen appears displaying successful completion for adding media, click
Next to return to the Add Media - Introduction screen.
Step 2 Click Done when you are ready to start the next step of the software configuration
process.
The ICW screen appears and displays the word Completed after Step 5: Add Media.
Step 3 Click Next to begin Step 6: Add Storage Policy.
The Storage Policy - Introduction screen appears (see Figure 2-12).
Adding Storage Policies
The Add Storage Policy wizard creates policy classes to logically segregate and control data. The
policy class parameters determine storage and truncation rules.
Figure 2-12 Storage Policy - Introduction
Installing SNMS 2-17
Page 38

SNMS
Step 1 Click Next to continue through all the screens for the Add Storage Policy wizard.
Once the Status screen appears displaying successful completion of configuring storage
policies, click Next to return to the Storage Policy - Introduction screen.
Step 2 Click Done when you are ready to start the next step of the software configuration
process.
The ICW screen appears and displays the word Completed after Step 6: Add Storage
Policy.
Step 3 Click Next to begin Step 7: Schedule Backup.
The Schedule StorNext Backup Introduction screen appears (see Figure 2-13).
2-18 6-00360-04 Rev A
Page 39

SNMS
Scheduling a Backup
The Schedule Backup wizard schedules backups that run automatically at designated times.
Backups are intended to protect against catastrophic loss.
The backup contains only the SNMS configuration files and database.
CAUTION
Figure 2-13 Schedule StorNext Backup Introduction
Your data files must be stored on tape because the backup does not store
them.
Step 1 Click Next to continue through all the screens for the Schedule Backup wizard.
NOTE
Installing SNMS 2-19
On the E-mail Address and Backup Copies screen, check the Primary &
Secondary check box to create primary and secondary backup copies of your
data. If you do not check this option, SNMS makes only a primary backup copy.
Page 40
SNMS
Once the Status screen appears displaying successful completion of backing up the
SNMS files, click Next to return to the Schedule StorNext Backup Introduction screen.
Step 2 Click Done to complete the last step of the software configuration process.
The ICW screen appears and displays the word Completed after Step 7: Schedule
Backup.
You have now completed the initial configuration for the SNMS software, and you can use the
StorNext Management Suite GUI to access the functionality of the software. Refer to the StorNext
Management Suite System Administrator Guide for more information about this functionality.
Figure 2-14 StorNext File System GUI
2-20 6-00360-04 Rev A
Page 41

SNMS
Downloading Client Software
Once you have configured the SNMS software, you can download the client files from the server
and then install them on your client machines. To download the client software from your server,
use either a Web browser or File Transfer Protocol (FTP).
Using a Web Browser
Use the following procedure to download client software if you have access to a web browser on
your client machine.
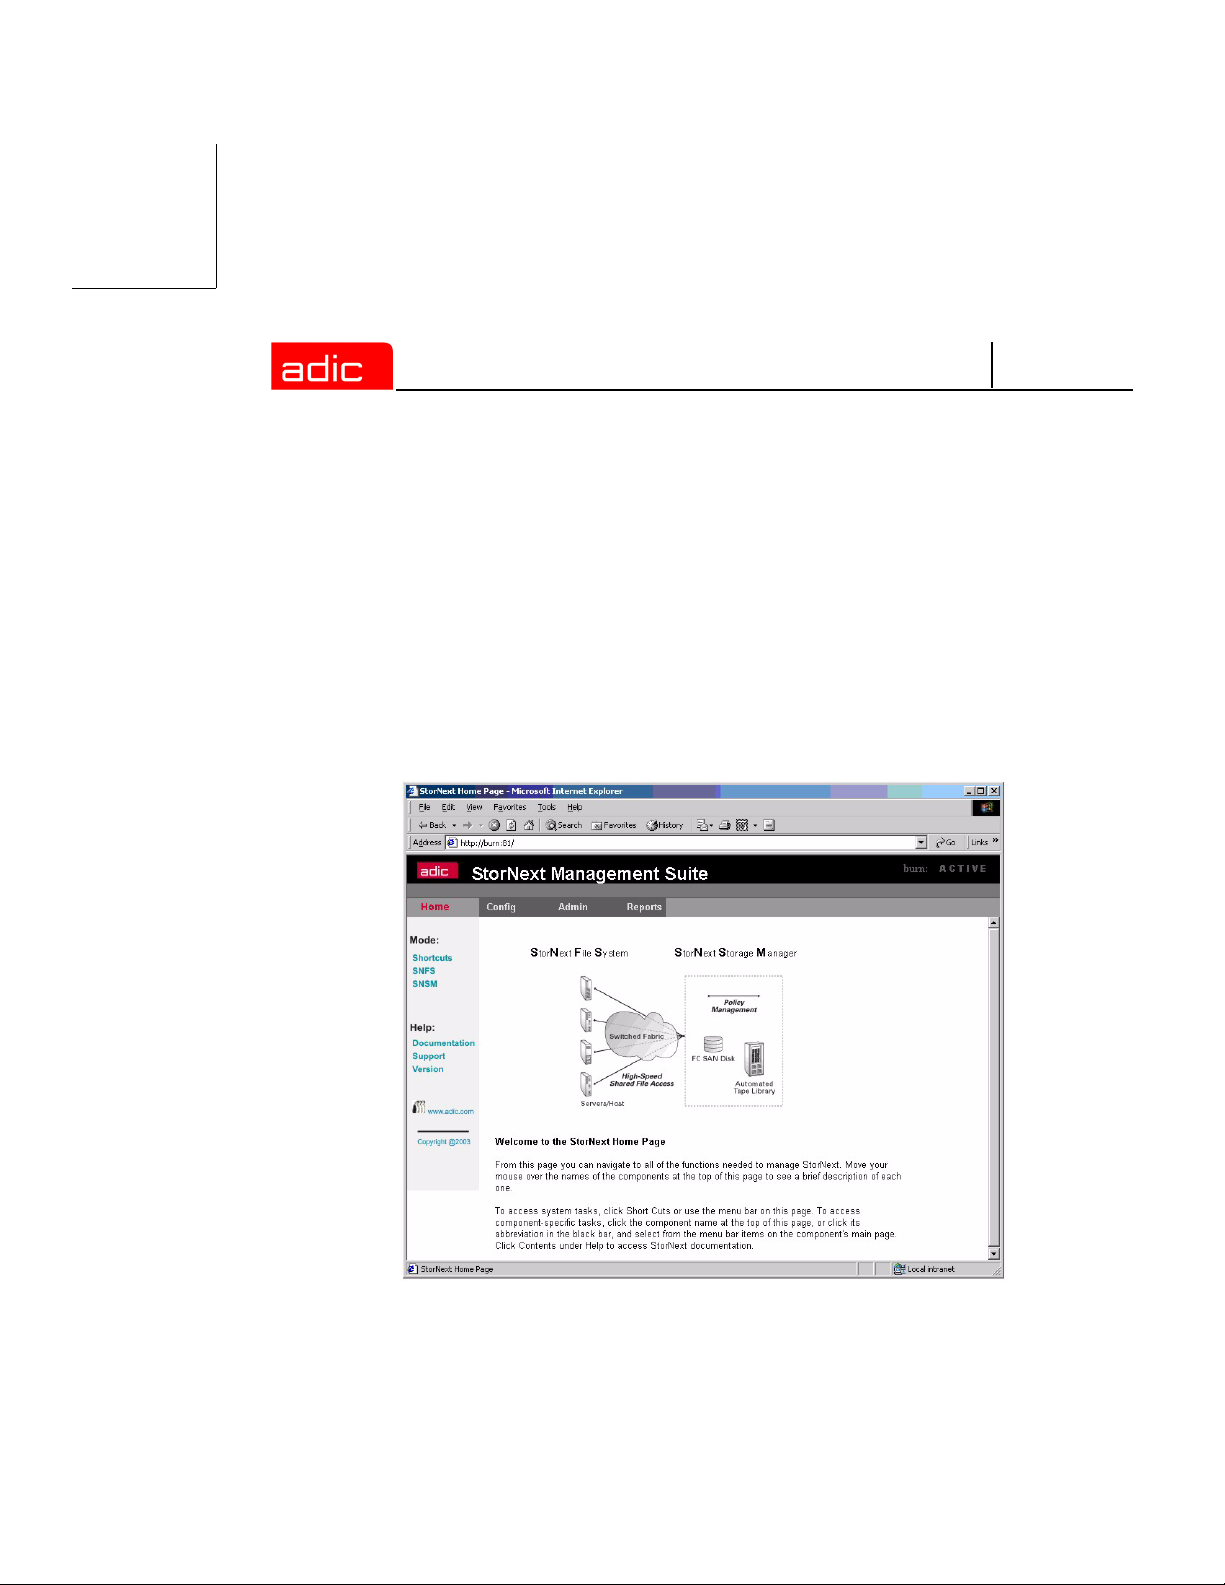
Step 1 Launch a browser from your client machine and point to the URL where your StorNext
Management Suite GUI resides.
Step 2 Select and click Shortcuts from the left navigation bar.
Step 3 Select and click Download Client Software from the Admin menu. The following screen
appears.
Figure 2-15 Select Platform
Installing SNMS 2-21
Page 42

SNMS
Step 4 Choose the platform that corresponds to the operating system on your client machine and
click Next.
Step 5 Continue through the Download Client Software wizard until you have completed
downloading the software for the platform you selected.
Step 6 Go to the Installing Client Software section of this document for instructions on installing
the software for your operating system.
Using FTP
Use the following procedure to download client software if you do not have Web browser access.
Step 1 ftp <StorNext server>
Step 2 ftp> cd /<usr>/cvfs/CLIENTS
Step 3 ftp> bin
Step 4 ftp> get <platform.tar>
Step 5 Go to the Installing Client Software section of this document for instructions on installing
the software for your operating system.
Installing Client Software
The SNMS client software allows the mounting of one or more StorNext File Systems and
communicates with your server. Once you have downloaded the SNMS client software from the
server, you can install the software on your client machines. You cannot perform these installations
through the GUI; you must use command-driven procedures that are specific for your operating
system.
The following procedures provide instructions for installing the SNMS client software in a
Windows, SGI IRIX, Sun Solaris, Linux, or IBM AIX operating system.
NOTE
2-22 6-00360-04 Rev A
If you used the optional pre-installation configuration, you must first perform the
steps for adding a user account and a group account on each machine that you set
up as a client. (Refer to the Using the O
section in this document to perform these steps.)
ptional Pre-Installation Configuration
Page 43

SNMS
Installing on Windows
Use the following procedure to install the SNMS client software in a Windows operating system.
Step 1 Double-click the downloaded file system icon (for example, n32d408.exe) from the
location where you saved the file on your machine.
Step 2 Follow the instructions on the screens in the Windows InstallShield Wizard.
WARNING:
Step 3 Once installation is complete, click Finish and reboot your system.
On the Choose Options to Complete the Installation screen, do NOT
select the option to Label my StorNext File System Disk Devices
check box. During the initial installation of the SNMS software, the
disks have already been labeled during server setup. If you re-label
your operating system disk, you will have to completely rebuild your
machine or restore it using an operating system backup.
Installing on SGI IRIX
Use the following procedure to install the SNMS client software in an SGI IRIX operating system.
Step 1 Log on as root.
This allows you to perform the installation without having permission problems.
Step 2 Install the client software.
tar xvf <filename>
inst -f .
Inst> go
Inst> quit
Step 3 Enable the StorNext File System to start automatically on reboot.
chkconfig cvfs on
chkconfig verbose on
Installing SNMS 2-23
Page 44

SNMS
Step 4 Make sure the /<usr>/cvfs/config/fsnameservers file contains the name of your
server machine.
Step 5 Create the mount points for the file systems.
mkdir -p <mount point>
chmod 777 <mount point>
Step 6 Add the following line to the /etc/fstab file to enable automount after reboot.
<file system name> <mount point> cvfs verbose=yes 0 0
The file system name is the name that you created when you configured the SNMS
software using the ICW’s Add File System wizard. (Refer to the
section of this document for more information.)
Step 7 Reboot the client to rebuild the UNIX kernel.
Adding File Systems
NOTE
To mount a file system manually, type the following at the command prompt.
mount -t cvfs <file system name> <mount point>
Installing on Sun Solaris
Use the following procedure to install the SNMS client software in a Sun Solaris operating system.
Step 1 Log on as root.
This allows you to perform the installation without having permission problems.
Step 2 Install the client software.
tar xvf <filename>
pkgadd -d .
Select to add the package ‘ADICsnfs’
type y (yes, add the package)
type q (quit the pkgadd program)
Step 3 Make sure the /<usr>/cvfs/config/fsnameservers file contains the name of your
server machine.
Step 4 Create the mount points for the file systems.
2-24 6-00360-04 Rev A
Page 45

SNMS
mkdir -p <mount point>
chmod 777 <mount point>
Step 5 Add the following line to the /etc/vfstab file to enable automount after reboot.
<file system name> - <mount point> cvfs - auto verbose=yes
The file system name is the name that you created when you configured the SNMS
software using the ICW Add File System wizard. (Refer to the
section of this document for more information.)
Adding File Systems
NOTE
To mount a file system manually, type the following at the command prompt.
mount -F cvfs <file system name> <mount point>
Installing on Linux
Use the following procedure to install the SNMS client software in a Linux operating system.
Step 1 Log on as root.
This allows you to perform the installation without having permission problems.
Step 2 Install the client software.
tar xvf <filename>
rpm -ivh <client package name>
Step 3 Enable the chkconfig levels to start automatically on reboot.
chkconfig --level 3456 cvfs on
Step 4 Make sure the /<usr>/cvfs/config/fsnameservers file contains the name of your
server machine.
Step 5 Create the mount points for the file systems.
mkdir -p <mount point>
chmod 777 <mount point>
Installing SNMS 2-25
Page 46

SNMS
Step 6 Add the following line to the /etc/fstab file to enable automount after reboot.
<file system name> <mount point> cvfs verbose=yes 0 0
The file system name is the name that you created when you configured the SNMS
software using the ICW’s Add File System wizard. (Refer to the
section of this document for more information.)
Adding File Systems
NOTE
To mount a file system manually, type the following at the command prompt.
mount -t cvfs <file system name> <mount point>
Installing on IBM AIX
Use the following procedure to install the SNMS client software in an IBM AIX operating system.
Step 1 Log on as root.
This allows you to perform the installation without having permission problems.
Step 2 Install the client software.
tar xvf <filename>
installp -ac -d ./*.bff all
Step 3 Make sure the /<usr>/cvfs/config/fsnameservers file contains the name of your
server machine.
Step 4 Create the mount points for the file systems.
mkdir -p <mount point>
chmod 777 <mount point>
Step 5 Add a stanza to /etc/filesystems to enable automount after reboot.
crfs -v cvfs -d <file system name> -a verbose=yes -a
type=cvfs -A yes -m <mount point>
The file system name is the name that you created when you configured the SNMS
software using the ICW’s Add File System wizard. (Refer to the
section of this document for more information.)
2-26 6-00360-04 Rev A
Adding File Systems
Page 47

SNMS
Installing StorNext FS on UNIX
You can install the StorNext File System (StorNext FS) software on a UNIX machine that uses an
SGI IRIX, Sun Solaris, Linux, (Red Hat, SuSE) or IBM AIX operating system. Once you have
successfully installed the StorNext FS software on your server, use the Initial Configuration Wizard
(ICW) to configure the software. You are then ready to use the StorNext FS software.
You can also run the StorNext FS software on a client machine by downloading the client files from
the server and then installing them on your client.
CAUTION
If you purchased the StorNext File System (StorNext FS) product for
UNIX, you must use the installation instructions in this chapter to
successfully install StorNext FS on your UNIX machine. You do not
need to use the installation instructions in the other chapters of this
guide unless you purchase the StorNext FS for Windows product
(refer to
StorNext Management Suite product (refer to
page 2-1).
Installing StorNext FS on Windows on page 4-1) or the
Installing SNMS on
Determining Installation Requirements
Before installing StorNext FS on any machine, refer to the StorNext Management Suite
Release Notes to verify that you have complied with all the necessary requirements for running the
software on your specific operating system.
To learn more about advanced configurations and features like failover, refer to the
StorNext Management Suite System Administrator Guide.
Installing StorNext FS on UNIX 3-1
Page 48

SNMS
Using the Optional Pre-Installation Configuration
StorNext FS requires the user account www to exist in the passwd file, and the group account
adic to exist in the group file. During installation, StorNext FS uses a system utility to create these
accounts if it cannot find them.
• If you want the system utility to create the accounts, skip this section and go to the
Installing StorNext FS Software section in this document.
• If you prefer to manually add these accounts, use the procedure described below. You must
not only perform this procedure for each machine on which you install the StorNext FS
software, but also on each machine that you set up as a client (refer to the
Software section in this document). After you have completed this optional step, continue
to the Installing StorNext FS Software section in this document.
Step 1 Add the user account www.
Username UserID GroupID Login Shell Home Directory
Installing Client
www 101 100 /bin/ksh /usr/adic/www
Step 2 Add the group account adic.
Group Name GroupID Members List
adic 100 root, tdlm, www
Installing StorNext FS Software
Use the following procedure to install the StorNext FS software in your UNIX operating
environment. Both server and client files are loaded on your machine during the installation
process.
Step 1 Designate one machine as your server.
Step 2 Load the CD that is appropriate for your operating system.
Step 3 Double-click the StorNext folder.
3-2 6-00360-04 Rev A
Page 49

SNMS
Step 4 Double-click inst.SNFS.
The following menu appears.
SNFS INSTALL 2.3.1(xxx) MAIN MENU
1) Installation Configuration
2) Install SNFS
3) Show Status
4) Quit
Enter your choice <#>:
Figure 3-1 SNFS Install Main Menu
Step 5 Type 1 to display a list of parameters that can be modified.
The following menu appears. The software is installed into the directory
(in this example, <usr>) containing the most amount of space.
SNFS Install 2.3.1 (xxx) Configuration Menu
_____VALUE________
0)
1)
2)
3)
4)
Enter parameter to modify or other selection <4>:
Figure 3-2 SNFS Install Configuration Menu
Step 6 To modify the default parameters, type the parameter number.
Installing StorNext FS on UNIX 3-3
/<usr>/adic/perl
/<usr>/adic/www
/<usr>/adic/apache
/<usr>/cvfs
RETURN
If you do not want to modify the default parameters, skip this step and go to Step 8.
____DESCRIPTION________
Perl installation directory
GUI installation directory
Apache installation directory
Disk Manager installation directory
Returns to previous menu
Page 50

SNMS
Step 7 When you are satisfied with the parameter settings of the installation configuration, press
Enter or type 4 to return to the Install Main Menu (see
Step 8 Type 2 to install the StorNext FS software.
The following menu appears showing four steps of component-level status. As the
software is being installed, it displays a submenu for each step. When the step is
complete, its status changes from “To do” to “Complete.”
This menu contains the same content for all operating systems except IRIX. On IRIX, you
will see additional text on the screen that instructs you to reboot your machine. (Refer to
the note in
SNFS INSTALL 2.3.1(xx) Status
1) Install perl Complete
2) Install GUI Complete
Step 10.)
Figure 3-1).
3) Install apache Complete
4) Install DSM Complete
When the installation has completed you will point your browser at the following address and
port # to access the StorNext home page:
http://<machinename:port#>
Please make a note of this information.
---------------------------------------------------------------------------------
Hit the enter key to continue.
Figure 3-3 SNFS Install Status
NOTE
3-4 6-00360-04 Rev A
Please make note of the machine name and port number in the Install Status
screen (see
StorNext File System GUI.
). You will need this information to access the
Page 51

SNMS
Step 9 When the installation is complete, return to the Install Main Menu (see Figure 3-1).
To review the screen that displays the component-level status of the StorNext FS software
installation (see
Step 10 Type 4 to quit the installation process and exit the menu.
), type 3 from the Install Main Menu.
NOTE
Before configuring the StorNext FS software, reboot your system if you are using
an IRIX operating system.
Configuring StorNext FS Software
Use the following procedure to configure the StorNext FS software that you have installed on your
machine.
Step 1 Open your Web browser.
NOTE
Step 2 Type the full address of your machine and its port number (http://<machine name>:
<port number>) in the Address field and press Enter. Use the name of the machine and
port number that you copied when you installed the StorNext FS software.
If you did not remember to copy the name of your machine and its port number, you can
still access the StorNext FS software. By default, the software runs on port number 81.
However, if this port number is being used by another application, then use the next higher
number. For instance, if port number 81 isn’t available, then use port number 82; if port
number 82 isn’t available, then use port number 83.
Refer to the StorNext Management Suite Release Notes for information about
browsers that are supported by StorNext FS.
Installing StorNext FS on UNIX 3-5
Page 52

The following screen appears.
Figure 3-4 StorNext Logon
Step 3 Type admin in the User ID field and press Tab.
Step 4 Type admin in the Password field and click OK.
SNMS
NOTE
The Initial Configuration Wizard (ICW) screen (see Figure 3-5) and the StorNext File
System GUI appear. The ICW guides you through the complete configuration of the
StorNext FS software.
CAUTION
To change your password or to set up additional users, refer to the StorNext
Management Suite System Administrator Guide for more information.
You should first complete the ICW for licensing and configuring your
software before you use the StorNext File System GUI. If you work on
the GUI before completing the ICW, you will encounter file system
failures.
Using the Initial Configuration Wizard
The Initial Configuration Wizard (ICW) guides you step-by-step through the process of configuring
the StorNext FS software. The first page of the ICW lists two configuration steps that must be
completed in sequence. Text for the active step appears in a different color, and is followed by the
word Completed when the step is done. Until the two configuration steps are completed, the ICW
opens every time the StorNext File System GUI is refreshed.
3-6 6-00360-04 Rev A
Page 53

SNMS
Each configuration step also contains its own wizard that leads you through a set of screens for that
step. You must continue through all the screens for a configuration step before the step is
completed. For example, you must complete all the screens associated with Step 1: Enter License
before you can continue to Step 2: Add File System. When you are finished with a step, click Done
to continue to the next step. After a step is completed, you cannot return to the previous step;
however, when you are still working on a step, you may continue multiple times through each step’s
screens by clicking Next.
Once all the steps are completed, click Finish from the ICW screen. The ICW screen is no longer
available—it is designed for initial configuration only.
Figure 3-5 Initial Configuration Wizard
Click Next to begin Step 1: Enter License. The Enter License - Introduction screen appears
(see Figure 3-6
Installing StorNext FS on UNIX 3-7
).
Page 54

SNMS
Entering a License
The Enter License wizard enables the configuration of the StorNext FS software. You must accept
the StorNext FS license agreement and provide a valid license string to go to the next configuration
step.
The StorNext FS software comes with a temporary license that allows you to use the software for
30 days. If you have not received a license string, you will see the 30 day temporary license check
box on the Enter License String screen. To use the temporary license, select this check box and
proceed through the resetting of the wizard. Before the temporary license expires, you should
contact the ADIC Technical Assistance Center (ATAC) at 1-800-827-3822 or at
support@adic.com
You may receive your license in one of the following ways.
• If you receive your license string electronically, paste the license string into the file
/<usr>/adic/DSM/config/license.dat. This allows StorNext FS to automatically
detect your license string when going through the ICW.
• If you receive your license string as a hard copy, type the license string exactly as it appears
into the field on the Enter License String screen. The following is an example of a license
string.
to obtain a permanent license.
server 1 83000C82 AAAAAAAAAWAJDA2R7UBAM7RA974VNBRFFANXECXZW2E9DAYBQ5HA
3-8 6-00360-04 Rev A
Page 55

SNMS
Figure 3-6 Enter License - Introduction
Step 1 Click Next to continue through all the screens for the Enter License wizard.
Once the Status screen appears displaying successful completion for adding the license
information, click Next to return to the Enter License - Introduction screen.
Installing StorNext FS on UNIX 3-9
Page 56

SNMS
Step 2 Click Done when you are ready to start the next step of the software configuration
process.
The ICW screen appears and displays the word completed after Step 1: Enter License
(see
Figure 3-5).
Step 3 Click Next to begin Step 2: Add File System.
The File System - Introduction screen appears (see Figure 3-7).
Adding File Systems
The Add File System wizard configures one or more file systems.
Figure 3-7 File System - Introduction
3-10 6-00360-04 Rev A
Page 57

SNMS
Step 1 Click Next to continue through all the screens for the Add File System wizard.
CAUTION
Step 2 Click Done to complete the last step of the software configuration process.
The ICW screen appears and displays the word completed after Step 2: Add File System.
NOTE
You have now completed the initial configuration for the StorNext FS software, and you can use the
StorNext File System GUI to access the functionality of the software. Refer to the StorNext
Management Suite System Administrator Guide for more information about this functionality.
The default settings for each step of the Add File System wizard
screens are optimized for most configurations. If you decide to
change the default settings, your changes could negatively impact
system performance.
You must first install StorNext FS before you can add affinities to a file system that
you have added. (Refer to “Adding an affinity” in the StorNext Management Suite
Administrator Guide for instructions on performing this task.)
Figure 3-8 StorNext File System GUI.
Installing StorNext FS on UNIX 3-11
Page 58

SNMS
Downloading Client Software
Once you have configured the StorNext FS software, you can download the client files from the
server and then install them on your client machines. To download the client software from your
server, use either a Web browser or File Transfer Protocol (FTP).
Using a Web Browser
Use the following procedure to download client software if you have access to a Web browser on
your client machine.
Step 1 Launch a browser from your client machine and point to the URL on which your
StorNext File System GUI resides.
Step 2 Select and click Download Client Software from the Admin menu.
The following screen appears.
Figure 3-9 Select Platform
3-12 6-00360-04 Rev A
Page 59

SNMS
Step 3 Choose the platform that corresponds to the client machine operating system and click
Next.
Step 4 Continue through the Download Client Software wizard until you have completed
downloading the software for the platform you selected.
Step 5 Go to the Installing Client Software section of this document for instructions on installing
the software for your operating system.
Using FTP
Use the following procedure to download client software if you do not have Web browser access.
Step 1 ftp <StorNext FS server>
Step 2 ftp> cd /<usr>/cvfs/CLIENTS
Step 3 ftp> bin
Step 4 ftp> get <platform.tar>
Step 5 Go to the section that follows for instructions on installing the software for your operating
system.
Installing Client Software
The SNFS client software communicates with your server and allows the mounting of one or more
StorNext File Systems. Once you have downloaded the SNMS client software from the server, you
can install the software on your client machines. You cannot perform these installations through the
GUI; you must use command-driven procedures that are specific for your operating system.
The following procedures provide instructions for installing the StorNext FS client software in a
Windows, SGI IRIX, Sun Solaris, Linux, or IBM AIX operating system.
NOTE
Installing StorNext FS on UNIX 3-13
If you used the optional pre-installation configuration, you must first perform the
steps for adding a user account and a group account on each machine that you set
up as a client. (Refer to the Using the Optional Pre-Installation Configuration
section in this document to perform these steps.)
Page 60

SNMS
Installing on Windows
Use the following procedure to install the StorNext FS client software in a Windows operating
system.
Step 1 Double-click the downloaded file system icon (for example, n32d408.exe) from the
location that you saved the file on your machine.
Step 2 Follow the instructions on the screens in the Windows InstallShield Wizard.
WARNING:
On the Choose Options to Complete the Installation screen, do NOT
select the Label my StorNext File System Disk Devices check box.
During the initial installation of the StorNext FS software, the disks
have already been labeled during server setup.
If you re-label your
operating system disk, you will have to completely rebuild your
machine or restore it using an operating system backup.
Step 3 Once installation is complete, click Finish and reboot your system.
Installing on SGI IRIX
Use the following procedure to install the StorNext FS client software in an SGI IRIX operating
system.
Step 1 Log on as root.
This allows you to perform the installation without having permission problems.
Step 2 Install the client software.
tar xvf <filename>
inst -f .
Inst> go
Inst> quit
3-14 6-00360-04 Rev A
Page 61

SNMS
Step 3 Enable the StorNext File System to start automatically on reboot.
chkconfig cvfs on
chkconfig verbose on
Step 4 Make sure the /<usr>/cvfs/config/fsnameservers file contains the name of your
server machine.
Step 5 Create the mount points for the file systems.
mkdir -p <mount point>
chmod 777 <mount point>
Step 6 Add the following line to the /etc/fstab file to enable automount after reboot.
<file system name> <mount point> cvfs verbose=yes 0 0
The file system name is the name that you created when you configured the StorNext FS
software using the ICW’s Add File System wizard. (Refer to the
section of this document for more information.)
Adding File Systems
Step 7 Reboot the client to rebuild the UNIX kernel.
NOTE
Installing StorNext FS on UNIX 3-15
To mount a file system manually, type the following at the command prompt.
mount -t cvfs <file system name> <mount point>
Page 62

SNMS
Installing on Sun Solaris
Use the following procedure to install the StorNext FS client software in a Sun Solaris operating
system.
Step 1 Log on as root.
This allows you to perform the installation without having permission problems.
Step 2 Install the client software.
tar xvf <filename>
pkgadd -d .
Select to add the package ‘ADICsnfs’
type y (yes, add the package)
type q (quit the pkgadd program)
Step 3 Make sure the /<usr>/cvfs/config/fsnameservers file contains the name of your
server machine.
Step 4 Create the mount points for the file systems.
mkdir -p <mount point>
chmod 777 <mount point>
Step 5 Add the following line to the /etc/vfstab file to enable automount after reboot.
<file system name> - <mount point> cvfs - auto verbose=yes
The file system name is the name that you created when you configured the StorNext FS
software using the ICW’s Add File System wizard. (Refer to the
section of this document for more information.)
NOTE
3-16 6-00360-04 Rev A
To mount a file system manually, type the following at the command prompt.
mount -F cvfs <file system name> <mount point>
Adding File Systems
Page 63

SNMS
Installing on Linux
Use the following procedure to install the StorNext FS client software in a Linux operating system.
Step 1 Log on as root.
This allows you to perform the installation without having permission problems.
Step 2 Install the client software.
tar xvf <filename>
rpm -ivh <client package name>
Step 3 Enable the chkconfig levels to start automatically on reboot.
chkconfig --level 3456 cvfs on
Step 4 Make sure the /<usr>/cvfs/config/fsnameservers file contains the name of your
server machine.
Step 5 Create the mount points for the file systems.
mkdir -p <mount point>
chmod 777 <mount point>
Step 6 Add the following line to the /etc/fstab file to enable automount after reboot.
<file system name> <mount point> cvfs verbose=yes 0 0
The file system name is the name that you created when you configured the StorNext FS
software using the ICW’s Add File System wizard. (Refer to the
section of this document for more information.)
NOTE
Installing StorNext FS on UNIX 3-17
To mount a file system manually, type the following at the command prompt.
mount -t cvfs <file system name> <mount point>
Adding File Systems
Page 64

SNMS
Installing on IBM AIX
Use the following procedure to install the StorNext FS client software in an IBM AIX operating
system.
Step 1 Log on as root.
This allows you to perform the installation without having permission problems.
Step 2 Install the client software.
installp -ac -d *.bff all
Step 3 Make sure the /<usr>/cvfs/config/fsnameservers file contains the name of your
server machine.
Step 4 Create the mount points for the file systems.
mkdir -p <mount point>
chmod 777 <mount point>
Step 5 Add a stanza to /etc/filesystems to enable automount after reboot.
crfs -v cvfs -d <file system name> -a verbose=yes -a
type=cvfs -A yes -m <mount point>
The file system name is the name that you created when you configured the StorNext FS
software using the ICW’s Add File System wizard. (Refer to the
section of this document for more information.)
3-18 6-00360-04 Rev A
Adding File Systems
Page 65

SNMS
Installing StorNext FS on Windows
You can install the StorNext File System (StorNext FS) software on a Windows machine that uses
either a Windows 2000 or Windows NT operating system. Once you have successfully installed the
StorNext FS software on your server, you should obtain a license for your server, label your drives,
and configure the software. (After initial configuration, you can use the StorNext FS GUI to change
your configuration parameters.) You are then ready to use the StorNext FS software.
You can also run the StorNext FS software on a client machine by downloading the client files from
the server and then installing them on your client.
CAUTION
If you purchased the StorNext File System (StorNext FS) product for
Windows, you must use the installation instructions in this chapter
to successfully install StorNext FS on your Windows machine. You
do not need to use the installation instructions in the other chapters
of this guide unless you purchase the StorNext FS for UNIX product
(refer to Installing StorNext FS on UNIX
Management Suite product (refer toInstalling SNMS
on page 3-1) or the StorNext
on page 2-1).
Determining Installation Requirements
Before installing StorNext FS on any machine, refer to the StorNext Management Suite
Release Notes to verify that you have complied with all the necessary requirements for running the
software on your specific operating system.
To learn more about advanced configurations and features like failover, refer to the
StorNext Management Suite System Administrator Guide.
Installing StorNext FS Software
If you purchased the StorNext FS product, use the following procedure to install the StorNext FS
software in your Windows operating environment. Both server and client files are loaded on your
machine during the installation process.
Step 1 Designate one Windows machine as your server.
Step 2 Insert the CD that is appropriate for your operating system into the drive.
Step 3 Click the My Computer icon on your desktop.
Installing StorNext FS on Windows 4-1
Page 66

SNMS
Step 4 Select and click the name of the drive that contains the CD.
Step 5 Open the StorNext folder and select the win2k or WinNT folder as appropriate.
CAUTION
Step 6 Click the installation procedure you want and follow the online instructions.
• Install the base and service files onto the machine you have designated as your server.
• Install the base and client files onto all machines set up as StorNext FS clients.
NOTE
Step 7 After the installation is complete, remove the CD from the drive.
Step 8 Restart the machine.
To install StorNext File System with Terminal Server, use the Add/
Remove Programs function provided by Windows to ensure that the
file system drivers are installed in the correct system path (usually
c:\wtsrv\system32\drivers) on your machine. After the entire
installation process has completed, then reboot your machine.
This procedure assumes the default directory for installing StorNext FS files is
C:\SNFS. If you want to use another directory location, replace all references to
C:\SNFS in this procedure with the specific location used.
Obtaining a License
Use the following procedure to obtain a valid license file.
Step 1 Run the StorNext FS license host identifier by clicking Start and using Programs >
StorNext File System > License Identifier.
Step 2 Send an e-mail with the ID string and number of client machines to the ADIC Technical
Assistance Center (ATAC) at
call ATAC for assistance (see Customer Assistance on page 5-1).
A technical support representative will respond with a license.dat file.
Step 3 Place license.dat in the C:\snfs\config directory on the server.
NOTE
4-2 6-00360-04 Rev A
If you have a temporary license, remove the temporary license file first before
replacing it with the permanent license file.
support@adic.com. If you do not have access to e-mail,
Page 67

SNMS
Labeling Drives
You must label each drive to be used by StorNext FS. A new drive needs to be labeled only once.
This can be done from any Stornext FS client with a Fibre Channel connection to the drive.
Use the following procedure to label each drive to be used by StorNext FS.
CAUTION
Step 1 On any StorNext FS client, click Start and select Programs > StorNext File System >
Disk Device Labeler.
Step 2 Inside the Disk Device Labeler window, use the mouse to highlight unused drives or
drives that do not have a recognized Volume Type.
CAUTION
Step 3 With the drives highlighted, click Label, and then click OK to confirm the operation.
Step 4 For each drive, use the New SNFS Label text box to enter a Label Name.
You can create any convention for the label names. For example, you could type
CvfsDisk[n] for each label name, replacing [n] with a decimal number starting at 0 and
incrementing for each drive, and the label names would be as follows: CvfsDisk0,
CvfsDisk1, CvfsDisk2, etc.
Step 5 In the New Sectors text box, use either the default value of the Total Number of Physical
Sectors, or enter a new size tailored for your application.
The process of disk drive labeling re-partitions the drives. Therefore,
if you select an incorrect drive, you may invalidate your operating
system or lose non-StorNext data.
Make sure you identify any drives that already contain a recognized
Volume Type. If you select an incorrect drive, you may invalidate
your operating system or lose non-StorNext data.
Step 6 For the remaining StorNext FS drives, repeat Step 4 and Step 5.
Step 7 When done, click Label.
Step 8 Click Exit.
Installing StorNext FS on Windows 4-3
Page 68

SNMS
Configuring StorNext FS Software
Use one of the following procedures to configure the StorNext FS software on your client machine.
Simple Configuration
A simple StorNext FS configuration assumes the following:
• A single regular stripe group.
• The StorNext FS server is directly connected to the Fibre Channel storage area network,
although it can support other types of connections. For more information, see “Shared
Setup” in the StorNext Management Suite System Administrator Guide.
Use the following procedure to configure a simple file system to be managed by StorNext FS.
NOTE
Step 1 Create a list of managed file systems (fsmlist file) by clicking Start and selecting
Programs > StorNext File System > Simple Configuration >
StorNext File System > Help.
For detailed information, click Start and select Programs > StorNext File System >
Help. Then select Simple Configuration Tool from the browser window.
Step 2 Close the Simple Configuration Tool by clicking File and Exit.
Step 3 Continue to Step 9 on page 4-6.
You can create a simple StorNext FS configuration during the initial software
installation that allows you to test the product. You can change to a custom
configuration at any time, however, by following the instructions for Custom
Configuration on page 4-5.
4-4 6-00360-04 Rev A
Page 69
SNMS
Custom Configuration
A custom StorNext FS configuration assumes the following:
• More than one stripe group.
• More than ten users accessing a machine that is used as a dedicated server. For more
information, see “Dedicated Setup” in the StorNext Management Suite System
Administrator Guide.
Use the following procedure to configure a custom file system to be managed by StorNext FS.
Step 1 If you have been running a simple configuration, disable the simple file system by
selecting Start > Programs > StorNext File System > File System Administrator, stop
file_system_name, and select Quit.
Step 2 Create the fsnameservers file by selecting Start > Control Panel >
StorNext File System icon.
Step 3 Click the fsnameservers tab.
Step 4 Add the IP address of the StorNext FS server to the right-hand box and click Add.
The fsnameservers file must be present on the StorNext FS server and on all
StorNext FS clients.
NOTE
Step 5 Create a custom StorNext FS-managed file system by clicking Start and selecting
Programs > StorNext File System > Configuration Administrator.
Step 6 Click New Configuration and fill out the appropriate information for each window tab.
For more information, refer to the Help menu.
Step 7 Save and name the file with an identifiable name using the following format.
file_system_name.cfg.
NOTE
Step 8 Close the Configuration Administrator by clicking Exit.
Installing StorNext FS on Windows 4-5
For information about failover environments, refer to the StorNext Management
Suite System Administrator Guide.
Make sure you have a file_system_name.cfg file for each uniquely named
StorNext File System on the StorNext FS server.
Page 70

SNMS
Step 9 Click Start to launch the StorNext FS server startup utility to automatically start a file
system during system startup or reboot.
Step 10 Select Program Files > StorNext File System > FSS Start UP List.
Step 11 Click on New.
Step 12 Enter the name of the file system to automatically start and click OK.
Step 13 Click OK again when finished.
Step 14 Enable the file system by clicking Start and selecting Programs >
StorNext File System > File System Administrator.
Step 15 From the File System Administrator window, select File > Start File System.
Step 16 Enter the name of the file system you want started and click Start.
Mapping StorNext FS Drives
Use the following procedure to map StorNext FS drives on a client machine.
Step 1 Select a drive letter to map the StorNext FS-managed file system. Or, you can this do at
any time through the File System Client Properties menu.
Step 2 Select My Computer > Control Panel and click the StorNext File System icon.
Step 3 Click the Map Drives tab.
Step 4 Select an unassigned drive and the file system you want to map to that drive and click
Map.
Step 5 Answer Yes to the Windows prompt to reboot the system.
The StorNext File System GUI appears and provides you access to the functionality of
StorNext FS (see the
Management Suite System Administrator Guide for more information about this
functionality.
Step 6 Return to Step 1 to repeat this procedure for each StorNext FS client using a
StorNext FS-managed file system.
After StorNext FS is mapped to a drive letter on each client, you can use the mapped drive for
storing and sharing data.
4-6 6-00360-04 Rev A
StorNext File System GUI. on page 3-11). Refer to the StorNext
Page 71

SNMS
Customer Assistance
Advanced Digital Information Corporation (ADIC) provides the following types of customer
assistance for StorNext Management Suite (SNMS).
Technical Assistance
Telephone and e-mail support, as well as training for SNMS, is available through ADIC.
Contacting Support
Depending on how you purchased technical support, telephone support is provided either through
your reseller or directly through ADIC.
The ADIC Technical Assistance Center (ATAC) in Denver, Colorado, provides world-wide service
and support.
• In North America and Mexico, call toll-free at 1-800-827-3822.
• In Europe, call toll-free at 00800-9999-3822.
• Outside North America and Europe, refer to the ADIC Web site at www. adic.com for a
listing of toll-free phone numbers from other countries.
• Send e-mail to: support@adic.com.
Training
The ADIC training organization in Denver provides hands-on instruction for all ADIC products. For
a list of classes, call 720-249-5810 between 8 a.m. and 5 p.m. Mountain time.
Publications
The software distribution CDs contain all SNMS documentation in Adobe
The Reader is available for download, free of charge, from Adobe, Inc. at www.adobe.com
Customer Assistance 5-1
®
Acrobat® Reader format.
.
Page 72

SNMS
Website
Additional information about SNMS and other ADIC products is available on our website at
www.adic.com
.
5-2 6-00360-04 Rev A
Page 73

SNMS
Glossary
A
ATAC (ADIC Technical Assistance Center)
The ADIC customer help desk.
D
DSM (Data Storage Manager)
One of two components that make up the StorNext Management Suite. Corresponds to the
product formerly known as CentraVision, but presently known as the StorNext File System.
F
FC (Fibre Channel)
A high speed data transfer architecture.
FTP (File Transfer Protocol)
The protocol used on the Internet for sending files.
I
InfiniteFileLife
A feature that offers data protection through file testing and automatic rewriting of data to new
media when indicated.
Glossary 1
Page 74

SNMS
ICW (Initial Configuration Wizard)
A tool for setting up a basic environment for the management of data, both on disk and on removable media (StorNext presently uses tape). It appears the first time the administrator connects to
the browser after installing the StorNext Management Suite.
M
Managed file system
A file system that enables automatic data movement between the tape library and disk storage.
MediaClass
A media management tool that segregates media into class groupings.
MSM (Media Storage Manager)
One of two components that make up the StorNext Storage Manager and corresponds to the
product formerly known as VolServ.
P
PolicyClass
Improves the efficiency of the data movement of different types.
S
SAN (Storage Area Network)
A SAN is a dedicated, high-performance network whose primary purpose is the transfer of
data along FC or high-speed Ethernet connections between servers, interconnect devices, and
storage peripherals.
SNMS (StorNext Management Suite)
A scalable, high performance, data management solution that ensures the long-term safety and
recoverability of data in SAN environments, while optimizing the use of storage resources. It
consists of two components, the StorNext Storage Manager (StorNext SM) and the StorNext File
System (StorNext FS).
6-00360-04 Rev A 2
Page 75

SNMS
StorNext FS (StorNext File System)
One of the two components that make up the StorNext Management Suite. StorNext FS uses the
functionality of a product, formerly known as CentraVision (DSM), to primarily provide Fibre
Channel (FC) connections (but can also support other types of connections) in a serverless
environment that enable clients to access data and share files.
StorNext SM (StorNext Storage Manager)
One of two main components comprising the StorNext Management Suite. StorNext SM
combines the functionality of two products known as FileServ (TSM) and VolServ (MSM) to
provide high-performance file migration and management services, and to manage automated
and manual media libraries, including library volumes.
Stripe group configuration
A set of similar storage devices that can be maintained either as a group or as a characteristic of
performance. All disks in a stripe group must have the same number and size of sectors.
T
Terminal Server
A computer or controller used to connect multiple terminals to a network or host computer.
Trashcan
An option available for managed file systems that deletes files.
TSM (Tertiary Storage Manager)
One of two components that make up the StorNext Storage Manager and corresponds to the
product formerly known as FileServ,
U
Unmanaged file system
A file system that never moves any data to the tape storage library.
Glossary 3
Page 76

SNMS
6-00360-04 Rev A 4
Page 77

SNMS
Index
A
Add File System wizard 2-11, 3-10, 3-15,
3-16, 3-17, 3-18
changing the default settings 2-12, 3-11
Add Library wizard 2-13
Add Media wizard 2-15
Add Storage Policy wizard 2-17
Add Tape Drive wizard 2-14
adding
file systems 2-11, 3-10
libraries 2-13
media 2-15
storage policies 2-17
tape drives 2-14
ADIC, website address 5-2
admin command 2-7
assistance, customer 5-1
audience for book 1-1
B
backups, scheduling 2-18
book, organization 1-1
C
CentraVision. See StorNext File System,
component name.
client software, installing
on IBM AIX 2-27, 3-17
on Linux 2-26
on Red Hat Linux 3-16
on SGI IRIX 2-24, 3-14
on Sun Solaris 2-25, 3-15
on Windows 2-23, 3-14
commands, admin 2-7
configuration
custom for Windows 4-5
simple for Windows 4-4
using optional pre-installation
for SNMS 2-1
for StorNext FS 3-1
configuring
SNMS software 2-6
StorNext FS software 4-4
contacting support 5-1
conventions, document 1-3
custom configuration for Windows 4-5
customer assistance 5-1
D
database
backup directory, installing 2-4
journal directory, installing 2-4
document
conventions 1-3
symbols 1-2
Download Client Software wizard 2-22,
3-13
drives
labeling 4-3
Volume Type 4-3
DSM. See StorNext File System,
component name.
Index 1
Page 78

SNMS
E
Enter License wizard 3-8
F
failover 2-1, 3-1, 4-1
file systems
managed 2-11
turning off the Recycle Bin 2-11
unmanaged 2-11
File Transfer Protocol
downloading client software 2-22, 3-13
file_system_name.cfg file 4-5
files
file_system_name.cfg 4-5
fsnameservers 2-24, 2-25, 2-26, 2-27,
3-15, 3-16, 3-17, 3-18, 4-5
inst.SNFS 3-2
inst.StorNext 2-2
FileServ. See StorNext Storage Manager,
component names.
fsnameservers file 2-24, 2-25, 2-26, 2-27,
3-15, 3-16, 3-17, 3-18, 4-5
FTP. See File Transfer Protocol.
installation, determining requirements
for SNMS 2-1
for StorNext FS 3-1, 4-1
installing client software 2-23, 3-13
on IBM AIX 2-27, 3-17
on Linux 2-26
on Red Hat Linux 3-16
on SGI IRIX 2-24, 3-14
on Sun Solaris 2-25, 3-15
database backup directory 2-4
database journal directory 2-4
SNMS 2-1
StorNext FS on UNIX 3-1
StorNext FS on Windows 4-1
L
labeling drives 4-3
license
entering 2-9, 3-8
obtaining 4-2
temporary 4-2
license string
receiving as hard copy 2-10, 3-8
receiving electronically 2-10, 3-8
I
ICW. See Initial Configuration Wizard.
Initial Configuration Wizard
screen 2-9
using 2-8
using the wizard 3-6
inst.SNFS 3-2
inst.StorNext 2-2
2 6-00360-04 Rev A
M
managed file system 2-11
mapping StorNext FS drives 4-6
media type, changing default parameters 2-
4
MSM. See StorNext Storage Manager,
component name.
Page 79

SNMS
O
obtaining a license 4-2
options, Label my CentraVision
Disk Devices 2-23
organization of book 1-1
P
parameters, changing default
media type 2-4
publication information 5-1
R
Recycle Bin, turning off to use file system
2-11
S
Schedule Backup wizard 2-18
scheduling a backup 2-18
screens
Choose Options to Complete
the Installation 2-23, 3-14
E-mail Address and
Backup Copies 2-19
Initial Configuration Wizard 2-9
Select Media Backup 2-16
Select Media Backup screen 2-16
simple configuration for Windows 4-4
SNMS. See StorNext Management Suite.
software
configuring SNMS 2-6
installing client 2-23, 3-13
StorNext File System
component name 1-1
configuring software 4-4
definition 1-1
installation requirements 3-1, 4-1
installing on UNIX 3-1
installing on Windows 4-1
installing Terminal Server 4-2
mapping drives 4-6
StorNext FS. See StorNext File System.
StorNext Management Suite
definition 1-1
installation requirements 2-1
installing 2-1
installing the software 2-1
StorNext SM. See StorNext
Storage Manager.
StorNext Storage Manager
component names 1-1
definition 1-1
support, contacting 5-1
symbols in document, explanations 1-2
T
technical assistance 5-1
temporary license 4-2
Terminal Server, using to install StorNext
FS 4-2
training information 5-1
Trashcan 2-11
TSM. See StorNext Storage Manager,
component name.
Index 3
Page 80

U
UNIX, installing StorNext FS 3-1
unmanaged file system 2-11
V
VolServ. See StorNext Storage Manager,
component names.
Volume Type, drives 4-3
W
Website address, ADIC 5-2
wizards
Add File System 2-11, 3-10, 3-15, 3-16,
3-17, 3-18
Add Library 2-13
Add Media 2-15
Add Storage Policy 2-17
Add Tape Drive 2-14
Download Client Software 2-22, 3-13
Enter License 3-8
Initial Configuration Wizard 2-8, 3-6
Schedule Backup 2-18
SNMS
4 6-00360-04 Rev A
 Loading...