

Page 1

System Administrator’s
Guide to
Installing DataMgr
DataMgr Version 3.5
January, 2000
Document Number 600922
Page 2

Trademark Notice
AMASS, EMASS, DataMgr, FileServ, and VolServ are either trademarks or registered
trademarks of ADIC, Advanced Digital Information Corporation. DAS is a trademark of
Grau, an ADIC subsidiary. All other product names and identifications are trademarks or
registered trademarks of their respective manufacturers.
Copyright Notice
Copyright © 1996-2000 by ADIC. All rights reserved. This document is the property of
ADIC. No part of this document may be reproduced, transmitted, transcribed, stored in a
retrieval system, or translated into any language or computer language in any form or by
any means, electronic, mechanical, magnetic, optical, chemical, manual, or otherwise,
without the express written permission of:
ADIC
10949 East Peakview Ave.
Englewood, CO 80111 USA
Phone: 303-792-9700
FAX: 303-792-2465
U.S. Government Rights Restricted
Use, duplication, or disclosure of either the software or documentation is subject to
restrictions set forth by the U.S. Government in FAR 52.227-19(c)(2) and subparagraph
(c)(1)(ii) of the Rights in Technical Data and Computer Software clause at DFARS 52.2277013 and/or in similar or following clauses in the FAR, DoD, or NASA FAR Supplement.
Technical Assistance
ADIC Technical Assistance Center:
• In the USA and Canada, call 1-800-827-3822.
• Outside the USA and Canada, call 303-874-0188 or toll-free 00800-9999-3822.
• Send e-mail to: techsup@adic.com.
Documentation
Although the material contained herein has been carefully reviewed, ADIC does not
warrant it to be free of errors or omissions. We reserve the right to make corrections,
updates, revisions, or changes to the information contained herein.
• Send e-mail to: swpubs@adic.com
Page 3

READER COMMENT FORM
ADIC includes this Form in an effort to provide the best possible documentation to our
customers. Please take a few moments to mail or FAX your response to:
ADIC
Software Documentation
10949 East Peakview Ave.
Englewood, CO 80111
FAX: 303-792-2465
E-mail: swpubs@adic.com
Question Circle One
Information was complete. Agree Disagree
Information was easy to find. Agree Disagree
Information was easy to follow. Agree Disagree
Is there anything you especially like or dislike about the organization, presentation,
or writing in this manual?_______________________________________________
___________________________________________________________________
___________________________________________________________________
___________________________________________________________________
___________________________________________________________________
Book Title Document Number
Customer Name Telephone
E-mail Address
Company Name
Address
City, State, Zip
Page 4

NOTES
Page 5

Contents
Purpose of This Book . . . . . . . . . . . . . . . . . . . . . . . . . . . . . . . . . . . . . . . . . . . . . . . . . .P-3
Who Should Read This Book . . . . . . . . . . . . . . . . . . . . . . . . . . . . . . . . . . . . . . . . . . .P-3
How This Book is Organized . . . . . . . . . . . . . . . . . . . . . . . . . . . . . . . . . . . . . . . . . . .P-4
Conventions . . . . . . . . . . . . . . . . . . . . . . . . . . . . . . . . . . . . . . . . . . . . . . . . . . . . . . . . .P-5
Books . . . . . . . . . . . . . . . . . . . . . . . . . . . . . . . . . . . . . . . . . . . . . . . . . . . . . . . . . . . . . . .P-6
Online Documentation . . . . . . . . . . . . . . . . . . . . . . . . . . . . . . . . . . . . . . . . . . . . .P-6
Related Publications . . . . . . . . . . . . . . . . . . . . . . . . . . . . . . . . . . . . . . . . . . . . . . .P-7
Contact Publications Department . . . . . . . . . . . . . . . . . . . . . . . . . . . . . . . . . . . .P-7
Secured Web Site . . . . . . . . . . . . . . . . . . . . . . . . . . . . . . . . . . . . . . . . . . . . . . . . . .P-7
Prerequisites 1
Capacity-based License . . . . . . . . . . . . . . . . . . . . . . . . . . . . . . . . . . . . . . . . . . . . . . . .1-3
Feature Licenses . . . . . . . . . . . . . . . . . . . . . . . . . . . . . . . . . . . . . . . . . . . . . . . . . . .1-3
Permanent Authorization Strings . . . . . . . . . . . . . . . . . . . . . . . . . . . . . . . . . 1-3
Temporary Product Key . . . . . . . . . . . . . . . . . . . . . . . . . . . . . . . . . . . . . . . . . 1-5
Changing Authorization String . . . . . . . . . . . . . . . . . . . . . . . . . . . . . . . . . . .1-5
BFS Issues License to Clients . . . . . . . . . . . . . . . . . . . . . . . . . . . . . . . . . . . . . . . . . . . 1-7
Registration File Monitors License . . . . . . . . . . . . . . . . . . . . . . . . . . . . . . . . . . .1-7
How to Refresh Registration File . . . . . . . . . . . . . . . . . . . . . . . . . . . . . . . . . . 1-8
Requirements . . . . . . . . . . . . . . . . . . . . . . . . . . . . . . . . . . . . . . . . . . . . . . . . . . . . . . . . 1-9
File Pathname Limit . . . . . . . . . . . . . . . . . . . . . . . . . . . . . . . . . . . . . . . . . . . . . . . .1-9
File System Size & Name . . . . . . . . . . . . . . . . . . . . . . . . . . . . . . . . . . . . . . . . . . . 1-9
Large Files . . . . . . . . . . . . . . . . . . . . . . . . . . . . . . . . . . . . . . . . . . . . . . . . . . . . . . . 1-10
Shared Libraries . . . . . . . . . . . . . . . . . . . . . . . . . . . . . . . . . . . . . . . . . . . . . . . . . .1-10
i
Page 6

System Administrator’s Guide to Installing DataMgr
Disk Space . . . . . . . . . . . . . . . . . . . . . . . . . . . . . . . . . . . . . . . . . . . . . . . . . . . . . . . 1-13
Create Installation Directory . . . . . . . . . . . . . . . . . . . . . . . . . . . . . . . . . . . . . . . . . . 1-14
Determine Location for Components . . . . . . . . . . . . . . . . . . . . . . . . . . . . . . . . . . .1-14
Summary of Elements . . . . . . . . . . . . . . . . . . . . . . . . . . . . . . . . . . . . . . . . . . . . .1-15
Create Directories . . . . . . . . . . . . . . . . . . . . . . . . . . . . . . . . . . . . . . . . . . . . . . . . .1-16
Complete Table . . . . . . . . . . . . . . . . . . . . . . . . . . . . . . . . . . . . . . . . . . . . . . . . 1-17
Size Databases . . . . . . . . . . . . . . . . . . . . . . . . . . . . . . . . . . . . . . . . . . . . . . . . . . . . . . 1-18
Size BFS Database . . . . . . . . . . . . . . . . . . . . . . . . . . . . . . . . . . . . . . . . . . . . . . . .1-18
Size Managed File System Database . . . . . . . . . . . . . . . . . . . . . . . . . . . . . . . . . 1-20
Edit Paths . . . . . . . . . . . . . . . . . . . . . . . . . . . . . . . . . . . . . . . . . . . . . . . . . . . . . . . . . . 1-21
man Pages . . . . . . . . . . . . . . . . . . . . . . . . . . . . . . . . . . . . . . . . . . . . . . . . . . . . . . . 1-21
Utilities . . . . . . . . . . . . . . . . . . . . . . . . . . . . . . . . . . . . . . . . . . . . . . . . . . . . . . . . . . 1-21
GUIs . . . . . . . . . . . . . . . . . . . . . . . . . . . . . . . . . . . . . . . . . . . . . . . . . . . . . . . . . . . .1-22
Edit Temporary Storage Space . . . . . . . . . . . . . . . . . . . . . . . . . . . . . . . . . . . . . . . . . 1-23
System Mount Table . . . . . . . . . . . . . . . . . . . . . . . . . . . . . . . . . . . . . . . . . . . . . . . . .1-24
Installation 2
Extract Files From Local CD . . . . . . . . . . . . . . . . . . . . . . . . . . . . . . . . . . . . . . . . . . . .2-3
Extract Files From Remote CD . . . . . . . . . . . . . . . . . . . . . . . . . . . . . . . . . . . . . . . . . .2-4
Install DataMgr . . . . . . . . . . . . . . . . . . . . . . . . . . . . . . . . . . . . . . . . . . . . . . . . . . . . . . . 2-6
Startup File . . . . . . . . . . . . . . . . . . . . . . . . . . . . . . . . . . . . . . . . . . . . . . . . . . . . . . . . .2-12
Startup & Shutdown . . . . . . . . . . . . . . . . . . . . . . . . . . . . . . . . . . . . . . . . . . . . . . . . .2-13
Setup Tasks 3
Establish Access for DMFS Clients . . . . . . . . . . . . . . . . . . . . . . . . . . . . . . . . . . . . . . 3-3
Schedule cron Jobs . . . . . . . . . . . . . . . . . . . . . . . . . . . . . . . . . . . . . . . . . . . . . . . . . . . . 3-4
ii Contents
Page 7

System Administrator’s Guide to Installing DataMgr
DMFS cron job . . . . . . . . . . . . . . . . . . . . . . . . . . . . . . . . . . . . . . . . . . . . . . . . . . . . 3-4
BFS cron job . . . . . . . . . . . . . . . . . . . . . . . . . . . . . . . . . . . . . . . . . . . . . . . . . . . . . . . 3-5
Back Up Databases . . . . . . . . . . . . . . . . . . . . . . . . . . . . . . . . . . . . . . . . . . . . . . . . .3-6
Assign a Backup Volume . . . . . . . . . . . . . . . . . . . . . . . . . . . . . . . . . . . . . . . .3-7
Save SSD Logs . . . . . . . . . . . . . . . . . . . . . . . . . . . . . . . . . . . . . . . . . . . . . . . . . . . .3-9
Edit cron File . . . . . . . . . . . . . . . . . . . . . . . . . . . . . . . . . . . . . . . . . . . . . . . . . . 3-10
Logging . . . . . . . . . . . . . . . . . . . . . . . . . . . . . . . . . . . . . . . . . . . . . . . . . . . . . . . . . . . . 3-12
Logging Hierarchy . . . . . . . . . . . . . . . . . . . . . . . . . . . . . . . . . . . . . . . . . . . . . . . . 3-12
Format of Messages . . . . . . . . . . . . . . . . . . . . . . . . . . . . . . . . . . . . . . . . . . . . . . .3-13
Priority Levels . . . . . . . . . . . . . . . . . . . . . . . . . . . . . . . . . . . . . . . . . . . . . . . . . . . 3-13
Modify Logging Characteristics . . . . . . . . . . . . . . . . . . . . . . . . . . . . . . . . . . . . 3-14
Modifiable Variables . . . . . . . . . . . . . . . . . . . . . . . . . . . . . . . . . . . . . . . . . . . . . . 3-15
Start Administra-
tive GUI . . . . . . . . . . . . . . . . . . . . . . . . . . . . . . . . . . . . . . . . . . . . . . . . . . . . . . . . . . . .3-19
Start Client GUI . . . . . . . . . . . . . . . . . . . . . . . . . . . . . . . . . . . . . . . . . . . . . . . . . .3-19
Change Colors and Fonts . . . . . . . . . . . . . . . . . . . . . . . . . . . . . . . . . . . . . . . . . . 3-20
Post Installation Tasks 4
Deinstall DataMgr . . . . . . . . . . . . . . . . . . . . . . . . . . . . . . . . . . . . . . . . . . . . . . . . . . . . 4-3
Reinstall DataMgr . . . . . . . . . . . . . . . . . . . . . . . . . . . . . . . . . . . . . . . . . . . . . . . . . . . . 4-4
Remove Load Directory . . . . . . . . . . . . . . . . . . . . . . . . . . . . . . . . . . . . . . . . . . . . . . . 4-6
Contents iii
Page 8

System Administrator’s Guide to Installing DataMgr
iv Contents
Page 9

Purpose of This Book . . . . . . . . . . . . . . . . . . . . . . .P-3
Who Should Read This Book . . . . . . . . . . . . . . . .P-3
How This Book is Organized . . . . . . . . . . . . . . . .P-4
Conventions . . . . . . . . . . . . . . . . . . . . . . . . . . . . . .P-5
Books . . . . . . . . . . . . . . . . . . . . . . . . . . . . . . . . . . . .P-6
Online Documentation . . . . . . . . . . . . . . . . . .P-6
Related Publications . . . . . . . . . . . . . . . . . . . .P-7
Preface
P
P
Contact Publications Department . . . . . . . . .P-7
Secured Web Site . . . . . . . . . . . . . . . . . . . . . . .P-7
Preface
Page 10

System Administrator’s Guide to Installing DataMgr
NOTES
P-2 Preface
Page 11
System Administrator’s Guide to Installing DataMgr
Preface
Purpose of
This Book
Who Should
Read This
Book
This book describes how to install and configure DataMgr on
both the server and on clients’ machines.
This book is written for the system administrators who has been
assigned the task of installing DataMgr.
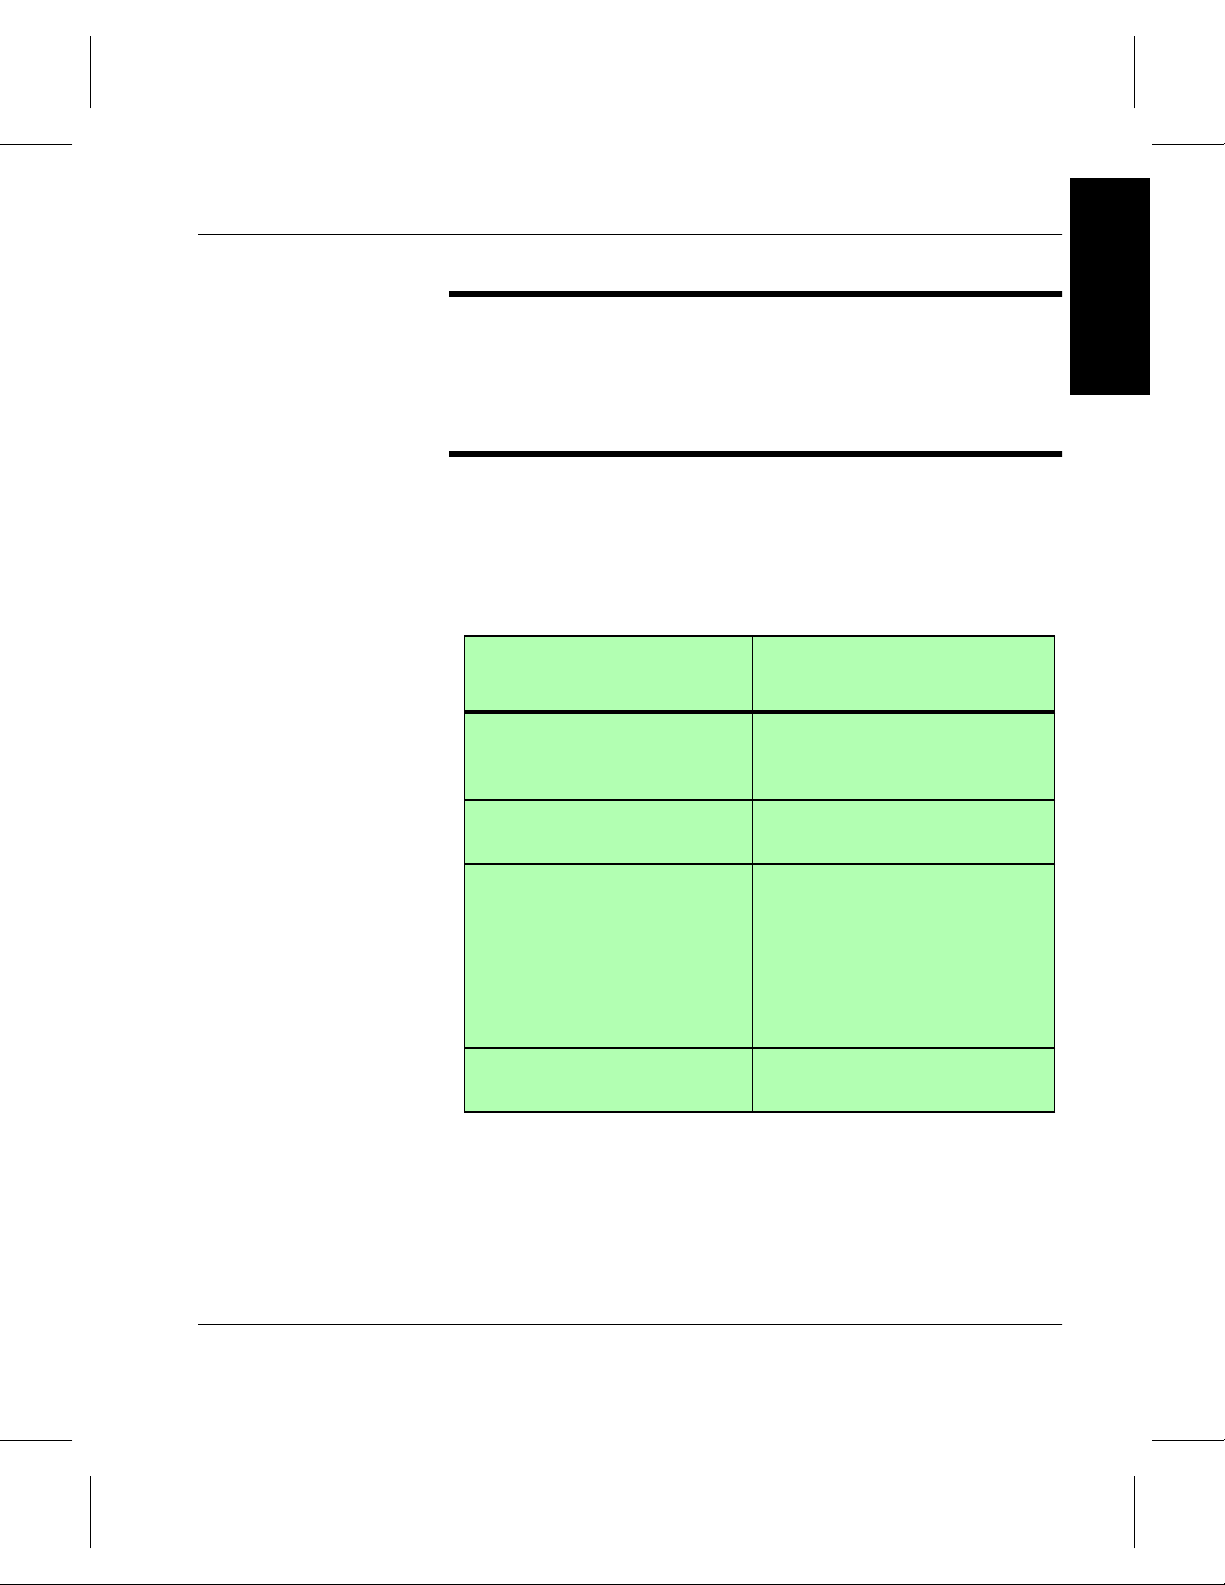
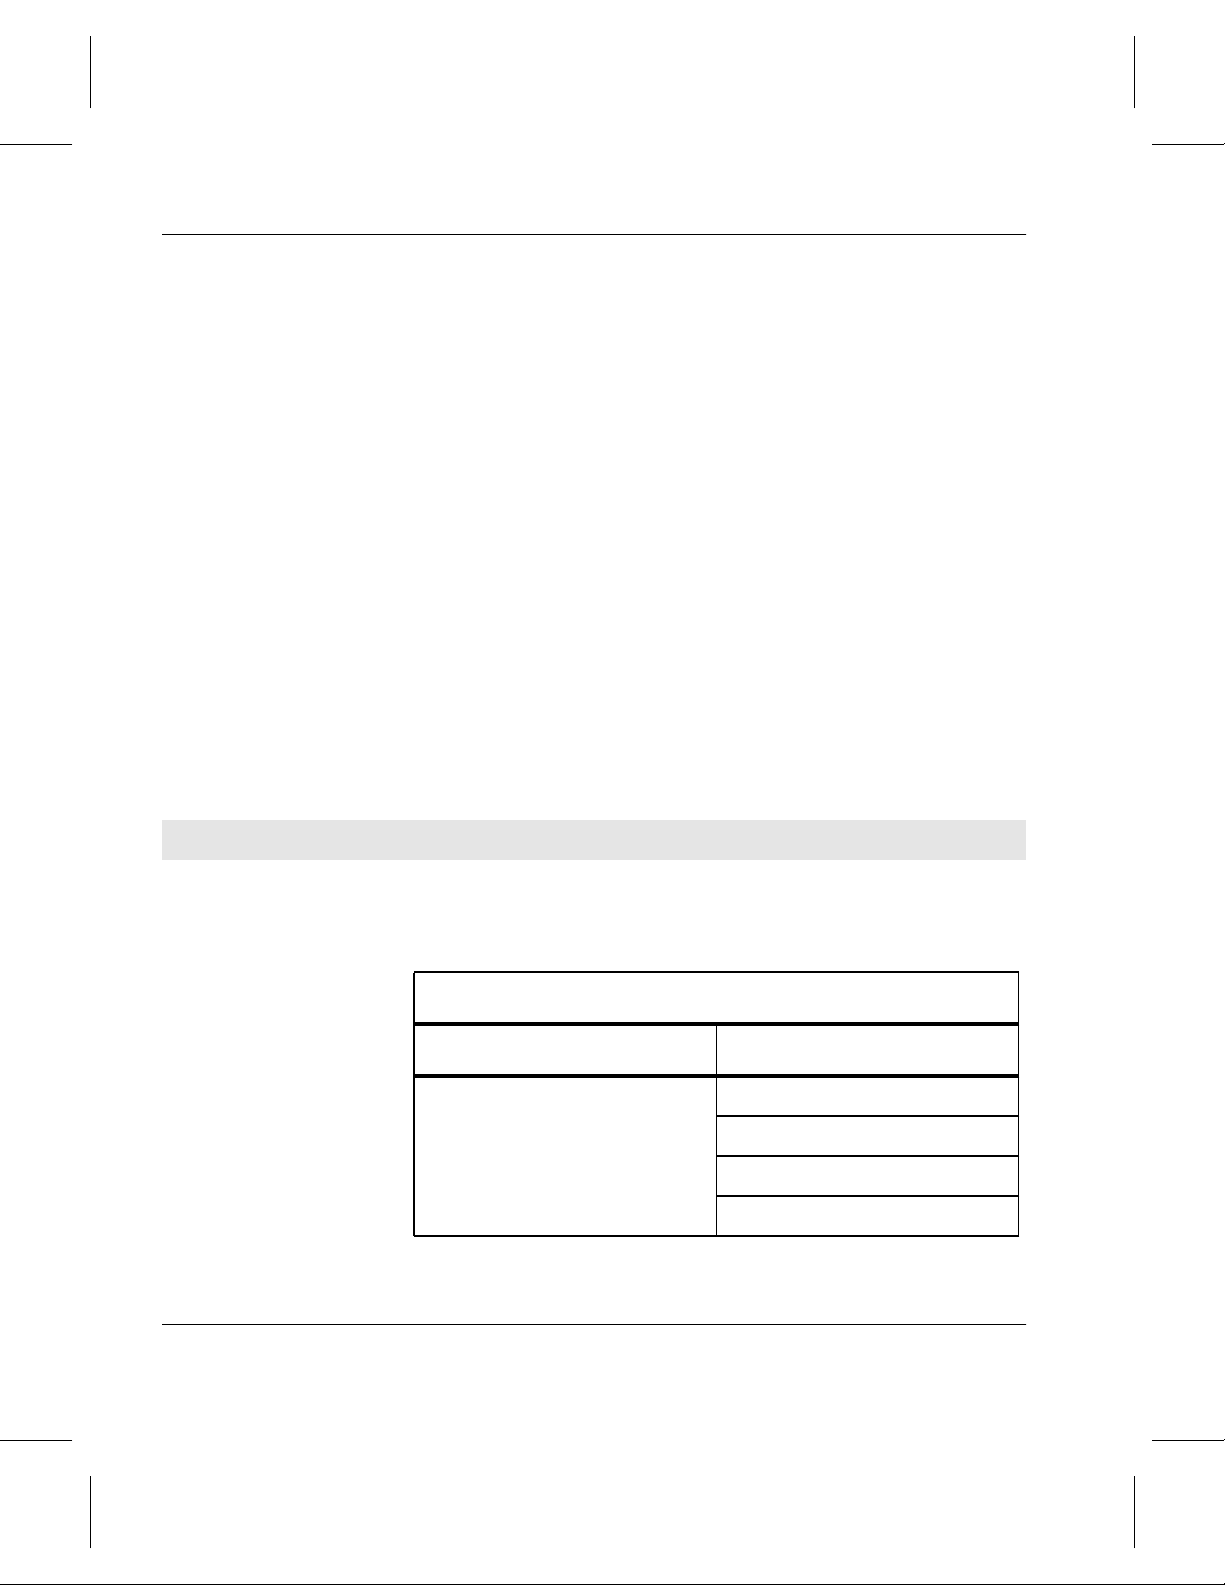
The table below lists DataMgr books that a system
administrator should read:
Books for System
Administrators to Read
DataMgr Overview
System Administrator’sGuide
to Installing DataMgr
System Administrator’sGuide
to Using DataMgr
Understand how DataMgr
works and know what features
are available.
Install & configure DataMgr on
server and clients’ machines.
Use DataMgr to define
migration criteria with either
commands or GUI. Description
of commands and utilities.
Describe backup and restore
issues.Provide troubleshooting
tools.
Topic
quick reference card Summary of commands and
utilities.
Preface P-3
Page 12

System Administrator’s Guide to Installing DataMgr
How This Book is Organized
This book contains the following chapters:
Chapter 1: Prerequisites — Defines system requirements for
DataMgr.
Chapter 2: Install DataMgr — Instructions for installing
DataMgr as well as special startup & shutdown procedures.
Chapter 3: Setup Tasks — Instructions for the following
tasks:
• Establish access for clients.
• Edit
• Change color and fonts on GUIs.
Chapter 4: Post Installation Tasks — Instructions for the
following tasks:
• Deinstall and reinstall DataMgr.
• Remove installation directory.
cron jobs.
P-4 Preface
Page 13
System Administrator’s Guide to Installing DataMgr
Preface
Conventions
The conventions used throughout the DataMgr technical books
are listed below:
Convention Example
The word “library” is a generic way to
reference a storage device.
Screen text, file names, program names, and
commands are in Courier font.
The root prompt is shown as a number
symbol.
What you should type in is shown in Courier
bold font.
Site-specific variables are in a Times italics
font.
A backward slash ( \ ) denotes the input is
continued onto the next line; the printed page
is just not wide enough to accommodate the
line.
If using HP SunSpot libraries, install patch
1234.
Files/Dirs created for MFS
/mrktcol:
/mrktcol/Migration
/mrktcol/Migration/locklist
# su root
# cd /etc/dmfs/usr/utils
# dmfscntl -p /mfspath
# rsh nodename -n dd if=/dev\
/tapedevicename/bs=20b | tar\
xvfb - 20
Type the entire command without the
backward slashes.
Pressing <Return> after each command is
assumed.
A menu name with an arrow refers to a
sequence of menus or options.
Main Menu -—> Edit —>Add-—> Select
Policy
Preface P-5
Page 14

System Administrator’s Guide to Installing DataMgr
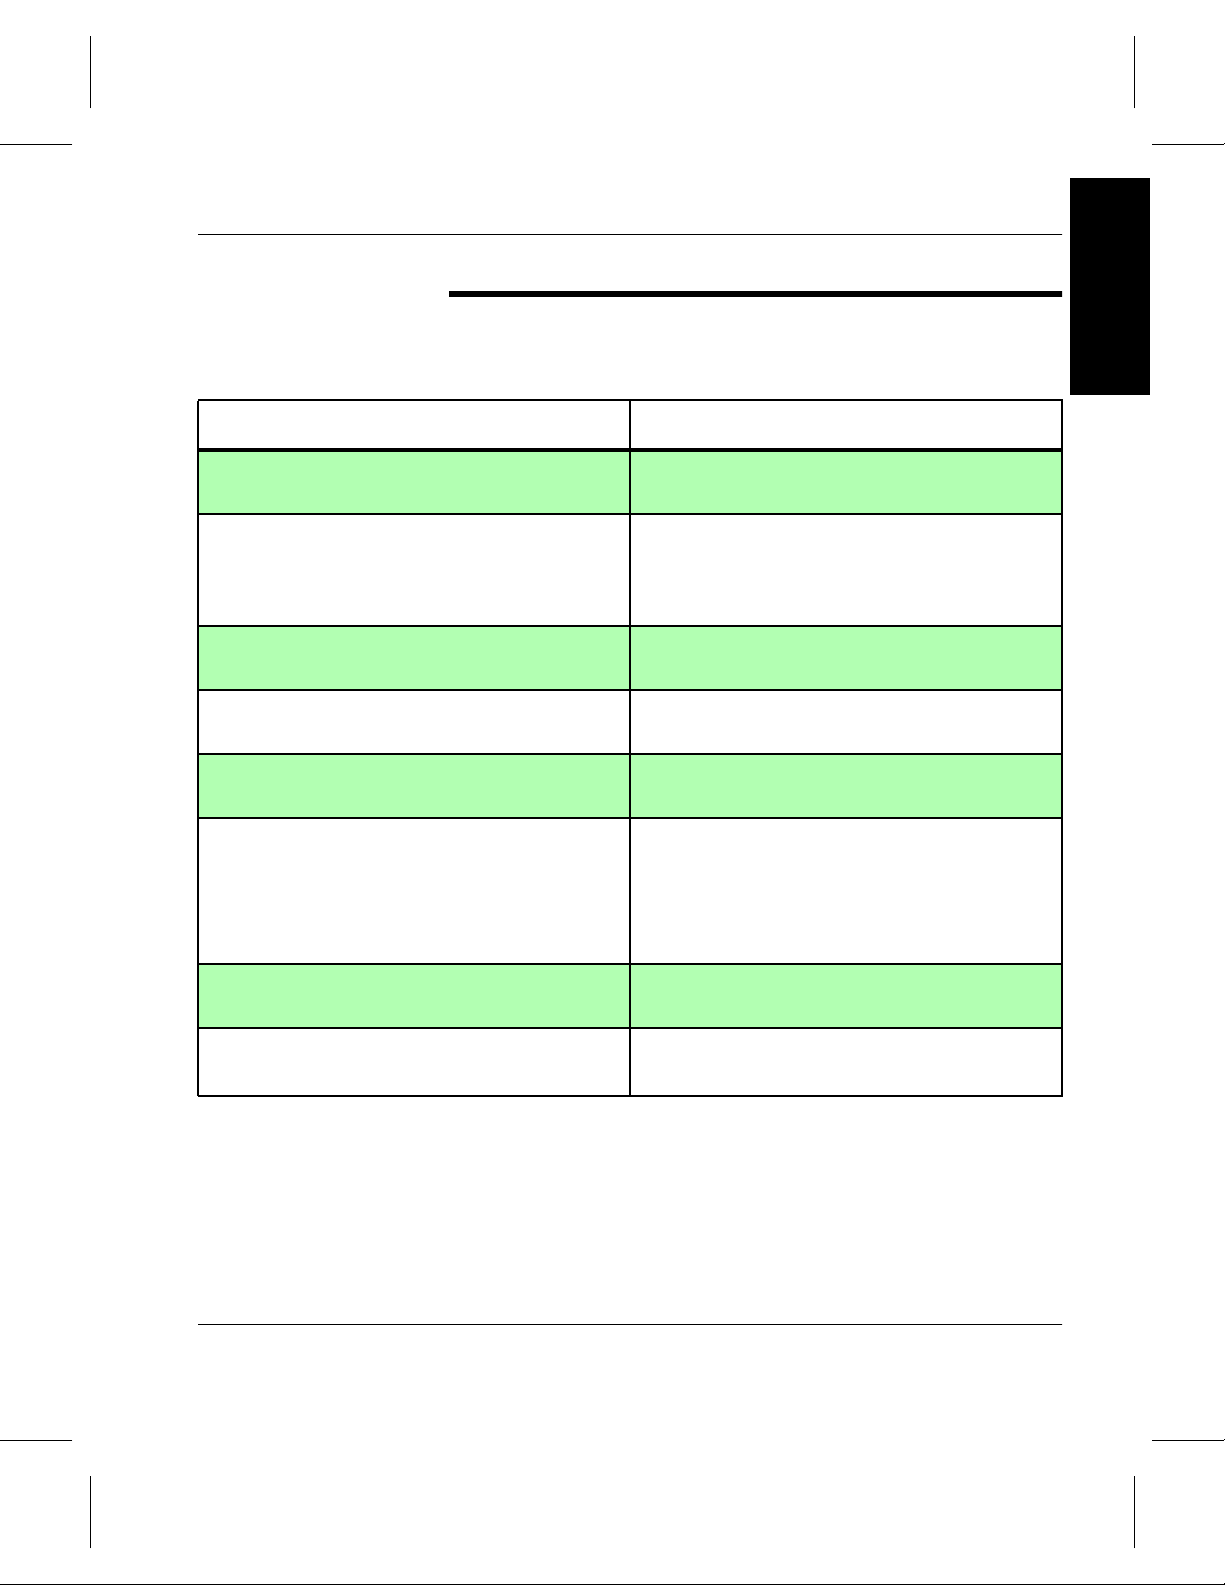
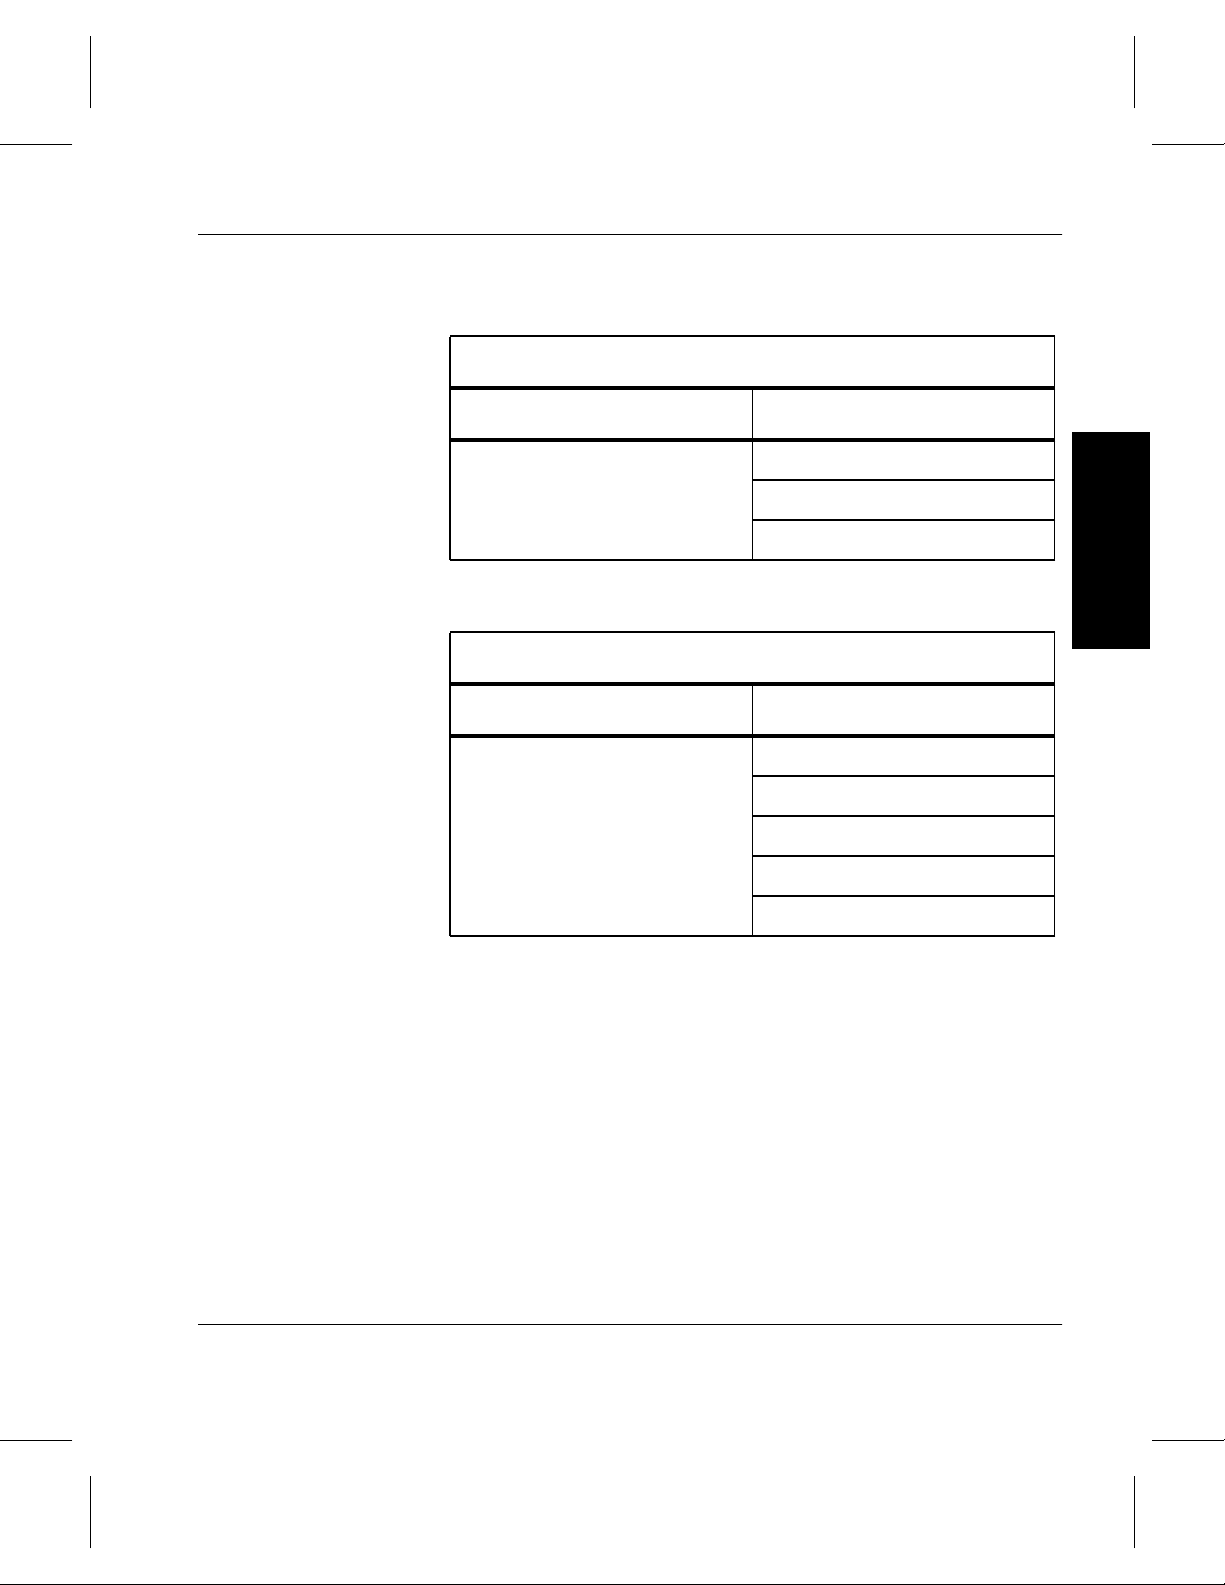
Books
The books described below are part of the technical
documentation set and are shipped on CD along with the
DataMgr software:
System Administrator’s Guide to
Installing DataMgr
Install and configure DataMgr on a UNIX
server and on clients’ workstations.
System Administrator’s Guide to
Using DataMgr
Define managed file system criteria with
either commands or GUI. Describes
DataMgr commands and utilities. Describe
backup and restore issues. Provides
troubleshooting tools.
Online Documentation
The software CD contains DataMgr book files and Adobe®
Acrobat® Reader. The Reader allows you to view and navigate
the online documentation files yet preserves the page design
and graphics from the printed books.
DataMgr Overview
An introduction to DataMgr, an
hierarchicalstorage management (HSM)
application. Contains a glossary.
Client’s Guide to Using DataMgr
View migration criteria; start
user-initiated migration and reload; and
manage file quota system.
quick reference card
Summarizes commands and utilities.
P-6 Preface
Page 15
System Administrator’s Guide to Installing DataMgr
Preface
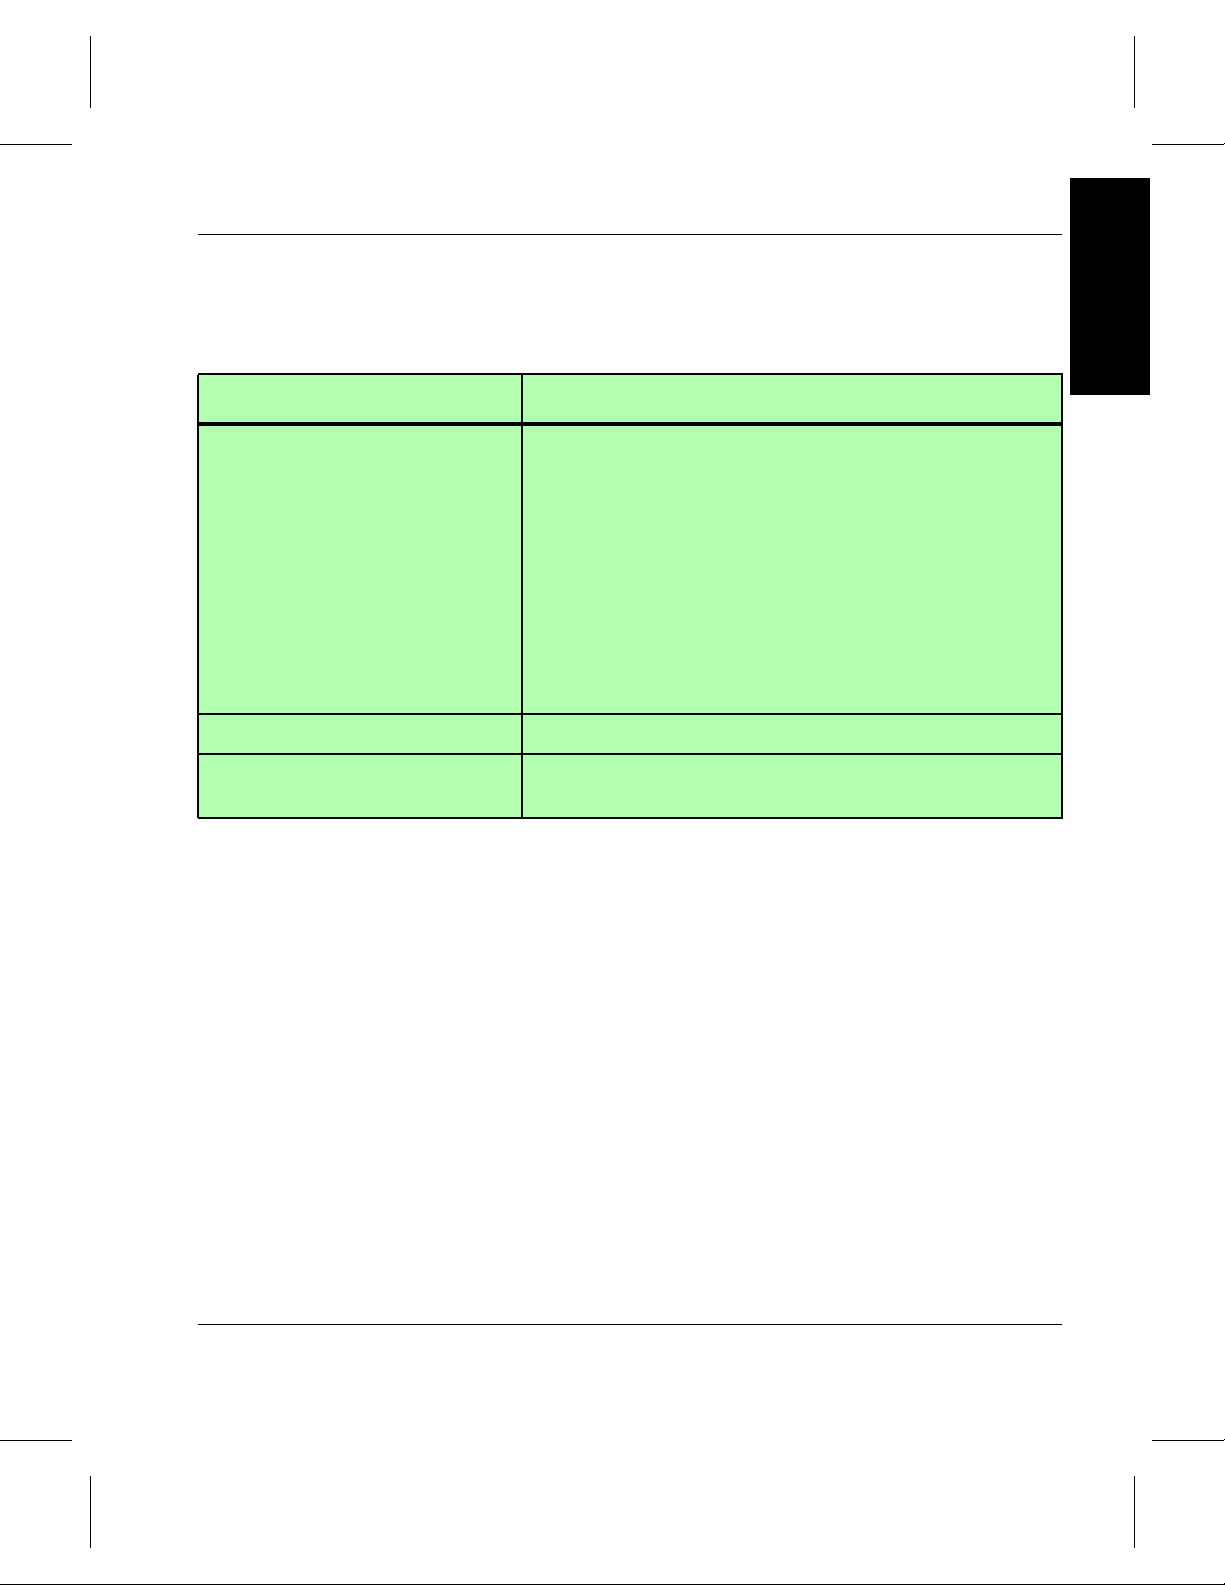
Related
Publications
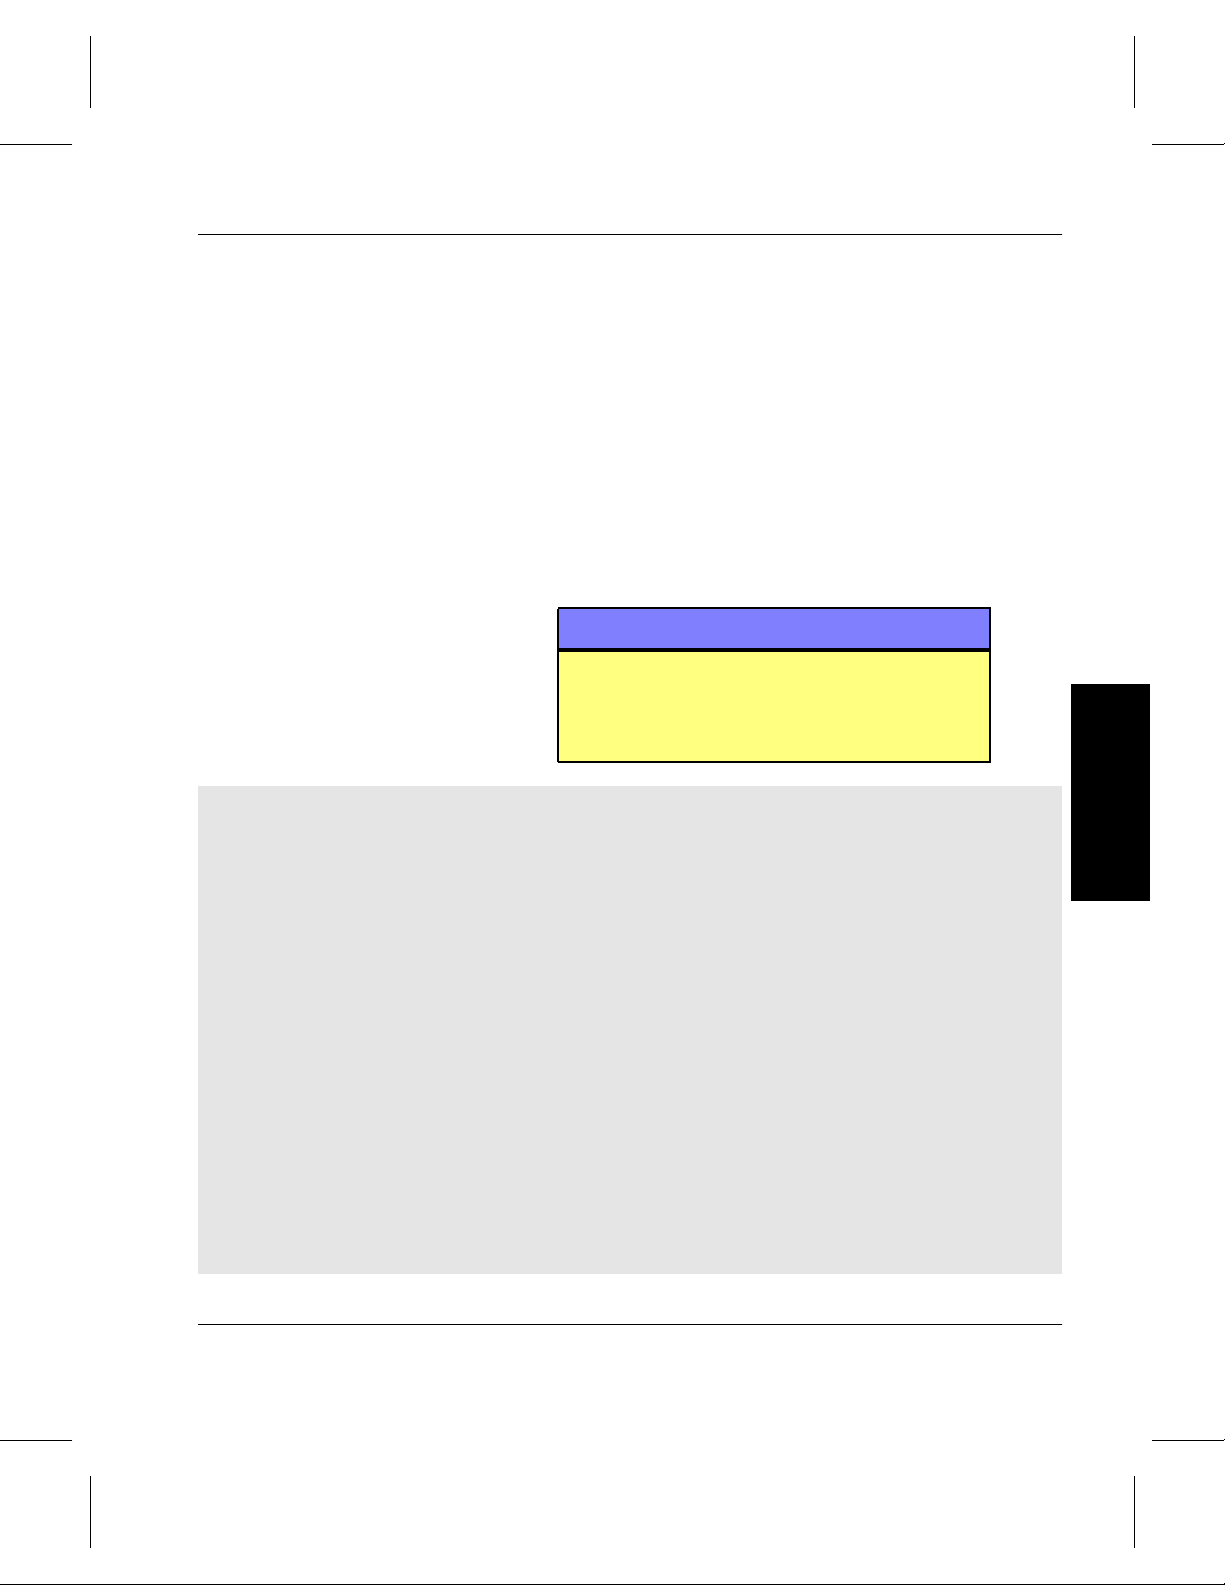
Related Publications Description
“Release Notes” For each version of DataMgr, the “Release Notes” contain:
“Product Alerts” Informs customers of technical problems and solutions.
“Product Bulletins” Conveys technical information — not problems — to
The publications described in the table below are created and
distributed on an as-needed basis:
• Summary of enhancements.
• Describes:
- Fixed problems.
- Known problems.
- Installation and configuration issues.
• Lists:
- Operating system patches.
- System requirements.
customers.
Contact
Publications
Department
Secured Web
Site
To make corrections or to comment on DataMgr publications,
please contact Software Technical Publications at our email
address: swpubs@adic.com.
To receive access to the secured site on our home page
containing technical product information (Release Notes,
Product Alerts, Product Bulletins, FAQs), send e-mail to
swpubs@adic.com and include the items below. In return, we
will send you instructions and a password.
• Name.
• Company.
Preface P-7
Page 16

System Administrator’s Guide to Installing DataMgr
• Address.
• Telephone number and fax number.
• DataMgr serial number (or enter “reseller” if you are not a
customer).
• Your e-mail address.
P-8 Preface
Page 17

NOTES
Preface
System Administrator’s Guide to Installing DataMgr
Preface P-9
Page 18

System Administrator’s Guide to Installing DataMgr
NOTES
P-10 Preface
Page 19

Capacity-based License . . . . . . . . . . . . . . . . . . . . .1-3
BFS Issues License to Clients . . . . . . . . . . . . . . . . 1-7
Requirements . . . . . . . . . . . . . . . . . . . . . . . . . . . . . 1-9
1
Create Installation Directory . . . . . . . . . . . . . . . 1-14
Determine Location for Components . . . . . . . .1-14
Size Databases . . . . . . . . . . . . . . . . . . . . . . . . . . . 1-18
Edit Paths . . . . . . . . . . . . . . . . . . . . . . . . . . . . . . . 1-21
Edit Temporary Storage Space . . . . . . . . . . . . . . 1-23
System Mount Table . . . . . . . . . . . . . . . . . . . . . .1-24
Prerequisites
Prerequisites
Page 20
System Administrator’s Guide to Installing DataMgr
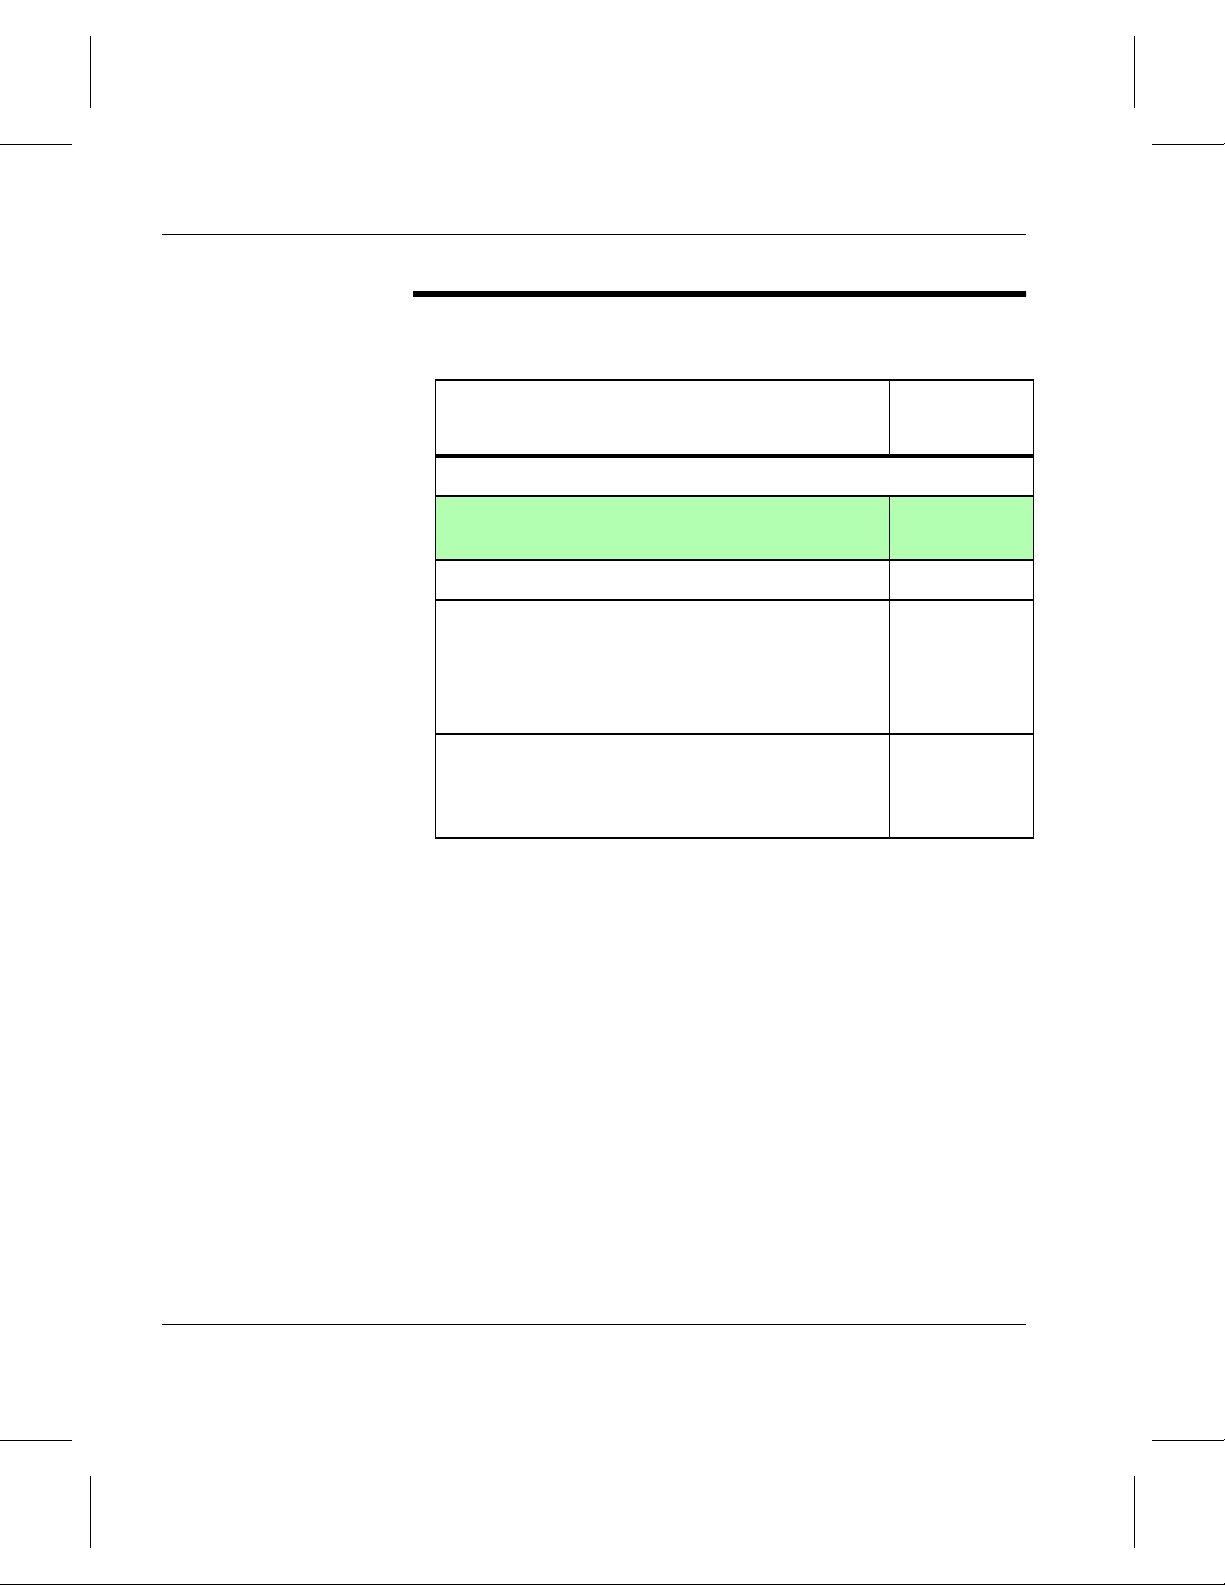
Roadmap
Task
Install AMASS before installing DataMgr.
Verify that you have the necessary system
requirements.
Install DataMgr. 2
Setup tasks:
• Establish access for clients.
• Edit cron jobs.
• Change GUI colors and fonts.
Post installation tasks:
• Deinstall and reinstall DataMgr.
• Remove installation directory.
Refer To
Chapter
1
3
4
1-2 Prerequisites
Page 21

System Administrator’s Guide to Installing DataMgr
Capacitybased
License
Feature Licenses
ADIC issues a DataMgr license based on the amount of disk
space each client machine mounts for management.
Capacity-based license levels are described below:
• Level 1 = Less than or equal to 5GB.
• Level 2 = Over 5GB but less than or equal to 25GB.
• Level 3 = Greater than 25GB.
The license is entered when installing the BFS component. The
BFS provides the licenses needed by the individual DMFS
clients. (For a description of DataMgr components, refer to
“Components” on page 1-4 in DataMgr Overview.)
A separate authorization string is needed for the optional
features below. For a description of these features, refer to the
Storage Policies chapter in DataMgr Overview.
• File Replication.
• Multi-tier Migration.
• File Import.
Prerequisites
Permanent Authorization Strings
During installation you are asked to enter either:
• A permanent authorization string.
• Or, a temporary 30-day product key.
Authorization strings have the following format:
xxxx-xxxx-xxxx-xxxx-xxx. You can enter the authorization
string in one of the following ways:
• Upper or lower case.
• With dashes ( - ).
Prerequisites 1-3
Page 22
System Administrator’s Guide to Installing DataMgr
• All strung together.
If your Software Certificate does not contain this string, call
ADIC at (303) 792-9700 or FAX (303) 792-2465 or email
techsup@adic.com and they will issue you an authorization
string after you provide them with the required information.
How to find this required information is described below:
Serial Number
Look at the DataMgr CD and write down the serial number.
Enter your Serial Number here__________________________
Host ID
Determine the host ID with the appropriate command in the
table below. Enter your Host ID here__________________
Operating System Command
AIX uname -m
1-4 Prerequisites
HP-UX uname -i
IRIX sysinfo -s
Solaris hostid
License Information
Write down the licenses for each BFS your company purchased.
Level 1 Licenses_________________
Level 2 Licenses_________________
Level 3 Licenses_________________
Page 23
System Administrator’s Guide to Installing DataMgr
Temporary Product Key
Changing Authorization String
The generic 30-day temporary product key is: U3QEYUCJ.
Note
The temporary product key does not enable File Replication,
Multi-tier, or File Import.
Prerequisites
At the end of 30 days, if a permanent Authorization String has
not been entered, DataMgr expires, but migrated data will not
be lost. If you enter a permanent license after the expiration
date, file migration and reload is again enabled through the
BFS.
Change the authorization string if any of the following
conditions apply:
• You proceed from an evaluation to a purchase.
• You add clients or upgrade clients (therefore add to the disk
space) that DataMgr manages.
• You want to enable file replication, multi-tier migration, or
file import.
Step 1. Contact ADIC to receive an authorization string.
Step 2. The
/etc/bfs/usr/utils/bfsmaint utility
initializes the license file. Therefore, when you
update the temporary Product Key to a permanent
Authorization String, use this utility as shown
below:
# cd /etc/bfs/usr/utils
# ./bfsmaint -i
Prerequisites 1-5
Page 24
System Administrator’s Guide to Installing DataMgr
Step 3. DataMgr replies with the message illustrated below,
License information for host zanzibar:
Temporary license expires in 1 month
Okay to overwrite license file? [n] y
Enter your Authorization string for a permanent
license:
Note
Use the bfsmaint -i utility option only when
DataMgr is running.
which confirms that you want to overwrite the
license file.
When prompted, enter a new authorization string.
Your responses are shown in bold.
1-6 Prerequisites
AAAA292X2QUV487BJAM
License file written
License information for host zanzibar:
Number of level 1: 10
Number of level 2: 1
Number of level 3: 0
Page 25

System Administrator’s Guide to Installing DataMgr
BFS Issues License to Clients
Registration File Monitors License
The BFS issues each DMFS client the appropriate license level
after receiving information on the amount of disk storage it
manages on the client machine. If a license for the appropriate
level is not available, the BFS issues the client a license for the
next higher level. If all licenses are in use, the request is denied.
(For a description of DataMgr components, refer to
“Components” on page 1-4 in DataMgr Overview.)
For example, if a client has 3GB of space for management, it
needs a Level 1 license. If a Level 1 licenses is not available,the
BFS will try to issue a Level 2 license, and if there are none
available, it will try to issue a Level 3 license.
If a client attempts to use either file replication or multi-tier
migration, but the BFS does not have the appropriate feature
license, the operation will fail.
On the BFS, DataMgr maintains a registration file located in
/etc/bfs/registered. This file (an example is shown
below) monitors all levels of licenses that are authorized and in
use at any given time.
Prerequisites
Serial number: DM-00539
License installed on Tue Jan 5 17:46:38 1999
Allowed license levels:
Number of level 1: 25
Number of level 2: 3
Number of level 3: 1
Current license levels in use:
Level 1 checked out: 8
Level 2 checked out: 1
Level 3 checked out: 1
Prerequisites 1-7
Page 26

System Administrator’s Guide to Installing DataMgr
How to Refresh Registration File
If a client goes down while files are being migrated or reloaded,
/etc/bfs/registered file can become out-of-sync
the
with the current client configurations.
To refresh the
registered file, refer to “Refresh Registration
File” on page 6-39 in System Administrator’s Guide to Using
DataMgr.
1-8 Prerequisites
Page 27
System Administrator’s Guide to Installing DataMgr
Requirements
File Pathname Limit
Make sure you read the DataMgr “Release Notes” to obtain the
following information:
• A list of current patches and packages required by your
servers.
• GUI requirements.
• Known problems.
• The latest AMASS compatibility matrix. Install a
compatible version of AMASS on a server on your network
to provide storage server resources.
Note
Install and start AMASS before installing DataMgr.
DataMgr supports a file pathname limit of 1023 characters for
the DataMgr root directory in AMASS. For example, if client
files are going under /
AMASS, then the length of this string (26 characters) must be
subtracted from 1023 (1023-26=997). Consequently,
succeeding file pathnames can be a total of 997 characters in
length.
archive/FMSclients/eureka on
Prerequisites
File System Size & Name
File system size is important. ADIC recommends that your file
system not exceed 1 million files. As the number of files
approaches 1 million, the system slows considerably. The
smaller the file system, the faster most utilities and commands
will complete.
The size of a file system name can be a maximum of 24
characters in length.
Prerequisites 1-9
Page 28
System Administrator’s Guide to Installing DataMgr
Large Files
If a DMFS client requires DataMgr to manage files larger than
2GB, the BFS must support large files. Large file support is
provided on the following operating system:
• AIX 4.2.1 and 4.3.
• HP-UX 10.20 HP-UX 11.0.
• IRIX 6.2, 6.4, and 6.5
• Solaris 2.6 and 7.0.
Shared Libraries
The tables below list required shared libraries for successful
operation of both the Client GUI and the Administrative GUI.
If, for example, your system does not have a
but it does have a l
ibXaw.so.4 or libXaw.so, create a
libXaw.so.5,
symbolic link to the actual library (highest number) with the
required library. An example follows:
# cd /usr/openwin/lib; ln -s libXaw.so.4 libXaw.so.5
1-10 Prerequisites
(actual library) (required library)
Fileset Libraries Included
X11.base.lib
X11.base.rte
X11.samples.lib.Core
AIX
/usr/lib/libX11.a
/usr/lib/libXaw.a
/usr/lib/libXm.a
/usr/lib/libXext.a
Page 29
System Administrator’s Guide to Installing DataMgr
HP-UX
Fileset Libraries Included
X11R5-SHLIBS /usr/lib/Motif1.2/libXm.sl
/usr/lib/X115R/libX11.sl
/usr/lib/X11R5/libXt.sl
IRIX
Fileset Libraries Included
x_eoe.sw.eoe
motif_eoe.sw.eoe
/usr/lib/libXaw.so
/usr/lib/libXmu.so
/usr/lib/libXt.so
/usr/lib/libX11.so
/usr/lib/libXext.so
Prerequisites
Prerequisites 1-11
Page 30

System Administrator’s Guide to Installing DataMgr
Open Windows
SUNWmfrun /usr/dt/lib/libXaw.so
Add both /usr/dt/lib and /usr/openwin/lib to the
LD_LIBRARY_PATH environment variable.
Solaris
X Windows Libraries Included
/usr/openwin/lib/libXaw.so
/usr/openwin/lib/libXmu.so
/usr/openwin/lib/libXt.so
/usr/openwin/lib/libX11.so
/usr/openwin/lib/libXext.so
1-12 Prerequisites
Page 31

System Administrator’s Guide to Installing DataMgr
Disk Space
The table below shows the amount of disk space required by
DataMgr:
Operating
System
AIX 32MB 14MB 140KB 4MB 8MB BFS Database and
HP-UX 30MB 13MB 66KB 10MB 5MB
IRIX 37MB 12MB 156KB 4MB 5MB
Solaris 31MB 10MB 91KB 4MB 5MB
* The /etc/dm/log and /etc/dm/raima/log contain log files so this initial size will grow.
# Use the equations found in “Size Databases” on Page 1-18 to calculate the space for these two
databases.
DMFS BFS SLD SSD /etc/dm*
/etc/dm/raima/bfs
and
/etc/dm/raima/dmfs
Managed File System
Database
The DataMgr installation script will verify that there is enough
space available in the installation directory before proceeding.
If there is not enough space, the script asks if you want to
attempt the install anyway. Typically, you want to stop the
install, make the space available, and continue with the
installation.
#
Prerequisites
Prerequisites 1-13
Page 32

System Administrator’s Guide to Installing DataMgr
Create Installation Directory
Determine
Location for
Create a platform-specific directory to contain the DataMgr
files extracted from the CD. The default directory is
/usr/dminstall. For instructions on deleting this directory
if space is limited, see “Remove Load Directory” on page 4-6
If, for example, you have extracted Solaris-specific DataMgr
files from the CD, your directory hierarchy would look similar
to the illustration below:
/ (root)
usr/
dminstall/
solaris/
~
/etc/dm/books/
home/
tmp/
lib/
bin/
Each DataMgr component (BFS, SSD, SLD, and DMFS) must
be installed on a UNIX machine.
.
Components
1-14 Prerequisites
• BFS: Install the BFS on a server that has network access to
the DataMgr clients (DMFS) and to the DataMgr daemons
(SSD and SLD). A minimum of one BFS component is
required.
• SSD: Install SSD on each server where AMASS is installed
and will be used for file storage.
• SLD: Install the SLD on any machine with network access
to the BFS, DMFS clients, and SSD. Only one SLD is
required.
Page 33

System Administrator’s Guide to Installing DataMgr
• DMFS: Install the DMFS on all client machines that have
file systems managed by DataMgr. The number of machines
is limited by the number and level of licenses you have
purchased.
Summary of Elements
DMFS Client
Stub
Has file systems
managed by DataMgr.
Stub file is left behind
after DataMgr
migrates a file.
Client xdmfs GUI.
Client Transaction
Database.
Managed File
System Database.
The illustration attempts to give you an overview of the
DataMgr elements described below.
BFS & SLD
Bitfile IDs
for
migrated
files
Administrative
xdmadm GUI.
BFS Database
correlates BFIDs
with RIDs.
Bitfile ID is a unique
way to identify a
migrated file.
/archive/FMSclients/clientmachinename
RID identifies the location of the
migrated file under the mount point
/archive.
Bitfile is a term used to describe the
migrated file on AMASS. The bitfiles
are located under the corresponding
clientmachinename directory.
SSD & AMASS
RIDs & Bitfiles
for
migrated
files
Prerequisites
Library
File
Actual migrated
files.
• Location of DataMgr components.
• Location of DataMgr GUIs:
- Administrative xdmadm GUI is on the BFS and used
by the System Administrator.
- Client xdmfs GUI is on the DMFS and used by clients
as well as the System Administrator.
Prerequisites 1-15
Page 34

System Administrator’s Guide to Installing DataMgr
• Location of DataMgr databases:
- Transaction Database is on each client’s machine.
- Managed File System Database is on each client’s
- BFS Database is on BFS. To calculate the size of this
• DataMgr-specific directories on AMASS:
- Bitfiles are located under
machine. To calculate the size of this database, see
“Size Managed File System Database” on page 1-20.
Database, see “Size BFS Database” on page 1-18.
/archive/FMSclients/clientmachinename.
Create Directories
During the installation process, DataMgr creates and writes to
the directories listed in the table below. If you do not use the
default directories, DataMgr creates the directory names that
you enter in the script and the appropriate symbolic links.
Note
Make sure that enough disk space is available for these
directories. For space requirements, see “Disk Space” on
page 1-13.
Component
All components /etc/dm Location for DataMgr common files, such as the
BFS /etc/bfs Location of BFS executables.
SLD /etc/sld Location of SLD executables.
SSD /etc/ssd Location of SSD executables.
Default
Directory
Description
error log. All machines running a DataMgr
component will have this directory.
1-16 Prerequisites
Page 35

System Administrator’s Guide to Installing DataMgr
Component
DMFS (clients) /etc/dmfs Location of DMFS executables.
Default
Directory
Description
Complete Table Complete the table below when answering the installation
questions. If you are installing a DMFS client component on
more than one machine, make as many copies of this table as
needed. If symbolic links are used, write down the appropriate
path for each machine in both the Default Path and Symbolic
Link Path columns.
Component Host Name UID GID Default Path
SSD
BFS
SLD
DMFS (clients)
AMASS
Symbolic Link
Path
Prerequisites
Prerequisites 1-17
Page 36

System Administrator’s Guide to Installing DataMgr
Size Databases
Managed File System
Database
The following database are used in DataMgr:
• BFS Database on the BFS component.
• Managed File System Database on each client.
• Client Transaction Database on each client.
Both the BFS Database and the Managed File System Database
must be sized.
DMFS Client
Stub
for File A
Information
on File A
BFS & SLD SSD & AMASS
RID &
Bitfile
ID for
File A
BFS Database
Bitfile
for
File A
Library
File A
Size BFS Database
1-18 Prerequisites
The BFS Database is located under /etc/dm/raima/bfs.
This Database contains the bitfile IDs for migrated files. A
bitfile ID points to a specific RID (record ID) on AMASS. This
is how DataMgr keeps track of where client files have been
migrated.
Use the formula below to determine the space required for the
BFS Database:
Database size = 64 * Number of files being migrated
Page 37

System Administrator’s Guide to Installing DataMgr
If File Replication or Multi-tier Policies are used, then the
equation is:
Database size = ((64 + (factor * 16)) * Number of files being migrated
factor = Number of replicated copies or number of tiers.
Example 1: if you have client files using a File Replication
policy with 1 primary copy and 1 secondary copy, the equation
would look like the following:
Database size = (64 + (1 * 16)) * number of files)
Database size = 80 * number of files
Example 2: if you have client files using a Multi-tier policywith
the primary copy and 2 tiers, the equation would look like the
following:
Database size = (64 + (2 * 16)) * number of files
Database size = 96 * number of files
Note
Prerequisites
A migrated file that is subsequently modified and re-migrated
creates a new record in the BFS Database. Also, when a
migrated file is removed from a client’s managed file system,
it’s record remains in the BFS Database until its retention time
expires and the Trashcan is dumped. At that point, the record
is available for re-use in the BFS Database.
Prerequisites 1-19
Page 38

System Administrator’s Guide to Installing DataMgr
Note
A BFS Database that is 2GB in size can contain information for
20 million managed files.
Size Managed File System Database
The Managed File System Database is located under
/etc/dm/raima/dmfs.There is a Managed File System
Database for each client’s managed file system. The Database
contains all the information on each file in the managed file
system and stores information used in generating a list of files
to migrate.
Prior to selecting a file system for management, you must
determined the size of the Managed File System Database.
Use the formula below to determine the size:
Database size = ((Number of Directories x 250)+(Number of Files x 650))
The values for the Number of Directories and Files are
estimates of the maximum number of files and directories that
will reside on the client’s file system. This estimate assumes a
typical directory and file name length of 20 characters or less. If
the file name length is longer, add that length to the estimate.
For example, if the typical file name length is 40 the equation
would look like the following:
1-20 Prerequisites
Database size = ((Number of Directories x 290)+(Number of Files x 650))
Page 39

System Administrator’s Guide to Installing DataMgr
Edit Paths
The following environmental paths are not automatically set up
during installation.
man Pages
Step 1. To use the man pages, set the following path.
For each c shell environment:
setenv MANPATH ${MANPATH}:/etc/dm/usr/share/man
For each bourne shell environment:
MANPATH=$MANPATH:/etc/dm/usr/share/man export MANPATH
Utilities
Step 2. The GUIs use the DataMgr utilities to accomplish a
task, for example, changing watermarks uses the
dmfscntl utility. Therefore, set the following
paths.
For each c shell environment:
Prerequisites
set path=($path /etc/dm/usr/utils /etc/dmfs/usr/bin\
/etc/dmfs/usr/utils /etc/bfs/usr/bin /etc/bfs/usr/utils\
/etc/sld/usr/daemons /etc/ssd/usr/daemons /etc/bfs/usr/daemons)
For each bourne shell environment:
PATH=$PATH:/etc/dm/usr/utils:/etc/dmfs/usr/bin:/etc/dmfs/usr/utils:\
/etc/sld/usr/daemons:/etc/ssd/usr/daemons:/etc/bfs/usr/daemons:\
/etc/bfs/usr/
export PATH
Prerequisites 1-21
Page 40

System Administrator’s Guide to Installing DataMgr
GUIs
Step 3. To run the Client xdmfs GUI, add
/etc/dmfs/usr/bin to your PATH.
Step 4. To run the Administrative
/etc/bfs/usr/bin to your PATH.
xdmadm GUI, add
Step 5. Both the Client GUI and the Administrative GUI
require the files below to be in the
/etc/dm/usr/share/gui directory. These files
are located in this directory during a normal
DataMgr installation.
• server
• xdmfs
• xdmfs.hlp
• xdmfskeysym
Step 6. Solaris only: To run the GUIs, add one of the
following to your
LD_LIBRARY_PATH:
• /usr/dt/lib
• Or, /usr/openwin/lib
Step 7. Both GUIs also expect the
X/Motif/XKeysymDB
file to be in /usr/lib/X11 directory. If the file is
not there, then copy
/etc/dm/usr/share/gui/xdmfskeysym as
follows:
# cp /etc/dm/usr/share/gui/xdmfskeysym /usr/lib/X11/XKeysymDB
On Solaris, do the following:
# cp
1-22 Prerequisites
/etc/dm/usr/share/gui/xdmfskeysym /usr/openwin/lib/XKeysymDB
Page 41

System Administrator’s Guide to Installing DataMgr
Edit Temporary Storage Space
The DataMgr dmfsscan command controls migration by
bringing space usage levels for a managed file system in line
with the values defined by the DataMgr administrator with the
low and prestage watermarks.
dmfsscan command, as a default, uses /usr/tmp for
The
temporary file storage. If you want these files to be directed
elsewhere, edit the /
DMFS_TMPDIR=newdir" entry as shown below:
the "
Add this entry
to the file.
etc/dmfs/config/params file and add
# cd /etc/dmfs/config/params
~
DMFS_TMPDIR=newdir
~
Prerequisites
Prerequisites 1-23
Page 42

System Administrator’s Guide to Installing DataMgr
System Mount Table
The system mount table defines the file systems and disk
partitions that are mounted at boot time.
The file system name defined to DataMgr in the
/etc/dmfs/config/dmfstab file must match an entry in
this system mount file.
The location and format of this table varies by system
architecture.The table below shows the location of this file on
the various supported platforms:
Operating
System
AIX /etc/filesystem filesystem
HP-UX /etc/fstab fstab
IRIX
Solaris /etc/vfstab vfstab
* For more information, refer to this man page.
System Mount Table Man Page*
1-24 Prerequisites
Page 43

NOTES
System Administrator’s Guide to Installing DataMgr
Prerequisites
Prerequisites 1-25
Page 44

System Administrator’s Guide to Installing DataMgr
NOTES
1-26 Prerequisites
Page 45

Extract Files From Local CD . . . . . . . . . . . . . . . . .2-3
Extract Files From Remote CD . . . . . . . . . . . . . . .2-4
Install DataMgr . . . . . . . . . . . . . . . . . . . . . . . . . . . . 2-6
Startup File . . . . . . . . . . . . . . . . . . . . . . . . . . . . . .2-12
Startup & Shutdown . . . . . . . . . . . . . . . . . . . . . .2-13
2
Installation
Installation
Page 46

System Administrator’s Guide to Installing DataMgr
Roadmap
Task
Install AMASS before installing DataMgr.
Verify that you have the necessary system
requirements.
Install DataMgr. 2
Setup tasks:
• Establish access for clients.
• Edit cron jobs.
• Change GUI colors and fonts.
Post installation tasks:
• Deinstall and reinstall DataMgr.
• Remove installation directory.
Refer To
Chapter
1
3
4
2-2 Installation
Page 47

System Administrator’s Guide to Installing DataMgr
Extract Files From Local CD
To install DataMgr from CD on a local host, perform
the following procedure:
L
Step 1. Log in as
Step 2. Create a temporary directory under /tmp and cd to
that directory.
Step 3. Do an ls on the cdrompath to determine the case
(upper or lower) of the file names. Some platforms
will change the name from upper case (DM) to
lower case (dm) letters.
Step 4. To extract the files from a CD on a local host, enter
the following command:
# tar -xmvf/
cdrompath
where:
Option Description
root.
/datamgr/
platform.TAR
Installation
cdrompath
platform.TAR
Step 5. If you have loaded the extracted files onto a machine
that will not be running DataMgr, log onto the target
machine and NFS mount the platform-specific
directory from the machine where the files are
located.
Step 6. Continue with “Install DataMgr” on Page 2-6.
Enter the pathname where the CD
has been mounted. For example,
/cdrom/DATAMGR.
Enter the applicable operating system
version. For example, sol26.TAR.
Installation 2-3
Page 48

System Administrator’s Guide to Installing DataMgr
Extract Files From Remote CD
# rsh nodename -n dd
if=/cdrompath/datamgr/platform.TAR bs=20b | tar xmvBf -
To install DataMgr from CD on a remote host,
perform the following procedure:
R
Step 1. Log in as
Step 2. Create a temporary directory under /tmp and cd to
that directory.
Step 3. Do an ls on the cdrompath to determine the case
(upper or lower) of the file names. Some platforms
will change the name from upper case (DM) to
lower case (dm) letters.
Step 4. To extract the files from a CD on a remote host,
enter the following command
where:
Option Description
root.
2-4 Installation
nodename Enter the remote host name of the
machine where the tape device is
attached. Make sure the node name
is included in the /.rhosts file.
cdrompath
platform.TAR
Enter the pathname where the CD
has been mounted. For example,
/cdrom/DATAMGR.
Enter the applicable operating system
version. For example, sol26.TAR.
Page 49

System Administrator’s Guide to Installing DataMgr
Step 5. If you have loaded the extracted files onto a machine
that will not be running DataMgr, log onto the target
machine and NFS mount the platform-specific
directory from the machine where the files are
located.
Step 6. Continue with “Install DataMgr” on Page 2-6.
Installation
Installation 2-5
Page 50

System Administrator’s Guide to Installing DataMgr
Install DataMgr
If the various components are going to be installed on different
machines, the installation sequence is as follows:
• SLD.
Note
The SLD component should be installed first and must
be running when the DMFS is installed. This only
applies if the two components are located on different
machines.
• BFS.
• SSD.
• DMFS.
ADIC recommends that each component be started before the
next component is installed. This will ensure that each
component can talk to the others correctly.
Caution
2-6 Installation
The installation script inserts entries into various system files.
These entries are encapsulated between special tags. A
typical tag will appear like %CDVSTART_dmfs%. Do not alter or
remove these tag lines.
From each machine listed in “Complete Table” on Page 1-17,
perform the installations steps below:
Caution
If you are upgrading DataMgr, make sure you have a
successful current backup of your BFS Database.
Page 51

System Administrator’s Guide to Installing DataMgr
Step 1. Change directory to the specific platform directory
created earlier and run the DataMgr installation
script.
For example, the commands below go to the hpux
directory and runs the DataMgr script.
# cd /usr/dminstall/hpux1020
# ./install_dm
Step 2. The installation script prompts you to enter the letter
that corresponds to the component you want to
install.
a) DMFS - Data Manager File System (provides migrating file systems)
b) BFS - Bitfile Server (requires installed SSD)
c) SLD - Service Locator Daemon (must be one per network)
d) SSD - Storage Server Daemon (provides local SSD; requires AMASS)
e) ALL - All of the above
Please enter a, b, c, d, e, or a list (eg, ab):
You can select — one, all, or a combination — of
components. For example, to install all four
components on this machine, enter “e” as shown
below:
Please enter a, b, c, d, e, or a list (eg, ab): e
Step 3. The following prompt checks to make sure a full
BFS Database back up has been performed.
Do you have a current full BFS Database Backup? (y | n) [y]
Installation
Installation 2-7
Page 52

System Administrator’s Guide to Installing DataMgr
• If you respond with y (default), the installation
script will continue.
• If you respond with n, the installation script will
terminate. You can Start DataMgr, perform a full
BFS Database backup, then run the installation
script again.
Step 4. The installation script prompts you to enter both the
User ID and Group ID. The specified GID should
already exist, but DataMgr will add the UID to the
machine’s
passwd file. A sample answer is shown
in bold:
Please enter the numeric user ID (uid) for the dmfs account: 357
Please enter the base group ID (gid) for the dmfs account: 86
Note
2-8 Installation
When you install the DMFS component, you
need to know the AMASS UID and GID.
Step 5. DataMgr uses the standard
operating system for all of its error messages. All
messages are sent using the
Through the
syslog.conf file, you can control the
destination of these messages.
Note
If you have previously installed DataMgr, the
installation script asks if you want to replace the
entries found in root’s crontab with defaults. The
crontab contains administrativetasks, Foradditional
information, see “Schedule cron Jobs” on page 3-4.
If you answer NO, the script moves on to the next
question. You will not be given the chance to select
specific entries or configure values.
syslog function of the
local1 facility.
Page 53
System Administrator’s Guide to Installing DataMgr
Step 6. If the SLD and the DMFS are going to be installed
on different machines, you must go to the SLD
machine and start the SLD (run
/etc/rc.dm)
before continuing with this installation.
Step 7. If you want to accept the default location for the files
specific to the components, press <Enter>. However,
if you want DataMgr to create another directory for
these files, enter a new path. Wherever possible, the
script allows you to use symbolic links to relocate
the actual DataMgr directories.
Note
Do not locate the /etc/dm/raima files on a
managed file system. Make sure the
/etc/dm/raima directory does not reside in
the /etc/dmfs/config/dmfstab file.
Installation
Enter actual DataMgr home location
[/install/datamgr/dm]: ________________
Append logging entries to
/etc/syslog.conf? (y | n) [n]: ________________
Enter actual SLD (Service Locator Daemon home location
[/etc/sld]: ________________
Enter actual DMFS (DataMgr FileSystem) home location
[/etc/dmfs]:_____________
Enter actual BFS (Bitfile Server) home location
[/etc/bfs]:__________________
Enter actual Raima database journal home location
[/etc/dm/raima/journal]: ________________________________
Enter actual Raima database home location [/etc/dm/raima]:____________
Enter actual SSD (Storage Server Daemon) home location
[default is /etc/ssd]:_________________
Installation 2-9
Page 54

System Administrator’s Guide to Installing DataMgr
Please enter the hostname of the Storage Server to be used for storing
database backups: ____________________________
Step 8. If you accept the default location for the mount
point, AMASS bitfiles directory, and BFS Database
backup directory, press <Enter>.
However, if you want DataMgr to create another
directory, enter a new path.
Enter actual Storage Server Archive directory location
[/archive/FMSclients]:________________
Enter actual DataMgr database backup directory location
[/archive/BFSDB_Backup]:______________
Step 9. Solaris only:
The following message displays and can be ignored:
Could not read symbolic link /dev/bd.off
Step 10. If the BFS component is being installed, the script
will attempt to detect the need to do a full BFS
Database backup when the script finishes.
Journaling requires a full BFS Database backup
before the journal file is backup.
• If a full backup is required, the following
appears:
Please do a full backup of your BFS Database before using any migrating
file systems. Press return to continue.
2-10 Installation
Page 55

System Administrator’s Guide to Installing DataMgr
Step 11. Enter the license strings that were purchased. For
information, see “Capacity- based License” on
page 1-3.
Step 12. If you have installed DMFS and the script indicates
that you should reboot (some systems require a
reboot when the kernel is modified), then reboot
when the script is complete.
IRIX only:
An error message similar to the following may
appear before the reboot but may be ignored:
“Error loading module emass_mfs_: Can’t
resolve all symbols in object.”
Step 13. Proceed to the next chapter.
Installation
Installation 2-11
Page 56

System Administrator’s Guide to Installing DataMgr
Startup File
The startup file performs the following tasks:
• Cleans up any migrations or reloads that were in progress
when the system went down by running
/etc/dmfs/usr/utils/dmfsck.It writes the bitfile ID
of each file that it recovers to standard output, one per line.
This utility can also be run manually. For information, refer
to the Utility Reference chapter in System Administrator’s
Guide to Using DataMgr.
• Starts up the DataMgr daemons for the components that are
installed on this machine. Startup uses the following
daemons:
DataMgr Components Daemons
BFS bfsd
SLD sld
SSD (on AMASS server) ssd
DMFS (on all clients) dmfsd
2-12 Installation
The table below lists the system startup files modified by
DataMgr during installation. After modification, these system
startup files run the
/etc/rc.dm script, which contains the
DataMgr startup commands.
Operating System Startup File
AIX /etc/inittab
HP-UX /sbin/init.d
IRIX
Solaris
/etc/init.d
Page 57

System Administrator’s Guide to Installing DataMgr
Startup & Shutdown
Although the command to automatically start DataMgr at
bootup is added to the system startup file during installation, a
special startup is required, for example, after the system
administrator performs system maintenance.
Step 1. To gracefully bring DataMgr down, run the script
below. This stops DataMgr and unloads the DMFS
driver on systems that support loadable device
drivers.
# /etc/dm/usr/utils/killdmfs
Step 2. To perform a special start of DataMgr, run the
/etc/rc.dm script.
Installation
Installation 2-13
Page 58

System Administrator’s Guide to Installing DataMgr
NOTES
2-14 Installation
Page 59

NOTES
System Administrator’s Guide to Installing DataMgr
Installation
Installation 2-15
Page 60

System Administrator’s Guide to Installing DataMgr
2-16 Installation
Page 61

Establish Access for DMFS Clients . . . . . . . . . . . 3-3
Schedule cron Jobs . . . . . . . . . . . . . . . . . . . . . . . . . 3-4
DMFS cron job . . . . . . . . . . . . . . . . . . . . . . . . . 3-4
BFS cron job . . . . . . . . . . . . . . . . . . . . . . . . . . . . 3-5
Back Up Databases . . . . . . . . . . . . . . . . . . . . . .3-6
Save SSD Logs . . . . . . . . . . . . . . . . . . . . . . . . . 3-9
Logging . . . . . . . . . . . . . . . . . . . . . . . . . . . . . . . . . 3-12
Logging Hierarchy . . . . . . . . . . . . . . . . . . . . . 3-12
Format of Messages . . . . . . . . . . . . . . . . . . . .3-13
Priority Levels . . . . . . . . . . . . . . . . . . . . . . . . 3-13
Modify Logging Characteristics . . . . . . . . . 3-14
Modifiable Variables . . . . . . . . . . . . . . . . . . . 3-15
Start Administra-tive GUI . . . . . . . . . . . . . . . . . 3-19
Start Client GUI . . . . . . . . . . . . . . . . . . . . . . .3-19
Change Colors and Fonts . . . . . . . . . . . . . . . 3-20
3
Setup Tasks
Setup Tasks
Page 62

System Administrator’s Guide to Installing DataMgr
Roadmap
Task
Install AMASS before installing DataMgr.
Verify that you have the necessary system
requirements.
Install DataMgr. 2
Setup tasks:
• Establish access for clients.
• Edit cron jobs.
• Change GUI colors and fonts.
Post installation tasks:
• Deinstall and reinstall DataMgr.
• Remove installation directory.
Refer To
Chapter
1
3
4
3-2 Setup Tasks
Page 63

System Administrator’s Guide to Installing DataMgr
Establish Access for DMFS Clients
Step 1. DataMgr is shipped so that only the DataMgr
administrator can select clients’ file systems for
management and can define migration criteria. By
default, clients can only view managed file system
selections and migration criteria.
Therefore, give clients
to be able to add file systems and edit migration
criteria. For information on file permission, refer to
chmod manual page.
the
Step 2. The BFS must be able to determine each client’s IP
address from its name. Accomplish this task with
appropriate entries in either the DNS Database, NIS
Database, or
/etc/hosts file.
root access if you want them
Setup Tasks 3-3
Setup Tasks
Page 64

System Administrator’s Guide to Installing DataMgr
Schedule cron Jobs
DMFS cron job
During installation, DataMgr puts entries in the root crontab
that perform the tasks described below. If the default schedule
does not suit your site’s needs, edit the
cron file. For more
information, see “Edit cron File” on page 3-10.
On all DMFS Clients, the crontab performs the following
jobs:
• Nightly at Midnight: Runs the
/etc/dmfs/usr/utils/dmfsscan utility, which
migrates client files based on configured watermarks. For
more information, see “Back Up Databases” on page 3-6,
and refer to the Utility Reference in System Administrator’s
Guide to Using DataMgr.
• Sunday at 1 a.m.: Runs the
/etc/dmfs/usr/utils/dmfsaudit utility, which
synchronizes databases. For more information, refer to the
Utility Reference chapter in System Administrator’s Guide
to Using DataMgr.
3-4 Setup Tasks
• Nightly at 11:45 p.m.: Runs the
/etc/dm/usr/utils/clearlog.sh script, which backs
up the SSD log to
/etc/dm/log/ssd/transfile and
truncates the file. The SSD log indicates each record ID,
bitfile ID, and file name that has been migrated by DataMgr.
It also contains a file that registers all the AMASS
transactions. After running the
DataMgr saves the SSD log as
clearlog.sh script,
transfile.x. For more
information, see “Save SSD Logs” on page 3-9. The
clearlog script also saves the current and last four system
logs.
Page 65

System Administrator’s Guide to Installing DataMgr
• Nightly at 1 a.m.: Runs the
/etc/dm/usr/scripts/clean_emasslogs script to
move the current set of logs to a file in the same directory
with the same name, but appended with a timestamp. For
more information, see “Edit cron File” on page 3-10. The
clean_emasslogs script also saves seven old log files per log
type plus the current log.
BFS cron job
On the BFS, the crontab performs the following jobs:
• Nightly at 2 a.m.: Runs the
/etc/bfs/usr/utils/bfsmaint -m -d utility, which
automatically replicates files (that are assigned to the File
Replication Policy) or automatically migrates files (that are
assigned to the Multi-tier Migration Policy). It also manages
the retention and expiration of migrated files. For more
information, see “BackUp Databases” on page 3-6, or refer
to the Utility Reference chapter in System Administrator’s
Guide to Using DataMgr.
• Nightly at 4 a.m.: Runs the
/etc/bfs/usr/utils/bfsdb_backup utility, which
backs up the BFS Database. Normally a full backup is
performed on Saturday morning and a partial backup is
performed every other morning.
For more information, see “Assign a Backup Volume” on
page 3-7. For more information, refer to the Utility
Reference chapter in System Administrator’s Guide to
Using DataMgr.
Setup Tasks
Setup Tasks 3-5
Page 66

System Administrator’s Guide to Installing DataMgr
Back Up Databases
To effectively and efficiently manage your clients’ file systems,
coordinate the execution of the following utilities by scheduling
them as cron jobs:
/etc/dmfs/user/utils/dmfsscan — controls file
•
migration.
etc/bfs/usr/utils/bfsmaint — copies and
•/
replicates migrated files according to the defined storage
policy as well as manages the retention and expiration of
migrated files.
ADIC recommends that you schedule these administrativetasks
after the backup of a client’s managed file systems has
completed. Therefore, the sequence of execution should be as
follows:
Step 1. Back up the DMFS client managed file system with
the DataMgr
dmmode command and one of the
following:
• A third-party backup package.
3-6 Setup Tasks
• Or, the UNIX tar or cpio command.
Step 2. Edit, if needed, a
Database with
/etc/bfs/usr/utils/bfsdb_backup.Fordays
and times, see “Schedule cron Jobs” on page 3-4.
While the BFS database is being backed up, the
databaseis locked to prevent anymodifications tothe
database until the backup is complete. Successful
backups are sent to
bfsdb_backup.completed.
cron job to back up the BFS
/etc/dm/raima/log/
Page 67

System Administrator’s Guide to Installing DataMgr
If this nightly backup fails, DataMgr sends a mail
message to
the status of the
sent to
bfsdb_backup.
root notifying the system administrator
bfsdb_backup. Failed backups are
/etc/dm/raima/log/
logfilename.
You can recover a previous backup version of the
database by using the
/etc/bfs/usr/utils/bfsdb_restore utility
that allows you to either restore the most recent
backup or restore a specified version. For more
information, refer to the Utility Reference chapter in
System Administrator’s Guide to Using DataMgr.
Assign a Backup Volume
Step 3. Edit, if needed, a
etc/dmfs/user/utils/dmfsscan utility.
/
cron job to run the
Step 4. Edit, if needed, a cron job to run the
etc/bfs/usr/utils/bfsmaint utility.
/
Step 1. Restrict the BFS Database backup directory, located
/archive/BFSDB_Backup on AMASS, to a
under
specified volume group. In our example, we want
the backup to be assigned to volume group 600.
Note
Do not use volume group 0 (zero) for the BFS
Database backups.
Setup Tasks
Setup Tasks 3-7
Page 68

System Administrator’s Guide to Installing DataMgr
Step 2. Enter the AMASS setvolgrp commands to assign
Step 3. To make sure the directory assignment is correct,
Step 4. Assign volumes to volume group 600 with the
/archive/BFSDB_Backup directory to
the
volume group 600:
# cd /archive/BFSDB_Backup
# setvolgrp /archive/BFSDB_Backup 600
enter the AMASS
vgroot commands to view the
relative paths for volume group 600.
# vgroot 600
AMASS
volgroup command. For specific
command information, refer to Managing the
AMASS File System.
3-8 Setup Tasks
Page 69

System Administrator’s Guide to Installing DataMgr
Save SSD Logs
DataMgr saves all file movement by the SSD to the
/etc/dm/log/ssd/transfile log file. The log files are
named
transfile.x, where “x” is an age-related counter
with the smaller number being the most current.
At installation, DataMgr schedules a nightly
cron job that
backs up the SSD log and saves the current transfile log to a
transfile.x file and then creates a new file called
transfile. However, the old transfile.x files are never
deleted.
The format of this
hhmmss:MMDDYYYY type blocks copy BFID ftoken bfsserver logid errors
filepath
transfile.x is as follows:
where:
Field Description
hhmmss Time of SSD log entry.
MMDDYYYY Date of SSD log entry.
type Creat = File was created in AMASS.
Delet = File was deleted in AMASS.
Renam = File was renamed in AMASS.
blocks Number of 512-byte blocks. Valid only for Creat
type.
copy File replication copy number. Valid only for Creat
type.
BFID Bitfile ID identifies a file that has been archived to
the AMASS file system. Valid for Creat type. and
Delet type.
For Renam types, this is the original bitfile name.
Setup Tasks 3-9
Setup Tasks
Page 70

System Administrator’s Guide to Installing DataMgr
Field Description
ftoken AMASS RID (record ID).
bfsserver BFS server name. Valid only for Creat type.
logid Internal log ID number used by DataMgr.
errors Zero indicates success; non-zero indicates failure.
filepath Path name to file. For Renam type, this is the new
To review these files in case of system errors, ADIC
recommends that you do not delete these “old”
files, but place them in one of the following areas:
• A DataMgr-managed directory so they can be migrated to
AMASS.
• Or, directly into an AMASS file system.
filename.
transfile.x
Edit cron File If the default schedule does not suit your site’s needs, edit the
cron file:
Step 1. Log in as root.
Step 2. The default crontab entries for running the
maintenance utilities are shown below:
In the
0 2 * * * /etc/dmfs/usr/utils/dmfsscan -aP
0 1 * * 0 /etc/dmfs/usr/utils/dmfsaudit -av
3-10 Setup Tasks
crontab on all DMFS clients:
Page 71

System Administrator’s Guide to Installing DataMgr
In the crontab on the BFS:
0 2 * * * /etc/bfs/usr/utils/bfsmaint -v -d 1 -m
0 4 * * 0-5 /etc/bfs/usr/utils/bfsdb_backup -v -n
0 4 * * 6 /etc/bfs/usr/utils/bfsdb_backup -v -n -f
Note
The -n option of bfsdb_backup causes
bfsdb_notify to send a mail message
to root notifying the system administrator of
any bfsdb_backup failure.
In the
0 1 * * 0 /etc/dm/scripts/clean_emasslogs
0 4 * * 0-5 /etc/bfs/usr/utils/bfsdb_backup -v -n
0 4 * * 6 /etc/bfs/usr/utils/bfsdb_backup -v -n -f
Step 3. Modify the
crontab on all DataMgr components:
crontab entries.
Step 4. Save and exit this file.
Setup Tasks
Setup Tasks 3-11
Page 72

System Administrator’s Guide to Installing DataMgr
Logging
Logging Hierarchy
System log messages are designed to help:
• Assess system operation.
• Monitor performance.
• Check system health.
• Resolve problems.
The figure below illustrates the logging hierarchy with the
customer-specific
System
Log
Messages
parms/ directory annotated.
emasslogs/
parms/
Levels 0-6
emasslog_parms/
(Environment Variables)
Levels 7-16
etac/
3-12 Setup Tasks
Page 73

System Administrator’s Guide to Installing DataMgr
Format of
The format of a system log message is illustrated below:
Messages
Aug 14 1:16:12 nserv dataMgr dmfsd[1001]: E0006 (5) <00000> Message.
Host name.
Product name, DataMgr in this case.
Process that logs message.
Month, day, time message was generated.
Priority Levels
Log number, begins with “E.”
Message destination PID in brackets [ ].
All messages are contained within a single file for easy reading
and problem solving. This file is located in the
/etc/dm/emasslogs/parms directory.
Priority levels for the messages are described in the following
tables:
Transaction number,
always 00000.
Priority level, in parentheses.
Actual Text
.
Priority
Level
0 EMERGENCY: system panic.
1 ALERTS: startup, shutdown, and crash.
2 CRITICAL: system runs but in a degraded mode.
3 ERROR: unsuccessful operation.
4 WARNING: system resources are running short.
5 NOTICE: general system information.
6 INFORMATION: confirms a successful operation.
Description
Setup Tasks
Setup Tasks 3-13
Page 74

System Administrator’s Guide to Installing DataMgr
Priority
Level
7 DEBUG: messages.
8 ADIC technical support trace message.
Modify Logging Characteristics
Description
Severalcharacteristics of a system log message can be modified
with environment variables in the
/usr/dm/emasslogs/emasslog_parms file that is created
at install time.
When the
reload_dmlog script, or stop and start the DMFS to activate
emasslog_parms file is modified, run the
the new options.
/etc/dm/scripts/reload_dmlog script allows system
The
administrator to specify which processes to reload with the new
logging levels in the
emasslog_parms file.
An example of the emasslog_parms file follows:
Comment lines begin with a number
sign ( # ).
Each environment variable name
starts in column one.
Equal symbol ( = ) is followed by a
value and ends with a semicolon (;).
3-14 Setup Tasks
# This file contains all the environment
variables
# EL_SYSLOG_OPTIONS indicates the format of
each message to syslog
EL_SYSLOG_OPTIONS=p;
# EL_PERF_MASK enables the performance logging
EL_PERF_ASK=ud;
Page 75

System Administrator’s Guide to Installing DataMgr
Modifiable
Variables
Environment Variable Description
EL_SYSLOG_FACILITY
(DataMgr defaults to 1)
(AMASS defaults to 2)
EL_SYSLOG_OPTIONS
(defaults to p)
The environment variables listed in the table below can
be modified if required:
Identifies the UNIX user-definable logging process that
sends DataMgr messages to the system log. The options
are listed below:
0 = LOG_LOCAL0
1 = LOG_LOCAL1
2 = LOG_LOCAL2
3 = LOG_LOCAL3
4 = LOG_LOCAL4
5 = LOG_LOCAL5
6 = LOG_LOCAL6
7 = LOG_LOCAL7
Indicates message destination. Use one, all, or any
combination of options. Options are:
p = use LOG_ PID.
c = use LOG_CONS to log messages to console too.
d = use LOG_NDELAY to log messages without delay.
Setup Tasks
Setup Tasks 3-15
Page 76

System Administrator’s Guide to Installing DataMgr
Environment Variable Description
EL_SYSLOG_MASK
(defaults to ud)
The log mask used for priority 0-7 messages that are
directed to the syslog. From the options available use
one option or any option combined with “u.”
Options are:
a = use LOG_ALERT for priority level 1
e = use LOG_EMERG for priority level 0.
c = use LOG_CRIT for priority level 2
i = use LOG_INFO for priority level 6
n = use LOG_NOTICE for priority level 5
r = use LOG_ERR for priority level 3
u = use LOG_UPTO() to log all priority levels up to ().
w= use LOG_WARNING for priority level 4
d = debug
For example,
• To mask all priority levelsexcept priority level 0, which
are emergency messages, edit the file as follows:
EL_SYSLOG_MASK=e;
• To mask all errors except zero “up to” priority level 3
(only levels 0, 1, 2, and 3 will display), edit the file as
follows: EL_SYSLOG_MASK=ur;
3-16 Setup Tasks
Logging that shows which commands have been run, the time it
ran, and whether or not the command succeeded are located in
/etc/dm/emasslogs/history/el_hist_00.
Page 77

System Administrator’s Guide to Installing DataMgr
The clean_emasslogs script will be added to the user’s cron
file upon installation. When this script is run it moves the
current set of logs to a file in the same directory with the same
name, but appended with a timestamp.Shown below is an
example of a moved logs with the timestamp applied.
# ls /etc/dm/emasslogs/history
el_hist_00 el_hist_00.1999:11:28:01:00:00
el_hist_00.1999:11:25:01:00:00 el_hist_00.1999:11:29:01:00:00
el_hist_00.1999:11:26:01:00:00 el_hist_00.1999:11:30:01:00:00
el_hist_00.1999:11:27:01:00:00 el_hist_00.1999:11:30:15:04:08
In addition to the current log, the default script saves up to
seven old log files per log type,. To change this default, edit the
MAX_COPY parameter in the clean_emasslogs script.
There are two ways to save all log files without deleting the old
files:
Note
In both cases a directory must be created
prior to modifying the clean_emasslogs
script. The clean_emasslogs script does
not create the directory.
• The first way to save logs is to create a clean_emasslogs
directory in which to store the moved files. Then edit the
clean_emasslogs script, SAVE_DIR parameter.
Note
Be aware that as files accumlate, the disk
space is reduced.
Setup Tasks 3-17
Setup Tasks
Page 78

System Administrator’s Guide to Installing DataMgr
• The second way to save logs and to make sure that there is
always enough disk space, is to create a clean_emasslogs
directory in AMASS with it’s own volume group, in which
to store the moved files. Then edit the
script, SAVE_DIR parameter.
• To use the reload_dmlog script with the emasslog_parms
file, follow the steps below:
EL_SYSLOG_MASK=ud;
In our example, we are turning on logging level nine.
clean_emasslogs
Step 1. Edit the emasslog_parms file to indicate
which logging levels to turn on and off. An
example is shown below:
Step 2. Save the
emasslog_parms file.
Step 3. Run the /etc/dm/scripts/reload_dmlog
script to activate the new settings. The
options for the
reload_dmlog script are
described below:
Option Description
-u Usage.
-a Reload all DataMgr processes running.
-p process Specify a single process ID.
-n name Specify a single process name. If multiple
processes have the same (e.g. dmfsd),
then -n dmfsd will affect each process.
3-18 Setup Tasks
Page 79

System Administrator’s Guide to Installing DataMgr
Start
Administrative GUI
Step 1. To run the Administrative GUI, enter the xdmadm
command.
# xdmadm
Step 2. The Services menu displays status and error
messages.
To display help, select
To quit, select Services-->Exit.
Help-->General Help.
Start Client GUI
Setup Tasks
Step 1. To run the Client GUI, enter the xdmfs command.
# xdmfs
Setup Tasks 3-19
Page 80

System Administrator’s Guide to Installing DataMgr
Step 2. The Client Main menu appears.
Change Colors and Fonts
To quit, select File-->Exit.
To display help, select
Help-->General Help.
When you start both GUIs, they will use default colors and
fonts. To change the defaults file, follow the steps below:
3-20 Setup Tasks
Step 1. Administrative GUI: Make a backup copy of the
/etc/dm/usr/share/gui/server file, which
contains default values.
Step 2. Client GUI: Make a backup copy of the
/etc/dm/usr/share/gui/xdmfs file, which
contains default values.
Page 81

System Administrator’s Guide to Installing DataMgr
Step 3. Use a text editor, such as vi, and edit the original file
by substituting the desired colors or fonts.
server*font: 9x15
server*fontlist: 9x15
server*background: steelblue
server*forground: white
Caution
DO NOT CHANGE any other text in this file.
Setup Tasks 3-21
Setup Tasks
Page 82

System Administrator’s Guide to Installing DataMgr
NOTES
3-22 Setup Tasks
Page 83

Deinstall DataMgr . . . . . . . . . . . . . . . . . . . . . . . . . 4-3
Reinstall DataMgr . . . . . . . . . . . . . . . . . . . . . . . . . 4-4
Remove the Installation Directory . . . . . . . . . . . .4-6
4
Post
Installation
Tasks
Post Installation
Page 84

System Administrator’s Guide to Installing DataMgr
Roadmap
Task
Install AMASS before installing DataMgr.
Verify that you have the necessary system
requirements.
Install DataMgr. 2
Setup tasks:
• Establish access for clients.
• Edit cron jobs.
• Change GUI colors and fonts.
Post installation tasks:
• Deinstall and reinstall DataMgr.
• Remove installation directory.
Refer To
Chapter
1
3
4
4-2 Post Installation Tasks
Page 85

System Administrator’s Guide to Installing DataMgr
Deinstall DataMgr
If you no longer want to run DataMgr, you can deinstall it from
your system by running the deinstallation script. It will remove
all DataMgr directories and files.
Caution
Do not run deinstall_dm before upgrading or reinstalling
DataMgr because it will totally remove all DataMgr files from
your system. On the other hand, the install_dm script will
remove just the files it needs to before reinstalling DataMgr.
Step 1. To stop DataMgr, run the script below. This stops
DataMgr and unloads the DMFS driver on systems
that support loadable device drivers.
# /etc/dm/usr/utils/killdmfs
Step 2. Run the following script:
# /etc/dm/scripts/deinstall_dm
Post Installation Tasks 4-3
Post Installation
Page 86

System Administrator’s Guide to Installing DataMgr
Reinstall DataMgr
If you upgrade a machine’s operating system, you must reinstall
DataMgr.
Step 1. Back up the DataMgr directories and files listed
below. Depending on the DataMgr component
installed, all of these directories may not exist on the
same machine.
• /etc/dm
• /etc/dmfs
• /etc/bfs
• /etc/sld
• /etc/ssd
Step 2. When you reinstall DataMgr, both GUI default files
/etc/dm/usr/share/gui/server and
(
/etc/dm/usr/share/gui/xdmfs) are replaced.
These are the files that you modified if you made
changes to the colors or fonts in the GUI. For steps
on modifying this file, see “Change Colors and
Fonts” on page 3-12.
4-4 Post Installation Tasks
Step 3. Because DataMgr installation is specific to the
operating system, extract the appropriate files from
the distribution CD. For instructions, see the
"Installation" chapter.
Step 4. Stop DataMgr by running the script below. This
stops DataMgr and unloads the DMFS driver on
systems that support loadable device drivers.
# /etc/dm/usr/utils/killdmfs
Page 87

System Administrator’s Guide to Installing DataMgr
Step 5. Run the installation script, which detects the
existence of DataMgr configuration files and will
not overwrite them.
# /etc/dm/scripts/install_dm
Post Installation Tasks 4-5
Post Installation
Page 88

System Administrator’s Guide to Installing DataMgr
Remove Load Directory
After the installation is complete, if space is limited you may
want to remove the extracted DataMgr files from the machine
where they were loaded.
Step 1. In our example, you have extracted Solaris-specific
DataMgr files as well as the PDF books from the
CD, your directory hierarchy would look similar to
the illustration below:
/ (root)
dminstall/
solaris/
usr/
books/
home/
tmp/
lib/
bin/
Step 2. To remove the platform-specific installation
directory (but not the
books directory), enter the
UNIX command below on the appropriate machine:
4-6 Post Installation Tasks
# cd /usr/dminstall
# rm -r solaris
where:
Option Description
solaris The name of your platform-specific
load directory.
Page 89

NOTES
System Administrator’s Guide to Installing DataMgr
Post Installation Tasks 4-7
Post Installation
Page 90

System Administrator’s Guide to Installing DataMgr
NOTES
4-8 Post Installation Tasks
Page 91

Index
Symbols
/archive/FMSclients . . . . . . . . . . . . . 1-16
/etc/bfs. . . . . . . . . . . . . . . . . . . . . . . . 1-16
/etc/bfs/registered File. . . . . . . . . 1-7, 1-8
/etc/dm. . . . . . . . . . . . . . . . . . . . . . . . 1-16
/etc/dm/log/ssd . . . . . . . . . . . . . . . . . . 3-9
/etc/dm/raima . . . . . . . . . . . . . . . . . . . 2-9
/etc/dm/usr/share/gui. . . . . . . . . . . . . 3-20
/etc/dmfs . . . . . . . . . . . . . . . . . . . . . .1-17
/etc/dmfs/config/dmfstab . . . . . . . . . . 2-9
/etc/hosts . . . . . . . . . . . . . . . . . . . . . . . 3-3
/etc/sld. . . . . . . . . . . . . . . . . . . . . . . . 1-16
/etc/ssd. . . . . . . . . . . . . . . . . . . . . . . . 1-16
/usr/dminstall. . . . . . . . . . . . . . . . . . . 1-14
A
Administrative GUI. . . . . . . . . . . . . . 3-19
illustration . . . . . . . . . . . . . . . . . .1-15
set up . . . . . . . . . . . . . . . . . . . . . . 1-22
Audience for book. . . . . . . . . . . . . . . .P-3
Authorization string . . . . . . . . . . . . . .1-3
changing . . . . . . . . . . . . . . . . . . . . 1-5
B
Backup
assign volume . . . . . . . . . . . . . . . . 3-7
schedule. . . . . . . . . . . . . . . . . . . . . 3-6
BFS . . . . . . . . . . . . . . . . . . .1-14, 2-6, 2-9
cron jobs . . . . . . . . . . . . . . . . . . . . 3-5
BFS database. . . . . . . . . . . . . . . . . . .2-10
illustration . . . . . . . . . . . . . . . . . .1-16
bfsdb_backup utility . . . . . . . . . 3-5, 3-11
bfsdb_backup.completed . . . . . . . . . . 3-6
bfsmaint utility . . . . . . . . . .3-5, 3-6, 3-11
Bitfile
directory . . . . . . . . . . . . . . . . . . . 2-10
illustration. . . . . . . . . . . . . . . . . . 1-16
Book
all titles in set . . . . . . . . . . . . . . . . P-6
audience . . . . . . . . . . . . . . . . . . . . P-3
conventions. . . . . . . . . . . . . . . . . . P-5
online . . . . . . . . . . . . . . . . . . . . . . P-6
C
CD
install from . . . . . . . . . . . . . . 2-3, 2-4
clearlog script . . . . . . . . . . . . . . . . . . . 3-4
Client GUI . . . . . . . . . . . . . . . . . . . . 3-19
illustration. . . . . . . . . . . . . . . . . . 1-15
set up. . . . . . . . . . . . . . . . . . . . . . 1-22
Command
set up path to. . . . . . . . . . . . . . . . 1-21
xdmadm . . . . . . . . . . . . . . . . . . . 3-19
xdmfs . . . . . . . . . . . . . . . . . . . . . 3-19
Components
determine location . . . . . . . . . . . 1-14
illustration. . . . . . . . . . . . . . . . . . 1-15
install. . . . . . . . . . . . . . . . . . . . . . . 2-7
Conventions in book. . . . . . . . . . . . . . P-5
cron Job
schedule . . . . . . . . . . . . . . . . . . . . 3-4
crontab . . . . . . . . . . . . . . . . . . . . . . . 3-10
INX-1
Page 92

System Administrator’s Guide to Installing DataMgr
D
Database
BFS. . . . . . . . . . . . . . . . . . . . . . . 2-10
DNS . . . . . . . . . . . . . . . . . . . . . . . 3-3
managed file system illustration. 1-16
NIS . . . . . . . . . . . . . . . . . . . . . . . . 3-3
Deinstall DataMgr . . . . . . . . . . . . . . . 4-3
deinstall_dm script . . . . . . . . . . . . . . . 4-3
Directory
/archive/FMSclients . . . . . . . . . . 1-16
/etc/bfs. . . . . . . . . . . . . . . . . . . . . 1-16
/etc/dm . . . . . . . . . . . . . . . . . . . . 1-16
/etc/dmfs . . . . . . . . . . . . . . . . . . . 1-17
/etc/sld. . . . . . . . . . . . . . . . . . . . . 1-16
/etc/ssd . . . . . . . . . . . . . . . . . . . . 1-16
defaults . . . . . . . . . . . . . . . . . . . . 1-16
Disk Space
requirements . . . . . . . . . . . . . . . . 1-13
DMFS . . . . . . . . . . . . 1-15, 2-6, 2-9, 2-11
cron jobs . . . . . . . . . . . . . . . . . . . . 3-4
establish access. . . . . . . . . . . . . . . 3-3
dmfsaudit utility . . . . . . . . . . . . 3-4, 3-10
dmfsscan utility. . . . . . . . . .3-4, 3-6, 3-10
dmfstab . . . . . . . . . . . . . . . . . . . . . . . 1-24
DNS database . . . . . . . . . . . . . . . . . . . 3-3
Documentation set . . . . . . . . . . . . . . . P-6
F
File
/etc/bfs/registered . . . . . . . . . 1-7, 1-8
/etc/hosts. . . . . . . . . . . . . . . . . . . . 3-3
cron. . . . . . . . . . . . . . . . . . . . . . . . 3-4
dmfstab . . . . . . . . . . . . . . . . . . . . 1-24
extract from CD . . . . . . . . . . 2-3, 2-4
registration . . . . . . . . . . . . . . . . . . 1-8
support for large . . . . . . . . . . . . . 1-10
transfile. . . . . . . . . . . . . . . . . . . . . 3-9
File system
name length . . . . . . . . . . . . . . . . . 1-9
size . . . . . . . . . . . . . . . . . . . . . . . . 1-9
G
Group ID . . . . . . . . . . . . . . . . . . . . . . 2-8
GUI. . . . . . . . . . . . . . . . . . . . . . . . . . 1-15
administrative. . . . . . . . . . . . . . . 3-19
client. . . . . . . . . . . . . . . . . . . . . . 3-19
customize . . . . . . . . . . . . . . . . . . 3-20
set up . . . . . . . . . . . . . . . . . . . . . 1-22
H
Host ID. . . . . . . . . . . . . . . . . . . . . . . . 1-4
I
Install
complete table . . . . . . . . . . . . . . 1-17
create directory. . . . . . . . . . . . . . 1-14
steps . . . . . . . . . . . . . . . . . . . . . . . 2-6
install_dm script. . . . . . . . . . . . . .2-7, 4-5
J
Journal . . . . . . . . . . . . . . . . . . . . . . . . 2-9
K
killdmfs script. . . . . . . . . . . 2-13, 4-3, 4-4
L
Large files. . . . . . . . . . . . . . . . . . . . . 1-10
License . . . . . . . . . . . . . . . . . . . .1-4, 2-11
capacity-based . . . . . . . . . . . . . . . 1-3
INX-2 Index
Page 93

System Administrator’s Guide to Installing DataMgr
features . . . . . . . . . . . . . . . . . . . . . 1-3
issued to clients. . . . . . . . . . . . . . . 1-7
Load directory
remove. . . . . . . . . . . . . . . . . . . . . . 4-6
Logs. . . . . . . . . . . . . . . . . . . . . . . 3-4, 3-9
clear. . . . . . . . . . . . . . . . . . . . . . . . 3-9
M
Maintenance
backup. . . . . . . . . . . . . . . . . . . . . . 3-6
man pages . . . . . . . . . . . . . . . . . . . . . 1-21
Mount point. . . . . . . . . . . . . . . . . . . .2-10
Mount table
system . . . . . . . . . . . . . . . . . . . . . 1-24
N
NIS database . . . . . . . . . . . . . . . . . . . . 3-3
O
Online books . . . . . . . . . . . . . . . . . . . .P-6
P
Pathname limit . . . . . . . . . . . . . . . . . .1-9
Paths . . . . . . . . . . . . . . . . . . . . . . . . . 1-21
Product
alerts . . . . . . . . . . . . . . . . . . . . . . .P-7
bulletins. . . . . . . . . . . . . . . . . . . . .P-7
Product key . . . . . . . . . . . . . . . . . . . . . 1-5
Publications dept
e-mail address . . . . . . . . . . . . . . . .P-7
R
Raima . . . . . . . . . . . . . . . . . . . . . . . . . 2-9
rc.dm script . . . . . . . . . . . . . . . . . . . . 2-13
Registration file . . . . . . . . . . . . . . . . . 1-7
refresh. . . . . . . . . . . . . . . . . . . . . . 1-8
Reinstall DataMgr. . . . . . . . . . . . . . . . 4-4
Release notes . . . . . . . . . . . . . . . P-7, 1-9
Requirements . . . . . . . . . . . . . . . . . . . 1-9
disk space . . . . . . . . . . . . . . . . . . 1-13
shared libraries . . . . . . . . . . . . . . 1-10
S
Script
clearlog . . . . . . . . . . . . . . . . . . . . . 3-4
deinstall_dm . . . . . . . . . . . . . . . . . 4-3
install_dm . . . . . . . . . . . . . . . 2-7, 4-5
killdmfs. . . . . . . . . . . . .2-13, 4-3, 4-4
rc.dlm . . . . . . . . . . . . . . . . . . . . . 2-13
Serial number . . . . . . . . . . . . . . . . . . . 1-4
Shared libraries. . . . . . . . . . . . . . . . . 1-10
Shutdown
special. . . . . . . . . . . . . . . . . . . . . 2-13
SLD. . . . . . . . . . . . . . . . . . .1-14, 2-6, 2-9
SSD. . . . . . . . . . . . . . . . . . .1-14, 2-6, 2-9
SSD logs . . . . . . . . . . . . . . . . . . . 3-4, 3-9
Startup
daemons . . . . . . . . . . . . . . . . . . . 2-12
special. . . . . . . . . . . . . . . . . . . . . 2-13
Startup file
location . . . . . . . . . . . . . . . . . . . . 2-12
Storage space
edit . . . . . . . . . . . . . . . . . . . . . . . 1-23
syslog function . . . . . . . . . . . . . . . . . . 2-8
System logs
. . . . . . . . . . . . . . . . . . . . . . . . . . . 3-4
System mount table. . . . . . . . . . . . . . 1-24
Index INX-3
Page 94

System Administrator’s Guide to Installing DataMgr
T
Table
user completes prior to install. . . 1-17
transfile. . . . . . . . . . . . . . . . . . . . . . . . 3-9
U
User ID . . . . . . . . . . . . . . . . . . . . . . . . 2-8
Utility
bfsd_backup . . . . . . . . . . . . . . . . 3-11
bfsdb_backup . . . . . . . . . . . . . . . . 3-5
bfsmaint . . . . . . . . . . . .3-5, 3-6, 3-11
dmfsaudit . . . . . . . . . . . . . . 3-4, 3-10
dmfsscan. . . . . . . . . . . .3-4, 3-6, 3-10
set up path to. . . . . . . . . . . . . . . . 1-21
W
Web
secured site . . . . . . . . . . . . . . . . . . P-7
X
xdmadm command . . . . . . . . . . . . . . 3-19
xdmfs command . . . . . . . . . . . . . . . . 3-19
INX-4 Index
 Loading...