

Page 1
Wetterstation mit Funk-Außensensor
Weather Station with Wireless Outdoor Sensor
Station météo avec capteur extérieur sans fil
Bedienungsanleitung
WS 1822
Operating instructions | Mode d‘emploi
Deutsch
English
Français
FW Station WS 1822 3 Sprach.indb 1 21.06.2018 15:33:53
Page 2
2
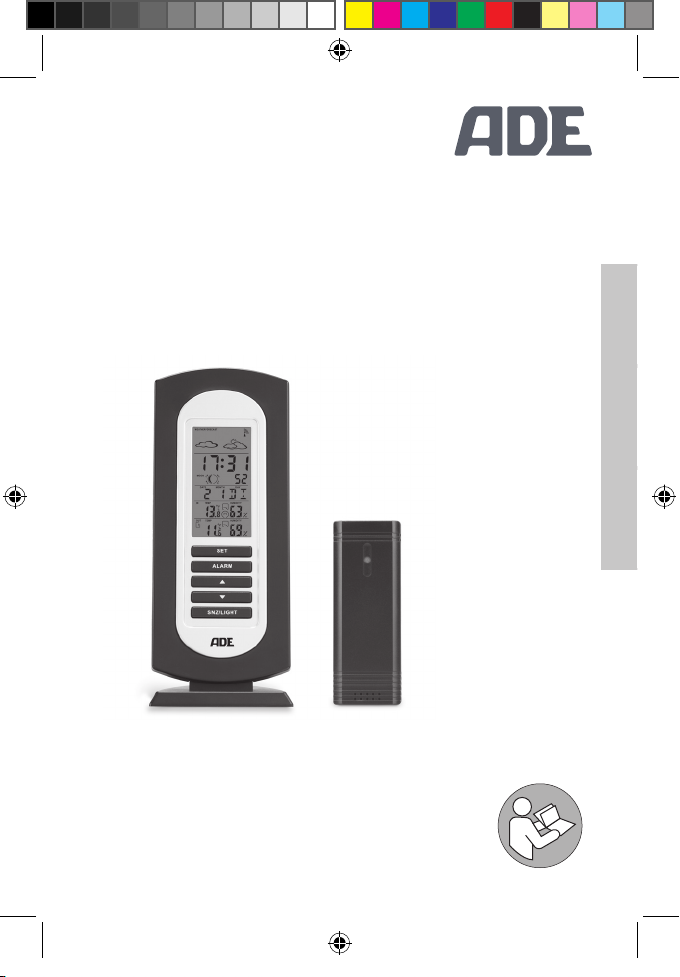
Wetterstation mit Funk-Außensensor WS 1822
Liebe Kundin, lieber Kunde !
Sie haben sich für den Kauf eines qualitativ hochwertigen Produkts der Marke ADE entschieden, das intelligente Funktionen mit einem außergewöhnlichen
Design vereint. Mit dieser Wetterstation haben Sie
unterschiedlichste Wetter- und Temperaturdaten immer
im Blick. Die langjährige Erfahrung der Marke ADE stellt
eine technisch hohen Standard und bewährte Qualität
sicher.
Wir wünschen Ihnen viel Freude und Erfolg beim Überwachen und Einsehen der Wetterdaten.
Ihr ADE Team
Lieferumfang
Wetterstation bestehen aus:
− Basisstation
− Funk-Außensensor
Batterien:
− 3 x LR03 (AAA) / 1,5 V für Basisstation
− 2 x LR6 (AAA) / 1,5 V für Funk-Außensensor
Bedienungsanleitung
FW Station WS 1822 3 Sprach.indb 2 21.06.2018 15:33:53
IM _Print _WS1822_ 201806_V1
Page 3

3
Wetterstation mit Funk-Außensensor WS 1822
Deutsch
Inhaltsverzeichnis
Lieferumfang ...............................................................................2
Allgemeines ..................................................................................5
Bestimmungsgemäßer Gebrauch ........................................6
Sicherheit ......................................................................................6
Das bietet die Funkwetterstation .........................................9
Basistation .................................................................................. 10
FunkAußensensor .................................................................. 13
Inbetriebnahme ....................................................................... 14
Außensensor ...................................................................... 14
Basisstation......................................................................... 15
Funkempfang starten ............................................................ 15
Checkliste bei fehlender Datenanzeige
im Display ........................................................................... 16
Uhrzeit und Datum manuell einstellen .....................17
Funkempfang manuell starten ................................... 18
Standort wählen ............................................................... 19
Weitere Funksensoren nutzen .................................... 21
Über den Zeitzeichensender DCF77 ................................22
Display-Anzeige der Basistation ........................................ 23
Wettervorhersage ............................................................ 23
Uhrzeit und Mondphasenanzeigen .......................... 24
Datumsanzeige ................................................................. 24
FW Station WS 1822 3 Sprach.indb 3 21.06.2018 15:33:53
Page 4
4
Wetterstation mit Funk-Außensensor WS 1822
Temperatur, Temperaturtrend und
Luftfeuchtigkeit (Innen) ................................................. 24
Temperatur, Temperaturtrend und
Luftfeuchtigkeit (Außen) ............................................... 24
Temperaturtrend ..............................................................25
Wohlfühlindikator ............................................................ 25
Gespeicherte Temperaturwerte ................................. 26
Temperaturalarm ............................................................. 26
Wecken ........................................................................................ 28
Weckzeit einstellen ......................................................... 28
Weckfunktion ein und ausschalten .......................... 29
Weckalarm beenden .......................................................29
Sonstige Funktionen .............................................................. 29
DisplayBeleuchtung einschalten .............................. 30
Zwischen °C und °F umschalten ................................. 30
Zwischen 12- und 24-Stunden-Format wechseln 30
Reinigen ...................................................................................... 30
Störung / Abhilfe ..................................................................... 31
Technischen Daten ................................................................. 32
Konformitätserklärung .......................................................... 33
Garantie ...................................................................................... 34
Entsorgen ................................................................................... 34
FW Station WS 1822 3 Sprach.indb 4 21.06.2018 15:33:53
Page 5
5
Wetterstation mit Funk-Außensensor WS 1822
Deutsch
Allgemeines
Über diese Anleitung
Diese Bedienungsanleitung beschreibt den
sicheren Umgang und die Pflege des Artikels.
Bewahren Sie diese Bedienungsanleitung
auf, falls Sie später etwas nachlesen möchten.
Wenn Sie den Artikel an jemand anderen weitergeben, geben Sie auch diese Anleitung mit.
Die Nichtbeachtung dieser Bedienungsanleitung kann zu Verletzungen oder Schäden am
Artikel führen.
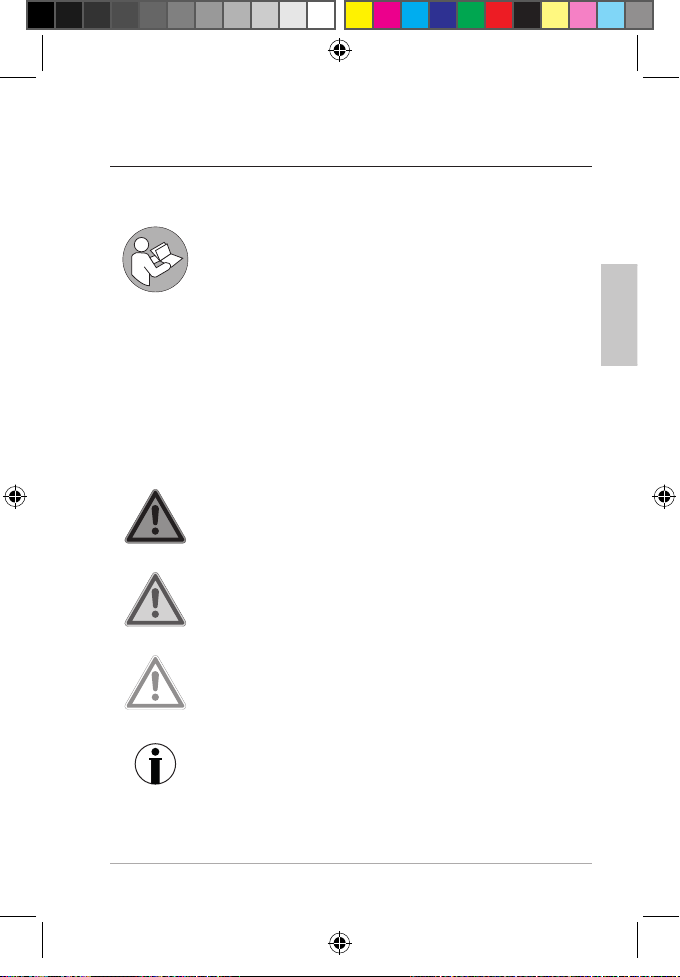
Zeichenerklärung
Dieses Symbol in Verbindung mit dem Wort
GEFAHR warnt vor schweren Verletzungen.
Dieses Symbol in Verbindung mit dem Wort
WARNUNG warnt vor Verletzungen mittleren
und leichten Grades.
Dieses Symbol in Verbindung mit dem Wort
HINWEIS warnt vor Sachschäden.
FW Station WS 1822 3 Sprach.indb 5 21.06.2018 15:33:53
Dieses Symbol kennzeichnet zusätzliche Informationen und allgemeine Hinweise.
Page 6
6
Wetterstation mit Funk-Außensensor WS 1822
Bestimmungsgemäßer Gebrauch
Die Wetterstation - bestehend aus Basisstation und
Funk-Außensensor - zeigt unterschiedliche Wetterdaten (Luftdruck, Temperatur etc.) aus der näheren
Umgebung an. Aus den gemessenen Wetterdaten
ermittelt die Wetterstation eine Wettervorhersage.
Die Wetterstation zeigt außerdem Datum, Uhrzeit
und Mondphasen an und verfügt zusätzlich über eine
Weckfunktion.
Für die gewerbliche Nutzung in der Wettervorhersage
oder in der Wetterdaten-Messung ist die Wetterstation
ungeeignet.
Sicherheit
Dieses Gerät kann von Kindern ab 8 Jah-
ren und darüber sowie von Personen mit
verringerten physischen, sensorischen
oder mentalen Fähigkeiten oder Mangel
an Erfahrung und/oder Wissen benutzt
werden, wenn sie beaufsichtigt werden
oder bezüglich des sicheren Gebrauchs
des Gerätes unterwiesen wurden und die
daraus resultierenden Gefahren verstanden
haben.
Kinder dürfen nicht mit dem Artikel spielen.
Reinigung und Benutzerwartung dürfen
FW Station WS 1822 3 Sprach.indb 6 21.06.2018 15:33:53
Page 7

7
Wetterstation mit Funk-Außensensor WS 1822
Deutsch
nicht von Kindern vorgenommen werden,
es sei denn, sie sind 8 Jahre oder älter und
werden beaufsichtigt.
Batterien können bei Verschlucken lebens-
gefährlich sein. Bewahren Sie Gerät und
Batterien deshalb für Kleinkinder unerreichbar auf. Wurde eine Batterie verschluckt,
muss sofort medizinische Hilfe in Anspruch
genommen werden.
Gefahr für Kinder
Halten Sie Kinder von Verpackungsmaterial und den
zum Lieferumfang gehörenden Kleinteilen fern. Bei
Verschlucken besteht Erstickungsgefahr.
GEFAHR von Brand⁄ Verbrennung und⁄ oder
Explosion
Explosionsgefahr bei unsachgemäßem Auswechseln
der Batterien. Ersetzen Sie Batterien nur durch denselben oder einen gleichwertigen Batterietyp. Beachten
Sie die „Technischen Daten“.
Batterien dürfen nicht geladen, mit anderen Mitteln
reaktiviert, auseinander genommen, ins Feuer geworfen oder kurzgeschlossen werden. Ansonsten besteht
erhöhte Explosions- und Auslaufgefahr, außerdem
können Gase entweichen!
Vermeiden Sie Kontakt der Batterieflüssigkeit mit
Haut, Augen und Schleimhäuten. Bei Kontakt spülen
Sie die betroffenen Stellen sofort mit reichlich klarem
FW Station WS 1822 3 Sprach.indb 7 21.06.2018 15:33:53
Page 8

8
Wetterstation mit Funk-Außensensor WS 1822
Wasser aus und suchen Sie umgehend einen Arzt auf.
HINWEIS vor Sachschäden
Schützen Sie Basisstation und Außensensor vor Staub,
Stößen, extremen Temperaturen und direkter
Sonneneinstrahlung.
Schützen Sie die Basisstation vor Feuchtigkeit. Stellen
Sie die Basisstation ausschließlich in einem trockenen,
geschlossenen Raum auf.
Der Funksensor ist gegen Feuchtigkeit geschützt,
muss aber vor direkter Nässeeinwirkung, z. B. Regen,
geschützt werden.
Nehmen Sie die Batterien aus Basisstation und Außen-
sensor heraus, wenn diese verbraucht sind oder wenn
Sie die Wetterstation länger nicht benutzen. So ver-
meiden Sie Schäden, die durch Auslaufen entstehen
können.
Setzen Sie Batterien keinen extremen Bedingungen
aus, indem Sie diese z. B. auf Heizkörpern oder unter
direkter Sonneneinstrahlung lagern. Erhöhte Auslauf-
gefahr!
Reinigen Sie Batterie- und Gerätekontakte bei Bedarf
vor dem Einlegen.
Tauschen Sie immer alle Batterien in der Basisstation
oder im Außensensor gleichzeitig aus.
Setzen Sie nur Batterien des gleichen Typs ein, ver-
wenden Sie keine unterschiedlichen Typen oder
gebrauchte und neue Batterien miteinander.
FW Station WS 1822 3 Sprach.indb 8 21.06.2018 15:33:53
Page 9
9
Wetterstation mit Funk-Außensensor WS 1822
Deutsch
Nehmen Sie keine Veränderungen an dem Gerät vor.
Lassen Sie Reparaturen nur von einer Fachwerkstatt
durchführen und beachten Sie die Garantiebedingungen.
Verwenden Sie keinesfalls harte, kratzende oder
scheuernde Reinigungsmittel o. ä., um die Wetterstation zu reinigen. Hierbei könnten die Oberächen
zerkratzen.
Das bietet die Funkwetterstation
Animierte Wettervorhersage
Innen- und Außentemperaturanzeige
Innen- und Außenhygrometer
Trendanzeigen und Memory-Funktion (MIN/MAX) für
Temperatur und Luftfeuchtigkeit
Alarm bei zu hoher/zu niedriger Außentemperatur mit
programmierbare Ober- und Untergrenze
Komfortzonen-Indikator (Raum- und Außenklima)
Mondphasen-Anzeige
Funkuhr (DCF Zeitsignal) mit manueller Zeiteinstel-
lung sowie Wecker und Schlummerfunktion
Ewiger Kalender mit Datum- und Tagesanzeige
Sprühwassergeschützter Funk-Außensensor zum
Hängen und Stellen
FW Station WS 1822 3 Sprach.indb 9 21.06.2018 15:33:53
Page 10
10
Wetterstation mit Funk-Außensensor WS 1822
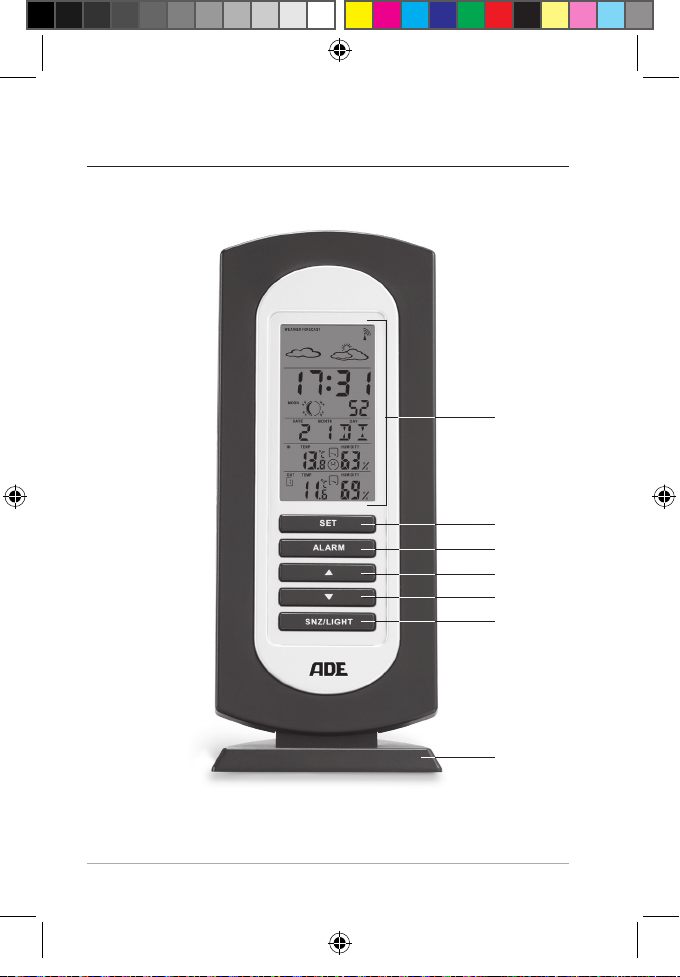
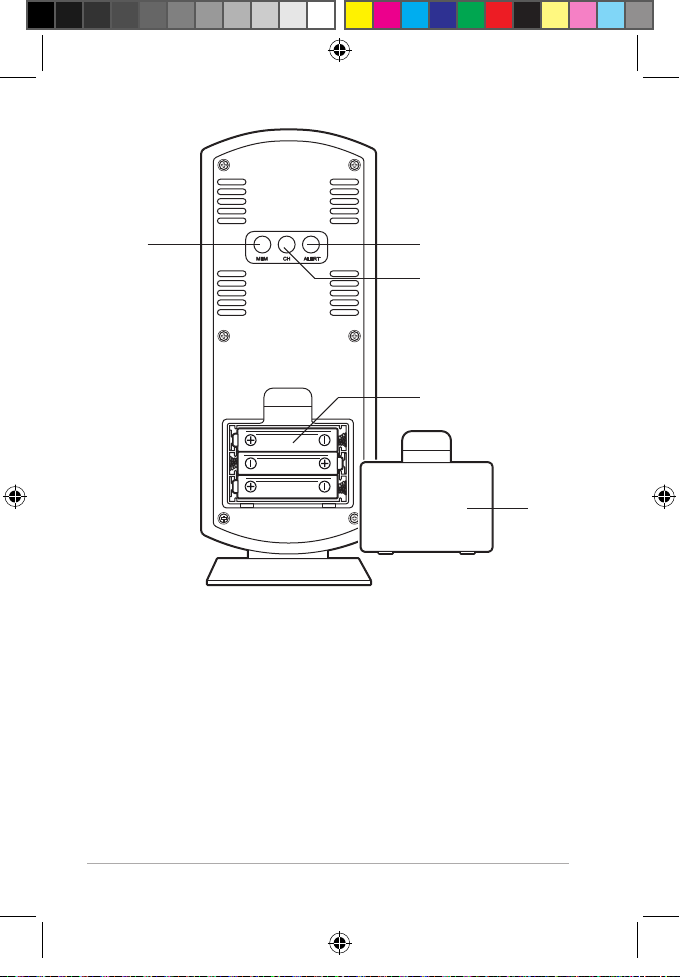
Basistation
1
2
3
4
5
6
FW Station WS 1822 3 Sprach.indb 10 21.06.2018 15:33:54
7
Page 11
11
Wetterstation mit Funk-Außensensor WS 1822
Deutsch
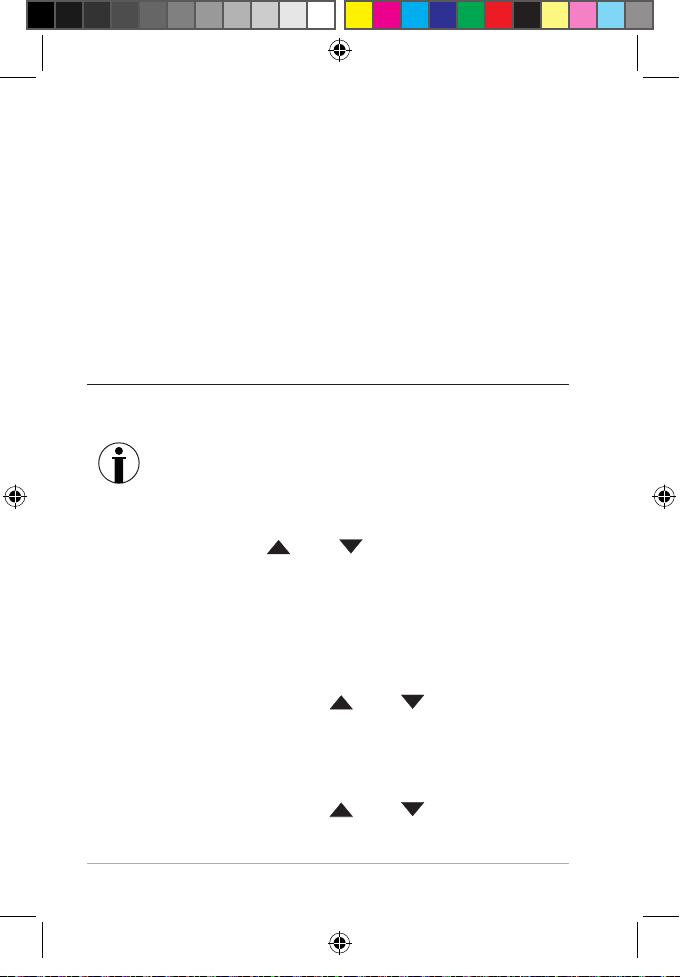
1 Display mit diversen Anzeigen
2 Taste SET:
Einstellmodus aktivieren
vorgenommene Einstellung aktivieren
3 Taste ALARM:
Weckzeit einstellen
Weckfunktion aktivieren/deaktivieren
4
Taste
Werte einstellen (erhöhen)
Umschalten zwischen 12- und 24-Stundenan-
zeige
5
Taste
Werte einstellen (verringern)
Umschalten zwischen Grad Celsius und Grad
Fahrenheit
Empfang zum Zeitzeichensender DCF77 manuell
starten oder unterbrechen
6 Taste SNZ/LIGHT:
Displaybeleuchtung ausschalten
Weckwiederholfunktion aktivieren
7 Standfuß
FW Station WS 1822 3 Sprach.indb 11 21.06.2018 15:33:54
Page 12
12
Wetterstation mit Funk-Außensensor WS 1822
12
10
8 Taste ALERT:
Temperaturgrenzen einstellen
9 Taste CH:
Temperaturwerte eines weiteren Außensensors
abrufen (wenn vorhanden)
10 Batteriefach für 3x LR03 (AAA), 1,5 V
11 Batteriefachdeckel
12 Taste MEM:
Gespeicherte Temperaturwerte aufrufen
8
9
11
FW Station WS 1822 3 Sprach.indb 12 21.06.2018 15:33:54
Page 13
13
Wetterstation mit Funk-Außensensor WS 1822
Deutsch
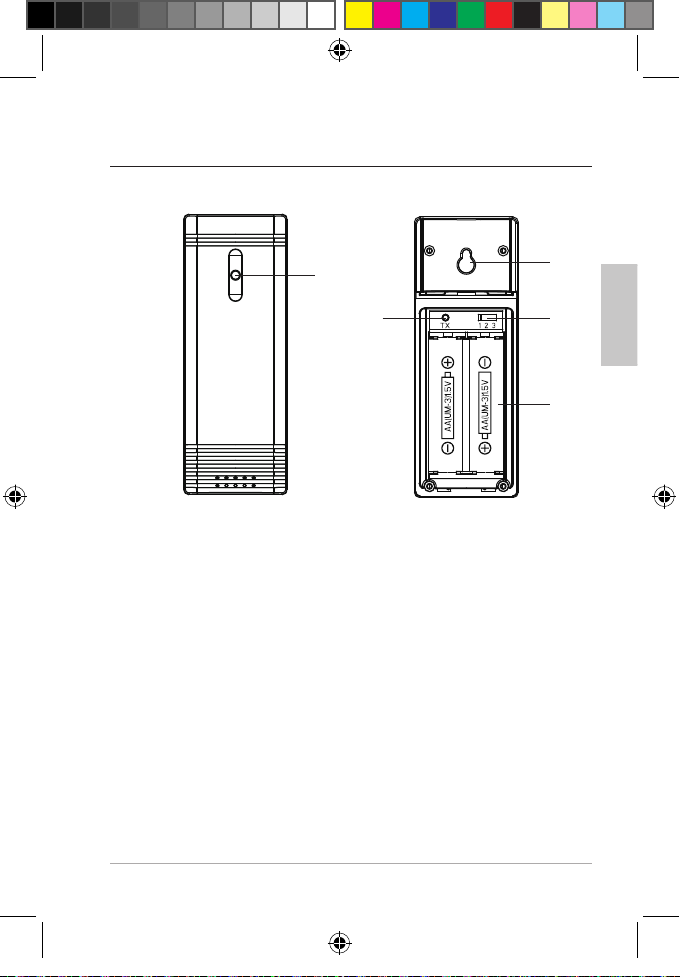
FunkAußensensor
17
16
13 Aufhänge-Öse
14 Kanalwechsel-Schalter 1 2 3 für Datenübertragung
15 Batteriefach für 2x LR6 (AA), 1,5 V
16 Taste TX für manuelle Datenübertragung
17 LED-Leuchte (leuchtet nur bei Datenübertragung)
13
14
15
FW Station WS 1822 3 Sprach.indb 13 21.06.2018 15:33:55
Page 14
14
Wetterstation mit Funk-Außensensor WS 1822
Inbetriebnahme
Gehen Sie in der aufgeführten Reihenfolge
vor und legen Sie zuerst die Batterien in den
Funksensor. Nur so kann die Wetterstation
einwandfrei funktionieren.
Verwenden Sie keine Akkus, da diese eine
zu geringe Spannung haben (nur 1,2 V statt
1,5 V). Das beeinusst unter anderem die
Messgenauigkeit.
Verwenden Sie möglichst Alkaline-Batterien
statt Zinkkohle-Batterien. Alkaline-Batterien halten länger, besonders bei niedrigen
Außentemperaturen.
Außensensor
1. Entfernen Sie die Batteriefach-Abdeckung auf der
Rückseite des Außensensors, indem Sie mit etwas Kraft
auf den aufgedruckten Pfeil drücken. Schieben Sie
die Batteriefach-Abdeckung in Pfeilrichtung weg vom
Außensensor.
2. Legen Sie 2 Batterien des Typs LR6 (AA) / 1,5 V so ein,
wie auf dem Boden des Batteriefachs abgebildet.
Beachten Sie die richtige Polarität der Batterien (+/-).
3. Schieben Sie die Batteriefach-Abdeckung wieder in
den Außensensor.
FW Station WS 1822 3 Sprach.indb 14 21.06.2018 15:33:55
Page 15
15
Wetterstation mit Funk-Außensensor WS 1822
Deutsch
Basisstation
1. Drücken Sie die Verschlusslasche etwas nach unten
und nehmen Sie die Batteriefach-Abdeckung ab.
2. Legen Sie 3 Batterien des Typs LR03 (AAA) / 1,5 V so ein,
wie auf dem Boden des Batteriefachs abgebildet.
Achten Sie auf die richtige Polarität (+/-).
3. Setzen Sie die Batteriefach-Abdeckung wieder auf und
klappen Sie sie zu.
4. Warten Sie ca. 30 Minuten. Diese Zeit benötigt die
Basisstation, um alle Wetterdaten zu sammeln und
Funksignale vom Zeitzeichensender zu erhalten.
Funkempfang starten
Wenn die Basisstation mit Strom versorgt wird, werden
für einen kurzen Moment sämtliche Anzeigen im Display
eingeblendet. Außerdem wird das Display kurz beleuchtet
und ein Piepton ertönt.
Danach schaltet das Gerät auf Empfang, wobei
die Funkwellen-Anzahl die Qualität des Empfangs
anzeigt: Je mehr Funkwellen im Display angezeigt
werden, desto besser ist der Empfang.
Während des Funkempfangs zum Zeitzeichensenders sind
die Tasten deaktiviert (außer
Sobald die Signale vom Zeitzeichensender und Funk-Außensensor in ausreichender Stärke empfangen wurden,
werden im Display die jeweiligen Daten dauerhaft angezeigt.
).
FW Station WS 1822 3 Sprach.indb 15 21.06.2018 15:33:55
Page 16
16
Wetterstation mit Funk-Außensensor WS 1822
Zeitzeichen-Sender: Uhrzeit und Datum
Funkturm-Symbol
Funk-Außensensor: Außen-Temperatur
Luftfeuchtigkeit
Basisstation: Innen-Temperatur
Luftfeuchtigkeit
Die Wetterstation schaltet ab sofort mehrmals in jeder
Nacht automatisch auf Empfang. Dabei wird die angezeigte Zeit mit der vom Zeitzeichen-Sender empfangenen verglichen und ggf. korrigiert.
Wurde kein ausreichend starkes Signal empfangen,
bricht die Basisstation nach einigen Minuten den Empfangsvorgang ab und das Funkturm-Symbol erlöscht. Der
Empfangsvorgang wird zu einem späteren Zeitpunkt neu
gestartet.
Die Uhrzeit läuft in diesem Fall (ausgehend von der Startzeit „00:00“) normal weiter.
Die Daten vom Funk-Außensensor werden fortlaufend 1x pro Minute übertragen.
Checkliste bei fehlender Datenanzeige im
Display
FW Station WS 1822 3 Sprach.indb 16 21.06.2018 15:33:55
Keine Datenanzeige vom Zeitzeichensender
1. Prüfen Sie, ob der Standort der Basisstation geeignet
ist, siehe „Standort wählen“.
Page 17
17
Wetterstation mit Funk-Außensensor WS 1822
Deutsch
2. Starten Sie Empfangsvorgang nochmals manuell,
siehe „Funkempfang manuell starten“.
3. Warten Sie ab, bis die Basisstation zu einem späteren
Zeitpunkt automatisch wieder auf Empfang schaltet. In den Nachtstunden ist der Empfang meistens
besser.
4. Nehmen Sie die Einstellungen manuell vor, wenn an
Ihrem Standort der Empfang nicht möglich ist, siehe
„Uhrzeit und Datum manuell einstellen“.
Keine Datenanzeige vom Funk-Außensensor
1. Prüfen Sie, ob Sie die Batterien richtig herum eingelegt haben.
2. Prüfen Sie, ob der Standort des Funk-Außensensors
geeignet ist, siehe „Standort wählen“.
Uhrzeit und Datum manuell einstellen
Wenn zwischen zwei Tastendrücken mehr als
ca. 8 Sekunden liegen, wird der Einstellvorgang
automatisch beendet und Sie müssen ihn wiederholen.
1. Halten Sie die Taste SET gedrückt, bis im Display „00“
blinkt.
2. Wählen Sie mit den Tasten
der Sie sich befinden (für die meisten Länder in Europa
ist „00“ die richtige Einstellung).
/ die Zeitzone aus, in
FW Station WS 1822 3 Sprach.indb 17 21.06.2018 15:33:55
Page 18

18
Wetterstation mit Funk-Außensensor WS 1822
3. Drücken Sie SET.
4. Gehen Sie weiter vor, wie vorstehend beschrieben:
− Drücken Sie die Taste
/ , um den gewünsch-
ten Wert einzustellen.
− Drücken Sie jeweils SET, um die gemachte Einstel-
lung zu speichern.
5. Führen Sie nachfolgend folgende Einstellungen durch:
− Stundenzeit
− Minutenzeit
− Jahr
− Monat
− Tag
− Sprache (bezieht sich ausschließlich auf die
Anzeige des Wochentagskürzels)
6. Drücken Sie abschließend SET, um den Vorgang zu
beenden.
Funkempfang manuell starten
Wird das nebenstehende Funksignal-Symbol nicht
mehr angezeigt, werden die Funksignale des Zeitzeichen-Senders nicht mehr empfangen. Die Uhrzeit-Anzeige läuft dennoch präzise weiter.
− Halten Sie die Taste
nal-Symbol wieder angezeigt wird. Dadurch wird der
Funkempfang manuell gestartet.
Beachten Sie:
War der Empfang nicht erfolgreich, wird das Emp-
fangs-Symbol nach einigen Minuten ausgeblendet
gedrückt, bis das Funksig-
FW Station WS 1822 3 Sprach.indb 18 21.06.2018 15:33:55
Page 19

19
Wetterstation mit Funk-Außensensor WS 1822
Deutsch
und die Uhrzeit im Display läuft normal weiter.
Bei erfolgreichem Empfang stellt sich die Basisstation
auf die Uhrzeit des Zeitzeichen-Senders ein. Haben Sie
bereits manuelle Zeit- und Datumseinstellungen vorgenommen, werden diese automatisch angepasst.
Standort wählen
HINWEIS vor Sachschaden
Schützen Sie Basisstation und Funksensor
vor Staub, Stößen, extremen Temperaturen
und direkter Sonneneinstrahlung.
Schützen Sie die Basisstation vor Feuchtig-
keit. Stellen Sie die Basisstation ausschließlich in einem trockenen, geschlossenen
Raum auf. Der Funksensor ist gegen Feuchtigkeit geschützt, muss aber vor direkter
Nässeeinwirkung, z. B. Regen, geschützt
werden.
Funkempfang zwischen Basisstation und FunkAußensensor
Der maximale Abstand zwischen Basisstation und
Funksensor darf 60 Meter betragen. Diese Reichweite
ist aber nur bei „direktem Sichtkontakt“ möglich.
Abschirmende Baumaterialien wie z. B. Stahlbeton
reduzieren oder verhindern den Funkempfang zwischen Basisstation und Außensensor.
Geräte wie Fernseher, schnurlose Telefone, Computer
und Leuchtstoffröhren können den Funkempfang
ebenfalls stören.
FW Station WS 1822 3 Sprach.indb 19 21.06.2018 15:33:55
Page 20

20
Wetterstation mit Funk-Außensensor WS 1822
Stellen Sie Basisstation und Außensensor nicht direkt
auf den Boden. Dies schränkt die Reichweite ein.
Bei niedrigen Temperaturen im Winter kann die
Leistung der Außensensor-Batterien deutlich abfallen.
Dies vermindert die Sendereichweite.
Funkempfang zwischen Basisstation und
Zeitzeichensender
Halten Sie Abstand zu Fernsehgeräten, Computern
und Monitoren. Auch Basisstationen von schnurlosen
Telefonen sollten sich nicht in unmittelbarer Nähe der
Wetterstation befinden.
Während der Nachtstunden ist der Empfang meistens
besser. Falls die Basisstation tagsüber keinen Empfang
hatte, kann es gut sein, dass das Signal in den Nachtstunden sofort und in voller Stärke empfangen wird.
Abhängig von Ihrem Standort kann es im seltenen Ein-
zelfall vorkommen, dass die Basisstation Signale von
einem anderen Zeitzeichen-Sender empfängt oder
sogar abwechselnd von zwei Zeitzeichen-Sendern.
Das ist kein Gerätefehler. Wechseln Sie in diesem Fall
den Standort der Basisstation.
Das Wetter, z. B. ein starkes Gewitter, kann Empfangs-
störungen verursachen.
Es kann gelegentlich zu kurzzeitigen Abschaltungen
des Senders kommen, z. B. wegen Wartungsarbeiten.
FW Station WS 1822 3 Sprach.indb 20 21.06.2018 15:33:55
Geräte aufstellen
Die Basisstation verfügt über einen Standfuß.
− Stellen Sie die Basisstation möglichst in Fensternähe
auf. Dort ist der Empfang in der Regel am besten.
Page 21

21
Wetterstation mit Funk-Außensensor WS 1822
Deutsch
Der Funk-Außensensor verfügt auf der Rückseite über
eine Aufhänge-Öse.
− Stellen Sie oder hängen Sie den Außensensor an einen
Platz, wo er vor direkten Witterungseinflüssen (Regen,
Sonne, Wind etc.) geschützt ist. Geeignete Standorte
sind z. B. unter einem Vordach oder in einem Carport.
Weitere Funksensoren nutzen
Die Basisstation wird mit einem Funksensor ausgeliefert.
Sie können sie jedoch mit bis zu drei Außensensoren
betreiben. Für mehr Informationen oder eine kostenpflichtige Bestellung wenden Sie sich bitte an folgende
E-Mail-Adresse: service@ade-germany.de.
Die Außensensoren können sich später in verschiede-
nen Räumen oder im Freien befinden.
Jedem Sensor muss eine eigene Nummer (= Nr. des
Übertragungskanals) zugewiesen werden.
Vorgehensweise:
1. Platzieren Sie Basisstation und Außensensoren dicht
beieinander.
2. Entfernen Sie die Batteriefach-Abdeckung auf der
Rückseite der Außensensoren.
3. Stellen Sie mit den Schaltern für jeden Außensensor
einen eigenen Kanal ein. Der zum Lieferumfang gehörende Sensor nutzt standardmäßig Kanal 1, wählen Sie
also für den zweiten Sensor Kanal 2 und den dritten
Sensor Kanal 3.
4. Legen Sie zwei Batterien des auf dem Boden angezeigten Batterietyps ein.
Beachten Sie die richtige Polarität (+/-).
FW Station WS 1822 3 Sprach.indb 21 21.06.2018 15:33:55
Page 22
22
Wetterstation mit Funk-Außensensor WS 1822
5. Setzen Sie die Batteriefach-Abdeckung wieder auf.
6. Wählen Sie mit der Taste CH den entsprechenden
Außensensor aus (1, 2 oder 3), um dessen Daten angezeigt zu bekommen.
7. Wählen Sie mit der Taste CH den entspre-
chenden Außensensor aus (1, 2 oder 3), um
dessen Daten angezeigt zu bekommen.
Wenn die Kanalnummer nach dem Einlegen der
Batterien nicht angezeigt wird, drücken Sie beim
jeweiligen Funksensor die Taste TX. Dadurch
werden die Wetterdaten direkt an die Basisstation übermittelt.
Anschließend können Sie den neuen Funk-Außensensor
an seinem eigentlichen Aufstellort aufstellen.
Über den Zeitzeichensender DCF77
Die in der Wetterstation integrierte Funkuhr erhält ihre
Funksignale vom Zeitzeichensender DCF77. Dieser strahlt
auf seiner Langwellenfrequenz von 77,5 kHz die genaue
und offizielle Uhrzeit der Bundesrepublik Deutschland aus.
Der Sender steht in Mainflingen bei Frankfurt am Main
und versorgt mit seiner Reichweite von bis zu 2000 km die
meisten funkgesteuerten Uhren West-Europas mit den erforderlichen Funksignalen.
Sobald die Basisstation mit Strom versorgt wird, schaltet
sie auf Empfang und sucht das Signal vom Sender DCF77.
Wurde das Zeitsignal in ausreichender Stärke empfangen,
werden im Display Datum und Uhrzeit angezeigt.
FW Station WS 1822 3 Sprach.indb 22 21.06.2018 15:33:56
Page 23
23
Wetterstation mit Funk-Außensensor WS 1822
Deutsch
Die Basisstation schaltet sich mehrmals täglich ein und
synchronisiert die Uhrzeit mit dem Funksignal vom Sender
DCF77. Im Falle eines Nicht-Empfangs, z. B. bei einem starken Gewitter, läuft das Gerät präzise weiter und schaltet
dann zur nächsten vorgesehenen Zeit wieder automatisch
auf Empfang.
Display-Anzeige der Basistation
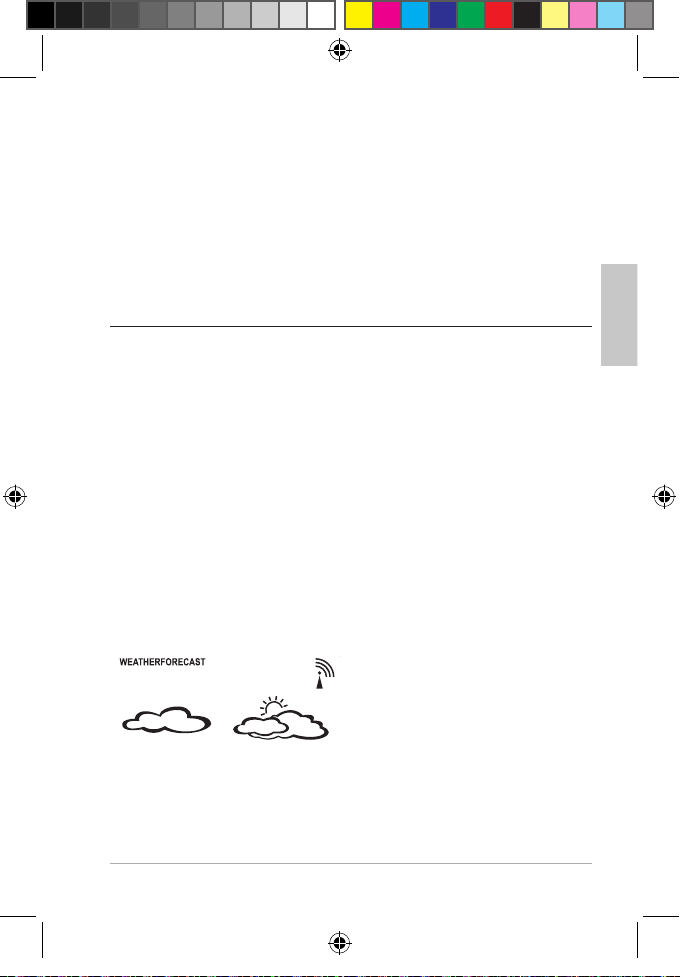
Wettervorhersage
Nach der Inbetriebnahme können die Angaben zur
Wettervorhersage etwa 12 Stunden noch nicht genutzt
werden, da die Wetterstation diese Zeit benötigt, um die
Wetterdaten zu sammeln und auszuwerten.
Die Wettervorhersage ergibt sich aus den gesammelten
Daten und den dabei gemessenen Luftdruckänderungen.
Die Vorhersage bezieht sich auf das Gebiet um die Wetterstation mit einem Radius von etwa 30 bis 50 km für einen
Zeitraum der nächsten 12 bis 24 Stunden.
Die Genauigkeit der Wettervorhersage liegt dabei etwa
bei 75 %. Es gibt vier verschiedene Anzeigen:
sonnig
leicht bewölkt
wolkig
regnerisch
Wird zusätzlich noch ein S angezeigt, gilt aktuell die Sommerzeit.
FW Station WS 1822 3 Sprach.indb 23 21.06.2018 15:33:56
Page 24
24
Wetterstation mit Funk-Außensensor WS 1822
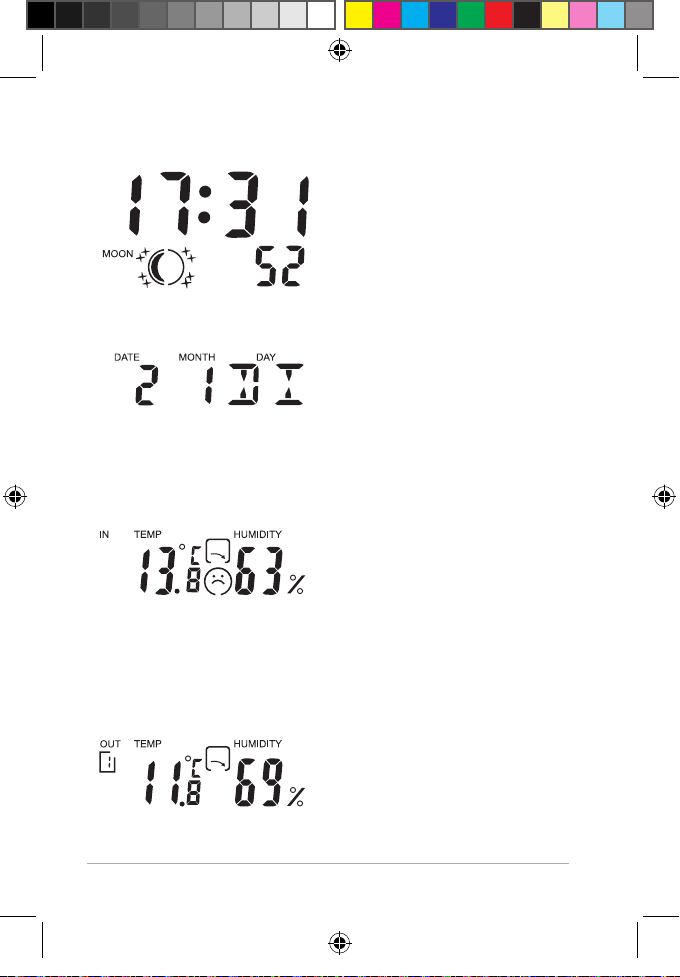
Uhrzeit und Mondphasenanzeigen
Uhrzeitanzeige im
12- oder 24-Stunden-Format
aktuelle Mondphase
Datumsanzeige
Tag und Monat
Wochentagskürzel
in der eingestellen
Sprache
Temperatur, Temperaturtrend und
Luftfeuchtigkeit (Innen)
aktuell gemessene
Temperatur und
Luftfeuchtigkeit
Temperaturtrend
Wohlfühlindikator
Temperatur, Temperaturtrend und
Luftfeuchtigkeit (Außen)
aktuell gemessene
Temperatur und
Luftfeuchtigkeit
FW Station WS 1822 3 Sprach.indb 24 21.06.2018 15:33:56
Temperaturtrend
Page 25
25
Wetterstation mit Funk-Außensensor WS 1822
Deutsch
Wohlfühlindikator
Anzeige des Übertragungskanals.
− Drücken Sie die Taste CH, um die Werte eines anderen
Außensensors angezeigt zu bekommen.
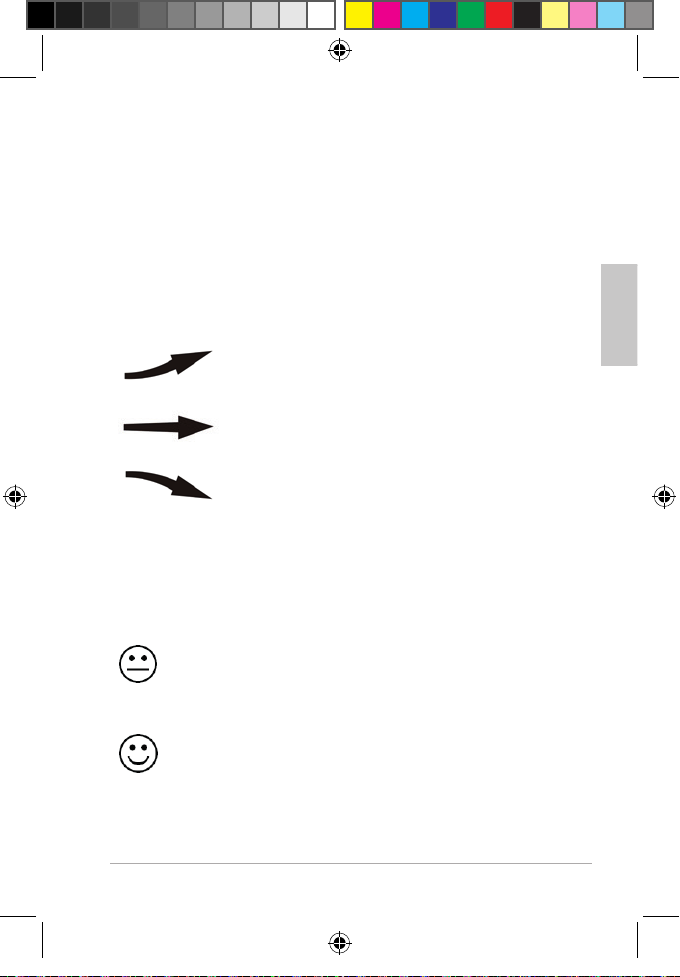
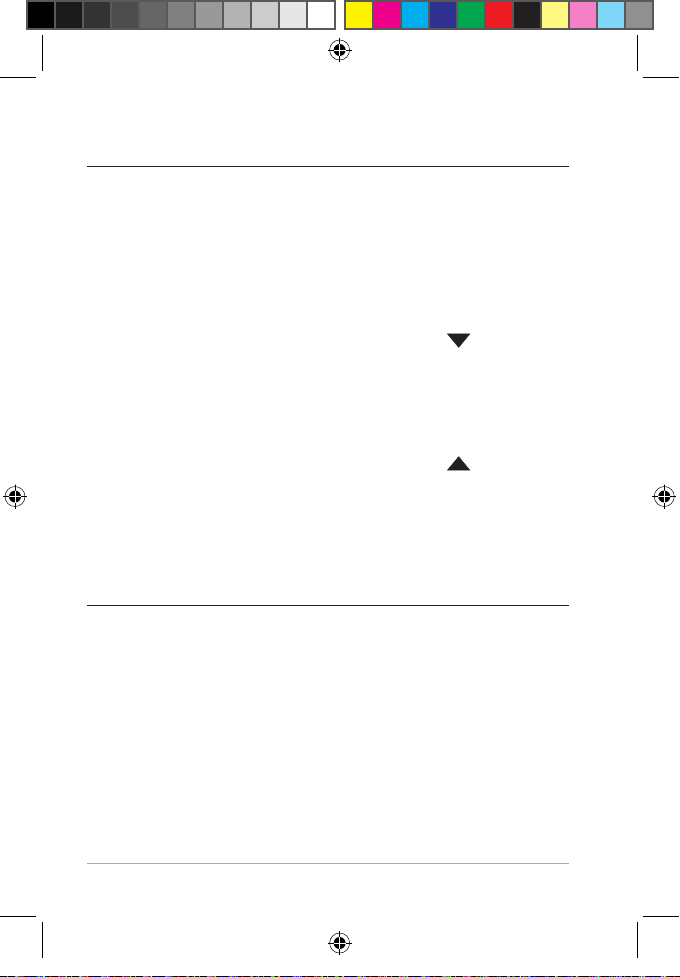
Temperaturtrend
Der Temperaturtrend wird durch Pfeile angezeigt:
Die Temperatur ist in der letzten Stunde
um 1 °C gestiegen.
Die Temperatur ist in der letzten Stunde
konstant geblieben.
Die Temperatur ist in der letzten Stunde
um 1 °C gefallen.
Wohlfühlindikator
Der Wohlfühlindikator setzt sich aus der Temperatur (T)
und der Luftfeuchtigkeit (L) zusammen und wird für Innen
und Außen separat angezeigt.
Trockenheit
T: beliebiger Wert
L: unter 40%
Angenehm
T: zwischen 20-28 °C
L: zwischen 40-70%
FW Station WS 1822 3 Sprach.indb 25 21.06.2018 15:33:56
Page 26
26
Wetterstation mit Funk-Außensensor WS 1822
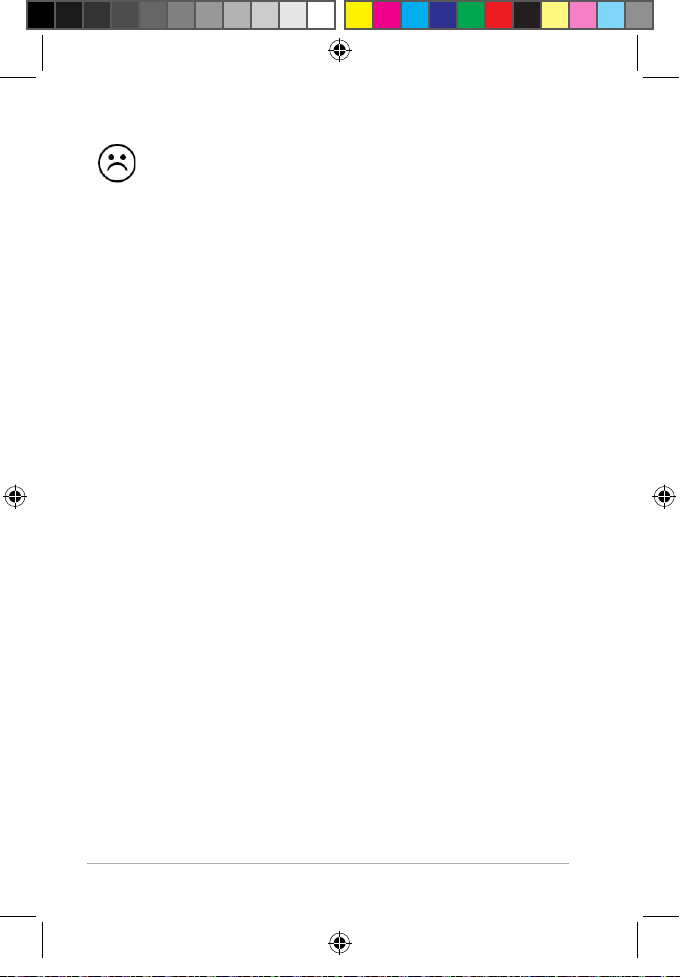
Hohe Luftfeuchtigkeit
T: beliebiger Wert
L: über 70%
keine
Anzeige
T: Außerhalb von 20-28 °C
L: zwischen 40-70%
Gespeicherte Temperaturwerte
Mit der Taste MEM erhalten Sie die höchsten und gerings-
ten Werte der letzten 24 Stunden in Bezug auf Temperatur
und Luftfeuchtigkeit angezeigt.
1x drücken: MAX-Werte werden angezeigt
2x drücken: MIN-Werte werden angezeigt
3x drücken: normale Display-Anzeige
Um die gespeicherten Werte zu löschen:
− Halten Sie die Taste MEM ca. 3 Sekunden gedrückt, bis
die angezeigten Werte gelöscht sind.
Temperaturalarm
Allgemeines
Mit dem Temperaturalarm können Sie einen Tempe-
raturbereich überwachen. Werden die obere oder die
untere Temperaturgrenze über- bzw. unterschritten,
werden Sie optisch und akustisch gewarnt.
Die Temperaturgrenzen können Sie selber einstellen.
Standardeinstellung: -50 bis 70 °C.
Wenn Sie mehrere Funk-Außensensoren im Einsatz
haben, können Sie für jeden Außensensor einen individuellen Temperaturbereich einstellen.
FW Station WS 1822 3 Sprach.indb 26 21.06.2018 15:33:56
Page 27
27
Wetterstation mit Funk-Außensensor WS 1822
Deutsch
Temperaturbereich einstellen
1. Nur wenn Sie mehrere Funk-Außensensoren mit der
Basisstation verbunden haben: Wählen Sie mit der
Taste den gewünschten Sensor aus (Kanalanzeige
beachten).
2. Halten Sie die Taste ALERT gedrückt, bis im Display der
Oberwert blinkt.
3. Stellen Sie mit den Tasten
/ die obere Tempera-
turgrenze ein.
4. Drücken Sie ALERT, um die Eingabe zu speichern.
5. Stellen Sie mit den Tasten
/ die untere Tempera-
turgrenze ein.
6. Drücken Sie abschließend ALERT.
Der Vorgang ist abgeschlossen und der Temperaturalarm ist aktiv. Sie erkennen das am
links gezeigten Symbol, das im Display im
unteren Bereich angezeigt wird.
Temperaturalarm deaktivieren⁄aktivieren
− Drücken Sie 1x kurz ALERT, um den Temperaturalarm
zu deaktivieren bzw. zu aktivieren.
Beim Erreichen des Temperaturbereiches ertönen Warntöne und Symbol und Temperaturanzeige blinken.
FW Station WS 1822 3 Sprach.indb 27 21.06.2018 15:33:56
zuerst 3 Warntöne
danach 5 Warntöne jede Minute
Page 28
28
Wetterstation mit Funk-Außensensor WS 1822
Temperaturalarm stoppen
Der Alarm bleibt so lange aktiv wie die Voraussetzun-
gen für den Temperaturalarm vorliegen.
Drücken Sie eine beliebige Taste (außer ALERT), um
den Alarm stumm zu schalten. Das Symbol für den
Temperaturalarm blinkt weiter.
Drücken Sie ALERT, um den Temperaturalarm ganz zu
beenden.
Wecken
Weckzeit einstellen
Wenn zwischen zwei Tastendrücken mehr als
ca. 8 Sekunden liegen, wird der Einstellvorgang automatisch beendet und Sie müssen
ihn wiederholen.
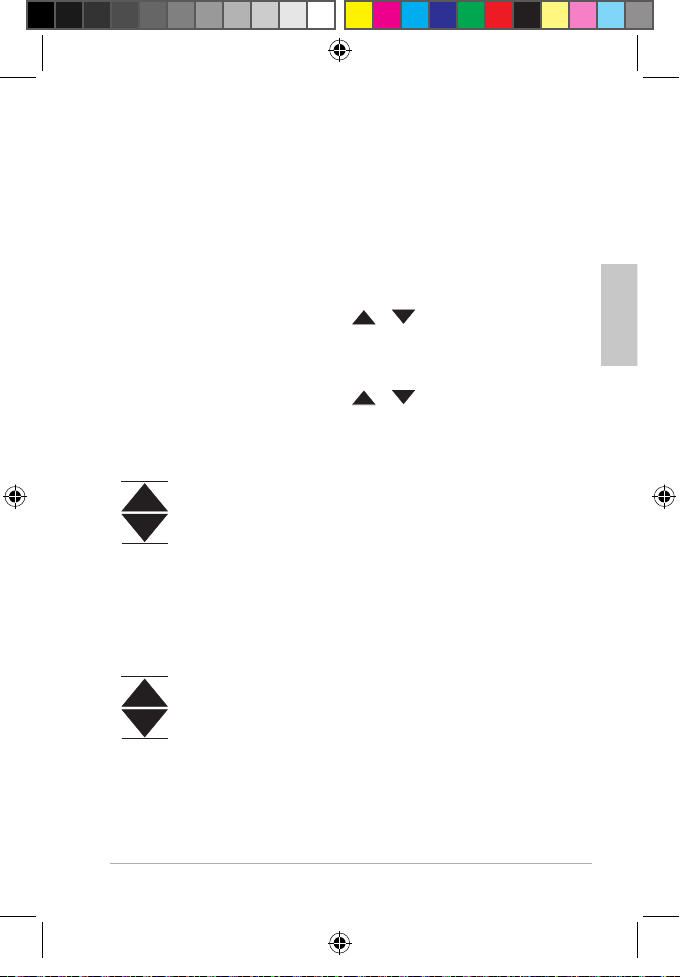
Wenn Sie
erfolgt der Vorlauf der angezeigten Werte
schneller.
1. Halten Sie ALARM einige Sekunden gedrückt, bis die
Weckstunden-Anzeige blinkt.
Im Display wird AL angezeigt.
2. Stellen Sie mit den Tasten
Weckstunde ein.
3. Drücken Sie ALARM.
Im Display blinkt die Minutenanzeige für die Weckzeit.
4. Stellen Sie mit den Tasten
Weckminute ein.
oder gedrückt halten,
oder die gewünschte
oder die gewünschte
FW Station WS 1822 3 Sprach.indb 28 21.06.2018 15:33:56
Page 29
29
Wetterstation mit Funk-Außensensor WS 1822
Deutsch
5. Drücken Sie abschließend ALARM, um die Einstellun-
gen zu speichern.
Weckfunktion ein und ausschalten
− Stellen Sie mit der Taste ALARM die Weckfunktion ein
und aus. Sobald das Wecksymbol angezeigt wird,
ist Weckfunktion aktiviert.
Weckalarm beenden
Zur eingestellten Zeit werden Sie von einem Wecksignal
geweckt, wobei das Signal mit zunehmender Weckdauer
immer intensiver wird.
Weckalarm ganz ausschalten
− Drücken Sie eine beliebige Taste der Basisstation
(außer SNZ/LIGHT), um den Alarm zu beenden.
AutostoppFunktion
Wenn Sie keine Taste drücken, schaltet sich der Alarm nach
2 Minuten automatisch aus. Nach 24 Stunden wird der
Alarm erneut ausgelöst.
Weckwiederholung (SnoozeFunktion)
− Drücken Sie 1x die Taste SNZ/LIGHT, wenn das
Wecksignal ertönt.
Im Display blinken und zz
Das Wecksignal verstummt für ca. 8 Minuten. Danach
schaltet sich das Gerät wieder ein und weckt Sie erneut.
Dieser Vorgang kann mehrfach wiederholt werden.
FW Station WS 1822 3 Sprach.indb 29 21.06.2018 15:33:56
Page 30
30
Wetterstation mit Funk-Außensensor WS 1822
Sonstige Funktionen
DisplayBeleuchtung einschalten
− Drücken Sie die Taste SNZ/LIGHT, um die Display-Be-
leuchtung der Basisstation für ca. 5 Sekunden einzuschalten.
Zwischen °C und °F umschalten
− Drücken Sie im Standardmodus 1x kurz , um die
Maßeinheit für die Temperatur zu wechseln.
Zwischen 12- und 24-Stunden-Format
wechseln
− Drücken Sie im Standardmodus 1x kurz , um
zwischen dem 12- und dem 24-Stunden-Format zu
wechseln. Beim 12-Stunden-Format werden Nachmittagsstunden mit "PM" gekennzeichnet.
Reinigen
− Wischen Sie Basisstation und Außensensor bei Bedarf
mit einem leicht angefeuchteten Tuch sauber.
FW Station WS 1822 3 Sprach.indb 30 21.06.2018 15:33:57
Page 31

31
Wetterstation mit Funk-Außensensor WS 1822
Deutsch
Störung ⁄ Abhilfe
Störung Mögliche Ursache
Das DCF77-Signal für die
Uhrzeit kann nicht empfangen werden.
Die Temperaturangabe des
Sensors erscheint zu hoch.
Im Display wird statt gemessenen Werten für
Temperatur bzw. Luftfeuchtigkeit H.HH bzw. LL.L
angezeigt.
Im Display blinkt die Temperaturanzeige.
Die Anzeige ist unleserlich,
die Funktion ist unklar oder
die Werte sind offensichtlich falsch.
Prüfen Sie den gewähl-
ten Standort.
Starten Sie den Funk-
empfang ggf. manuell.
Stellen Sie die Uhrzeit
manuell ein.
Prüfen Sie, ob der Sen-
sor direkter Sonnenstrahlung ausgesetzt
ist.
Die Werte liegen ober-
bzw. unterhalb des
Messbereichs.
Der Temperaturalarm
hat ausgelöst, siehe
Kapitel "Temperaturalarm".
Nehmen Sie die
Batterien für einige
Momente heraus.
FW Station WS 1822 3 Sprach.indb 31 21.06.2018 15:33:57
Page 32

32
Wetterstation mit Funk-Außensensor WS 1822
Störung Mögliche Ursache
Die Basisstation empfängt
keine Signale des Funksensors.
Stellen Sie sicher, dass
sich keine elektrischen
Störquellen in der
Nähe des Funksensors
oder der Basisstation
benden.
Prüfen Sie die Batterien
im Sensor.
Bewegen Sie die Basis-
station näher zum Sensor oder umgekehrt.
Die Uhrzeit weicht genau
um eine, zwei, drei etc.
Stunden ab.
Wahrscheinlich haben
Sie eine falsche Zeitzone eingestellt. Für
die meisten Länder
in Europa ist „00“ die
richtige Einstellung.
Technischen Daten
Basisstation
Modell: Wetterstation WS 1822
Eingang: 4,5 V
Batterien: 3x LR03 (AAA) / 1,5 V
Messbereich
- Temperatur: 0 °C - 50 °C (32 °F - 122 °F)
FW Station WS 1822 3 Sprach.indb 32 21.06.2018 15:33:57
Page 33

33
Wetterstation mit Funk-Außensensor WS 1822
Deutsch
- Luftfeuchtigkeit: 20% - 95%
Sendefrequenz:
Max. Sendeleistung:
433,92 MHz
+ 10 dBm
Funk-Außensensor
Batterien: 2x LR6 (AA) / 1,5 V
Messbereich:
- Temperatur: -20 °C - 60 °C (-4 °F - 140 °F)
- Luftfeuchtigkeit: wie Basisstation
Reichweite: ca. 60 Meter (offenes Gelände)
Inverkehrbringer: Waagen-Schmitt GmbH
Hammer Steindamm 27-29
22089 Hamburg, Germany
Unsere Produkte werden ständig weiterentwickelt und
verbessert. Aus diesem Grund sind Design- und technische
Änderungen jederzeit möglich.
Konformitätserklärung
Hiermit erklärt die Waagen-Schmitt GmbH, dass die
Wetterstation WS 1822 den Richtlinien 2014/30/EU und
2011/65/EU entspricht.
Die Erklärung verliert ihre Gültigkeit, falls an dem Gerät
eine nicht mit uns abgestimmte Änderung vorgenommen
wurde.
FW Station WS 1822 3 Sprach.indb 33 21.06.2018 15:33:57
Hamburg, April 2018
Waagen-Schmitt GmbH
Page 34

34
Wetterstation mit Funk-Außensensor WS 1822
Garantie
Sehr geehrte Kundin, sehr geehrter Kunde,
die Firma Waagen-Schmitt GmbH garantiert für 2 Jahre ab
Kaufdatum die kostenfreie Behebung von Mängeln aufgrund von Material- oder Fabrikationsfehlern durch Reparatur oder Austausch.
Bitte geben Sie den Artikel im Garantiefall mit dem Kaufbeleg (unter Angabe des Reklamationsgrundes) an Ihren
Händler zurück.
Entsorgen
Verpackung entsorgen
Entsorgen Sie die Verpackung sortenrein.
Geben Sie Pappe und Karton zum Altpapier,
Folien in die Wertstoff-Sammlung.
Artikel entsorgen
Entsorgen Sie den Artikel entsprechend der Vorschriften,
die in Ihrem Land gelten.
FW Station WS 1822 3 Sprach.indb 34 21.06.2018 15:33:57
Page 35

35
Wetterstation mit Funk-Außensensor WS 1822
Deutsch
Geräte dürfen nicht im normalen Hausmüll entsorgt werden
Am Ende seiner Lebensdauer ist der Artikel
einer geordneten Entsorgung zuzuführen.
Dabei werden im Gerät enthaltene Wertstoffe der Wiederverwertung zugeführt
und die Belastung der Umwelt vermieden.
Geben Sie das Altgerät an einer Sammelstelle für Elektroschrott oder einem Wertstoffhof ab.
Wenden Sie sich für nähere Auskünfte an
Ihr örtliches Entsorgungsunternehmen
oder Ihre kommunale Verwaltung.
Batterien und Akkus gehören nicht in
den Hausmüll
Alle Batterien und Akkus müssen bei einer
Sammelstelle der Gemeinde, des Stadtteils oder im Handel abgegeben werden.
Dadurch können Batterien und Akkus einer
umweltschonenden Entsorgung zugeführt
werden.
FW Station WS 1822 3 Sprach.indb 35 21.06.2018 15:33:57
Page 36

36
Weather Station with Wireless Outdoor Sensor WS 1822
Dear Customer!
You have chosen to purchase a high-quality ADE brand
product, which combines intelligent functions with
an exceptional design. With this weather station, you
will always have a variety of weather and temperature
data available at a glance. The wealth of experience of
the ADE brand ensures a high technical standard and
proven quality.
We wish you much enjoyment and success while
monitoring and examining your weather data.
Your ADE Team
Scope of delivery
Weather stations consist of:
− Base station
− Wireless outdoor sensor
Batteries:
− 3 x LR03 (AAA) / 1.5 V for base station
− 2 x LR6 (AAA)/1.5 V for wireless outdoor sensor
Operating Manual
FW Station WS 1822 3 Sprach.indb 36 21.06.2018 15:33:57
Page 37

37
Weather Station with Wireless Outdoor Sensor WS 1822
English
Table of Contents
Scope of delivery ..................................................................... 36
General information ............................................................... 39
Intended use ............................................................................. 40
Safety ........................................................................................... 40
Your wireless weather station provides .......................... 43
Base station ...............................................................................44
Wireless outdoor sensor ....................................................... 47
Starting up ................................................................................. 48
Outdoor sensor ................................................................. 48
Base station ........................................................................ 49
Starting signal reception ...................................................... 49
Checklist when data is missing in the display........50
Setting the time and date manually ......................... 51
Starting signal reception manually ........................... 52
Choosing a location ........................................................ 53
Use additional wireless sensors .................................. 55
About the time signal transmitter DCF77 ...................... 56
Display indicators of the base station .............................. 57
Weather forecast .............................................................. 57
Time and moon phase displays .................................. 58
Date display ........................................................................58
Temperature, temperature trend, and humidity
(indoors) ..............................................................................58
FW Station WS 1822 3 Sprach.indb 37 21.06.2018 15:33:57
Page 38

38
Weather Station with Wireless Outdoor Sensor WS 1822
Temperature, temperature trend, and humidity
(outdoors) ........................................................................... 58
Temperature trend .......................................................... 59
Comfort indicator.............................................................59
Stored temperature values ........................................... 60
Temperature alert ............................................................ 60
Alarm............................................................................................ 62
Setting the alarm time ...................................................62
Switching the alarm function on/off .........................63
Stopping the alarm ..........................................................63
Other functions ........................................................................ 64
Turn on display lighting ................................................. 64
Switch between °C and °F ............................................. 64
Toggling between 12- and 24-hour format ............ 64
Cleaning ......................................................................................64
Fault/Remedy ........................................................................... 65
Technical data ........................................................................... 66
Declaration of Conformity ................................................... 67
Warranty ..................................................................................... 68
Disposal ...................................................................................... 68
FW Station WS 1822 3 Sprach.indb 38 21.06.2018 15:33:57
Page 39

39
Weather Station with Wireless Outdoor Sensor WS 1822
English
General information
About this operating manual
This operating manual describes how to
operate and maintain your product safely.
Keep this operating manual in a safe place for
future reference. If you pass this product on to
someone else, pass on this operating manual
as well. Failure to observe this operating
manual may result in injuries or damage to
your product.
FW Station WS 1822 3 Sprach.indb 39 21.06.2018 15:33:57
Explanation of symbols
This symbol combined with the word DANGER
warns of serious injuries.
This symbol combined with the word
WARNING warns of moderate and mild injuries.
This symbol combined with the word NOTE
warns of material damage.
This symbol indicates additional information
and general notes.
Page 40

40
Weather Station with Wireless Outdoor Sensor WS 1822
Intended use
The weather station – consisting of a base station and
wireless outdoor sensor – displays various weather
data (air pressure, temperature, etc.) pertaining to
the near environment. The weather station makes
a weather forecast on the basis of the measured
weather data.
Furthermore, the weather station displays the date,
time, and lunar phases and is also equipped with an
alarm.
The weather station is unsuited to commercial use
in weather forecasting or in taking meteorological
measurements.
Safety
This device can be used by children 8 years
of age and older, as well as by persons
with reduced physical, sensory, or mental
capabilities or lacking experience and/or
knowledge, if they are being supervised or
have been instructed in the safe use of the
device and understand the dangers that
may arise.
Children must not play with the product.
Cleaning and user maintenance must not
be carried out by children, unless they
FW Station WS 1822 3 Sprach.indb 40 21.06.2018 15:33:58
Page 41

41
Weather Station with Wireless Outdoor Sensor WS 1822
English
are 8 years of age or older and are being
supervised.
Batteries, when swallowed, can be
life-threatening. The device and batteries
should therefore be kept out of reach
of small children. If a battery has been
swallowed, medical assistance must be
sought immediately.
Danger for children
Keep children away from packaging material and
other small parts included in the scope of delivery.
There is a risk of choking if swallowed.
RISK of fire/burning and/or explosion
There is a risk of explosion if the batteries are replaced
improperly. Replace the batteries only with those of
the same or an equivalent type. Pay attention to the
“Technical data”.
Batteries must not be recharged, reactivated by other
means, dismantled, thrown into fire, or short-circuited.
Otherwise, there is an increased risk of explosion and
leakage; furthermore, gases may escape!
Avoid contact of the battery fluid with skin, eyes, and
mucosa. In case of contact, immediately rinse the
affected areas with plenty of clean water and consult
a doctor.
FW Station WS 1822 3 Sprach.indb 41 21.06.2018 15:33:58
Page 42

42
Weather Station with Wireless Outdoor Sensor WS 1822
NOTE on preventing material damage
Protect the base station and outdoor sensor from dust,
impacts, extreme temperatures and direct sunlight.
Protect the base station from moisture. Position the
base station exclusively in a dry, closed room.
The wireless sensor is protected against moisture, but
must be protected from direct exposure to moisture,
e.g. rain.
Remove the batteries from the base station and
outdoor sensor once they have been consumed or
when you are no longer using the weather station. You
will thus avoid damage that may result from leakage
of battery acid.
Do not expose the batteries to any extreme
conditions, e.g. by storing them on heaters or under
direct sunlight. Increased risk of leakage!
Clean the battery and device contacts, as needed,
before inserting the battery.
Always exchange all of the batteries in the base
station or in the outdoor sensor at the same time.
Only insert batteries of the same type; do not use
different types or used and new batteries with each
other.
FW Station WS 1822 3 Sprach.indb 42 21.06.2018 15:33:58
Page 43

43
Weather Station with Wireless Outdoor Sensor WS 1822
English
Do not make any modifications to the device. Only
allow repairs to be carried out at a specialist workshop
and pay attention to the guarantee conditions.
Do not under any circumstances use hard, scratching,
or abrasive cleaning agents or the like in order to
clean the weather station. Doing so may scratch the
surfaces.
Your wireless weather station provides
Animated weather forecast
Indoor and outdoor temperature display
Indoor and outdoor hygrometer
Trend displays and memory function (MIN/MAX) for
temperature and humidity
High/low outdoor temperature alarm with
programmable upper and lower limits
Comfort zone indicator (indoor and outdoor climate)
Moon phase display
Radio-controlled clock (DCF time signal) with manual
time setting as well as alarm and snooze function
Perpetual calendar with date and time indicator
Splash-proof wireless outdoor sensor for hanging and
standing installation
FW Station WS 1822 3 Sprach.indb 43 21.06.2018 15:33:58
Page 44

44
Weather Station with Wireless Outdoor Sensor WS 1822
Base station
1
2
3
4
5
6
FW Station WS 1822 3 Sprach.indb 44 21.06.2018 15:33:58
7
Page 45

45
Weather Station with Wireless Outdoor Sensor WS 1822
English
1 Display with various indications
2 SET button:
Activate settings mode
Activate modified setting
3 ALARM button:
Setting the alarm time
Activates/deactivates alarm function
4
Button
Adjust values (increase)
Toggle between 12- and 24-hour displays
5
Button
Adjust values (decrease)
Toggle between degrees Celsius and degrees
Fahrenheit
Manually start or interrupt reception by time
signal transmitter DCF77
6 SNZ/LIGHT button:
Switching off the display light
Activate snooze function
7 Foot
FW Station WS 1822 3 Sprach.indb 45 21.06.2018 15:33:58
Page 46

46
Weather Station with Wireless Outdoor Sensor WS 1822
12
8
9
10
8 ALERT button:
Set temperature limits
9 CH button:
Retrieve temperature values of another outdoor
sensor (if any)
10 Battery compartment for 3x LR03 (AAA), 1.5 V
11 Battery compartment cover
12 MEM button:
Call up stored temperature values
11
FW Station WS 1822 3 Sprach.indb 46 21.06.2018 15:33:59
Page 47

47
Weather Station with Wireless Outdoor Sensor WS 1822
English
Wireless outdoor sensor
17
16
13 Hanging loop
14 Channel change switch 1 2 3 for data transfer
15 Battery compartment, 2x LR6 (AA), 1.5 V
16 TX button for manual data transfer
17 LED light (lit only during data transfer)
13
14
15
FW Station WS 1822 3 Sprach.indb 47 21.06.2018 15:33:59
Page 48

48
Weather Station with Wireless Outdoor Sensor WS 1822
Starting up
Proceed in the order specified below and first
insert the batteries into the outdoor sensor.
Only then can the weather station function
without flaws.
Do not use rechargeable batteries, since
their voltage is too low (only 1.2 V instead of
1.5 V). This affects, among other things, the
precision of the measurements.
Where possible, use alkaline rather than
zinc-carbon batteries. Alkaline batteries
last longer, especially at low outdoor
temperatures.
Outdoor sensor
1. Remove the battery compartment cover on the rear
side of the outdoor sensor by pressing with a little force
on the imprinted arrow. Slide the battery compartment
cover in the direction of the arrow, away from the
outdoor sensor.
2. Insert 2 batteries of the type LR6 (AA) / 1.5 V as
depicted on the bottom of the battery compartment.
Pay attention to the correct polarity of the batteries
(+/-).
3. Slide the battery compartment cover back into place
on the outdoor sensor.
FW Station WS 1822 3 Sprach.indb 48 21.06.2018 15:33:59
Page 49

49
Weather Station with Wireless Outdoor Sensor WS 1822
English
Base station
1. Push the locking tab down slightly and remove the
battery compartment cover.
2. Insert 3 batteries of type LR03 (AAA)/1.5 V as depicted
on the bottom of the battery compartment. Pay
attention to the correct polarity (+/-).
3. Replace the battery compartment cover and snap it
shut.
4. Wait approx. 30 minutes. The base station requires this
time to collect all weather data and to receive radio
signals from the time signal transmitter.
FW Station WS 1822 3 Sprach.indb 49 21.06.2018 15:33:59
Starting signal reception
When the base station is energised, all displays are shown
for a brief moment. Furthermore, the display is briefly lit up
and a beep sounds.
The device then switches to receiving-mode,
during which the number of radio waves indicates
the quality of the reception: The more radio waves
shown on the display, the better is the reception.
During wireless reception by the time signal transmitter,
the buttons are disabled (except
).
As soon as the signals from the time signal transmitter and
wireless outdoor sensor have been received in sufficient
strength, the respective data is permanently shown in the
display.
Page 50

50
Weather Station with Wireless Outdoor Sensor WS 1822
Time signal transmitter: Time and Date
Radio tower symbol
Wireless outdoor
sensor:
outdoor temperature
Humidity
Base station: indoor temperature
Humidity
From now on, the weather station automatically switches
to receiving-mode multiple times each night. During
this process, the displayed time is compared with that
received from the time signal transmitter and, if necessary,
corrected.
If no sufficiently strong signal has been received,
the base station aborts the receiving process after a
few minutes and the radio-tower symbol goes out. The
receiving process is started again at a later point in time.
In this case, the time proceeds as usual (beginning with
the start time of “00:00”).
The data from the wireless outdoor sensor are
transmitted continuously once per minute.
Checklist when data is missing in the display
FW Station WS 1822 3 Sprach.indb 50 21.06.2018 15:33:59
No data display from the time signal transmitter
1. Check whether the location of the base station is
suitable, see "Choosing a location".
Page 51

51
Weather Station with Wireless Outdoor Sensor WS 1822
English
2. Restart reception manually, see "Manually starting
signal reception".
3. Wait until the base station automatically switches
back to reception at a later time. The reception is
usually better at night.
4. Manually perform the settings if reception is not
possible at your location, see "Setting the time and
date manually".
No data display from the wireless outdoor sensor
FW Station WS 1822 3 Sprach.indb 51 21.06.2018 15:33:59
1. Check whether you have inserted the batteries
correctly.
2. Check whether the location of the wireless outdoor
sensor is suitable, see "Choosing a location".
Setting the time and date manually
If there is more than approx. 8 seconds between
two pushes of a button, the setting process
automatically ends and you will have to repeat it.
1. Press and hold down the SET button until “00” flashes
on the display.
2. Use the
most countries in Europe, “00” is the correct setting).
3. Press SET.
4. Proceed as previously described:
/ buttons to select your time zone (for
Page 52

52
Weather Station with Wireless Outdoor Sensor WS 1822
− Press the / button to set the desired value.
− Press SET to save the setting you have made.
5. Carry out the following settings:
− Hours
− Minutes
− Year
− Month
− Day
− Language (refers exclusively to the display of the
weekday abbreviation)
6. Finally, press SET to conclude the procedure.
Starting signal reception manually
If the radio signal symbol to the left is no longer
displayed, the radio signals from the time signal
transmitter are no longer being received. The time
indicator nevertheless continues precisely.
FW Station WS 1822 3 Sprach.indb 52 21.06.2018 15:33:59
− Press and hold the
button until the radio signal
symbol is displayed again. The signal reception is thus
started manually.
Pay attention to the following:
If the reception was not successful, the reception
symbol fades out after a few minutes and the time on
the display continues normally.
Upon successful signal reception, the base station
adjusts itself to the time of the time signal transmitter.
If you have already made manual time and date
settings, they will be adjusted automatically.
Page 53

53
Weather Station with Wireless Outdoor Sensor WS 1822
English
Choosing a location
NOTE on material damage
Protect the base station and wireless sensor
from dust, impacts, extreme temperatures
and direct sunlight.
Protect the base station from moisture.
Position the base station exclusively in a
dry, closed room. The wireless sensor is
protected against moisture, but must be
protected from direct exposure to moisture,
e.g. rain.
FW Station WS 1822 3 Sprach.indb 53 21.06.2018 15:34:00
Signal reception between the base station and
wireless outdoor sensor
The maximum distance between the base station
and the outdoor sensor is 60 metres. This range is,
however, only possible with “direct line of sight”.
Protective construction materials such as reinforced
concrete reduce or inhibit signal reception between
the base station and outdoor sensor.
Devices such as TVs, cordless phones, computers, and
fluorescent tubes can likewise disrupt signal reception.
Do not place the base station and the outdoor sensor
directly on the ground. This limits the range.
At low temperatures in winter, the performance of the
outdoor sensor batteries can markedly decrease. This
reduces the transmission range.
Signal reception between the base station and
Page 54

54
Weather Station with Wireless Outdoor Sensor WS 1822
time signal transmitter
Maintain distance from TV sets, computers, and
monitors. Also, base stations from cordless phones
should not be located in immediate proximity to the
weather station.
The reception is generally better at night. If the base
station did not have reception during the day, it may
well be that the signal will be immediately and fully
received at night.
Depending on your location, it can infrequently
happen that the base station receives signals from
another time signal transmitter or even alternately
from two time signal transmitters. This is not a fault in
the device. In this case you should change the location
of the base station.
The weather, e.g. a heavy storm, can cause
interference with the reception.
Temporary shutoffs of the transmitter can sometimes
happen, e.g. because of maintenance work.
Setting up equipment
The Base station has a foot.
− Set up the base station as close to a window as
possible. Here, the reception will generally be best.
The wireless outdoor sensor has a suspension eyelet on
the back panel.
− Place or hang the outdoor sensor at a position where
it is protected from the direct inuence of the weather
(rain, sun, wind, etc.). Suitable locations are, for
example, under an awning or in a carport.
FW Station WS 1822 3 Sprach.indb 54 21.06.2018 15:34:00
Page 55

55
Weather Station with Wireless Outdoor Sensor WS 1822
English
Use additional wireless sensors
The base station is supplied with a wireless sensor.
However, you can operate it with up to three outdoor
sensors. For more information or priced order please use
the following email address: service@ade-germany.de.
The outdoor sensors can be situated in different
spaces or outdoors.
Every sensor must be allocated its own number (= no.
of the transmission channel).
Procedure:
1. Place the base station and wireless sensors close
together.
2. Remove the battery compartment cover on the rear
side of the outdoor sensor.
3. For each outdoor sensor, set a unique channel using
the switches. Sensor included in delivery uses by
default channel 1, so select channel 2 for the second
and channel 3 for the third sensor.
4. Insert two batteries of the type indicated on the base.
Pay attention to the correct polarity (+/-).
5. Put the battery compartment cover back in place.
6. Using the CH button, select the corresponding outdoor
sensor (1, 2 or 3) in order to have its data displayed.
FW Station WS 1822 3 Sprach.indb 55 21.06.2018 15:34:00
7. Using the CH button, select the
corresponding outdoor sensor (1, 2 or 3) in
order to have its data displayed.
Page 56

56
Weather Station with Wireless Outdoor Sensor WS 1822
If the channel number is not displayed after
inserting the batteries, press the TX button for
the respective wireless sensor. This way, the
weather data is transmitted directly to the base
station.
Then you can install the new wireless outdoor sensor on
the appropriate location.
About the time signal transmitter
DCF77
The radio-controlled clock integrated into the weather
station receives its radio signal from the DCF77 time signal
transmitter. This broadcasts the precise and official time
of the Federal Republic of Germany on the long-wave
frequency of 77.5 kHz.
The transmitter is located in Mainflingen near Frankfurt
am Main and, with its range of up to 2000 km, supplies the
majority of radio-controlled clocks in western Europe with
the necessary radio signals.
As soon as the base station is supplied with current, it
switches to receiving mode and searches for the signal
from the DCF77 transmitter. If the time signal is received in
sufficient strength, the display shows the date and time.
The base station switches on multiple times daily and
synchronises the time with the radio signal from the
DCF77 transmitter. In the event the signal is not received,
e.g. during a strong storm, the device continues to run
FW Station WS 1822 3 Sprach.indb 56 21.06.2018 15:34:00
Page 57

57
Weather Station with Wireless Outdoor Sensor WS 1822
English
precisely and then switches to receiving mode again at the
next scheduled time.
Display indicators of the base station
Weather forecast
After start-up, the information still can not be used for
weather forecasting for approximately 12 hours, since the
weather station needs this time to collect and analyse the
weather data.
The weather forecast is based on the collected data and
the measured air pressure changes.
The forecast pertains to the region around the weather
station with a radius of approx 30 to 50 km, for a period of
12 to 24 hours.
The accuracy of the weather forecast lies around 75%.
There are four different displays:
sunny
light cloud
cloudy
rainy
If an additional S is displayed, summer time is currently
valid.
FW Station WS 1822 3 Sprach.indb 57 21.06.2018 15:34:00
Page 58

58
Weather Station with Wireless Outdoor Sensor WS 1822
Time and moon phase displays
Time display in
12- or 24-hour
format
Current moon phase
Date display
Day and month
Weekday
abbreviation in the
selected language
Temperature, temperature trend, and
humidity (indoors)
currently measured
temperature and
humidity
Temperature trend
Comfort indicator
Temperature, temperature trend, and
humidity (outdoors)
currently measured
temperature and
humidity
FW Station WS 1822 3 Sprach.indb 58 21.06.2018 15:34:00
Page 59

59
Weather Station with Wireless Outdoor Sensor WS 1822
English
Temperature trend
Comfort indicator
Transmission channel display.
− Press the CH button to display the values of another
outdoor sensor.
Temperature trend
The temperature trend is indicated by arrows:
The temperature has increased by 1 °C
in the last hour.
FW Station WS 1822 3 Sprach.indb 59 21.06.2018 15:34:00
The temperature has remained constant
in the last hour.
The temperature has decreased by 1 °C
in the last hour.
Comfort indicator
The comfort indicator comprises temperature (T) and
humidity (L) and has separate indoor and outdoor displays.
Dryness
T: any value
L: below 40%
Comfortable
T: between 20-28 °C
L: between 40-70%
Page 60

60
Weather Station with Wireless Outdoor Sensor WS 1822
High humidity
T: any value
L: above 70%
no
display
T: Outside 20-28 °C
L: between 40-70%
Stored temperature values
Using the MEM button, you will get the highest and lowest
temperature and humidity values for the last 24 hours
displayed.
Press 1x: MAX values are displayed
Press 2x: MIN values are displayed
Press 3x: normal display indicator
In order to delete the saved values:
− Press and hold the MEM button for approx. 3 seconds
until the displayed values are deleted.
Temperature alert
General information
Using temperature alarm, you can monitor the
temperature range. If the upper or lower temperature
limit is over- or underrun, you are warned by visual
and acoustic signals.
You can set the temperature limits yourself. Default
setting: -50 to 70°C.
If you have several wireless outdoor sensors in use,
you can set a temperature range for each outdoor
sensor individually.
FW Station WS 1822 3 Sprach.indb 60 21.06.2018 15:34:00
Page 61

61
Weather Station with Wireless Outdoor Sensor WS 1822
English
Setting temperature range.
1. Only if you have several wireless outdoor sensors are
connected with the base station: Using the button,
select the desired sensor (mind the channel indication).
2. Press and hold down the ALERT button until the upper
value flashes on the display.
3. Use the
/ buttons to set the upper temperature
limit.
4. Press ALERT in order to save the entry.
5. Use the
/ buttons to set the lower temperature
limit.
6. Finally, press ALERT.
The process is complete and the temperature
alarm is active. You will recognise the symbol
shown on the left, which appears in the lower
part of the display.
Disabling/enabling temperature alarm
− Press ALERT once briey to disable or enable the
temperature alarm
Once the temperature range has been
reached, warning beeps will sound and the
symbol and temperature display will flash.
FW Station WS 1822 3 Sprach.indb 61 21.06.2018 15:34:00
first 3 warning beeps
then 5 warning beeps each minute
Page 62

62
Weather Station with Wireless Outdoor Sensor WS 1822
Terminating temperature alarm
The alarm remains active as long as the temperature
alarm conditions are valid.
Press any button (except ALERT) to mute the alarm.
The temperature alarm symbol continues to flash.
Press ALERT to terminate the temperature alarm.
Alarm
Setting the alarm time
If there is more than approx. 8 seconds
between two pushes of a button, the setting
process automatically ends and you will have
to repeat it.
Press and hold down
the progress of the displayed values.
1. Hold down ALARM for a few seconds until the alarm
hour indicator blinks.
The display will show “AL”.
2. Using the
and buttons, set the desired alarm
hour.
3. Press ALARM.
The minute indicator for the alarm time blinks on the
display.
4. Using the
and buttons, set the desired alarm
minute.
5. Finally, press ALARM to save the settings.
or to speed up
FW Station WS 1822 3 Sprach.indb 62 21.06.2018 15:34:00
Page 63

63
Weather Station with Wireless Outdoor Sensor WS 1822
English
Switching the alarm function on/off
− Using the ALARM button, turn the alarm function on
and o. As soon as the alarm symbol is displayed,
the alarm function is activated.
Stopping the alarm
At the set time, you will be woken by an alarm signal,
which will become more intense as the waking time
increases.
Switching the alarm off completely
− Press any button on the base station
(except SNZ/LIGHT) to stop the alarm.
Auto-stop function
If you do not press a button, the alarm switches off
automatically after 2 minutes. After 24 hours, the alarm will
be triggered again.
Repeat alarm (snooze function)
− Press the SNZ/LIGHT button once when the alarm
signal sounds.
and zz ash in the display
The alarm signal falls silent for approx. 8 minutes. Then the
device switches back on and the alarm sounds again. This
procedure can be repeated multiple times.
FW Station WS 1822 3 Sprach.indb 63 21.06.2018 15:34:01
Page 64

64
Weather Station with Wireless Outdoor Sensor WS 1822
Other functions
Turn on display lighting
− Press the SNZ/LIGHT button to switch on the display
light of the base station for approx. 5 seconds.
Switch between °C and °F
− In standard mode, press once briey to change the
unit of temperature measurement.
Toggling between 12- and 24-hour format
− In standard mode, press once briey to toggle
between 12- and 24-hour formats. In the 12-hour
format, afternoon hours are indicated as “PM”.
Cleaning
− As necessary, wipe the base station and the outdoor
sensor clean with a lightly-dampened cloth.
FW Station WS 1822 3 Sprach.indb 64 21.06.2018 15:34:01
Page 65

65
Weather Station with Wireless Outdoor Sensor WS 1822
English
Fault/Remedy
Fault Possible cause
The DCF77 signal for the
time cannot be received.
The temperature
information of the
sensor seems too high.
Instead of showing
the measured values
for temperature or
humidity, the display
shows H.HH or LL.L.
The temperature
indicator is blinking on
the display.
The indicator is illegible,
the function is unclear,
or the values are
obviously false.
Check the chosen
location.
Start the signal reception
manually, if necessary.
Adjust the time manually.
Check whether the sensor
has been exposed to
direct sunlight.
The values lie above or
below the measurement
range.
The temperature alarm
has tripped; see chapter
“Temperature alarm”.
Remove the batteries for a
few moments.
FW Station WS 1822 3 Sprach.indb 65 21.06.2018 15:34:01
Page 66

66
Weather Station with Wireless Outdoor Sensor WS 1822
Fault Possible cause
The base station is not
receiving signals from
the wireless sensor.
Ensure that no electrical
sources of interference
are located in the vicinity
of the wireless sensor or
of the base station.
Check the batteries in the
sensor.
Move the base station
closer to the sensor, or
vice versa.
The time differs by
exactly one, two, three,
etc. hours.
You have probably set an
incorrect time zone. For
most countries in Europe,
“00” is the correct setting.
Technical data
Base station
Model: Weather Station WS 1822
Input:
Batteries:
4.5 V
3x LR03 (AAA)/1.5 V
Measuring range
- Temperature: 0 °C - 50 °C (32 °F - 122 °F)
- Humidity: 20% - 95%
FW Station WS 1822 3 Sprach.indb 66 21.06.2018 15:34:01
Page 67

67
Weather Station with Wireless Outdoor Sensor WS 1822
English
Transmission frequency: 433.92 MHz
Max. transmission power: + 10 dBm
Wireless outdoor sensor
Batteries:
2x LR6 (AA) / 1.5 V
Measuring range:
- Temperature: -20 °C - 60 °C (-4 °F - 140 °F)
- Humidity: like base station
Range: approx. 60 metres (open terrain)
Distributor: Waagen-Schmitt GmbH
Hammer Steindamm 27-29
22089 Hamburg, Germany
Our products are constantly being developed and
improved. For this reason, design and technical
modifications are possible at any time.
Declaration of Conformity
Waagen-Schmitt GmbH hereby declares that the digital
weather station WS 1822 complies with EU directives
2014/30/EU and 2011/65/EU.
The declaration will lose its validity if any modification is
made to the device without our consent.
FW Station WS 1822 3 Sprach.indb 67 21.06.2018 15:34:01
Hamburg, April 2018
Waagen-Schmitt GmbH
Page 68

68
Weather Station with Wireless Outdoor Sensor WS 1822
Warranty
Dear Valued Customer,
The company Waagen-Schmitt GmbH guarantees for
2 years from the purchase date the cost-free rectification
of defects on the basis of material or fabrication errors
through repair or exchange.
In the event of a warranty claim, please return the product
with the proof of purchase (specifying the reason for claim)
to your dealer.
Disposal
Disposing of the packaging
Dispose of the packaging with similar
materials. Dispose of cardboard with waste
paper and of films with recyclable materials.
Disposing of the product
Dispose of the product in accordance with the regulations
that apply in your country.
FW Station WS 1822 3 Sprach.indb 68 21.06.2018 15:34:01
Page 69

69
Weather Station with Wireless Outdoor Sensor WS 1822
English
Devices must not be disposed of in
normal household waste
At the end of its life, the product must be
disposed of in an appropriate way. In this
way, valuable materials contained in the
device will be recycled and the burden on
the environment avoided. Bring the old
device to a collection point for electronic
waste or to a recycling depot.
For more information, contact your
local waste disposal firm or your local
administrative body.
Standard and rechargeable batteries
should not be disposed of along with
household waste
All standard and rechargeable batteries
must be brought to a local or district
collection point or to the retailer. Such
standard and rechargeable batteries can
thus be disposed of in an environmentally
friendly way.
FW Station WS 1822 3 Sprach.indb 69 21.06.2018 15:34:01
Page 70

70
Station météo avec capteur radio extérieur WS 1822
Chère cliente, cher client!
Nous sommes ravis que vous ayez choisi un appareil de
haute qualité de la marque ADE, qui allie des fonctions
intelligentes à un design exceptionnel. Grâce à cette
station météo, vous disposerez d’un seul coup d’œil de
toutes les informations sur la météo et la température.
Les années d'expérience de la marque ADE garantissent
une haute technicité et une qualité éprouvée.
Nous vous souhaitons beaucoup de plaisir à l’utilisation
de votre nouveau thermomètre/hygromètre.
L’équipe ADE
Contenu de l’emballage
La station météo est composée des éléments
suivants:
− Station de base
− Capteur sans l extérieur
Piles:
− 3 x LR03 (AAA) / 1,5 V pour la station de base
− 2xLR6 (AAA) / 1,5V pour le capteur radio extérieur
Mode d’emploi
FW Station WS 1822 3 Sprach.indb 70 21.06.2018 15:34:01
Page 71

71
Station météo avec capteur radio extérieur WS 1822
Français
Table des matières
Contenu de l’emballage ........................................................70
Généralités .................................................................................73
Utilisation conforme ............................................................... 74
Sécurité ....................................................................................... 74
Fonctionnalités de la station météo radio-pilotée .....77
Station de base .........................................................................78
Capteur sans fil extérieur...................................................... 81
Mise en marche initiale ......................................................... 82
Capteur extérieur ............................................................. 82
Station de base ................................................................. 83
Lancer la réception radio ...................................................... 83
Liste de contrôle en cas de données erronées
affichées à l’écran .............................................................84
Régler l’heure et la date manuellement ..................85
Activer manuellement la réception du signal .......86
Choisir l’emplacement ....................................................87
Utiliser d’autres capteurs radio ................................... 89
À propos de l’émetteur de signal horaire DCF77.........90
Écran de la station de base .................................................. 91
Prévisions météo .............................................................. 91
Affichage de l’heure et des phases de la lune ....... 92
Affichage de la date ........................................................ 92
Température, tendance des températures
et humidité de l’air (intérieur) ...................................... 92
FW Station WS 1822 3 Sprach.indb 71 21.06.2018 15:34:01
Page 72

72
Station météo avec capteur radio extérieur WS 1822
Température, tendance des températures
et humidité de l’air (extérieur) ..................................... 92
Tendance de température ............................................ 93
Indice de bien-être .......................................................... 93
Températures enregistrées ...........................................94
Alerte de température....................................................94
Réveil ............................................................................................ 96
Régler l'heure de réveil .................................................. 96
Allumer/éteindre la fonction réveil ............................ 97
Arrêter la sonnerie du réveil ......................................... 97
Autres fonctions ......................................................................98
Allumer l’éclairage de l’écran ....................................... 98
Choisir entre °C et °F ....................................................... 98
Choisir le format d’affichage 12 heures
ou 24 heures ......................................................................98
Nettoyage .................................................................................. 98
Problèmes/solutions .............................................................. 99
Données techniques ............................................................ 100
Déclaration de conformité .................................................101
Garantie .................................................................................... 102
Mise au rebut .......................................................................... 102
FW Station WS 1822 3 Sprach.indb 72 21.06.2018 15:34:01
Page 73

73
Station météo avec capteur radio extérieur WS 1822
Français
Généralités
À propos de ce mode d'emploi
Ce mode d'emploi décrit l'utilisation conforme
ainsi que les procédures d'entretien de l'article.
Conservez ce manuel pour toute référence
ultérieure. Si vous cédez l’article à une tierce
personne, transmettez-lui également ce mode
d’emploi. Le non-respect de ce mode d'emploi
peut entraîner des blessures ou endommager
l'article.
Légende
Ce symbole, associé au mot DANGER, prévient
de blessures graves.
Ce symbole, associé au mot ATTENTION,
prévient de blessures moyennes et légères.
Ce symbole, associé au mot AVERTISSEMENT,
prévient de dommages matériels.
FW Station WS 1822 3 Sprach.indb 73 21.06.2018 15:34:02
Ce symbole désigne des informations
supplémentaires ainsi que des indications
d'ordre général.
Page 74

74
Station météo avec capteur radio extérieur WS 1822
Utilisation conforme
La station météo, qui comprend une station de base et
un capteur radio extérieur, affiche diverses informations
météorologiques (pression atmosphérique, température,
etc.) sur l'environnement immédiat. La station météo
calcule une prévision météorologique d’après les
données thermiques mesurées.
En outre, elle renseigne sur l'heure, la date et les
phases lunaires et dispose d'une fonction réveil.
Elle n'est pas adaptée à une utilisation commerciale
pour les prévisions météorologiques ou la mesure de
données météorologiques.
Sécurité
Cet appareil peut être utilisé par des enfants
dès l'âge de 8 ans ainsi que par des personnes
aux capacités physiques, sensorielles ou
mentales limitées ou de peu d'expérience
et/ou de connaissances si ceux-ci sont sous
surveillance ou ont été instruits de l'utilisation
conforme de l'article et comprennent les
risques qui en découlent.
Les enfants ne doivent pas jouer avec cet
article.
Le nettoyage et l’entretien ne doivent
pas être réalisés par des enfants, à moins
FW Station WS 1822 3 Sprach.indb 74 21.06.2018 15:34:02
Page 75

75
Station météo avec capteur radio extérieur WS 1822
Français
qu’ils aient 8ans révolus et soient sous
surveillance.
Les piles peuvent être dangereuses pour la
santé en cas d’ingestion. Par conséquent,
tenez l’appareil et les piles hors de portée
des enfants. En cas d'ingestion d'une pile,
sollicitez immédiatement une aide médicale.
Danger pour les enfants
Tenez les enfants éloignés des matériaux d'emballage
et des petits éléments faisant partie du contenu de
l'emballage. Il existe un risque d'étouffement en cas
d'ingestion.
DANGER d’incendie/brûlure et/ou d’explosion
Risque d’explosion en cas de remplacement non
conforme des piles. Remplacez les piles uniquement
par des piles similaires ou un type de pile équivalent.
Respectez les indications mentionnées dans les
«Caractéristiques techniques».
Les piles ne doivent pas être chargées, réactivées avec
d’autres moyens, démontées, jetées au feu ou courtcircuitées. Dans le cas contraire, il existe un risque élevé
d'explosion et de fuite, ainsi que d’échappement de gaz!
Évitez tout contact de la peau, des yeux et des
muqueuses avec le liquide de la batterie. En cas de
contact, rincez immédiatement et abondamment les
zones concernées à l’eau claire et consultez un médecin.
FW Station WS 1822 3 Sprach.indb 75 21.06.2018 15:34:02
Page 76

76
Station météo avec capteur radio extérieur WS 1822
AVERTISSEMENT sur les dommages matériels
Protégez la station de base et le capteur extérieur de
la poussière, des chocs, des températures extrêmes et
de la lumière directe du soleil.
Protégez la station de base de l'humidité. Installez la
station de base exclusivement dans une pièce sèche et
fermée.
Le capteur sans fil est protégé contre l'humidité, mais
doit cependant être protégé contre les effets de l'eau,
par ex. la pluie.
Retirez les piles de la station de base et du capteur
extérieur lorsqu'elles sont usées ou lorsque vous
n'utilisez pas la station météo pendant une période
prolongée. Vous éviterez ainsi les dommages qui
pourraient résulter d’une fuite des piles.
N’exposez pas les piles à des conditions extrêmes, en
les conservant par exemple sur une source de chaleur
ou à la lumière directe du soleil. Risque accru de fuite
pour les piles!
Si nécessaire, nettoyez les bornes des piles et les
contacteurs de l'appareil avant l'insertion.
Changez toujours toutes les piles de la station de base
ou du capteur extérieur en même temps.
N'employez que des piles d’un même type, ne
mélangez pas des types de piles différents, ni des piles
usées et des piles neuves.
FW Station WS 1822 3 Sprach.indb 76 21.06.2018 15:34:02
Page 77

77
Station météo avec capteur radio extérieur WS 1822
Français
N’apportez aucune modification à l’appareil. Confiez
exclusivement les réparations à un atelier spécialisé et
respectez les conditions de garantie.
N'utilisez en aucun cas des produits ménagers durs,
rugueux, abrasifs ou similaires pour nettoyer la station
météo. Cela pourrait rayer les surfaces.
Fonctionnalités de la station météo
radio-pilotée
Prévisions météorologiques animées
Affichage des températures intérieures et extérieures
Hygrométrie intérieure et extérieure
Affichage des tendances et fonction mémoire
(MIN/MAX) pour la température et l’humidité de l’air
Alerte en cas de température extérieure trop élevée/
trop basse, avec possibilité de programmer le seuil
supérieur et inférieur
Indicateur des zones de confort (climat ambiant et
extérieur)
Affichage des phases de la lune
Horloge radio-pilotée (signal horaire DCF) avec
réglage de l’heure manuel ainsi que réveil et fonction
répétition
Calendrier perpétuel avec indication de la date et du
jour
Capteur extérieur radio résistant aux projections d’eau,
à suspendre ou à poser
FW Station WS 1822 3 Sprach.indb 77 21.06.2018 15:34:02
Page 78

78
Station météo avec capteur radio extérieur WS 1822
Station de base
1
2
3
4
5
6
FW Station WS 1822 3 Sprach.indb 78 21.06.2018 15:34:02
7
Page 79

79
Station météo avec capteur radio extérieur WS 1822
Français
1 Écran à affichages divers
2 Bouton SET:
Activer le mode réglage
Activer le réglage sélectionné
3 Bouton ALARM:
Régler l'heure de réveil
Activer/désactiver le réveil
4
Bouton
:
Régler les valeurs (augmenter)
Permuter entre format 12 heures et format 24
heures
5
Touche
Régler les valeurs (réduire)
Permuter entre degrés Celsius et degrés
Fahrenheit
Amorcer ou interrompre manuellement la
réception avec l’émetteur de signal horaire DCF77
6 Bouton SNZ/LIGHT:
Éteindre l’éclairage de l’écran
Activer la fonction de répétition de la sonnerie du
réveil
7 Socle
FW Station WS 1822 3 Sprach.indb 79 21.06.2018 15:34:02
Page 80

80
Station météo avec capteur radio extérieur WS 1822
12
8
9
10
8 Bouton ALERT:
Régler les limites de température
9 Bouton CH:
Appeler les valeurs de températures fournies par
un autre capteur extérieur (si utilisé)
10 Compartiment pour 3 piles LR03 (AAA), 1,5V
11 Couvercle du compartiment à piles
12 Bouton MEM:
Afficher les températures enregistrées
11
FW Station WS 1822 3 Sprach.indb 80 21.06.2018 15:34:03
Page 81

81
Station météo avec capteur radio extérieur WS 1822
Français
Capteur sans fil extérieur
17
16
13
14
15
13 Œillet de suspension
14 Commutateur de changement de canal 123 pour la
transmission des données
15 Compartiment pour 2 piles LR6 (AA), 1,5 V
16 Bouton TX pour la transmission manuelle des
données
17 Témoin LED (s’allume uniquement lors de la
transmission des données)
FW Station WS 1822 3 Sprach.indb 81 21.06.2018 15:34:03
Page 82

82
Station météo avec capteur radio extérieur WS 1822
Mise en marche initiale
Procédez dans l’ordre indiqué et commencez
par introduire les piles dans le capteur
extérieur. C’est uniquement de cette manière
que la station météo pourra parfaitement
fonctionner.
N’utilisez pas de piles rechargeables,
car celles-ci ont une tension trop faible
(seulement 1,2V au lieu de 1,5V). Cela
affecte notamment la précision de la mesure.
Utilisez de préférence des piles alcalines
plutôt que des piles au zinc-carbone. Les
piles alcalines durent plus longtemps,
particulièrement en cas de températures
extérieures basses.
Capteur extérieur
1. Retirez le couvercle du compartiment à piles à l’arrière
du capteur extérieur en appuyant avec un peu de
force sur la flèche imprimée. Faites glisser le couvercle
du compartiment à piles du capteur extérieur dans la
direction de la flèche.
2. Insérez 2 piles de type LR6 (AA) / 1,5 V tel qu'indiqué
au fond du compartiment à piles. Veillez à la bonne
polarité des piles (+/-).
3. Faites à nouveau glisser le couvercle du compartiment
à piles dans le capteur extérieur.
FW Station WS 1822 3 Sprach.indb 82 21.06.2018 15:34:03
Page 83

83
Station météo avec capteur radio extérieur WS 1822
Français
Station de base
1. Poussez sur la patte de fermeture quelque peu vers le
bas et retirez le couvercle du compartiment à piles.
2. Insérez 3 piles de type LR03 (AAA)/1,5 V tel qu'indiqué
au fond du compartiment à piles. Veillez à la bonne
polarité (+/-).
3. Remettez le couvercle du compartiment à piles et fermez-le.
4. Attendez env. 30 minutes. La station de base a besoin
de ce temps pour collecter toutes les valeurs et recevoir
les signaux radio de l'émetteur de signal horaire.
Lancer la réception radio
Dès que la station de base est alimentée, toutes les
informations s’affichent en même temps à l’écran. De plus,
l'écran est brièvement éclairé et un bip retentit.
FW Station WS 1822 3 Sprach.indb 83 21.06.2018 15:34:03
Ensuite l'appareil se règle sur réception, le nombre
d'ondes radio indiquant la qualité de la réception:
plus il y a d'ondes radio affichées à l'écran, plus la
réception est bonne.
Pendant l’échange radio avec l’émetteur de signal horaire,
les boutons sont désactivés (sauf pour
).
Dès que la force des signaux reçus de l’émetteur de signal
horaire et du capteur radio externe est suffisante, chacune
des données s’affiche de façon permanente sur l’écran.
Émetteur de signal
horaire:
Heure et date
Symbole en forme
d'antenne radio
Page 84

84
Station météo avec capteur radio extérieur WS 1822
Capteur radio
extérieur:
Température extérieure
Humidité de l’air
Station de base : Température intérieure
Humidité de l’air
La station météo se règle alors automatiquement sur
réception plusieurs fois chaque nuit. Ainsi, l'heure indiquée
est comparée à l'heure de l'émetteur de signal horaire et, le
cas échéant, rectifiée.
Dans le cas où un signal suffisamment fort n'a pas été
détecté, la station de base interrompt le processus de
réception après quelques minutes et le symbole d'antenne
radio s'éteint. Le processus de réception sera relancé un
peu plus tard.
Dans ce cas, l’heure continue de fonctionner normalement
(à partir de l’heure de départ «00:00»).
Les données en provenance du capteur radio
extérieur sont transmises toutes les minutes.
Liste de contrôle en cas de données erronées
affichées à l’écran
Aucune donnée de l’émetteur de signal horaire affichée
FW Station WS 1822 3 Sprach.indb 84 21.06.2018 15:34:03
1. Vérifiez que l’emplacement de la station de base est
adapté, voir «Choisir l’emplacement».
2. Relancez le processus de réception manuellement,
voir «Activer manuellement la réception du signal».
Page 85

85
Station météo avec capteur radio extérieur WS 1822
Français
3. Attendez jusqu’à ce que la station de base repasse
plus tard automatiquement sur réception. Veuillez
noter que la réception est meilleure pendant la nuit.
4. Procédez aux réglages manuels si la réception est
impossible là où vous vous trouvez, voir «Régler
l’heure et la date manuellement».
Aucun affichage de données en provenance du
capteur radio extérieur
1. Vérifiez que vous avez correctement introduit les
piles.
2. Vérifiez que l’emplacement du capteur radio
externe soit adapté, voir «Choisir l’emplacement».
FW Station WS 1822 3 Sprach.indb 85 21.06.2018 15:34:03
Régler l’heure et la date manuellement
Si, pendant le réglage, il s’écoule plus de 8secondes
entre l’actionnement de deux touches ou boutons,
le réglage prend automatiquement fin et devra être
entrepris de nouveau.
1. Tenez le bouton SET enfoncé jusqu’à ce que l’indication
«00» clignote.
2. Choisissez, à l’aide des boutons
horaire dans lequel vous vous trouvez («00» convient
pour la plupart des pays européens).
3. Appuyez sur SET.
/ , le fuseau
Page 86

86
Station météo avec capteur radio extérieur WS 1822
4. Procédez ensuite comme indiqué ci-après:
− Appuyez sur
/ pour régler la valeur recherchée.
− Appuyez sur SET pour enregistrer le réglage opéré.
5. Procédez ensuite aux réglages suivants:
− Heure
− Minutes
− Année
− Mois
− Jour
− Langue (pour l’abréviation des jours de la semaine)
6. Appuyez sur SET pour terminer les réglages.
Activer manuellement la réception du signal
Si le symbole signal radio ci-contre ne s’affiche
plus, les signaux radio de l’émetteur de signal
horaire ne sont plus réceptionnés. L’affichage de
l’heure continue cependant d’être précis.
FW Station WS 1822 3 Sprach.indb 86 21.06.2018 15:34:03
− Maintenez le bouton
enfoncé jusqu’à ce que le
signal radio s’ache de nouveau. La réception radio
manuelle est alors lancée.
Nota:
S’il n’y a pas de réception, le symbole réception
disparaît après quelques minutes et l’heure continue
de s’afficher normalement à l’écran.
S’il y a réception, la station de base se règle sur l’heure
de l’émetteur de signal horaire. Si vous avez déjà
réalisé un réglage manuel de l’heure et de la date,
ceux-ci seront ajustés automatiquement.
Page 87

87
Station météo avec capteur radio extérieur WS 1822
Français
Choisir l’emplacement
AVERTISSEMENT Risque de dommages matériels
Protégez la station de base et le capteur
extérieur de la poussière, des chocs, des
températures extrêmes et de la lumière
directe du soleil.
Protégez la station de base de l'humidité.
Installez la station de base exclusivement
dans une pièce sèche et fermée. Le capteur
sans fil est protégé contre l'humidité, mais
doit cependant être protégé contre les
effets de l'eau, par ex. la pluie.
Réception radio entre la station de base et le
capteur radio extérieur
L’écart maximal entre la station de base et le capteur
radio est de 60 mètres. Cette portée n’est cependant
possible que par «contact visuel direct».
Des matériaux de construction peu perméables aux
ondes électromagnétiques, tels que le béton armé,
réduisent ou empêchent la réception radio entre la
station de base et le capteur extérieur.
Les appareils tels que les téléviseurs, les téléphones
sans fil, les ordinateurs et les lampes fluorescentes
peuvent également perturber la réception radio.
Ne placez pas la station de base et le capteur extérieur
directement au sol. Cela limite la portée.
En cas de basses températures en hiver, la puissance
des piles du capteur extérieur peut fortement
diminuer. Cela diminue la portée de transmission.
FW Station WS 1822 3 Sprach.indb 87 21.06.2018 15:34:04
Page 88

88
Station météo avec capteur radio extérieur WS 1822
Réception radio entre la station de base et
l’émetteur de signal horaire
Installez-la à distance des ordinateurs, des moniteurs
et des téléviseurs. Les stations de base des téléphones
sans fil doivent également être tenues à distance de la
station météo.
Veuillez noter que la réception est meilleure pendant
la nuit. Si la station de base n’avait pas de réception
dans la journée, il est fort possible que le signal soit
immédiatement reçu et à pleine puissance dans les
heures nocturnes.
Indépendamment de votre emplacement, il se peut
dans quelques rares cas que les signaux de la station
de base d’un autre émetteur de signal horaire soient
reçus, ou même que les signaux de deux émetteurs de
signal horaire soient reçus alternativement. Il ne s’agit
pas d’un dysfonctionnement. Dans ce cas, changez la
station de base de place.
La réception peut être perturbée par les conditions
météo (par exemple par un orage).
Il peut arriver que l’émetteur soit mis à l’arrêt pour
de courtes durées, par exemple pour des travaux
d’entretien.
Installer les appareils
La station de base dispose d’un socle.
− Installez la station de base si possible près d’une fenêtre.
En général, c’est là que la réception est la meilleure.
Le capteur extérieur est muni d’un œillet de suspension
à l’arrière.
FW Station WS 1822 3 Sprach.indb 88 21.06.2018 15:34:04
Page 89

89
Station météo avec capteur radio extérieur WS 1822
Français
− Installez ou accrochez le capteur extérieur à un endroit
où il est protégé des conditions météorologiques
directes (pluie, soleil, vent etc.). Des emplacements
adaptés sont par ex. sous un auvent ou sous un abri
de voiture.
Utiliser d’autres capteurs radio
La station de base est livrée avec un capteur radio. Vous
pouvez cependant l’utiliser avec au maximum trois
capteurs extérieurs. Pour plus d'informations ou pour
effectuer une commande (livraison payante), merci d'écrire
à l'adresse: service@ade-germany.de.
Les capteurs extérieurs peuvent se trouver plus tard
dans différentes pièces ou à l'extérieur.
Il faudra attribuer à chaque capteur son propre
numéro (numéro de canal de transmission).
Procédure à suivre:
1. Placez la station de base et le capteur à proximité l'un
de l'autre.
2. Retirez le couvercle du compartiment à piles à l'arrière
des capteurs extérieurs.
3. À l'aide des commutateurs, réglez un canal pour
chaque capteur extérieur. Le capteur fourni utilise par
défaut le canal1. Sélectionnez ainsi le canal2 pour le
deuxième capteur et le canal3 pour le troisième.
4. Placez deux piles du type indiqué au fond du
compartiment.
Veillez à respecter la polarité (+/-).
5. Replacez le couvercle du compartiment à piles.
FW Station WS 1822 3 Sprach.indb 89 21.06.2018 15:34:04
Page 90

90
Station météo avec capteur radio extérieur WS 1822
6. Sélectionnez le capteur extérieur (1, 2 ou 3)
correspondant à l'aide du bouton CH pour afficher ses
données.
7. Sélectionnez le capteur extérieur (1, 2 ou 3)
correspondant à l'aide de la touche CH pour
afficher ces données.
Si le numéro du canal ne s’affiche pas après avoir
introduit les piles, appuyez sur le bouton TX de
chaque capteur radio. Les données thermiques
seront ainsi directement communiquées à la
station de base.
Pour finir, vous pouvez placer le nouveau capteur extérieur
à son emplacement effectif.
À propos de l’émetteur de signal
horaire DCF77
L'horloge radio-pilotée intégrée à la station météo reçoit
son signal de l'émetteur de signal horaire DCF77. Celui-ci
émet sur une fréquence à ondes longues de 77,5kHz; son
heure est l’heure officielle en vigueur dans la République
fédérale d’Allemagne.
L’émetteur de signal horaire est situé à Mainflingen,
près de Francfort-sur-le-Main, et alimente la plupart des
horloges radio d’Europe de l’Ouest; sa portée s’étend à
près de 2000km.
Dès que la station de base est alimentée en courant, elle
s’allume sur réception et cherche le signal de l’émetteur DCF77.
Si le signal est assez puissant, la date et l’heure s’affichent.
FW Station WS 1822 3 Sprach.indb 90 21.06.2018 15:34:04
Page 91

91
Station météo avec capteur radio extérieur WS 1822
Français
La station de base s’allume plusieurs fois en journée et
synchronise l’heure avec le signal radio de l’émetteur DCF77.
En cas de non-réception, comme cela peut se produire
par temps d’orage, l’appareil continue de fonctionner avec
précision puis se remet automatiquement en mode de
réception à l’heure programmée suivante.
Écran de la station de base
Prévisions météo
Après la mise en marche initiale, la station météo aura
besoin de 12heures pour collecter et analyser les
premières données météorologiques et aucune prévision
ne pourra être réalisée pendant cet intervalle de temps.
Les prévisions météorologiques sont issues des données
collectées et des variations de pression atmosphérique
mesurées.
La prévision se réfère à la zone entourant la station météo
dans un rayon d'environ 30 à 50km pour une durée
concernant les 12 à 24heures à venir.
La précision des prévisions météorologiques est d’environ
75%. Plusieurs indications seront visibles à l’écran:
ensoleillé
légèrement couvert
couvert
pluvieux
FW Station WS 1822 3 Sprach.indb 91 21.06.2018 15:34:04
L’écran indique en outre un S lorsque l’heure d’été est en
vigueur.
Page 92

92
Station météo avec capteur radio extérieur WS 1822
Affichage de l’heure et des phases de la lune
Affichage de l’heure
au format 12 ou
24 heures
Phase actuelle de la
lune
Affichage de la date
Jour et mois
Abréviation du jour
de la semaine dans
la langue configurée
Température, tendance des températures et
humidité de l’air (intérieur)
Température et
humidité ambiante
actuelles
Tendance des températures
Indice de bien-être
Température, tendance des températures et
humidité de l’air (extérieur)
aktuell gemessene
Temperatur und
Luftfeuchtigkeit
FW Station WS 1822 3 Sprach.indb 92 21.06.2018 15:34:04
Page 93

93
Station météo avec capteur radio extérieur WS 1822
Français
Tendance de température
Indice de bien-être
Affichage du canal de transmission
− Appuyez sur le bouton CH pour acher les valeurs
provenant d’un autre capteur extérieur.
Tendance de température
La tendance des températures est indiquée par une flèche:
La température est montée de 1°C
pendant l’heure passée.
La température est restée constante
pendant l’heure passée.
La température a descendu de 1°C
pendant l’heure passée.
Indice de bien-être
L’indicateur de bien-être recoupe la température (T) et
l’humidité de l’air (H) et est indiqué séparément pour
l’intérieur et l’extérieur.
Sec
T: toute valeur
H: moins de 40%
Agréable
T: entre 20 et 28°C
H: entre 40 et -70%
FW Station WS 1822 3 Sprach.indb 93 21.06.2018 15:34:04
Page 94

94
Station météo avec capteur radio extérieur WS 1822
Très humide
T: toute valeur
H: plus de 70%
Aucun affichage T: En dehors de 20-28°C
L: zwischen 40-70%
Températures enregistrées
Le bouton MEM vous donne les valeurs les plus élevées
et les plus faibles des 24 dernières heures concernant la
température et l'humidité de l'air.
Appuyez 1 fois: les valeurs MAX s’affichent
Appuyez 2 fois: les valeurs MIN s’affichent
Appuyez 3 fois: l'affichage normal revient à l'écran
Pour supprimer les valeurs enregistrées:
− Maintenez le bouton MEM enfoncé pendant env.
3secondes, jusqu'à ce que les valeurs achées soient
supprimées.
Alerte de température
Généralités
L'alerte de température permet de surveiller les
températures d'une certaine plage. Lorsque la limite
inférieure et supérieure de température est dépassée,
vous êtes alerté par des signaux visuel et sonore.
Vous pouvez définir les limites de température.
Réglages standard: de -50 à +70°C.
Si vous utilisez plusieurs capteurs extérieurs, vous pouvez
définir une plage de température pour chaque capteur.
FW Station WS 1822 3 Sprach.indb 94 21.06.2018 15:34:04
Page 95

95
Station météo avec capteur radio extérieur WS 1822
Français
Réglage de la plage de température
1. Uniquement dans le cas où plusieurs capteurs sont
reliés à la station de base: sélectionnez le capteur
voulu à l'aide du bouton (attention au canal affiché).
2. Maintenez le bouton ALERT enfoncé jusqu’à ce que la
valeur supérieure clignote à l’écran.
3. À l’aide des boutons
/ , réglez la limite supérieure
de température.
4. Appuyez sur ALERT pour enregistrer la valeur réglée.
5. À l’aide des boutons
/ , réglez la limite inférieure
de température.
6. Appuyez ensuite sur ALERT.
Le processus est terminé et l’alerte de
température est maintenant active. Cette
fonction est matérialisée par l’affichage, en
bas de l’écran, du symbole ci-contre.
Désactiver ou activer l’alerte de température
− Appuyez brièvement 1 fois sur ALERT pour désactiver
ou activer l’alerte de température.
Une fois la plage de températures atteinte,
l’alarme se déclenche et le symbole ainsi que
l’indication de la température se mettent à
clignoter.
FW Station WS 1822 3 Sprach.indb 95 21.06.2018 15:34:04
3 signaux sonores pour commencer
5 signaux sonores chaque minute par la suite
Page 96

96
Station météo avec capteur radio extérieur WS 1822
Arrêter l’alerte de température
L’alerte restera active tant que règneront les
conditions pour lesquelles l’alerte aura été réglée.
Appuyez sur une touche quelconque (sauf ALERT)
pour éteindre le signal sonore. Le symbole de l’alerte
continuera à clignoter.
Appuyez sur ALERT pour mettre totalement fin à
l’alerte de température.
Réveil
Régler l'heure de réveil
Si, pendant le réglage, il s’écoule plus de
8secondes entre l’actionnement de deux
touches ou boutons, le réglage prend
automatiquement fin et devra être entrepris
de nouveau.
Si vous tenez enfoncé
défileront plus rapidement.
1. Maintenez le bouton ALARM enfoncé pendant
quelques secondes, jusqu'à ce que l'indication de
l'heure du réveil se mette à clignoter.
L’écran indique AL.
2. Réglez l'heure de réveil souhaitée à l'aide des boutons
ou .
3. Appuyez sur ALARM.
Les chiffres des minutes pour l'heure de réveil
clignotent à l'écran.
ou , les valeurs
FW Station WS 1822 3 Sprach.indb 96 21.06.2018 15:34:05
Page 97

97
Station météo avec capteur radio extérieur WS 1822
Français
4. Réglez les minutes de réveil souhaitées à l'aide des
boutons ou .
5. Appuyez une dernière fois sur ALARM pour enregistrer
vos réglages.
Allumer/éteindre la fonction réveil
− Allumez et éteignez la fonction réveil avec le bouton
ALARM. Dès que le symbole de réveil s'ache, la
fonction réveil est activée.
Arrêter la sonnerie du réveil
À l'heure programmée, vous êtes réveillé par une sonnerie,
le signal s’amplifiant progressivement.
Éteindre complètement la sonnerie du réveil
− Appuyez sur n'importe quel bouton de la station de
base (sauf SNZ/LIGHT) pour arrêter la sonnerie.
Fonction d'arrêt automatique
Si vous n'appuyez sur aucun bouton, la sonnerie s'éteint
automatiquement au bout de 2minutes. Après 24 heures,
la sonnerie est de nouveau déclenchée.
Répétition (fonction Snooze)
− Appuyez 1 fois sur le bouton SNZ/LIGHT lorsque la
sonnerie retentit.
Le symbole et zz clignotent à l’écran.
La sonnerie du réveil est suspendue pendant env.
8 minutes. Le réveil se déclenchera de nouveau après ce
délai. Ce processus peut être répété plusieurs fois.
FW Station WS 1822 3 Sprach.indb 97 21.06.2018 15:34:05
Page 98

98
Station météo avec capteur radio extérieur WS 1822
Autres fonctions
Allumer l’éclairage de l’écran
− Appuyez sur le bouton SNZ/LIGHT pour allumer
l'éclairage de l'écran pendant env. 5 secondes.
Choisir entre °C et °F
− En mode standard, appuyez 1 fois brièvement sur
pour changer l’unité de mesure de la température.
Choisir le format d’affichage 12 heures ou 24
heures
− En mode standard, appuyez 1 fois brièvement sur
pour changer le format d’achage de l’heure. Au
format 12 heures, les heures de l’après-midi sont
caractérisées par la mention «PM».
Nettoyage
− Si besoin, essuyez la station de base et le capteur
extérieur avec un chion propre et légèrement
humidié.
FW Station WS 1822 3 Sprach.indb 98 21.06.2018 15:34:05
Page 99

99
Station météo avec capteur radio extérieur WS 1822
Français
Problèmes/solutions
Dysfonctionnement Cause possible
Le signal DCF77 pour
l’heure ne peut pas être
réceptionné.
Les données de
température du capteur
semblent trop élevées.
H.HH ou LL.L s’affiche
à l’écran au lieu des
valeurs mesurées pour
la température ou
l’humidité.
La température clignote
à l’écran.
L’affichage est illisible,
le fonctionnement
est défectueux ou
les valeurs sont
manifestement fausses.
Vérifiez l’emplacement
choisi.
Lancez éventuellement
la réception radio
manuellement.
Réglez l’heure
manuellement.
Vérifiez si le capteur est
exposé directement à la
lumière du soleil.
Les valeurs se situent en
dessus ou en dessous de
la plage de mesure.
L’alerte de température
s’est déclenchée, voir
la section «Alerte de
température».
Retirez les piles quelques
instants.
FW Station WS 1822 3 Sprach.indb 99 21.06.2018 15:34:05
Page 100

100
Station météo avec capteur radio extérieur WS 1822
Dysfonctionnement Cause possible
La station de base ne
reçoit aucun signal du
capteur radio.
Assurez-vous qu’aucune
interférence électrique ne
se trouve près du capteur
radio ou de la station de
base.
Vérifiez les piles du
capteur.
Rapprochez la station
de base du capteur ou
inversement.
L’heure diffère
exactement d’une, deux,
trois heures ou plus.
Vous avez apparemment
défini un mauvais fuseau
horaire. Pour la plupart
des pays européens, le
fuseau horaire est «00».
Données techniques
Station de base
Modèle: Station de base WS 1822
Entrée:
Piles:
4,5V
3x LR03 (AAA)/1,5 V
Plage de mesure:
- Température: de 0 °C à 50 °C (32 °F à 122 °F)
- Humidité de l’air: de 20% à 95%
FW Station WS 1822 3 Sprach.indb 100 21.06.2018 15:34:05
 Loading...