

Page 1
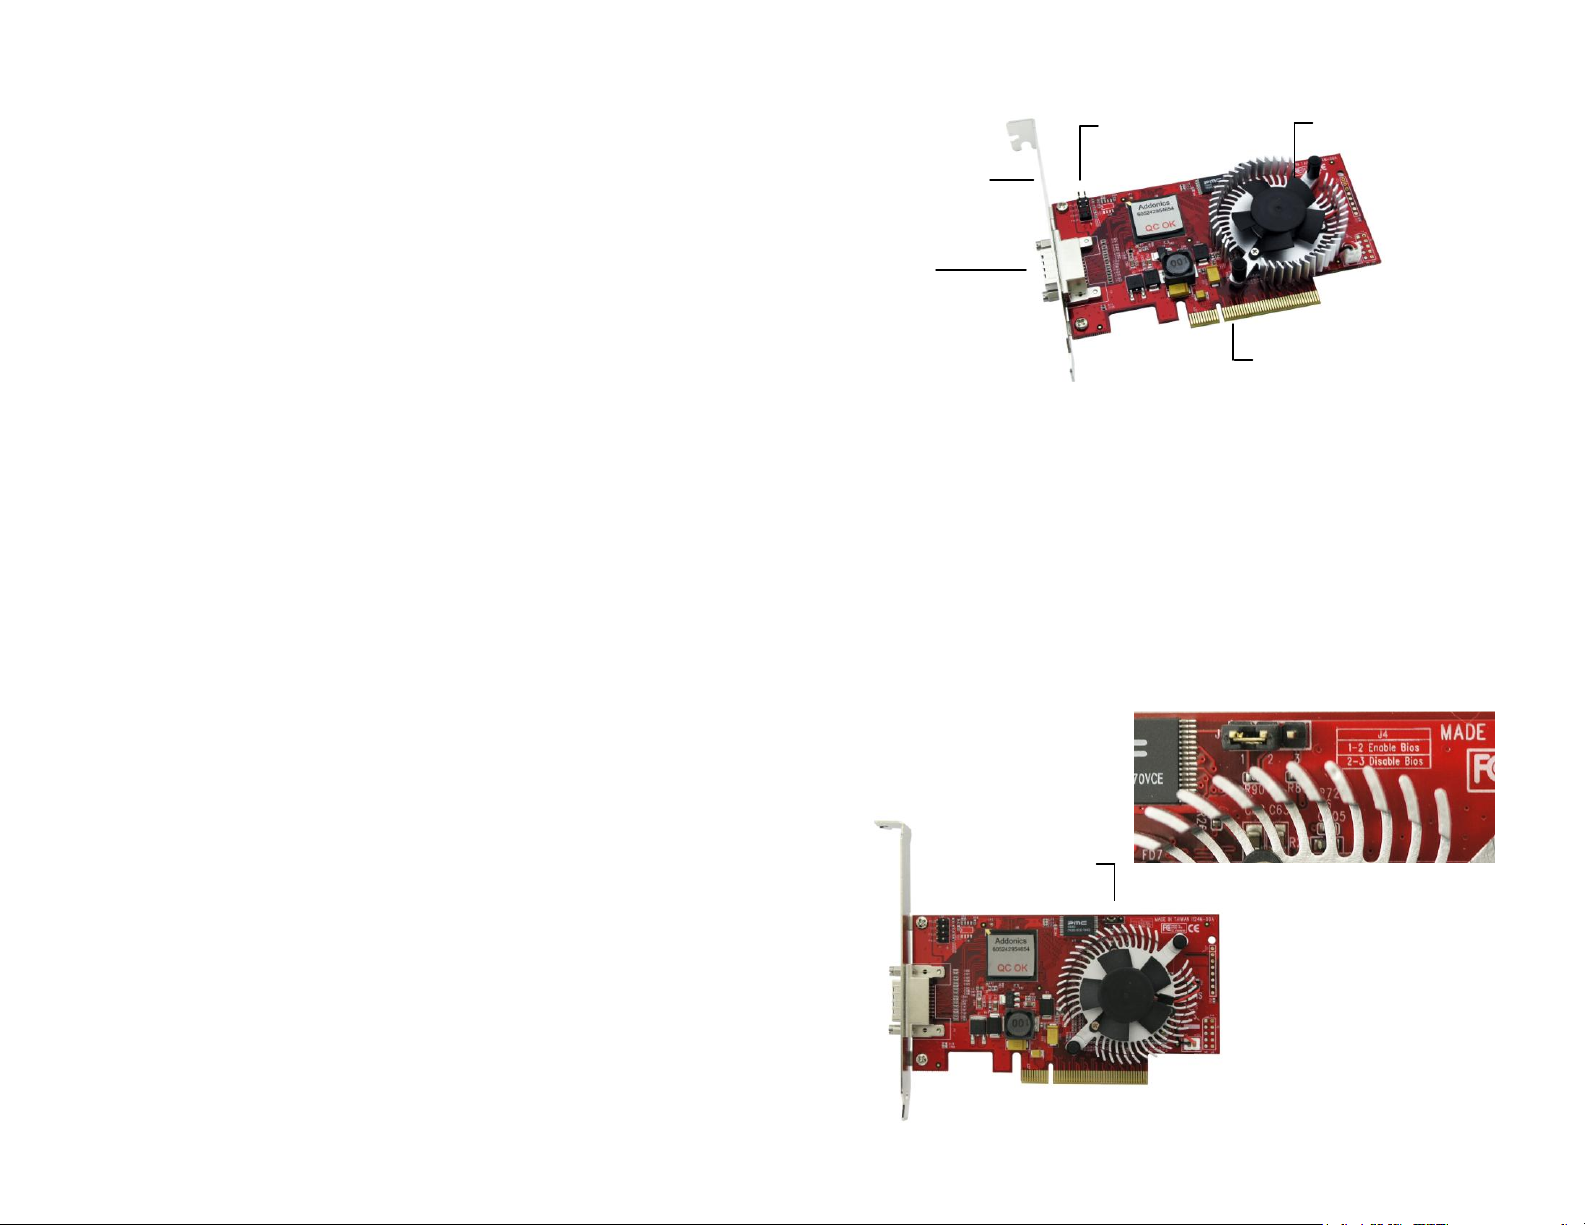
Standard height
mounting bracket
Drive activity LED
pin connections
Multilane 4x SATA
interface
PCI-Express 8x
Fan
J4
Enable / Disable BIOS
Detailed View of J4
Overview
Addonics
T E C H N O L O G I E S
Multilane 4X RAID5/JBOD PCI-E 8x Controller
ADSA3GPX8-ML
To switch between RAID and non-RAID mode
The controller card comes with jumper pins that would allow you to switch
between RAID and non-RAID mode. The RAID mode means you can create
RAID volumes using the SATARAID5 array manager. The non-RAID mode
means you can only configure individual drives.
The RAID mode uses the SATARAID5 array manager and the raid driver version.
The non-RAID mode uses the base driver.
User’s Guide
Page 2
Windows Software Installation for RAID mode
Note: Install the SATA Utilities from the CD that came with your package first
before installing the Host Controller.
A. From the CD start-up menu select SATA RAID Utilities. Select Model
#ADSA3GPX8-ML.
B. Unzip the file on your drive.
C. Click on the folder that matches your OS. Run the 3124-W-I32-
R_version.msi.
D. This will install the SATARAID5 Array Manager. This utility will allow you
configure and monitor the status of the raid volume. It will also create
and store the driver files of the controller card. The location of the driver
files is C:\Program\Silicon Image\3124-W-I32-R SATARAID5\RAID
Driver.
Hardware Installations:
1. Power OFF PC and remove its cover.
2. Select an empty PCI-E 8x slot and insert the SATA Controller.
3. Makes sure to secure the bracket with a screw.
4. Close the PC’s cover.
Windows 2000, XP, 2003 server Driver Installations
1. Turn computer ON. When Windows boots up, “A New Hardware
Found” pops on the screen and the Addonics Serial ATA PCI Host
Controller is identified.
2. At the “Add New Hardware Wizard Window, click “Next”
3. Choose “Install from a list or specific location”, and click “Next”
4. Select “Don’t Search. I will choose the driver to install” and click “Next”.
5. Click “Have Disk” then Browse the location “C:\Program\Silicon
Image\3124-W-I32-R SATARAID5\RAID Driver.”
6. If using a driver that has not been digitally signed by Microsoft, you will
be asked if you want to continue the installation. Click Continue.
7. When the new hardware wizard has finish installing the Serial ATA card.
Click “Finish” to complete the installations.
Confirming Serial ATA Driver Installation
1. Right click the My Computer icon and select properties.
2. Click Device Manager in the Menu Tree.
3. Click the “+” sign in front of SCSI controllers. Silicon Image SATA
controller should appear.
Important Note:
To do a RAID SET, you can press F4 or CTRL+S from the boot up
screen. Read and follow the instruction inside the BIOS screen.
You can also install the SATA GUI utility Under Windows to monitor
the RAID Set. It is under the Utility section of the driver disc.
Installing ADSA3GPX8-ML under Mac OSX.
Below are the instructions to install drivers for Mac OSX compatible SATA
controllers which support RAID 0, 1, 10, 5, and JBOD. An internet connection
may be required to download the latest drivers from the Addonics website.
1. Physically install the controller into the Apple computer.
PCI-Express RAID controllers can only be installed onto Mac Pro
systems. PCI-Express RAID controllers have not been thoroughly tested under
the final model of PowerMac G5 and are not guaranteed to be compatible.
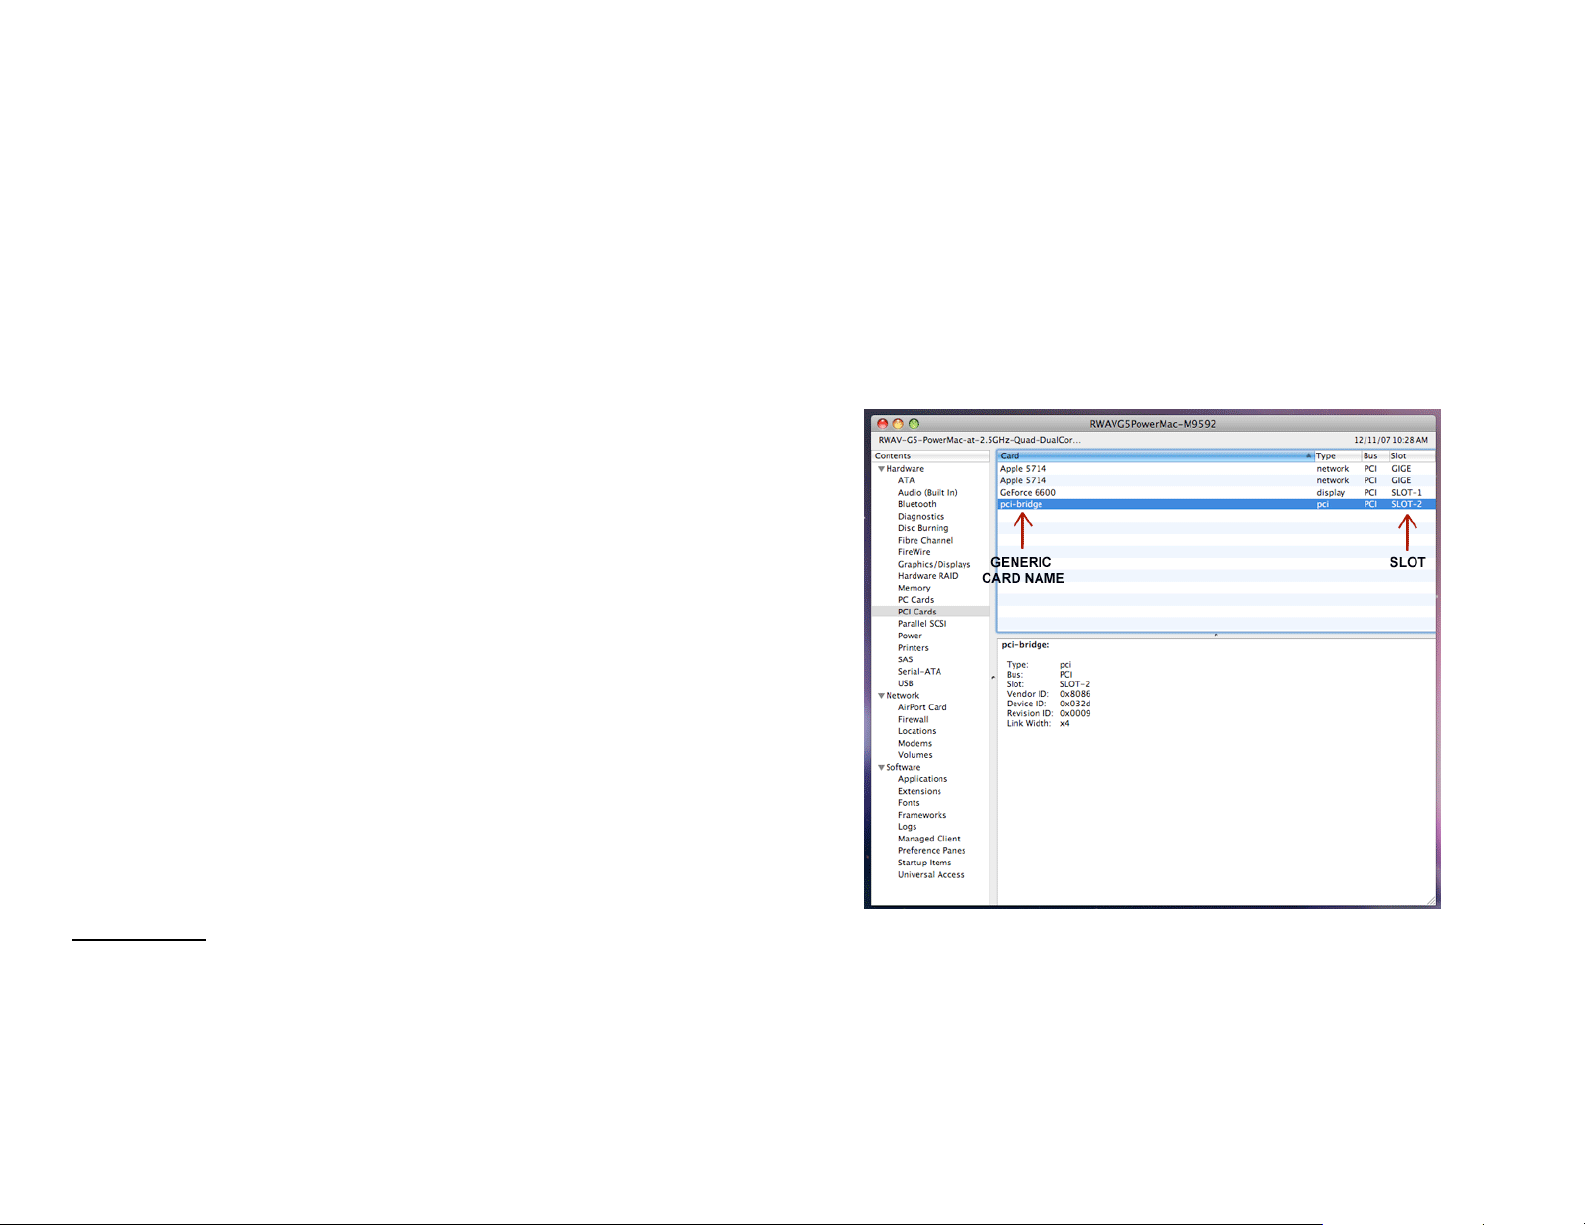
To verify that your PCI-Express controller has been correctly installed and is
recognized by the system, Enter Applications -> Utilities -> System Profiler and
click on "PCI Cards" from the selection menu at the left. A generic pci-bridge card
should be displayed on the slot where you physically installed the controller.
2. Download the latest drivers for your controller from the Addonics web site.
Page 3

3. Locate the downloaded driver and extract the contents. Double click on the
extracted installer to begin the installation process.
4. Continue through the installation process, entering in your desired settings.
When the installation process is finished, the RAID controller driver and RAID
software have been installed.
6. The Silicon Image SATARaid5 Manager has been installed at the same time
as the controller driver.
A. The new folder containing the SATARaid5 Manager can be accessed from
Applications -> Utilities -> Silicon Image.
5. Return to Applications -> Utilities -> System Profiler and check the "PCI
Cards" list to see if the controller drivers have been correctly installed.
A correctly installed PCI-Express RAID controller will display as:
pci1095,7124 for RAID controllers based on the SiI3124 chipset with RAID
firmware
Page 4

B. Within this folder, click on "SATARaid5Manager" to execute the RAID creation
and management utility.
Technical Support
If you need assistance to get your unit functioning properly, please call Addonics
Technical Support. Our technical staff will be happy to assist you, but they will
need your help to do so. Calling the technical support staff without all the proper
information can be both time consuming and frustrating. Here are some tips to
help you out:
Contact Information
Phone: 408-573-8580
Fax: 408-573-8588
Email: http://www.addonics.com/sales/query/
Internet: http://www.addonics.com
TECHNICAL SUPPORT
Phone: 408-453-6212
Hours: 8:30 am - 6:00 pm PST
Email: http://www.addonics.com/support/query/
C. For detailed instructions on creating and managing RAID volumes, read the
SATARaid5 Manager User Manual.
 Loading...