

Page 1
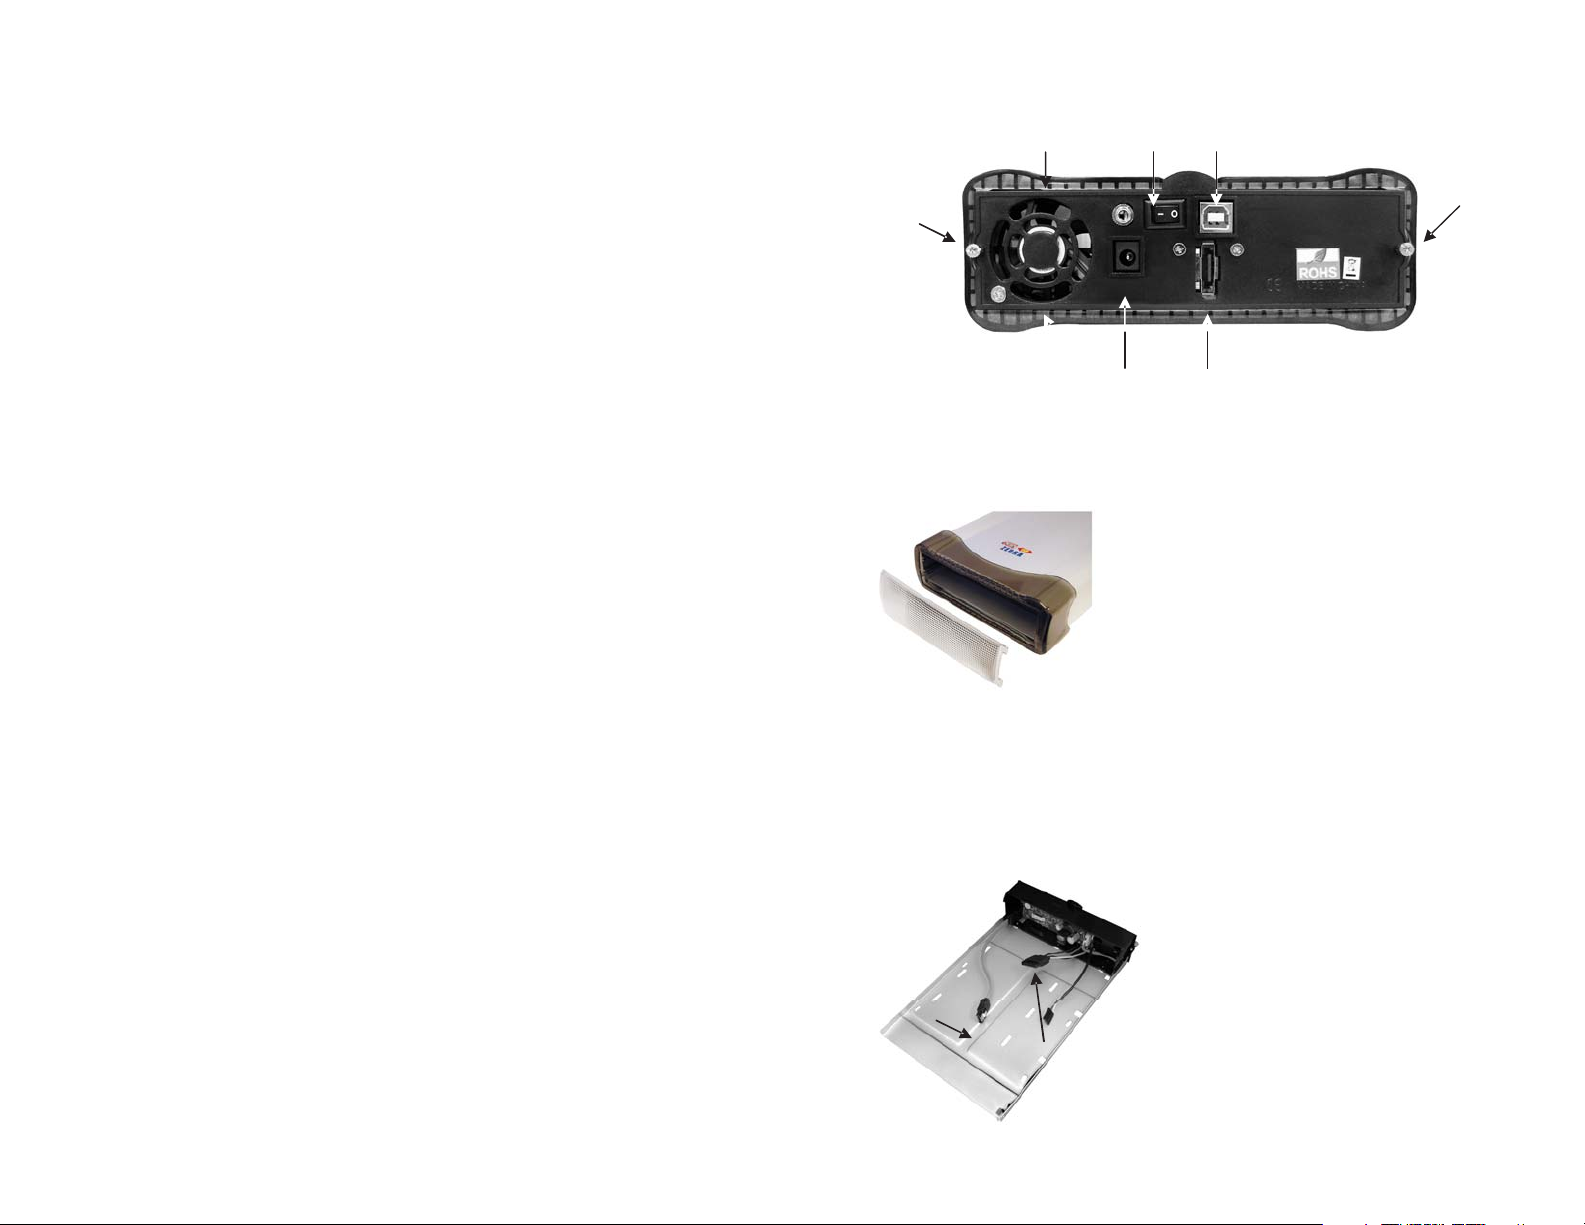
Enclosure Overview
Fan Switch USB Port
Addonics
TECHNOLOGIES
Zebra eSATA/USB Combo Drive Enclosure
Model: ZESU2CS
User’s Guide
Screw 2
Power
Connector
eSATA Port
Screw 1
Removing the front panel
You can remove the front panel of the enclosure
to access the drive drawer of the optical drive.
Step 1
Loosen the two screws from the rear panel. Pull out the interior tray from the
enclosure.
FCC Warning Statement
This equipment has been tested and found to comply with the limits for a class B digital
device pursuant to Part 15 of the FCC rules. These limits are designed to provide
reasonable protection against harmful interference in a residential installation. This
equipment generates, uses and can radiate radio frequency energy. If not installed and
used in accordance with the instructions, it may cause harmful interfer ence to radio
communications. However, there is no guarantee that interference will not occur in a
particular installation. If the equipment does cause harmful interference to radio or
television reception, which can be determined by turning the equipment on and off, the user
is encouraged to try and correct the interference by one or more of the following
suggestions.
Reorient or relocate the receiving antenna
Increase the distance between the equipment and the receiver
Connect the equipment to a different power outlet other than the one where receiver is
connected
Consult a certified television or radio technician
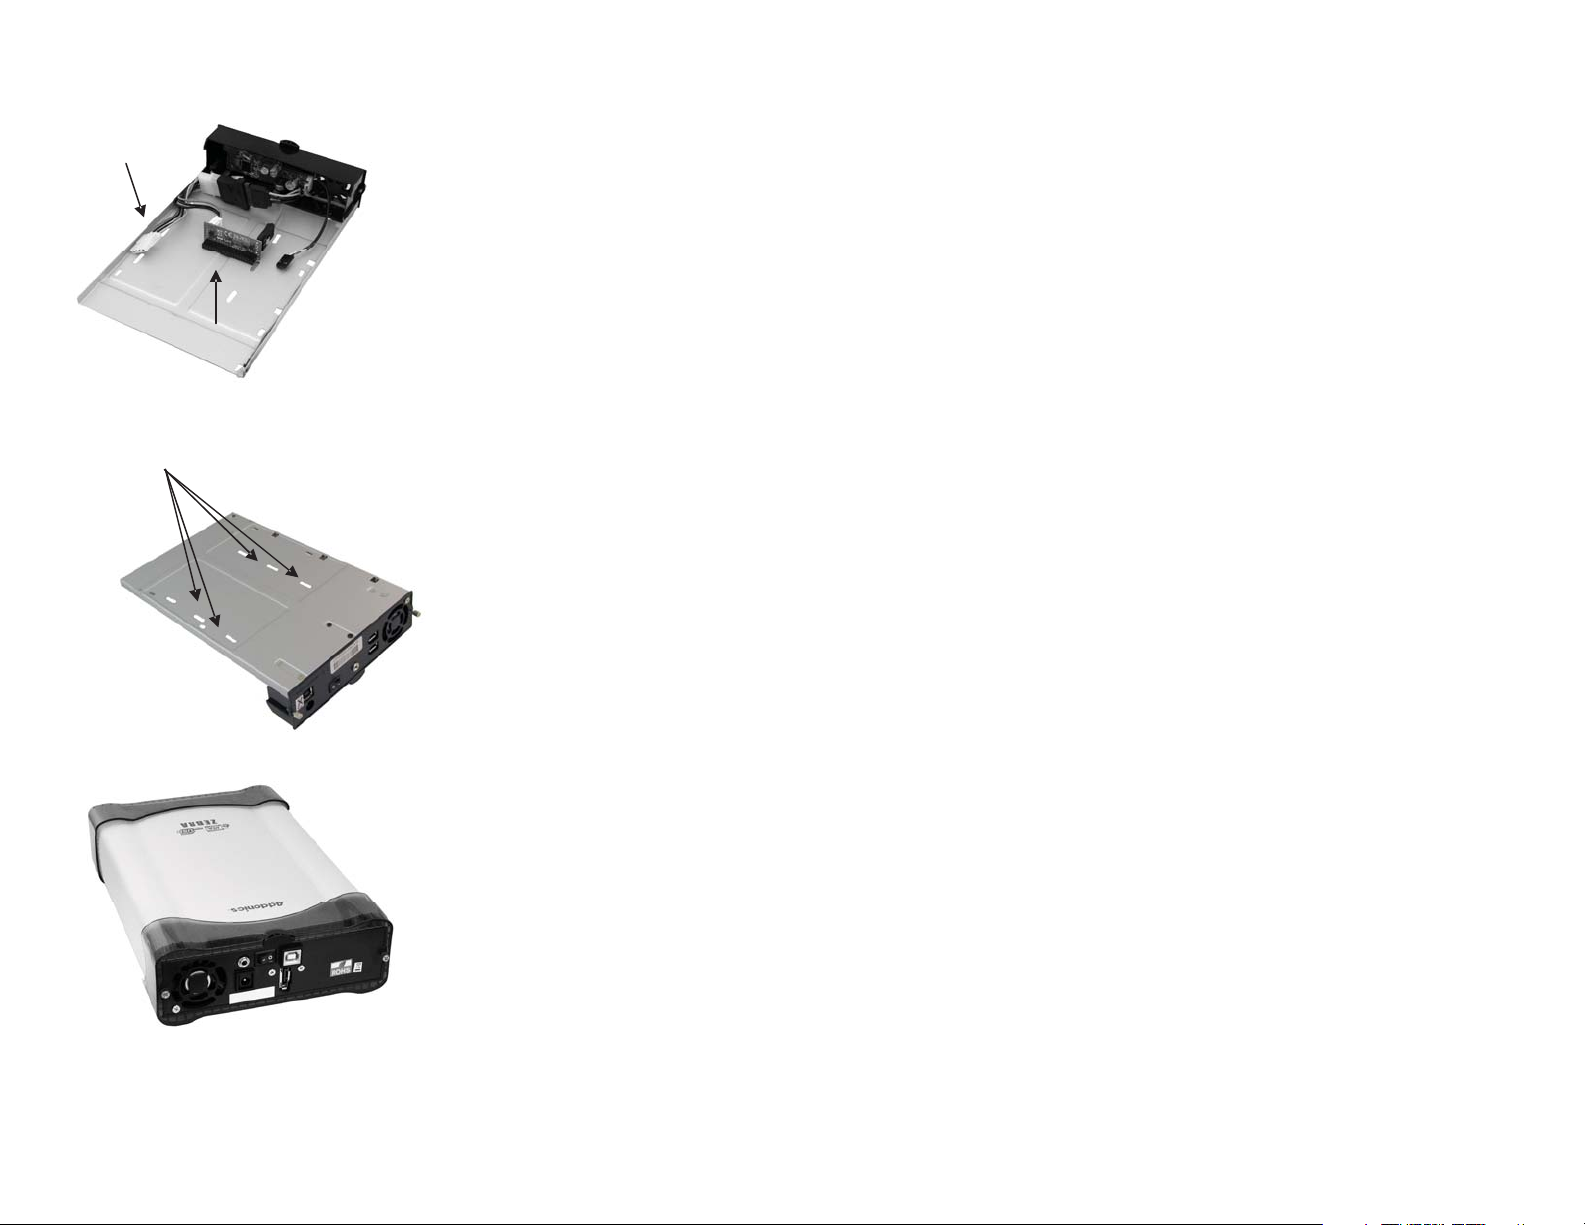
Step 2
Connect the SATA hard drive or optical drive to the SATA interface of the SATA
cable. Connect the 15-pin SATA power connector to the SATA power interface
on the hard drive.
SATA
Cable
15-Pin SATA
Power Connector
Page 2
Optional Configuration: For Connecting IDE hard drive
Technical Support
Y-Cable
Screw holes
ADSAIDE
converter
Using the SATA to IDE converter, you
can use IDE hard drives on the Zebra
enclosure
Step 3
Use the enclosed screws to
secure the hard drive to the tray.
If you need assistance to get your unit functioning properly, please call Addonics
Technical Support. Our technical staff will be happy to assist you, but they will
need your help to do so. Calling the technical support staff without all the proper
information can be both time consuming and frustrating. Here are some tips to
help you out:
MODEL NUMBER – Please have this number on hand.
SYSTEM INFORMATION – Type of computer, peripherals, etc.
OPERATING SYSTEM – What version of Windows
WHAT’S THE TROUBLE? – Give enough information
about your problem so that we can recreate and diagnose it.
FREE Software Drivers for all Addonics Technologies
Products are available 24 hours per day at the
World Wide Web Site: www.addonics.com
Contact Information
Phone: 408-573-8580
Fax: 408-573-8588
Email: http://www.addonics.com/sales/query/
Internet: http://www.addonics.com
TECHNICAL SUPPORT
Phone: 408-453-6212
Hours: 8:30 am - 6:00 pm PST
Email: http://www.addonics.com/support/query/
Step 4
After the hard drive is installed,
slide the tray back into the
enclosure and then fasten the two
screws properly.
 Loading...