

Page 1
ADDONICS TECHNOLOGIES
Model: HDUSI3TDR
Note: Make sure that the capacity of the target hard disk is
equal or larger than the source hard disk.
For example, on the label of the hard drives, it might identify both
drives as 80GB but the actual size differs. And when this type of
drives are used on the HDD duplicator, when you start
duplicating, you will receive a “Target Not Ready” error. To
resolve this issue, you need to decrease the drive size of the
source drive. To do this, navigate to: 6.Setup > 6.2Copy Size and
use the button arrows to decrease the drive size of the source
drive by increments of 1%.
I. Installing drive into the HDD Duplicator
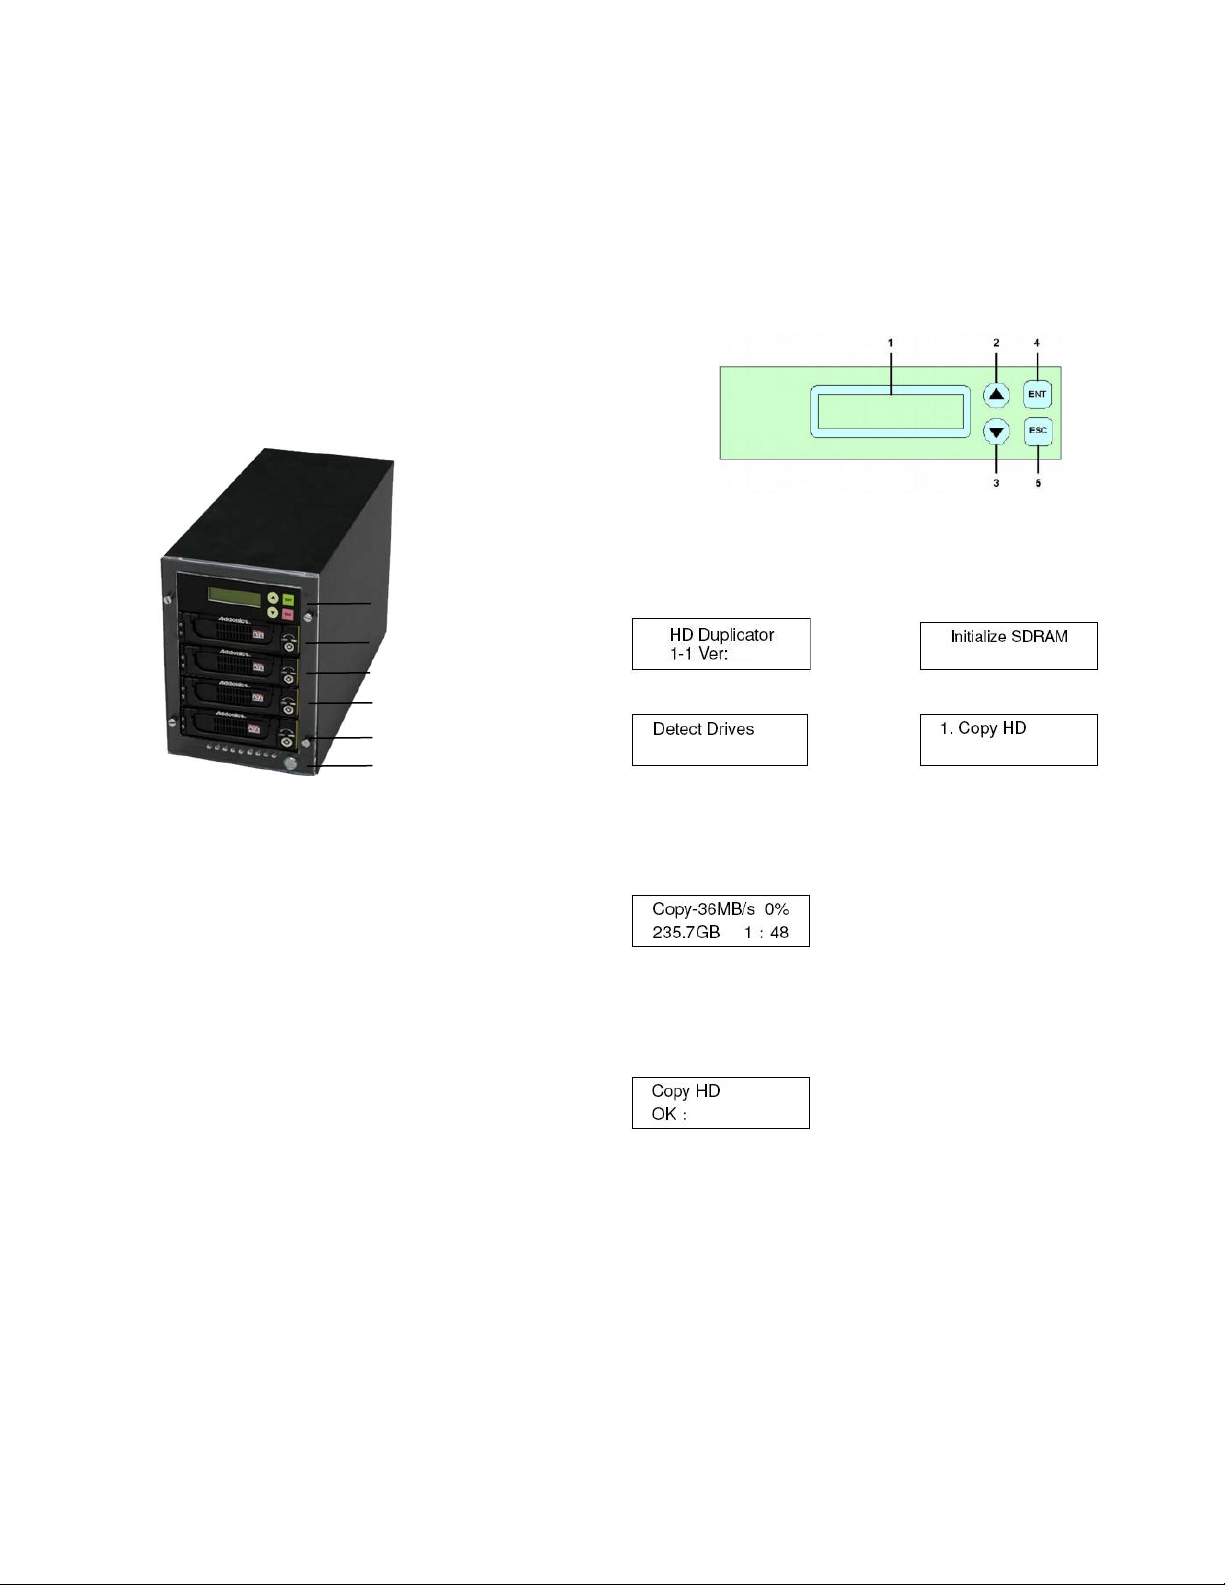
III. The Duplicator Panel
There are four buttons and an LCD on the panel of HDD
Duplicator.
1 – LCD shows a function or a message.
2 – it is used to scroll up function menus.
3 – it is used to scroll down function menus.
4 – it is used to execute a function.
5 – it is used to cancel a function.
Duplicator Panel
Source Drive Bay
Target Drive Bay1
Target Drive Bay2
Target Drive Bay3
Power Switch
For installing a hard drive on the various enclosures that
come with the HDD duplicator, refer to the bundled
enclosure installation guides.
Step 1
Once the hard drive is installed on the drive enclosure, slide in
the Source drive into the drive bay. Push down the handle and
using the key provided, turn the key lock to the Lock position.
This will secure the drive and turn on the power to the hard drive.
Step 2
Slide in the Target drive into the drive bay. Push down the
handle and using the key provided, turn the key lock to the Lock
position. This will secure the drive and turn on the power to the
hard drive.
II. Connecting the power cable and powering on
a. Connect the power cord provided from the wall outlet to the
back of the tower.
b. A main power switch is located at the back of the tower. Turn
the switch on. Another auxiliary switch is located on the front
of the tower.
c. Push the auxiliar y switch butt on to turn on the HDD
duplicator.
IV. Duplicating a drive
When the duplicator powers on, it initializes and goes through the
steps below
Shows the firmware version Initialize SDRAM's status..
Detect Drives' status. Shows the first function:
Copy HDD copies data directly from the source hard disk to the
target hard disk.
Press ENT button to begin copy. The system will auto-detect the
hard disks and show the following info on the LCD.
The LCD will show the following info during the copying process:
remaining time, completed percentage. The copy speed, capacity
and time will vary depending on the source hard disk. Once the
copying process is complete the LCD will display the following
results.
The complete user manual of the HDD Duplicator Panel can
found in the Driver Disk under User Guides or can be
downloaded from
http://www.addonics.com/support/user_guides/
Technical Support
Contact Information
Phone: 408-573-8580
Fax: 408-573-8588
Email: http://www.addonics.com/sales/query/
Internet: http://www.addonics.com
TECHNICAL SUPPORT
Phone: 408-453-6212
Hours: 8:30 am - 6:00 pm PST
Email: http://www.addonics.com/support/query/
 Loading...