

Page 1
ADDONICS TECHNOLOGIES
Model: ADSSSAI
Installation Guide
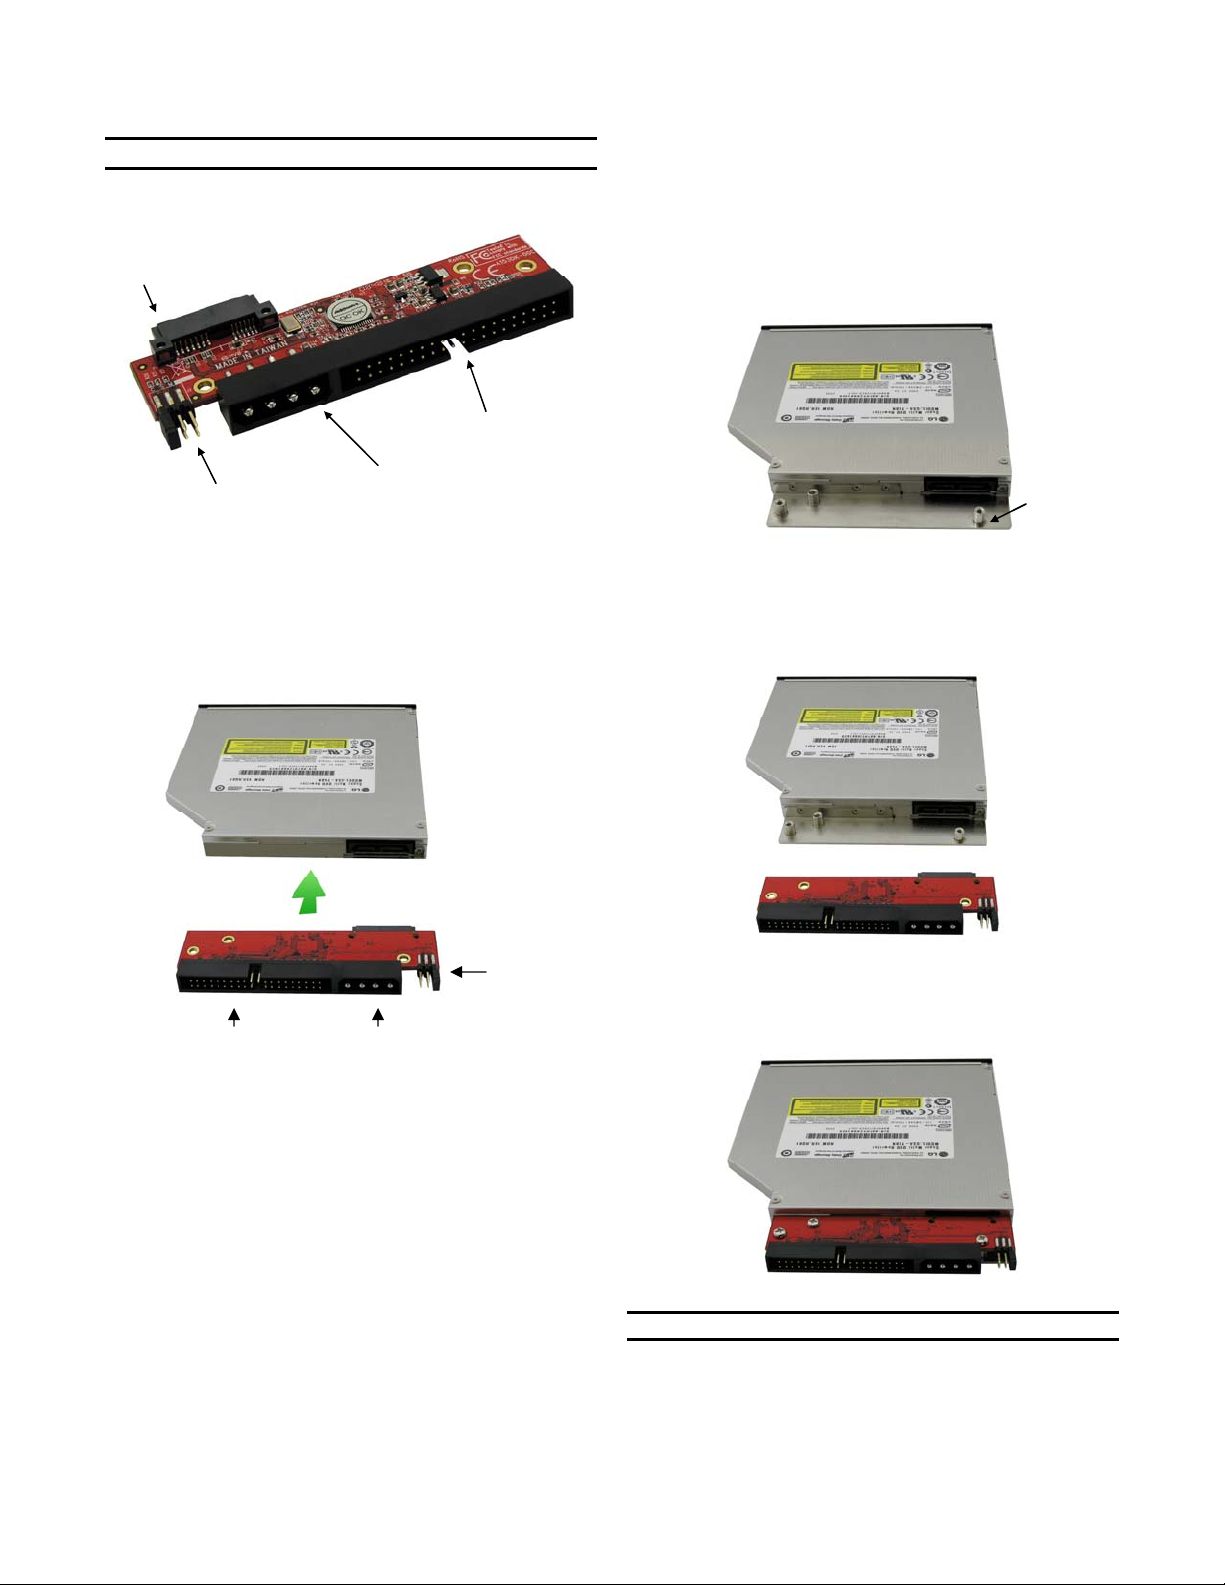
Slim SATA
connection
40-pin standard IDE
connection
Cable Select, Slave, Master
(Labeled on PCB as C S M)
Installation Instructions
4-pin Molex power
connection
1. Attach the slim SATA to IDE Converter (ADSSSAI) onto
a slim SATA optical drive connector.
Instructions to install mounting bracket (ADSSSAIBK)
(this bracket is an optional accessory)
1. Attach the mounting bracket onto a slim SATA optical
drive using the four smaller flat head screws.
Mounting bracket
(ADSSSAIBK)
2. Insert the slim SATA to IDE Converter onto the slim
SATA optical drive, aligning the three screw holes from
the Converter and the mounting bracket.
IDE position
jumper settings
are configured
Attach 40-pin IDE
ribbon cable here
Attach 4-pin Molex
power source here
here
2. Attach a 40-pin IDE ribbon cable onto the ADSSSAI for
data connection, and a 4-pin Molex power cable to
power the unit.
3. Configure the IDE position jumper located besides the
4-pin Molex power depending on its position on the IDE
ribbon cable.
”C” marked on the board stands for “Cable Select”
”S” marked on the board stands for “Slave”
”M” marked on the board stands for “Master”
3. Secure the Converter onto the mounting bracket using
the three larger round head screws.
TECHNICAL SUPPORT
Email: http://www.addonics.com/sales/query/
Internet: http://www.addonics.com
Technical Support (8:30 am to 6:00 pm PST)
Phone: 408 453-6212
Email: http://www.addonics.com/support/query/
 Loading...