

Addon WBR9400 Quick Install Guide
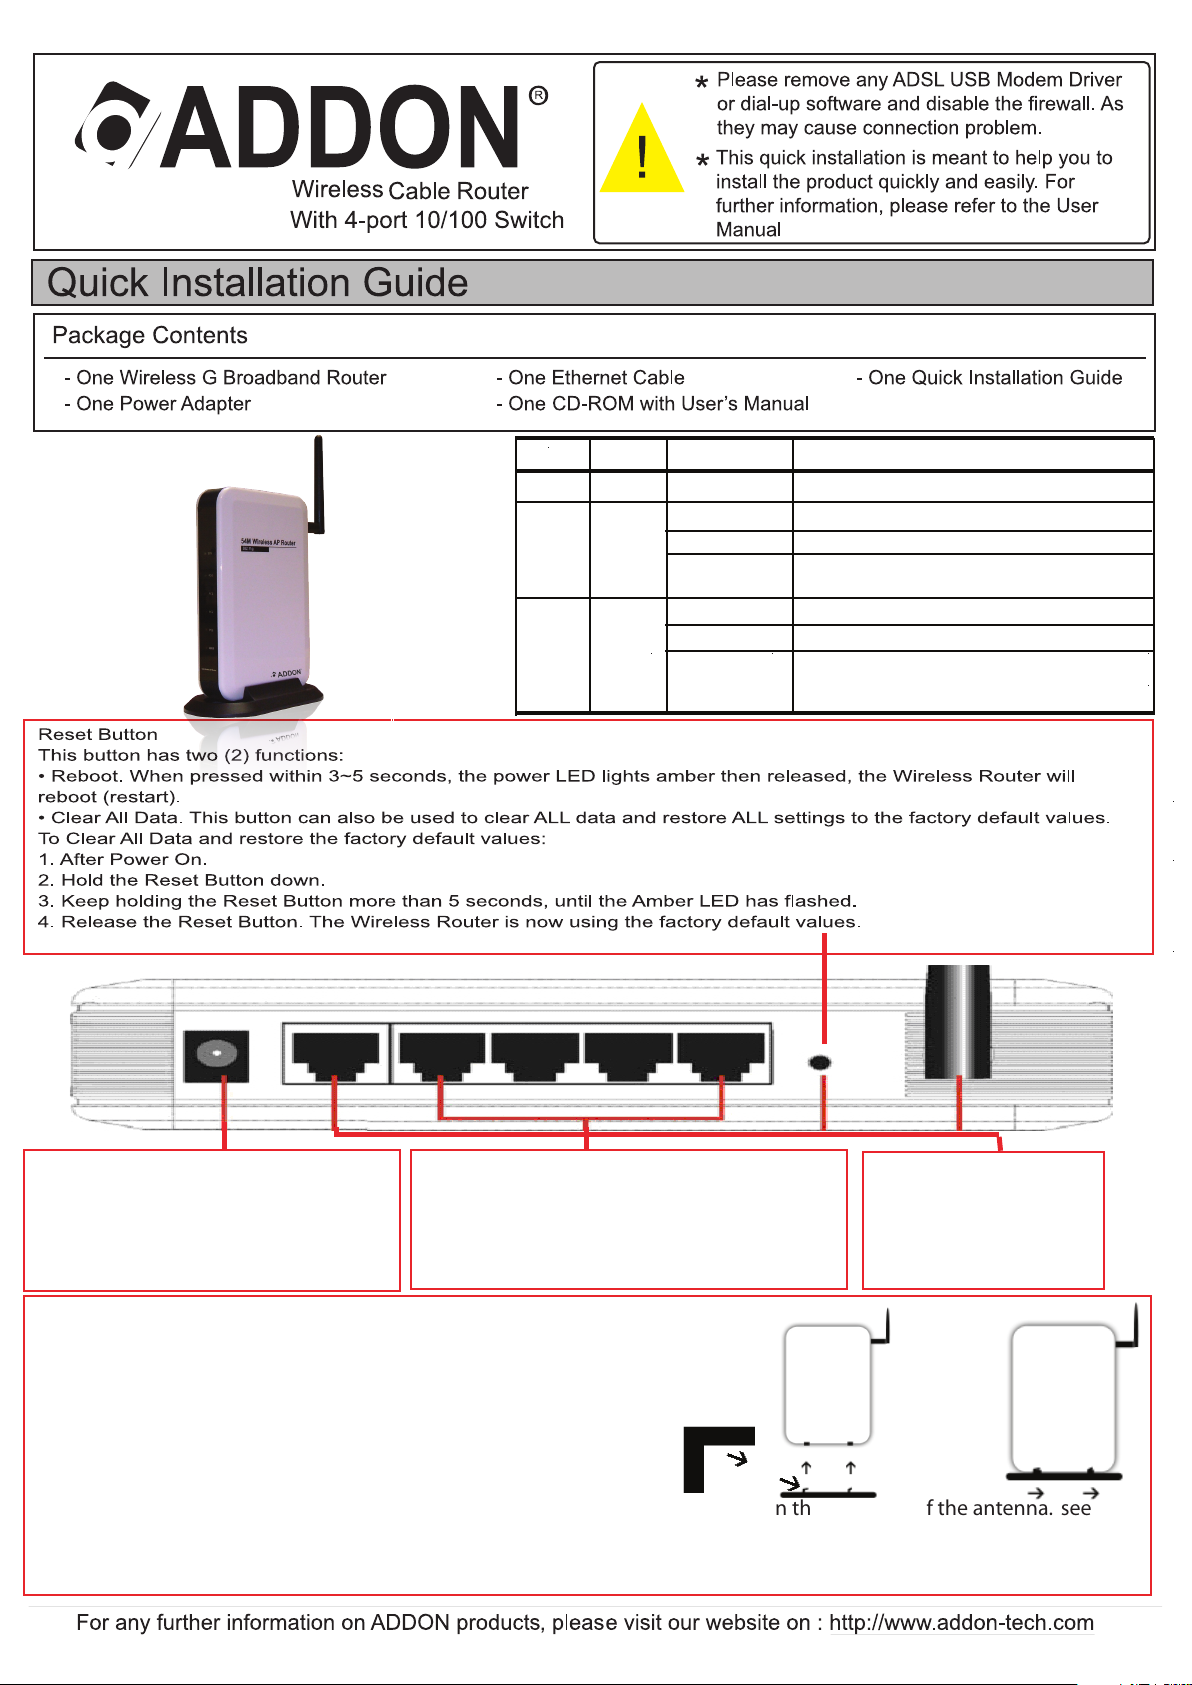
Number LED
Light Status Description
1 SYS
ON
POWER/CPU/WLAN ACT
.
2 PC(1-4) ON
PC is connected
Off
No PC connection
Flashing
LAN port has Activity (ACT), data being
sent
3 WAN ON
WAN is connected
Off
No WAN connection
Flashing
WAN port has Activity (ACT), data being
sent
ADD-WBR9400
Power port
Connect the supplied power adapter
here. (Warning: Only use the power
adapter provided, as use of others may
cause damage the hardware)
Installing the Stand
Step 1 | Prepare the stand and router.
Step 2 | Hold stand with hooks facing the direction of the antenna. see figure 1.
Step 3 | Insert hooks in the holes at the bottom of the router and slide the stand in the direction of the antenna. see
figure 2.
(The stand will click to indicate that it’s secure in place)
10/100 BaseT LAN port
Use standard LAN cables (RJ45 Connectors) to
connect your PCs to these ports. If required, any
port can be connected to another hub.
Figure 1
Internet port (10/100 BaseT)
Connect the DSL or Cable
modem here. if your modem
came with a cable, use the
supplied cable. Otherwise use a
standard LAN cable.
Figure 2
SYS
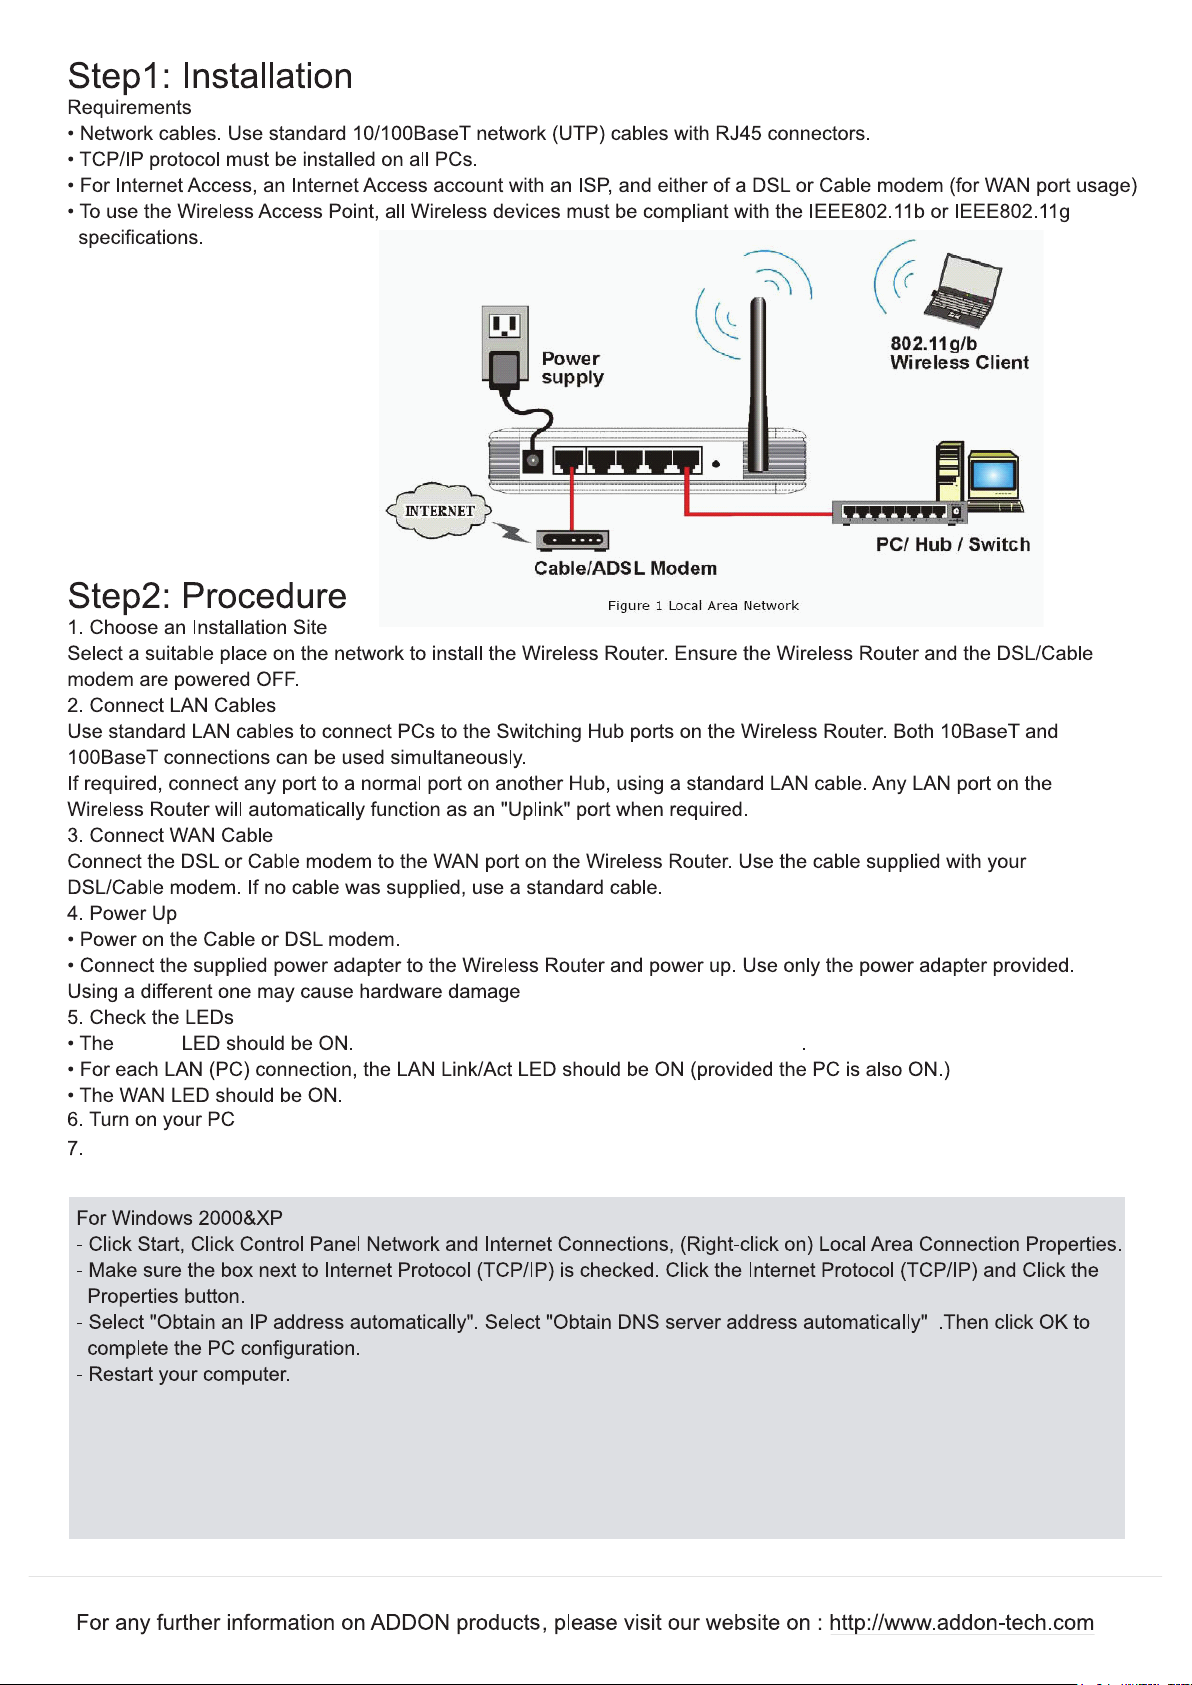
Your computer must be set to obtain an IP address automatically.
For Windows Vista
- Click Start, Click Control Panel -> Network and Sharing Centre -> Manage Network connections.
- Right click on Local Area Connection and click Properties.
- Double click Internet Protocol Version 4.
- Select “Obtain an IP address automatically” and select “Obtain DNS server address automatically”. Then click OK
 Loading...