

Page 1

© Adder Technology Limited February 22
User Manual
Secure KVM Switch API
Adder Technology Limited
Part No. MAN-000022
Release 1.0
Registered Address:
Adder Technology Limited
Saxon Way,
Bar Hill, Cambridge
CB23 8SL, UK
Adder Corporation
24 Henry Graf Road
Newburyport,
MA 01950
USA
Adder Technology
(Asia Pacific) Pte. Ltd.,
8 Burn Road
#04-10 Trivex,
Singapore 369977
Page 2
Secure KVM Switch API
MAN-000022 Page 2
Introduction
This guide explains how to use RS-232 to remotely control an Adder Secure KVM switch (AVS-2114,
AVS-2214, AVS-4114, AVS-4214), flexi-switch (AVS-4128) and multi-viewer (AVS-1124).
To control a switch using RS232, the user needs to connect a controlling device to the switch’s RCU port.
The controlling device can be a PC or any custom device with RS-232 capability.
Remote controlling means performing actions that users could otherwise do only using the front panel,
including:
• Switching channels
• Audio hold
• Selecting channels to display on left and right monitors (AVS-4128 only)
• Switching KM control between left and right channels (AVS-4128 only)
• Selecting preset layouts and updating window parameters (AVS-1124 only)
Installation
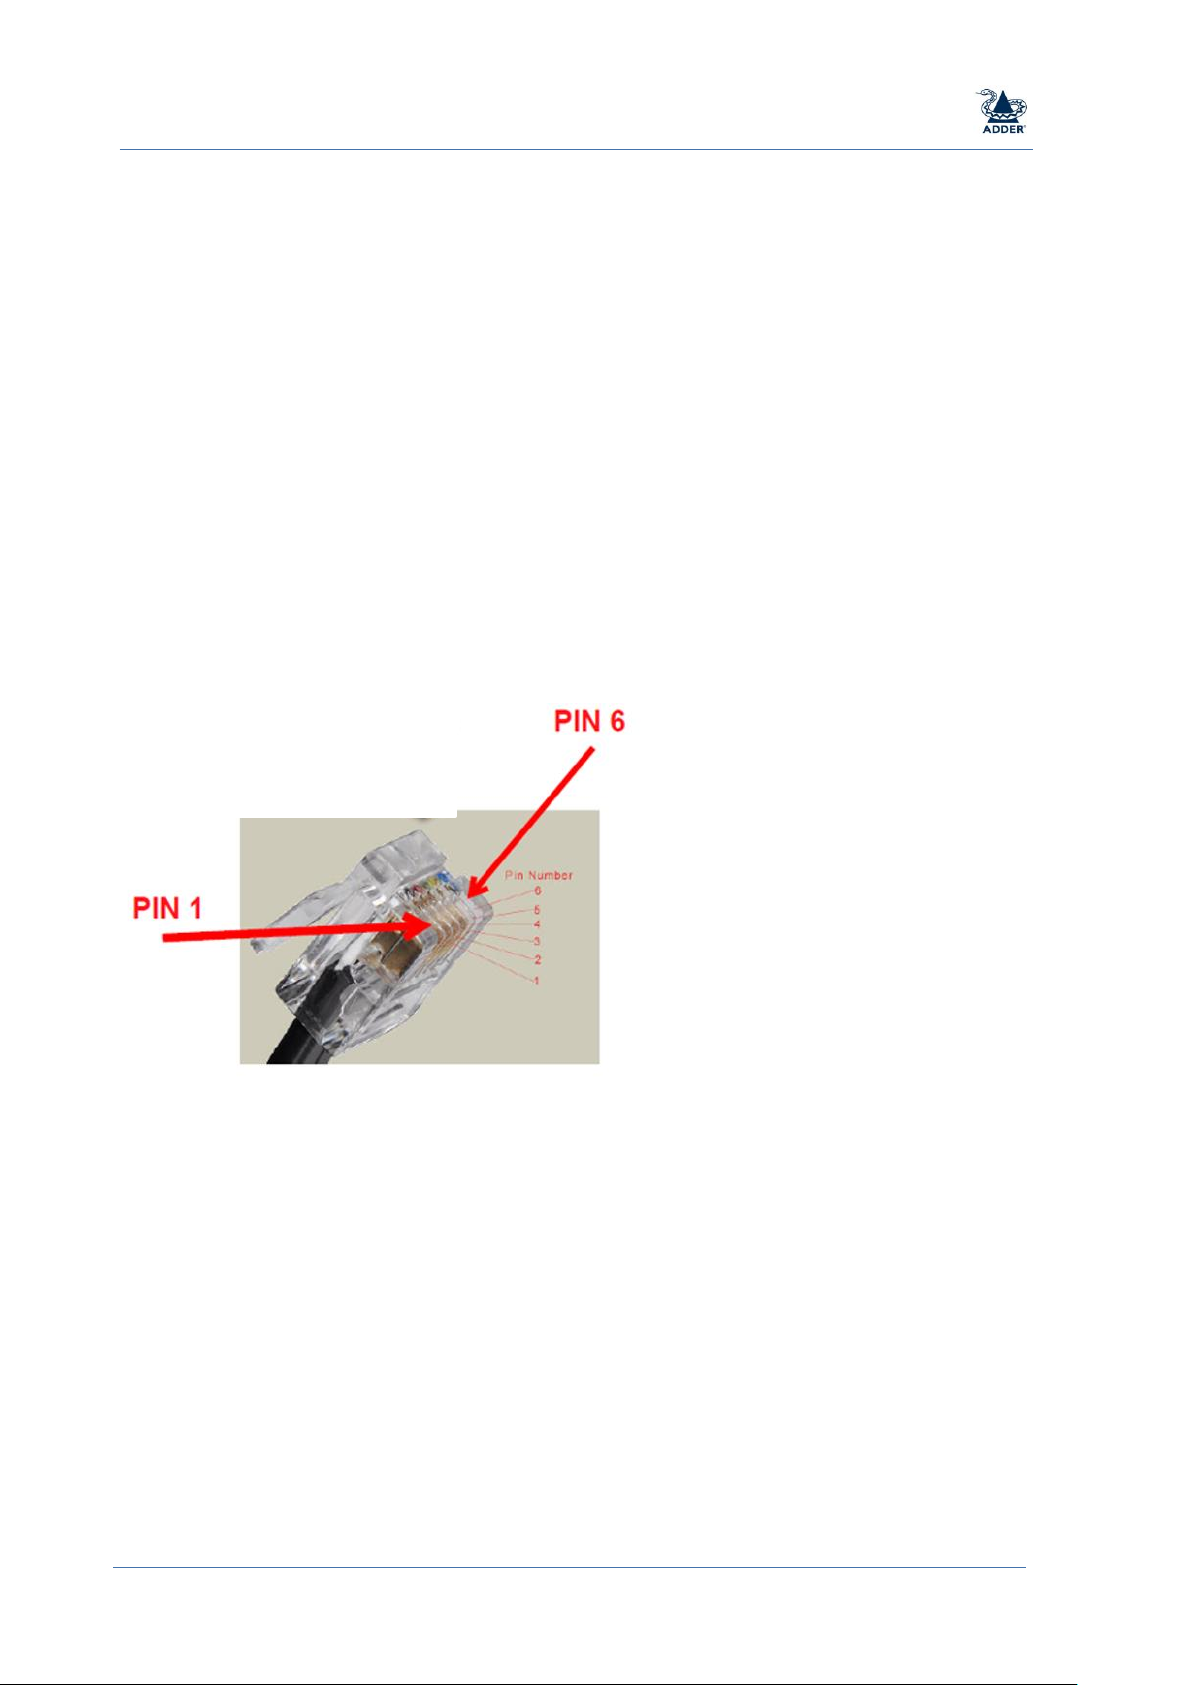
This procedure shows how to connect a switch to a remote-control device. A suitable RS232 cable will be
required with an RJ12 connector to plug into the RCU port with the pinout shown below:
Pinout for the RDU port:
• Pin 1: 5V
• Pin 2: Not connected
• Pin 3: Not Connected
• Pin 4: GND
• Pin 5: RX
• Pin 6: TX
Few modern PCs have an RS232 port, so it may be necessary to use a USB or Ethernet adapter.
Operation
Configuring Example Using the PuTTY open-source serial console utility. This procedure demonstrates
how to switch channels via RS-232 using a remote control Windows PC.
Pre-configuration
1. Install PuTTY on the remote computer.
2. Connect a serial cable from the PC’s USB port to the switch’s RCU port.
Page 3
Secure KVM Switch API
MAN-000022 Page 3
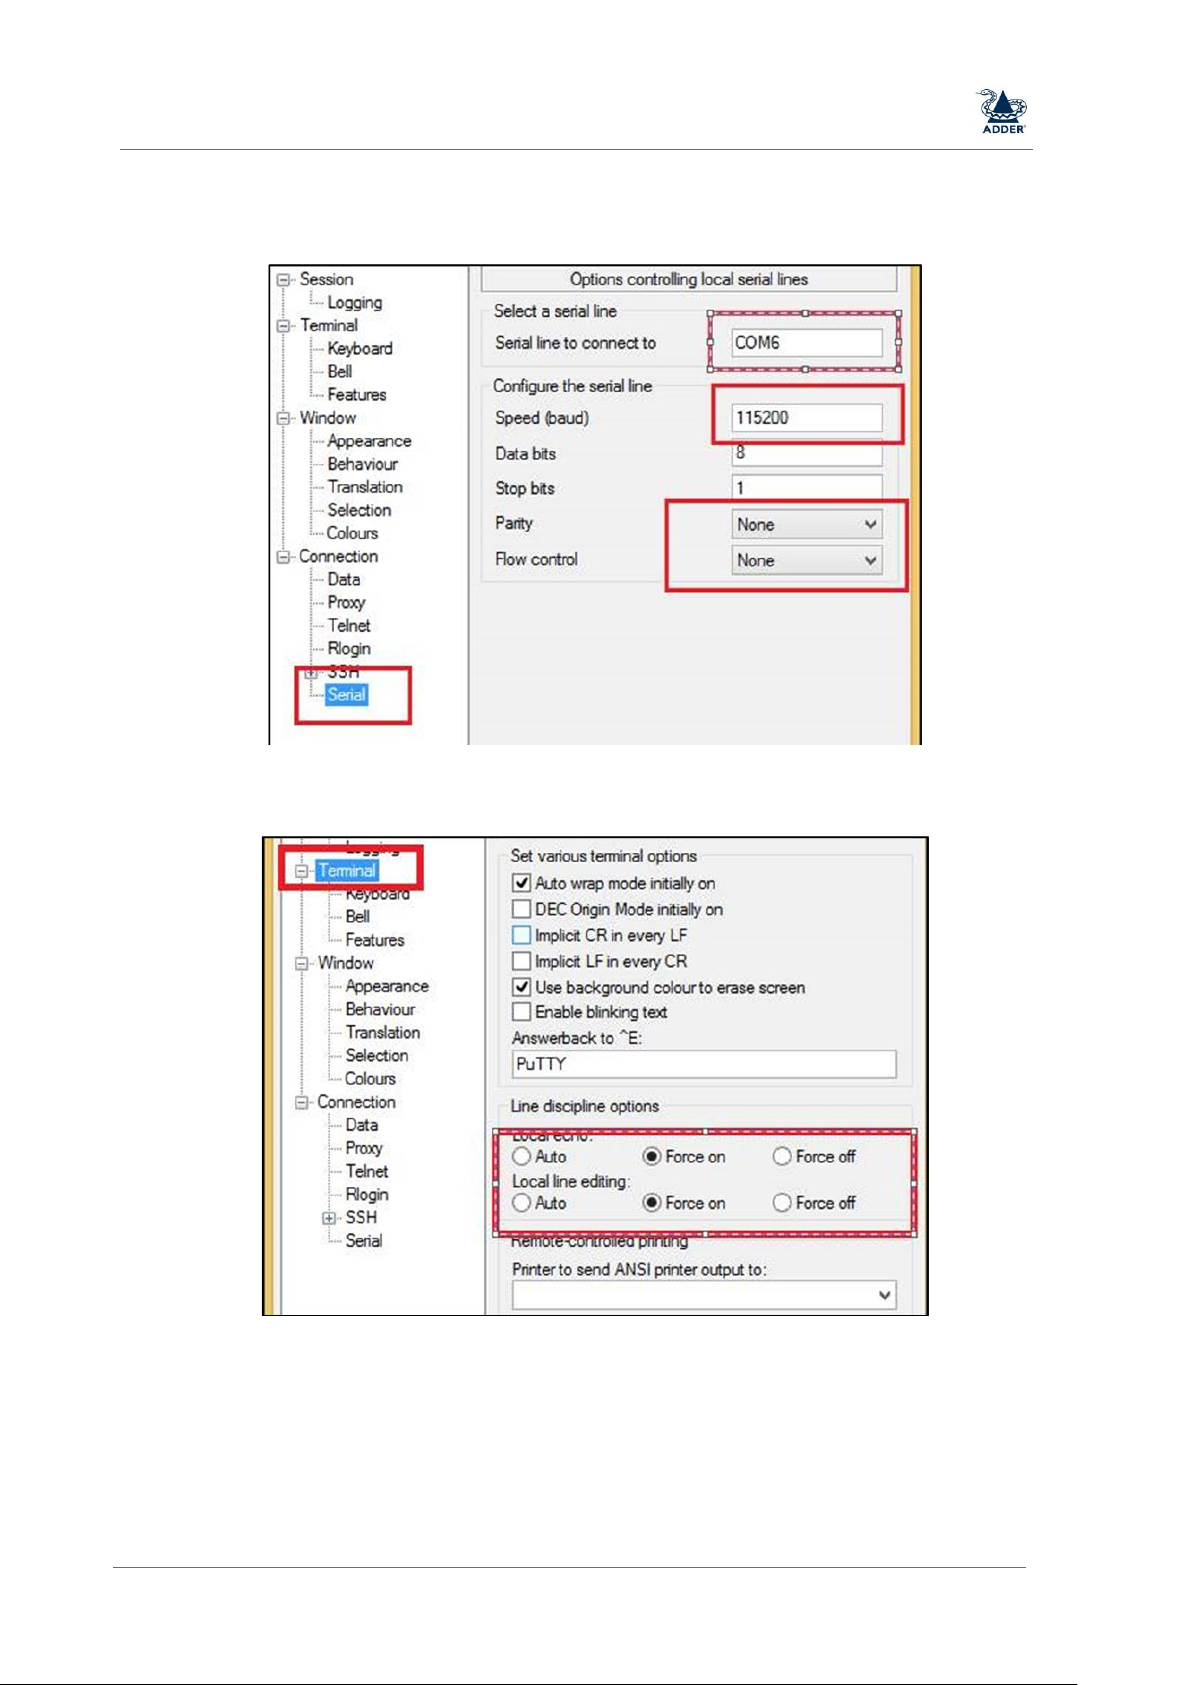
3. Run the PuTTY utility.
4. Configure the Serial, Terminal and Session settings, as per figures 1 to 3
Figure 1: PuTTY Serial Settings
Figure 2: PuTTY Terminal Settings
Page 4

Secure KVM Switch API
MAN-000022 Page 4
Figure 3: PuTTY Session Settings
Note: At this point, the device starts sending Keep-Alive events, every five seconds.
Keep-Alive events are transmitted by the switch periodically to communicate the current configuration.
For example, to switch a KVM to Channel 4, the user types: #AFP_ALIVE F7
Then, every five seconds, the device sends the following keep-alive event: 00@alive fffffff7 as shown in
Figure 4.
Figure 4: Keep-Alive Events
The interval time of keep-alive events can be changed, using the #ANATA command followed by a time
period operand in units of 0.1 second. Thus:
• #ANATA 1 gives an interval of 0.1 seconds
• #ANATA 30 gives an interval of 3 seconds
Page 5

Secure KVM Switch API
MAN-000022 Page 5
KVM Switches
To switch channels, enter the #AFP-ALIVE command followed by a channel number operand. For
example, to switch to channel 3, enter:
#AFP_ALIVE FB
Channel #
Operand
1
FE 2 FD 3 FB
4
F7
5
EF 6 DF
7
BF
8
7F
Figure 5: KVM Switch Channel Operands
To toggle the audio hold button, enter the command #AUDFREEZE 1
Flexi-Switch
To switch channels, enter the #AFP-ALIVE command followed by a left/right side and channel number
operand. For example, to switch to channel 3 on the left monitor, enter:
#AFP_ALIVE FFFB
Left Side
Right Side
Channel #
Operand
Channel #
Operand
1
FFFE
1
FEFF
2
FFFD
2
FDFF
3
FFFB
3
FBFF
4
FFF7
4
F7FF
5
FFEF
5
EFFF
6
FFDF
6
DFFF
7
FFBF
7
BFFF
8
FF7F
8
7FFF
Figure 6: Flexi-switch Channel Operands
Other commands:
• Toggle the audio hold button: #AUDFREEZE 1
• Toggle KM focus between left and right sides
o Left: #AFP_ALIVE FEFFFF
o Right: #AFP_ALIVE FDFFFF
Multi-Viewer
Command Structure
The command structure is comprised of the following 4 fields:
<pre-amble> <command> <operand1> <operand2>
Page 6

Secure KVM Switch API
MAN-000022 Page 6
Where:
• There is a space between each field
• The pre-amble is either #ANATL or #ANATR, where:
o #ANATL equals the key sequence Left CTRL | Left CTRL
o #ANATR equals the key sequence Right CTRL | Right CTRL
• Commands require 0, 1 or 2 operands
• Command success: Upon successful command execution, the device returns the output:
command + OK
• Command failure: Upon failure, the device returns the output: command + Error Message
• To initiate a new serial connection, enter #ANATF 1
Command List
The command is a translation of the keyboard hotkey listed in an Appendix of the Multi-Viewer User
Manual (MAN-000007). Example translations are:
Description
Hotkey
API Command
Load preset #3
Left Ctrl | Left Ctrl | F3
#ANATL F3
Switch to channel #4
Left Ctrl | Left Ctrl | 4
#ANATL 4
Maximize active channel
to full screen
Left Ctrl | Left Ctrl | F
#ANATL F
Figure 7: Example commands
The most common commands are likely to be loading a preset and positioning and resizing windows on
the display. The general format of the command to move and resize a window is:
#ANATL F11 END <Channel> <Operation> <Location>
Where:
<Channel> is 1 to 4
<Operation> is:
1. Window top left X location (0 to 100%)
2. Window top left Y location (0 to 100%)
3. Window X extent as percentage of total X width
4. Window Y extent as percentage of total Y height
5. X offset (the location of the window compared to the full image size when bigger).
6. Y offset (the location of the window compared to the full image size when bigger).
7. X scaling as a percentage
8. Y scaling as a precentage
<Percent> is a 4 digit number in increments of 0.01%
Note that where dual monitors are used in Extend mode, the percentages relate to the total display size.
For example, to set the window for channel 1 to occupy the 4th quadrant:
Description
API Command
Set the window top left X position at half display
#ANATL F11 END 1 1 5000
Set the window top left X position at half display
#ANATL F11 END 1 2 5000
Set window X extent to half screen
#ANATL F11 END 1 3 5000
Set window Y extent to half screen
#ANATL F11 END 1 4 5000
Figure 8: Set Channel 1 to 4th quadrant (single monitor)
Page 7

Secure KVM Switch API
MAN-000022 Page 7
Note that the commands change slightly when using dual side by side monitors:
Description
API Command
Set the window top left X position at half display
#ANATL F11 END 1 1 2500
Set the window top left X position at half display
#ANATL F11 END 1 2 5000
Set window X extent to half screen
#ANATL F11 END 1 3 2500
Set window Y extent to half screen
#ANATL F11 END 1 4 5000
Figure 9: Set Channel 1 to 4th quadrant of left monitor
There is one command that doesn’t adhere to the aforementioned pattern, Audio Hold. To toggle the
audio hold button, enter the command:
#AUDFREEZE 1
 Loading...