

Page 1

Cuda 12000 IP Access Switch
CLI-based Administration Guide
Release 3.0
ART NO. 780-000052-00
P
P
UBLISHED SEPTEMBER 2001
http://www.adc.com
Page 2

Page 3

ADC Telecommunications, Inc.
8 Technology Drive
Westborough, MA 01581
ADC Telecommunications, Inc. (herein referred to as “ADC”) may revise this manual at any time without notice.
All statements, technical information, and recommendations contained herein are believed to be accurate and
reliable at the time of publication but are presented without any warranty of any kind, express or implied,
(including the warranties of merchantability and fitness and against infringement or interferrence with your
enjoyment of the information) and you are solely responsible for your use of this manual with any equipment
or software described herein.
This manual (in whole or in part, including all files, data, documentation, and digital and printed copies made
therefrom) is protected by United States copyright laws, international treaties and all other applicable national
or international laws. With the exception of materials printed for use by a user who is authorized by separate
license from ADC, this manual may not, in whole or part, be modified, excerpted, copied, photocopied,
translated, or reduced to any electronic medium or machine readable form, without ADC’s written consent
obtained prior thereto.
The CUDA 12000 is listed to UL 1950 Third Edition and CAN/CSA-C22.2 No. 950-95 Third Edition compliance.
The following information is for compliance by Class A devices with FCC regulations: the equipment described
in this manual has been tested and found to comply with the limits for a Class A digital device, pursuant to part
15 of the FCC regulations. These limits are designed to provide reasonable protection against harmful
interference when the equipment is operated in a commercial environment. This equipment generates, uses,
and can radiate radio-frequency energy and, if not installed and used in accordance with the instruction
manual, may cause harmful interference to radio communications. Operation of this equipment in a residential
area is likely to cause harmful interference, in which case you will be required to correct the interference at your
own expense.
You can determine whether your equipment is causing interference by turning it off. If the interference stops, it
was probably caused by the equipment or one of its peripheral devices. If the equipment causes interference to
radio or television reception, try to correct the interference by using one or more of the following methods.
■ Turn television or radio antenna until the interference stops.
■ Move equipment to one side or the other of the television or radio.
■ Move equipment farther away from the television or radio.
■ Plug equipment into an outlet that is on a different circuit from the television or radio. (That is, make
certain the equipment and the television or radio are on circuits controlled by different circuit breakers or
fuses.)
Modifications to this equipment that are not authorized by ADC could void the FCC certification and UL
approval and negate your authority to operate the equipment.
This manual is provided by ADC on an ”AS IS, WITH ALL FAULTS” basis, without any representation or
warranty of any kind, either express or implied, including without limitation any representations or
endorsements regarding use of, the results of, or performance of the equipment or software, its
appropriateness, accuracy, reliability, or correctness. You assume the entire risk as to the use of this
manual. ADC does not assume liability for the use of this manual beyond its original purchase price.
In no event will ADC be liable for additional direct or indirect damages including any lost profits, lost
savings, lost revenue or other incidental or consequential damages arising from any defects, or the
use or inability to use this manual or the equipment or software described herein, even if ADC has
been advised of the possibility of such damages.
Cuda 12000, MeshFlow, CudaView, FastFlow Broadband Provisioning Manager and CableOnce are trademarks
of ADC Telecommunications, Inc. CableLabs® is a registered trademark of Cable Television Laboratories, Inc.
Java® is a registered trademark of Sun Microsystems, Inc. in the United States and other countries. Jini™ is a
trademark of Sun Microsystems, Inc. in the United States and other countries.
The Cuda 12000 includes RSA BSAFE cryptographic or security protocol software from RSA security. The Cuda
12000 contains an integrated DOCSIS-compliant provisioning server. Use of this provisioning functionality is
restricted to licensed authorization. ADC will not support provisioning for for your use thereof if you are not
authorized by the appropriate software license to use such provisioning.
All other company and product names mentioned herein may be trademarks of their respective companies.
Page 4

The equipment and software described herein may be covered by an ADC warranty statement. You may obtain a
copy of the applicable warranty by referring to www.adc.com/cable/support and selecting the technical assistance
link. What follows is a summary of the warranty statement. The summary is not binding on ADC and is provided to
you merely as a convenience.
The equipment warranty usually lasts twelve (12) months from point of shipment and the software warranty usually
lasts sixty (60) days from the point of shipment. The software warranty covers both functionality as well as the
media on which the software is delivered. Neither warranty entitles the customer to receive free and unlimited
access for technical assistance. A separate technical support agreement must be purchased for unlimited access to
technical support resources.
The equipment warranty only applies to the cost of a replacement component. It does not include the labor charge
for installation of the replacement component. During the warranty period, warranty claims will be processed on a
10-day return to factory basis. Once the defective component is returned to the factory, ADC’s sole liability under
the equipment warranty shall be either:
■ To repair or to replace, at ADC’s option, the defective equipment component with a new or refurbished
component; or
■ If after repeated efforts ADC is unable to resolve the defect by repair or replacement, to refund the purchase
price of the equipment or component upon return of the defective item.
A working component will be returned to the customer within 10 days after it is received by ADC.
The warranty period for repaired or replaced equipment components shall be the remainder of the original
warranty period for the repaired or replaced item or ninety (90) days, whichever is greater.
Equipment warranty claims can be processed on-line through a web interface or directly by a customer support
representative of ADC. As part of the standard process for issuing a Return Materials Authorization (RMA), the
Customer Support organization will verify all reported failures prior to authorizing a shipment of a replacement
part.
The equipment warranty does not cover any of the following events:
■ The equipment has been subject to abnormal use, abnormal conditions, improper storage, exposure to
moisture or dampness, unauthorized modifications, unauthorized connections, unauthorized repair, misuse,
neglect, abuse, accident, alteration, improper installation, or other events which are not the fault of ADC,
including damage caused by shipping;
■ ADC or an authorized ADC distributor or reseller was not notified by the customer of the equipment defect
during the applicable warranty period.
If the software media is unusable such that the software cannot be loaded onto the equipment, ADC will replace
the media within 1 business day after ADC is notified through Technical Assistance Center.
During the software warranty period, ADC will provide software updates and/or maintenance releases at no
additional charge to resolve any issues where the software does not function according to software specification.
In order to receive on-going software maintenance releases after the 60-day warranty period, the customer must
purchase the base level technical assistance agreement.
The software warranty does not cover any of the following events:
■ Unauthorized modifications to the software or firmware;
■ Unauthorized installation of non-ADC software on the Cuda 12000 platform;
■ ADC or an authorized ADC distributor or reseller was not notified by the customer of the software defect
during the applicable warranty period.
Non-ADC software may be warranted by its developer, owner or other authorized entity as expressly provided in
the documentation accompanying such software.
Failures caused by non-ADC software are not covered by ADC’s warranty and service activities to remedy such
failures will be billed to the customer.
Remote technical assistance will be provided free of charge during the 60-day software warranty period. The hours
for support during the warranty period are Monday through Friday from 8:00am to 5:00pm EST.
Additional hardware and software services are available by purchasing an extended service agreement. Contact
your account representative or call 1-877-227-9783 for further details.
© 2001 ADC Telecommunications, Inc. All Rights Reserved.
Page 5

CONTENTS
CUDA 12000 IP ACCESS SWITCH CLI-BASED ADMINISTRATION
GUIDE
ABOUT THIS GUIDE
Document Objective 16
Audience 16
Document Organization 17
Notations 19
Command Syntax 20
Related Documentation 21
Contacting Customer Support 21
IADMINISTRATION OVERVIEW
1 CUDA 12000 OVERVIEW
Introducing the Cuda 12000 IP Access Switch 26
Hardware 27
Software 30
Minimum Chassis Configuration 31
Understanding the Cuda 12000 Within Your Network 32
Cable Modem Termination System (CMTS) 33
IP Routing Configuration 33
2 ABOUT THE COMMAND LINE INTERFACE
About the CLI 35
Accessing the CLI 37
Command Modes 40
Global Commands 42
Root Mode 44
Physical Interface Mode 46
Page 6

IP Interface Mode 50
OSPF Global Configuration Mode 51
Import and Export OSPF Route Filter Modes 53
RIP Configuration Mode 54
Import and Export RIP Route Filter Modes 55
Slot Mode 56
3 MANAGING USER ACCOUNTS
Understanding User Accounts 57
Configuring Access Profiles 58
Creating and Modifying Access Profiles 60
Displaying Access Profiles 61
Deleting a Profile 62
Managing User Accounts 63
Creating and Modifying User Accounts 64
Displaying User Accounts 65
Deleting User Accounts 66
Configuring User Authentication 67
Configuring Local Authentication 68
Configuring TACACS+ Authentication 69
Configuring RADIUS Authentication 71
II CHASSIS ADMINISTRATION
4 CHASSIS CONFIGURATION
Understanding Chassis Identification 76
Understanding Management Module Redundancy 76
Configuring Chassis Parameters 78
Displaying Current Chassis Configuration 81
Configuring Clock Sources 86
Starting and Stopping the HTTP Server 88
Enabling and Disabling Traffic Relay 89
Broadcasting Messages to Users 91
Page 7

5 MULTI-CHASSIS SUPPORT
About Multi-Chassis Support 94
Planning Multi-Chassis Support 96
Enabling the Jini Lookup Service 97
Configuring Multi-Chassis Support 98
Creating a Common User Account for the Group 100
Viewing Chassis Details 101
6 MODULE ADMINISTRATION
Cuda Application Modules 104
Configuring the 10/100 Ethernet and GigE Modules 105
Viewing Module Information 106
Viewing Installed Modules 106
Viewing Module Versions 108
Viewing Ethernet Interface Packet Statistics 110
Displaying Statistics for All System Interfaces 112
7 PACKET OVER SONET ADMINISTRATION
About Packet Over SONET 116
Packet Over SONET (POS) Interface Administration 117
Displaying POS Interface Information 119
Disabling and Enabling Interfaces 123
Viewing POS Interface Packet Statistics 124
Viewing SONET Line-Layer Information 126
Viewing SONET Path Layer Information 127
Section Layer Administration 129
Configuring and Viewing SONET Alarms 132
Configuring POS Alarm Reporting 133
Viewing Alarm Information 135
Configuring Point-to-Point Protocol (PPP) 137
Configuring PPP Security 138
Configuring LCP 144
Enabling NCP 146
Page 8

8 TIMING AND ALARM CONTROLLER MANAGEMENT
About Timing and Alarm Controller Fault Reporting 148
Assertion Levels 150
Configuring the Power Assertion Level 151
Configuring Fan Unit Assertion Levels 152
Configuring Fault Reporting 153
Removing a Fault Notification 155
Viewing Fault Reporting Status 156
Configuring Alarms Out 157
Viewing Alarm Signals Out the DB-15 Connector 160
9 SIMPLE NETWORK MANAGEMENT PROTOCOL (SNMP)
About SNMP 162
Configuring SNMP Access Control 164
Configuring SNMP Access Views 165
Configuring SNMP Groups 168
Configuring SNMP Communities 172
Configuring SNMPv3 Users 175
Configuring SNMPv3 Contexts 178
Configuring System Name, Contact, and Location 180
Configuring SNMP Event Notification Types 182
Monitoring SNMP 196
Sample SNMP Configurations 198
Sample SNMPv1/v2c Community Access Control 198
Sample SNMPv3 Access Control 199
Sample Notification Configuration 201
10 MANAGING SYSTEM EVENTS
About System Events 204
Configuring the Syslog Server 205
Configuring SNMP Trap Recipients 206
Removing SNMP Trap Recipients 207
Configuring Event Transmission 208
Event Reporting 210
Event Classes 210
Reporting Actions 211
Page 9

Configuring Event Reporting 211
Viewing Event Reporting Configuration 213
Event Classes and SNMP System Events 214
Clearing the Event Log 216
Displaying Event Transmission, Reporting, and Syslog Parameters 216
Displaying the Event Log 218
III IP ROUTING
11 CREATING ROUTE FILTERS
About RIP and OSPF Route Maps 224
Creating Route Maps 225
Using the Match Command 227
Using the Override Command 228
Creating OSPF Import Route Maps 229
Creating OSPF Export Route Maps 231
Creating RIP Import Route Maps 234
Creating RIP Export Route Maps 236
Creating Map Lists 239
Route Filter Configuration Example 241
12 CONFIGURING DHCP RELAY
About DHCP Relay 244
Displaying DHCP Relay Configuration 245
Configuring DHCP Relay Options 247
Specifying DHCP Servers 249
Specifying External DHCP Servers 249
Specifying the Internal DHCP Server 250
DHCP and BOOTP Policies 251
About DHCP Policies 251
About BOOTP Policies 252
Configuring DHCP and BOOTP Policies 253
DHCP Policy Configuration Examples 259
Page 10

13 CONFIGURING DHCP AUTHORITY
About DHCP Authority 264
Enabling DHCP Authority 266
Configuring DHCP Authority Ranges 267
Removing DHCP Authority Ranges 268
DHCP Authority Configuration Examples 269
14 CONFIGURING IP
Configuring IP Addresses 272
Viewing IP Interfaces 274
Deleting IP Addresses 276
Displaying the Routing Table 277
Configuring Static Routes 278
Adding Static Routes 278
Deleting Static Routes 280
Adding the Default Route 282
Deleting the Default Route 283
Managing the Address Resolution Protocol (ARP) 284
Displaying the ARP Cache 285
Adding ARP Entries 286
Deleting ARP Entries 287
Configuring the ARP Timeout 288
Clearing the ARP Cache 289
Configuring RIP 290
About RIP 290
Configuring RIP on IP Interfaces 290
Disabling RIP on IP Interfaces 297
Removing RIP from IP Interfaces 297
Configuring OSPF 298
About OSPF 298
OSPF Configuration Task Overview 301
Configuring OSPF Global Parameters 301
Adding OSPF Areas 303
Removing OSPF Areas 305
Configuring OSPF on IP Interfaces 306
Removing OSPF from IP Interfaces 312
Configuring OSPF Virtual Interfaces 313
Page 11

Removing OSPF Virtual Interfaces 317
Configuring OSPF Neighbor Traps 318
Configuring IP Source Routing 320
About IP Source Routing 321
Adding IP Source Routes 322
Displaying IP Source Routes 323
Removing IP Source Routes 324
Source Routing Configuration Example 325
15 IP PACKET FILTERING
About IP Packet Filtering 328
Enabling and Disabling IP Packet Filtering 329
Understanding Access Lists 330
Creating Access Lists 331
Displaying Access Lists 335
Deleting Access Lists 335
Applying Access Lists to Interfaces 336
Displaying Access Classes 338
Removing Access Lists from Access Classes 339
Packet Filtering Considerations and Example 340
Implicit Deny 340
Match Sequence 341
Sample Access List 341
16 NETWORK-LAYER BRIDGING
About Network-Layer Bridging 344
Creating Network-Layer Bridges 345
Creating Bridge Groups 347
Adding Interfaces to Bridge Groups 349
Assigning IP Addresses To Bridge Groups 351
17 MANAGING IP MULTICAST
About IP Multicast 354
IGMP 354
IGMP Proxy 354
Managing IGMP Interfaces 356
Page 12

Joining IGMP Groups 356
Configuring IGMP Interface Parameters 357
Displaying IGMP Groups and Interface Parameters 358
Deleting IGMP Groups 362
Managing IGMP Proxies 363
Configuring Proxies 363
Displaying Proxies 365
Deleting Proxies 365
Displaying Multicast Routes 366
IV CABLE MODEM TERMINATION SYSTEMS
18 CONFIGURING CABLE MODEM TERMINATION SYSTEMS
CMTS Upstream Frequency Reuse 369
Configuring the MAC Interface 370
Displaying MAC Interface Parameters and Statistics 370
Understanding MAC Interface Statistics 372
Configuring MAC Interface Parameters 374
Configuring the Downstream Channel 379
Displaying Downstream Configuration and Statistics 379
Understanding Downstream Channel Statistics 381
Configuring Downstream Parameters 382
Configuring Upstream Channels 390
Displaying Upstream Configuration and Statistics 390
Configuring Upstream Channel Parameters 392
Upstream Channel MAP Configuration 401
Upstream Channel Ranging Configuration 404
Configuring Admission Control 408
Configuring Frequency Hopping 411
Understanding Frequency Hopping Configuration 411
Understanding Frequency Hopping Parameters 412
Frequency Hopping Statistics 416
Defining Modulation Profiles 418
Example — Creating a Modulation Profile 424
Displaying Modulation Profiles 425
Deleting Modulation Profiles 427
Page 13

Configuring CMTS Privacy Parameters 428
Configuring Flap Control 428
19 MANAGING CABLE MODEMS
Viewing Cable Modems 432
Displaying the Summary of Cable Modem Registration States 432
Displaying a Detailed Listing for an Interface 434
Displaying Specific Cable Modems 438
Displaying Cable Modem Statistics 439
Tracking Offline Cable Modems 441
Setting the Duration for Tracking Offline Cable Modems 441
Maintaining Statistics for Offline Cable Modems 442
Clearing Offline Cable Modems 442
Resetting Cable Modems 443
Resetting a Single Modem 443
Resetting Multiple Modems 444
Resetting All Modems on a Network 446
Changing Upstream Channels 447
Viewing Services 449
Configuring BPI and BPI+ Parameters 453
About BPI and BPI Plus 453
Configuring Authorization and Traffic Encryption Keys 455
Configuring Trust and Validity for Manufacturer Certificates 458
Configuring IP Multicast Address Mapping 461
Viewing Privacy Keys 464
Managing Flap Lists 466
Viewing the Flap List 466
Clearing the Flap List 469
Managing Quality of Service 470
Service Flows 471
Classifiers 480
Service Flow Logs 486
Dynamic Service 489
Page 14

20 SUBSCRIBER MANAGEMENT
About Subscriber Management Filtering 494
About CPE Control 495
Configuring Filter Groups 496
Viewing Filter Groups 502
Deleting Filter Groups and Filters 503
Modifying Existing Filter Groups 504
Assigning Default Filter Groups 505
Modifying Filter Groups Per Cable Modem 507
Viewing Filter Group Assignments 510
Configuring CPE Control Parameters 512
Modifying CPE Control Parameters Per Cable Modem 515
Viewing CPE Control Parameters and CPE Devices 518
Viewing CPE Control Parameters 518
Viewing CPE Devices 520
21 MIB BROWSING
Cable Modem MIBs 522
MTA MIBs 524
Browsing Cable Modem and MTA Status 525
Cable Modem and MTA Command Output Descriptions 528
A COMMAND SUMMARY
Access Control Commands 562
Mode Commands 563
General Commands 564
IP Administration and Route Filtering Commands 565
RIP Commands 568
OSPF Commands 570
DHCP Relay Commands 572
Cable Interface Administration Commands 573
Cable Modem and Subscriber Administration Commands 577
Network-Layer Bridge Commands 580
Fault Management Commands 581
Chassis Commands 582
SNMP Commands 584
Page 15

Packet Over SONET (POS) Commands 585
Ethernet Commands 588
B CONFIGURING EXTERNAL PROVISIONING SERVERS
C GLOSSARY
INDEX
Page 16

Page 17

ABOUT THIS GUIDE
This chapter introduces you to the Cuda 12000 IP Access Switch CLI-based
Administration Guide and contains the following sections:
■ Document Objective (page 16)
■ Audience (page 16)
■ Document Organization (page 17)
■ Notations (page 19)
■ Command Syntax (page 20)
■ Related Documentation (page 21)
■ Contacting Customer Support (page 21)
Page 18

16 C
HAPTER : ABOUT THIS GUIDE
Document Objective
The Cuda 12000 IP Access Switch CLI-based Administration Guide provides
procedural information about the commands you can use to configure and
manage the Cuda 12000 system using the command line interface (CLI).
Before you use this guide, you should have already installed and brought the
system online using the Cuda 12000 IP Access Switch Installation Guide.
The Cuda 12000 IP Access Switch CLI-based Administration Guide is a
companion to the Cuda 12000 IP Access Switch CLI Reference Guide, which
provides detailed reference information on CLI command syntax and
arguments.
Audience
This guide targets the network administrator, responsible for configuring and
managing the Cuda 12000 within a cable television headend site. It assumes
a working knowledge of network operations, although it does not assume
prior knowledge of ADC’s network equipment.
ADC Telecommunications, Inc.
Page 19

Document Organization
The Cuda 12000 IP Access Switch CLI-based Administration Guide is
organized as follows:
Part I: Administration Overview
Chapter 1: Cuda 12000 Overview — Provides an overview of product
functionality and includes information on how the Cuda 12000
integrates into your network.
Chapter 2: About the Command Line Interface — Introduces you to
the Cuda 12000 command line interface (CLI).
Chapter 3: Managing User Accounts — Provides information and
procedures on how to create and configure user accounts for control of
management access to the chassis.
Part II: Chassis Administration
Chapter 4: Chassis Configuration — Provides an overview of
chassis-wide configuration and related tasks.
Document Organization 17
Chapter 5: Multi-Chassis Support — Provides information and
procedures on how to create groups of Cuda 12000 chassis.
Chapter 6: Module Administration — Provides information and
procedures for basic module administration, as well as Ethernet
administration. Also includes information on how to view traffic statistics
for each port.
Chapter 7: Packet Over SONET Administration — Provides
information and procedures for Packet Over SONET administration.
Chapter 8: Timing and Alarm Controller Management — Describes
the alarm management features that you can use to discover and
troubleshoot cable modems, modules, and link problems. Also includes
information on how to configure alarm reporting for attached fan tray
and power supplies.
Chapter 9: Simple Network Management Protocol (SNMP) —
Provides procedures for configuring the Cuda 12000 for SNMPv1,
SNMPv2, and SNMPv3 management.
Chapter 10: Managing System Events — Describes how to manage
event transmission and logging on the Cuda 12000.
Cuda 12000 IP Access Switch CLI-based Administration Guide
Page 20

18 C
HAPTER : ABOUT THIS GUIDE
Part III: IP Routing
Chapter 11: Creating Route Filters — Provides information and
procedures for creating RIP and OSPF policy-based route filters.
Chapter 12: Configuring DHCP Relay — Provides information and
procedures on how to configure DHCP relay on a cable interface.
Chapter 13: Configuring DHCP Authority — Provides information and
procedures on how to configure DHCP authority on a cable interface.
Chapter 14: Configuring IP — Provides information and procedures on
how to configure IP routing on your system. Includes information on
Open Shortest Path First (OSPF) and Routing Information Protocol (RIP)
configuration.
Chapter 15: IP Packet Filtering — Provides information and procedures
for creating packet filters for cable interfaces.
Chapter 16: Network-Layer Bridging — Provides information and
procedures for creating network-layer bridge groups. These bridge
groups allow you to associate the same IP address with multiple system
interfaces. A key value of this feature is the ability to span a single subnet
across multiple system modules.
Chapter 17: Managing IP Multicast — Provides information and
procedures for configuring the Cuda 12000 to route multicast traffic,
which delivers a single stream of information to multiple destinations at
one time. Includes information on IGMP and multicast routes.
Part IV: Cable Modem Termination Systems
Chapter 18: Configuring Cable Modem Termination Systems —
Provides information and procedures for configuring and managing
CMTS RF parameters. Provides instruction on the configuration of
downstream and upstream channels, admission control, and advanced
CMTS parameters.
Chapter 19: Managing Cable Modems — Provides information for
managing and monitoring cable modems on the network.
Chapter 20: Subscriber Management — Describes how to configure
subscriber traffic filtering and Customer Premise Equipment (CPE) device
management on the Cuda 12000.
Chapter 21: MIB Browsing — Provides information on how to browse
cable modem and MTA MIBs and the MIB objects that are returned.
ADC Telecommunications, Inc.
Page 21
Notations
Notations 19
Appendices
Appendix A: Command Summary — Provides a complete listing of CLI
commands and a brief description of each; organized by function.
Appendix B: Configuring External Provisioning Servers — Provides
information on configuring external FastFlow BPM and third-party
provisioning servers.
Appendix C: Glossary — Provides a glossary of networking terms.
Table 1 lists the text notations that are used throughout the Cuda 12000
documentation set guide.
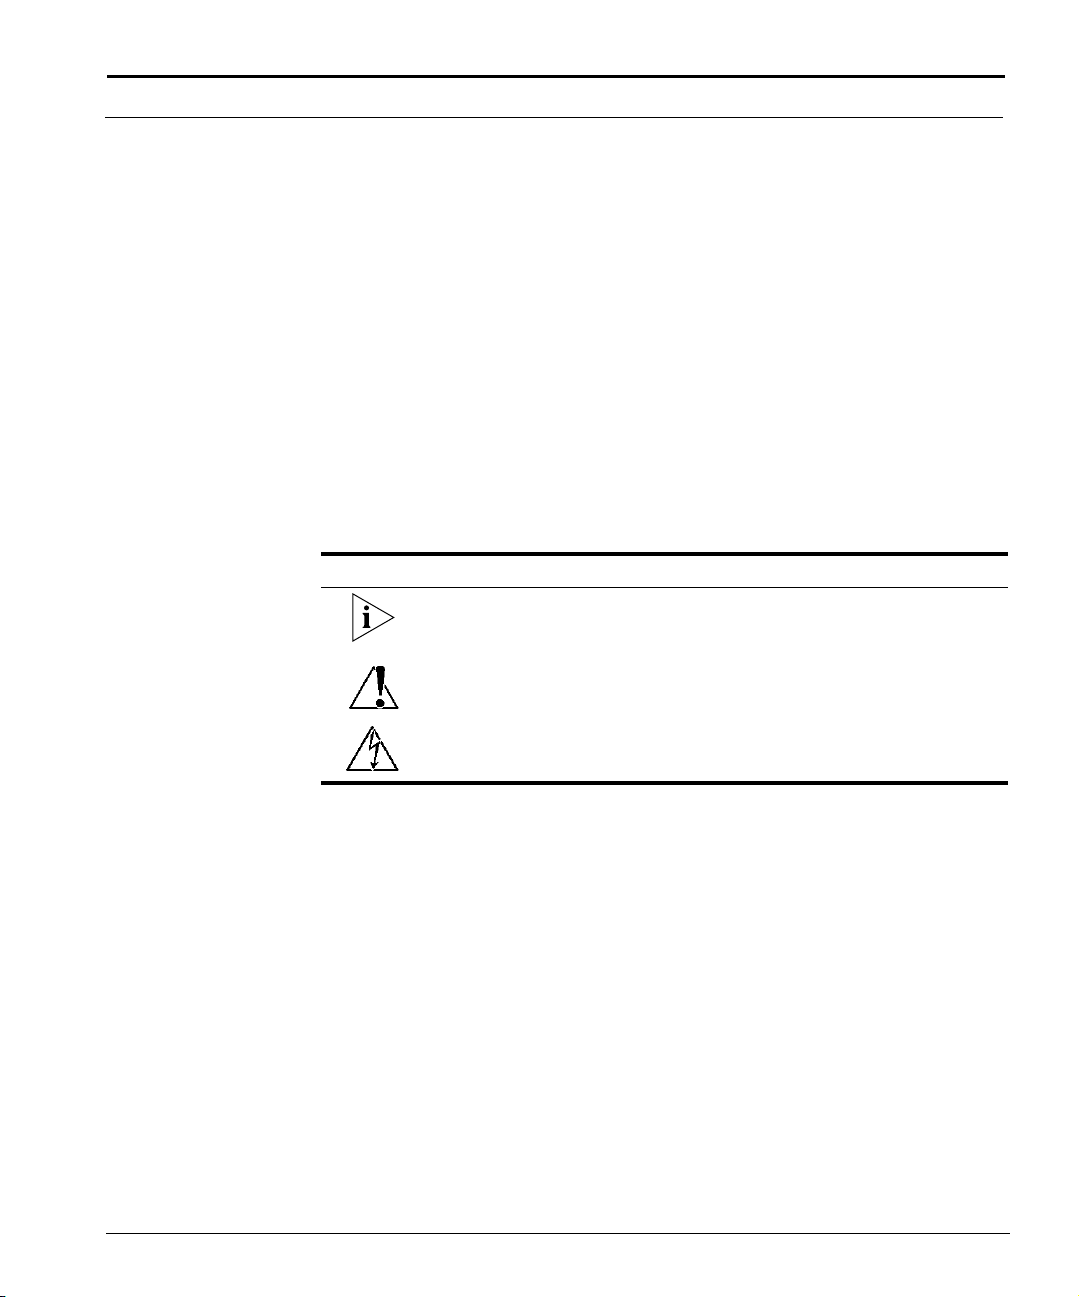
Tab le 1 Notice Conventions
Icon Notice Type Description
Information Note Important or useful information,
such as features or instructions
Caution Information that alerts you to
potential damage to the system
Warning Information that alerts you to
Cuda 12000 IP Access Switch CLI-based Administration Guide
potential personal injury
Page 22

20 C
HAPTER : ABOUT THIS GUIDE
Command Syntax
Table 2 describes the command syntax conventions used in this guide.
Tab le 2 Command Syntax Conventions
Command Element Syntax
Commands and
keywords
Variables Enclosed in < > and expressed in plain text. For example:
Optional Arguments Enclosed in [ ]. For example:
Set of Choices Enclosed in { | }. For example:
List Expressed as three dots (...). For example:
Expressed in bold. For example:
show chassis-config
add arp <ip-address> <mac-address>
In this example, <ip-address> and <mac-address> are variables
that follow the add arp command.
ip route default <gateway-ip-address> [<metric>]
In this example, the variable <metric> is an optional argument.
loop {line | internal}
In this example, the user can specify either the line keyword or
the internal keyword following the loop command.
snmp-server host [<notification-type>...]
In this example, the user can specify multiple notification
types.
In examples only, all user input — commands, keywords, and variables — are
in bold to distinguish what the user enters from display-only screen text. In
all other sections of this document, the conventions described above apply.
ADC Telecommunications, Inc.
Page 23

Related Documentation
For more information on the Cuda 12000 system, refer to the following
publications:
■ Cuda 12000 IP Access Switch Installation Guide: Provides the
information you need to install the system and bring it online. Includes a
test procedure to ensure that the system is operational and can provision
modems.
■ Cuda 12000 IP Access Switch CLI Reference Guide: Provides detailed
reference information on CLI command syntax and arguments.
■ Cuda 12000 IP Access Switch CudaView Administration Guide:
Contains procedural information you need to configure and manage the
system using CudaView.
Contacting Customer Support
To help you resolve any issues that you may encounter when installing,
maintaining, and operating the Cuda 12000 system, you can reach
Customer Support as follows:
Related Documentation 21
■ Phone: (877) 227-9783 (option 4)
■ E-mail: support@basystems.com
■ Customer Support Web Site — To access Customer Support on the Web,
go to
http://www.adc.com/cable/support, then select the
Technical Assistance Center link. You can then report the problem online,
search the ADC Customer Support database for known problems and
solutions, and check Frequently Asked Questions.
When contacting Customer Support for technical assistance, be sure to have
the following information ready:
■ List of system hardware and software components, including revision
levels and serial numbers.
■ Diagnostic error messages.
■ Details about recent system configuration changes, if applicable.
Cuda 12000 IP Access Switch CLI-based Administration Guide
Page 24

22 C
HAPTER : ABOUT THIS GUIDE
ADC Telecommunications, Inc.
Page 25

ADMINISTRATION OVERVIEW
I
Chapter 1 Cuda 12000 Overview
Chapter 2 About the Command Line Interface
Chapter 3 Managing User Accounts
Page 26

Page 27

1
CUDA 12000 OVERVIEW
This chapter explains the overall features of the Cuda 12000 IP Access
Switch and describes how your Cuda 12000 IP Access Switch fits into your
network. This chapter consists of the following sections:
■ Introducing the Cuda 12000 IP Access Switch (page 26)
■ Understanding the Cuda 12000 Within Your Network (page 32)
Page 28

26 C
HAPTER 1: CUDA 12000 OVERVIEW
Introducing the Cuda 12000 IP Access Switch
The Cuda 12000 IP Access Switch is a fully-meshed IP access switch that sits
between the hybrid fiber coax cables (HFC) and the carrier’s IP backbone
network. It serves as an integrated Cable Modem Termination System
(CMTS) and IP router, and supports DOCSIS and EuroDOCSIS RFI
Specification 1.0 and 1.1.
To understand the Cuda 12000 IP Access Switch, you need to understand
the following aspects of the switch:
■ Hardware
■ Software
■ Minimum Chassis Configuration
ADC Telecommunications, Inc.
Page 29

Hardware
Introducing the Cuda 12000 IP Access Switch 27
This section provides a brief overview of Cuda 12000 IP Access Switch
hardware features and modules. For more information on Cuda 12000 IP
Access Switch hardware, refer to the Cuda 12000 IP Access Switch
Installation Guide.
Features
The Cuda 12000 provides the following hardware features:
Tab le 1- 1 Cuda 12000 Hardware Features
Feature Description
Total System
Redundancy
Distributed
Processing Power
The entire system is architected for full redundancy to
provide a highly fault-tolerant solution that includes:
■ Dual-Power Sources: The system can be connected to
two -48 VDC power sources to ensure uninterrupted
power availability.
■ MeshFlow
TM
Fabric: Every application module is
connected to every other application module via a
high-speed serial mesh. This mesh supports a peak
throughput capacity of 204.6 Gbps. (132 x 1.55 Gbps.),
delivering IP packet routing with minimal latency and
high availability to guarantee Quality of Service (QoS)
across your core IP network.
■ Dual Management modules: The Cuda 12000 supports
up to two Management modules to ensure
uninterrupted system management.
■ Redundant Management Buses: The backplane consists
of a 100-Mbps management BUS with redundant
channels, over which the Management modules and
system application modules communicate.
Application modules consist of a network processor with
dedicated Synchronous Burst SRAM. Unlike other systems
that use a central system processor, processing power and
memory scale with every application module that you
install in the chassis.
Cuda 12000 IP Access Switch CLI-based Administration Guide
Page 30

28 C
HAPTER 1: CUDA 12000 OVERVIEW
Feature Description
CableOnceTM
Network
Connections
Hot-swappable
Modules
Modules
The Cuda 12000 IP Access Switch chassis comprises 14 slots. Twelve of the
slots are for application modules and two of the slots are for management
modules, which control the operations of the chassis. The following is a list
of the modules supported by the Cuda 12000 IP Access Switch:
The system supports a CableOnce design that allows you to
cable directly to the appropriate connector fixed to the rear
of the chassis, or slot backplate. Cabling directly to these
stationary connectors, instead of to the modules
themselves, allows module replacement without recabling.
You remove a module and then insert a new one while the
cables remain attached to the system. This blind-mate
design also lets you pre-cable chassis slots to prepare them
in advance for module installation at a later time.
All system modules can be replaced while the system is
running without interruption to other interconnected
networks. Both application modules and Management
modules are hot-swappable.
■ Management Module
■ DOCSIS Modules
- 1x4 DOCSIS Module
- 1x4 DOCSIS SpectraFlow Module
- 1x6 DOCSIS SpectraFlow Module with Spectrum Management
■ EuroDOCSIS Modules
- 1x4 EuroDOCSIS Module
- 1x4 EuroDOCSIS SpectraFlow Module
- 1x4 EuroDOCSIS SpectraFlow Module with Spectrum Management
■ Egress Modules (Route Server Modules)
- Octal 10/100 Ethernet SpectraFlow Module
- Gigabit Ethernet SpectraFlow Module
- Packet over SONET (POS) SpectraFlow Module
ADC Telecommunications, Inc.
Page 31

Introducing the Cuda 12000 IP Access Switch 29
DOCSIS (Data Over Cable Service Interface Specification) is a CableLabs®
standard for interoperability between a CMTS and cable modems.
EuroDOCSIS (European Data Over Cable Service Interface Specification) is a
CableLabs
®
and tComLabs® standard.
DOCSIS and EuroDOCSIS modules serve as CMTS interface modules with
your HFC network using upstream and downstream ports. Upstream ports
support both QPSK and 16 QAM modulation; the downstream port supports
64/256 QAM modulation. Each application module has an independent
network processor and Synchronous Burst RAM. As a result, processing
power and memory scale with every module that you install in the chassis.
The route server module functions in a dual role as both a forwarding device
and a route server. The configured route server module is an egress
(non-DOCSIS) module, such as an Octal 10/100 Ethernet SpectraFlow
Module, Gigabit Ethernet SpectraFlow Module, or Packet over SONET (POS)
SpectraFlow Module.
While maintaining its original role as a forwarding module, the route server
maintains a central routing table. This module then distributes the routing
table to other application modules upon initialization, and incrementally
updates the forwarding tables as new routes are discovered. Distributed
forwarding tables on each application module provide an added level of fault
tolerance; should the Management module or another application module
fail, the existing operational modules forward traffic without interruption.
Cuda 12000 IP Access Switch CLI-based Administration Guide
Page 32

30 C
HAPTER 1: CUDA 12000 OVERVIEW
Software
The Cuda 12000 IP Access Switch system software comprises two software
components, as follows:
■ Base System Software (required): The base system software is shipped
with your Cuda and contains the operating system. The base software
includes the command line interface (CLI) and provides you with the
following functions:
■ User Account Management
■ Chassis Configuration
■ Multi-Chassis Support
■ Module Administration
■ Event Management
■ SNMP Management
■ IP Configuration
■ Packet and Route Filter Creation
■ DHCP Relay Configuration
■ CMTS Administration
■ Cable Modem Administration
■ Subscriber Management
■ CudaView (optional): CudaView contains the graphical user interface
(GUI) component of the element management system. CudaView
provides full management functionality in graphical views that are easy
for users to understand. CudaView provides an intuitive and “top-down”
visual display that accelerates the management learning curve for new
users and improves the productivity of all users. CudaView offers
topology views, fault views, performance graphs, and many other useful
features. For more information on CudaView, refer to the Cuda 12000 IP
Access Switch CudaView Administration Guide.
ADC Telecommunications, Inc.
Page 33

Introducing the Cuda 12000 IP Access Switch 31
Minimum Chassis Configuration
The minimum configuration of a Cuda 12000 IP Access Switch comprises the
following:
■ A minimum of one management module, plus the base software
package. The module and base software are required to configure the
Cuda 12000 IP Access Switch.
■ An Octal 10/100 Ethernet, Gigabit Ethernet, or POS module. Each of
these modules offers these services:
■ A link from the Cuda 12000 to your network backbone
■ May be configured as the route server
■ May function in a dual forwarding role
■ One DOCSIS or EuroDOCSIS application module, which is required to
perform CMTS functions.
Cuda 12000 IP Access Switch CLI-based Administration Guide
Page 34

32 C
HAPTER 1: CUDA 12000 OVERVIEW
Understanding the Cuda 12000 Within Your Network
Cuda 12000 IP Access Switches are installed at the HFC end of a cable plant
and are responsible for gateway operations between the headend and the
Internet. Through the Cuda 12000 IP Access Switch, digital data signals are
modulated onto RF channels for broadcast over the same infrastructure.
Typically, the signals are broadcast through the HFC to fiber nodes in the
network. Amplifiers, coaxial cable, and taps carry the signals to the
subscriber premises.
This example shows how the Cuda 12000 IP Access Switch can fit into your
network.
Optional
FastFlow
BPM Prov.
Server
Cuda 12000
Cable Modem/MTA
Figure 1-1 How the Cuda 12000 IP Access Switch Fits into Your Network
ADC Telecommunications, Inc.
Page 35

Understanding the Cuda 12000 Within Your Network 33
Cable Modem Termination System (CMTS)
The Cuda 12000 implements DOCSIS and EuroDOCSIS CMTS functionality,
providing connectivity and data forwarding for cable modems over the RF
cable plant.
The DOCSIS and EuroDOCSIS modules interface with your HFC network,
using a 1-to-4 downstream-to-upstream port ratio (referred to as 1 x 4), or a
1-to-6 downstream-to-upstream port ratio (referred to as 1 x 6). Upstream
ports support QPSK and 16 QAM modulation; the downstream port
supports 64 and 256 QAM modulation.
IP Routing Configuration
The Cuda 12000 IP Access Switch uses the Internet Protocol (IP) to exchange
data over computer networks consisting of cable and Ethernet interfaces. In
addition, it supports RIP and OSPF routing protocols in order to exchange
routing information with other routers in the IP network.
In order to integrate the Cuda 12000 IP Access Switch into your network,
the following configuration must be accomplished:
■ Configure the CMTS interfaces so that the cable modems range properly.
■ Provision cable modems, Multimedia Terminal Adapters (MTAs), and CPE
(Customer Premise Equipment) devices, using the FastFlow Broadband
Provisioning Manager or a third-party provisioning server.
■ Configure DHCP subnets, so that the DHCP server gives out IP addresses
to cable modems, MTAs, and CPE devices.
■ Configure IP on your cable, Ethernet, and Packet Over SONET interfaces
to connect the Cuda 12000 to your backbone network and provide the
subscribers access to the Internet.
■ For the HFC segments, configure DHCP relay to specify the subnet to be
used for assigning IP addresses to cable modems, MTAs, and CPE devices.
IP, RIP and OSPF can currently be configured on any of the interfaces within
the Cuda12000 IP Access Switch.
Cuda 12000 IP Access Switch CLI-based Administration Guide
Page 36

34 C
HAPTER 1: CUDA 12000 OVERVIEW
ADC Telecommunications, Inc.
Page 37

ABOUT THE COMMAND LINE
2
About the CLI
INTERFACE
This chapter introduces you to the command line interface (CLI) and covers
the following topics:
■ About the CLI (page 35)
■ Accessing the CLI (page 37)
■ Command Modes (page 40)
The Cuda 12000 management module runs the Linux operating system. The
CLI operates within this environment. The CLI is a textual command line
interface accessible through a local COM port or through remote Telnet or
secure shell (SSH).
The CLI operates within the command shell and offers a number of features
to facilitate ease-of-use and configuration, including:
■ Context Sensitive Online Help — The CLI offers the following online
Help mechanisms:
■ Individual Command Help — You can display help on most
commands by typing help followed by the command name. For
example:
cli:172.16.19.10:root# help bridge-group
bridge-group Creates a bridge group
<name/id of bridge group>
cli:172.16.19.10:root#
The command name is listed on the left with a description on the
right. Arguments are indented in standard syntax below the command
name.
Page 38

36 C
HAPTER 2: ABOUT THE COMMAND LINE INTERFACE
■ Command Mode Help — To view all commands available in the
current mode with associated descriptions, type help. To show a list of
available commands without descriptions, type ? at the prompt or
press the Tab key twice.
■ Configurable Prompt — By default, the prompt displays both the
address assigned to the management module and the current command
mode. You can configure the prompt so it does not display this
information. When the address and mode is displayed in the prompt, you
can issue set prompt to remove it. To configure the prompt to display
address and mode information, issue set prompt mode. For example:
cli:172.16.19.10:root# set prompt
cli#
cli# set prompt mode
cli:172.16.19.10:root#
■ Command Completion — The system does not require that you type
the entire command string. You simply need to type enough of the string
to make it unique among the available commands so the system can
recognize it. Once you type enough of the command string to distinguish
it among other commands, simply press
command, or press
[Tab] to complete the
[Enter] to execute it.
For most commands within the CLI, hyphens are placed between nouns,
(such as cpe-control), while no hyphen is placed between verbs and nouns
(such as no shutdown and show ip). Also note that commands and their
associated arguments are case-sensitive.
ADC Telecommunications, Inc.
Page 39

Accessing the CLI
Your first form of access to the CLI (after installing the Cuda 12000) is
through COM port 1 located on the front of the management module. Once
you assign the Craft Ethernet port on the management module an IP
address, you can access the CLI remotely through Telnet or SSH.
Use the following procedure to logon to the system management module
and access the CLI environment through COM port 1:
1. Ensure that you have cabled a console or a system running a terminal
emulation program to COM port 1 and configured the correct serial
transmission settings (57,600, 8, 1).
Accessing the CLI 37
2. Access the system through the terminal emulator. Press
[Enter] until you
see the Linux login prompt.
3. You are then prompted for a login name and password to logon to the
CLI. Enter your login name and password. The system ships with the
following system defaults:
■ Account Name: administrator
■ Password: bas
The Linux prompt is then displayed.
Note that the default login name and password are case-sensitive — all
lowercase.
4. From the command prompt, access the CLI environment by issuing the
following command:
bascli
5. Within the CLI environment, enter your Cuda 12000 login name and
password, as follows:
enable <account name>
<password>
Note that the login name and password must be either defined locally on
the Cuda 12000 or defined on a RADIUS or TACACS+ authentication
server. Refer to Chapter 3 “Managing User Accounts” for more
information on managing usernames and passwords.
Cuda 12000 IP Access Switch CLI-based Administration Guide
Page 40

38 C
HAPTER 2: ABOUT THE COMMAND LINE INTERFACE
The system ships with the following system defaults:
Account Name: root
Password: bas
For example:
[administrator@Tech2000 administrator]$ bascli
cli:null:root> enable root
password: ***
Connecting to 172.16.19.10...
Java Server version is compatible
ClientMode: CLI
logon complete
Sending message: User root just logged in from Tech2000
FROM:root@Tech2000:: User root just logged in from
Tech2000
Note that the default login name and password are case-sensitive — all
lowercase.
Use the following procedure to logon to the system management module
and access the CLI environment through the Craft Ethernet port:
1. Ensure that you have assigned an IP address to the Ethernet craft port on
the management module, and that the Telnet and SSH server processes
are running.
2. Open a Telnet session or an SSH session with the IP address or hostname
assigned to the management module.
3. When the cli:null:root prompt appears, enter your Cuda 12000 login
name and password, as follows:
enable <account name>
<password>
The system ships with the following system defaults:
Account Name: root
Password: bas
ADC Telecommunications, Inc.
Page 41

Accessing the CLI 39
For example:
ADC Cuda 12000
cli:null:root> enable root
password: ***
Connecting to 192.168.208.3...
Java Server version is compatible
logon complete
Sending message: User root just logged in from techpubs
FROM:root@techpubs:: User root just logged in from
techpubs
Note that the default login name and password are case-sensitive — all
lowercase.
Cuda 12000 IP Access Switch CLI-based Administration Guide
Page 42

40 C
HAPTER 2: ABOUT THE COMMAND LINE INTERFACE
Command Modes
The Cuda 12000 switches and routes IP traffic between cable modems on an
analog HFC network, and an IP digital network. As a result, administration
tasks range from configuring IP interfaces and routing protocols to
managing subscribers.
To support these administration tasks, the system provides a set of global
commands and multiple command modes.
Global commands can be accessed anywhere in the CLI, while each
command mode provides access to a set of related commands that cover a
particular configuration scope. The current command mode is displayed in
the prompt by default; you can verify the current mode that you are in at
anytime by using the show mode command.
Command mode structure follows a hierarchy in which some modes run
within others; all run within root mode. You can back up to the parent level
from any sub mode using the up command. For local access, note that you
can exit the CLI command shell and return to the Linux prompt at any time
by typing quit. For Telnet or SSH access, the quit command terminates your
session (you can also type q, which is a shortened form of quit).
You can also display a list of all available commands within the current mode
by using one of the following help commands:
Help Command Description
help
? Displays all commands available within the
Displays the commands and command
descriptions.
current mode without descriptions; you
can also display all commands by pressing
the Ta b key twice.
ADC Telecommunications, Inc.
Page 43

Command Modes 41
The command modes that are available for system configuration depend on
the product packages installed. Base package system management
command modes include:
■ Root Mode
■ Physical Interface Mode
■ IP Interface Mode
■ OSPF Global Configuration Mode
■ Import and Export OSPF Route Filter Modes
■ RIP Configuration Mode
■ Import and Export RIP Route Filter Modes
■ Slot Mode
If the FastFlow Broadband Provisioning Manager is installed on your Cuda
12000 IP Access Switch, additional command modes are available. Refer to
the FastFlow Broadband Provisioning Manager CLI-based Administration
Guide and the FastFlow Broadband Provisioning Manager CLI Reference
Guide for more information on FastFlow Broadband Provisioning Manager
command modes.
Cuda 12000 IP Access Switch CLI-based Administration Guide
Page 44

42 C
HAPTER 2: ABOUT THE COMMAND LINE INTERFACE
Global Commands
Global commands can be used anywhere in the CLI, regardless of your
current command mode. Table 2-1 lists global commands as they appear
when you type help at the command prompt. Note that the help command
output displays many commands in their abbreviated form.
Tab le 2- 1 Global Commands
Command Description
basmonitor Starts the system monitor.
boot Enables, disables, or reboots a module in an
application slot.
clear Clears a specified system resource (depending on the
specified argument), such as ARP cache or statistics
counters.
cm-filter-default Sets the default cable modem filter values for the
system.
cpe-control Sets the default subscriber management values for the
system.
connect Connects you to another Cuda 12000 IP Access Switch
chassis.
echo Echoes a comment so that it displays.
enable Enables a user session.
help Displays CLI command help.
interface Changes you to interface mode.
ip Configures IP parameters for the system.
no Specifies the no form of a command.
ping Enables you to the send an ICMP echo request packet
to a destination to determine if it is reachable.
prov-server Changes you to provisioning server mode. This
command is useful only if the FastFlow Broadband
Provisioning Manager is installed on your Cuda 12000
IP Access Switch.
q Shortened form of quit.
quit Enables you to exit from the CLI.
root Changes you to root mode.
router Changes you to router mode.
ADC Telecommunications, Inc.
Page 45

Command Modes 43
Tab le 2- 1 Global Commands
Command Description
server Shortened form of prov-server.
set Sets several user session parameters.
show Specifies the show form of a command, which
provides a read-only view of configuration parameters
and other information.
sleep Delays the display of the CLI prompt for a specified
number of seconds.
slot Changes you to slot mode.
source Executes a script file.
talk Enables and disables sending of broadcast messages.
This command also allows you to send a message.
traceroute Traces an IP route from a source to a destination.
up Moves you up one level in the command mode
hierarchy.
Cuda 12000 IP Access Switch CLI-based Administration Guide
Page 46

44 C
HAPTER 2: ABOUT THE COMMAND LINE INTERFACE
Root Mode
Root is the top-level mode in the CLI administration console; all other modes
run within this mode. From within root mode you can access second-level
command modes, such as slot configuration mode. To enter root mode from
within any configuration mode, type root.
Table 2-2 lists available root commands as they appear when you type help
at the command prompt. Global commands are not listed and can be found
in Table 2-1 on page 42. Note that the help command output displays many
commands in their abbreviated form.
Tab le 2- 2 Root Mode Commands
Command Description
aaa Configures TACACS+ and RADIUS network
authentication.
access-list Creates an access list, which consists of IP filtering
rules.
access-profile Creates an access profile for a user.
account Creates user accounts.
alarm-throttle Configures alarm delivery and threshold parameters.
aux-device Configures hardware alarm and clocking parameters.
bridge-group Creates a bridge group.
bridge-timeout Configures timers for bridge group broadcast flows.
ccdown Shuts down the control module.
chassis Configures multi-chassis support parameters.
chassis-config Configures local chassis parameters.
chassis-fault Configures chassis alarms.
cm-filter Creates a cable modem filter.
db-check Validates provisioning database information.
db-connect Configures access to the provisioning database.
event-config Configures event reporting, throttling, and syslog
parameters.
event-log Empties the event log.
http-server Starts and stops the Web server.
lookup Controls the Jini lookup service on the chassis.
ADC Telecommunications, Inc.
Page 47

Command Modes 45
Tab le 2- 2 Root Mode Commands
Command Description
modulation-profile Configures modulation profiles, which contain burst
properties for upstream data channels.
privacy Configures X.509 certificate parameters for BPI plus.
radius-server Configures a RADIUS authentication server.
reset Reboots a module.
save Saves the system configuration for all slots to persistent
storage.
snmp-server Configures the SNMP agent.
tacacs-server Configures the TACACS+ server.
traffic-relay Configures traffic relay for processes (such as servers)
on the chassis.
Cuda 12000 IP Access Switch CLI-based Administration Guide
Page 48

46 C
HAPTER 2: ABOUT THE COMMAND LINE INTERFACE
Physical Interface Mode
Physical interface mode allows for the administration of a specified interface,
including interface-specific configuration and information displays. To enter
this mode, you must specify the chassis/slot/port-number (c/s/i) combination
that identifies the physical interface that you want to configure. After you
enter this mode, all configuration that you perform pertains to the interface
that you specified.
To enter interface configuration mode, type interface <c/s/i> from within
any configuration mode. The CLI automatically displays the type of interface
for the specific c/s/i. The following tables list interface commands by type:
■ Table 2-3 — Lists available DOCSIS interface mode commands as they
appear when you type help at the command prompt.
■ Table 2-4 — Lists available Ethernet interface mode commands as they
appear when you type help at the command prompt.
■ Table 2-5 — Lists available POS interface mode commands as they appear
when you type help at the command prompt.
Keep in mind that the help command output displays many commands in
their abbreviated form. Also keep in mind that global commands are not
listed in any of these tables and can be found in Table 2-1 on page 42.
NOTE: The commands displayed via help
, ?, and through the double Tab
action are relevant to the selected interface.
Tab le 2- 3 DOCSIS Interface Mode Commands
Command Description
access-class Applies an access list to the current interface.
access-list Creates an access list, which consists of IP filtering
rules.
admission-control Enables and disables admission control.
analyzer Enables the protocol analyzer.
arp Sets the ARP timeout parameter.
bootp-policy Defines BOOTP request policies.
cable Optional prefix to commands in this mode.
ADC Telecommunications, Inc.
Page 49

Command Modes 47
Tab le 2- 3 DOCSIS Interface Mode Commands
Command Description
cm First element in various cable modem and subscriber
management commands, such as cm modify active,
cm reset, and so on.
cm-filter Creates a cable modem filter.
cm-offline Configures several offline cable modem parameters for
the current interface.
dhcp-authority Adds a DHCP authority range. The command also
enables and disables DHCP authority.
dhcp-policy Configures several parameters in the DHCP packet and
determines the list of servers to which the DHCP
packet is sent.
dhcp-relay Configures various DHCP relay agent options, such as
the IP addresses of cable modem, CPE, and MTA
gateways.
downstream Configures the downstream channel.
flap-list Controls the size of the flap list.
insertion-interval Configures the modem insertion interval.
link-trap Enables link traps for the interface.
map-timer Configures the map timer interval.
modulation-profile Configures modulation profiles, which contain burst
properties for upstream data channels.
periodic-ranginginterval
Configures how the interface periodically invites
modems to range.
plant-delay Configures the estimated plant propagation delay.
pll-state Configures the phase lock loop state for the interface.
privacy Configures BPI plus parameters for the interface.
proxy-arp Enable proxy ARP on the interface.
qos Enables SNMP and cable modem access to the QoS
tables on the CMTS.
ranging-attempts Configures the number of times that a cable modem is
invited to range before being removed from the
system.
shared-secret Configures a shared secret on the current CMTS
interface.
shutdown Enables you to administratively shut down an interface.
Cuda 12000 IP Access Switch CLI-based Administration Guide
Page 50

48 C
HAPTER 2: ABOUT THE COMMAND LINE INTERFACE
Tab le 2- 3 DOCSIS Interface Mode Commands
Command Description
spectrum-group Configures spectrum group rules.
sync-interval Configures the time interval between synchronization
message transmissions on the downstream channel.
trace-log Configures event logging for the interface.
ucd-interval Configures the time interval between transmission of
successive Upstream Channel Descriptor (UCD)
messages for each upstream channel.
upstream Configures upstream channels.
Tab le 2- 4 Ethernet Interface Mode Commands
Command Description
access-class Applies an access list to the current interface.
access-list Creates an access list, which consists of IP filtering
rules.
add Adds a static ARP entry for the current interface.
arp Sets the ARP timeout parameter.
bootp-policy Defines BOOTP request policies.
dhcp-authority Adds a DHCP authority range. The command also
enables and disables DHCP authority.
dhcp-policy Configures several parameters in the DHCP packet and
determines the list of servers to which the DHCP
packet is sent.
dhcp-relay Configures DHCP relay agent options.
duplex Configures the duplex mode for the interface (full
duplex, half duplex, or auto).
link-trap Enables link traps for the interface.
negotiation Configures an Ethernet port to automatically negotiate
duplex and speed.
shutdown Enables you to administratively shut down an interface.
speed Configures the speed for an Ethernet port.
ADC Telecommunications, Inc.
Page 51

Command Modes 49
Tab le 2- 5 POS Interface Mode Commands
Command Description
access-class Applies an access list to the current interface.
access-list Creates an access list, which consists of IP filtering
rules.
arp Sets the ARP timeout parameter.
bootp-policy Defines BOOTP request policies.
clock-source Configures the SONET transmission clock source.
crc Configures cyclic redundancy checking (CRC).
dhcp-authority Adds a DHCP authority range. The command also
enables and disables DHCP authority.
dhcp-policy Configures several parameters in the DHCP packet and
determines the list of servers to which the DHCP
packet is sent.
dhcp-relay Configures DHCP relay agent options.
link-trap Enables link traps for the interface.
loop Configures the current interface for loopback testing.
mtu Configures the maximum transmission unit (MTU) for
the current interface.
pos Configures POS parameters.
ppp Configures PPP parameters.
shutdown Enables you to administratively shut down an interface.
Cuda 12000 IP Access Switch CLI-based Administration Guide
Page 52

50 C
HAPTER 2: ABOUT THE COMMAND LINE INTERFACE
IP Interface Mode
IP interface mode allows for the administration of a specified IP interface,
including IP interface-specific configuration and information displays. To
enter this mode, you must:
1. Enter physical interface mode for the physical interface associated with
the IP interface.
2. Issue the ip address command. On the command line, you specify the IP
address and network mask combination that identifies the IP interface.
In IP address mode, the following commands are available:
■ All commands that are available in the associated physical interface mode
(DOCSIS, Ethernet, or POS).
■ Commands for configuring RIP and OSPF on the interface (ip rip
commands and ip ospf commands).
ADC Telecommunications, Inc.
Page 53

OSPF Global Configuration Mode
OSPF commands allow you to configure global OSPF (Open Shortest Path
First) parameters. The system supports OSPF version 2 as defined in RFC
1583.
OSPF global configuration mode allows you to enable the protocol on a
system-wide basis, and set system-wide OSPF parameters — such as
router ID — and default OSPF parameters.
All OSPF areas to which you want this system to belong must be configured
within this mode. You then assign areas to OSPF-enabled IP interfaces on an
individual basis within IP interface mode. For example, if you want three IP
interfaces to belong to three separate areas, you must first define the three
areas using the ospf area command within this configuration mode. You
can then use the ip ospf
mode to assign the interface to one of the areas.
You can also set OSPF cost and dead-interval on a per-area basis.
Configuration on a per-IP-interface basis overrides the same values that you
define in OSPF global configuration mode.
command within the IP interface configuration
Command Modes 51
To enter OSPF global configuration mode, type router ospf from any mode,
or type ospf from router mode.
Cuda 12000 IP Access Switch CLI-based Administration Guide
Page 54

52 C
HAPTER 2: ABOUT THE COMMAND LINE INTERFACE
Table 2-6 lists available OSPF global commands as they appear when you
type help at the command prompt. CLI global commands are not listed and
can be found in Table 2-1 on page 42. Note that the help command output
displays many commands in their abbreviated form.
Tab le 2- 6 OSPF Global Configuration Mode Commands
Command Description
asbr Configures the Cuda 12000 IP Access Switch as an
Autonomous System Boundary Router (ASBR).
export Changes you to router export mode.
import Changes you to router import mode.
ospf Configures an OSPF area.
ospf-vi Configures an OSPF virtual interface.
report Enables sending of OSPF neighbor state and OSPF
virtual neighbor state events.
router-id Configures the OSPF router ID.
ADC Telecommunications, Inc.
Page 55

Import and Export OSPF Route Filter Modes
Route filters control the flow of routes to and from the routing table. Import
route filters control which routes are stored in the routing table. Export filters
control which routes are advertised to other routers. You can define route
filters to control the flow of both OSPF and RIP routes.
Command Modes 53
To create OSPF import route filters, enter import mode from within
router:ospf mode, or type router ospf import from any mode. You can
then use the available commands to create route filters to control which
OSPF routes the system learns.
To create OSPF export route filters, enter export mode from within
router:ospf mode or type router ospf export from any mode. You can then
use the available commands to create route filters to control which OSPF
networks the router advertises to other OSPF routers.
Table 2-7 lists available OSPF import and export route filter commands as
they appear when you type help at the command prompt. CLI global
commands are not listed and can be found in Table 2-1 on page 42. Note
that the help command output displays many commands in their
abbreviated form.
Tab le 2- 7 OSPF Import and Export Route Filter Mode Commands
Command Description
asbr Configures the Cuda 12000 IP Access Switch as an
Autonomous System Boundary Router.
map-list Adds a route map to a map list.
match Specifies criteria that is matched against route entries.
ospf Configures an OSPF area.
ospf-vi Configures an OSPF virtual interface.
override Enables you to override values for import or export
filters.
report Enables sending of OSPF neighbor state and OSPF
virtual neighbor state events.
route-map Creates a route map.
router-id Configures the OSPF router ID.
Cuda 12000 IP Access Switch CLI-based Administration Guide
Page 56

54 C
HAPTER 2: ABOUT THE COMMAND LINE INTERFACE
RIP Configuration Mode
RIP (Routing Information Protocol) is a broadcast-based protocol used by
routers to update routing tables, which include information about the
networks that are in their routing tables. The routing table is broadcast to
the other routers on the network where RIP is configured over IP.
The Cuda 12000 supports RIP version 2 as defined in RFC 1724. The Cuda
can interoperate in a network of both RIPv1 and RIPv2 routers. A network
composed of RIPv1 and RIPv2 routers is useful in supporting the transition
from older routers to newer routers supporting RIPv2.
In order to exchange RIP routes over an interface you must configure RIP
over IP on that interface. After RIP is added to the interface, the Cuda 12000
begins to exchange RIP routes with adjacent RIP routers.
To enter RIP configuration mode, type router rip from any mode, or type rip
from router mode.
RIP configuration mode allows you to enter RIP import and export route filter
modes using the import and export commands. It does not allow you to set
global parameters. RIP parameters are configured on a per-IP-interface basis
within IP interface mode by means of the ip rip command.
ADC Telecommunications, Inc.
Page 57

Import and Export RIP Route Filter Modes
Route filters control the flow of routes to and from the routing table. Import
route filters control which routes are stored in the routing table. Export filters
control which routes are advertised to other routers. You can define route
filters to control the flow of both OSPF and RIP routes.
To create RIP import route filters, enter import mode from within router:rip
mode or type router rip import from within any mode. You can then use
the available commands to create route filters to control which RIP routes the
system learns.
To create RIP export route filters, enter export mode from within router rip
mode or type router rip export from within any mode. You can then use
the available commands to create route filters to control which RIP networks
the router advertises to other RIP-enabled routers.
Table 2-8 lists available RIP import and export route filter commands as they
appear when you type help at the command prompt. CLI global commands
are not listed and can be found in Table 2-1 on page 42. Note that the help
command output displays many commands in their abbreviated form.
Command Modes 55
Tab le 2- 8 RIP Import and Export Route Filter Mode Commands
Command Description
map-list Adds a route map to a map list.
match Specifies criteria that is matched against route entries.
override Configures the override values for import or export
filters.
route-map Creates a route map.
Cuda 12000 IP Access Switch CLI-based Administration Guide
Page 58

56 C
HAPTER 2: ABOUT THE COMMAND LINE INTERFACE
Slot Mode
Slot mode provides access to slot-specific commands. To enter this mode,
you must specify a chassis/slot (c/s) combination that identifies the slot that
you want to administer. Within this mode, you can do the following:
■ Persist (save) configuration for the current module, or all modules in the
system
■ Configure and show trace log activity for the current slot
■ Reset the module contained in the slot, or all modules in the chassis.
To enter slot mode, enter slot <chassis/slot> from within any mode.
Table 2-9 lists available slot mode commands as they appear when you type
help at the command prompt. CLI global commands are not listed and can
be found in Table 2-1 on page 42. Note that the help command output
displays many commands in their abbreviated form.
Tab le 2- 9 Slot Mode Commands
Command Description
copy Downloads a file from a TFTP server to flash.
cpu-utilization Enables CPU utilization on the module.
filter-aging Configures IP packet filtering for all interfaces in the
slot.
reset Reboots a module.
save Saves the system configuration for all slots to persistent
storage.
trace-log Configures event logging for the slot.
ADC Telecommunications, Inc.
Page 59

MANAGING USER ACCOUNTS
3
This chapter provides information and procedures on how to manage user
accounts and consists of the following tasks:
■ Configuring Access Profiles (page 57)
■ Managing User Accounts (page 58)
■ Configuring User Authentication (page 63)
Before you can effectively perform these tasks, you need to understand
some concepts of user accounts.
Understanding User Accounts
You can manage security and control access to the system by creating and
managing user accounts on the Cuda 12000. User accounts define both the
functional areas the user can access and the types of access allowed for
those areas.
In addition to creating user accounts locally on the Cuda 12000, you can also
create user accounts on a TACACS+ or RADIUS authentication server. Refer
to “Configuring User Authentication” on page 67 for more information.
Creating local accounts involves assigning access profiles to users. The
accounts themselves are created using the account command. The access
profiles that you assign to the account are created using the access-profile
command.
You must have root profile privileges, as defined below, to manage user
accounts.
Page 60

58 C
HAPTER 3: MANAGING USER ACCOUNTS
Configuring Access Profiles
Access profiles define the type of access available to users. The access
profile command allows you to configure access to the following functional
areas:
Tab le 3- 1 Functional Areas
Functional Area Description
Admin Functions associated with administering user
HFC Functions associated with configuring and
accounts, such as adding modifying, and deleting
users and profiles, as well as chassis configuration.
monitoring DOCSIS/EuroDOCSIS-related (CMTS)
parameters such as configuring upstream and
downstream channels.
Observer Functions associated with a limited command set.
The user has access to root mode and slot mode
only, and is restricted to a limited set of commands.
The user can type help or ? to determine the
available commands.
Prov Functions associated with provisioning-related tasks,
such as configuring DHCP servers and subnets.
Router Functions associated with router-related tasks, such
as configuring IP, RIP, and OSPF interfaces.
For each functional area, you can provide the following privileges:
■ noaccess. Prevents the user from viewing or configuring the functional
area.
■ readonly. The user can view information for the functional area, but not
configure it.
■ read/write. The user can both configure and view the functional area.
ADC Telecommunications, Inc.
Page 61

Configuring Access Profiles 59
The system ships with the following default access profiles. Note that these
profiles are displayed in all capital letters when viewed to distinguish them
from user-defined profiles. Also note that you cannot modify or remove
these built-in profiles:
■ AUDITORPROFILE. Provides read-only access to DOCSIS, routing, and
provisioning functionality; no access to administrative functions.
■ OPERATORPROFILE. Provides read-write access to DOCSIS, routing, and
provisioning functionality; no access to administrative functions.
■ ROOTPROFILE. Provides read-write access to all functional areas,
including DOCSIS, routing, provisioning, and administrative functions.
■ NOACCESSPROFILE. Denies access to all functional areas.
You can add more than one access profile to a user account. When you do
so, the more powerful privileges take precedence. For example, if you assign
both the AUDITORPROFILE and the ROOTPROFILE to a single user account,
the ROOTPROFILE overrides the AUDITORPROFILE and the user has
read-write access to all four functional product areas.
Cuda 12000 IP Access Switch CLI-based Administration Guide
Page 62

60 C
HAPTER 3: MANAGING USER ACCOUNTS
Creating and Modifying Access Profiles
To create or modify an access profile, use the access-profile command. To
create a profile, specify a new profile name; to modify a profile specify an
existing profile name. You create or modify a profile by performing the
following tasks:
Task Command
1. Enter root mode. root
2. Define the access profile. access-profile <profile name> description
<text string> {addprivilege | removeprivilege}
{admin | hfc | observer | prov | router}
{noaccess | read/write | readonly}
Example
The following example creates a profile with read only rights to routing
functionality:
cli:172.16.19.10:root# access-profile routemonitor description
"Readonly" addprivilege router readonly
PROFILE AFTER CREATE
profileName: routemonitor
profileDescription: Readonly
PrivilegeList:
router: readonly
'routemonitor' was successfully created
cli:172.16.19.10:root#
ADC Telecommunications, Inc.
Page 63

Displaying Access Profiles
You display access profile information by performing the following tasks:
Task Command
1. Enter root mode. root
2. Display all access profiles. show access-profile
3. Display a specific access profile. show access-profile <profile name>
Example
The following example displays a profile named routemonitor:
cli:172.16.19.10:root# show access-profile routemonitor
Showing single profile:
profileName: routemonitor
profileDescription: Readonly
PrivilegeList:
router: readonly
cli:172.16.19.10:root#
Configuring Access Profiles 61
Cuda 12000 IP Access Switch CLI-based Administration Guide
Page 64

62 C
HAPTER 3: MANAGING USER ACCOUNTS
Deleting a Profile
You remove an access profile by performing the following tasks:
Task Command
1. Enter root mode. root
2. Remove a specified access
no access-profile <profile name>
profile.
Example
The following example deletes an access profile named routemonitor:
cli:172.16.19.10:root# no access-profile routemonitor
'routemonitor' was successfully removed
cli:172.16.19.10:root#
ADC Telecommunications, Inc.
Page 65

Managing User Accounts
You create and modify local user accounts on the Cuda 12000 using the
account command. You must have root profile privileges to manage user
accounts which the following:
■ Creating and Modifying User Accounts
■ Displaying User Accounts
■ Deleting User Accounts
For each user account, you define the following parameters:
Tab le 3- 2 User Account Parameters
Parameter Description
Managing User Accounts 63
username
password
description
access-profile
Name of the user as defined by the
administrator that created the account.
Password required to access this account. Note
that if you do not specify a password, a NULL
value is added. This means that the user would
simply press [Enter] to access the account.
Administrative description of the user account.
Access profile that you want to assign to the
user account. Note that you can add multiple
profiles to a user account by reissuing the
command.
Cuda 12000 IP Access Switch CLI-based Administration Guide
Page 66

64 C
HAPTER 3: MANAGING USER ACCOUNTS
Creating and Modifying User Accounts
To create or modify a user account, use the account command. To create a
new account, specify a new account name. To modify an existing account,
specify an existing name. You create or modify a user account by performing
the following tasks:
Task Command
1. Enter root mode. root
2. Create a user account. account <account name> {add-profile <profile name> |
remove-profile <profile name> | password <password> |
description <string>}
Example
The following example creates a new user account named Route_1 that uses
the password tech and applies a profile named routemonitor:
cli:172.16.19.10:root# account Route_1 add-profile routemonitor
password tech description "Read Only Routing Admin"
ACCOUNT AFTER CREATE
UserName: Route_1
UserDescription: Read Only Routing Admin
PROFILE LIST
profileName: routemonitor
profileDescription: Readonly
PrivilegeList:
router: readonly
'Route_1' was successfully created
cli:172.16.19.10:root#
User account names and passwords are case-sensitive.
ADC Telecommunications, Inc.
Page 67

Displaying User Accounts
You view user accounts configured on the system by performing the
following tasks:
Task Command
1. Enter root mode. root
2. Show all user accounts. show account
3. Show a specified user account. show account <account name>
Example
The following example shows the user account named Route_1:
Managing User Accounts 65
cli:172.16.19.10:root# show account Route_1
Showing single account:
UserName: Route_1
UserDescription: Read Only Routing Admin
PROFILE LIST
profileName: routemonitor
profileDescription: Readonly
PrivilegeList:
router: readonly
cli:172.16.19.10:root#
Cuda 12000 IP Access Switch CLI-based Administration Guide
Page 68

66 C
HAPTER 3: MANAGING USER ACCOUNTS
Deleting User Accounts
You may want to delete a user account when you no longer need it or want
to remove a user from the system. After a user account is deleted that user is
locked out of the system.
Note that this is also true for the user with root profile privileges. If there is
only one user with root profile privileges for your system and that user is
locked out of the system, then you need to contact Customer Support for
assistance.
To remove a user account from the system, perform the following task:
Task Command
Delete account. no account <account name>
Example
The following example removes the user account Route_1 from the system:
cli:172.16.19.10:root# no account Route_1
'Route_1' was successfully removed
cli:172.16.19.10:root#
ADC Telecommunications, Inc.
Page 69

Configuring User Authentication
The Cuda 12000 IP Access Switch supports three types of user
authentication:
■ Local authentication – Users are authenticated locally by the Cuda 12000.
This is the default authentication type.
■ TACACS+ authentication – Users are authenticated by a TACACS+ server.
When the user attempts to login to the Cuda 12000, the Cuda 12000
encrypts the username and pasword, and forwards them to the
TACACS+ server for authentication. TACACS+ users are assigned the
ROOTPROFILE access profile.
■ RADIUS authentication – Users are authenticated by a RADIUS server.
When the user attempts to login to the Cuda 12000, the Cuda 12000
encrypts the password only, and forwards the username and password to
the RADIUS server for authentication. RADIUS users are assigned the
ROOTPROFILE access profile.
The sections that follow describe how to configure user authentication.
Configuring User Authentication 67
Cuda 12000 IP Access Switch CLI-based Administration Guide
Page 70

68 C
HAPTER 3: MANAGING USER ACCOUNTS
Configuring Local Authentication
By default, users are authenticated locally by the Cuda 12000 using the
accounts and access profiles you create as described earlier in this chapter. If
you configure TACACS+ or RADIUS authentication, and then decide to
change back to local authentication, perform the following tasks:
Task Command
1. Enter root mode. root
2. Enable local authentication. aaa authentication login default local
3. Verify that local authentication is
enabled.
show aaa
Example
cli:192.168.208.3:root# aaa authentication login default local
cli:192.168.208.3:root# show aaa
aaa authentication login default local
ADC Telecommunications, Inc.
Page 71

Configuring TACACS+ Authentication
Before you configure TACACS+ authentication on the Cuda 12000, make
sure that:
■ At least one account for Cuda 12000 users has been created on the
TACACS+ server. Users must login to the Cuda 12000 an account created
on the TACACS+ server. Refer to your TACACS+ server documentation
for more information.
■ You know the IP address of the TACACS+ server.
■ You know the shared key that the Cuda 12000 will use to encrypt
TACACS+ usernames and passwords for transmission to the TACACS+
server.
If TACACS+ authentication is unavailable due to problems with the TACACS+
server, local authentication is used.
To configure TACACS+ authentication on the Cuda 12000, perform the
following tasks:
Configuring User Authentication 69
Task Command
1. Enter root mode. root
2. Specify the IP address of the
TACACS+ server.
3. Specify the encryption key that
the Cuda 12000 will use to
encrypt usernames and
passwords. The key is an
alphanumeric string.
4. Verify TACACS+ server settings. show tacacs-server
5. Enable TACACS+ authentication. aaa authentication login default tacacs+
Cuda 12000 IP Access Switch CLI-based Administration Guide
tacacs-server host <ip-address>
tacacs-server key <string>
Page 72

70 C
HAPTER 3: MANAGING USER ACCOUNTS
Task Command
6. Verify that TACACS+
show aaa
authentication is enabled.
Example
cli:192.168.208.3:root# tacacs-server host 192.168.220.200
cli:192.168.208.3:root# tacacs-server key one4me
cli:192.168.208.3:root# show tacacs-server
tacacs-server host 192.168.220.200
tacacs-server key one4me
cli:192.168.208.3:root# aaa authentication login default tacacs+
cli:192.168.208.3:root# show aaa
aaa authentication login default tacacs+
cli:192.168.208.3:root#
ADC Telecommunications, Inc.
Page 73

Configuring RADIUS Authentication
Before you configure RADIUS authentication on the Cuda 12000, make sure
that:
■ At least one account for Cuda 12000 users has been created on the
RADIUS server. Users must login to the Cuda 12000 an account created
on the RADIUS server. Refer to your RADIUS server documentation for
more information.
■ You know the IP address of the RADIUS server.
■ You know the shared key that the Cuda 12000 will use to encrypt
RADIUS passwords for transmission to the RADIUS server. Usernames are
not encrypted.
If RADIUS authentication is unavailable due to problems with the RADIUS
server, local authentication is used.
To configure RADIUS authentication on the Cuda 12000, perform the
following tasks:
Configuring User Authentication 71
Task Command
1. Enter root mode. root
2. Specify the IP address of the
RADIUS server.
3. Specify the encryption key that
the Cuda 12000 will use to
encrypt passwords. The key is an
alphanumeric string.
4. Verify RADIUS server settings. show radius-server
5. Enable RADIUS authentication. aaa authentication login default radius
Cuda 12000 IP Access Switch CLI-based Administration Guide
radius-server host <ip-address>
radius-server key <string>
Page 74

72 C
HAPTER 3: MANAGING USER ACCOUNTS
Task Command
6. Verify that RADIUS
show aaa
authentication is enabled.
Example
cli:192.168.208.3:root# radius-server host 192.168.220.202
cli:192.168.208.3:root# radius-server key one4me
cli:192.168.208.3:root# show radius-server
radius-server host 192.168.220.202
radius-server key one4me
cli:192.168.208.3:root# aaa authentication login default radius
cli:192.168.208.3:root# show aaa
aaa authentication login default radius
cli:192.168.208.3:root#
ADC Telecommunications, Inc.
Page 75

CHASSIS ADMINISTRATION
II
Chapter 4 Chassis Configuration
Chapter 5 Multi-Chassis Support
Chapter 6 Module Administration
Chapter 7 Packet Over SONET Administration
Chapter 8 Timing and Alarm Controller Management
Chapter 9 Simple Network Management Protocol (SNMP)
Chapter 10 Managing System Events
Page 76

Page 77

4
CHASSIS CONFIGURATION
This chapter explains the configuration features of the Cuda 12000 chassis
and includes the following sections:
■ Understanding Chassis Identification (page 76)
■ Understanding Management Module Redundancy (page 76)
■ Configuring Chassis Parameters (page 78)
■ Displaying Current Chassis Configuration (page 81)
■ Configuring Clock Sources (page 86)
■ Starting and Stopping the HTTP Server (page 88)
■ Enabling and Disabling Traffic Relay (page 89)
■ Broadcasting Messages to Users (page 91)
In addition to the features described in this chapter, you can group multiple
chassis together to be managed through a single network management
view. Refer to Chapter 5 “Multi-Chassis Support” for more information.
Page 78

76 C
HAPTER 4: CHASSIS CONFIGURATION
Understanding Chassis Identification
The Cuda 12000 chassis has two key identifiers:
■ Chassis Number — The Cuda 12000 chassis is shipped with a unique
chassis-number, which is a fixed value assigned to each chassis during
manufacturing at the ADC plant.
■ Chassis ID — Each Cuda 12000 switch should be configured with a
unique chassis identification (ID) number. The chassis ID serves as a router
management tool.
Understanding Management Module Redundancy
Each chassis is equipped with at least one management module, which
controls the chassis. For management module redundancy, the Cuda 12000
supports installation of two management modules. When two management
modules are installed, one acts as the primary management module and the
other acts as the secondary management module.
When a Cuda 12000 that is configured with two management modules
reboots, the Cuda randomly determines which module acts as the primary
and which module acts as the secondary. The STATUS DISPLAY LED on the
management module indicates whether the management module is a
primary or secondary (for example, the LED on a primary management
module displays “PRIMARY”).
The primary management module is the active management module on the
Cuda 12000. When you issue CLI commands or use the Cuda Desktop GUI
to manage the Cuda 12000, you are interacting with the primary
management module.
The secondary management module has two responsibilities:
■ Monitor the state of the primary management module
■ Keep its mirrored disk sectors synchronized with the primary
management module
ADC Telecommunications, Inc.
Page 79

Understanding Management Module Redundancy 77
A secondary management module can take over the primary role in two
ways:
■ Automatically, when the secondary management module detects that the
primary management module is not functioning properly.
■ Manually, through the chassis-config CLI command. In this case, you use
the command to force the current primary management module into the
secondary role, which in turn forces the current secondary management
module into the primary role.
When the secondary management module takes over the primary role, the
secondary:
■ Activates its copy of the chassis software
■ Establishes connections with all other cards in the chassis
When the secondary management module activates its copy of the BAS
software and establishes connections to cards, the secondary management
module also starts services, including disk-mirroring and LDAP. Through disk
mirroring, the software on the two management modules share data.
When a switch to a secondary management module occurs:
■ Services are unavailable for a brief period of time
■ Network management access is prevented for a brief period of time.
The Cuda’s data-forwarding operation is not disrupted while a switchover to
a backup occurs.
Cuda 12000 IP Access Switch CLI-based Administration Guide
Page 80

78 C
HAPTER 4: CHASSIS CONFIGURATION
Configuring Chassis Parameters
Chassis configuration includes the following parameters:
■ Chassis Number — A fixed number assigned to the Cuda 12000 chassis
during manufacturing at the ADC plant.
■ Chassis ID — User-defined. A unique identification number that you
assign to the Cuda 12000 chassis in the network. The Cuda uses a
multi-range numbering system. Acceptable chassis ID values are 1 to 128,
or the number 255.
■ Cluster ID — User-defined. An ID of “0” is the default and is
recommended.
■ Manager — Enables you to force the current primary management
module into a secondary role, thereby forcing the current secondary
management module into the primary role.
■ Scope — Currently, “Cluster” is the only supported value.
Before you proceed to configure a chassis, you must know the number of
the specific chassis. To display the current chassis configuration, including
the current Chassis Number, use the show chassis-config command within
root mode. For example:
cli:172.16.19.10:root# show chassis-config
Chassis Number: 101
Chassis Id: 1
Cluster Id: 0
Primary Manager Slot: 13
Secondary Manager Slot: 14
Scope: Cluster
cli:172.16.19.10:root#
ADC Telecommunications, Inc.
Page 81

Configuring Chassis Parameters 79
Configuration of chassis parameters is achieved using the chassis-config
command within root mode. Perform the following tasks within root mode
to configure chassis parameters:
Task Command
1. Identify the chassis number. show chassis-config
2. Configure the chassis ID. chassis-config <chassis-number>
chassisid <1..128>
3. Configure the Cluster ID chassis-config <chassis-number>
clusterid <number>
4. Switch the primary management
module to a secondary role,
chassis-config <chassis-number>
manager secondary
thereby forcing the secondary
management module into the
primary role.
5. Define the management scope of
the primary or secondary chassis
chassis-config <chassis-number>
scope {chassis | cluster}
controller.
The following example steps you through the chassis configuration process:
cli:172.16.19.10:root# show chassis-config
Chassis Number: 101
Chassis Id: 5
Cluster Id: 20
Primary Manager Slot: 13
Secondary Manager Slot: 14
Scope: Chassis
cli:172.16.19.10:root# chassis-config 101 chassisid 1
cli:172.16.19.10:root# chassis-config 101 clusterid 0
cli:172.16.19.10:root# chassis-config 101 scope cluster
cli:172.16.19.10:root# show chassis-config
Chassis Number: 101
Chassis Id: 1
Cluster Id: 0
Primary Manager Slot: 13
Secondary Manager Slot: 14
Scope: Cluster
cli:172.16.19.10:root#
Cuda 12000 IP Access Switch CLI-based Administration Guide
Page 82

80 C
HAPTER 4: CHASSIS CONFIGURATION
The following example shows you how to force a primary management
module into a secondary role, thereby forcing the secondary management
module into a primary role:
cli:192.168.222.200:root# show chassis-config
Chassis Number: 101
Chassis Id: 1
Cluster Id: 0
Primary Manager Slot: 13
Secondary Manager Slot: 14
Scope: Cluster
cli:192.168.222.200:root# chassis-config 101 manager secondary
Connection to 192.168.222.200 refused or closed!
Note that you must reconnect to the Cuda 12000 after you force the
management modules to change roles.
ADC Telecommunications, Inc.
Page 83

Displaying Current Chassis Configuration 81
Displaying Current Chassis Configuration
The Cuda 12000 allows you to generate a list of CLI commands that display
the current running state of the chassis configuration. The command that
supports this function is show running-config.
Use the following procedure to display the complete current configuration:
Task Command
1. Enter root mode. root
2. Display the current
configuration.
Note that:
■ When you issue the command with no arguments, the output does not
display default values. Issue the command with the all argument to
display all values.
■ The xml argument displays the output in XML format.
show running-config [{all | xml |
server-name <server-name>}]
■ The server-name argument is reserved for ADC internal use only.
In addition to displaying the running configuration, you have the ability to
generate a script to a file. This script may be used to configure other chassis
to use the same configuration. You can write the script within the bascli
environment using the source command; or you may use -f
session.
Cuda 12000 IP Access Switch CLI-based Administration Guide
within a telnet
Page 84

82 C
HAPTER 4: CHASSIS CONFIGURATION
Example
cli:192.168.208.3:root# show running-config
!
! BAS Chassis
event-config reporting warning local|syslog|traps
event-config reporting notice local|syslog|traps
event-config reporting info none
traffic-relay tftp port 69
traffic-relay time_of_day port 37
!
! RIP Protocol
router rip
!
! RIP Import filters
import
up
!
! RIP Export filters
export
up
root
!
! OSPF Protocol
router ospf
ospf area 0.0.0.0
!
! OSPF Import filters
import
up
!
! OSPF Export filters
export
up
root
!
! IP Protocol
!
! Bridge Group Holder
!
! Bas SNMP Manager
snmp-server group adc v1 read public write private notify
public context adc s
torage nonvolatile
snmp-server group adc v2c read public write private notify
public context adc
storage nonvolatile
ADC Telecommunications, Inc.
Page 85

Displaying Current Chassis Configuration 83
snmp-server group adc v3 noauth read public write private
notify public contex
t adc storage nonvolatile
snmp-server group mgr v3 noauth read nosnmpconfig context
monitor storage nonv
olatile
snmp-server group guitraps v1 notify guitraps storage readonly
snmp-server group guitraps v2c notify guitraps storage
readonly
snmp-server group superman v3 priv read allaccess write
allaccess context admi
n storage nonvolatile
snmp-server group admingroup v1 read allaccess write allaccess
storage nonvola
tile
snmp-server group admingroup v2c read allaccess write
allaccess storage nonvol
atile
snmp-server group monitorgroup v1 read nosnmpconfig storage
nonvolatile
snmp-server group monitorgroup v2c read nosnmpconfig storage
nonvolatile
snmp-server group trapcommunity v1 notify allaccess storage
nonvolatile
snmp-server group trapcommunity v2c notify allaccess storage
nonvolatile
snmp-server view public 1.3.6.1 included storage nonvolatile
snmp-server view private 1.3.6.1 included storage nonvolatile
snmp-server view guitraps 1.3.6.1 included storage readonly
snmp-server view allaccess 1.3.6.1 included storage
nonvolatile
snmp-server view nosnmpconfig 1.3.6.1 included storage
nonvolatile
snmp-server view nosnmpconfig 1.3.6.1.6.3 excluded storage
nonvolatile
snmp-server community admincon admingroup address
192.168.212.0 mask 255.255.2
55.0 storage nonvolatile
snmp-server community guitraps guitraps storage readonly
snmp-server community justme admingroup address 100.100.10.5
address 100.100.1
0.8 address 192.168.212.109 storage nonvolatile
snmp-server community monitor monitorgroup storage nonvolatile
snmp-server community private adc context adc storage
nonvolatile
snmp-server community public adc context adc storage
nonvolatile
Cuda 12000 IP Access Switch CLI-based Administration Guide
Page 86

84 C
HAPTER 4: CHASSIS CONFIGURATION
snmp-server community trapcommunity trapcommunity storage
nonvolatile
snmp-server host 127.0.0.1 guitraps udp-port 54321 storage
readonly
snmp-server host 201.1.1.20 trapcommunity version 1 udp-port
162
!
! Fault Manager
!
! Controller Module
slot 1/13
!
! Gigabit Ethernet Module
slot 1/3
!
! Interface 1/3/1 Gigabit Ethernet Mac
interface ethernet 1/3/1
root
!
! 10/100 Ethernet Module
slot 1/11
!
! Interface 1/11/1 10/100 Ethernet MAC
interface ethernet 1/11/1
!
! IP Address
ip address 199.199.1.1 255.255.255.0
ip ospf area-id 0.0.0.1
up
root
!
! Interface 1/11/2 10/100 Ethernet MAC
interface ethernet 1/11/2
root
!
! Interface 1/11/3 10/100 Ethernet MAC
interface ethernet 1/11/3
root
!
! Interface 1/11/4 10/100 Ethernet MAC
interface ethernet 1/11/4
root
!
! Interface 1/11/5 10/100 Ethernet MAC
interface ethernet 1/11/5
root
!
! Interface 1/11/6 10/100 Ethernet MAC
ADC Telecommunications, Inc.
Page 87

Displaying Current Chassis Configuration 85
interface ethernet 1/11/6
root
!
! Interface 1/11/7 10/100 Ethernet MAC
interface ethernet 1/11/7
root
!
! Interface 1/11/8 10/100 Ethernet MAC
interface ethernet 1/11/8
root
!
! CMTS Module
slot 1/1
!
! Interface 1/1/1 CMTS MAC
interface cable 1/1/1
dhcp-policy default permit forward-internal
dhcp-relay add-agent-options enable
ip source-route 201.1.2.0 255.255.255.0 201.1.3.1
ip source-route 201.1.4.0 255.255.255.0 201.1.5.0
ip source-route 201.4.6.0 255.255.255.0 201.2.7.0
admission-control disable
privacy base auth-lifetime 604800 tek-lifetime 43200
cert-trust trusted enab
le-cert-validity-periods true
cm-offline timer 10
cpe-control max-ip 10
cpe-control active
trace-log baseline-privacy true registration true ranging
true
!
! Interface 1/1/1 CMTS Downstream
downstream transmit-power 0
downstream no shutdown
!
! Interface 1/1/1 CMTS Upstream 1
upstream 1 frequency 42.0 voice-bw-reserve 65.0
upstream 1 no shutdown
!
! Interface 1/1/1 CMTS Upstream 2
upstream 2 voice-bw-reserve 60.0
upstream 2 no shutdown
!
! Interface 1/1/1 CMTS Upstream 3
!
! Interface 1/1/1 CMTS Upstream 4
root
!
Cuda 12000 IP Access Switch CLI-based Administration Guide
Page 88

86 C
HAPTER 4: CHASSIS CONFIGURATION
! POS Module
slot 1/8
!
! Interface 1/8/1 POS MAC
interface pos 1/8/1
arp timeout 0
!
! BasPppProtocol
root
Configuring Clock Sources
The Cuda 12000 IP Access Switch backplane has a primary clock (A) and a
secondary clock (B). For each of these clocks, you can configure one of the
following clock sources:
■ External BITS-A clock source
■ External BITS-B clock source
■ External Packet-Over-SONET (POS) clock source
■ Internal Stratum-3 oscillator clock source on the management module
If you do not configure any clock sources, each DOCSIS/EuroDOCSIS module
uses its own clock.
If you are using a BITS-A or BITS-B external clock source, make sure that the
Cuda 12000 is connected to the appropriate clock sources via the BITS-A or
BITS-B external clock connectors. Refer to the Cuda 12000 IP Access Switch
Installation Guide for more information on these connectors.
If you are using a POS module as the clock source, make sure that the
interface on the POS module has been configured to receive clocking from
the other (remote) side of the POS link. To do this, issue the following
command from within POS interface mode:
clock-source line
Refer to Chapter 7 “Packet Over SONET Administration” for more
information on configuring POS interfaces.
ADC Telecommunications, Inc.
Page 89

Configuring Clock Sources 87
A typical configuration would be as follows:
■ Primary clock configured to use a BITS-A or BITS-B external clock source
■ Secondary clock configured to use the internal Stratum-3 oscillator clock
source.
The example at the end of this section illustrates the commands you would
issue to create this typical configuration.
To configure primary and secondary clock sources, perform the following
tasks:
Task Command
1. Enter root mode. root
2. Configure the clock source for the
primary clock.
aux-device backplane-clock-a
{bits-a | bits-b | internal | none |
slot <c/s> {enable | disable}}
Note that the slot <c/s> {enable |
disable} argument configures a POS
module as the clock source. The <c/s>
variable specifies the POS module’s slot.
Specify the enable keyword to enable
the POS module as a clock source;
specify the disable keyword to disable
the POS module as a clock source.
3. Configure the clock source for the
secondary clock.
aux-device backplane-clock-b
{bits-a | bits-b | internal | none |
slot <c/s> {enable | disable}}
4. Verify primary and secondary
show aux-device backplane-clocks
clock sources.
Example
In this example, the clock source for the primary clock is BITS-A, and the
clock source for the secondary clock is the internal Stratum 3 oscillator.
cli:192.168.220.244:root# aux-device backplane-clock-a bits-a
cli:192.168.220.244:root# aux-device backplane-clock-b internal
cli:192.168.220.244:root# show aux-device backplane-clocks
Stratum-3 oscillator Installed
Backplane clock A source bitsA
Backplane clock B source internal
Cuda 12000 IP Access Switch CLI-based Administration Guide
Page 90

88 C
HAPTER 4: CHASSIS CONFIGURATION
Starting and Stopping the HTTP Server
The chassis runs an HTTP server, which allows CudaView users to manage
the chassis with their Web browsers. Refer to the Cuda 12000 IP Access
Switch CudaView Administration Guide for more information on CudaView.
You can start and stop the HTTP server using the http-server command. If
you stop the HTTP server, the chassis cannot be managed through
CudaView. By default, the HTTP server is enabled and running.
To start and stop the HTTP server, perform these tasks:
Task Command
1. Enter root mode. root
2. Start the HTTP server. http-server enable
3. Stop the HTTP server. http-server disable
ADC Telecommunications, Inc.
Page 91

Enabling and Disabling Traffic Relay
You can configure processes, such as the HTTP server, to send and receive
TCP or UDP packets using an internal address on the Cuda 12000. This
method of sending and receiving packets is called traffic relay.
If you are running a TFTP server on the Cuda 12000 as part of FastFlow BPM
provisioning, you must enable traffic relay for the TFTP server in order to
download configuration files to cable modems. The TFTP server sends and
receives packets using an internal address. Refer to the FastFlow BPM
documentation set for more information on the FastFlow BPM.
The traffic-relay command also allows you to configure the Cuda 12000 for
in-band management. For example, you can use this command to enable
forwarding of Telnet traffic and HTTP traffic using an internal address,
thereby allowing you to perform in-band management of the Cuda 12000
using the CLI or CudaView.
To enable or disable traffic relay for a process, perform these tasks:
Enabling and Disabling Traffic Relay 89
Task Command
1. Enter root mode. root
2. Enable traffic relay for a
process.
3. Disable traffic relay for a
process.
4. Display traffic relay status. show traffic-relay
Note that the port argument allows you to specify a port that the specified
process uses to listen for incoming requests.
Cuda 12000 IP Access Switch CLI-based Administration Guide
traffic-relay {dns | ftp | http | snmp |
snmp-trap | ssh | syslog | telnet |
tftp | time_of_day} [port <port>]
Refer to the Cuda 12000 IP Access
Switch CLI Reference Guide for details
on command syntax.
no traffic-relay {dns | ftp | http |
snmp | snmp-trap | ssh | syslog |
telnet | tftp | time_of_day}
Page 92

90 C
HAPTER 4: CHASSIS CONFIGURATION
Example
In this example, traffic relay is enabled for Telnet.
cli:192.168.208.3:root# traffic-relay telnet
cli:192.168.208.3:root# show traffic-relay
row count: 10
Protocol State Port Number
------------ -------- ----------tftp enable 69
time_of_day enable 37
syslog disable 514
dns disable 53
snmp disable 161
telnet enable 23
ssh disable 22
http disable 80
ftp disable 21
snmp-trap disable 162
cli:192.168.208.3:root#
ADC Telecommunications, Inc.
Page 93

Broadcasting Messages to Users
The talk command enables you to broadcast messages to all chassis users
and to enable and disable the ability to broadcast messages.
To broadcast messages to users, perform the following task:
Task Command
From any mode, send a broadcast
message.
To enable or disable the broadcast capability, perform the following task:
Task Command
From any mode, enable or disable
the broadcast capability.
Broadcasting Messages to Users 91
talk <message-string>
Note that if the string contains spaces,
enclose it in quotes.
talk {enable | disable}
Example
cli:192.168.208.3:root# talk "Testing the broadcast message feature"
@14:20:42 root@techpubs:: Testing the broadcast message feature
cli:192.168.208.3:root#
Cuda 12000 IP Access Switch CLI-based Administration Guide
Page 94

92 C
HAPTER 4: CHASSIS CONFIGURATION
ADC Telecommunications, Inc.
Page 95

5
MULTI-CHASSIS SUPPORT
This chapter describes multi-chassis support, and includes the following
sections:
■ About Multi-Chassis Support (page 94)
■ Planning Multi-Chassis Support (page 96)
■ Enabling the Jini Lookup Service (page 97)
■ Configuring Multi-Chassis Support (page 98)
■ Creating a Common User Account for the Group (page 100)
■ Viewing Chassis Details (page 101)
Page 96

94 C
HAPTER 5: MULTI-CHASSIS SUPPORT
About Multi-Chassis Support
The purpose of multi-chassis support is to allow network administrators,
from a single session, to access and manage multiple chassis as a single
group. When a network administrator connects to a chassis that is a member
of a multi-chassis group, the administrator can also access all other chassis in
that group without having to connect to each chassis individually.
To become a member of a multi-chassis group, each chassis must have
multi-chassis support enabled and must be configured with the same group
name. When a chassis is configured with a group name, the chassis registers
its name with the Jini™ lookup service, which acts as a directory that enables
all chassis in the same group to find each other.
When planning multi-chassis support, consider that each Cuda 12000 can
run the Jini lookup service, but the service does not have to be enabled on
every Cuda 12000. Refer to “Planning Multi-Chassis Support” on page 96
for more information on planning multi-chassis support.
To access the multi-chassis group, the network administrator logs in to one
of the chassis in the group. The network administrator then can select either
that chassis to manage or any other chassis in the group.
The Cuda 12000 uses a proxy-based approach to communicate between the
host chassis — the chassis to which you are currently logged in — and other
chassis within the same group. The Java server on the management module
in the host chassis forwards network management messages that are
destined for other chassis to the appropriate chassis group member.
You can manage SNMPv3 resources (contexts and users) on the host chassis
only. In addition, you can manage hardware alarms/faults and user accounts
on the host chassis only. You cannot manage SNMPv3, hardware
alarms/faults, and user accounts by proxy.
ADC Telecommunications, Inc.
Page 97

About Multi-Chassis Support 95
The multi-chassis group, MCS-Group1, in the example below consists of
three chassis: A, B, and C. The group name “MCS-Group1” is configured on
each chassis, and each chassis registers this name with the Jini lookup service
running on Chassis C. In this example, the network administrator logs in to
Chassis B (the host chassis), but keep in mind that the network administrator
can also log in to Chassis A and Chassis C to access the group. When the
network administrator performs network management operations (such as
configuring an interface) on Chassis A and Chassis C, then Chassis B
forwards network management messages to Chassis A and Chassis C.
Chassis B also forwards messages to the network administrator’s workstation
that originate from Chassis A and Chassis C.
Chassis A
Messages
Messages
Chassis B
Network
Administrator’s
Workstation
Figure 5-1 Sample Multi-Chassis Group
Cuda 12000 IP Access Switch CLI-based Administration Guide
Messages
Host
Chassis
Chassis C
MCS-Group1
Jini lookup
service running
on Chassis C
Page 98

96 C
HAPTER 5: MULTI-CHASSIS SUPPORT
Planning Multi-Chassis Support
Before you configure multi-chassis support, perform these planning tasks:
■ Identify each Cuda 12000 chassis that will be in the group. Make sure
that all chassis in the group are running software versions that have
multi-chassis support.
■ Decide on a group name. A descriptive name is suggested (for example,
“MCS-Group-Net-Mgmt”). The name may not contain spaces. You will
configure this name on each chassis in the group.
■ Decide on a user account for the group with the necessary access
privileges for performing your desired network management tasks. All
Cuda 12000s in the group must have a common, identical user account.
When you connect to a chassis in the group, you must login to this
account to access all members of the group.
■ Make sure that all chassis in the group share the same physical network
(such as the same Ethernet LAN). Members of the same group cannot
reside on different physical networks.
■ Identify two Cuda 12000 chassis that will run the Jini lookup service. The
reason you should enable the Jini lookup service on two Cuda 12000
chassis (instead of one) is to put redundancy in place. Each chassis that
runs the Jini lookup service must be on the same physical network as the
multi-chassis group that it serves.
After you finish planning multi-chassis support, perform these tasks:
1. Enable the Jini lookup service. Refer to “Enabling the Jini Lookup Service”
on page 97.
2. Configure multi-chassis support on each Cuda 12000 chassis in the
group. Refer to “Configuring Multi-Chassis Support” on page 98 for
details.
3. Create a common user account on each chassis in the group. Refer to
“Creating a Common User Account for the Group” on page 100.
4. Monitor the group as needed. Refer to “Viewing Chassis Details” on
page 101.
ADC Telecommunications, Inc.
Page 99

Enabling the Jini Lookup Service
Enable the Jini lookup service on at least two Cuda 12000 chassis. Each
chassis that runs the Jini lookup service must be on the same physical
network as the multi-chassis group that it serves. To enable the Jini lookup
service on a chassis, perform the following tasks:
Tasks Commands
1. Enter configuration mode. root
2. Enable the Jini lookup service. lookup enable
3. Verify the Jini status. show lookup
Example
In this example, the status of the Jini lookup service is displayed, then the Jini
lookup service is started, and finally the Jini lookup status is displayed again.
cli:192.168.208.3:root# show lookup
# JINI lookup service (reggie) is stopped.
cli:192.168.208.3:root# lookup enable
Please wait, this may take some time ...
# rmid is stopped
# Starting RMI activation daemon: OK
#
# httpd (pid 4055 4054 4053 4052 4051 4050 4049 540 539 538 537
536 535 534 533
531) is running...
# rmid (pid 5492 5491 5490 5489 5488 5487 5486 5485 5484 5483
5482 5481 5480 547
9 5478 5433) is running...
# JINI lookup service (reggie) is stopped.
# CODEBASE= http://192.168.208.3:80/jini/reggie-dl.jar
# POLICY= /bas/data/java.policy
# LOG_DIR= /var/log/reggie_log
# GROUPS= Cuda12000
# Registering JINI lookup service: OK
#
# JINI lookup service (reggie) is running.
cli:192.168.208.3:root# show lookup
# JINI lookup service (reggie) is running.
Enabling the Jini Lookup Service 97
Cuda 12000 IP Access Switch CLI-based Administration Guide
Page 100

98 C
HAPTER 5: MULTI-CHASSIS SUPPORT
Configuring Multi-Chassis Support
The Cuda 12000 ships with multi-chassis support enabled. During the initial
installation (or upgrade) of the Cuda operating system software, the Java
server checks for a multi-chassis support service property. If the property is
not found, the Java server automatically enables multi-chassis support, using
Jini as the chassis discovery mechanism on the local network.
When multi-chassis support is enabled, all chassis on the same physical
network register with each Jini lookup service. Chassis that have the same
group name form a multi-chassis group. By default, the Cuda 12000 ships
with multi-chassis support activated, and the local group name of Cuda.
You can use the CLI to manually enable and disable multi-chassis support
and to override the default group name with one of your own choosing. If
you override the default name, make sure that the new name you specify is
the correct group name (that is, it matches the group names configured on
other chassis in the group). In addition, you can also specify a group
description and access additional chassis using the connect command.
Perform these tasks to manually configure multi-service support on a chassis:
Tasks Commands
1. Enter configuration mode. root
2. Enable or disable multi-chassis
support, specify a group name,
or specify a description.
3. Display multi-chassis group
status.
4. Access another chassis while in
the current log-in session.
chassis {mcs {enable | disable} | group
<group name> | description <string>}
show chassis {local | <ip-address>}
connect <ip address>
ADC Telecommunications, Inc.
 Loading...