

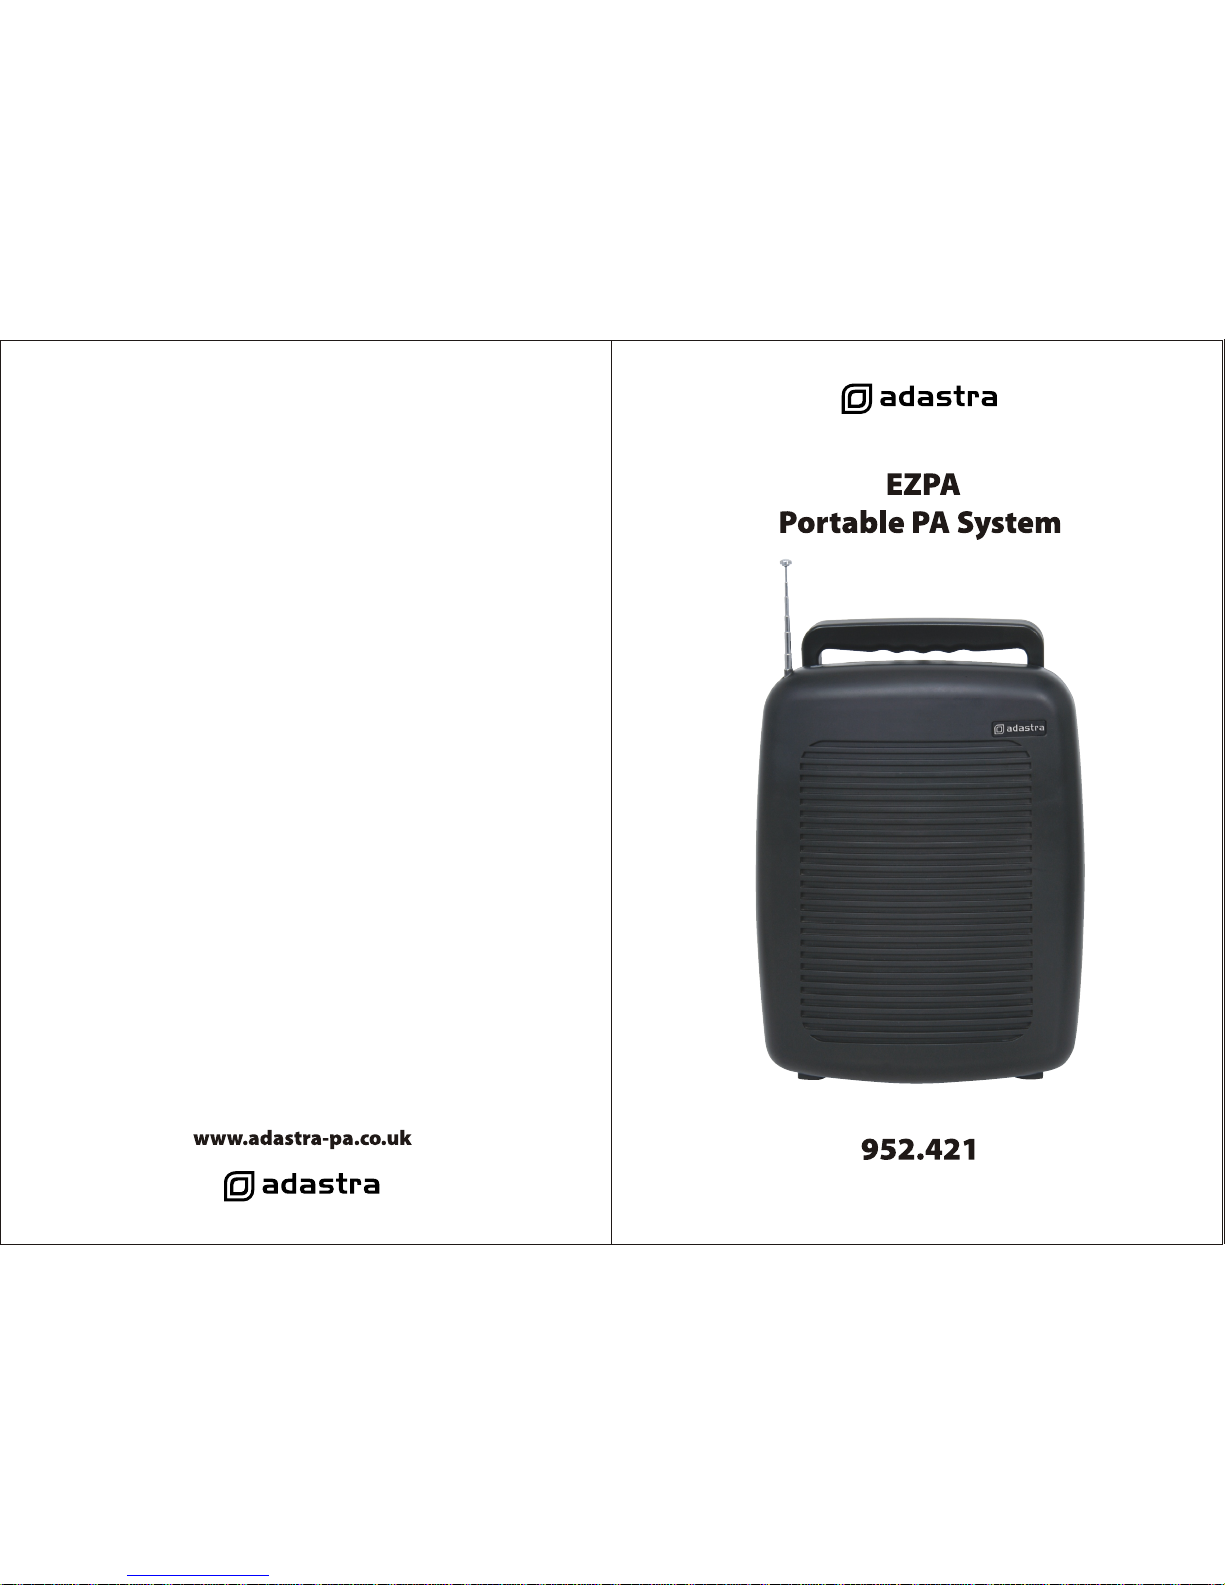
Page 1
Page 2
2
1. Built-in 1GB MP3 player. With USB port which can play
flash drive, Mp3 player etc. With SD/MMC card reader.
With 3.5mm AUX in jack which can connect with iPod,
CD player etc. With recording function.
2. With 1 handheld microphone and 1 body pack
transmitter with headset MIC and lapel MIC.
3. Built-in rechargeable battery.
4. ECHO, TONE controls.
5. Power/volume control, Mp3 volume control.
6. 6.35mm MIC IN, RCA line in jacks.
7. 6.35mm LINE OUT and 3.5mm phone out jacks.
8. AC input and 12V DC input jacks.
CAUTION
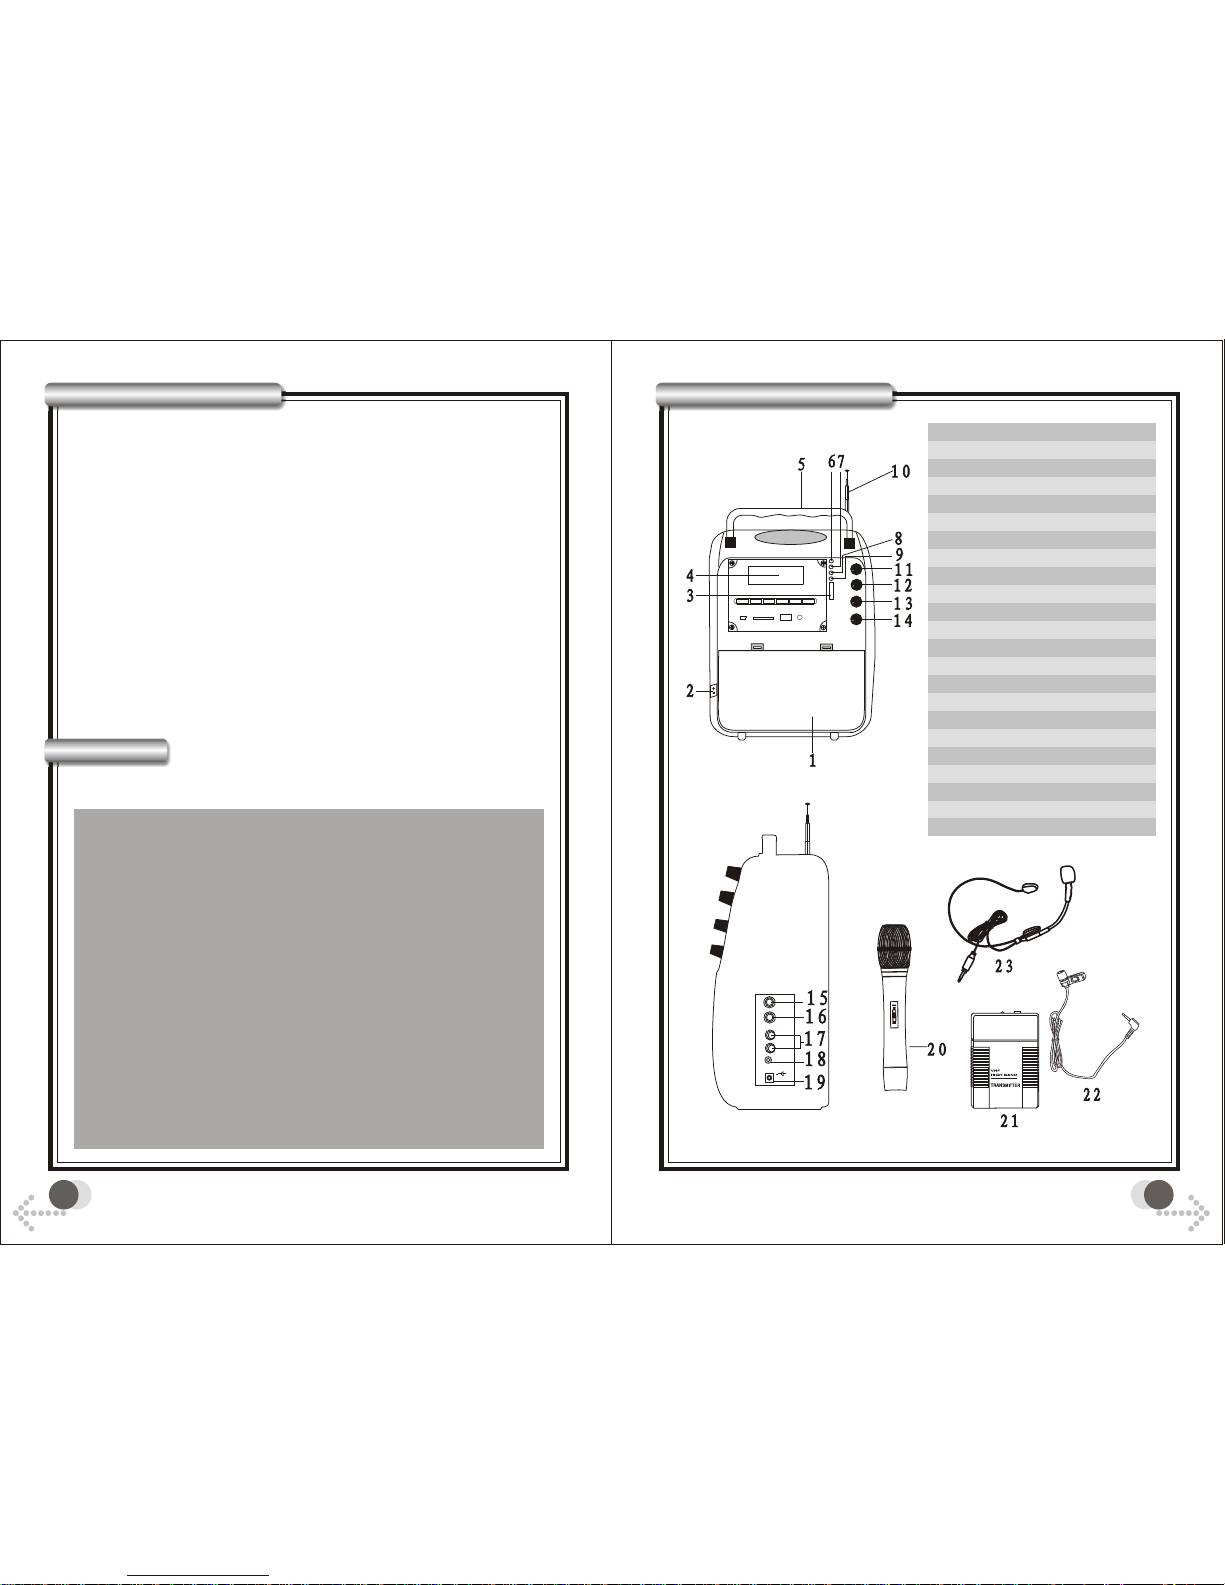
PARTS DESCRIPTION
FEATURES
++
DC 12VDC 12V
MICMIC
LINE OUTLINE OUT
LINELINE
ININ
PHONEPHONE
MENU MENU ENTER ENTER PLAY/PAUSE PLAY/PAUSE PREVIOUS PREVIOUS NEXTNEXT RECORDRECORD
USB USB AUX INAUX IN
DIGITAL MP3 PLAYER
SD/MMCSD/MMC
FLASH DRIVERFLASH DRIVER
1. Rear Cover( battery inside)
2. AC input jack
3. AF lever meter
4. Mp3 player
5. Handle
6. Low battery power indicator
7. Charging indicator
8. Power indicator
9. RF indicator
10. Antenna
11. Power switch/volume control
12. Mp3 volume control
13. Echo control
14. Tone control
15. MIC input jack
16. Line out jack
17. Line input jack
18. Phone out jack
19. DC input jack
20. Handheld MIC
21. Body pack transmitter
22. Clip-on MIC
23. Headset MIC
1. Free from high temperature; don't expose the device to
equipment.
2. Don't place the device in the environment of humidity and dirts.
3. Place the device in the ventilated environment.
4. Don't pull the power cord while you pull out the plug,
plug to pull out.
5. Pull out the AC power if you will not use the device for a long time.
6. Your operation must be subjected to the specified voltage
the device and complied with this guide.
7. Don't open chassis :it is very dangerous either open the
put your hand inside the chassis, don't do it.
If the device is not propers, pull out the plug at once and
retailer or the nearest distributor.
the hot
just hold the
mark on
chassis or
contact
your
1
Page 3
4
ʹÓÃ˵Ã÷
1. Confirm the power:
A. When use the AC power:
1) Please confirm if your currently AC power as the same as the
device parameter, if no, the device will be destroyed.
2) Turn on the volume control in clockwise direction, this device is
normally working when the panel red power LED come on.
3) Open the battery cover of the transmitter put a 9V battery into it,
then close. Put the plug of headset into the mic jack on the
transmitter, keep the distance as 0.8-1M between the mic head
and receiver, the green indicator light is lightening, the wireless
start working. Tune the wireless amplifier volume control to your
desired level.
B. When use the build-in DC 12V rechargeable battery:
1) Insert the rechargeable battery in correct polarity direction.
(DC 12V:Red means +, Black means - ,)
2) Turn on the volume control in clockwise direction, RED indicator is
come on, this device is working now. If the LOW POWER indicator
come on when use this device, means the voltage is not enough.
Please recharge it
C. When use the outer DC 12V rechargeable battery:
1) DC power can be input into by DC power jack directly.
2) When use car battery: voltage should be 12v-15v, please note the
correct polarity.
D. When recharging:
1) Plug the power cable into AC power jack for recharging, when
RECHARGE indicator turn to GREEN from RED, means voltage
is enough.
2) Please recharge the battery every 2 months if you don't use it for
a long time, and recharge it 8-10 hours continuous.
OPERATION
OPERATION
2. Amplifier:
1) Turn POWER/VOULME knob clockwise. Power Led indicator will
light. Adjust master volume, Mp3 volume, tone and Echo control to
suitable level.
2) Wire microphone: Plug wire microphone into MIC in jack.
Microphone volume can be adjusted by master volume 11. Keep
microphone away from the main unit to avoid feedback noise.
3) External audio can be input to main unit through RCA input jack.
4) Connect headphone to phon out jack to listen to music without
interfering others.
5) Sound can be output to amplifier through LINE OUT jack.
3. Wireless transmitter:
1) Insert a 9V battery into the wireless transmitter. Turn on power
switch, power LED indicator will flash once then off. RF indicator
on amplifier will light. Extend the antenna fully.
2) Adjust amplifier volume and tone control to a suitable level.
3) When the transmitter power switch is ON and the power indicator
light red, it means that the transmitter battery is not enough.
Please replace with new battery.
3
Page 4

6
4. DIGITAL MP3 PLAYER
1) FEATURES
(1) Big LCD screen with blue backlight.
(2) Built-in flash memory, USB flash disc player and
SD/MMC card reader.
(3) A-B repeat and high quality recording function.
(4) Support MP3 and WMA music files.
(5) File administration function can support 5 levels
folders.
(6) Seven play mode: all, repeat all, one, repeat one,
shuffle, folder, repeat folder.
(7) Program upgrade function. End user can upgrade the
MP3 player with our upgrade software.
2) DATA DOWNLOADING
CAUTION: Please turn off MP3 player before connecting
with PC.
MENU ENTER PLAY/PAUSE PREVIOUS NEXT RECORD
USB AUX IN
DIGITAL MP3 PLAYER
SD/MMC
FLASH DRIVER
(1) Use attached USB cable to connect MP3 player with PC.
MP3 player can be powered by PC when connected
with PC. (Please use win 2000 or above)
(2) MP3 player LCD screen will display " USB ON LINE".
USB ON LINE
OPERATION
OPERATION
(3) Two hard disc symbols will display in the PC screen.
One is Flash, another is SD/MMC card. You can
download music from your PC into Flash memory or
SD/MMC card.
(4) MP3 player can not play music when connected with
PC. To play music please disconnect MP3 player from
PC.
3) PARTS DESCRIPTION
MENU MENU ENTER ENTER PLAY/PAUSE PLAY/PAUSE PREVIOUS PREVIOUS NEXTNEXT RECORDRECORD
USB USB AUX INAUX INSD/MMCSD/MMC
FLASH DRIVERFLASH DRIVER
01:46:00
001 / 008
5
Page 5

8
4) TURN ON/OFF PLAYER
First turn on amplifier power switch. Power LED indicator in
front panel of main unit will light.Then press and hold
PLAY/PAUSE button for more than 2 seconds. The LCD
screen will light blue and display DIGITAL MP3 PLAYER.
To turn off player, press down PLAY/PAUSE and hold for 3
seconds. The screen shows POWER OFF. The Player is
turned off.
MENU MENU ENTER ENTER PLAY/PAUSE PLAY/PAUSE PREVIOUS PREVIOUS NEXTNEXT RECORDRECORD
To adjust the volume, press MENU lightly and choose figure .
Press PREVIOUS lightly to increase the volume. Press NEXT
lightly to reduce the volume. Volume range is from 0 to 20.
Press ENTER to confirm. Press MENU to choose the next
function. It will automatically return to original interface if there
is not any operation within 20 seconds.
5) VOLUME ADJUSTMENT
6) EQ SET UP
To adjust EQ effect, press MENU and choose JAZZ. Press
lightly PREVIOUS/NEXT to choose the EQ mode you like.
There are 7 EQ modes: Flat/Jazz/Rock/Pops/Classic/
Live/Dance. Press ENTER to confirm. Press MENU to choose
the next function. It will automatically return to original interface
if there is not any operation within 20 seconds.
OPERATION
OPERATION
7) MEDIA SELECTION
The MP3 Player's default setting is Flash when turned on. If you
want to play SD card or USB, press MENU lightly and choose
Flash. Then press PREVIOUS/NEXT lightly to choose CARD,
USB or FLASH.
You can choose CARD only after you have inserted SD or MMC
card into SD card slot. You can choose USB only after you
have inserted USB device to USB slot. Press ENTER to confirm.
Press MENU to choose the next function. It will automatically
return to original interface if there is not any operation within 20
seconds.
9) START PLAYING
(1) Press PLAY/PAUSE to open your MENU(catalog menu) and
enter into navigation to choose whatever song you like.
Press PLAY/PAUSE slightly. The player will start to play.
Press again to pause.
ONE
SHUFFL
FOLDER
FOLDER
ONE
Play all tracks within selected folder in order repeatedly.
Play all tracks within selected folder in order and then stops.
Play all tracks in selected memory format in random order.
Play selected track repeatedly.
Play selected track and stops.
Play all tracks in selected memory format in order repeatedly.
Play all tracks in selected memory format in order and stops.
8) PLAY MODE
To change play mode, press MENU lightly and choose
. Then press PREVIOUS/NEXT lightly to choose the
play mode you want. Press ENTER to confirm. Press
MENU to choose the next function. It will automatically
return to original interface if there is not any operation
within 20 seconds.
7
Page 6

10
Recording can be started up only when MP3 Player is in
Flash mode and in PAUSE or STOP mode. Press
RECORD slightly to enter record mode. Screen will
display as following.
11) RECORD
During recording press PLAY lightly to pause recording.
Press PLAY again to continue recording. Press RECORD
lightly to stop recording and save the recorded file.
Recorded files will be saved in LINEIN folder. Recorded
files will be arranged like this :LINE001, LINE002...
(2) During playing press PREVIOUS to select the last song.
Press and hold PREVIOUS for 2seconds to reward the
song.
(3) During playing press NEXT to select the next song.
Press and hold NEXT for 2seconds to forward the song.
10) A-B REPEAT
During playing press RECORD lightly and choose repeat
starting point A. In the top middle of LCD screen it will
display A . Press RECORD again to select the ending
point B. In the top corner of LCD screen it will display
A B. The player will repeat playing the music between A
and B. Press RECORD for third time to cancel repeat.
Recorded
Time
Recording
State
Record Mode
Total available
Time for recording
Recorded
File Name
Recording State: Stop Recording Pause Recording
Press MENU and hold for 2 seconds, screen will display as
following.
12) MENU
1. File menu
2. Rec menu
3. Settings
4. F/W Upgrade
Press PREVIOUS/NEXT to choose the option you want to set
up. Press ENTER to confirm. Press MENU to return. It will
automatically return to original interface if there is not any
operation within 20 seconds.
(1) File menu
Select 'File menu' by 'previous/next' keys and then 'enter' key .
A menu of all folders/files in memory opens. Select track by
'previous/next' keys and then 'enter' key. Track loads but does
not play until 'play' key is pressed. Or select folder by
'previous/next' keys and then 'enter' key. The folder opens
showing all files within that folder. A track is then selected by
'previous/next' keys and then 'enter' key. Track loads but does
not play until play key is pressed.
Menu key steps back one level (file-sub folder-folder-menunormal operation). This Mp3 player can support 5levels folders.
When flash has no more space for recording, it will display
DISK FULL. Available recording time depends on available
Flash memory size and the recording sampling rate.
CAUTION: During recording do not turn off Mp3 player. Data
could be lost and MP3 player may be damaged.
OPERATION
OPERATION
9
Page 7

To delete song, first choose the song you like to delete. Then press
RECORD to delete the song. Delete interface will display and ask
you to confirm delete or not. Default is NO. Press
PREVIOUS/NEXT to choose YES or NO. Press ENTER to confirm.
Folder can not be deleted. During playing no song can be deleted.
(2) REC menu
When you choose REC MENU, you can choose recording
sampling rate by pressing PREVIOUS/NEXT. There are four
options: 32Kbps, 64Kbps, 128Kbps, 192Kbps. Default sampling
rate is 192Kbps.
CAUTION: Recording can be functioned only in FLASH media.
(3) Settings
Choose SETTINGS and press ENTER. LCD screen will display as
following.
-Backlight time: to set up backlight auto off time
Always on,10s, 20s, 30s, 40s, 50s, 60s,70s
-Auto off: to set up Mp3 player auto power off time. Default is
OFF.
'Off': player switches off only when switched off manually on
player or by amplifier being switched off on
'Power/Volume' control)
'10 mins'
'20 mins'
'30 mins'
In each case player switches off after stated time delay.
1.Backlight time
2.Auto power off
3.Varispeed
4.Information
-Varispeed.
This function enables the users to adjust the playing speed of MP3
player. There are 6 different kinds of playing speed: -3,-2,-1,0,1,2.
Default is 0.
-3,-2,-1 slower speed
0 normal speed
1, 2 faster speed
Press PREVIOUS/NEXT to choose the playing speed you need.
Press ENTER to confirm.
CAUTION: Only in Flash media, you can adjust the playing speed.
This function does not work when playing USB or SD/MMC card.
- Information: Choose this option and press ENTER. LCD screen
will display as following.
System Information
Firmware Ver 0.50
Total: 0500MB
Free: 012MB
Software version
Total flash memory
Free flash memory
OPERATION
OPERATION
12
11
Page 8

13
¼¼Êõ²ÎÊý
À©Òô»ú
·¢ÉäÆ÷
ʹÓÃ˵Ã÷ʹÓÃ˵Ã÷
SPECIFICATIONS
Frequency range: VHF 173~175MHz
Dynamic range: 80dB
Frequency Response: 100-10KHz
Working Temperature: -20 ~40
Battery Voltage 9V battery
Battery Life about 10 hours
·¢ÉäÆ÷
À©Òô»ú
Receiving Mode: VHF
Output Impedance: 600
Frequency Range: 173~175MHz
S/N Ratio: 60dB
Stability for frequency: +/-0.005%(-20 ~40 )
Power Output: 30W(MAX)
Effective Distance: 50M (open field)
Power supply: AC 230V 50Hz;DC 12V-15V
TRANSMITTER
AMPLIFIER
 Loading...