

Page 1

Adafruit MicroSD SPI or SDIO Card Breakout Board
Created by Jeff Epler
Last updated on 2021-03-24 11:06:08 AM EDT
Page 2

2
3
6
8
8
8
8
9
9
9
10
10
11
12
14
17
20
23
29
30
30
31
32
33
36
39
40
40
40
41
43
44
46
47
48
49
52
55
59
62
62
62
62
Guide Contents
Guide Contents
Overview
Pinouts
CircuitPython
Preparing your SD card
General Steps for Accessing SD Cards
Tip: Create a mount_sd.py file
sdcardio: For SD cards on SPI interfaces
sdioio: For SD cards on SDIO interfaces
adafruit_sdcard.py: For legacy uses
Using sdcardio
Initialize & Mount SD Card Filesystem
Reading & Writing Data
Example complete mount_sd.py
ItsyBitsy M4 Express + Breakout
Grand Central M4 Express
PyGamer
Feather Sense + Adalogger FeatherWing
Python Docs
Using sdioio
Initialize & Mount SD Card Filesystem
Reading & Writing Data
Example complete mount_sd.py
Grand Central M4 Express + SDIO Breakout
Feather STM32F405 Express
Python Docs
Adafruit CircuitPython SD
Adafruit CircuitPython Module Install
Initialize & Mount SD Card Filesystem
Reading & Writing Data
Example complete mount_sd.py
Adalogger M0 Feather
Python Docs
Examples
Listing files on SD card
Benchmarking SD card access
Logging temperature to SD card
Playing MP3 from SD Card
Showing BMPs from SD card
Downloads
Files
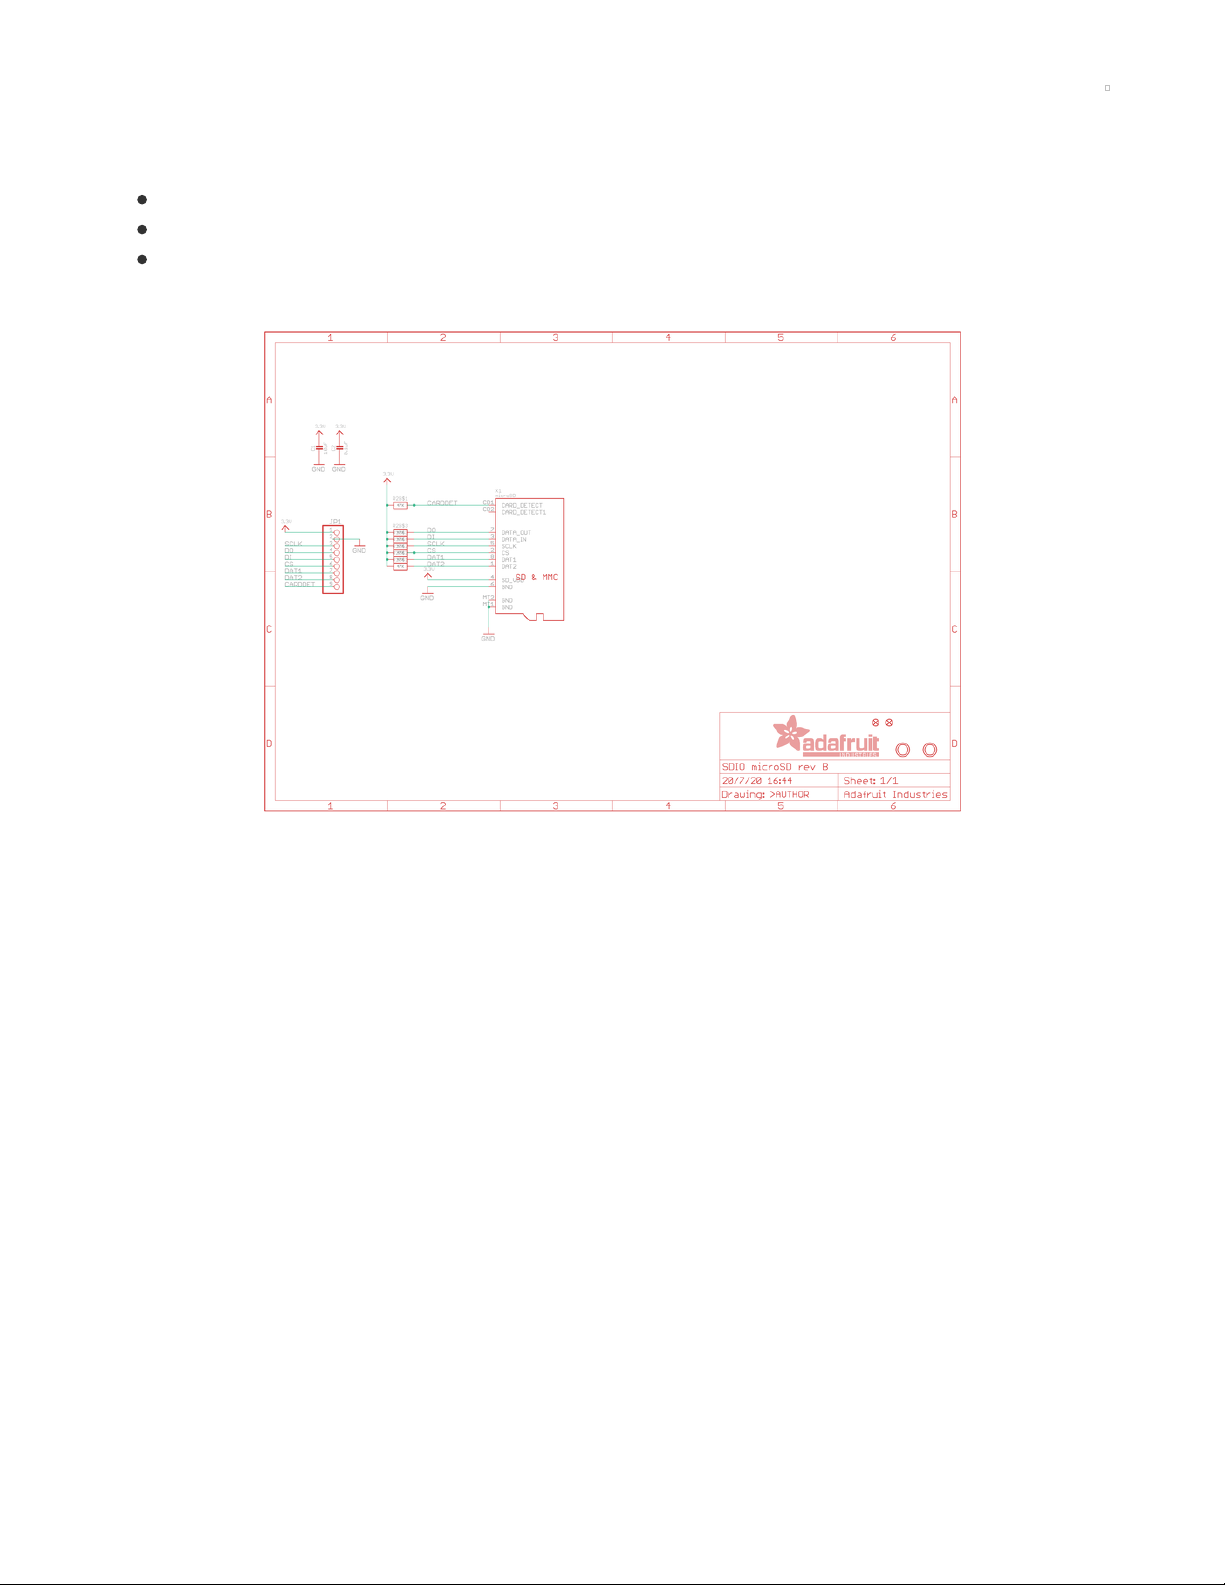
Schematic
Fab Print
© Adafruit Industries https://learn.adafruit.com/adafruit-microsd-spi-sdio Page 2 of 64
Page 3

Overview
Micro SD cards and microcontrollers go together like micro-peanutbutter-and-jelly: SD cards are
inexpensive, durable, easy to find at any shop, come in many sizes and can plug into any computer using
a common SD card reader. That makes them perfect for microcontroller storage and retrieval - whether it's
images, fonts, GIFs, audio files, or sensor logs.
Wiring up SD cards when you're starting out is super easy - you just pick up one of Adafruit's SPI-to-SD
breakout boards (https://adafru.it/qyF), wire it to an SPI port and a chip select pin and with a little library
work you're reading and writing files (https://adafru.it/Myb). That's all good and great but you may
eventually find that your SD card project is a little...slow. Even with fast SPI ports, there's only one data
pin, which can make it hard to stream large files fast.
If you've hit that limit, this new breakout (https://adafru.it/Mzd) is designed to help. Unlike previous
adapters, it is not fixed for SPI usage, and can be used with SDIO hardware support. SDIO is a multi-pin
data protocol (up to 4 data pins at once!) SDIO also tends to be able to be clocked faster than SPI. Of
course, your speeds will vary depending on what microcontroller you hook it up to. When we used SDIO
instead of SPI on CircuitPython with the SAMD51 Grand Central (https://adafru.it/grandc), we got a speed
increase of about 200% when reading data off the card
© Adafruit Industries https://learn.adafruit.com/adafruit-microsd-spi-sdio Page 3 of 64
Page 4

You will need to verify that your microcontroller has SDIO support and you have SDIO firmware/library
support as well. SDIO is usually available on higher end chips, and you may need to use some specific
pins. You can
still
use this for SPI mode, but it does not have level shifters, so it's not for use with 5V
microcontrollers.
For use with 3V power and logic microcontrollers only! The SDIO pins are bi-directional, and we've never
seen a 5V microcontroller with SDIO, so there's no level shifting or power regulator.
The breakout comes with a bit of header so you can use in a breadboard. It doesn't come with the micro
SD card itself!
© Adafruit Industries https://learn.adafruit.com/adafruit-microsd-spi-sdio Page 4 of 64
Page 5

Secure Digital (https://adafru.it/rye), or SD, cards and tiny microSD cards are an inexpensive and
ubiquituous means of adding lots of storage to devices. For a few dollars you can have gigabytes of
storage at your fingertips (smaller than your fingertips actually!). With CircuitPython boards you typically
have a very limited amount of flash memory to store code and data.
Wouldn't it be nice if you could connect a microSD card to a Python board and expand its storage? It
turns you can use microSD cards with CircuitPython! In fact some boards like the Metro M4 Grand Central
come with microSD card support built-in, and for other boards like the Feather M4 Express family they can
easily be connected to a microSD card that expands their storage.
WIth the Adafruit MicroSD SPI or SDIO Card Breakout Board, you can add an SD card to your project
using the common SPI interface or the higher performance SDIO interface.
This guide also shows how to use a microSD card to store files for a CircuitPython board. Specifically
using a microSD card with CircuitPython boards like Feather M0 Adalogger, Grand Central M4, ItsyBitsy
M4, and others will be covered in this guide. You'll learn how to connect a microSD card to the board and
mount it as a new filesystem that store code & data.
Starting with CircuitPython 6, there are two new modules to improve the performance of SD cards using
SDIO.
Make sure you're running CircuitPython 6.0 or later, including pre-releases. These modules aren't
availble in older versions. Remember, you can always downgrade to the stable version of
CircuitPython if necessary.
© Adafruit Industries https://learn.adafruit.com/adafruit-microsd-spi-sdio Page 5 of 64
Page 6

Pinouts
Power Pins
3V - This is the power pin. MicroSD cards must use 3.3V, so take care to only hook 3.3V to this pin.
Hooking 5V or VBAT to this pin will damage your microSD card.
GND - common ground for power and logic.
Common Logic Pins
DET - Detect whether a microSD card is inserted. This pin is connected to GND internally when
there's no card, but when one is inserted it is pulled up to 3V with a 4.7kΩ resistor. That means that
when the pin's logic level is False there's no card and when it's True there is.
SPI Logic Pins
If you're using SPI to connect to your SD cards, the pins have the following functions:
CLK - This is the SPI Clock pin / SCK Serial Clock, its an input to the chip.
SO - this is the Serial Out / Microcontroller In Serial Out pin, for data sent from the SD card to your
processor.
SI - this is the Serial In / Microcontroller Out Serial In pin, for data sent from your processor to the SD
card. Its an input to the chip and can use 3 - 5V logic.
CS - this is the Chip Select pin, drop it low to start an SPI transaction. Its an input to the chip and can
use 3 - 5V logic.
Pull ups are provided on all SPI logic pins.
© Adafruit Industries https://learn.adafruit.com/adafruit-microsd-spi-sdio Page 6 of 64
Page 7

SDIO Logic Pins
If you're using SDIO to connect to your SD cards, the pins have the following functions:
CLK - The SDIO clock pin. A clock signal is sent by the microcontroller to the SD card on this pin.
CMD - A bidirectional pin for communication between the microcontroller and the SD card, used for
commands and information.
4 Data pins - Four bidirectional pins for communication between the microcontroller and the SD card,
used for transferring bulk data. Take care to wire these in the correct order! The silk screen legends
read: D0, D1, DAT2, D3.
Pull ups are provided on all SDIO logic pins.
Note that when inserted, the SD card extends slightly beyond the edge of the PCB. Check out the
mechanical drawing on the Downloads page (https://adafru.it/Qce).
© Adafruit Industries https://learn.adafruit.com/adafruit-microsd-spi-sdio Page 7 of 64
Page 8

CircuitPython
Are you new to using CircuitPython? No worries, there is a full getting started guide
here (https://adafru.it/cpy-welcome).
Adafruit suggests using the Mu editor to edit your code and have an interactive REPL in
CircuitPython. You can learn about Mu and installation in this tutorial (https://adafru.it/ANO).
Preparing your SD card
If you bought an SD card, chances are it's already pre-formatted with a FAT filesystem. However you may
have problems with how the factory formats the card, or if it's an old card it needs to be reformatted.
CircuitPython supports both FAT16 and FAT32 filesystems.
It's always good idea to format the card before using, even if it's new! Note that formatting will erase the
card, so save anything you want first.
We strongly recommend you use the official SD card formatter utility - written by the SD association.
It solves many problems that come with bad formatting!
https://adafru.it/FKd
The official SD formatter is available from
https://www.sdcard.org/downloads/formatter/ (https://adafru.it/FKd)
Download it and run it on your computer, there's also a manual linked from that page for additional
instructions.
General Steps for Accessing SD Cards
The following pages will show all the steps to set up an SD card, including wiring information if applicable.
They all follow the same general structure:
1. If necessary, create an SPI bus object connecting to the card (cards attached by SDIO do not have a
separate bus object)
2. Construct an SDCard object
3. Create a vfs (virtual filesystem) object
4. "Mount" the vfs object to make the SD card's files appear so they can be accessed by functions like
open()
Tip: Create a mount_sd.py file
If you put the exact lines necessary to mount the sd card in a separate Python file in CIRCUITPY as
mount_sd.py, you can easily call it from the REPL or from code.py with import :
import mount_sd
In the examples, we'll assume you have already created a mount_sd.py file.
https://adafru.it/FKd
© Adafruit Industries https://learn.adafruit.com/adafruit-microsd-spi-sdio Page 8 of 64
Page 9

CircuitPython has trouble recognizing cards bigger than 32GB. 32GB of data with CIrcuitPython?
That's a lot.
sdcardio: For SD cards on SPI interfaces
sdcardio is the module for SD cards that use an SPI interface. Unless otherwise noted, it's a good bet that
a microcontroller SD card interface uses SPI. SPI uses 4 signal wires and can function at rates from
400kHz up to multiple MHz. Under some circumstances, multiple SPI devices can share 3 out of the 4
pins.
sdioio: For SD cards on SDIO interfaces
sdioio is the module for SD cards that use an SDIO interface. A few specific boards have SDIO interfaces
available. SDIO uses at least 3 signal wires (CMD, CLK, and DATA0), but can use additional data wires
(DATA1, DATA2, DATA3). SDIO operates at 25MHz or 50MHz, and it can transfer 1 or 4 bits at a time.
However, in practice, it offers around 1.5 to 2x the speed of SPI when reading from an SD card.
The built in micro SD slot on the STM32F405 Feather is connected using SDIO. The Grand Central M4 can
connect the SD card using SDIO or SPI, depending which pins are used.
adafruit_sdcard.py: For legacy uses
adafruit_sdcard is covered in its own guide (https://adafru.it/MA2). There are still some cases where you
should use adafruit_sdcard :
You're not ready to upgrade to CircuitPython 6
Some boards without much capacity omit sdcardio , but you can put adafruit_sdcard in CIRCUITPY.
This applies to all boards with the SAM D21 microcontroller.
© Adafruit Industries https://learn.adafruit.com/adafruit-microsd-spi-sdio Page 9 of 64
Page 10

Using sdcardio
sdcardio is an SPI interface SD card library in CircuitPython 6.0 that is optimized in C to be much
faster than the original adafruit_sdcard library. Some much smaller/older boards don't have enough
memory for this module, in which case you will have to use adafruit_sdcard
Use the code and wiring examples in this section if these conditions are met:
Your SD card slot uses the SPI bus to connect to the microcontroller (If it uses SDIO, go to the pages
for sdioio (https://adafru.it/MA3))
Your CircuitPython board supports the sdcardio module. (If not, go to the pages for
adafruit_sdcard (https://adafru.it/MA4))
Your CicuitPython version supports the sdcardio module. Only CircuitPython 6 and newer have
sdcardio. (If not, go to the pages for adafruit_sdcard (https://adafru.it/MA4))
If the same SPI bus is shared with other peripherals, it is important that the SD card be initialized
before accessing any other peripheral on the bus. Failure to do so can prevent the SD card from being
recognized until it is powered off or re-inserted.
The following section will show how to initialize the SD card and read & write data to it. You'll want to put
the correct lines to initialize it in mount_sd.py on your CIRCUITPY drive. For specific wiring information
and exact mount_sd.py files for several different boards, check out the following pages.
Initialize & Mount SD Card Filesystem
Before you can use the microSD card you need to initialize its SPI connection and mount its filesystem.
First import all the modules we'll need:
import board
import busio
import sdcardio
import storage
Next create the SPI bus and a digital output for the microSD card's chip select line (be sure to select the
right pin names for your wiring):
# Use the board's primary SPI bus
spi = board.SPI()
# Or, use an SPI bus on specific pins:
#spi = busio.SPI(board.SD_SCK, MOSI=board.SD_MOSI, MISO=board.SD_MISO)
# For breakout boards, you can choose any GPIO pin that's convenient:
cs = board.D10
# Boards with built in SPI SD card slots will generally have a
# pin called SD_CS:
#cs = board.SD_CS
Note that when you use sdcardio , cs is a Pin object, not a DigitalInOut object. If you change your code to
© Adafruit Industries https://learn.adafruit.com/adafruit-microsd-spi-sdio Page 10 of 64
Page 11

use adafruit_sdcard , you need to use a DigitalInOut object instead.
At this point you're ready to create the microSD card object and the filesystem object:
sdcard = sdcardio.SDCard(spi, cs)
vfs = storage.VfsFat(sdcard)
Notice the sdcardio module has a SDCard class which contains all the logic for talking to the microSD
card at a low level. This class needs to be told the SPI bus and chip select pin in its constructor.
After a SDCard instance is created it can be passed to the storage module's VfsFat class. This class has
all the logic for translating CircuitPython filesystem calls into low level microSD card access. Both
the SDCard and VfsFat class instances are required to mount the card as a new filesystem.
Finally you can mount the microSD card's filesystem into the CircuitPython filesystem. For example to
make the path /sd on the CircuitPython filesystem read and write from the card run this command:
storage.mount(vfs, "/sd")
At this point, you can read and write to the SD card using common Python functions like open , read , and
write . The filenames will all begin with "/sd/" to differentiate them from the files on the CIRCUITPY drive. If
you're not familiar, here's an overview.
Reading & Writing Data
Once the microSD card is mounted inside CircuitPython's filesystem you're ready to read and write data
from it Reading and writing data is simple using Python's file operations like open (https://adafru.it/reL),
close (https://adafru.it/ryE), read (https://adafru.it/ryE), and write (https://adafru.it/ryE). The beauty of
CircuitPython and MicroPython is that they try to be as similar to desktop Python as possible, including
access to files.
For example to create a file and write a line of text to it you can run:
with open("/sd/test.txt", "w") as f:
f.write("Hello world!\r\n")
Notice the with statement is used to create a context manager that opens and automatically closes the
file. This is handy because with file access you Python you must close the file when you're done or else all
the data you thought was written might be lost!
The open function is used to open the file by telling it the path to it, and the mode (w for writing). Notice
the path is under /sd, /sd/test.txt. This means the file will be created on the microSD card that was
mounted as that path.
Inside the context manager you can access the f variable to operate on the file while it's open. The write
function is called to write a line of text to the file. Notice that unlike a print statement you need to end the
string passed to write with explicit carriage returns and new lines.
You can also open a file and read a line from it with similar code:
© Adafruit Industries https://learn.adafruit.com/adafruit-microsd-spi-sdio Page 11 of 64
Page 12

with open("/sd/test.txt", "r") as f:
print("Read line from file:")
print(f.readline(), end='')
When reading a line from a file with readline , the newline character '\n' at the end of the line is included.
By printing with end='' , the newline normally added by print is skipped. Otherwise, when reading back the
file, it would appear that there were extra blank lines after every line of the file.
If you wanted to read and print all of the lines from a file you could call readline in a loop. Once readline
reaches the end of the file it will return an empty string so you know when to stop:
with open("/sd/test.txt", "r") as f:
print("Printing lines in file:")
line = f.readline()
while line != '':
print(line, end='')
line = f.readline()
You can also just use the open file object in a for loop. Each time the loop runs, the loop variable will be
assigned the content of the next line of the file:
with open("/sd/test.txt", "r") as f:
print("Printing lines in file:")
for line in f:
print(line, end='')
Finally one other very common file scenario is opening a file to add new data at the end, or append data.
This works exactly the same as in Python and the open function can be told you'd like to append instead
of erase and write new data (what normally happens with the w option for open ). For example to add a
line to the file:
with open("/sd/test.txt", "a") as f:
f.write("This is another line!\r\n")
Notice the a option in the open function--this tells Python to add data at the end of the file instead of
erasing it and starting over at the top. Try reading the file with the code above to see the new line that
was added!
Those are the basics to manipulating files on microSD cards with CircuitPython! Once you have it
working, put the correct lines in mount_sd.py in CIRCUITPY, then continue learning by checking out the
example pages to print directory listings, log sensor data, play MP3 files and display bitmap graphics.
Example complete mount_sd.py
This example works on the ItsyBitsy M4 Express together with the Adafruit MicroSD Breakout Board:
© Adafruit Industries https://learn.adafruit.com/adafruit-microsd-spi-sdio Page 12 of 64
Page 13

import board
import busio
import sdcardio
import storage
spi = board.SPI()
cs = board.D10
sdcard = sdcardio.SDCard(spi, cs)
vfs = storage.VfsFat(sdcard)
storage.mount(vfs, "/sd")
Your board may be different. Refer to the following pages for more details.
© Adafruit Industries https://learn.adafruit.com/adafruit-microsd-spi-sdio Page 13 of 64
Page 14

ItsyBitsy M4 Express + Breakout
sdcardio is an SPI interface SD card library in CircuitPython 6.0 that is optimized in C to be much
faster than the original adafruit_sdcard library. Some much smaller/older boards don't have enough
memory for this module, in which case you will have to use adafruit_sdcard
Ready to do a little wiring? Almost any Adafruit CircuitPython board will connect to the MicroSD Breakout
Board using SPI. The following is an example using the Itsy BItsy M4 express.
Board 3V to breakout 3V via supply rail
Board GND to breakout GND via supply rail
Board MI (or MISO) to breakout SO
Board MO (or MOSI) to breakout SI
Board SCK to breakout CLK
Board D10 to breakout CS
The example below uses D10, but you can use any available
digital pin instead. Change the mount_sd.py code below to
use the pin you selected instead of board.D10 .
The ItsyBitsy and the MicroSD breakout are a great way to have SD card storage in a small footprint, but
these instructions will work with just about any Adafruit Feather too. Just follow the fritzing diagram and
then put the following in mount_sd.py:
import board
import busio
import sdcardio
import storage
spi = board.SPI()
cs = board.D10 # Use the pin you wired to the breakout CS
sdcard = sdcardio.SDCard(spi, cs)
vfs = storage.VfsFat(sdcard)
storage.mount(vfs, "/sd")
© Adafruit Industries https://learn.adafruit.com/adafruit-microsd-spi-sdio Page 14 of 64
Page 15

Adafruit Micro SD SPI or SDIO Card Breakout Board - 3V ONLY!
Micro SD cards and microcontrollers go together like micro-peanutbutter-and-jelly: SD cards are
inexpensive, durable, easy to find at any shop, come in many sizes and can plug into any...
$2.95
In Stock
Your browser does not support the video tag.
Adafruit ItsyBitsy M4 Express featuring ATSAMD51
What's smaller than a Feather but larger than a Trinket? It's an Adafruit ItsyBitsy M4 Express featuring the
Microchip ATSAMD51! Small,...
$14.95
In Stock
Add to Cart
Add to Cart
© Adafruit Industries https://learn.adafruit.com/adafruit-microsd-spi-sdio Page 15 of 64
Page 16

SD/MicroSD Memory Card (8 GB SDHC)
Add mega-storage in a jiffy using this 8 GB class 4 micro-SD card. It comes with a SD adapter so you can
use it with any of our shields or adapters. Preformatted to FAT so it works out...
$9.95
In Stock
Add to Cart
© Adafruit Industries https://learn.adafruit.com/adafruit-microsd-spi-sdio Page 16 of 64
Page 17

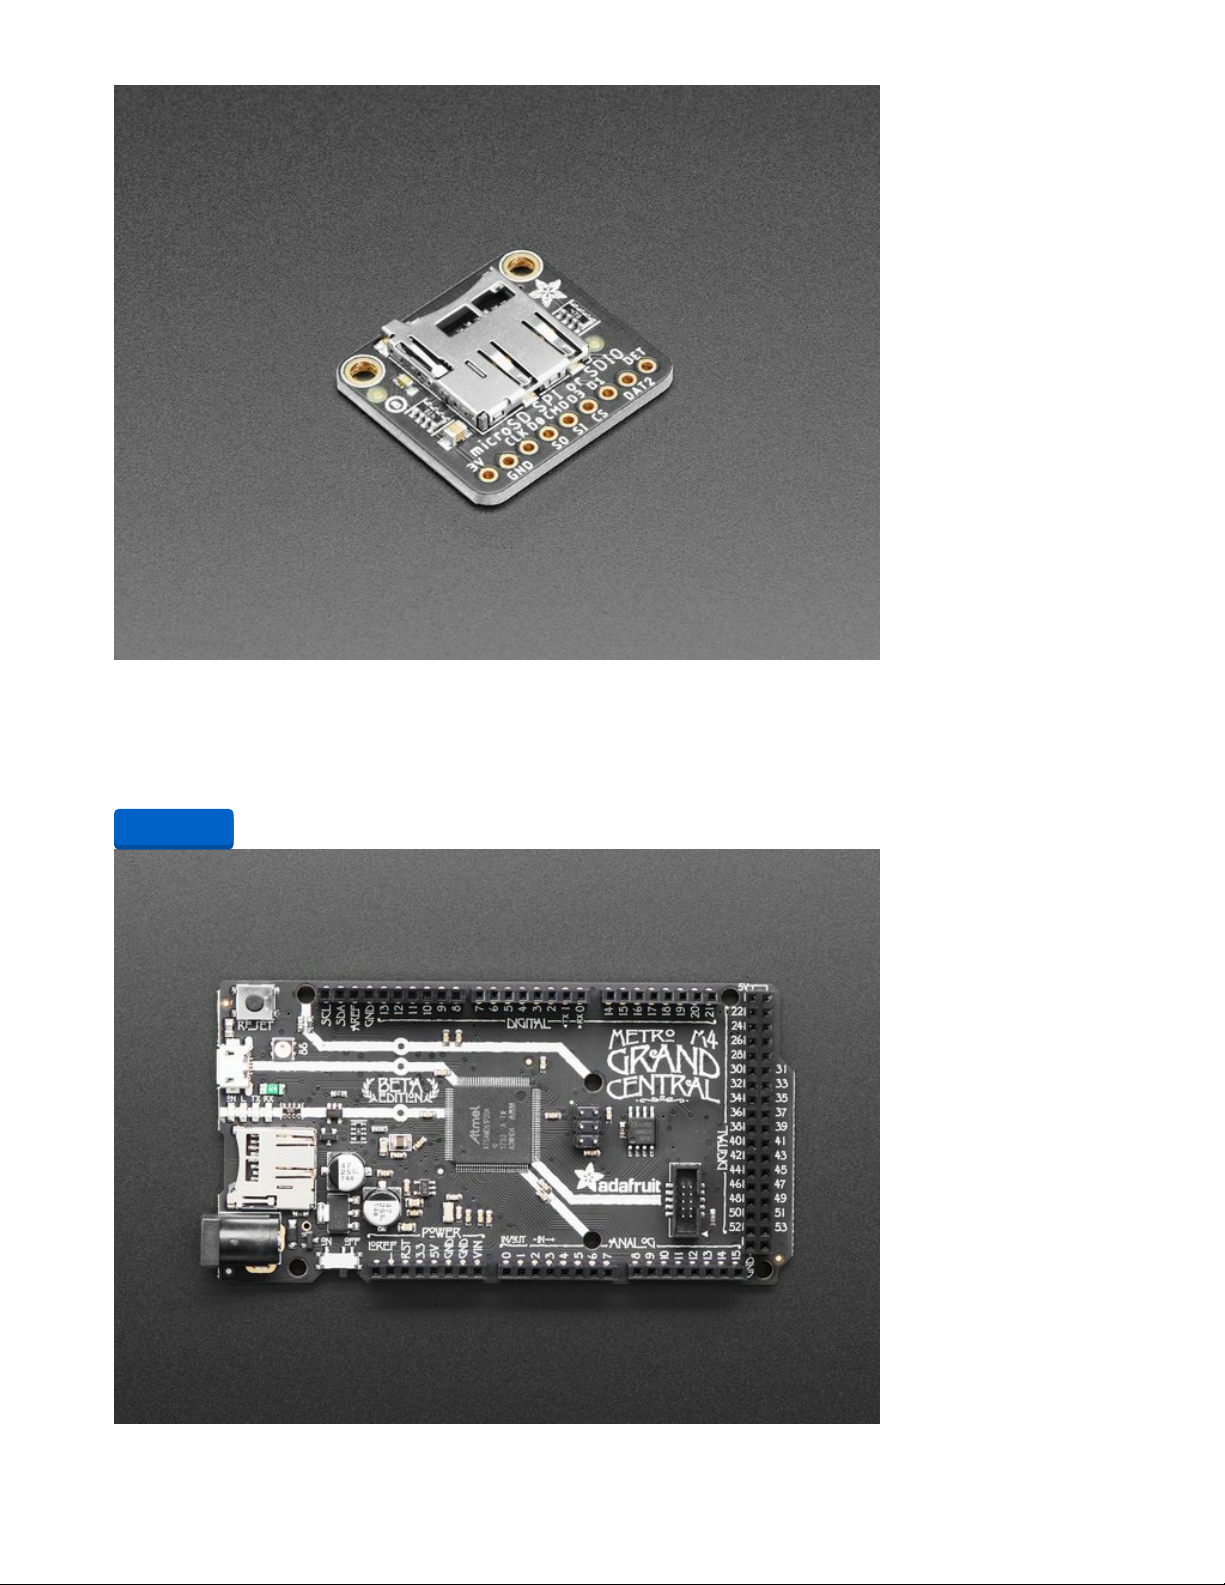
Grand Central M4 Express
sdcardio is an SPI interface SD card library in CircuitPython 6.0 that is optimized in C to be much
faster than the original adafruit_sdcard library. Some much smaller/older boards don't have enough
memory for this module, in which case you will have to use adafruit_sdcard
The Adafruit Grand Central M4 Express has a built-in SD card connected to the SPI bus, so no wiring or
soldering is needed!
To mount the SD card, use the following code. Remember to put it in the file mount_sd.py on CIRCUITPY
so you can easily call it from code.py or the REPL with import mount_sd .
import board
import busio
import sdcardio
import storage
spi = busio.SPI(board.SD_SCK, MOSI=board.SD_MOSI, MISO=board.SD_MISO)
cs = board.SD_CS
sdcard = sdcardio.SDCard(spi, cs)
vfs = storage.VfsFat(sdcard)
storage.mount(vfs, "/sd")
© Adafruit Industries https://learn.adafruit.com/adafruit-microsd-spi-sdio Page 17 of 64
Page 18

Adafruit Grand Central M4 Express featuring the SAMD51
Are you ready? Really ready? Cause here comes the Adafruit Grand Central featuring the Microchip
ATSAMD51. This dev board is so big, it's not...
$37.50
In Stock
Add to Cart
© Adafruit Industries https://learn.adafruit.com/adafruit-microsd-spi-sdio Page 18 of 64
Page 19

SD/MicroSD Memory Card (8 GB SDHC)
Add mega-storage in a jiffy using this 8 GB class 4 micro-SD card. It comes with a SD adapter so you can
use it with any of our shields or adapters. Preformatted to FAT so it works out...
$9.95
In Stock
Add to Cart
© Adafruit Industries https://learn.adafruit.com/adafruit-microsd-spi-sdio Page 19 of 64
Page 20

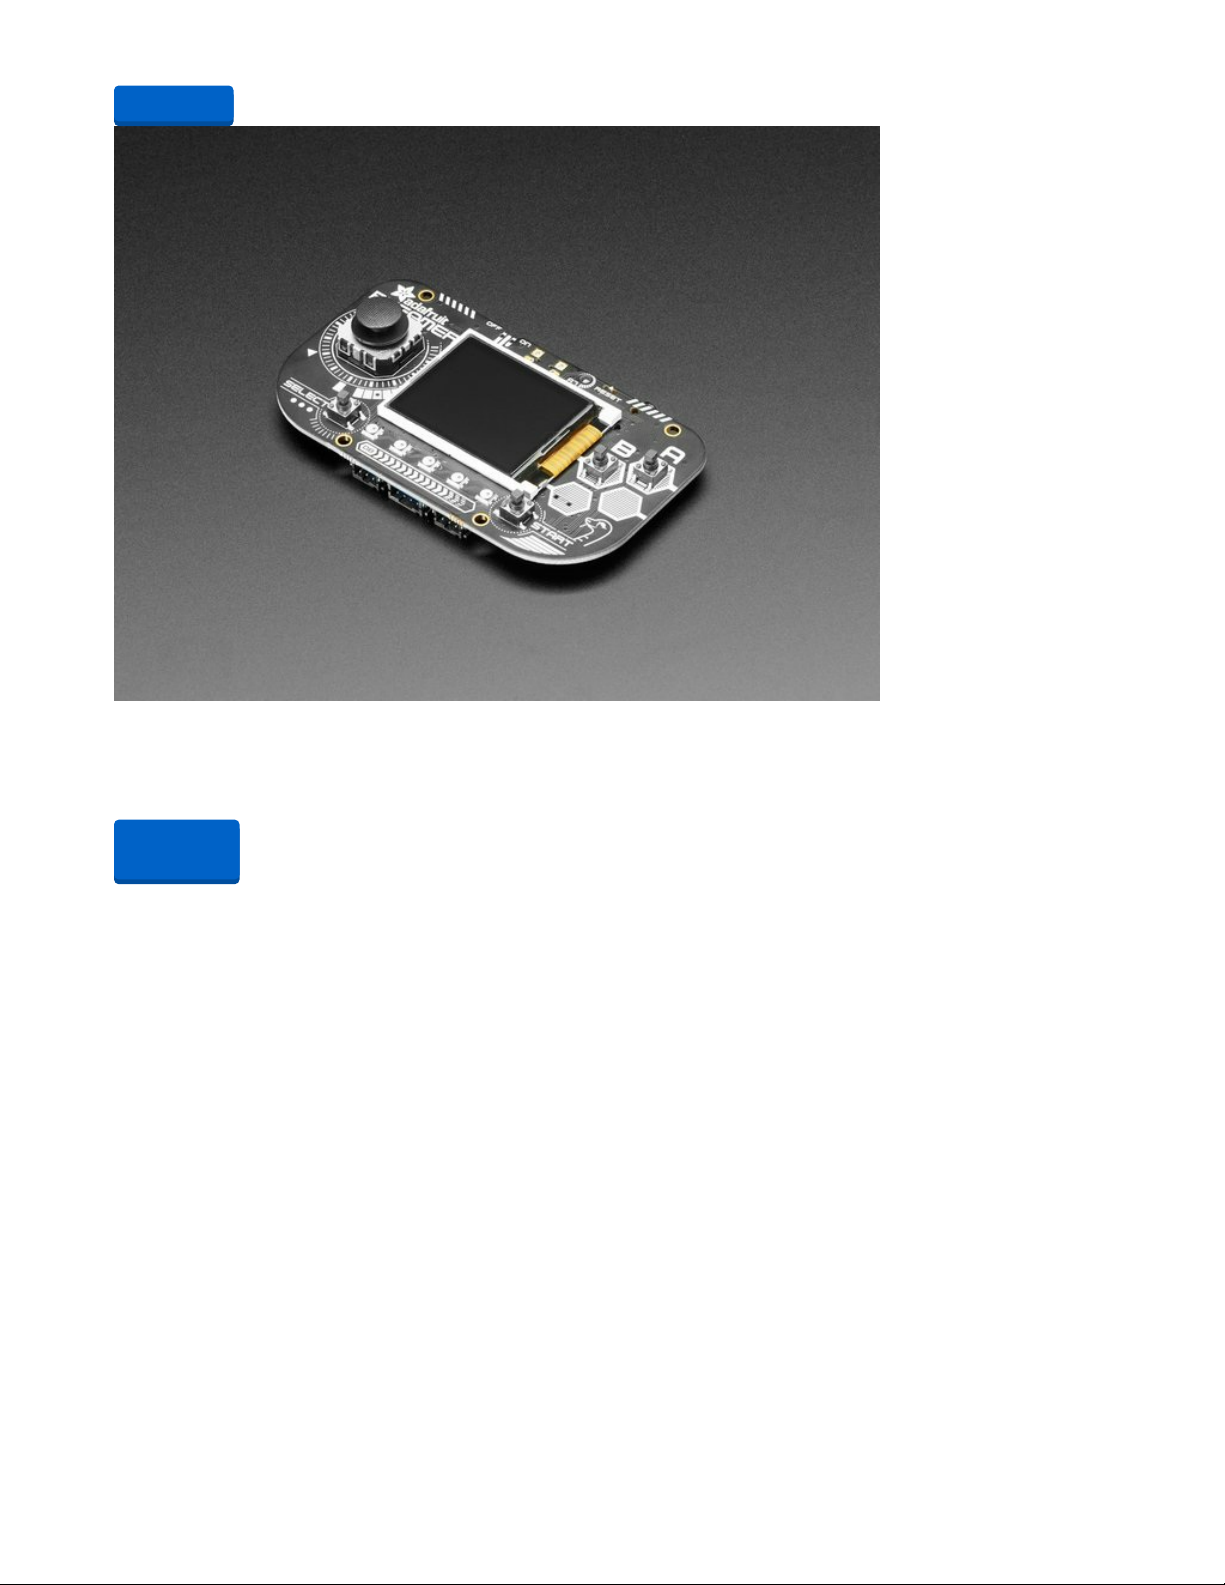
PyGamer
sdcardio is an SPI interface SD card library in CircuitPython 6.0 that is optimized in C to be much
faster than the original adafruit_sdcard library. Some much smaller/older boards don't have enough
memory for this module, in which case you will have to use adafruit_sdcard
The PyGamer has a built-in SD card connected to a SPI bus, so no wiring or soldering is needed!
To mount the SD card, use the following code. Remember, to put it in the file mount_sd.py on
CIRCUITPY so you can easily call it from code.py or the REPL with import mount_sd .
import board
import sdcardio
import storage
spi = board.SPI()
cs = board.SD_CS
sdcard = sdcardio.SDCard(spi, cs)
vfs = storage.VfsFat(sdcard)
storage.mount(vfs, "/sd")
Adafruit PyGamer Starter Kit
Please note: you may get a royal blue or purple case with your starter kit (they're both lovely
colors)What fits in your pocket, is fully Open...
$59.95
In Stock
© Adafruit Industries https://learn.adafruit.com/adafruit-microsd-spi-sdio Page 20 of 64
Page 21
Adafruit PyGamer for MakeCode Arcade, CircuitPython or Arduino
What fits in your pocket, is fully Open Source, and can run CircuitPython, MakeCode Arcade or Arduino
games you write yourself? That's right, it's the Adafruit...
Out of Stock
Add to Cart
Out of
Stock
© Adafruit Industries https://learn.adafruit.com/adafruit-microsd-spi-sdio Page 21 of 64
Page 22

SD/MicroSD Memory Card (8 GB SDHC)
Add mega-storage in a jiffy using this 8 GB class 4 micro-SD card. It comes with a SD adapter so you can
use it with any of our shields or adapters. Preformatted to FAT so it works out...
$9.95
In Stock
Add to Cart
© Adafruit Industries https://learn.adafruit.com/adafruit-microsd-spi-sdio Page 22 of 64
Page 23

Feather Sense + Adalogger FeatherWing
sdcardio is an SPI interface SD card library in CircuitPython 6.0 that is optimized in C to be much
faster than the original adafruit_sdcard library. Some much smaller/older boards don't have enough
memory for this module, in which case you will have to use adafruit_sdcard
With all its built-in sensors and battery power, the Feather M4 Sense is great for data-logging projects.
Stacking headers or FeatherWing Doublers need a little soldering but no custom wiring.
Plug the FeatherWing into the Feather.
You can also place them side by side on a FeatherWing
Doubler.
Don't forget that the Adalogger FeatherWing has a Real Time Clock (RTC) (https://adafru.it/MA5) so you
can even timestamp your logs!
To mount the SD card, use the following code. Remember, to put it in the file mount_sd.py on
CIRCUITPY so you can easily call it from code.py or the REPL with import mount_sd .
© Adafruit Industries https://learn.adafruit.com/adafruit-microsd-spi-sdio Page 23 of 64
Page 24

import board
import busio
import sdcardio
import storage
spi = board.SPI()
cs = board.D10
sdcard = sdcardio.SDCard(spi, cs)
vfs = storage.VfsFat(sdcard)
storage.mount(vfs, "/sd")
Adafruit Feather nRF52840 Sense
The Adafruit Feather Bluefruit Sense takes our popular Feather nRF52840 Express and adds a
smorgasbord of sensors...
$32.50
In Stock
Add to Cart
© Adafruit Industries https://learn.adafruit.com/adafruit-microsd-spi-sdio Page 24 of 64
Page 25

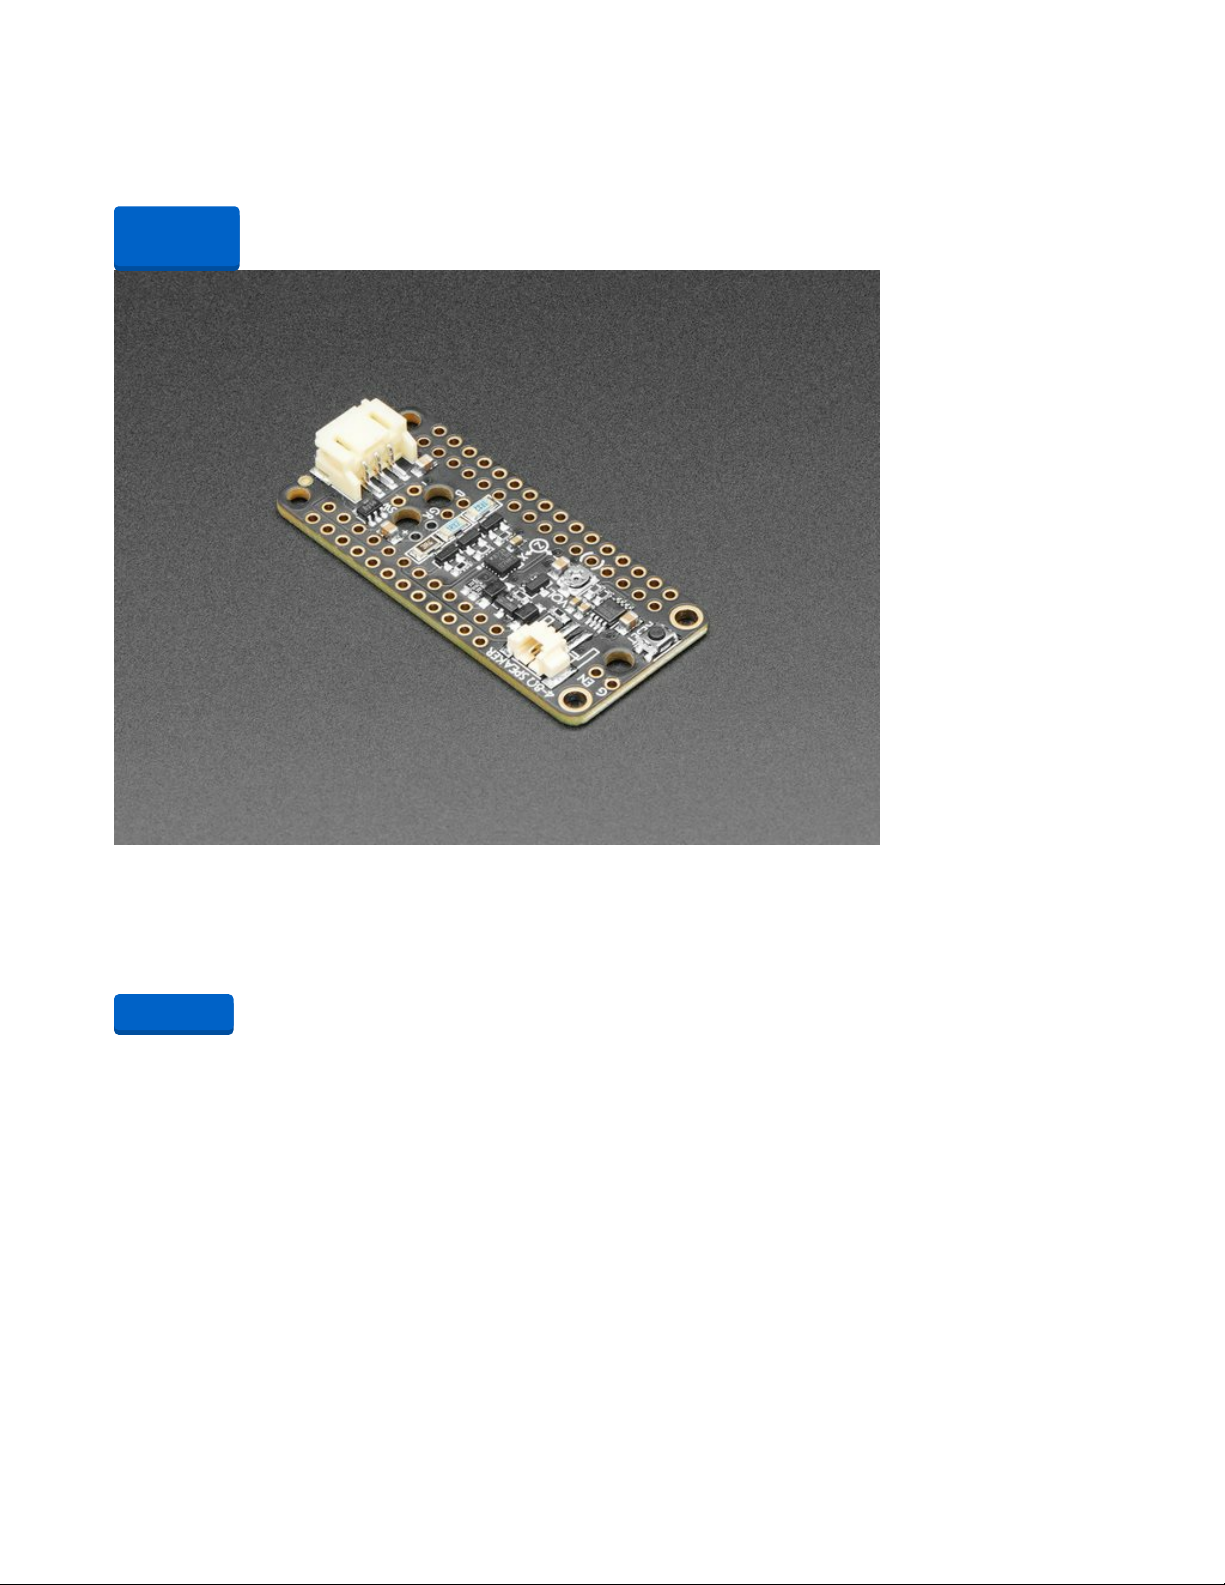
Adalogger FeatherWing - RTC + SD Add-on For All Feather Boards
A Feather board without ambition is a Feather board without FeatherWings! This is the Adalogger
FeatherWing: it adds both a battery-backed Real Time Clock and micro SD...
$8.95
In Stock
Add to Cart
© Adafruit Industries https://learn.adafruit.com/adafruit-microsd-spi-sdio Page 25 of 64
Page 26

FeatherWing Doubler - Prototyping Add-on For All Feather Boards
This is the FeatherWing Doubler - a prototyping add-on and more for all Feather boards. This is similar to
our
$7.50
In Stock
Stacking Headers for Feather - 12-pin and 16-pin female headers
These two Female Stacking Headers alone are, well, lonely. But pair them with any of our Feather boards
and...
Out of Stock
Add to Cart
Out of
Stock
© Adafruit Industries https://learn.adafruit.com/adafruit-microsd-spi-sdio Page 26 of 64
Page 27
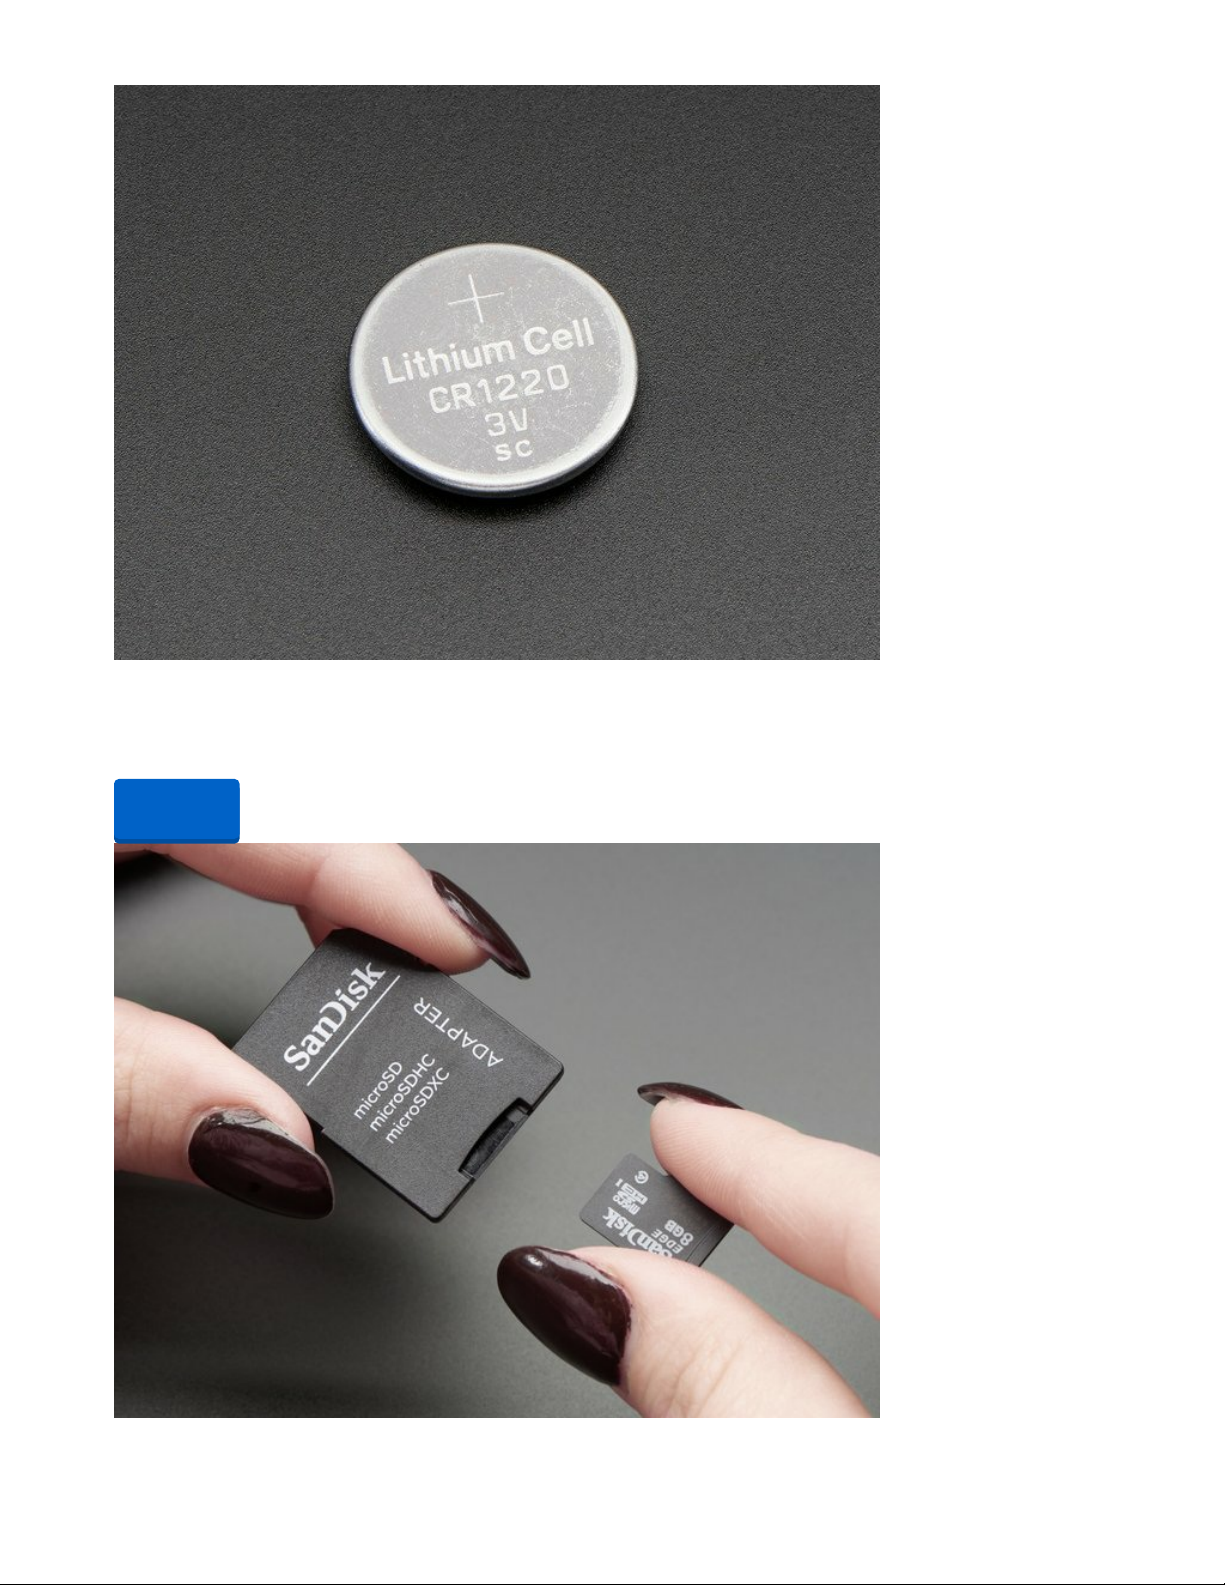
CR1220 12mm Diameter - 3V Lithium Coin Cell Battery
These are the highest quality & capacity batteries, the same as shipped with the iCufflinks, iNecklace,
Datalogging and GPS Shields, GPS HAT, etc. One battery per order...
Out of Stock
Out of
Stock
© Adafruit Industries https://learn.adafruit.com/adafruit-microsd-spi-sdio Page 27 of 64
Page 28

SD/MicroSD Memory Card (8 GB SDHC)
Add mega-storage in a jiffy using this 8 GB class 4 micro-SD card. It comes with a SD adapter so you can
use it with any of our shields or adapters. Preformatted to FAT so it works out...
$9.95
In Stock
Add to Cart
© Adafruit Industries https://learn.adafruit.com/adafruit-microsd-spi-sdio Page 28 of 64
Page 29

Python Docs
Python Docs (https://adafru.it/Mmc)
© Adafruit Industries https://learn.adafruit.com/adafruit-microsd-spi-sdio Page 29 of 64
Page 30

Using sdioio
sdioio uses SDIO high-speed interface to communicate with SD cards, it is not pin compatible with
SPI and requires special wiring. Not all chips support SDIO, and if they do, you usually have to use
special pins! It also requires CircuitPython 6.0.
Use the code and wiring examples in this section if these conditions are met:
Your SD card slot uses the SDIO bus to connect to a 3V microcontroller (If it uses SPI, go to the pages
for sdcardio (https://adafru.it/MA6))
Your CircuitPython board supports the sdioio module. (If not, you may be able to use bitbangio and
adafruit_sdcard )
The following section will show how to initialize the SD card and read & write data to it. You'll want to put
the correct lines to initialize it in mount_sd.py on your CIRCUITPY drive. For specific wiring information
and exact mount_sd.py files for several different boards, check out the following pages.
Initialize & Mount SD Card Filesystem
Before you can use the microSD card you need to initialize its SDIO connection and mount its filesystem.
First import all the modules we'll need:
import board
import sdioio
import storage
At this point you're ready to create the microSD card object and the filesystem object:
sdcard = sdioio.SDCard(
clock=board.SDIO_CLOCK,
command=board.SDIO_COMMAND,
data=board.SDIO_DATA,
frequency=25000000)
vfs = storage.VfsFat(sdcard)
Notice the sdioio module has a SDCard class which contains all the logic for talking to the microSD card
at a low level. This class needs to be told the pins to use in its constructor. SDIO_DATA is actually a tuple
of up to 4 data pins.
After a SDCard instance is created, it can be passed to the storage module VfsFat class. This class has
all the logic for translating CircuitPython filesystem calls into low level microSD card access. Both
the SDCard and VfsFat class instances are required to mount the card as a new filesystem.
Finally you can mount the microSD card filesystem into the CircuitPython filesystem. For example to make
the path /sd on the CircuitPython filesystem read and write from the card run this command:
storage.mount(vfs, "/sd")
At this point, you can read and write to the SD card using common Python functions like open , read , and
© Adafruit Industries https://learn.adafruit.com/adafruit-microsd-spi-sdio Page 30 of 64
Page 31

write . The filenames will all begin with "/sd/" to differentiate them from the files on the CIRCUITPY drive.
If you're not familiar, here's an overview.
Reading & Writing Data
Once the microSD card is mounted inside CircuitPython's filesystem you're ready to read and write data
from it Reading and writing data is simple using Python's file operations like open (https://adafru.it/reL),
close (https://adafru.it/ryE), read (https://adafru.it/ryE), and write (https://adafru.it/ryE). The beauty of
CircuitPython and MicroPython is that they try to be as similar to desktop Python as possible, including
access to files.
For example to create a file and write a line of text to it you can run:
with open("/sd/test.txt", "w") as f:
f.write("Hello world!\r\n")
Notice the with statement is used to create a context manager that opens and automatically closes the
file. This is handy because with file access you Python you must close the file when you're done or else all
the data you thought was written might be lost!
The open function is used to open the file by telling it the path to it, and the mode (w for writing). Notice
the path is under /sd, /sd/test.txt. This means the file will be created on the microSD card that was
mounted as that path.
Inside the context manager you can access the f variable to operate on the file while it's open. The write
function is called to write a line of text to the file. Notice that unlike a print statement you need to end the
string passed to write with explicit carriage returns and new lines.
You can also open a file and read a line from it with similar code:
with open("/sd/test.txt", "r") as f:
print("Read line from file:")
print(f.readline(), end='')
When reading a line from a file with readline , the newline character '\n' at the end of the line is included.
By printing with end='' , the newline normally added by print is skipped. Otherwise, when reading back the
file, it would appear that there were extra blank lines after every line of the file.
If you wanted to read and print all of the lines from a file you could call readline in a loop. Once readline
reaches the end of the file it will return an empty string so you know when to stop:
with open("/sd/test.txt", "r") as f:
print("Printing lines in file:")
line = f.readline()
while line != '':
print(line, end='')
line = f.readline()
You can also just use the open file object in a for loop. Each time the loop runs, the loop variable will be
assigned the content of the next line of the file:
© Adafruit Industries https://learn.adafruit.com/adafruit-microsd-spi-sdio Page 31 of 64
Page 32

with open("/sd/test.txt", "r") as f:
print("Printing lines in file:")
for line in file:
print(line, end='')
Finally one other very common file scenario is opening a file to add new data at the end, or append data.
This works exactly the same as in Python and the open function can be told you'd like to append instead
of erase and write new data (what normally happens with the w option for open ). For example to add a
line to the file:
with open("/sd/test.txt", "a") as f:
f.write("This is another line!\r\n")
Notice the a option in the open function--this tells Python to add data at the end of the file instead of
erasing it and starting over at the top. Try reading the file with the code above to see the new line that
was added!
Those are the basics to manipulating files on microSD cards with CircuitPython! Once you have it
working, put the correct lines in mount_sd.py in CIRCUITPY, then continue learning by checking out the
example pages to print directory listings, log sensor data, play MP3 files and display bitmap graphics.
Example complete mount_sd.py
This example is for Grand Central M4 Express with the "SPI or SDIO Breakout", using the SDIO
connection:
import board
import sdioio
import storage
sdcard = sdioio.SDCard(
clock=board.SDIO_CLOCK,
command=board.SDIO_COMMAND,
data=board.SDIO_DATA,
frequency=25000000)
vfs = storage.VfsFat(sdcard)
storage.mount(vfs, "/sd")
Your board may be different. Refer to the following pages for more details.
© Adafruit Industries https://learn.adafruit.com/adafruit-microsd-spi-sdio Page 32 of 64
Page 33

Grand Central M4 Express + SDIO Breakout
sdioio uses SDIO high-speed interface to communicate with SD cards, it is not pin compatible with
SPI and requires special wiring. Not all chips support SDIO, and if they do, you usually have to use
special pins! It also requires CircuitPython 6.0.
The Adafruit Grand Central M4 Express supports SDIO mode with the SDIO Breakout Board. First, wire
the two together as shown:
Board 3.3 to breakout 3V
Board GND to breakout GND
Board D32 to breakout CLK
Board D33 to breakout CMD
Board D8 to breakout D0
Board D29 to breakout D1
Board D20 to breakout DAT2
Board D21 to breakout D3
To mount the SD card, use the following code. Remember to put it in the file mount_sd.py on CIRCUITPY
so you can easily call it from code.py or the REPL with import mount_sd .
import board
import sdioio
import storage
sdcard = sdioio.SDCard(
clock=board.SDIO_CLOCK,
command=board.SDIO_COMMAND,
data=board.SDIO_DATA,
frequency=25000000)
vfs = storage.VfsFat(sdcard)
storage.mount(vfs, "/sd")
© Adafruit Industries https://learn.adafruit.com/adafruit-microsd-spi-sdio Page 33 of 64
Page 34
Adafruit Micro SD SPI or SDIO Card Breakout Board - 3V ONLY!
Micro SD cards and microcontrollers go together like micro-peanutbutter-and-jelly: SD cards are
inexpensive, durable, easy to find at any shop, come in many sizes and can plug into any...
$2.95
In Stock
Add to Cart
© Adafruit Industries https://learn.adafruit.com/adafruit-microsd-spi-sdio Page 34 of 64
Page 35

Adafruit Grand Central M4 Express featuring the SAMD51
Are you ready? Really ready? Cause here comes the Adafruit Grand Central featuring the Microchip
ATSAMD51. This dev board is so big, it's not...
$37.50
In Stock
SD/MicroSD Memory Card (8 GB SDHC)
Add mega-storage in a jiffy using this 8 GB class 4 micro-SD card. It comes with a SD adapter so you can
use it with any of our shields or adapters. Preformatted to FAT so it works out...
$9.95
In Stock
Add to Cart
Add to Cart
© Adafruit Industries https://learn.adafruit.com/adafruit-microsd-spi-sdio Page 35 of 64
Page 36

Feather STM32F405 Express
sdioio uses SDIO high-speed interface to communicate with SD cards, it is not pin compatible with
SPI and requires special wiring. Not all chips support SDIO, and if they do, you usually have to use
special pins! It also requires CircuitPython 6.0.
The Feather STM32F405 Express uses SDIO to connect its built in micro SD card slot. Didn't notice it had
an SD card slot? We hid it on the underside.
To mount the SD card, use the following code. Remember to put it in the file mount_sd.py on CIRCUITPY
so you can easily call it from code.py or the REPL with import mount_sd .
import board
import sdioio
import storage
sdcard = sdioio.SDCard(
clock=board.SDIO_CLOCK,
command=board.SDIO_COMMAND,
data=board.SDIO_DATA,
frequency=25000000)
vfs = storage.VfsFat(sdcard)
storage.mount(vfs, "/sd")
© Adafruit Industries https://learn.adafruit.com/adafruit-microsd-spi-sdio Page 36 of 64
Page 37

Adafruit Feather STM32F405 Express
ST takes flight in this Feather board. The new STM32F405 Feather (video) that we designed runs
CircuitPython at a blistering 168MHz –...
$24.95
In Stock
Add to Cart
© Adafruit Industries https://learn.adafruit.com/adafruit-microsd-spi-sdio Page 37 of 64
Page 38

SD/MicroSD Memory Card (8 GB SDHC)
Add mega-storage in a jiffy using this 8 GB class 4 micro-SD card. It comes with a SD adapter so you can
use it with any of our shields or adapters. Preformatted to FAT so it works out...
$9.95
In Stock
Add to Cart
© Adafruit Industries https://learn.adafruit.com/adafruit-microsd-spi-sdio Page 38 of 64
Page 39

Python Docs
Python Docs (https://adafru.it/Mmd)
© Adafruit Industries https://learn.adafruit.com/adafruit-microsd-spi-sdio Page 39 of 64
Page 40

Adafruit CircuitPython SD
The original adafruit_sd library is available for older M0 boards that don't have enough flash for the
new updated sdcardio optimized library. It's slower, but works well enough for basic SD card usages!
Use the code and wiring examples in this section if:
Your board doesn't support sdcardio or sdioio
This is the case particularly for older and lower-capacity microcontroller like the M0 series.
The following section will show how to initialize the SD card and read & write data to it. You'll want to put
the correct lines to initialize it in mount_sd.py on your CIRCUITPY drive. For typical wiring information and
exact mount_sd.py files for several different boards, check out next page.
Adafruit CircuitPython Module Install
You'll need to install the Adafruit CircuitPython SD (https://adafru.it/zwC) library on your CircuitPython
board.
First make sure you are running the latest version of Adafruit CircuitPython (https://adafru.it/Amd) for your
board.
Next you'll need to install the necessary libraries to use the hardware--carefully follow the steps to find
and install these libraries from Adafruit's CircuitPython library bundle (https://adafru.it/ENC).
Our CircuitPython starter guide has a great page on how to install libraries from the
bundle (https://adafru.it/ABU).
Load the the following libraries into the lib folder on your
CIRCUITPY drive:
adafruit_sdcard.mpy
adafruit_bus_device
Before continuing make sure your board's lib folder or root
filesystem has the adafruit_sdcard.mpy file and
adafruit_bus_device folder copied over.
Initialize & Mount SD Card Filesystem
Before you can use the microSD card you need to initialize its SPI connection and mount its filesystem.
First import all the modules we'll need:
import adafruit_sdcard
import board
import busio
import digitalio
import storage
© Adafruit Industries https://learn.adafruit.com/adafruit-microsd-spi-sdio Page 40 of 64
Page 41

Next create the SPI bus and a digital output for the microSD card's chip select line (be sure to select the
right pin names for your wiring):
# Use the board's primary SPI bus
spi = board.SPI()
# Or, use an SPI bus on specific pins:
#spi = busio.SPI(board.SD_SCK, MOSI=board.SD_MOSI, MISO=board.SD_MISO)
# Boards with built in SPI SD card slots will generally have a
# pin called SD_CS:
cs = digitalio.DigitalInOut(board.SD_CS)
# For breakout boards, you can choose any GPIO pin that's convenient:
#cs = digitalio.DigitalInOut(board.D10)
Note that when you use adafruit_sdcard , cs is a DigitalInOut object, not a microcontroller.Pin object. If you
change your code to use sdcardio , you need to use a Pin object instead.
At this point you're ready to create the microSD card object and the filesystem object:
sdcard = adafruit_sdcard.SDCard(spi, cs)
vfs = storage.VfsFat(sdcard)
Notice the sdcardio module has a SDCard class which contains all the logic for talking to the microSD
card at a low level. This class needs to be told the SPI bus and chip select pin in its constructor.
After a SDCard instance is created it can be passed to the storage module's VfsFat class. This class has
all the logic for translating CircuitPython filesystem calls into low level microSD card access. Both
the SDCard and VfsFat class instances are required to mount the card as a new filesystem.
Finally you can mount the microSD card's filesystem into the CircuitPython filesystem. For example to
make the path /sd on the CircuitPython filesystem read and write from the card run this command:
storage.mount(vfs, "/sd")
At this point, you can read and write to the SD card using common Python functions like open , read , and
write . The filenames will all begin with "/sd/" to differentiate them from the files on the CIRCUITPY drive.
If you're not familiar, here's an overview.
Reading & Writing Data
Once the microSD card is mounted inside CircuitPython's filesystem you're ready to read and write data
from it Reading and writing data is simple using Python's file operations like open (https://adafru.it/reL),
close (https://adafru.it/ryE), read (https://adafru.it/ryE), and write (https://adafru.it/ryE). The beauty of
CircuitPython and MicroPython is that they try to be as similar to desktop Python as possible, including
access to files.
For example to create a file and write a line of text to it you can run:
with open("/sd/test.txt", "w") as f:
f.write("Hello world!\r\n")
Notice the with statement is used to create a context manager that opens and automatically closes the
file. This is handy because with file access you Python you must close the file when you're done or else all
© Adafruit Industries https://learn.adafruit.com/adafruit-microsd-spi-sdio Page 41 of 64
Page 42

the data you thought was written might be lost!
The open function is used to open the file by telling it the path to it, and the mode (w for writing). Notice
the path is under /sd, /sd/test.txt. This means the file will be created on the microSD card that was
mounted as that path.
Inside the context manager you can access the f variable to operate on the file while it's open. The write
function is called to write a line of text to the file. Notice that unlike a print statement you need to end the
string passed to write with explicit carriage returns and new lines.
You can also open a file and read a line from it with similar code:
with open("/sd/test.txt", "r") as f:
print("Read line from file:")
print(f.readline(), end='')
When reading a line from a file with readline , the newline character '\n' at the end of the line is included.
By printing with end='' , the newline normally added by print is skipped. Otherwise, when reading back the
file, it would appear that there were extra blank lines after every line of the file.
If you wanted to read and print all of the lines from a file you could call readline in a loop. Once readline
reaches the end of the file it will return an empty string so you know when to stop:
with open("/sd/test.txt", "r") as f:
print("Printing lines in file:")
line = f.readline()
while line != '':
print(line, end='')
line = f.readline()
You can also just use the open file object in a for loop. Each time the loop runs, the loop variable will be
assigned the content of the next line of the file:
with open("/sd/test.txt", "r") as f:
print("Printing lines in file:")
for line in file:
print(line, end='')
Finally one other very common file scenario is opening a file to add new data at the end, or append data.
This works exactly the same as in Python and the open function can be told you'd like to append instead
of erase and write new data (what normally happens with the w option for open ). For example to add a
line to the file:
with open("/sd/test.txt", "a") as f:
f.write("This is another line!\r\n")
Notice the a option in the open function--this tells Python to add data at the end of the file instead of
erasing it and starting over at the top. Try reading the file with the code above to see the new line that
was added!
Those are the basics to manipulating files on microSD cards with CircuitPython! Once you have it
© Adafruit Industries https://learn.adafruit.com/adafruit-microsd-spi-sdio Page 42 of 64
Page 43

working, put the correct lines in mount_sd.py in CIRCUITPY, then continue learning by checking out the
example pages to print directory listings, log sensor data, play MP3 files and display bitmap graphics.
Example complete mount_sd.py
This example works on the AdaLogger M0:
import adafruit_sdcard
import board
import busio
import digitalio
import storage
spi = board.SPI()
cs = digitalio.DigitalInOut(board.SD_CS)
sdcard = adafruit_sdcard.SDCard(spi, cs)
vfs = storage.VfsFat(sdcard)
storage.mount(vfs, "/sd")
Your board may be different. Refer to the following pages for more details.
© Adafruit Industries https://learn.adafruit.com/adafruit-microsd-spi-sdio Page 43 of 64
Page 44

Adalogger M0 Feather
The Feather M0 Adalogger is a classic board that doesn't have the same power as its newer siblings, but
it's still good for logging. Best of all, no soldering is necessary to access the SD card.
To mount the SD card, use the following code. Remember, to put it in the file mount_sd.py on
CIRCUITPY so you can easily call it from code.py or the REPL with import mount_sd .
import adafruit_sdcard
import board
import busio
import digitalio
import storage
spi = board.SPI()
cs = digitalio.DigitalInOut(board.SD_CS)
sdcard = adafruit_sdcard.SDCard(spi, cs)
vfs = storage.VfsFat(sdcard)
storage.mount(vfs, "/sd")
Adafruit Feather M0 Adalogger
Feather is the new development board from Adafruit, and like its namesake it is thin, light, and lets you fly!
We designed Feather to be a new standard for portable microcontroller...
$19.95
In Stock
Add to Cart
© Adafruit Industries https://learn.adafruit.com/adafruit-microsd-spi-sdio Page 44 of 64
Page 45

SD/MicroSD Memory Card (8 GB SDHC)
Add mega-storage in a jiffy using this 8 GB class 4 micro-SD card. It comes with a SD adapter so you can
use it with any of our shields or adapters. Preformatted to FAT so it works out...
$9.95
In Stock
Add to Cart
© Adafruit Industries https://learn.adafruit.com/adafruit-microsd-spi-sdio Page 45 of 64
Page 46

Python Docs
Python Docs (https://adafru.it/C5z)
© Adafruit Industries https://learn.adafruit.com/adafruit-microsd-spi-sdio Page 46 of 64
Page 47

Examples
The following examples assume sure you've configured mount_sd.py (https://adafru.it/MA7) for your
board. If you can import mount_sd at the REPL without getting an error, you should be good to go.
>>> import mount_sd
>>>
© Adafruit Industries https://learn.adafruit.com/adafruit-microsd-spi-sdio Page 47 of 64
Page 48

Listing files on SD card
Put the code below in code.py on your CIRCUITPY drive, open up the REPL (and restart it with ^D if
necessary) to get a listing of all the files an SD card contains. We recursively print out all files and also the
filesize. This is a good demo to start with because you can at least tell if your files exist!
This example will work on any board where you've configured mount_sd.py (https://adafru.it/MA7)!.
The function print_directory works using os.listdir (to list files in a directory) and os.stat (to get information
about an item, such as size or whether it's a directory).
By keeping track of the nesting of directories within directories, names are indented according to the
value of tabs to show the directory structure.
import os
import mount_sd
def print_directory(path, tabs=0):
for file in os.listdir(path):
stats = os.stat(path + "/" + file)
filesize = stats[6]
isdir = stats[0] & 0x4000
if filesize < 1000:
sizestr = str(filesize) + " by"
elif filesize < 1000000:
sizestr = "%0.1f KB" % (filesize / 1000)
else:
sizestr = "%0.1f MB" % (filesize / 1000000)
prettyprintname = ""
for _ in range(tabs):
prettyprintname += " "
prettyprintname += file
if isdir:
prettyprintname += "/"
print('{0:<40} Size: {1:>10}'.format(prettyprintname, sizestr))
# recursively print directory contents
if isdir:
print_directory(path + "/" + file, tabs + 1)
print("Files on filesystem:")
print("====================")
print_directory("/sd")
© Adafruit Industries https://learn.adafruit.com/adafruit-microsd-spi-sdio Page 48 of 64
Page 49

Benchmarking SD card access
Put the code below in code.py on your CIRCUITPY drive, open up the REPL (and restart it with ^D if
necessary) to get report of how quickly CircuitPython can read and write your SD card.
This example will work on any board where you've configured mount_sd.py (https://adafru.it/MA7)!.
We saw some great speed increases going from good ( adafruit_sdcard ) to better ( sdcardio ) to best ( sdio ).
However, every SD card is different and (especially when writing data) slow down as they "age", so your
mileage may vary:
SD card access with adafruit_sdcard on Grand Central:
Reads up to 120kB/s
Data logging at up to 160 of lines per second
SD card access with sdcardio on Grand Central:
Reads up to 650kB/s
Data logging at up to 700 of lines per second
SD card access with sdioio on Grand Central with SDIO breakout:
Reads up to 1100kB/s
Data logging at over 1000 lines per second
© Adafruit Industries https://learn.adafruit.com/adafruit-microsd-spi-sdio Page 49 of 64
Page 50

import time
import os
import mount_sd
# First, just write the file 'hello.txt' to the card
with open("/sd/hello.txt", "w") as f: print("hello world", file=f)
print()
print("SD card I/O benchmarks")
# Test read and write speed in several scenarios:
# * 512 or 4096 bytes at a time
# * Writing 1 time or 16 times
# First write the content to the SD card, then read it back, reporting the
# time taken.
for sz in 512, 4096:
b = bytearray(sz)
for i in range(sz): b[i] = 0xaa
for n in (1, 16):
with open("/sd/hello.bin", "wb") as f:
t0 = time.monotonic_ns()
for i in range(n):
f.write(b)
t1 = time.monotonic_ns()
dt = (t1-t0) / 1e9
print(f"write {len(b)} x {n} in {dt}s {n * len(b) / dt / 1000:.1f}Kb/s")
with open("/sd/hello.bin", "rb") as f:
t0 = time.monotonic_ns()
for i in range(n):
f.readinto(b)
t1 = time.monotonic_ns()
dt = (t1-t0) / 1e9
print(f"read {len(b)} x {n} in {dt}s {n * len(b) / dt / 1000:.1f}Kb/s")
print()
# Test "logging" speed and report the time to write each line.
# Note that in this test the file is not closed or flushed after each
# line, so in the event of power loss some lines would be lost. However,
# it allows much more frequent logging overall.
#
# If keeping data integrity is your highest concern, follow the logging
# example, not this logging benchmark!
print("logging test")
with open("/sd/log.txt", "wt") as logfile:
t0 = time.monotonic_ns()
for i in range(10000):
t1 = time.monotonic_ns()
dt = (t1-t0) / 1e9
print(f"Line {i}, {dt:2f}s elapsed", file=logfile)
t1 = time.monotonic_ns()
dt = (t1-t0) / 1e9
print(f"Logged 10000 lines in {dt} seconds, {dt*100:.0f}us/line")
sz = os.stat('/sd/log.txt')[6]
print(f"{sz} bytes written, {sz/dt/1000:.1f}Kb/s")
© Adafruit Industries https://learn.adafruit.com/adafruit-microsd-spi-sdio Page 50 of 64
Page 51

© Adafruit Industries https://learn.adafruit.com/adafruit-microsd-spi-sdio Page 51 of 64
Page 52

Logging temperature to SD card
Did you know your CircuitPython-compatible microcontroller probably has a thermometer inside? It does!
microcontroller.cpu.temperature reflects the temperature inside the microcontroller itself, which will
frequently be 3-4 degrees C above the ambient temperature. Note that temperatures are reported in
Celsius, not Fahrenheit.
This is a great example to extend with the sensor(s) of your choice, as well as with a Real Time Clock
(RTC) so that you know the time that each reading was recorded. We chose the internal temperature to
make this work with a wide range of boards, as long you've configured
mount_sd.py (https://adafru.it/MA7)!
import time
import board
import digitalio
import microcontroller
import mount_sd
led = digitalio.DigitalInOut(board.D13)
led.direction = digitalio.Direction.OUTPUT
# Use the filesystem as normal! Our files are under /sd
print("Logging temperature to filesystem")
# append to the file!
while True:
# open file for append
with open("/sd/temperature.txt", "a") as f:
led.value = True # turn on LED to indicate we're writing to the file
t = microcontroller.cpu.temperature
print("Temperature = %0.1f" % t)
f.write("%0.1f\n" % t)
led.value = False # turn off LED to indicate we're done
# file is saved
time.sleep(1)
© Adafruit Industries https://learn.adafruit.com/adafruit-microsd-spi-sdio Page 52 of 64
Page 53

Adalogger FeatherWing - RTC + SD Add-on For All Feather Boards
A Feather board without ambition is a Feather board without FeatherWings! This is the Adalogger
FeatherWing: it adds both a battery-backed Real Time Clock and micro SD...
$8.95
In Stock
Add to Cart
© Adafruit Industries https://learn.adafruit.com/adafruit-microsd-spi-sdio Page 53 of 64
Page 54

Adafruit Feather nRF52840 Sense
The Adafruit Feather Bluefruit Sense takes our popular Feather nRF52840 Express and adds a
smorgasbord of sensors...
$32.50
In Stock
Add to Cart
© Adafruit Industries https://learn.adafruit.com/adafruit-microsd-spi-sdio Page 54 of 64
Page 55

Playing MP3 from SD Card
This code plays MP3 files without volume control. If you use headphones, choose a set with an inline volume control and always listen at a safe volume.
Compressed audio can be a nice alternative to uncompressed WAV files - especially when you have a
small filesystem like that on many CircuitPython boards: those WAV files get pretty big fast! Thanks to the
expiration of the MP3 patent pool, we can now include MP3 decoding as a core CircuitPython capability
.
CircuitPython supports any MP3 file you like. We've found that mono and stereo files from 32kbit/s to
128kbit/s work, with sample rates from 16kHz to 44.1kHz. The DAC output on the SAMD51 M4 is just 12-bit
so there's not much point in using higher bitrates.
With this example, tailored to the PyGamer, you can loop MP3s to your heart's content (or as long as
power lasts). Put the MP3 files in the main folder of your SD card, put the code below in code.py, and
make sure you've configured mount_sd.py (https://adafru.it/MA7)!
This example can be adapted to a lot of SAMD51 and nRF52840 boards. Where there's no headphone
jack or speaker connection, consider the Prop Maker Featherwing for your sound-making needs. For
more about playing MP3s, visit the page in the essentials guide (https://adafru.it/MAs). For a full MP3
player for your PyGamer, see the dedicated guide (https://adafru.it/MAt).
© Adafruit Industries https://learn.adafruit.com/adafruit-microsd-spi-sdio Page 55 of 64
Page 56

import os
import time
import board
import digitalio
import mount_sd
# Updating the display can interfere with MP3 playback if it is not
# done carefully
try:
board.DISPLAY.auto_refresh = False
except:
pass
from audiomp3 import MP3Decoder
try:
from audioio import AudioOut
except ImportError:
try:
from audiopwmio import PWMAudioOut as AudioOut
except ImportError:
pass # not always supported by every board!
# The mp3 files on the sd card will be played in alphabetical order
mp3files = sorted("/sd/" + filename for filename in os.listdir("/sd")
if filename.lower().endswith("mp3"))
voodoo = [1,2,3]
# You have to specify some mp3 file when creating the decoder
mp3 = open(mp3files[0], "rb")
decoder = MP3Decoder(mp3)
audio = AudioOut(board.A0, right_channel=board.A1)
speaker_enable = digitalio.DigitalInOut(board.SPEAKER_ENABLE)
speaker_enable.switch_to_output(True)
while True:
for filename in mp3files:
print("Playing", filename)
# Updating the .file property of the existing decoder
# helps avoid running out of memory (MemoryError exception)
decoder.file = open(filename, "rb")
audio.play(decoder)
# This allows you to do other things while the audio plays!
while audio.playing:
time.sleep(1)
© Adafruit Industries https://learn.adafruit.com/adafruit-microsd-spi-sdio Page 56 of 64
Page 57

Adafruit PyGamer Starter Kit
Please note: you may get a royal blue or purple case with your starter kit (they're both lovely
colors)What fits in your pocket, is fully Open...
$59.95
In Stock
Add to Cart
© Adafruit Industries https://learn.adafruit.com/adafruit-microsd-spi-sdio Page 57 of 64
Page 58
Adafruit PyGamer for MakeCode Arcade, CircuitPython or Arduino
What fits in your pocket, is fully Open Source, and can run CircuitPython, MakeCode Arcade or Arduino
games you write yourself? That's right, it's the Adafruit...
Out of Stock
Adafruit Prop-Maker FeatherWing
The Adafruit Feather series gives you lots of options for a small, portable, rechargeable microcontroller
board. Perfect for fitting into your next prop build! This FeatherWing will...
$9.95
In Stock
Out of
Stock
Add to Cart
© Adafruit Industries https://learn.adafruit.com/adafruit-microsd-spi-sdio Page 58 of 64
Page 59

Showing BMPs from SD card
With this example, tailored to the PyGamer, you can have a portable picture frame. Put the BMP files in
the main folder of your SD card, put the code below in code.py, and make sure you've configured
mount_sd.py (https://adafru.it/MA7)!
This example can be adapted to a lot of CircuitPython boards with support for
displayio (https://adafru.it/EGh).
For more information on making bitmap files, check out this guide (https://adafru.it/MbZ).
import os
import time
import board
import digitalio
import displayio
import mount_sd
display = board.DISPLAY
# The bmp files on the sd card will be shown in alphabetical order
bmpfiles = sorted("/sd/" + filename for filename in os.listdir("/sd")
if filename.lower().endswith("bmp"))
while True:
for filename in bmpfiles:
print("showing", filename)
bitmap_file = open(filename, "rb")
bitmap = displayio.OnDiskBitmap(bitmap_file)
tile_grid = displayio.TileGrid(bitmap,
pixel_shader=displayio.ColorConverter())
group = displayio.Group()
group.append(tile_grid)
display.show(group)
# Show the image for 10 seconds
time.sleep(10)
© Adafruit Industries https://learn.adafruit.com/adafruit-microsd-spi-sdio Page 59 of 64
Page 60

Adafruit PyGamer Starter Kit
Please note: you may get a royal blue or purple case with your starter kit (they're both lovely
colors)What fits in your pocket, is fully Open...
$59.95
In Stock
Add to Cart
© Adafruit Industries https://learn.adafruit.com/adafruit-microsd-spi-sdio Page 60 of 64
Page 61

Adafruit PyGamer for MakeCode Arcade, CircuitPython or Arduino
What fits in your pocket, is fully Open Source, and can run CircuitPython, MakeCode Arcade or Arduino
games you write yourself? That's right, it's the Adafruit...
Out of Stock
Out of
Stock
© Adafruit Industries https://learn.adafruit.com/adafruit-microsd-spi-sdio Page 61 of 64
Page 62
Downloads
Files
SD card simplified specification (https://adafru.it/MAu)
EagleCAD files on GitHub (https://adafru.it/MAv)
Fritzing object in the Adafruit Fritzing Library (https://adafru.it/MAw)
Schematic
Fab Print
© Adafruit Industries https://learn.adafruit.com/adafruit-microsd-spi-sdio Page 62 of 64
Page 63

© Adafruit Industries https://learn.adafruit.com/adafruit-microsd-spi-sdio Page 63 of 64
Page 64

© Adafruit Industries Last Updated: 2021-03-24 11:06:08 AM EDT Page 64 of 64
 Loading...