

Page 1
Turtle Graphics in CircuitPython on TFT Gizmo
Created by John Park
Last updated on 2021-02-08 06:46:25 PM EST
Page 2

2
3
4
7
7
7
8
8
9
9
11
11
13
17
17
17
17
18
20
21
23
24
26
27
29
31
33
35
37
39
Guide Contents
Guide Contents
Overview
Parts
The Turtle API
Controlling the Pen
Moving
Heading
Shapes
More control
Queries
CircuitPython on Circuit Playground Bluefruit
Install or Update CircuitPython
Assembly
Turtle Graphics on Gizmo
Libraries
The Mu Editor
Turtle Graphics Code
Square
Asterisk
Circle
Circle Petals
Star
Rainbow Benzene
Parabolas
Sierpinski Triangle
Hilbert Curve
Koch Snowflake
Christmas Tree
Snowflakes
Where to Find More
© Adafruit Industries https://learn.adafruit.com/turtle-graphics-gizmo Page 2 of 40
Page 3
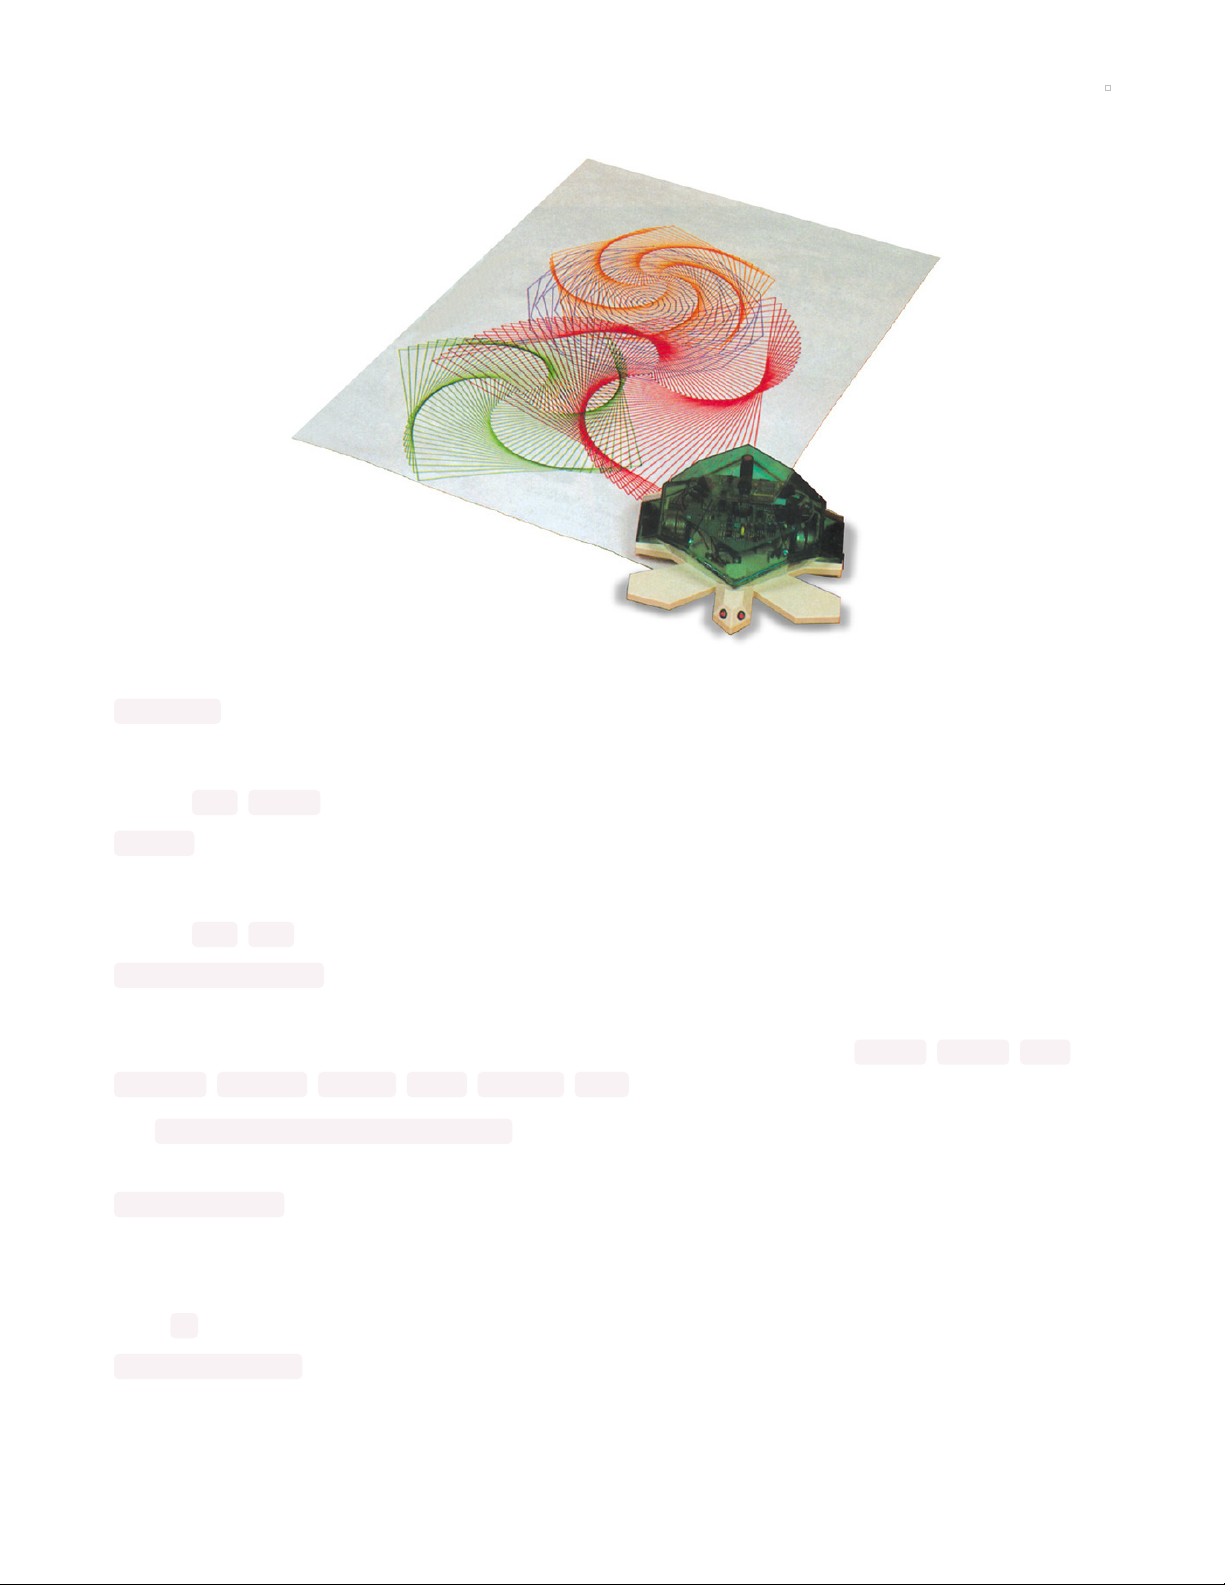
Overview
Learn to create your own graphics programs with Turtle Graphics on the Circuit Playground Bluefruit!
The legendary Turtle graphics of the Logo programming language has made their way to CircuitPython!
Now, you can learn to program your own graphics right on the TFT Gizmo screen attached to a Circuit
Playground Bluefruit board!
In this guide, we'll look at some general Turtle commands, then we'll set up the Circuit Playground
Bluefruit and TFT Gizmo to use Turtle in CircuitPython, and then we'll run some example programs to
draw sweet graphics on the display!
© Adafruit Industries https://learn.adafruit.com/turtle-graphics-gizmo Page 3 of 40
Page 4
Besides the CPB with TFT Gizmo, the adafruit_turtle library will run on most of the M4 based boards,
such as the Hallowing M4, but will require some fine tuning of the pin assignments and other details.
You may have heard of, or even played around with,
turtle graphics
(https://adafru.it/FaL). Simply put, this
is a metaphor for drawing vector images where you control a
turtle
that can drag a pen along with it.
Commands to the turtle include things like move forward some distance, turn left or right by some angle,
lift the pen off the paper (so that moving won't make a mark), or put it on the paper (so that moving will
make a mark).
There have been many on-screen implementations of turtle graphics, most notably the
LOGO (https://adafru.it/FaM) programming language. Versions have also been made that control a robot
that has a pen so as to create on-paper copies of turtle drawings.
Parts
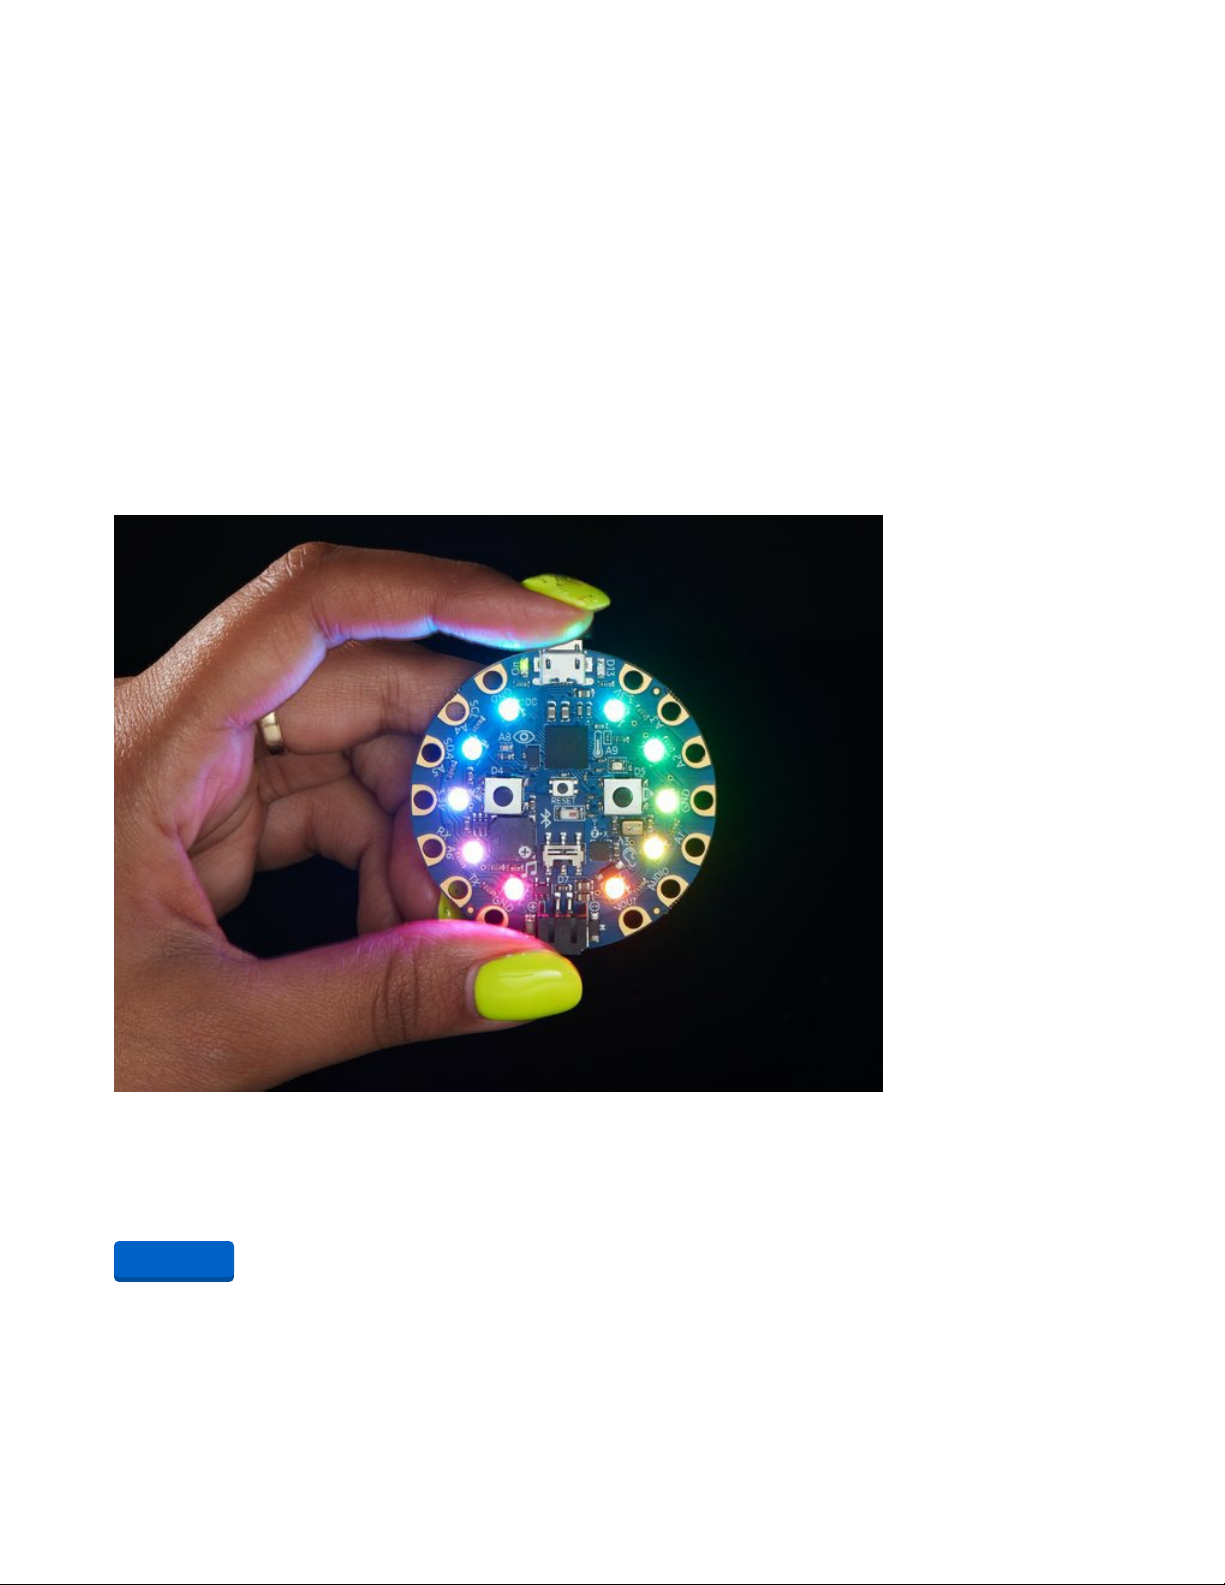
Circuit Playground Bluefruit - Bluetooth Low Energy
Circuit Playground Bluefruit is our third board in the Circuit Playground series, another step towards a
perfect introduction to electronics and programming. We've...
$24.95
In Stock
Your browser does not support the video tag.
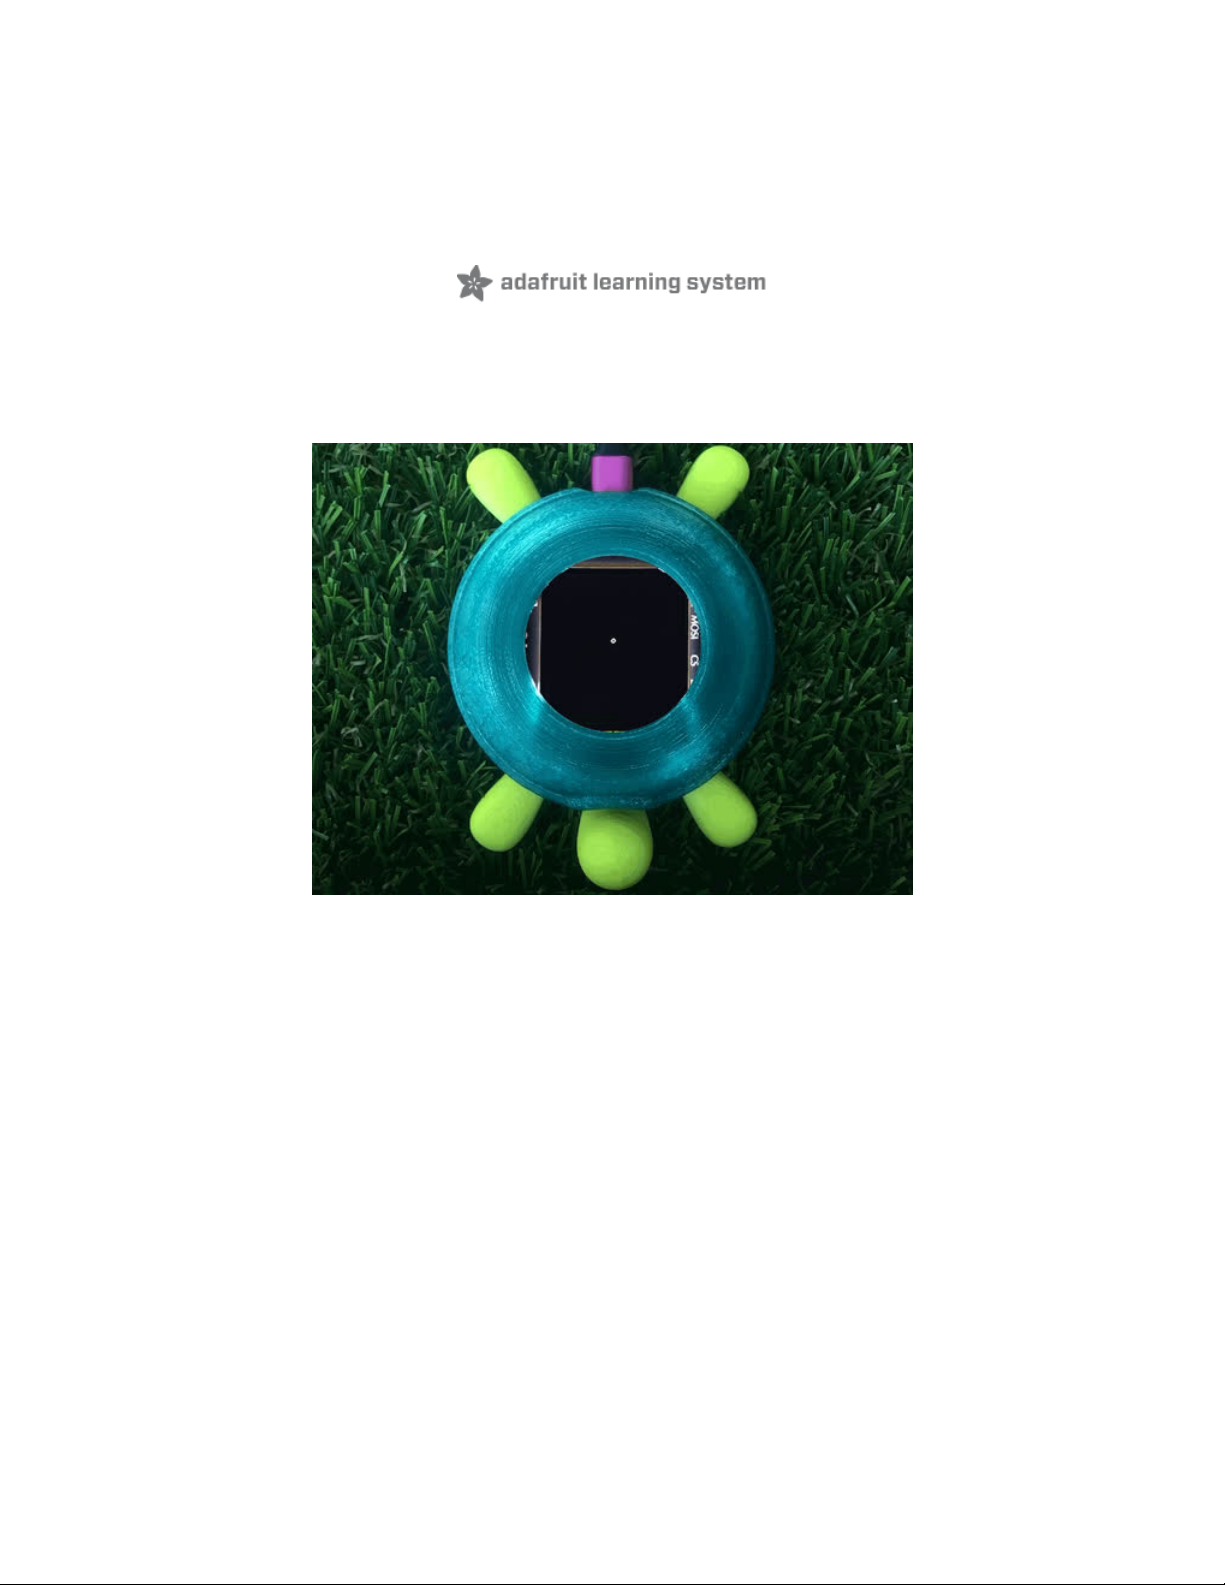
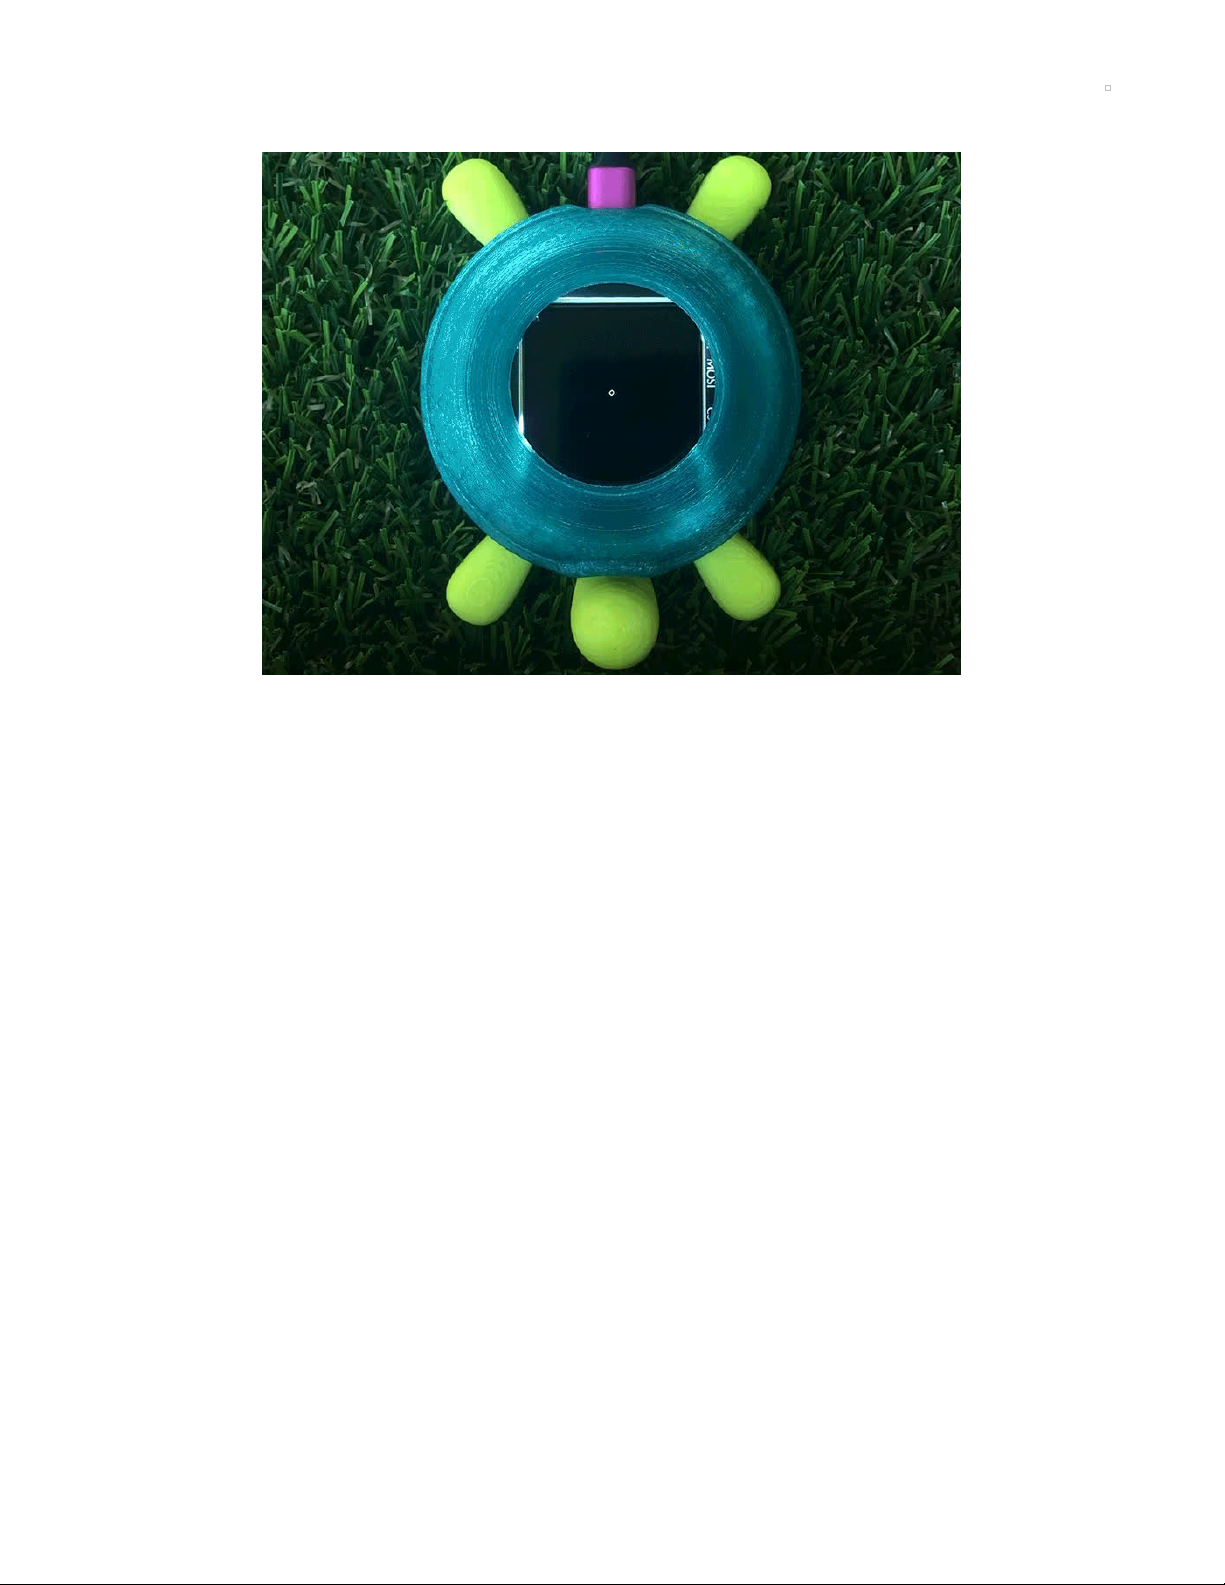
Circuit Playground TFT Gizmo - Bolt-on Display + Audio Amplifier
Extend and expand your Circuit Playground projects with a bolt on TFT Gizmo that lets you add a lovely
color display in a sturdy and reliable fashion. This PCB looks just like a round...
$19.95
Add to Cart
© Adafruit Industries https://learn.adafruit.com/turtle-graphics-gizmo Page 4 of 40
Page 5
In Stock
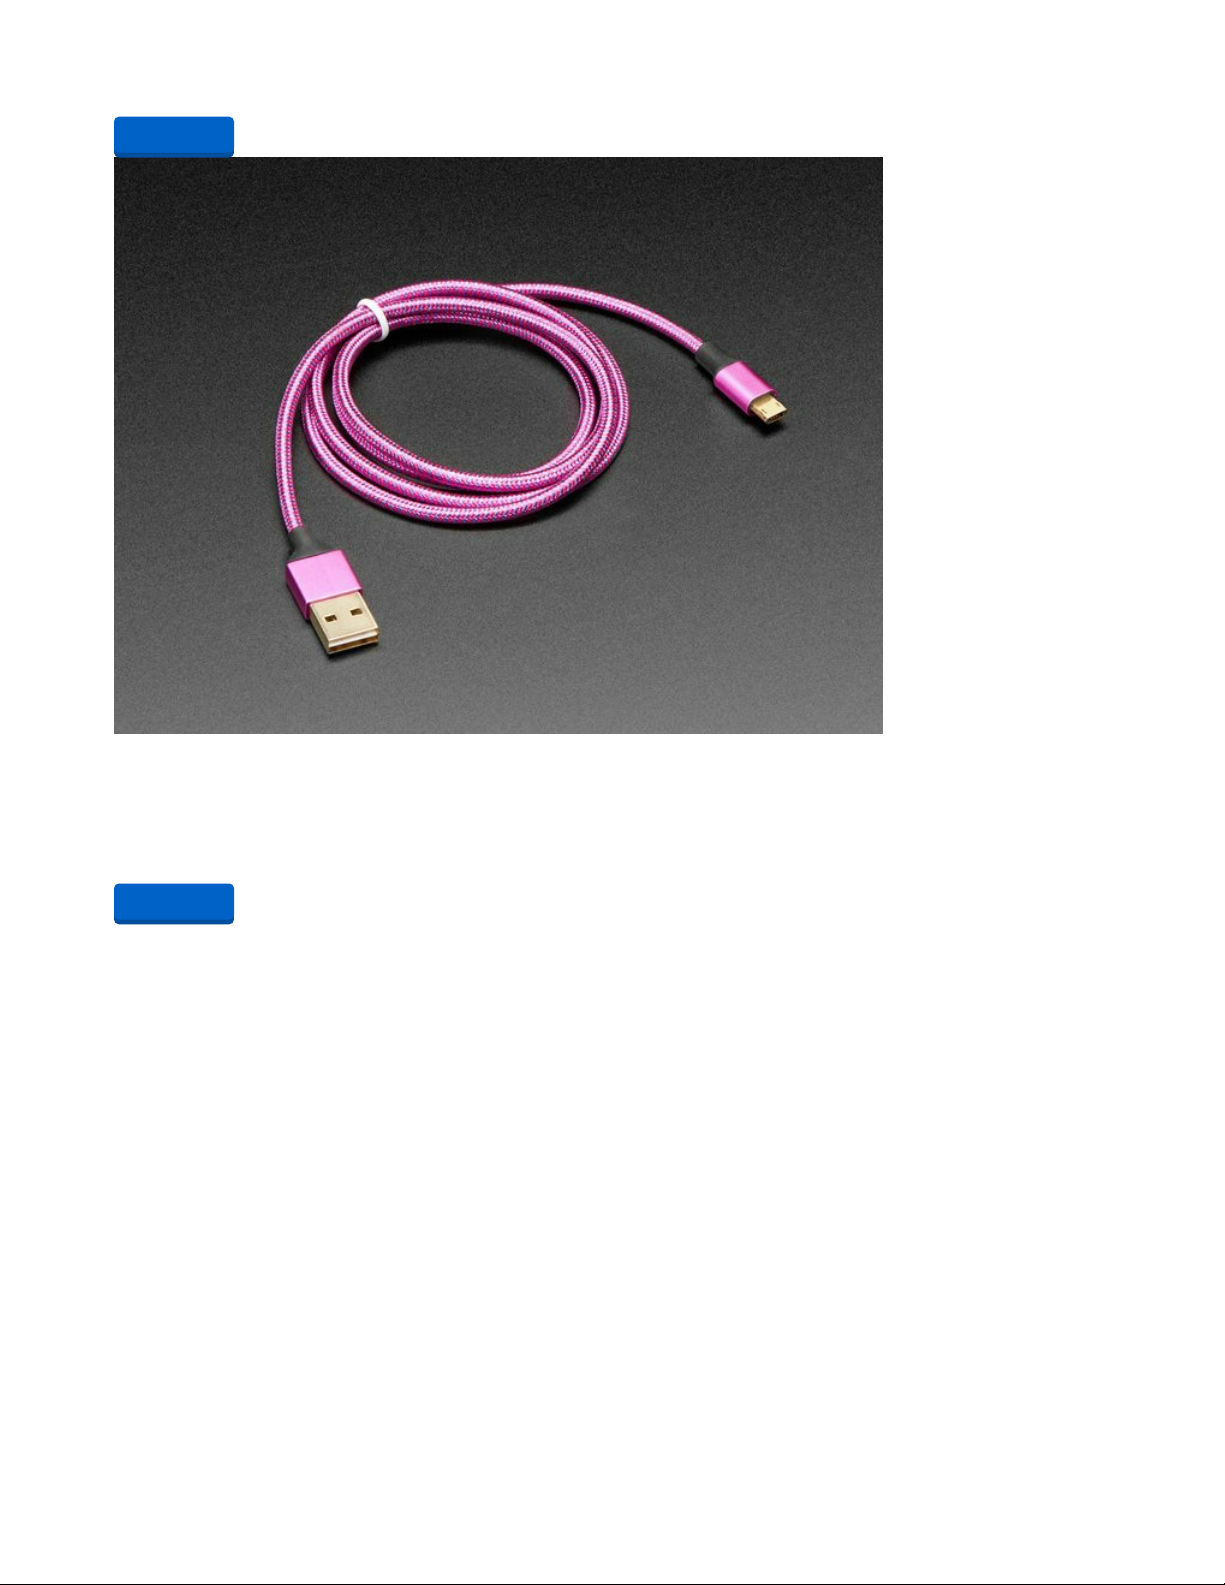
Fully Reversible Pink/Purple USB A to micro B Cable - 1m long
This cable is not only super-fashionable, with a woven pink and purple Blinka-like pattern, it's also fully
reversible! That's right, you will save seconds a day by...
$3.95
In Stock
Add to Cart
Add to Cart
© Adafruit Industries https://learn.adafruit.com/turtle-graphics-gizmo Page 5 of 40
Page 6
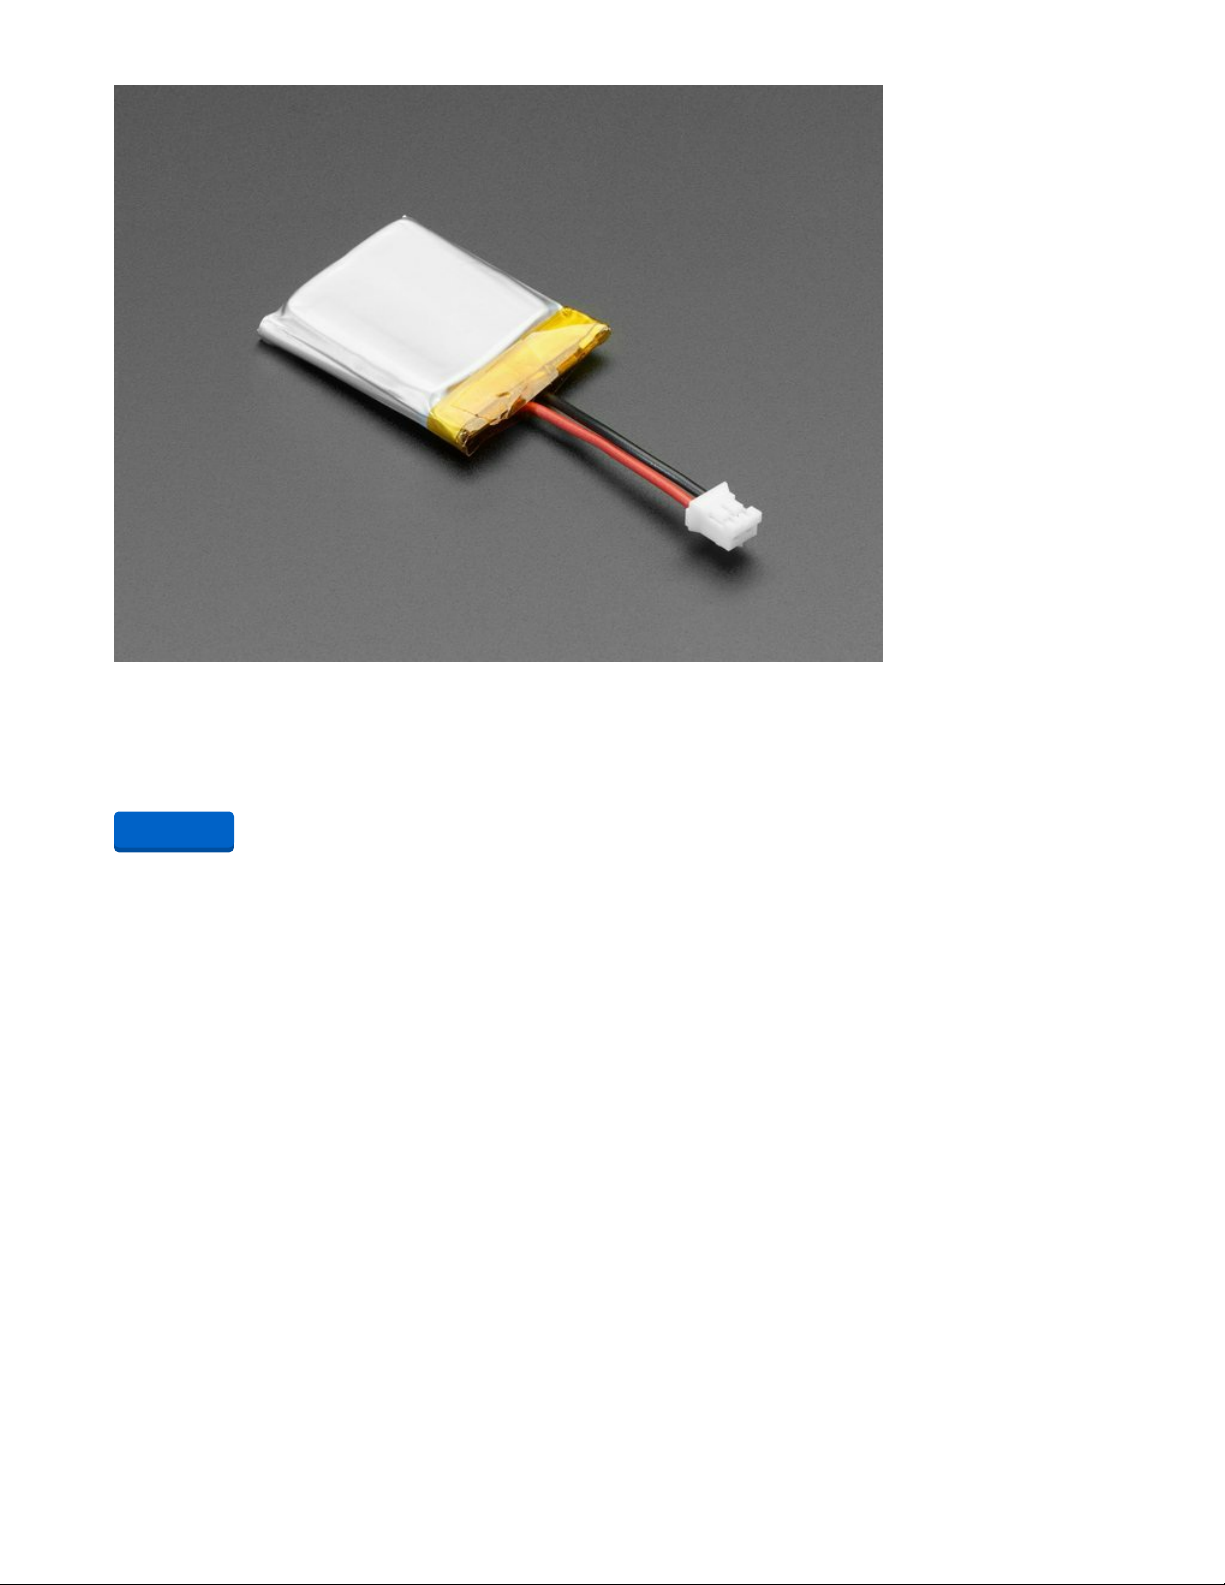
Lithium Ion Polymer Battery with Short Cable - 3.7V 350mAh
Lithium ion polymer (also known as 'lipo' or 'lipoly') batteries are thin, light and powerful. The output
ranges from 4.2V when completely charged to 3.7V. This battery...
$5.95
In Stock
Add to Cart
© Adafruit Industries https://learn.adafruit.com/turtle-graphics-gizmo Page 6 of 40
Page 7
The Turtle API
Controlling the Pen
pendown()
Lower the pen, causing subsequent commands will draw.
Aliases: pd() , down()
penup()
Raise the pen, causing subsequent commands to not draw.
Alaises: pu() , up()
pencolor(color=None)
The form without an argument will return the current pen color as a 24-bit integer. The other form sets the
pen color to the specified value. The Color class should be used for this value: WHITE , BLACK , RED ,
ORANGE , YELLOW , GREEN , BLUE , PURPLE , PINK .
E.g. turtle.pencolor(adafruit_turtle.Color.RED)
Moving
forward(distance)
Move the turtle forward (on its current heading) by the specified distance. The distance is a number of
pixels if the turtle is moving exactly vertically or horizontally.
Alias: fd
backward(distance)
Move the turtle backward (opposite its current heading) by the specified distance. The distance is a
© Adafruit Industries https://learn.adafruit.com/turtle-graphics-gizmo Page 7 of 40
Page 8

number of pixels if the turtle is moving exactly vertically or horizontally.
Aliases: bk , back
setx(x)
Set the turtle's horizontal coordinate.
sety(y)
Set the turtle's vertical coordinate.
goto(x, y)
Set both coordinates of the turtle.
Heading
Drawing in a straight line isn't that interesting, so the direction that the turtle is facing (and thus moving)
can be changed. This is called its
heading
. The first two functions below set what it means to change the
heading by some value. The result of calling these methods stay in effect until the next call to one of
them. By default, degrees are used, with a change of 1 corresponding to 1 degree.
degrees(fullcircle=360)
A full circle is 360 degrees and, by default, changing the heading by 1 means changing it by one degree.
Supplying a different value will serve to scale those incremental heading changes. For example, if you
call degrees(180) , changing the heading by 1 will change it by 2 degrees.
radians()
Use radians to turn the turtle. Changing the heading by 1 now means changing it by 1 radian (about 57.3
degrees).
The remaining methods change the turtle's heading.
left(angle)
Turn the turtle left by
angle
(what that means is subject to the above methods).
Alias: lt
right(angle)
Turn the turtle right by
angle
(what that means is subject to the above methods).
Alias: rt
setheading(angle)
Set the heading of the turtle to
angle
. Up is an
angle
of 0, right is 90.
Alias: seth
Shapes
dot(radius=None, color=None)
Draw a filled-in circle centered on the turtle's current position. Turtle position and heading are
unchanged.
© Adafruit Industries https://learn.adafruit.com/turtle-graphics-gizmo Page 8 of 40
Page 9

If
radius
is omitted a reasonable one is used, otherwise
radius
is used as the radius of the dot. If
color
is
omitted the current pen color is used, otherwise
color
is used. This does not change the pen's color. As
above, colors are available from the Color class.
circle(radius, extent=None, steps=None)
Draw a unfilled circle using the turtle's current pen color. This uses a computed sequence of calls to
forward and left so the turtle's position and heading are changed. Since the circle drawing uses left , it
draws counterclockwise by default. If
radius
is negative (i.e. < 0) drawing is done clockwise.
The radius of the desired circle is specified by
radius
, which is a number of pixels from the center to the
edge.
The argument
extent
specifies what portion of the circle to draw and is specified in the same units as calls
to left and right , as determined by the most recent call to degrees or radians . The default is to draw the
complete circle. Calling circle(10, extent=180) will draw half a circle of radius 10, assuming that radians
hasn't been called and neither has degrees with an argument other than 360. The turtle's heading is
always what it was after drawing the last part of the circle, regardless
extent
. This will always be at the
tangent to the circle. You can use this in your drawings. E.g. to draw a closed half-circle:
turtle.circle(20, extent=180)
turtle.left(90)
turtle.forward(40)
The final argument,
steps
, determines how many sides the circle has. By default (
steps
is None ) as many
are used as required to create a smooth circle. Specifying a value for
steps
has the effect of drawing that
many line segments instead. So circle(radius r, steps=6) will draw a hexagon.
If you draw a full circle, the turtle will end up back where it started with the heading it started with. By
drawing circles (of other polygons by using
steps
) repeatedly and turning between each, some
interesting designs can be created.
for _ in range(36):
turtle.circle(50, steps=6)
turtle.left(10)
More control
home()
Move the turtle to its initial position and heading.
clear()
Clear the screen, the position and heading of the turtle is unaffected.
Queries
These methods let you ask the turtle about aspects of it's current state.
pos()
Returns the turtle's (x, y) position.
xcor()
© Adafruit Industries https://learn.adafruit.com/turtle-graphics-gizmo Page 9 of 40
Page 10

Returns the turtle's x coordinate.
ycor()
Returns the turtle's y coordinate.
heading()
Returns the turtle's heading.
isdown()
Returns whether the pen is down (i.e. drawing).
© Adafruit Industries https://learn.adafruit.com/turtle-graphics-gizmo Page 10 of 40
Page 11
CircuitPython on Circuit Playground Bluefruit
Install or Update CircuitPython
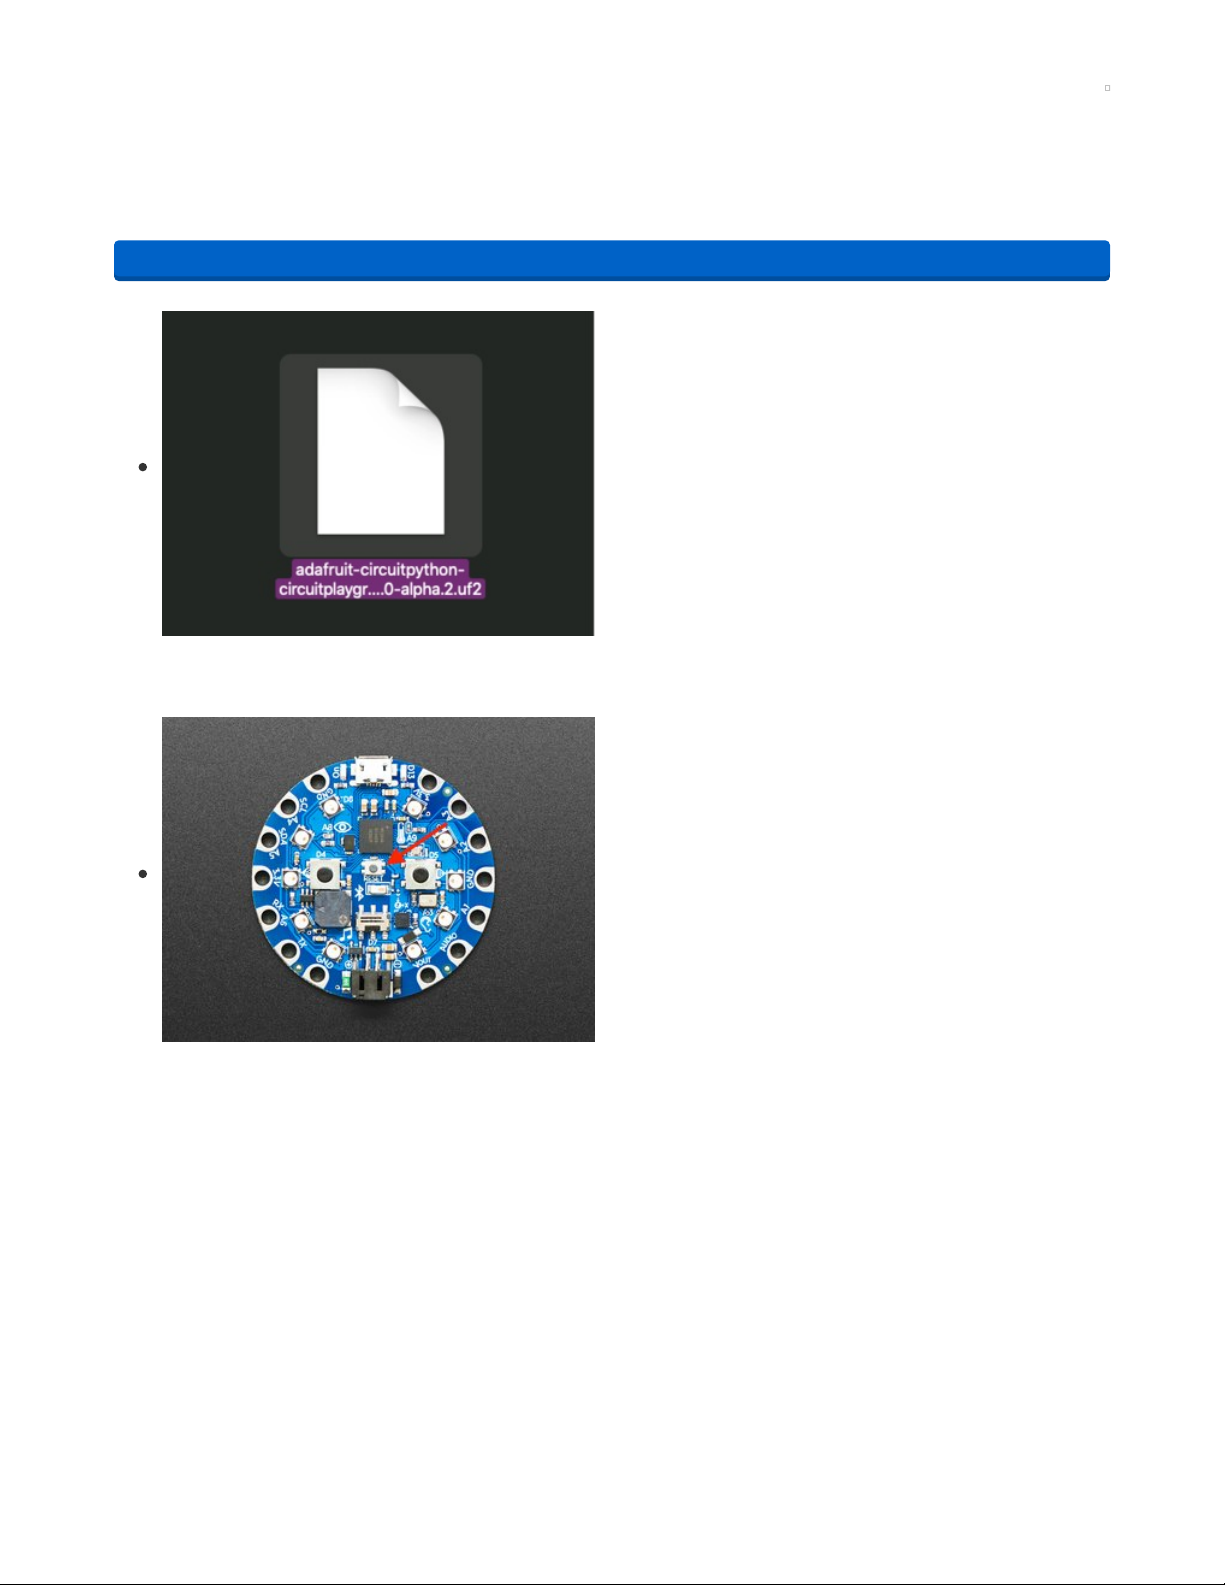
Follow this quick step-by-step to install or update CircuitPython on your Circuit Playground Bluefruit.
https://adafru.it/FNK
Click the link above and download the latest UF2 file
Download and save it to your Desktop (or wherever is handy)
Plug your Circuit Playground Bluefruit into your computer
using a known-good data-capable USB cable.
A lot of people end up using charge-only USB cables and it
is very frustrating! So make sure you have a USB cable you
know is good for data sync.
Double-click the small Reset button in the middle of the CPB
(indicated by the red arrow in the image). The ten NeoPixel
LEDs will all turn red, and then will all turn green. If they turn
all red and stay red, check the USB cable, try another USB
port, etc. The little red LED next to the USB connector will
pulse red - this is ok!
If double-clicking doesn't work the first time, try again.
Sometimes it can take a few tries to get the rhythm right!
(If double-clicking doesn't do it, try a single-click!)
https://adafru.it/FNK
© Adafruit Industries https://learn.adafruit.com/turtle-graphics-gizmo Page 11 of 40
Page 12
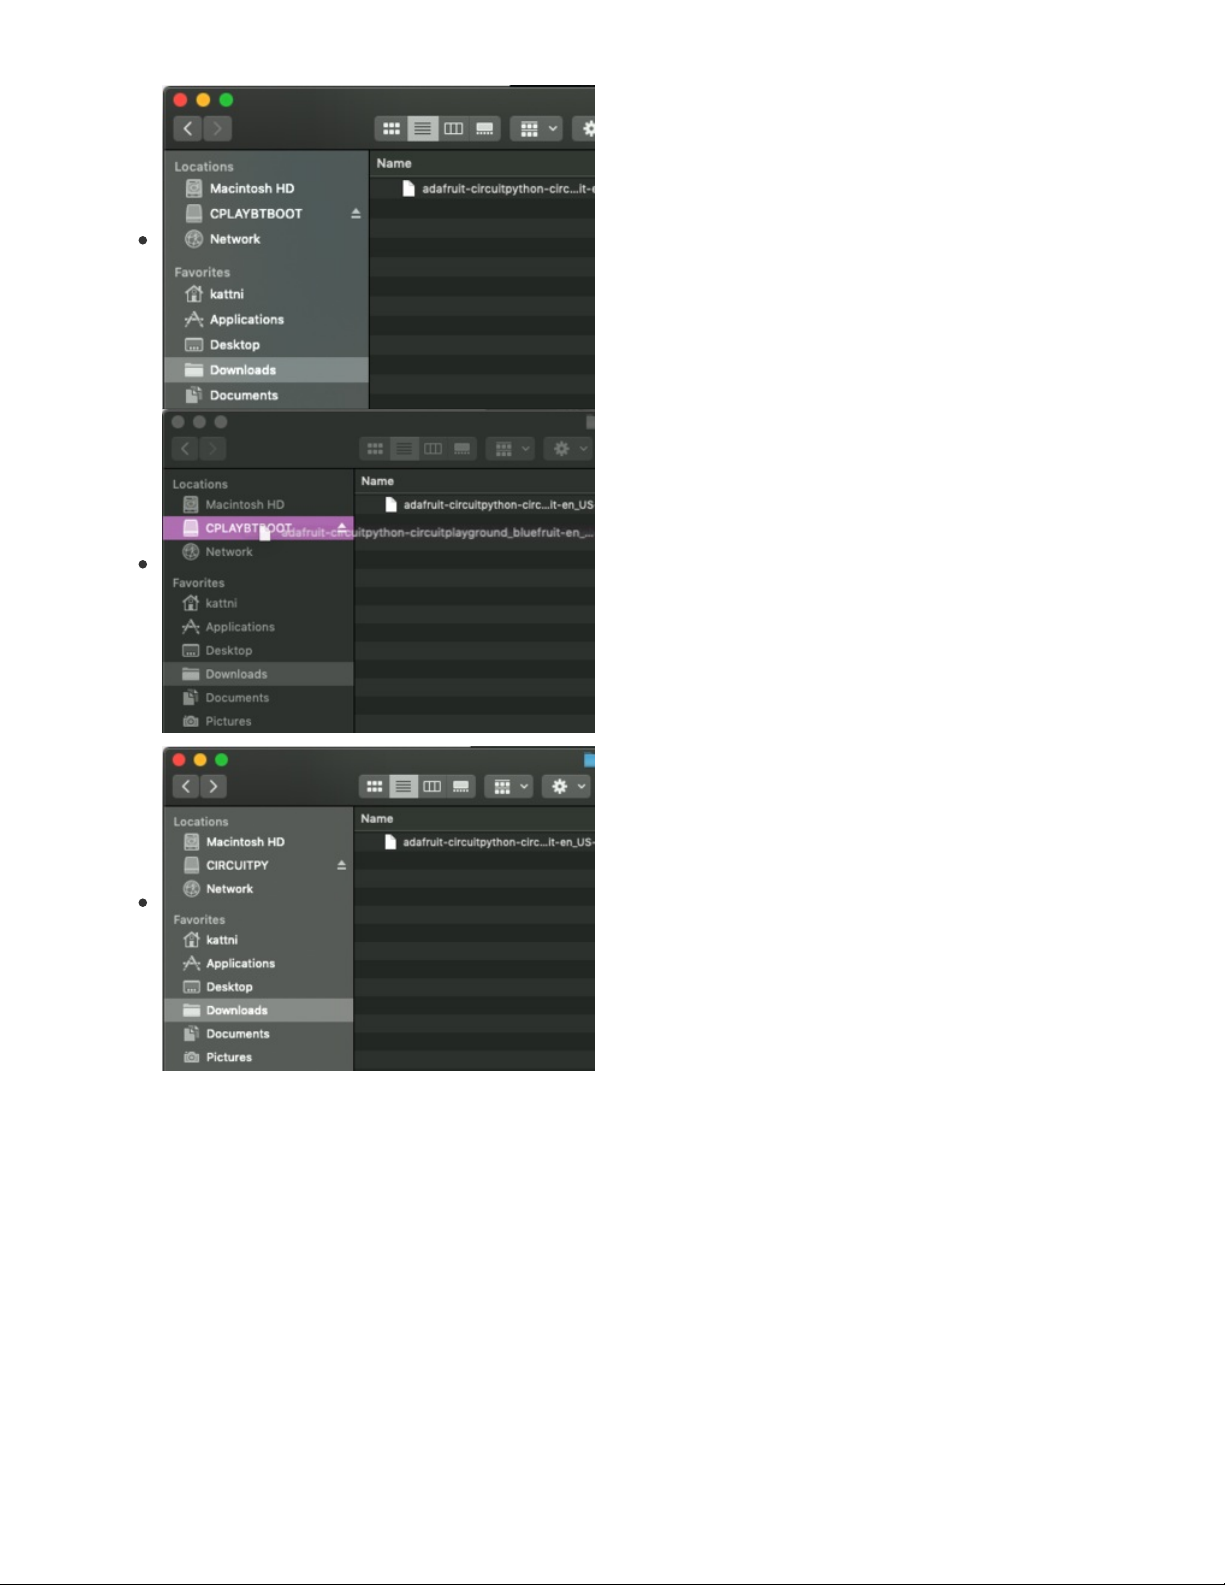
You will see a new disk drive appear called CPLAYBTBOOT.
Drag the adafruit_circuitpython_etc.uf2 file to
CPLAYBTBOOT.
The LEDs will turn red. Then, the CPLAYBTBOOT drive will
disappear and a new disk drive called CIRCUITPY will
appear.
That's it, you're done! :)
© Adafruit Industries https://learn.adafruit.com/turtle-graphics-gizmo Page 12 of 40
Page 13

Assembly
This page shows assembling the Circuit Playground TFT Gizmo, but the process is identical for the
E-Ink Gizmo.
Placing the Circuit Playground TFT Gizmo on the Circuit Playground Express or Circuit Playground
Bluefruit is pretty straightforward. All you need is a #2 Phillips screwdriver.
There may be plastic covers over the screw holes on the TFT Gizmo, which you will need to remove
before assembly.
© Adafruit Industries https://learn.adafruit.com/turtle-graphics-gizmo Page 13 of 40
Page 14

The amber colored Kapton tape dots must be removed from
each of the twelve standoffs before assembling the boards.
These are electrically insulating and will prevent the Gizmo
from working properly if left in place.
You can use your fingernails or some tweezers or a pin to
poke and lift each dot as shown here.
© Adafruit Industries https://learn.adafruit.com/turtle-graphics-gizmo Page 14 of 40
Page 15

Start by aligning the two boards side by side like in the photo
with the black plastic speaker connector and battery
connectors pointing in the same direction.
Place the Circuit Playground board on top of the Gizmo being
sure that the connectors mentioned in the previous step are
still aligned.
© Adafruit Industries https://learn.adafruit.com/turtle-graphics-gizmo Page 15 of 40
Page 16

Install a few screws loosely, so that all of the holes are still
aligned, before tightening them down.
Finish installing the remaining screws. After that, you're done!
© Adafruit Industries https://learn.adafruit.com/turtle-graphics-gizmo Page 16 of 40
Page 17

Turtle Graphics on Gizmo
Libraries
Now we'll install the libraries that we need to use Turtle
graphics on the Circuit Playground Bluefruit with TFT Gizmo.
Click this link (https://adafru.it/ENC) to go to the
circuitpython.org Libraries page. Download the latest version
of the Bundle library .zip file that matches the version of
CircuitPython you're using on the board.
Uncompress the .zip file and then copy the following
directory and three library .mpy files to the lib directory of the
CIRCUITPY drive:
adafruit_bus_device
adafruit_logging.mpy
adafruit_st7789.mpy
adafruit_turtle.mpy
The Mu Editor
Adafruit recommends using the free program Mu to edit your CircuitPython programs and save them on
your Circuit Playground Bluefruit. You can use any text editor, but Mu has some handy features.
See this page on the Circuit Playground Bluefruit guide (https://adafru.it/GDt) on the steps used to install
Mu.
Turtle Graphics Code
Let's start of with a simple bit of code. It will draw a square on the screen.
Copy the code below and then paste it into a new document in Mu. Save it to the CIRCUITPY drive as
code.py.
© Adafruit Industries https://learn.adafruit.com/turtle-graphics-gizmo Page 17 of 40
Page 18

#Turtle Gizmo Square
#==| Turtle Gizmo Setup start |========================================
import board
import busio
import displayio
from adafruit_st7789 import ST7789
from adafruit_turtle import turtle
displayio.release_displays()
spi = busio.SPI(board.SCL, MOSI=board.SDA)
display_bus = displayio.FourWire(spi, command=board.TX, chip_select=board.RX)
display = ST7789(display_bus, width=240, height=240, rowstart=80,
backlight_pin=board.A3, rotation=180)
turtle = turtle(display)
#==| Turtle Gizmo Setup end |=========================================
turtle.pendown()
#top
turtle.forward(80)
turtle.right(90)
#right
turtle.forward(80)
turtle.right(90)
#bottom
turtle.forward(80)
turtle.right(90)
#left
turtle.forward(80)
turtle.right(90)
while True:
pass
Square
After the setup code imports libraries and configures some
pins for the display, the main body of the code runs. Watch
the screen on your TFT Gizmo as the board restarts and runs
the code.
First, it sets the pen down with the turtle.pendown() command.
(Later, you'll learn to lift the pen with turtle.penup() so you
don't always draw a line then the turtle moves!)
The turtle starts out at the origin point -- 0,0 on the x- and yaxis respectively. It then moves forward 80 pixels, drawing a
line as it goes using the turtle.forward(80) command. This
draws the top of the square.
Next, the turtle turns right using the turtle.right(90) command.
This same pair of commands -- forward() and right() -- run
three more times in order to complete the square.
© Adafruit Industries https://learn.adafruit.com/turtle-graphics-gizmo Page 18 of 40
Page 19

Since there are some repetitive steps in there, we can tidy up the code by iterating through a loop four
times like this:
#Turtle Gizmo Square Loop
#==| Turtle Gizmo Setup start |========================================
import board
import busio
import displayio
from adafruit_st7789 import ST7789
from adafruit_turtle import turtle
displayio.release_displays()
spi = busio.SPI(board.SCL, MOSI=board.SDA)
display_bus = displayio.FourWire(spi, command=board.TX, chip_select=board.RX)
display = ST7789(display_bus, width=240, height=240, rowstart=80,
backlight_pin=board.A3, rotation=180)
turtle = turtle(display)
#==| Turtle Gizmo Setup end |=========================================
turtle.pendown()
for _ in range(4):
turtle.forward(80)
turtle.right(90)
while True:
pass
Try out that code -- it's much shorter, but you'll see the same square drawn on the screen!
© Adafruit Industries https://learn.adafruit.com/turtle-graphics-gizmo Page 19 of 40
Page 20

Asterisk
Now that we can loop through a command many times, let's
add another two commands -- turtle.back() and turtle.left()
We can move forward and backward to create a line, shift the
angle 18 degrees to the left, and do it all again. After twenty
iterations of this we have a nice star pattern!
With a small change to the code (see the comment on line 18)
we can turn this into an iris pattern!
© Adafruit Industries https://learn.adafruit.com/turtle-graphics-gizmo Page 20 of 40
Page 21

#Turtle Gizmo Asterix
#==| Turtle Gizmo Setup start |========================================
import board
import busio
import displayio
from adafruit_st7789 import ST7789
from adafruit_turtle import turtle
displayio.release_displays()
spi = busio.SPI(board.SCL, MOSI=board.SDA)
display_bus = displayio.FourWire(spi, command=board.TX, chip_select=board.RX)
display = ST7789(display_bus, width=240, height=240, rowstart=80,
backlight_pin=board.A3, rotation=180)
turtle = turtle(display)
#==| Turtle Gizmo Setup end |=========================================
turtle.pendown()
for _ in range(20):
turtle.forward(80)
turtle.back(80) #try changing this to 70 for an iris effect
turtle.left(18)
while True:
pass
© Adafruit Industries https://learn.adafruit.com/turtle-graphics-gizmo Page 21 of 40
Page 22

Circle
The built-in command turtle.circle() makes it very simple to
draw a triangle. No, just kidding! It draws a circle!
Try out the example here, and then us some different
numbers for the circle radius instead of the 118 here.
# Turtle Gizmo Circle
#==| Turtle Gizmo Setup start |========================================
import board
import busio
import displayio
from adafruit_st7789 import ST7789
from adafruit_turtle import turtle
displayio.release_displays()
spi = busio.SPI(board.SCL, MOSI=board.SDA)
display_bus = displayio.FourWire(spi, command=board.TX, chip_select=board.RX)
display = ST7789(display_bus, width=240, height=240, rowstart=80,
backlight_pin=board.A3, rotation=180)
turtle = turtle(display)
#==| Turtle Gizmo Setup end |=========================================
turtle.penup()
turtle.right(90)
turtle.forward(118)
turtle.left(90)
turtle.pendown()
turtle.circle(118) #radius of the circle
while True:
pass
© Adafruit Industries https://learn.adafruit.com/turtle-graphics-gizmo Page 22 of 40
Page 23

Circle Petals
Let's get a little fancy. We will now introduce a few more
techniques, including the turtle.pencolor() command to
change the color of the line that our turtle draws, as well as
iterating through multiple loops with changing variables.
This will allow us to change the size of a series of five circles,
and repeat the pattern four times.
© Adafruit Industries https://learn.adafruit.com/turtle-graphics-gizmo Page 23 of 40
Page 24

# Turtle Circle Petals
#==| Turtle Gizmo Setup start |========================================
import board
import busio
import displayio
from adafruit_st7789 import ST7789
from adafruit_turtle import Color, turtle
displayio.release_displays()
spi = busio.SPI(board.SCL, MOSI=board.SDA)
display_bus = displayio.FourWire(spi, command=board.TX, chip_select=board.RX)
display = ST7789(display_bus, width=240, height=240, rowstart=80,
backlight_pin=board.A3, rotation=180)
turtle = turtle(display)
#==| Turtle Gizmo Setup end |=========================================
colors = [Color.YELLOW, Color.GREEN]
for _ in range(4):
for i in range (5):
turtle.pencolor(colors[i % 2])
turtle.pendown()
turtle.circle(60 - (i*10) )
turtle.penup()
turtle.right(90)
while True:
pass
© Adafruit Industries https://learn.adafruit.com/turtle-graphics-gizmo Page 24 of 40
Page 25

Star
Here's a super stylish, 1970's inspired star! Note how the
length of each forward command is increased as the value of
i goes up during each of the 26 iterations of the loop.
# Turtle Gizmo Star Fancy
#==| Turtle Gizmo Setup start |========================================
import board
import busio
import displayio
from adafruit_st7789 import ST7789
from adafruit_turtle import Color, turtle
displayio.release_displays()
spi = busio.SPI(board.SCL, MOSI=board.SDA)
display_bus = displayio.FourWire(spi, command=board.TX, chip_select=board.RX)
display = ST7789(display_bus, width=240, height=240, rowstart=80,
backlight_pin=board.A3, rotation=180)
turtle = turtle(display)
#==| Turtle Gizmo Setup end |=========================================
turtle.pendown()
turtle.pencolor(Color.BLUE)
for i in range(26):
turtle.fd(i*10)
turtle.rt(144)
while True:
pass
© Adafruit Industries https://learn.adafruit.com/turtle-graphics-gizmo Page 25 of 40
Page 26

Rainbow Benzene
Here's a classic, beautiful design. This hexagonal shape
twists with each iteration, and every side of each perceived
hexagon is a different color of the rainbow!
© Adafruit Industries https://learn.adafruit.com/turtle-graphics-gizmo Page 26 of 40
Page 27

# Turtle Gizmo Rainbow Benzene
#==| Turtle Gizmo Setup start |========================================
import board
import busio
import displayio
from adafruit_st7789 import ST7789
from adafruit_turtle import Color, turtle
displayio.release_displays()
spi = busio.SPI(board.SCL, MOSI=board.SDA)
display_bus = displayio.FourWire(spi, command=board.TX, chip_select=board.RX)
display = ST7789(display_bus, width=240, height=240, rowstart=80,
backlight_pin=board.A3, rotation=180)
turtle = turtle(display)
#==| Turtle Gizmo Setup end |=========================================
benzsize = min(display.width, display.height) * 0.5
print("Turtle time! Lets draw a rainbow benzene")
colors = (Color.RED, Color.ORANGE, Color.YELLOW, Color.GREEN, Color.BLUE, Color.PURPLE)
turtle.pendown()
start = turtle.pos()
for x in range(benzsize):
turtle.pencolor(colors[x%6])
turtle.forward(x)
turtle.left(59)
while True:
pass
© Adafruit Industries https://learn.adafruit.com/turtle-graphics-gizmo Page 27 of 40
Page 28

Parabolas
This lovely parabolic curve set creates the illusion of
curvature. It is in fact made up entirely of straight line
segments, just as you would with a piece of string art and
some pins pushed into a canvas.
It also introduces the turtle.dot() command, which drops
down a dot of your desired radius wherever the turtle is. In
this case, the turtle is moved with turtle.goto() This command
allows the turtle to instantly head to a coordinate point on the
screen rather than needing explicit angle rotations specified
along with a "forward" command.
© Adafruit Industries https://learn.adafruit.com/turtle-graphics-gizmo Page 28 of 40
Page 29

# Turtle Gizmo Parabolic Jack
#==| Turtle Gizmo Setup start |========================================
import board
import busio
import displayio
from adafruit_st7789 import ST7789
from adafruit_turtle import Color, turtle
displayio.release_displays()
spi = busio.SPI(board.SCL, MOSI=board.SDA)
display_bus = displayio.FourWire(spi, command=board.TX, chip_select=board.RX)
display = ST7789(display_bus, width=240, height=240, rowstart=80,
backlight_pin=board.A3, rotation=180)
turtle = turtle(display)
#==| Turtle Gizmo Setup end |=========================================
print("Draw parabolas using straight line segments!")
def vert(x, y, size):
turtle.goto(x, y)
turtle.dot(size)
turtle.penup()
turtle.pencolor(Color.GREEN)
vert(0, 0, 7)
vert(0, 100, 7)
vert(100, 0, 7)
vert(0, -100, 7)
vert(-100, 0, 7)
x_quad=[10, 10, -10, -10]
y_quad=[10, -10, -10, 10]
for q in range(4):
for i in range(0,11):
x_from = 0
y_from = (10-i) * y_quad[q]
x_to = i * x_quad[q]
y_to = 0
turtle.penup()
turtle.goto(x_from,y_from)
turtle.pendown()
turtle.goto(x_to,y_to)
turtle.home()
while True:
pass
© Adafruit Industries https://learn.adafruit.com/turtle-graphics-gizmo Page 29 of 40
Page 30

Sierpinski Triangle
Time to get fractal! These are recursive, equilateral triangles
as described by Waclaw Sierpinski in 1915! Read more about
them here (https://adafru.it/FaP).
© Adafruit Industries https://learn.adafruit.com/turtle-graphics-gizmo Page 30 of 40
Page 31

# Turtle Gizmo Sierpinski Triangle
#==| Turtle Gizmo Setup start |========================================
import board
import busio
import displayio
from adafruit_st7789 import ST7789
from adafruit_turtle import turtle
displayio.release_displays()
spi = busio.SPI(board.SCL, MOSI=board.SDA)
display_bus = displayio.FourWire(spi, command=board.TX, chip_select=board.RX)
display = ST7789(display_bus, width=240, height=240, rowstart=80,
backlight_pin=board.A3, rotation=180)
turtle = turtle(display)
#==| Turtle Gizmo Setup end |=========================================
def getMid(p1, p2):
return ((p1[0] + p2[0]) / 2, (p1[1] + p2[1]) / 2) #find midpoint
def triangle(points, depth):
turtle.penup()
turtle.goto(points[0][0], points[0][1])
turtle.pendown()
turtle.goto(points[1][0], points[1][1])
turtle.goto(points[2][0], points[2][1])
turtle.goto(points[0][0], points[0][1])
if depth > 0:
triangle([points[0],
getMid(points[0], points[1]),
getMid(points[0], points[2])],
depth-1)
triangle([points[1],
getMid(points[0], points[1]),
getMid(points[1], points[2])],
depth-1)
triangle([points[2],
getMid(points[2], points[1]),
getMid(points[0], points[2])],
depth-1)
big = min(display.width/2, display.height/2)
little = big / 1.4
seed_points = [[-big, -little], [0, big], [big, -little]] #size of triangle
triangle(seed_points, 4)
while True:
pass
© Adafruit Industries https://learn.adafruit.com/turtle-graphics-gizmo Page 31 of 40
Page 32

Hilbert Curve
Here's another interesting fractal pattern, called a Hilbert
curve (https://adafru.it/FaO).
© Adafruit Industries https://learn.adafruit.com/turtle-graphics-gizmo Page 32 of 40
Page 33

# Turtle Gizmo Hilbert
#==| Turtle Gizmo Setup start |========================================
import board
import busio
import displayio
from adafruit_st7789 import ST7789
from adafruit_turtle import Color, turtle
displayio.release_displays()
spi = busio.SPI(board.SCL, MOSI=board.SDA)
display_bus = displayio.FourWire(spi, command=board.TX, chip_select=board.RX)
display = ST7789(display_bus, width=240, height=240, rowstart=80,
backlight_pin=board.A3, rotation=180)
turtle = turtle(display)
#==| Turtle Gizmo Setup end |=========================================
def hilbert2(step, rule, angle, depth, t):
if depth > 0:
a = lambda: hilbert2(step, "a", angle, depth - 1, t)
b = lambda: hilbert2(step, "b", angle, depth - 1, t)
left = lambda: t.left(angle)
right = lambda: t.right(angle)
forward = lambda: t.forward(step)
if rule == "a":
left()
b()
forward()
right()
a()
forward()
a()
right()
forward()
b()
left()
if rule == "b":
right()
a()
forward()
left()
b()
forward()
b()
left()
forward()
a()
right()
turtle.penup()
turtle.goto(-108, -108)
turtle.pendown()
turtle.pencolor(Color.PURPLE)
hilbert2(7, "a", 90, 5, turtle)
while True:
pass
© Adafruit Industries https://learn.adafruit.com/turtle-graphics-gizmo Page 33 of 40
Page 34

Koch Snowflake
This is a third generation fractal Koch
snowflake.
© Adafruit Industries https://learn.adafruit.com/turtle-graphics-gizmo Page 34 of 40
Page 35

# Turtle Gizmo Koch Snowflake
#==| Turtle Gizmo Setup start |========================================
import board
import busio
import displayio
from adafruit_st7789 import ST7789
from adafruit_turtle import turtle
displayio.release_displays()
spi = busio.SPI(board.SCL, MOSI=board.SDA)
display_bus = displayio.FourWire(spi, command=board.TX, chip_select=board.RX)
display = ST7789(display_bus, width=240, height=240, rowstart=80,
backlight_pin=board.A3, rotation=180)
turtle = turtle(display)
#==| Turtle Gizmo Setup end |=========================================
def f(side_length, depth, generation):
if depth == 0:
side = turtle.forward(side_length)
else:
side = lambda: f(side_length / 3, depth - 1, generation + 1)
side()
turtle.left(60)
side()
turtle.right(120)
side()
turtle.left(60)
side()
turtle.penup()
turtle.goto(-99, 56)
turtle.pendown()
num_generations = 3
top_side = lambda: f(218, num_generations, 0)
top_side()
turtle.right(120)
top_side()
turtle.right(120)
top_side()
while True:
pass
© Adafruit Industries https://learn.adafruit.com/turtle-graphics-gizmo Page 35 of 40
Page 36

Christmas Tree
This lovely Christmas tree was adapted from this program
written by Keith Randall. (https://adafru.it/GCb)
# Turtle Gizmo Christmas Tree
#==| Turtle Gizmo Setup start |========================================
import board
import busio
import displayio
from adafruit_st7789 import ST7789
from adafruit_turtle import Color, turtle
displayio.release_displays()
spi = busio.SPI(board.SCL, MOSI=board.SDA)
display_bus = displayio.FourWire(spi, command=board.TX, chip_select=board.RX)
display = ST7789(display_bus, width=240, height=240, rowstart=80,
backlight_pin=board.A3, rotation=180)
turtle = turtle(display)
#==| Turtle Gizmo Setup end |=========================================
# Fractal Christmas Tree:
# https://codegolf.stackexchange.com/questions/15860/make-a-scalable-christmas-tree
# by Keith Randall
n = 42 # input value for scaling the tree. note: ornaments don't scale
turtle.goto(0, -20)
#star
© Adafruit Industries https://learn.adafruit.com/turtle-graphics-gizmo Page 36 of 40
Page 37

turtle.left(90)
turtle.forward(3*n)
turtle.pencolor(Color.YELLOW)
turtle.left(126)
turtle.pendown()
for _ in range(5):
turtle.forward(n/5)
turtle.right(144)
turtle.forward(n/5)
turtle.left(72)
turtle.right(126)
#tree
turtle.pencolor(Color.GREEN)
turtle.back(n*4.8)
def tree(d,s):
if d <= 0:
return
turtle.forward(s)
tree(d-1, s*.8)
turtle.right(120)
tree(d-3, s*.5)
turtle.right(120)
tree(d-3, s*.5)
turtle.right(120)
turtle.back(s)
turtle.pendown()
turtle.pencolor(Color.GREEN)
tree(15, n)
turtle.back(n/2)
#ornaments
def ornament(x, y):
turtle.penup()
turtle.goto(x, y)
turtle.pencolor(Color.RED)
turtle.pendown()
turtle.dot(7)
turtle.penup()
orn_pnts=[ (5, 60), (-7, 40), (10, 20), (-15, 0), (25, -20),
(-27, -30), (7, -33), (40, -60), (-9, -63),
(-50, -88), (62, -97) ]
for j in range(len(orn_pnts)):
ornament(orn_pnts[j][0], orn_pnts[j][1])
turtle.penup()
turtle.goto(0, -120)
while True:
pass
© Adafruit Industries https://learn.adafruit.com/turtle-graphics-gizmo Page 37 of 40
Page 38

Snowflakes
This example will draw lots of beautiful snowflake-style patterns! If you want to get technical about the
number of sides in your flakes, make some adjustments to this line:
draw_flake(randint(5, 8)) #adjust number of arms here
© Adafruit Industries https://learn.adafruit.com/turtle-graphics-gizmo Page 38 of 40
Page 39

# Turtle Gizmo Snowflakes
#==| Turtle Gizmo Setup start |========================================
import time
from random import randint
import board
import busio
import displayio
from adafruit_st7789 import ST7789
from adafruit_turtle import turtle
displayio.release_displays()
spi = busio.SPI(board.SCL, MOSI=board.SDA)
display_bus = displayio.FourWire(spi, command=board.TX, chip_select=board.RX)
display = ST7789(display_bus, width=240, height=240, rowstart=80,
backlight_pin=board.A3, rotation=180)
turtle = turtle(display)
#==| Turtle Gizmo Setup end |=========================================
def draw_arm():
turtle.pendown()
for angle, length in arm_data:
turtle.forward(length)
turtle.left(angle)
turtle.forward(length)
turtle.backward(length)
turtle.right(2*angle)
turtle.forward(length)
turtle.backward(length)
turtle.left(angle)
turtle.penup()
def draw_flake(arms):
turtle.penup()
turtle.home()
turtle.clear()
angle = 0
delta_angle = 360 // arms
for _ in range(arms):
turtle.home()
turtle.setheading(angle)
draw_arm()
angle += delta_angle
turtle.penup()
turtle.home()
while True:
arm_data = [(randint(30, 80), randint(10, 40)) for _ in range(5)]
draw_flake(randint(5, 8)) #adjust number of arms here
time.sleep(5)
© Adafruit Industries https://learn.adafruit.com/turtle-graphics-gizmo Page 39 of 40
Page 40

Where to Find More
You can find much more information about turtle graphics as well as example scripts through an Internet
search of "turtle python graphics examples" or some variation. Since turtle graphics are mainly in terms of
moving and turning they can usually be converted to CircuitPython and the adafruit_turtle library.
Check out these example sites:
Michael0x2a Examples (https://adafru.it/Fd6)
Geeks for Geeks Examples (https://adafru.it/Fd7)
Vivax Solutions Examples (https://adafru.it/Fd8)
© Adafruit Industries Last Updated: 2021-02-08 06:46:25 PM EST Page 40 of 40
 Loading...