

Page 1
CLUE Step Counter with ST LSM6DS33
Created by Liz Clark
Last updated on 2021-04-25 11:03:34 AM EDT
Page 2

2
3
3
3
6
7
7
9
9
11
11
11
14
16
16
17
18
18
19
19
20
20
22
Guide Contents
Guide Contents
Overview
How It Works
Parts
Project Video
CircuitPython on CLUE
Set up CircuitPython Quick Start!
CLUE CircuitPython Libraries
Installing CircuitPython Libraries on your CLUE
Coding the CLUE Step Counter
Additional Libraries
Code
Fonts and Background Bitmap
CircuitPython Code Walkthrough
Setup
Graphics
Pedometer Setup
The Loop
Counting Steps
Calculating Average Steps Per Hour
Updating the Progress Bar
Adjusting Screen Brightness
Final Assembly and Use
© Adafruit Industries https://learn.adafruit.com/clue-step-counter-st-lsm6ds33 Page 2 of 23
Page 3
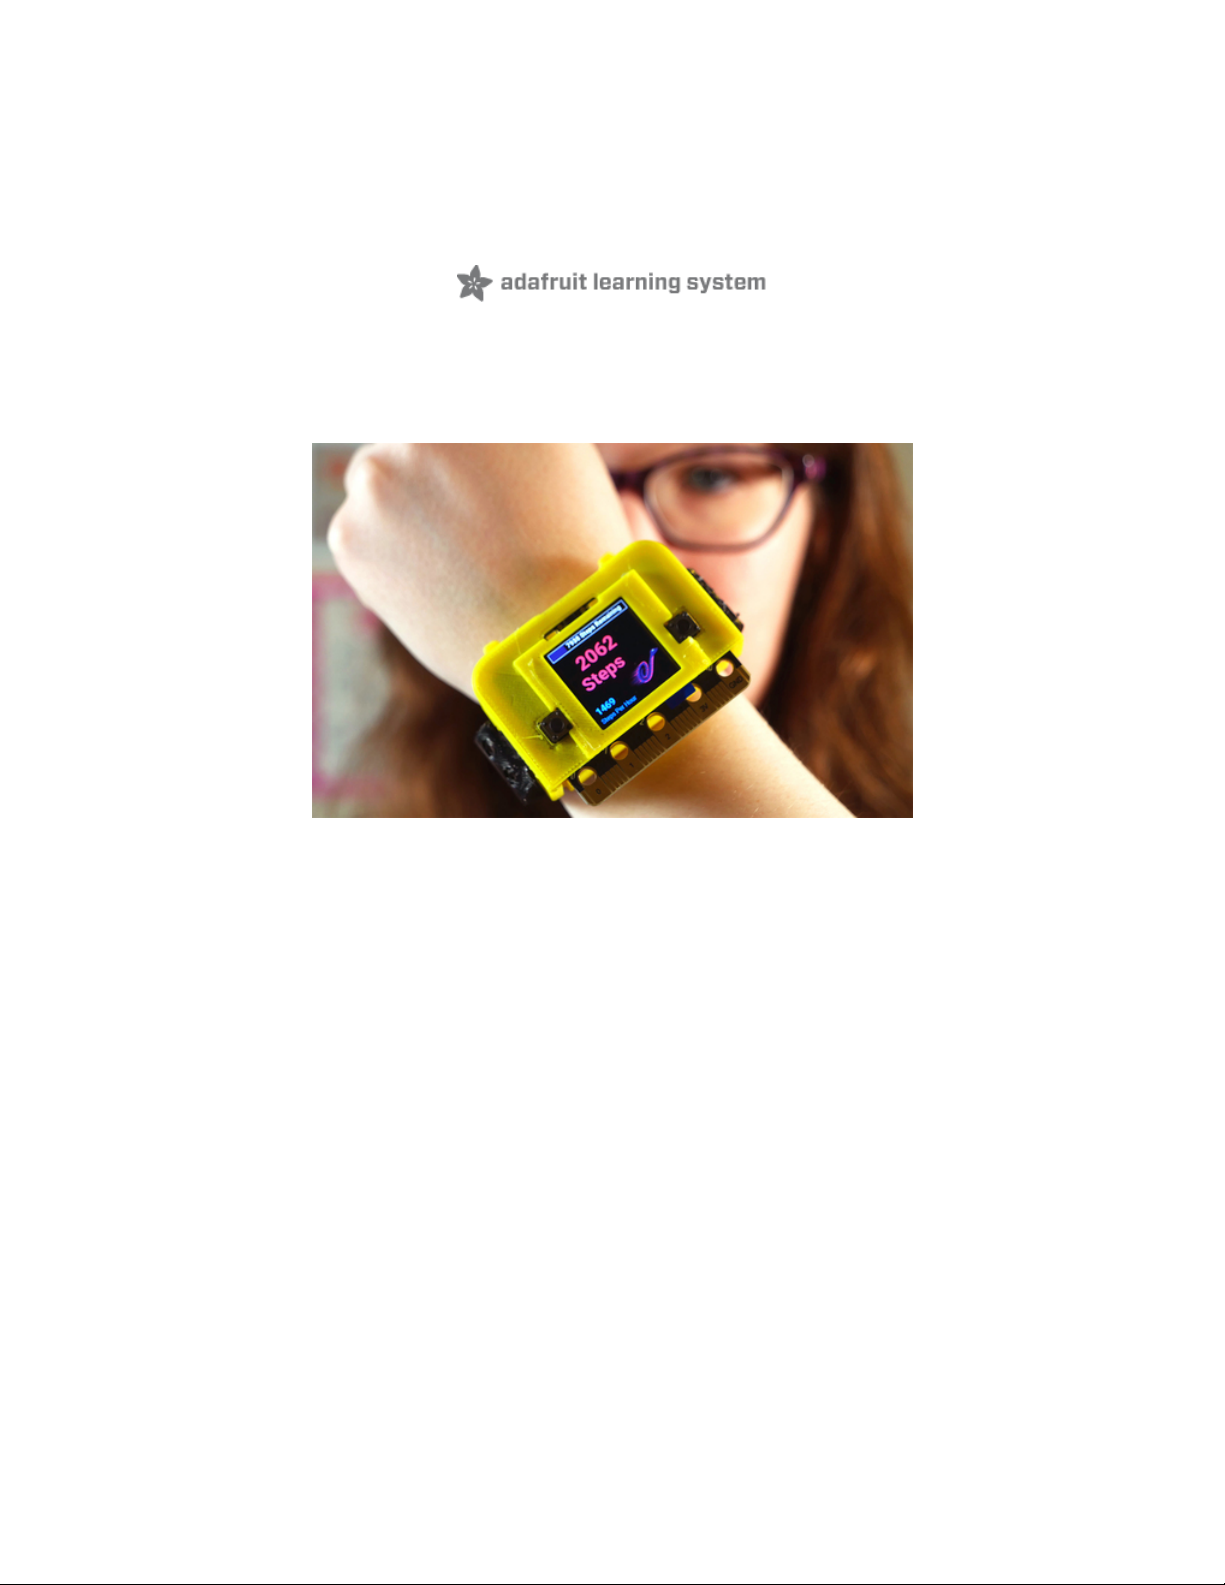
Overview
You can clue into your daily step count with the CLUE board! Pair it with a wearable case and you have a
DIY step counter. A lot of step counters require an app to see your data, but with this project you can see
your daily steps without any fears about your data security.
How It Works
The CLUE's on-board accelerometer has a built-in pedometer. With the CircuitPython CLUE and
LSM6DS33 libraries, you can access the pedometer to count your steps with just a few lines of code.
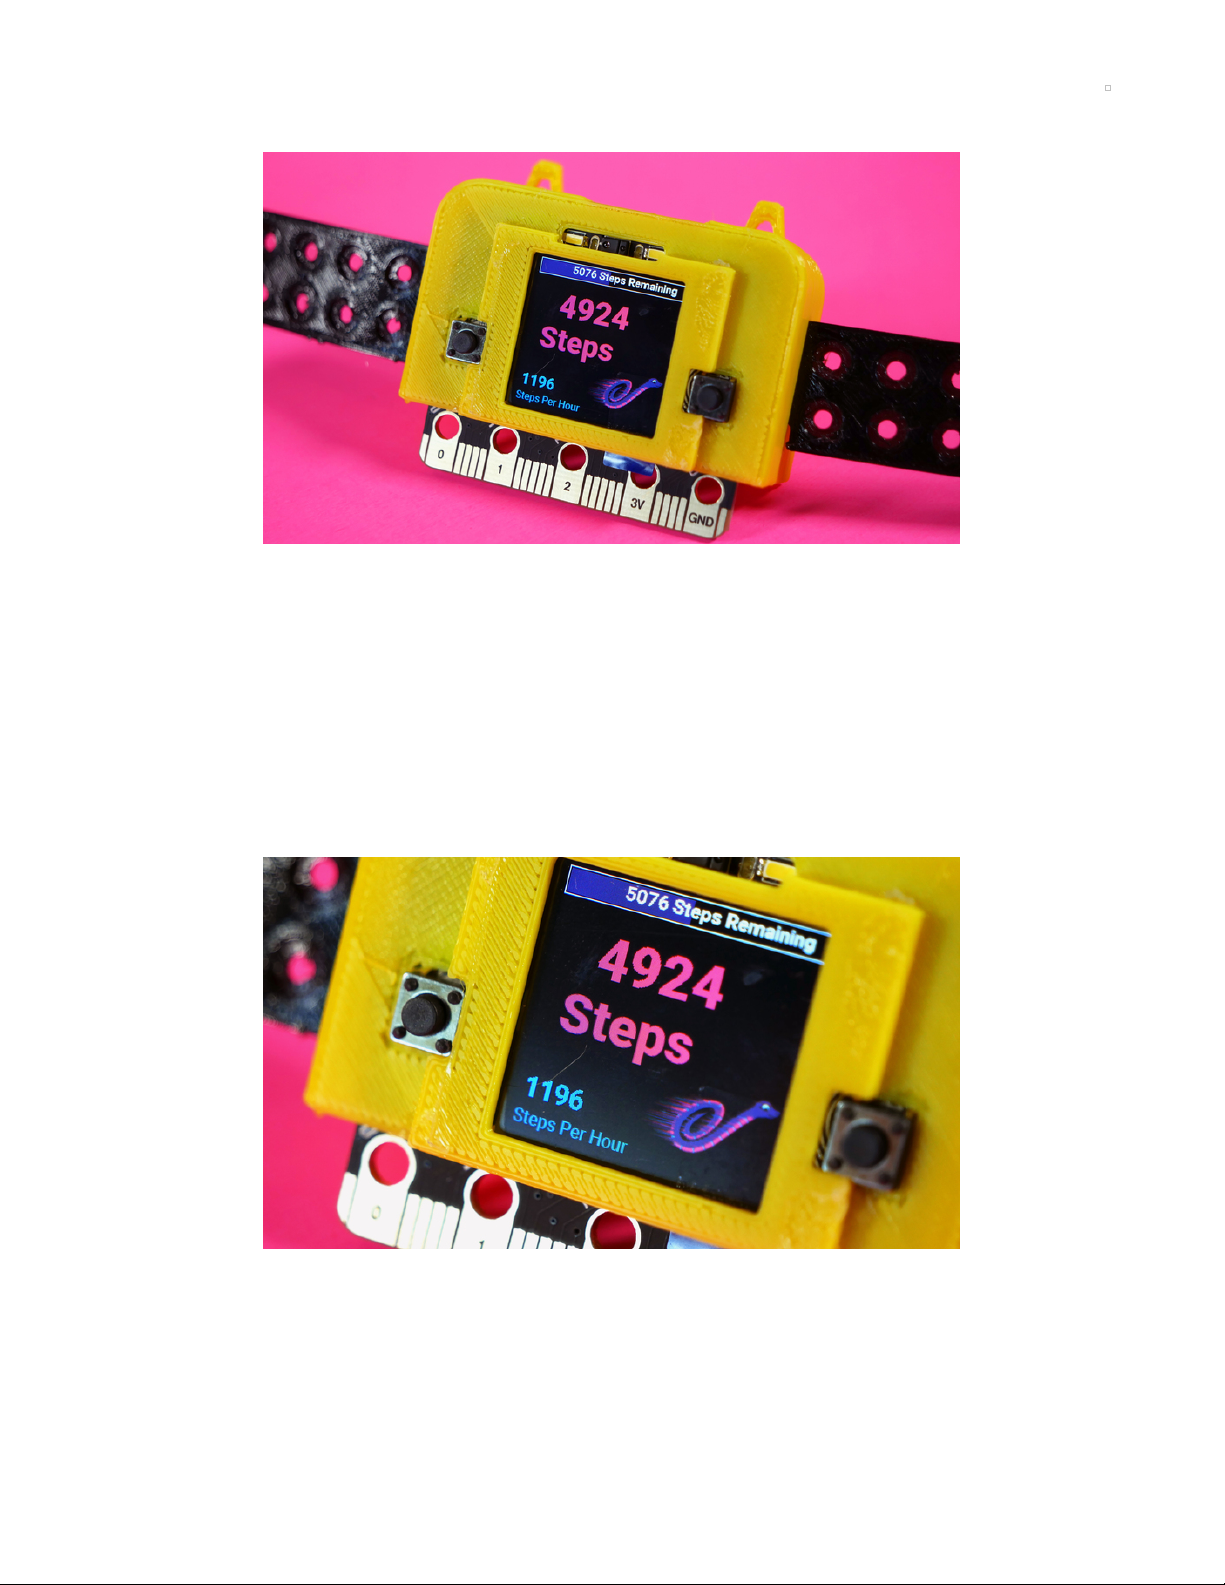
In addition to monitoring your total step count, you can also track your progress towards your step goal
and see how many steps per hour you're taking. To keep your battery life going strong, you can also
adjust the CLUE's display brightness using the A and B buttons on either side of the screen.
Parts
Your browser does not support the video tag.
Adafruit CLUE - nRF52840 Express with Bluetooth LE
Do you feel like you just don't have a CLUE? Well, we can help with that - get a CLUE here at Adafruit by
picking up this sensor-packed development board. We wanted to build some...
$39.95
© Adafruit Industries https://learn.adafruit.com/clue-step-counter-st-lsm6ds33 Page 3 of 23
Page 4
In Stock
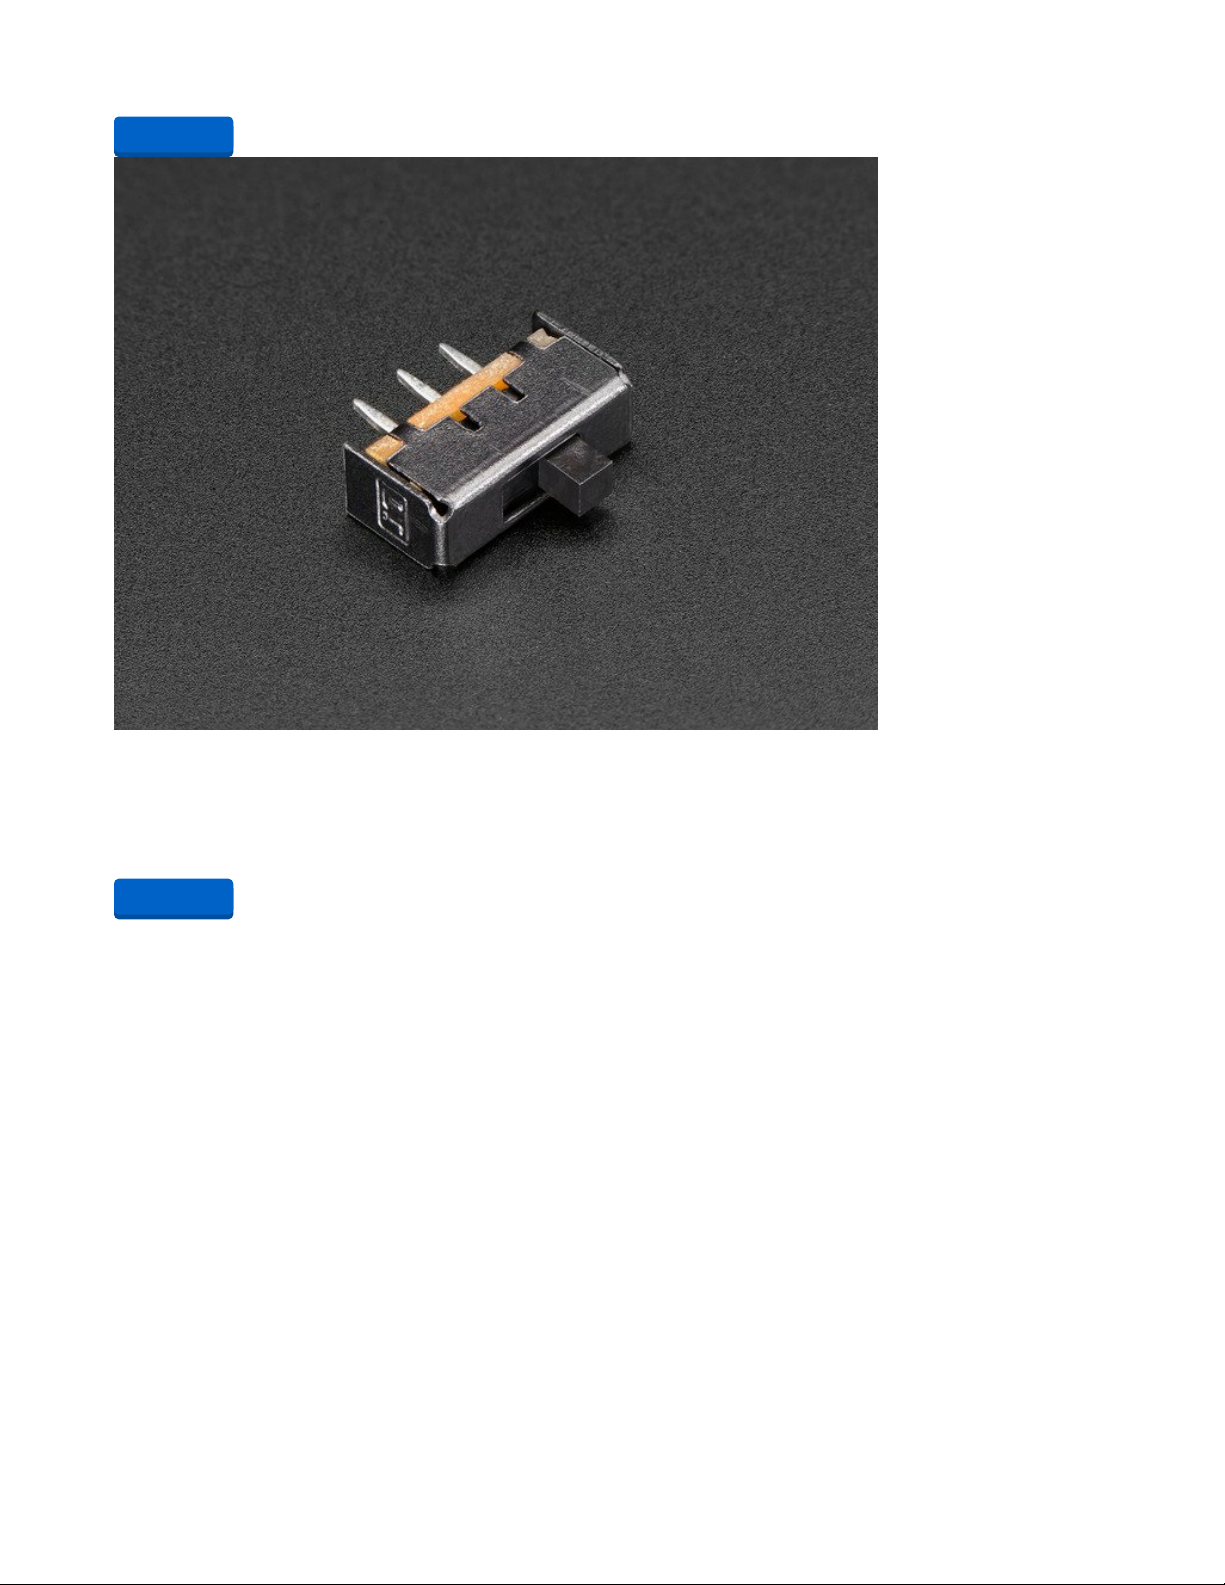
Breadboard-friendly SPDT Slide Switch
These nice switches are perfect for use with breadboard and perfboard projects. They have 0.1" spacing
and snap in nicely into a solderless breadboard. They're easy to switch...
$0.95
In Stock
Add to Cart
Add to Cart
© Adafruit Industries https://learn.adafruit.com/clue-step-counter-st-lsm6ds33 Page 4 of 23
Page 5
Lithium Ion Polymer Battery Ideal For Feathers - 3.7V 400mAh
Lithium ion polymer (also known as 'lipo' or 'lipoly') batteries are thin, light and powerful. The output
ranges from 4.2V when completely charged to 3.7V. This battery...
$6.95
In Stock
Add to Cart
© Adafruit Industries https://learn.adafruit.com/clue-step-counter-st-lsm6ds33 Page 5 of 23
Page 6

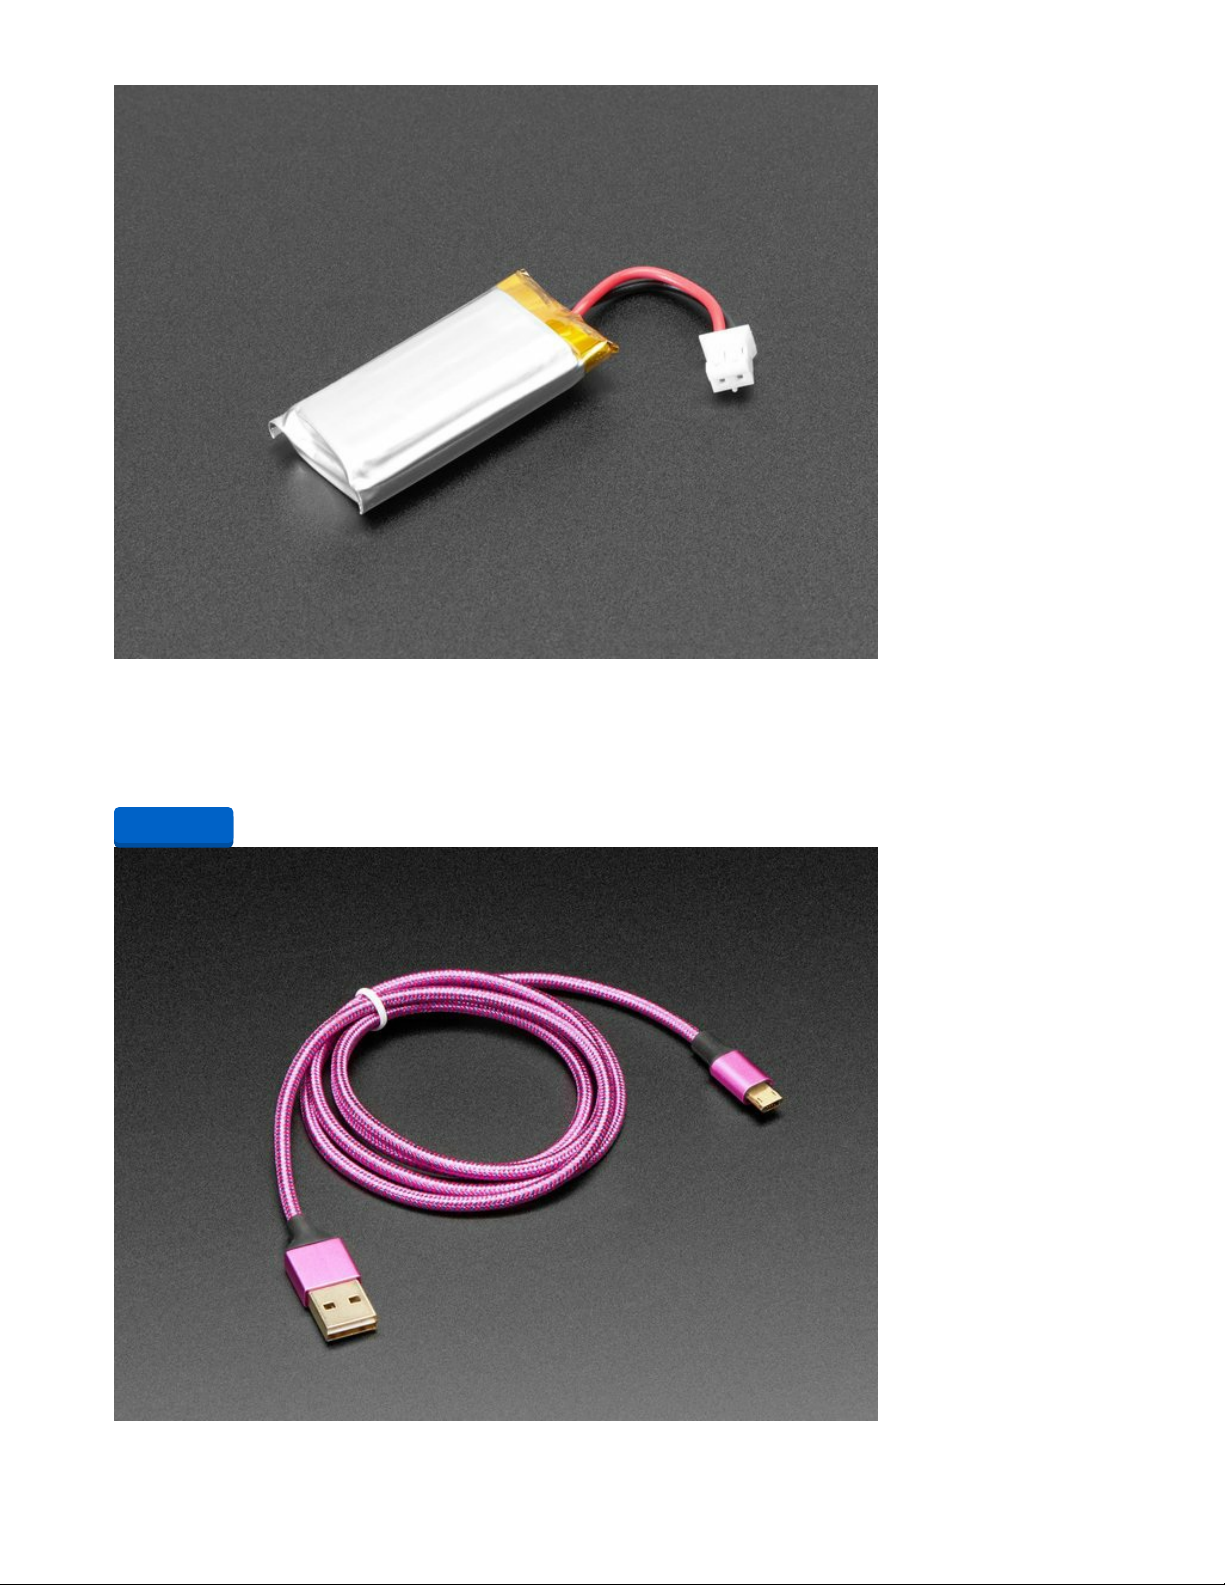
Fully Reversible Pink/Purple USB A to micro B Cable - 1m long
This cable is not only super-fashionable, with a woven pink and purple Blinka-like pattern, it's also fully
reversible! That's right, you will save seconds a day by...
Out of Stock
Project Video
Out of
Stock
© Adafruit Industries https://learn.adafruit.com/clue-step-counter-st-lsm6ds33 Page 6 of 23
Page 7
CircuitPython on CLUE
CircuitPython (https://adafru.it/tB7) is a derivative of MicroPython (https://adafru.it/BeZ) designed to simplify
experimentation and education on low-cost microcontrollers. It makes it easier than ever to get
prototyping by requiring no upfront desktop software downloads. Simply copy and edit files on the
CIRCUITPY flash drive to iterate.
The following instructions will show you how to install CircuitPython. If you've already installed
CircuitPython but are looking to update it or reinstall it, the same steps work for that as well!
Set up CircuitPython Quick Start!
Follow this quick step-by-step for super-fast Python power :)
https://adafru.it/IHF
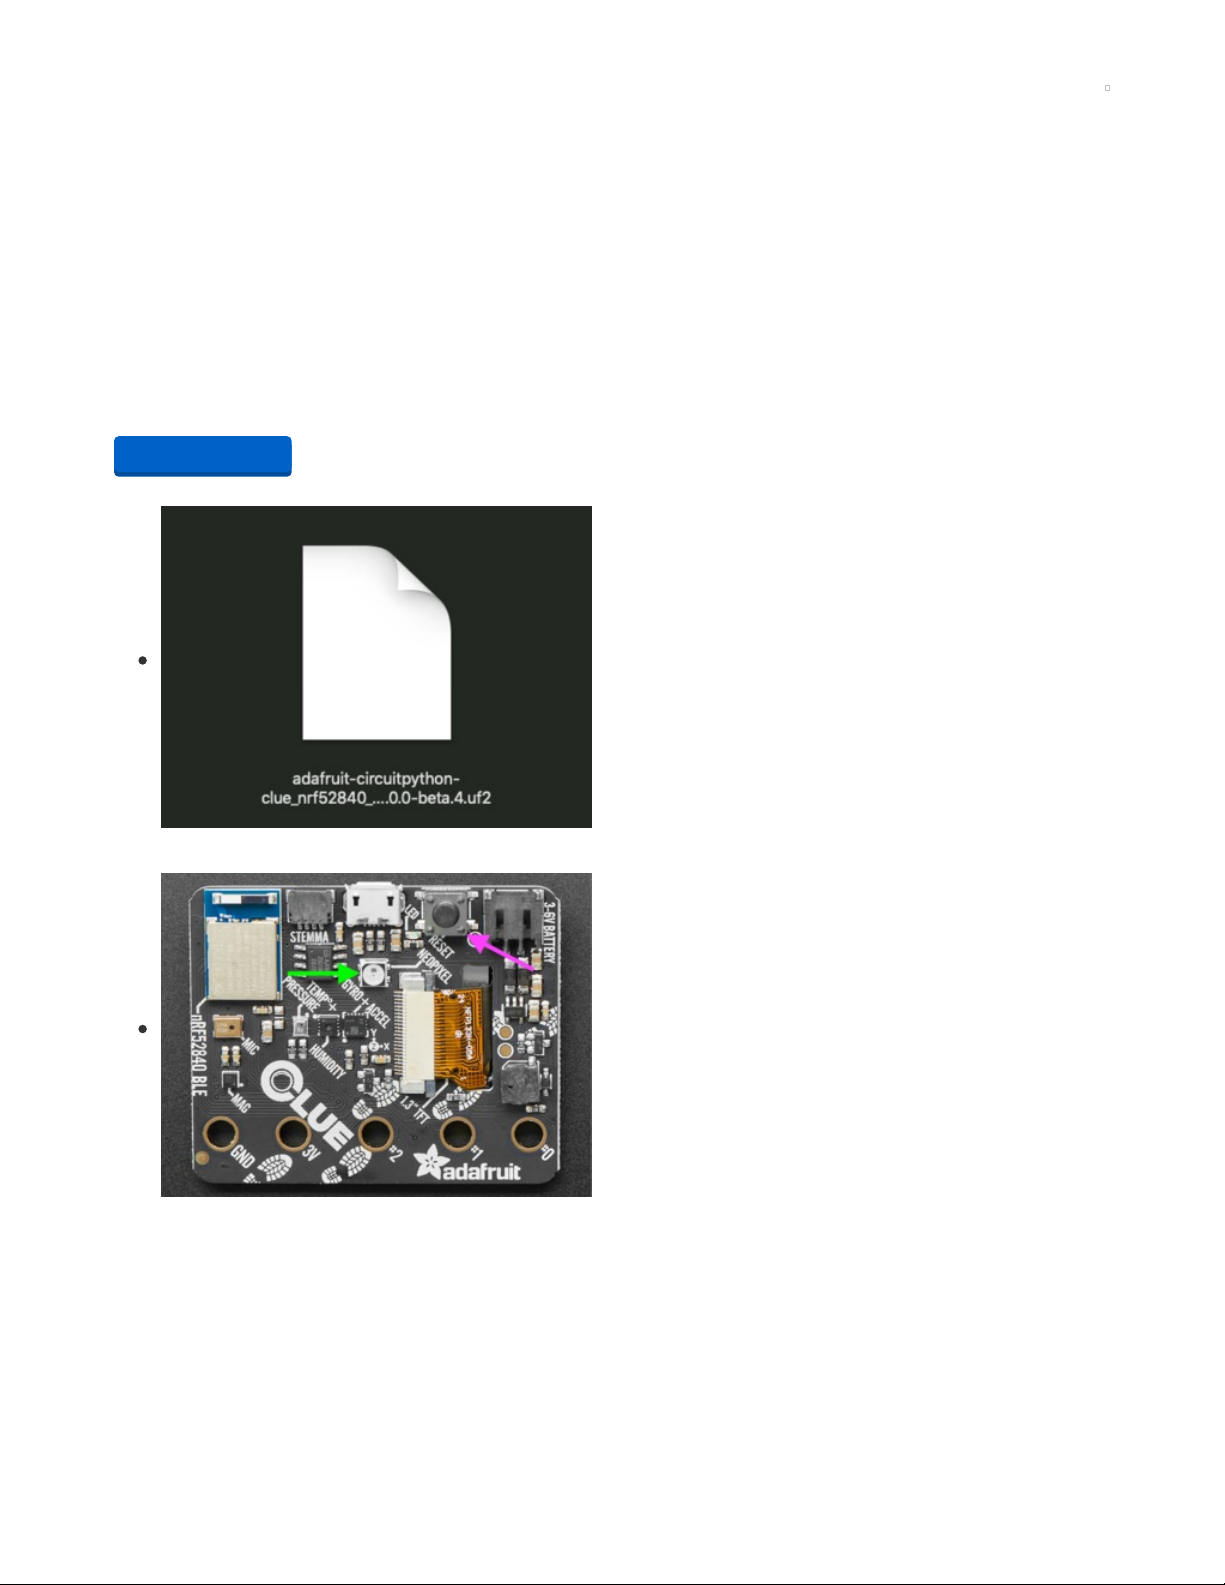
Click the link above to download the latest version of
CircuitPython for the CLUE.
Download and save it to your desktop (or wherever is handy).
Plug your CLUE into your computer using a known-good USB
cable.
A lot of people end up using charge-only USB cables and it is
very frustrating! So make sure you have a USB cable you
know is good for data sync.
Double-click the Reset button on the top (magenta arrow) on
your board, and you will see the NeoPixel RGB LED (green
arrow) turn green. If it turns red, check the USB cable, try
another USB port, etc. Note: The little red LED next to the
USB connector will pulse red. That's ok!
If double-clicking doesn't work the first time, try again.
Sometimes it can take a few tries to get the rhythm right!
https://adafru.it/IHF
© Adafruit Industries https://learn.adafruit.com/clue-step-counter-st-lsm6ds33 Page 7 of 23
Page 8

You will see a new disk drive appear called CLUEBOOT.
Drag the adafruit-circuitpython-clue-etc.uf2 file to
CLUEBOOT.
The LED will flash. Then, the CLUEBOOT drive will disappear
and a new disk drive called CIRCUITPY will appear.
If this is the first time you're installing CircuitPython or you're
doing a completely fresh install after erasing the filesystem,
you will have two files - boot_out.txt, and code.py, and one
folder - lib on your CIRCUITPY drive.
If CircuitPython was already installed, the files present before
reloading CircuitPython should still be present on your
CIRCUITPY drive. Loading CircuitPython will not create new
files if there was already a CircuitPython filesystem present.
That's it, you're done! :)
© Adafruit Industries https://learn.adafruit.com/clue-step-counter-st-lsm6ds33 Page 8 of 23
Page 9

CLUE CircuitPython Libraries
The CLUE is packed full of features like a display and a ton of sensors. Now that you have CircuitPython
installed on your CLUE, you'll need to install a base set of CircuitPython libraries to use the features of the
board with CircuitPython.
Follow these steps to get the necessary libraries installed.
Installing CircuitPython Libraries on your CLUE
If you do not already have a lib folder on your CIRCUITPY drive, create one now.
Then, download the CircuitPython library bundle that matches your version of CircuitPython from
CircuitPython.org.
https://adafru.it/ENC
The bundle downloads as a .zip file. Extract the file. Open the
resulting folder.
Open the lib folder found within.
https://adafru.it/ENC
© Adafruit Industries https://learn.adafruit.com/clue-step-counter-st-lsm6ds33 Page 9 of 23
Page 10

Once inside, you'll find a lengthy list of folders and .mpy files.
To install a CircuitPython library, you drag the file or folder
from the bundle lib folder to the lib folder on your CIRCUITPY
drive.
Copy the following folders and files from the bundle lib folder
to the lib folder on your CIRCUITPY drive:
adafruit_apds9960
adafruit_bmp280.mpy
adafruit_bus_device
adafruit_clue.mpy
adafruit_display_shapes
adafruit_display_text
adafruit_lis3mdl.mpy
adafruit_lsm6ds
adafruit_register
adafruit_sht31d.mpy
adafruit_slideshow.mpy
neopixel.mpy
Your lib folder should look like the image on the left. These
libraries will let you run the demos in the CLUE guide.
© Adafruit Industries https://learn.adafruit.com/clue-step-counter-st-lsm6ds33 Page 10 of 23
Page 11

Coding the CLUE Step Counter
Additional Libraries
Once you've finished setting up your CLUE, add these additional libraries to the lib folder:
adafruit_bitmap_font
adafruit_progressbar
simpleio.mpy
Then, you can click on the Download: Project Zip link above the code to download the code file, fonts
folder and bitmap background image.
Code
Click on "Copy Code" and then paste it into the Mu editor to save to your CLUE as code.py or copy the
code file from the Project Zip folder to the CLUE's CIRCUITPY drive.
import time
import board
import displayio
from adafruit_clue import clue
from simpleio import map_range
from adafruit_bitmap_font import bitmap_font
from adafruit_lsm6ds.lsm6ds33 import LSM6DS33
from adafruit_lsm6ds import Rate, AccelRange
from adafruit_progressbar.progressbar import ProgressBar
from adafruit_display_text.label import Label
# turns off onboard NeoPixel to conserve battery
clue.pixel.brightness = (0.0)
# accessing the Clue's accelerometer
sensor = LSM6DS33(board.I2C())
# step goal
© Adafruit Industries https://learn.adafruit.com/clue-step-counter-st-lsm6ds33 Page 11 of 23
Page 12

step_goal = 10000
# onboard button states
a_state = False
b_state = False
# array to adjust screen brightness
bright_level = [0, 0.5, 1]
countdown = 0 # variable for the step goal progress bar
clock = 0 # variable used to keep track of time for the steps per hour counter
clock_count = 0 # holds the number of hours that the step counter has been running
clock_check = 0 # holds the result of the clock divided by 3600 seconds (1 hour)
last_step = 0 # state used to properly counter steps
mono = time.monotonic() # time.monotonic() device
mode = 1 # state used to track screen brightness
steps_log = 0 # holds total steps to check for steps per hour
steps_remaining = 0 # holds the remaining steps needed to reach the step goal
sph = 0 # holds steps per hour
# variables to hold file locations for background and fonts
clue_bgBMP = "/clue_bgBMP.bmp"
small_font = "/fonts/Roboto-Medium-16.bdf"
med_font = "/fonts/Roboto-Bold-24.bdf"
big_font = "/fonts/Roboto-Black-48.bdf"
# glyphs for fonts
glyphs = b'0123456789abcdefghijklmnopqrstuvwxyzABCDEFGHIJKLMNOPQRSTUVWXYZ-,.: '
# loading bitmap fonts
small_font = bitmap_font.load_font(small_font)
small_font.load_glyphs(glyphs)
med_font = bitmap_font.load_font(med_font)
med_font.load_glyphs(glyphs)
big_font = bitmap_font.load_font(big_font)
big_font.load_glyphs(glyphs)
# creating display and default brightness
clue_display = board.DISPLAY
clue_display.brightness = 0.5
# graphics group
clueGroup = displayio.Group(max_size=20)
# loading bitmap background
clue_bg = displayio.OnDiskBitmap(open(clue_bgBMP, "rb"))
clue_tilegrid = displayio.TileGrid(clue_bg, pixel_shader=displayio.ColorConverter())
clueGroup.append(clue_tilegrid)
# creating the ProgressBar object
bar_group = displayio.Group(max_size=20)
prog_bar = ProgressBar(1, 1, 239, 25, bar_color=0x652f8f)
bar_group.append(prog_bar)
clueGroup.append(bar_group)
# text for step goal
steps_countdown = Label(small_font, text='%d Steps Remaining' % step_goal, color=clue.WHITE)
steps_countdown.x = 55
steps_countdown.y = 12
# text for steps
text_steps = Label(big_font, text="0 ", color=0xe90e8b)
© Adafruit Industries https://learn.adafruit.com/clue-step-counter-st-lsm6ds33 Page 12 of 23
Page 13

text_steps.x = 45
text_steps.y = 70
# text for steps per hour
text_sph = Label(med_font, text=" -- ", color=0x29abe2)
text_sph.x = 8
text_sph.y = 195
# adding all text to the display group
clueGroup.append(text_sph)
clueGroup.append(steps_countdown)
clueGroup.append(text_steps)
# sending display group to the display at startup
clue_display.show(clueGroup)
# setting up the accelerometer and pedometer
sensor.accelerometer_range = AccelRange.RANGE_2G
sensor.accelerometer_data_rate = Rate.RATE_26_HZ
sensor.gyro_data_rate = Rate.RATE_SHUTDOWN
sensor.pedometer_enable = True
while True:
# button debouncing
if not clue.button_a and not a_state:
a_state = True
if not clue.button_b and not b_state:
b_state = True
# setting up steps to hold step count
steps = sensor.pedometer_steps
# creating the data for the ProgressBar
countdown = map_range(steps, 0, step_goal, 0.0, 1.0)
# actual counting of the steps
# if a step is taken:
if abs(steps-last_step) > 1:
step_time = time.monotonic()
# updates last_step
last_step = steps
# updates the display
text_steps.text = '%d' % steps
clock = step_time - mono
# logging steps per hour
if clock > 3600:
# gets number of hours to add to total
clock_check = clock / 3600
# logs the step count as of that hour
steps_log = steps
# adds the hours to get a new hours total
clock_count += round(clock_check)
# divides steps by hours to get steps per hour
sph = steps_log / clock_count
# adds the sph to the display
text_sph.text = '%d' % sph
# resets clock to count to the next hour again
clock = 0
mono = time.monotonic()
# adjusting countdown to step goal
© Adafruit Industries https://learn.adafruit.com/clue-step-counter-st-lsm6ds33 Page 13 of 23
Page 14

prog_bar.progress = float(countdown)
# displaying countdown to step goal
if step_goal - steps > 0:
steps_remaining = step_goal - steps
steps_countdown.text = '%d Steps Remaining' % steps_remaining
else:
steps_countdown.text = 'Steps Goal Met!'
# adjusting screen brightness, a button decreases brightness
if clue.button_a and a_state:
mode -= 1
a_state = False
if mode < 0:
mode = 0
clue_display.brightness = bright_level[mode]
else:
clue_display.brightness = bright_level[mode]
# b button increases brightness
if clue.button_b and b_state:
mode += 1
b_state = False
if mode > 2:
mode = 2
clue_display.brightness = bright_level[mode]
else:
clue_display.brightness = bright_level[mode]
time.sleep(0.001)
Fonts and Background Bitmap
In addition to the lib folder, for this project you'll also have a fonts folder. The fonts folder contains the
three bitmap fonts that are used for text displayed on the CLUE's display.
Roboto-Medium-16.bdf
Roboto-Bold-24.bdf
Roboto-Black-48.bdf
There is also a bitmap image for the background of the CLUE's display. This image file, called
clue_bgBMP.bmp, will also be stored on the CLUE.
Copy the fonts folder and the clue_bgBMP.bmp bitmap image file from the Project Zip folder to the
CLUE's CIRCUITPY drive.
Your CLUE CIRCUITPY drive should look like this after you load the libraries, fonts, bitmap and code
below:
© Adafruit Industries https://learn.adafruit.com/clue-step-counter-st-lsm6ds33 Page 14 of 23
Page 15

© Adafruit Industries https://learn.adafruit.com/clue-step-counter-st-lsm6ds33 Page 15 of 23
Page 16

CircuitPython Code Walkthrough
Setup
The CircuitPython code begins by importing the libraries.
import time
import board
import displayio
from adafruit_clue import clue
from simpleio import map_range
from adafruit_bitmap_font import bitmap_font
from adafruit_lsm6ds import LSM6DS33, Rate, AccelRange
from adafruit_progressbar import ProgressBar
from adafruit_display_text.label import Label
After the libraries are imported, the on-board NeoPixel is turned off. This is done in an effort to conserve
battery life.
clue.pixel.brightness = (0.0)
Next, the CLUE's accelerometer is defined and will be called as sensor in the code. There are built-in
functions in the CLUE's CircuitPython library for common accelerometer uses but this is how you can
access it directly.
sensor = LSM6DS33(board.I2C())
Then, the overall step goal is setup. You can edit this number to match your goal.
step_goal = 10000
Some state machines are created for the physical A and B buttons on the front of the CLUE. These will be
used to adjust the brightness of the screen.
a_state = False
b_state = False
Speaking of screen brightness, this is followed by an array called bright_level , which holds the three
brightness level options for the screen: 0 (off), 0.5 (half brightness) and 1 (full brightness).
bright_level = [0, 0.5, 1]
This is followed by various states and variables that will be used in the main loop. Their purposes are
commented next to them.
© Adafruit Industries https://learn.adafruit.com/clue-step-counter-st-lsm6ds33 Page 16 of 23
Page 17

countdown = 0 # variable for the step goal progress bar
clock = 0 # variable used to keep track of time for the steps per hour counter
clock_count = 0 # holds the number of hours that the step counter has been running
clock_check = 0 # holds the result of the clock divided by 3600 seconds (1 hour)
last_step = 0 # state used to properly counter steps
mono = time.monotonic() # time.monotonic() device
mode = 1 # state used to track screen brightness
steps_log = 0 # holds total steps to check for steps per hour
steps_remaining = 0 # holds the remaining steps needed to reach the step goal
sph = 0 # holds steps per hour
Graphics
Up next is the graphics setup. First, the on-board file locations for the graphical background and the fonts
are defined.
clue_bgBMP = "/clue_bgBMP.bmp"
small_font = "/fonts/Roboto-Medium-16.bdf"
med_font = "/fonts/Roboto-Bold-24.bdf"
big_font = "/fonts/Roboto-Black-48.bdf"
Next, the glyphs are defined that will be used with the bitmap fonts and the setup for the bitmap fonts is
completed.
glyphs = b'0123456789abcdefghijklmnopqrstuvwxyzABCDEFGHIJKLMNOPQRSTUVWXYZ-,.: '
small_font = bitmap_font.load_font(small_font)
small_font.load_glyphs(glyphs)
med_font = bitmap_font.load_font(med_font)
med_font.load_glyphs(glyphs)
big_font = bitmap_font.load_font(big_font)
big_font.load_glyphs(glyphs)
The CLUE's display is setup to be clue_display and the default brightness is set to half.
clue_display = board.DISPLAY
clue_display.brightness = 0.5
Next, the graphics group is created along with the tilegrid . This will hold the bitmap background.
clueGroup = displayio.Group(max_size=20)
clue_bg = displayio.OnDiskBitmap(open("/clue_bgBMP.bmp", "rb"))
clue_tilegrid = displayio.TileGrid(clue_bg, pixel_shader=displayio.ColorConverter())
clueGroup.append(clue_tilegrid)
Following the bitmap background, a ProgressBar is created. This bar will illustrate your progress to hitting
your step goal at the top of the display.
bar_group = displayio.Group(max_size=20)
prog_bar = ProgressBar, (11, 239, 25, bar_color=0x652f8f)
bar_group.append(prog_bar)
clueGroup.append(bar_group)
© Adafruit Industries https://learn.adafruit.com/clue-step-counter-st-lsm6ds33 Page 17 of 23
Page 18

https://adafru.it/Kpb
The final graphical elements are text objects. They'll hold the text for steps remaining, the step count and
steps per hour. The text objects are added to the clueGroup graphic and then the clueGroup is shown on
the CLUE's display on boot with clue_display.show(clueGroup) .
steps_countdown = Label(small_font, text='%d Steps Remaining' % step_goal, color=clue.WHITE)
steps_countdown.x = 55
steps_countdown.y = 12
text_steps = Label(big_font, text="0 ", color=0xe90e8b)
text_steps.x = 45
text_steps.y = 70
text_sph = Label(med_font, text=" -- ", color=0x29abe2)
text_sph.x = 8
text_sph.y = 195
clueGroup.append(text_sph)
clueGroup.append(steps_countdown)
clueGroup.append(text_steps)
clue_display.show(clueGroup)
Pedometer Setup
The final lines of code before the loop setup the accelerometer on the CLUE board and enable the
pedometer.
sensor.accelerometer_range = AccelRange.RANGE_2G
sensor.accelerometer_data_rate = Rate.RATE_26_HZ
sensor.gyro_data_rate = Rate.RATE_SHUTDOWN
sensor.pedometer_enable = True
The Loop
After all the setup, the loop begins with button debouncing for the A and B buttons located on the front of
the CLUE.
while True:
if not clue.button_a and not a_state:
a_state = True
if not clue.button_b and not b_state:
b_state = True
This is followed by setting up the variable steps to hold the step count being collected by the CLUE's
pedometer.
steps = sensor.pedometer_steps
Next, countdown is setup to hold what will be the progress bar's data that will show how close you are to
your steps goal. This utilizes the map_range function, which is handy for mapping different value ranges
so that they play well together.
You'll see that there are five values in the parentheses: steps , 0 , step_goal , 0.0 and 1.0 . Ignoring steps
https://adafru.it/Kpb
© Adafruit Industries https://learn.adafruit.com/clue-step-counter-st-lsm6ds33 Page 18 of 23
Page 19

for a moment, the value range of 0 to step_goal is being mapped to 0.0 and 1.0 , which is the range that
the ProgressBar library looks for when creating a ProgressBar object. The first item, in this case steps , is
what will be subtracted from the total value range (in this case step_goal ).
In summary, the step_goal range is being mapped to the ProgressBar's range, which will have your total
steps at the time subtracted in order to display the progress towards your goal.
countdown = map_range(steps, 0, step_goal, 0.0, 1.0)
Counting Steps
This leads to the actual step counting. It begins with an if statement that checks if the step count has
changed.
if abs(steps-last_step) > 1:
If it has, then time.monotonic() is logged as step_time and last_steps is updated to hold the value of steps .
step_time = time.monotonic()
last_step = steps
Additionally, the display is updated to show the current step count. The text_steps text object displays the
value being held by steps .
text_steps.text = '%d' % steps
This is followed by some time tracking that will be used to calculate your steps per hour. clock is setup to
hold the difference between the two time.monotonic() devices step_time and mono . mono is logged
before the loop and by doing this you can track how long steps have actually been taking place rather
than the CLUE's time that it has been operating.
clock = step_time - mono
Calculating Average Steps Per Hour
To get the steps per hour calculation, there is an if statement that checks if steps have been counted for
more than an hour, or 3600 seconds. If they have, then the steps per hour will be updated. This is done by
having clock_check hold the value of clock divided by 3600 . This is done so that you can get a count of
how many hours have passed.
Your step count is then held by steps_log . Another variable, clock_count , is increased by the rounded
result of clock_check . This means that the total hour count is increased. The steps per hour, being held by
sph , is then updated to divide steps_log , which is the total steps you've taken, by the clock_count , which
is the total number of hours that you've been counting steps. The result of this calculation is then pushed
to the text_sph object to update the Clue's display.
Finally, clock is reset to 0 to begin counting down to the next hour and mono is updated to hold
time.monotonic() .
© Adafruit Industries https://learn.adafruit.com/clue-step-counter-st-lsm6ds33 Page 19 of 23
Page 20

if clock > 3600:
clock_check = clock / 3600
steps_log = steps
clock_count += round(clock_check)
print('hour count: %d' % clock_count)
sph = steps_log / clock_count
text_sph.text = '%d' % sph
clock = 0
mono = time.monotonic()
Updating the Progress Bar
The progress bar is updated by setting bar.progress to hold the value of countdown as a float. This
simultaneously updates the display and the math going on behind the scenes with the ProgressBar library.
bar.progress = float(countdown)
Up next is a new if statement, this time checking to see if you have reached your steps goal. If you
haven't, then the remaining steps are stored in the variable steps_remaining . This value is then stored in
the steps_countdown text object and is sent to the display to be shown over the progress bar.
However, if the goal has been met, then the steps_countdown text will read "Steps Goal Met!".
if step_goal - steps > 0:
steps_remaining = step_goal - steps
steps_countdown.text = '%d Steps Remaining' % steps_remaining
else:
steps_countdown.text = 'Steps Goal Met!'
Adjusting Screen Brightness
The last portion of the loop is for adjusting the CLUE's screen brightness. This will come in handy for
preserving battery life. If you press the A button, then the brightness will
decrease
and if you press the B
button, the brightness will
increase
.
There are three brightness levels, which are held in the bright_level array. The variable mode is being
used to track the current brightness level and position in the bright_level array. If A is pressed, then mode
is decreased by 1 and if B is pressed, then mode is increased by 1 . The result is a change in the
screen's brightness level. However, if mode is less than 0 or greater than 2 , the brightness does not
change since you will no longer be in range of the bright_level array.
© Adafruit Industries https://learn.adafruit.com/clue-step-counter-st-lsm6ds33 Page 20 of 23
Page 21

if clue.button_a and a_state:
mode -= 1
a_state = False
if mode < 0:
mode = 0
clue_display.brightness = bright_level[mode]
else:
clue_display.brightness = bright_level[mode]
if clue.button_b and b_state:
mode += 1
b_state = False
if mode > 2:
mode = 2
clue_display.brightness = bright_level[mode]
else:
clue_display.brightness = bright_level[mode]
© Adafruit Industries https://learn.adafruit.com/clue-step-counter-st-lsm6ds33 Page 21 of 23
Page 22

Final Assembly and Use
After loading the CircuitPython code and files onto the CLUE, you're ready to get stepping. For best
results, you'll want to house your CLUE in a wearable case. The Ruiz brothers have a great 3D printed
design and Learn Guide for a CLUE case that you wear on your wrist like a watch. This is the perfect way
to count your steps. The guide also details how to install an on/off switch for the CLUE with a lipo battery.
https://adafru.it/Kpc
After printing and assembling your case, your CLUE step counter is complete! You can track your steps all
day long without worrying about the security of your health data or location tracking. The battery should
last at least a full day so you won't miss a single step.
https://adafru.it/Kpc
© Adafruit Industries https://learn.adafruit.com/clue-step-counter-st-lsm6ds33 Page 22 of 23
Page 23

© Adafruit Industries Last Updated: 2021-04-25 11:03:34 AM EDT Page 23 of 23
 Loading...