

Page 1
CircuitPython Hardware: SD Cards
Created by Tony DiCola
Last updated on 2021-02-09 11:24:42 AM EST
Page 2

2
3
4
4
5
7
7
7
8
9
10
12
14
15
16
18
18
18
18
19
Guide Contents
Guide Contents
Overview
Hardware
Parts
Wiring
CircuitPython
Adafruit CircuitPython Module Install
Usage
Initialize & Mount SD Card Filesystem
Reading & Writing Data
List Files
Logging Temperature
Python Docs
Code Storage on SD Card
hello.py Example
MicroPython
pyboard
WiPy
MicroPython ESP8266 SD Card Setup
Mount SD Card
© Adafruit Industries https://learn.adafruit.com/micropython-hardware-sd-cards Page 2 of 21
Page 3
Overview
Note the video above was made showing the MicroPython version of this library. Follow the guide to
see both CircuitPython and MicroPython versions of using the SD card library.
Secure Digital (https://adafru.it/rye), or SD, cards and tiny microSD cards are inexpensive and ubiquituous
means of adding lots of storage to devices. For a few dollars you can have gigabytes of storage at your
fingertips (smaller than your fingertips actually!). With small CircuitPython and MicroPython boards you
typically have a very limited amount of flash memory to store code and data. Wouldn't it be nice if you
could connect a microSD card to a Python board and expand its storage? It turns you can use microSD
cards with CircuitPython and MicroPython! In fact some boards like the pyboard (https://adafru.it/pFb)
come with microSD card support built-in, and for other boards like the ESP8266 or M0 / SAMD21 family
they can easily be connected to a microSD card that expands their storage.
This guide explores how to use a microSD card to store files for a CircuitPython MicroPython board.
Specifically adding a microSD card to CircuitPython boards like Feather M0
adalogger, pyboard (https://adafru.it/pFb), WiPy (https://adafru.it/pFf), and
ESP8266 (https://adafru.it/n6A) will be covered in this guide. You'll learn how to connect a microSD card
to the board and mount it as a new filesystem that store code & data.
© Adafruit Industries https://learn.adafruit.com/micropython-hardware-sd-cards Page 3 of 21
Page 4
Hardware
Parts
You'll need the following parts to follow this guide:
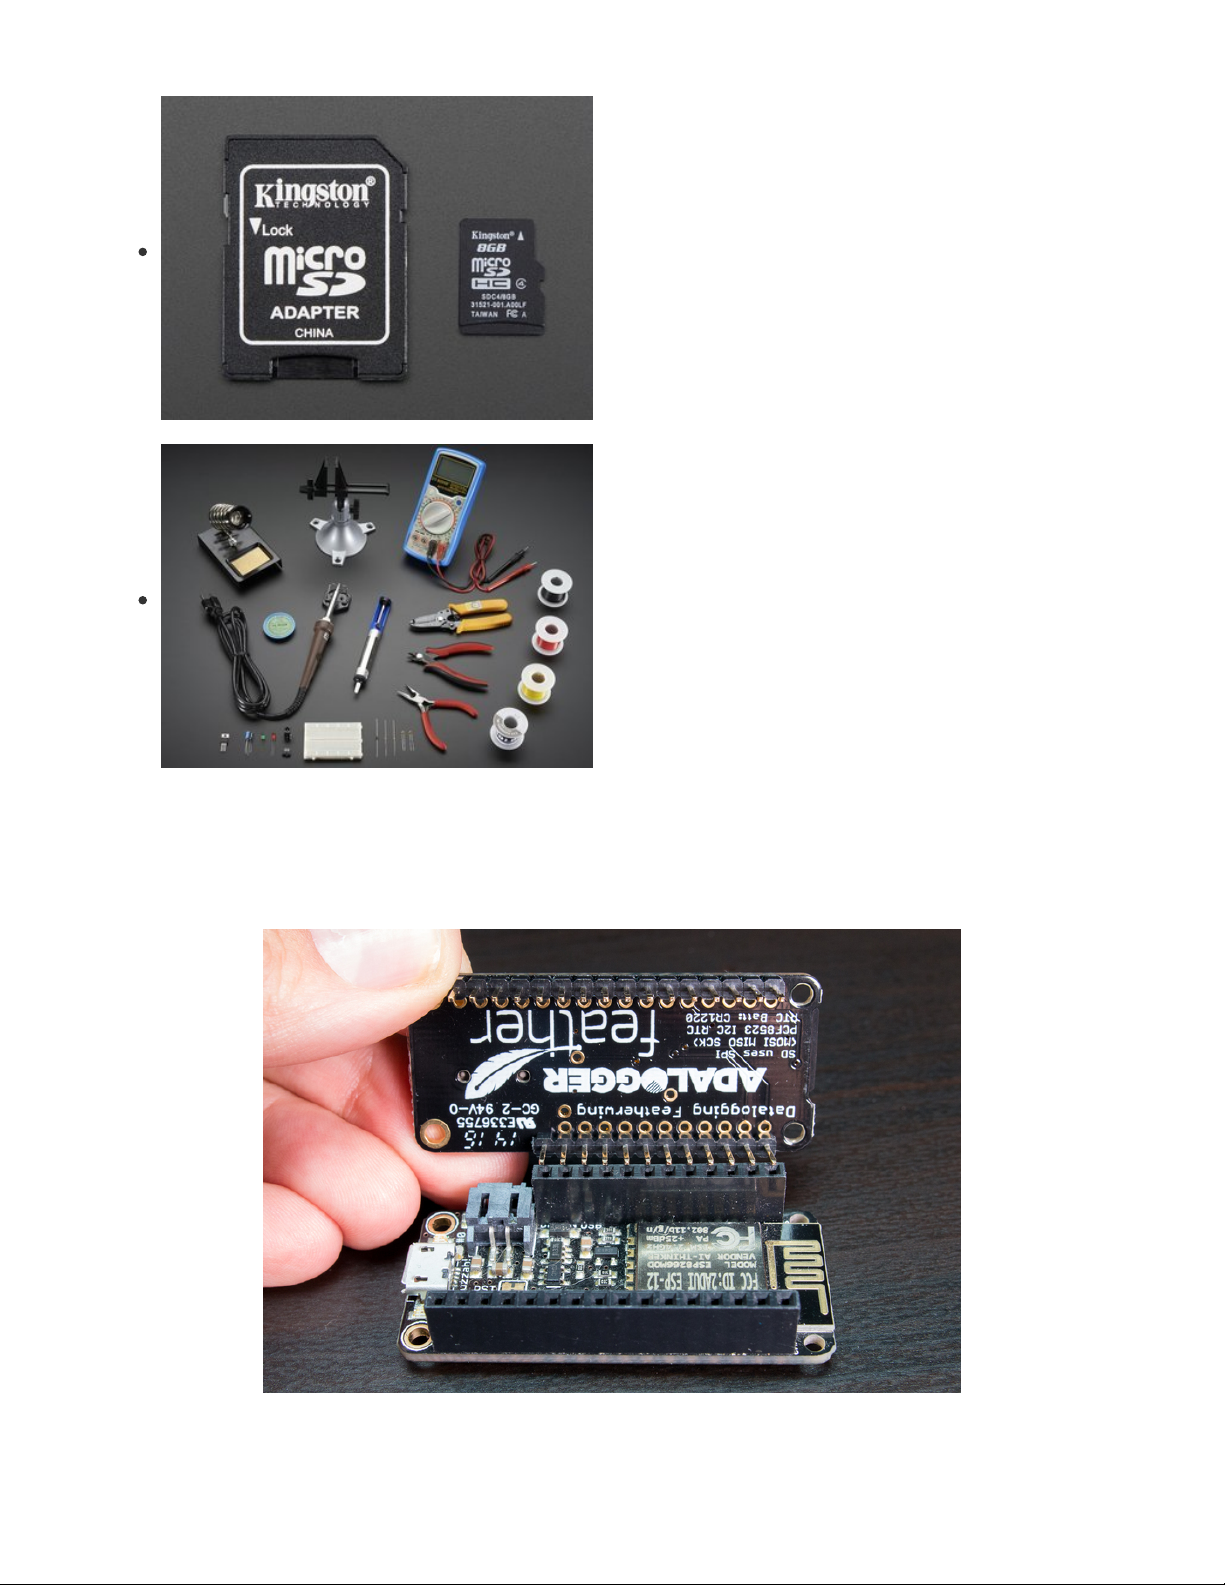
CircuitPython board. This guide focuses on
the ESP8266 (https://adafru.it/n6A) and Feather M0/SAMD21-
based boards (http://adafru.it/2772), but any CircuitPython
board that supports I2C should work. You'll find a board with
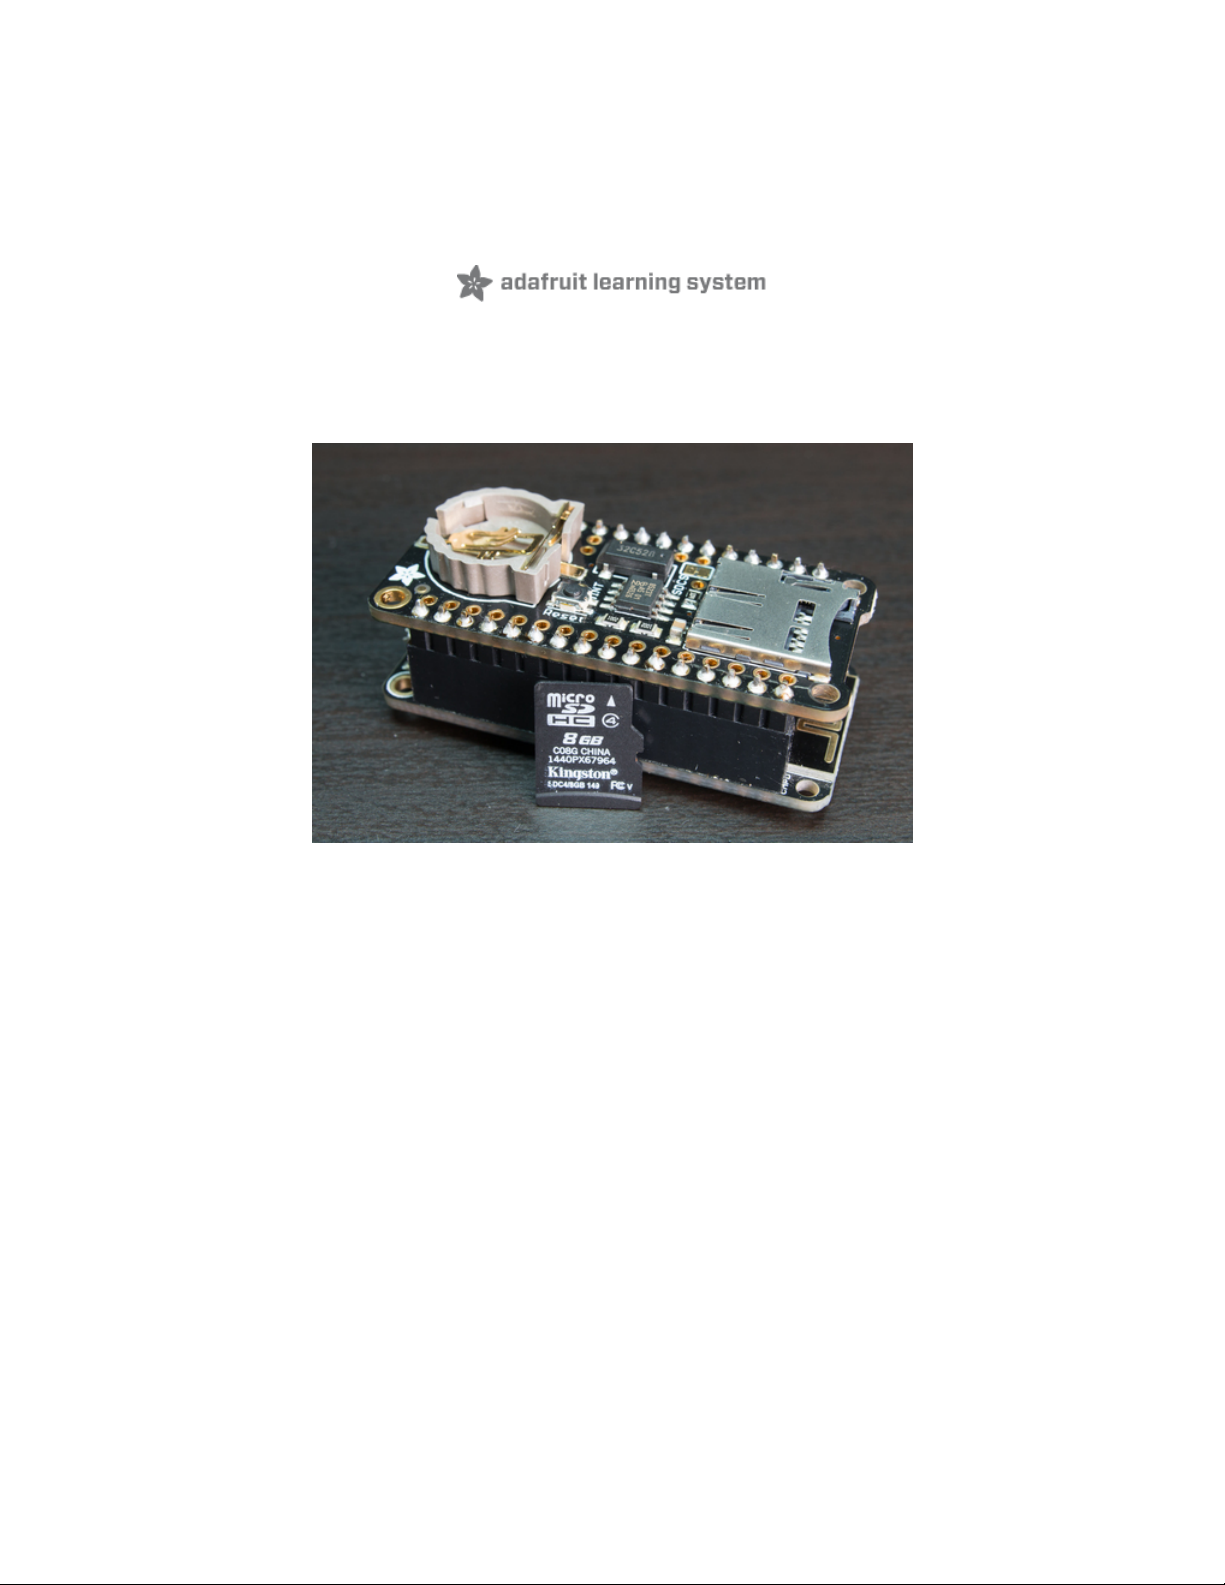
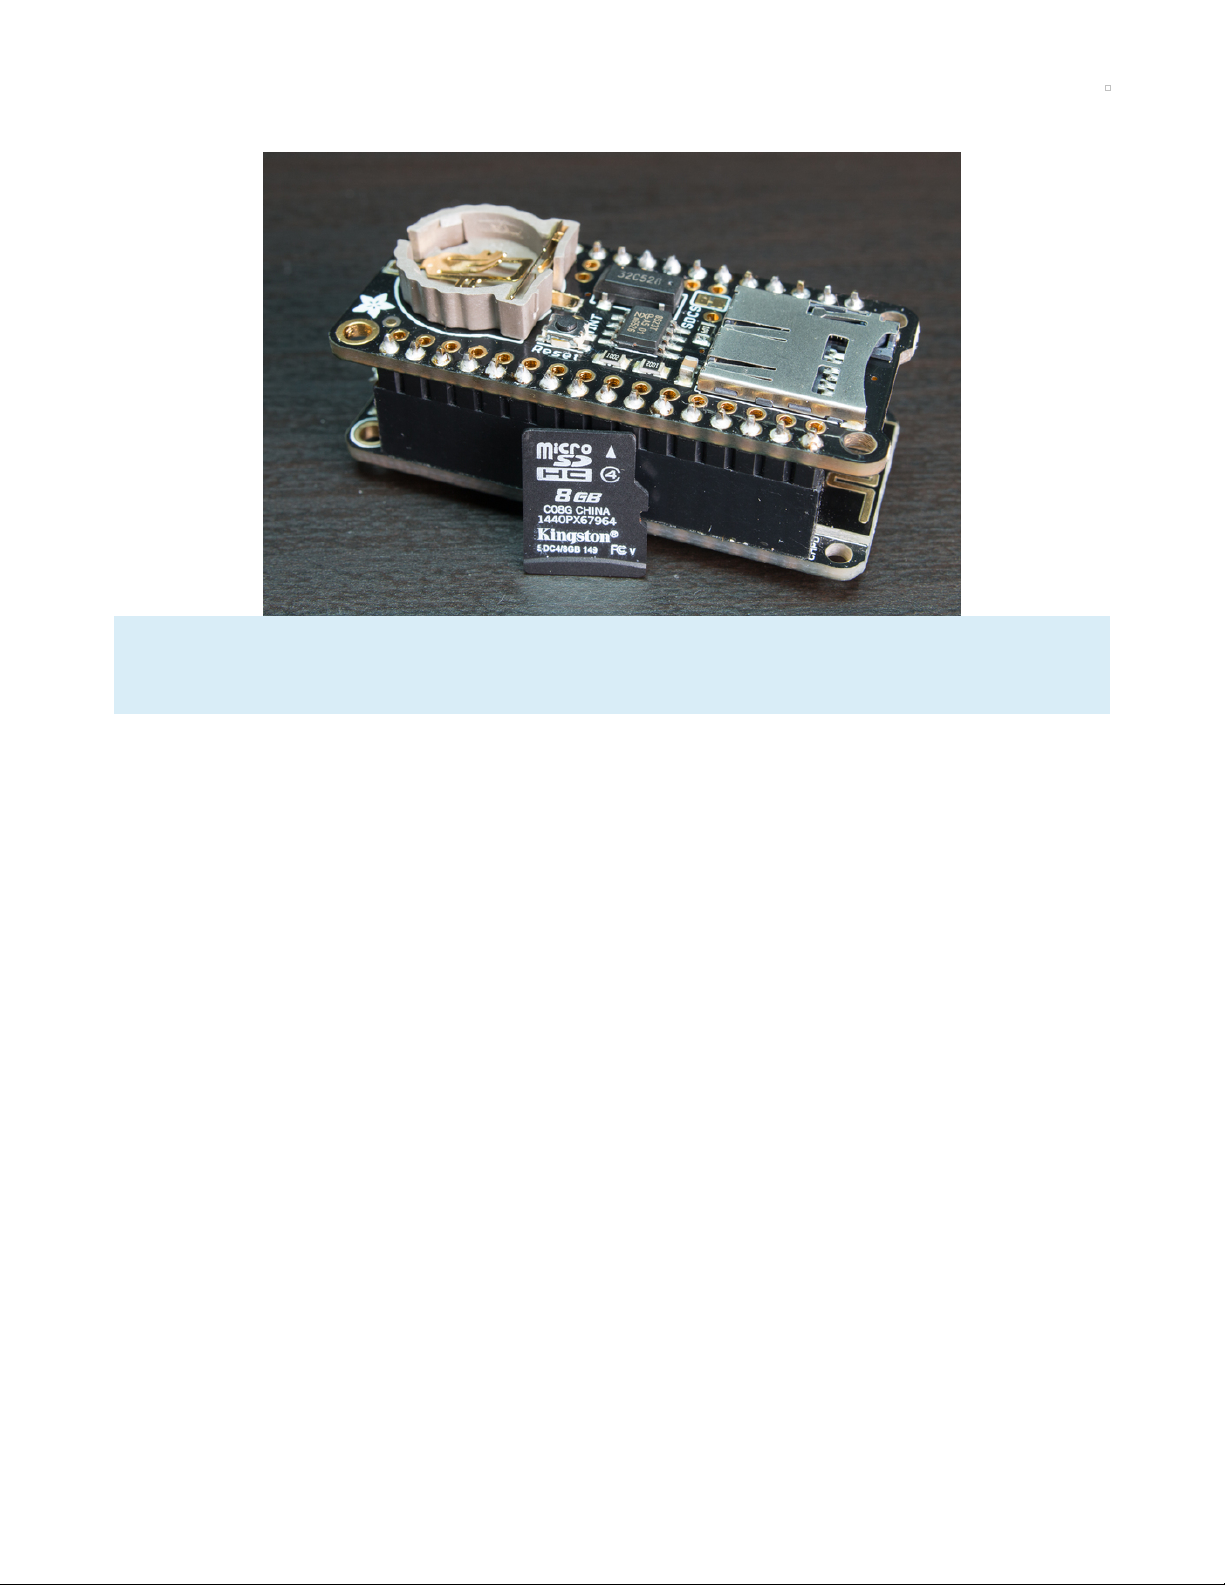
a SD card holder built-in, like the Feather M0
Adalogger (https://adafru.it/weP), the most simple and direct
way to use an SD card.
If your board doesn't come with CircuitPython running on it
already then check out your board's guide for how to load
CircuitPython firmware. For example the Feather M0 express
guide (https://adafru.it/wbv) is a good reference.
If you're using a Feather board and FeatherWing you
probably want a Feather female header
set (http://adafru.it/2886) or Feather stacking female header
set (http://adafru.it/2830).
MicroSD card holder. If your board doesn't have one already
you'll need to get a microSD card holder that exposes the
card as a SPI device. For Feathers the Adalogger
FeatherWing (https://adafru.it/weP) is an easy plug-in adapter
that adds microSD card (and more) to your board. For other
boards a microSD breakout (https://adafru.it/qyF) is what you
want.
© Adafruit Industries https://learn.adafruit.com/micropython-hardware-sd-cards Page 4 of 21
Page 5
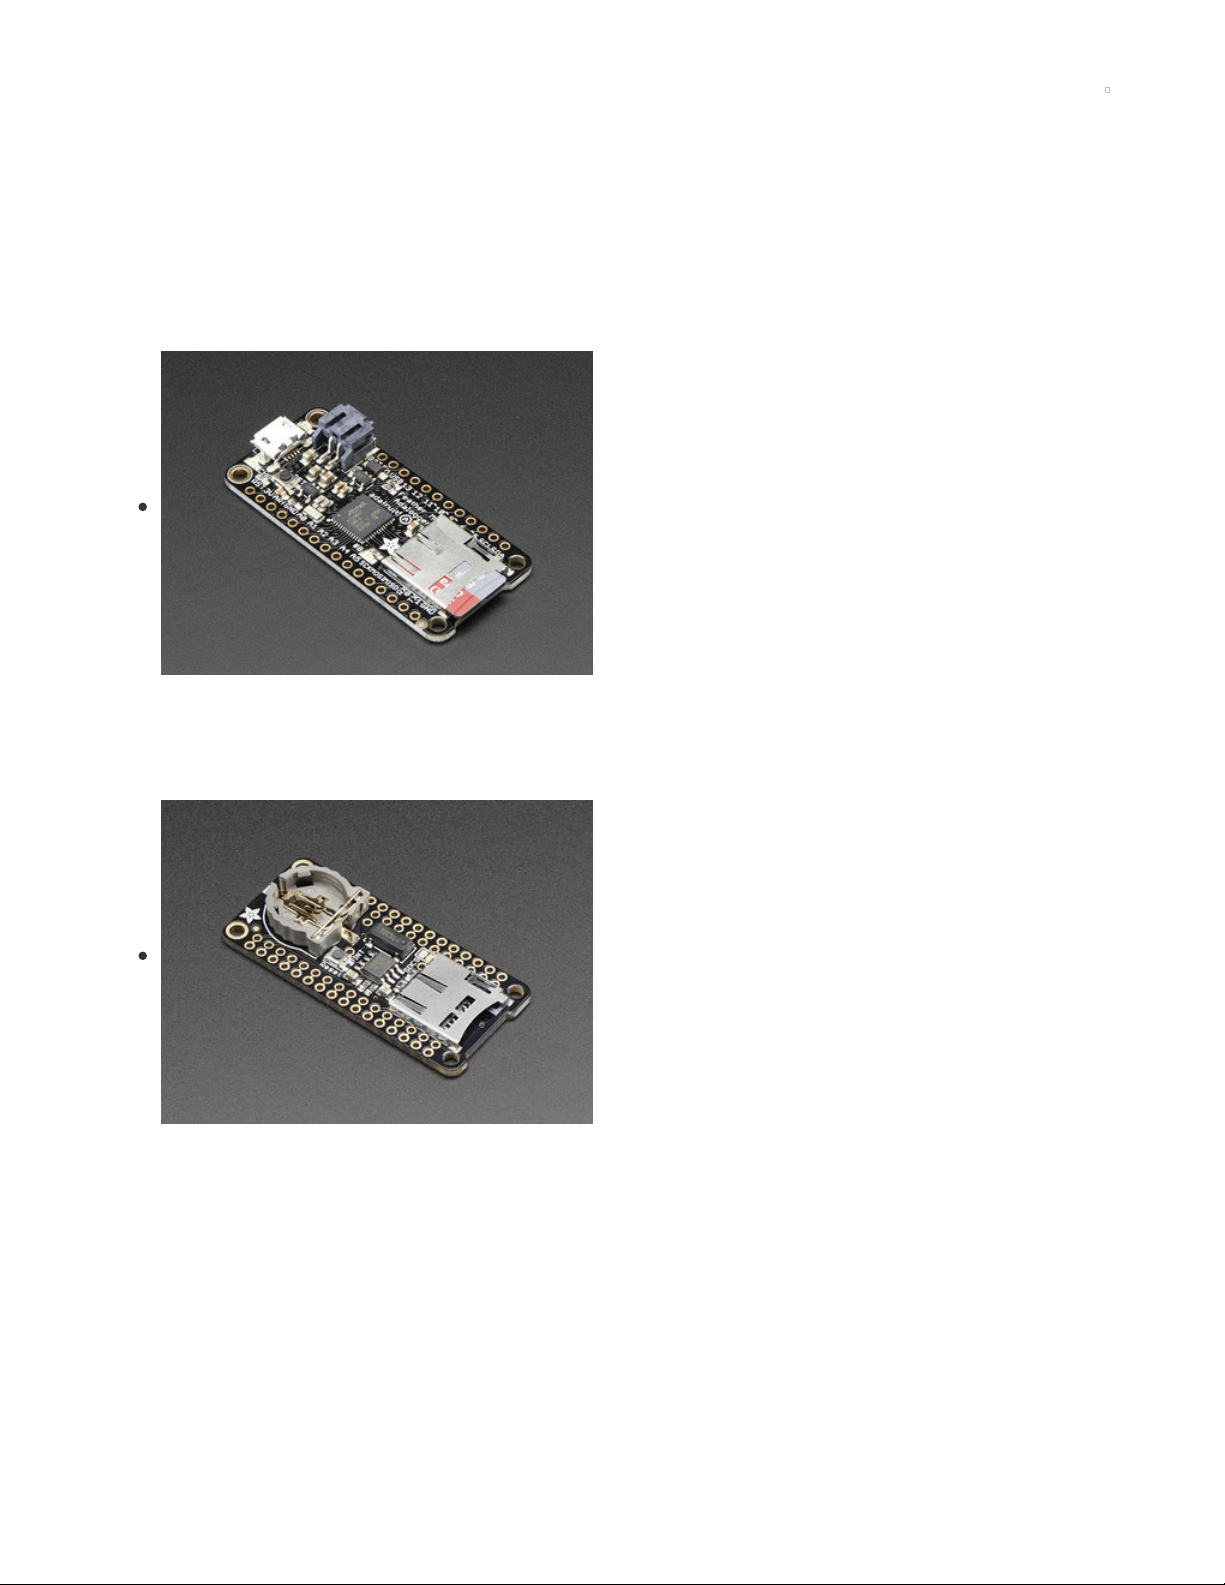
MicroSD card. (https://adafru.it/e4Z) You'll need a card to use
to store data. Any microSD card should work, but be aware
the very cheap / generic cards can sometimes be more
unreliable or cause problems compared to known-good
cards. If a card works well for Raspberry Pi and other boards
it should work well for CircuitPython and MicroPython.
Be careful to avoid extremely large (128+ gigabyte) cards as
they require special filesystems and block sizes that might not
be compatible with the code in this guide. Stick with a typical
4 - 16 gigabyte card.
Breadboard (http://adafru.it/64)and jumper
wires (http://adafru.it/153). If you aren't using a Feather and
FeatherWing you'll need a breadboard and jumper wires to
connect the components.
Soldering tools (http://adafru.it/136). You'll need to solder
headers to the boards Check out the guide to excellent
soldering (https://adafru.it/dxy) if you're new to soldering.
Wiring
If you're using a Feather and FeatherWing just plug the FeatherWing into your board and be sure to note
which pin on the FeatherWing is used for the microSD card chip select line (for the Adalogger
FeatherWing this is GPIO 10 on M0 boards and GPIO 15 on the ESP8266).
If you're wiring up a microSD card breakout you'll need to connect it to your board's hardware SPI bus, for
© Adafruit Industries https://learn.adafruit.com/micropython-hardware-sd-cards Page 5 of 21
Page 6
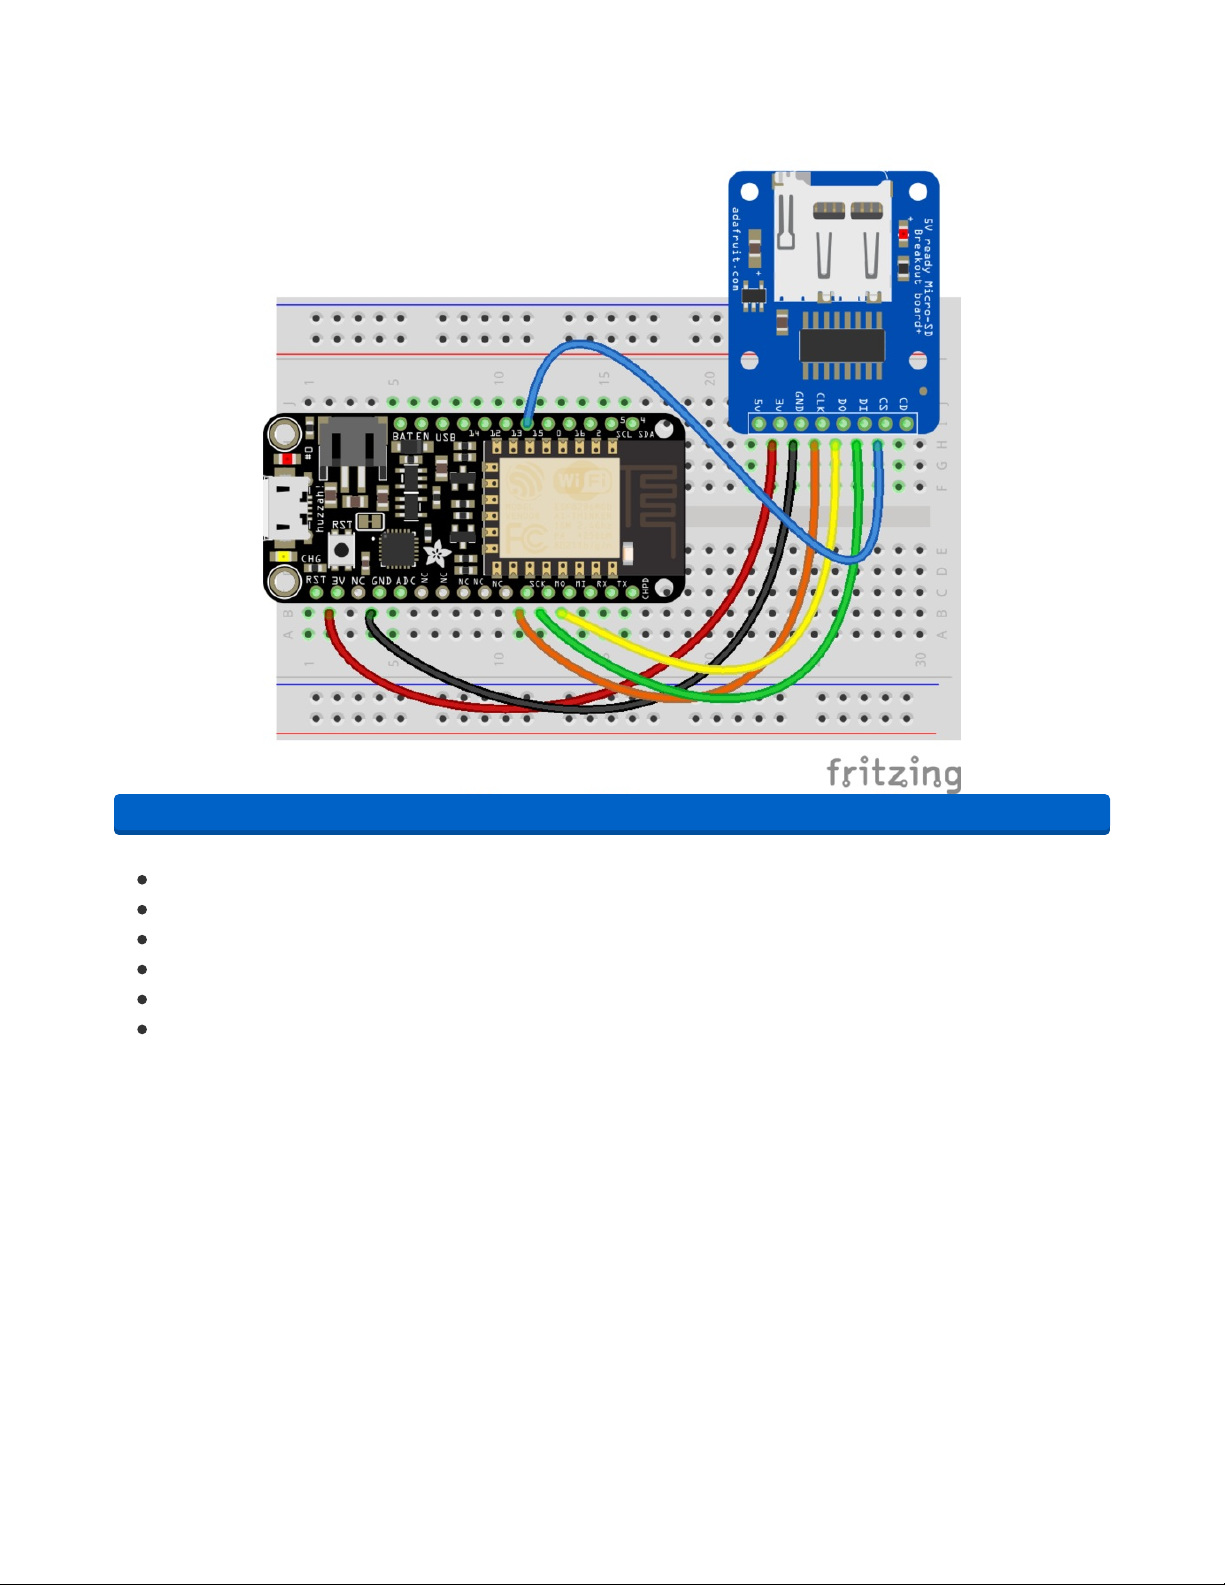
example with the ESP8266 you might wire it as follows:
https://adafru.it/zwB
Board ground (GND) to microSD breakout ground (GND) .
Board 3.3V power to microSD breakout 3.3V power.
Board SPI CLK (ESP8266 GPIO 14) to microSD breakout clock (CLK).
Board SPI MOSI (ESP8266 GPIO 13) to microSD breakout data input (DI).
Board SPI MISO (ESP8266 GPIO 12) to microSD breakout data output (DO).
Board GPIO 15 (or any other free digital IO pin) to microSD breakout chip select (CS) .
Finally make sure your microSD card is formatted with the FAT or FAT32 filesystem. Most cards come
pre-formatted with this filesystem, but if yours does not or you'd like to erase it look for a disk utility in
your operating system. On macOS the Disk Utility program can format cards, and on Windows right-click
the drive and select Format.
https://adafru.it/zwB
© Adafruit Industries https://learn.adafruit.com/micropython-hardware-sd-cards Page 6 of 21
Page 7
CircuitPython
Adafruit CircuitPython Module Install
To use a microSD card with your Adafruit CircuitPython board you'll need to install
the Adafruit_CircuitPython_SD (https://adafru.it/zwC) module on your board.
First make sure you are running the latest version of Adafruit CircuitPython (https://adafru.it/Amd) for your
board.
Next you'll need to install the necessary libraries to use the hardware--carefully follow the steps to find
and install these libraries from Adafruit's CircuitPython library bundle (https://adafru.it/zdx). Our
introduction guide has a great page on how to install the library bundle (https://adafru.it/ABU) for both
express and non-express boards. Be sure to use the latest CircuitPython Bundle as it includes an
updated version of the SD card module with a few necessary fixes!
Remember for non-express boards like the, you'll need to manually install the necessary libraries from the
bundle:
adafruit_sdcard.mpy
adafruit_bus_device
If your board doesn't support USB mass storage, like the ESP8266, then use a tool like ampy to copy the
file to the board (https://adafru.it/s1f). You can use the latest version of ampy and its new directory copy
command (https://adafru.it/q2A) to easily move module directories to the board.
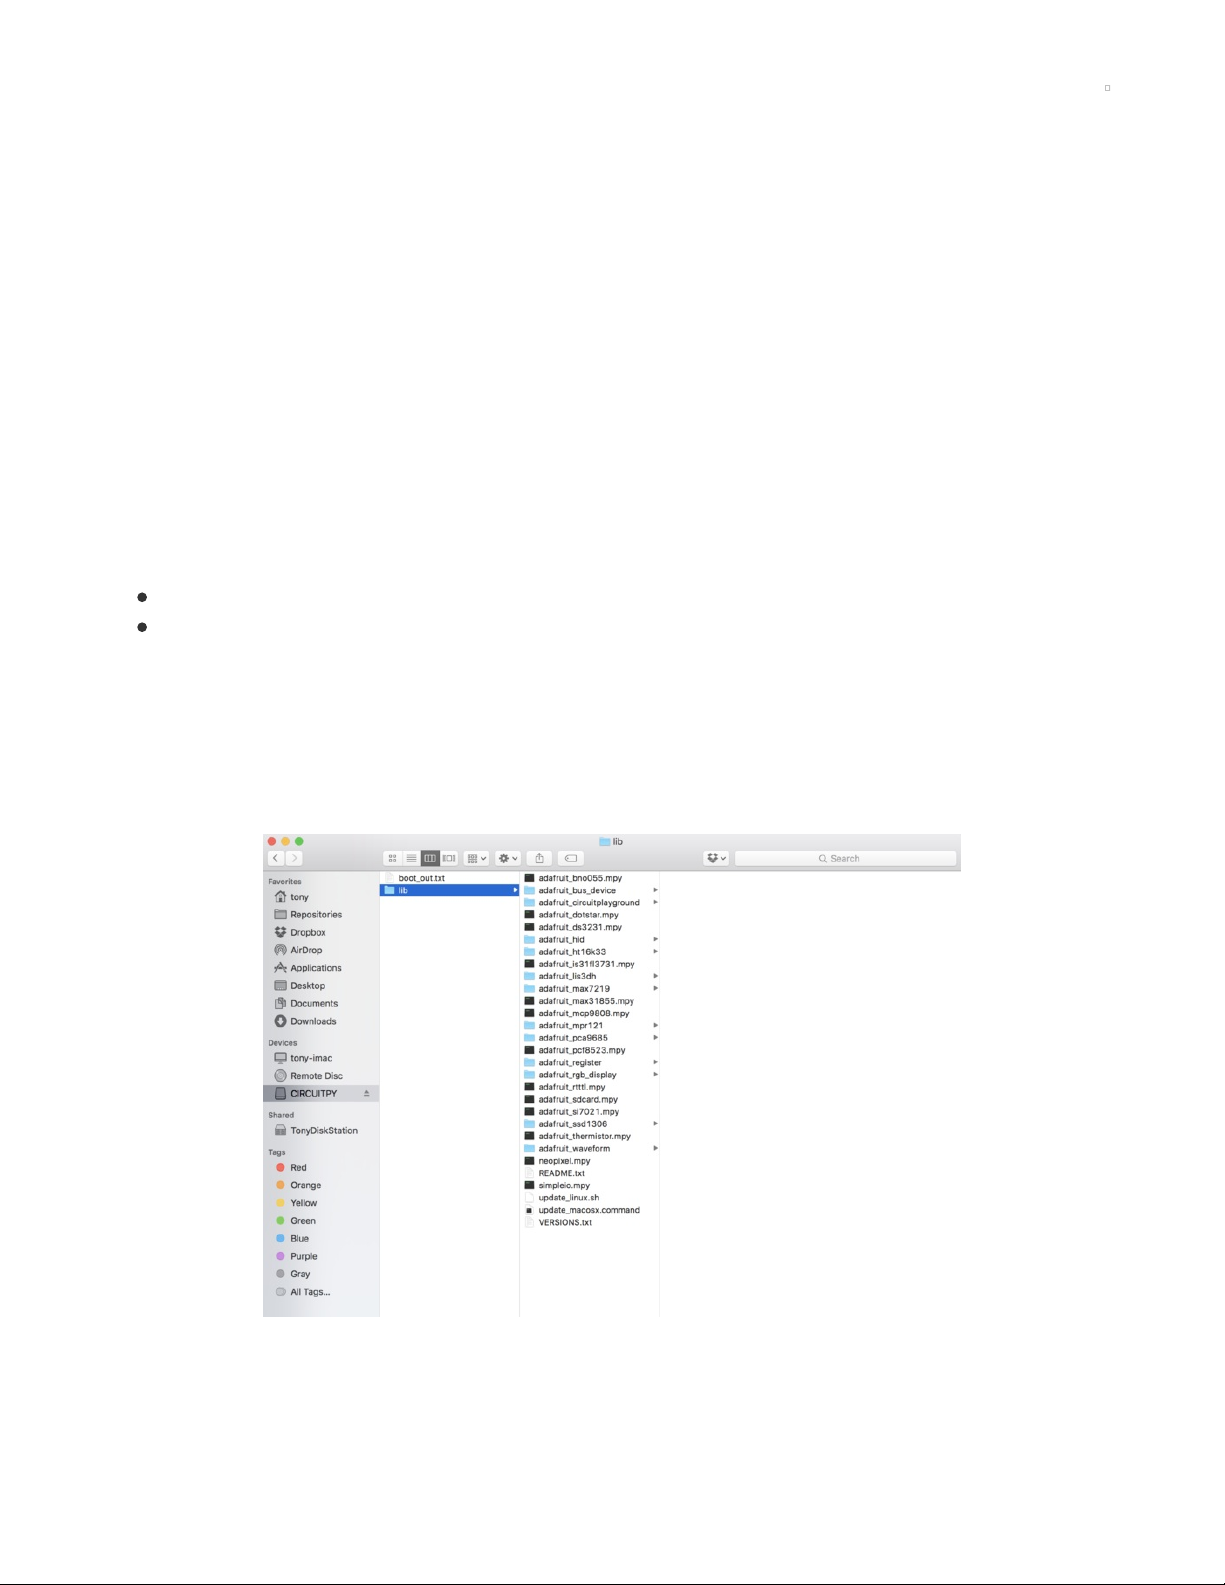
Before continuing make sure your board's lib folder or root filesystem has the adafruit_sdcard.mpy and
adafruit_bus_device modules copied over.
Usage
The following section will show how to initialize the SD card and read & write data to it from the board's
Python prompt / REPL.
© Adafruit Industries https://learn.adafruit.com/micropython-hardware-sd-cards Page 7 of 21
Page 8

Next connect to the board's serial REPL (https://adafru.it/Awz)so you are at the CircuitPython >>> prompt.
Initialize & Mount SD Card Filesystem
Before you can use the microSD card you need to initialize its SPI connection and mount its filesystem.
First import the necessary modules to initialize the SPI and CS line physical connections:
import board
import busio
import digitalio
Next create the SPI bus and a digital output for the microSD card's chip select line (be sure to select the
right pin name or number for your wiring):
spi = busio.SPI(board.SCK, MOSI=board.MOSI, MISO=board.MISO)
# Use board.SD_CS for Feather M0 Adalogger
cs = digitalio.DigitalInOut(board.SD_CS)
# Or use a digitalio pin like 5 for breakout wiring:
#cs = digitalio.DigitalInOut(board.D5)
Now import modules to access the SD card and filesystem:
import adafruit_sdcard
import storage
At this point you're ready to create the microSD card object and the filesystem object:
sdcard = adafruit_sdcard.SDCard(spi, cs)
vfs = storage.VfsFat(sdcard)
Notice the adafruit_sdcard module has a SDCard class which contains all the logic for talking to the
microSD card at a low level. This class needs to be told the SPI bus and chip select digital IO pin in its
initializer.
After a SDCard class is created it can be passed to the storage module's VfsFat class. This class has all
the logic for translating CircuitPython filesystem calls into low level microSD card access. Both the SDCard
and VfsFat class instances are required to mount the card as a new filesystem.
Finally you can mount the microSD card's filesystem into the CircuitPython filesystem. For example to
make the path /sd on the CircuitPython filesystem read and write from the card run this command:
storage.mount(vfs, "/sd")
The first parameter to the storage.mount command is the VfsFat class instance that was created above,
and the second parameter is the location within the CircuitPython filesystem that you'd like to 'place' the
microSD card. Remember the mount location as you'll need it to read and write files on the card!
If the same SPI bus is shared with other peripherals, it is important that the SD card be initialized
before accessing any other peripheral on the bus. Failure to do so can prevent the SD card from
being recognized until it is powered off or re-inserted.
© Adafruit Industries https://learn.adafruit.com/micropython-hardware-sd-cards Page 8 of 21
Page 9

Reading & Writing Data
Once the microSD card is mounted inside CircuitPython's filesystem you're ready to read and write data
from it. Reading and writing data is simple using Python's file operations like open (https://adafru.it/reL),
close (https://adafru.it/ryE), read (https://adafru.it/ryE), and write (https://adafru.it/ryE). The beauty of
CircuitPython and MicroPython is that they try to be as similar to desktop Python as possible, including
access to files.
For example to create a file and write a line of text to it you can run:
with open("/sd/test.txt", "w") as f:
f.write("Hello world!\r\n")
Notice the with statement is used to create a context manager that opens and automatically closes the
file. This is handy because with file access you Python you must close the file when you're done or else
all the data you thought was written might be lost!
The open function is used to open the file by telling it the path to it, and the mode (w for writing). Notice
the path is under /sd, /sd/test.txt. This means the file will be created on the microSD card that was
mounted as that path.
Inside the context manager you can access the f variable to operate on the file while it's open. The write
function is called to write a line of text to the file. Notice that unlike a print statement you need to end the
string passed to write with explicit carriage returns and new lines.
You can also open a file and read a line from it with similar code:
with open("/sd/test.txt", "r") as f:
print("Read line from file:")
print(f.readline())
If you wanted to read and print all of the lines from a file you could call readline in a loop. Once readline
reaches the end of the file it will return an empty string so you know when to stop:
with open("/sd/test.txt", "r") as f:
print("Printing lines in file:")
line = f.readline()
while line != '':
print(line)
line = f.readline()
There's even a readlines function that will read all of the lines in the file and return them in an array of
lines. Be careful though as this means the entire file must be loaded into memory, so if the file is very
large you might run out of memory. If you know your file is very small you can use it though:
with open("/sd/test.txt", "r") as f:
lines = f.readlines()
print("Printing lines in file:")
for line in lines:
print(line)
Finally one other very common file scenario is opening a file to add new data at the end, or append data.
This works exactly the same as in Python and the open function can be told you'd like to append instead
© Adafruit Industries https://learn.adafruit.com/micropython-hardware-sd-cards Page 9 of 21
Page 10

of erase and write new data (what normally happens with the w option for open). For example to add a
line to the file:
with open("/sd/test.txt", "a") as f:
f.write("This is another line!\r\n")
Notice the a option in the open function--this tells Python to add data at the end of the file instead of
erasing it and starting over at the top. Try reading the file with the code above to see the new line that
was added!
That's all there is to manipulating files on microSD cards with CircuitPython!
Here are a few more complete examples of using a SD card from the Trinket M0 CircuitPython
guides (https://adafru.it/Bvi). These are great as a reference for more SD card usage.
List Files
Load this into main.py:
© Adafruit Industries https://learn.adafruit.com/micropython-hardware-sd-cards Page 10 of 21
Page 11

import os
import adafruit_sdcard
import board
import busio
import digitalio
import storage
# Use any pin that is not taken by SPI
SD_CS = board.D0
# Connect to the card and mount the filesystem.
spi = busio.SPI(board.SCK, board.MOSI, board.MISO)
cs = digitalio.DigitalInOut(SD_CS)
sdcard = adafruit_sdcard.SDCard(spi, cs)
vfs = storage.VfsFat(sdcard)
storage.mount(vfs, "/sd")
# Use the filesystem as normal! Our files are under /sd
# This helper function will print the contents of the SD
def print_directory(path, tabs=0):
for file in os.listdir(path):
stats = os.stat(path + "/" + file)
filesize = stats[6]
isdir = stats[0] & 0x4000
if filesize < 1000:
sizestr = str(filesize) + " by"
elif filesize < 1000000:
sizestr = "%0.1f KB" % (filesize / 1000)
else:
sizestr = "%0.1f MB" % (filesize / 1000000)
prettyprintname = ""
for _ in range(tabs):
prettyprintname += " "
prettyprintname += file
if isdir:
prettyprintname += "/"
print('{0:<40} Size: {1:>10}'.format(prettyprintname, sizestr))
# recursively print directory contents
if isdir:
print_directory(path + "/" + file, tabs + 1)
print("Files on filesystem:")
print("====================")
print_directory("/sd")
Once it's loaded up, open up the REPL (and restart it with ^D if necessary) to get a printout of all the files
included. We recursively print out all files and also the filesize. This is a good demo to start with because
you can at least tell if your files exist!
© Adafruit Industries https://learn.adafruit.com/micropython-hardware-sd-cards Page 11 of 21
Page 12

Logging Temperature
But you probably want to do a little more, lets log the temperature from the chip to a file.
Here's the new script
import time
import adafruit_sdcard
import board
import busio
import digitalio
import microcontroller
import storage
# Use any pin that is not taken by SPI
SD_CS = board.D0
led = digitalio.DigitalInOut(board.D13)
led.direction = digitalio.Direction.OUTPUT
# Connect to the card and mount the filesystem.
spi = busio.SPI(board.SCK, board.MOSI, board.MISO)
cs = digitalio.DigitalInOut(SD_CS)
sdcard = adafruit_sdcard.SDCard(spi, cs)
vfs = storage.VfsFat(sdcard)
storage.mount(vfs, "/sd")
# Use the filesystem as normal! Our files are under /sd
print("Logging temperature to filesystem")
# append to the file!
while True:
# open file for append
with open("/sd/temperature.txt", "a") as f:
led.value = True # turn on LED to indicate we're writing to the file
t = microcontroller.cpu.temperature
print("Temperature = %0.1f" % t)
f.write("%0.1f\n" % t)
led.value = False # turn off LED to indicate we're done
# file is saved
time.sleep(1)
When saved, the Trinket will start saving the temperature once per second to the SD card under the
file temperature.txt
© Adafruit Industries https://learn.adafruit.com/micropython-hardware-sd-cards Page 12 of 21
Page 13

The key part of this demo is in these lines:
print("Logging temperature to filesystem")
# append to the file!
while True:
# open file for append
with open("/sd/temperature.txt", "a") as f:
led.value = True # turn on LED to indicate we're writing to the file
t = microcontroller.cpu.temperature
print("Temperature = %0.1f" % t)
f.write("%0.1f\n" % t)
led.value = False # turn off LED to indicate we're done
# file is saved
time.sleep(1)
This is a slightly complex demo but it's for a good reason. We use with (a 'context') to open the file
for appending, that way the file is only opened for the very short time its written to. This is safer because
then if the SD card is removed or the board turned off, all the data will be safe(r).
We use the LED to let the person using this know that the temperature is being written, it turns on just
before the write and then off right after.
After the LED is turned off the with ends and the context closes, the file is safely stored.
© Adafruit Industries https://learn.adafruit.com/micropython-hardware-sd-cards Page 13 of 21
Page 14

Python Docs
Python Docs (https://adafru.it/C5z)
© Adafruit Industries https://learn.adafruit.com/micropython-hardware-sd-cards Page 14 of 21
Page 15

Code Storage on SD Card
In addition to storing data files on the SD Card, you may also want to store Python scripts or libraries. This
is especially useful for the "non-Express" boards that have a very limited file system.
In order to execute code from the SD Card, you have to tell the system where to look for the executable
files. The search path is set and viewed via the sys.path command. The default path looks on the
processor file system in "/" then "/lib" then in the modules contained in .frozen as part of the board's
CircuitPython build. Here is an example:
The search path may be extended via the sys.path.append command. If you have followed the
previous example for mounting an SD Card (https://adafru.it/C5A) as "/sd" then you can extend the search
path using the sys.path.append("/sd") command as shown:
If you want mount the SD card and extend the search path via a script, place the following code in a file
named sdmount.py and then copy it onto the file system of your processor board (not the SD card).
In this example the script sdmount.py will mount the SD card as "/sd" and then extend the sys.path to use
"/sd".
This example is written for the Feather M0 Adalogger so the "chip select" is set to SD_CS . For other
boards, use the pin that is connected to the Chip Select line of your SD card (e.g. board.D5 ).
import sys
import adafruit_sdcard
import board
import busio
import digitalio
import storage
# Connect to the card and mount the filesystem.
spi = busio.SPI(board.SCK, board.MOSI, board.MISO)
cs = digitalio.DigitalInOut(board.SD_CS)
sdcard = adafruit_sdcard.SDCard(spi, cs)
vfs = storage.VfsFat(sdcard)
storage.mount(vfs, "/sd")
sys.path.append("/sd")
The file sdmount.py must be placed on the processor file system, not on the SD card. For a non-express
board like the feather_m0_adalogger used in this example use ampy .
ampy -p /dev/ttyUSB0 put sdmount.py
From the REPL you can now reboot (by typing Control-D) then mount the SD card and verify the path:
© Adafruit Industries https://learn.adafruit.com/micropython-hardware-sd-cards Page 15 of 21
Page 16

hello.py Example
The following walks through a simple example of how to execute a script from the SD Card.
First, store the following code as hello.py on the SD Card using your computer. Typically this would be
done by removing the SD Card from your device and attaching it to your computer where it will be
mounted as a USB drive. You can save the hello.py file directly on the drive or save it locally on your
computer and drag/drop it to the USB drive.
print('Hello, World!')
After copying the file to your SD Card, and reinserting and remounting the SD Card on your device, you
can verify that the file is there:
As you can see, there are some additional files on my SD Card.
You can now execute the code from the SD Card like any stored file as shown:
If you want to have access to the entire Adafruit CircuitPython Bundle, you can copy the lib/ subdirectory
to your SD Card then make it available with an additional append. Here is a revised script sdmount_lib.py
file that also appends "/sd/lib" to the path.
import sys
import adafruit_sdcard
import board
import busio
import digitalio
import storage
# Connect to the card and mount the filesystem.
spi = busio.SPI(board.SCK, board.MOSI, board.MISO)
cs = digitalio.DigitalInOut(board.SD_CS)
sdcard = adafruit_sdcard.SDCard(spi, cs)
vfs = storage.VfsFat(sdcard)
storage.mount(vfs, "/sd")
sys.path.append("/sd")
sys.path.append("/sd/lib")
Copy sdmount_lib.py to your processor's File system (not the SD Card).
ampy -p /dev/ttyUSB0 put sdmount_lib.py
© Adafruit Industries https://learn.adafruit.com/micropython-hardware-sd-cards Page 16 of 21
Page 17

You now have access to the entire Bundle! You can see that '/lib' shows up first in the path. When
searching for a library the system will first look in /lib then in /sd and /sd/lib.
For example, you can load the NeoPixel driver with:
import neopixel
and it will be loaded from the SD Card.
© Adafruit Industries https://learn.adafruit.com/micropython-hardware-sd-cards Page 17 of 21
Page 18

MicroPython
Note this page describes how to use a MicroPython.org version of this library with MicroPython
boards. Skip back to the previous page if you're using a CircuitPython board like the Feather M0
express or Adalogger!
Before you get started you'll want to be familiar with the basics of using MicroPython by reading these
guides:
MicroPython Basics: What is MicroPython? (https://adafru.it/pMb)
MicroPython Basics: How to Load MicroPython on a Board (https://adafru.it/pNB)
MicroPython Basics: Load Files & Run Code (https://adafru.it/r2B)
MicroPython Basics: Loading Modules (https://adafru.it/ryf)
Note that SD card support varies greatly for MicroPython boards. A few boards have good native support
built-in:
pyboard
The pyboard is one of the easiest MicroPython boards to use with a microSD card. The board is built with
a small microSD card slot and its firmware will automatically load the card as the root filesystem for the
board. Plug in the card, power up the pyboard and it should automatically use the card as a filesystem to
run scripts, store data, etc. You don't need to buy extra hardware or run any commands!
Check out the pyboard SD card documentation (https://adafru.it/qyB) for more details.
WiPy
The WiPy also makes it easy to use a microSD card with its WiPy expansion board (http://adafru.it/2960).
The expansion board includes a microSD card slot so you can easily plug in a card. With a few lines of
code you can mount the microSD card on the board's filesystem to read and write data, just like with the
pyboard.
Check out the WiPy SD card documentation (https://adafru.it/qyC) for more details.
Other MicroPython boards like the ESP8266 need to use a little more code to work with microSD cards.
Follow the steps below to use MicroPython ESP8266 with a microSD card.
MicroPython ESP8266 SD Card Setup
Before you can use a microSD card with MicroPython on the ESP8266 you'll need to make sure you're
using at least firmware version 1.8.4 or higher . If you aren't familiar with loading MicroPython firmware on
the ESP8266 check out this handy guide for all the details (https://adafru.it/pNB). Be sure to get
MicroPython ESP8266 stable firmware version 1.8.4 or higher from its download page!
Once your board is running MicroPython 1.8.4 or higher there's one more step to enable microSD card
access. You need to manually install a Python module to talk to the SD card. This module is not included
in the MicroPython ESP8266 firmware by default, but it's easy to copy to the board's internal filesystem.
Be sure to read this guide on loading modules (https://adafru.it/ryf) to understand more about how you
can copy modules and load them.
© Adafruit Industries https://learn.adafruit.com/micropython-hardware-sd-cards Page 18 of 21
Page 19

The quickest way to load the module is to copy its source to the board. This isn't the most memory
efficient way to load the module (it will use a bit more RAM), but it's good to quickly get started. Once you
have SD card access working you can freeze the module into a custom build of MicroPython
firmware (https://adafru.it/ryA) to reduce its memory usage.
First download the SD card driver module (https://adafru.it/ryB) from the MicroPython GitHub
repository (https://adafru.it/ryC) by clicking the button below:
https://adafru.it/ryD
Next use a tool like ampy (https://adafru.it/q9C) to copy the sdcard.py file to the root of the board's
filesystem:
ampy --port /board/serial/port put sdcard.py
At this point the sdcard.py file should be on the root of the MicroPython board's filesystem. You're ready
to run code that can import the SD card and make it the new root filesystem.
Mount SD Card
To mount the SD card as the MicroPython ESP8266 board's filesystem you'll need to run a few
commands. Connect to the board's serial or other REPL and first run this import command:
import machine, sdcard, os
If you see an error like the sdcard module couldn't be found or imported double check that you copied
the module's .py file to the board (or that you froze it into the firmware if you're building a custom
MicroPython firmware).
Once the necessary modules are imported you can initialize access to the SD card with this command:
sd = sdcard.SDCard(machine.SPI(1), machine.Pin(15))
Make sure you're using MicroPython ESP8266 version 1.8.4 or higher! If you're using an older firmware
version this command will fail because the machine.SPI object doesn't use interface number 1.
This command will create a SD card object that's initialized using the hardware SPI interface (interface 1
for the ESP8266) and the specified chip select pin (GPIO 15, but you can use other GPIO pins if you wire
them accordingly).
Next to make the SD card the new root filesystem run the following command:
vfs = os.VfsFat(sd, "")
This line will create a new virtual FAT filesystem using the SD card as a backing store instead of the
internal flash memory on the board. The filesystem is assigned to a global vfs object that MicroPython
ESP8266 internally uses for its filesystem.
It actually isn't that important that the vfs object be assigned since the VfsFat object initializer does all the
work to mount the filesystem. However as a best practice it's good to assign the new VfsFat object to a
variable so it never gets garbage collected.
https://adafru.it/ryD
© Adafruit Industries https://learn.adafruit.com/micropython-hardware-sd-cards Page 19 of 21
Page 20

The second parameter to the VfsFat object initializer is the path on the filesystem to mount the card. For
now only the empty string is allowed as it specifies to load the filesystem as the new root (i.e. under / ).
At this point the microSD card should be the new root filesystem for the board. You can interact with the
files just like interacting with files on the internal filesystem. See the CircuitPython file usage
page (https://adafru.it/zwE) for details on file reading and writing with the open, read, and write functions.
Remember since the card is mounted as the root filesystem you access files directly under the / path and
not /sd or other deeper paths!
© Adafruit Industries https://learn.adafruit.com/micropython-hardware-sd-cards Page 20 of 21
Page 21

© Adafruit Industries Last Updated: 2021-02-09 11:24:42 AM EST Page 21 of 21
 Loading...