

Page 1
Installing CircuitPython on SAMD21 Boards
Created by Shawn Hymel
Last updated on 2021-03-05 05:59:27 PM EST
Page 2

2
3
5
5
5
7
7
9
9
9
10
13
14
14
14
16
19
21
22
22
22
23
23
23
Guide Contents
Guide Contents
Overview
Installing the Arduino Board Definition
Install Arduino
Add Board Manager URL
Install Board Definition
Board Definition Packages
Installing the UF2 Bootloader
Windows 7 Drivers
Download the UF2 Arduino Installer
Upload UF2 with Arduino
Learning More About UF2
Installing CircuitPython
Caveats for CircuitPython on Non-Express Boards
Download the Latest Version of CircuitPython
Start the UF2 Bootloader
Test It!
Learning CircuitPython
Advanced: Creating Your Own Port
1. Create a UF2 Port
2. Create a CircuitPython Port
3. Test Your Board
4. Create Pull Requests
5. Update Mu (Optional)
© Adafruit Industries https://learn.adafruit.com/installing-circuitpython-on-samd21-boards Page 2 of 25
Page 3
Overview
CircuitPython is a programming language based on Python, and it is designed to work with low-cost
microcontroller boards to make learning and tinkering easier. The Microchip ATSAMD21 is an inexpensive
chip with the power to run CircuitPython.
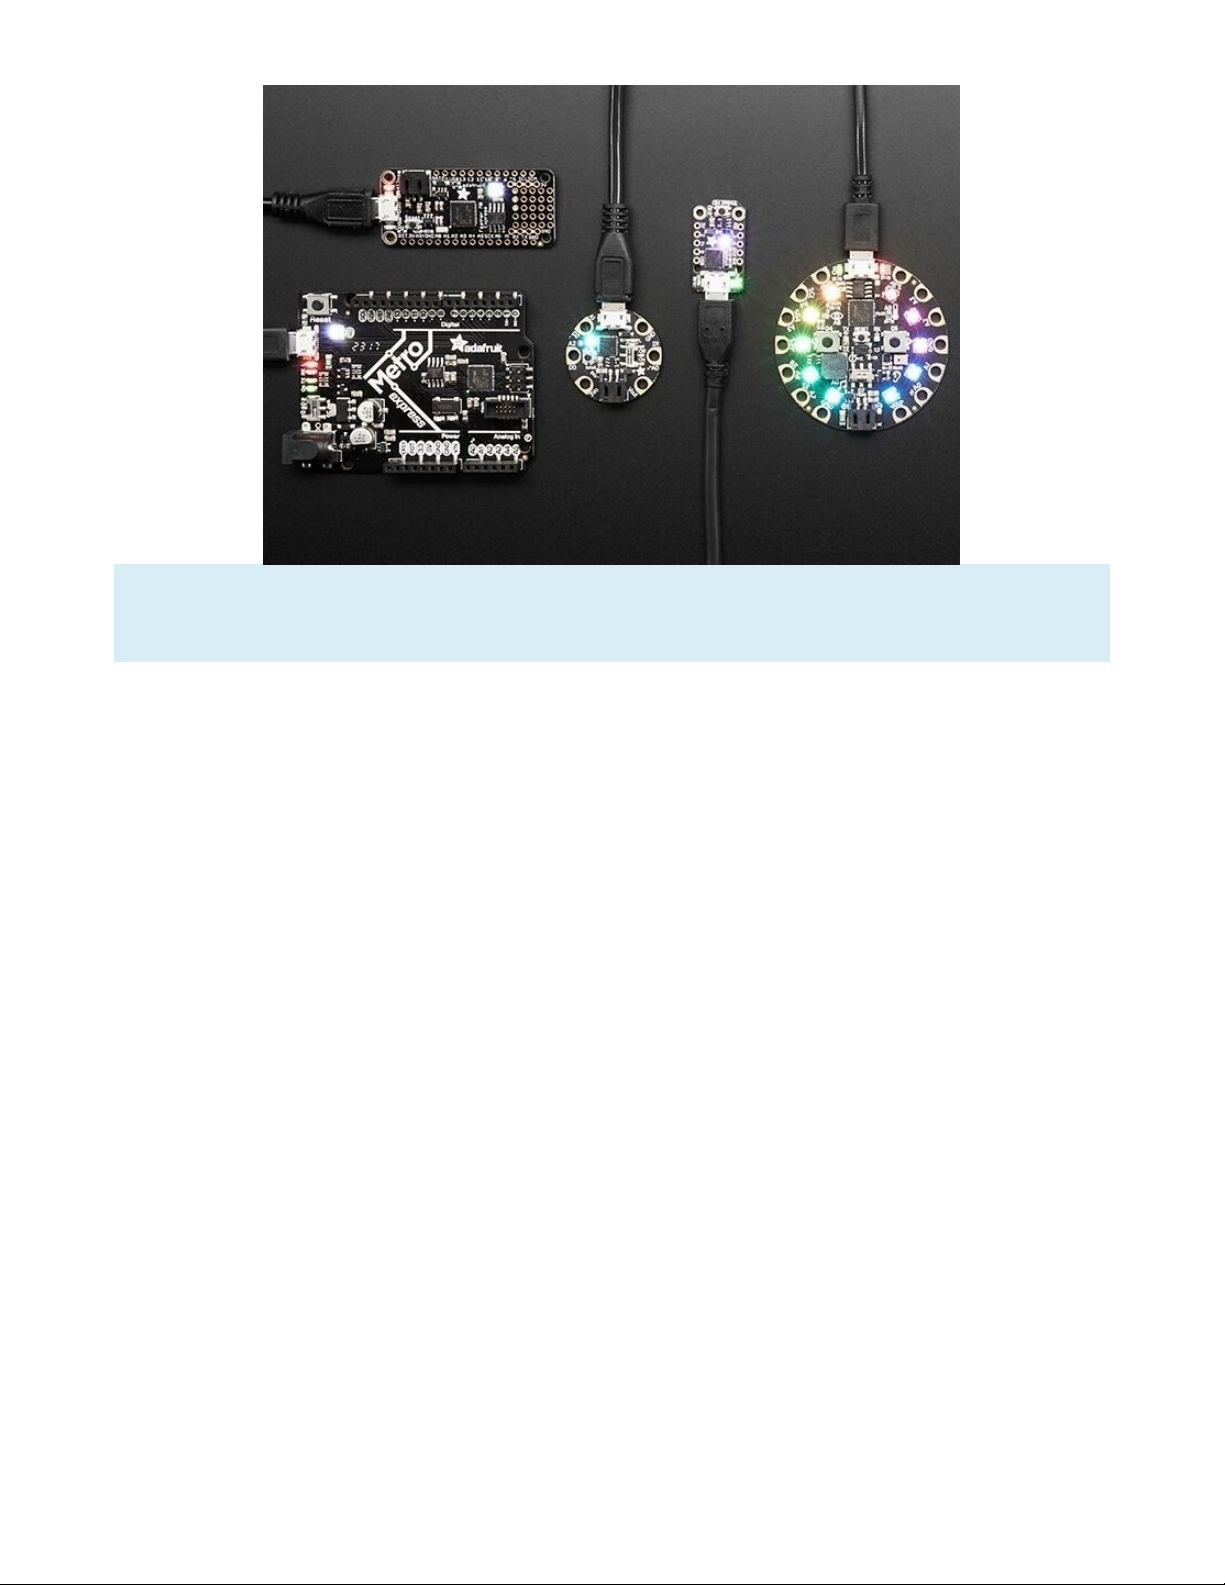
Some SAMD21-based boards, like the Circuit Playground Express (https://adafru.it/wpF), METRO M0
Express (https://adafru.it/xoa), and Feather M0 Express (https://adafru.it/wfb), are designed to work with
CircuitPython out of the box. Others, like the Arduino MKRZero, require a little more work.
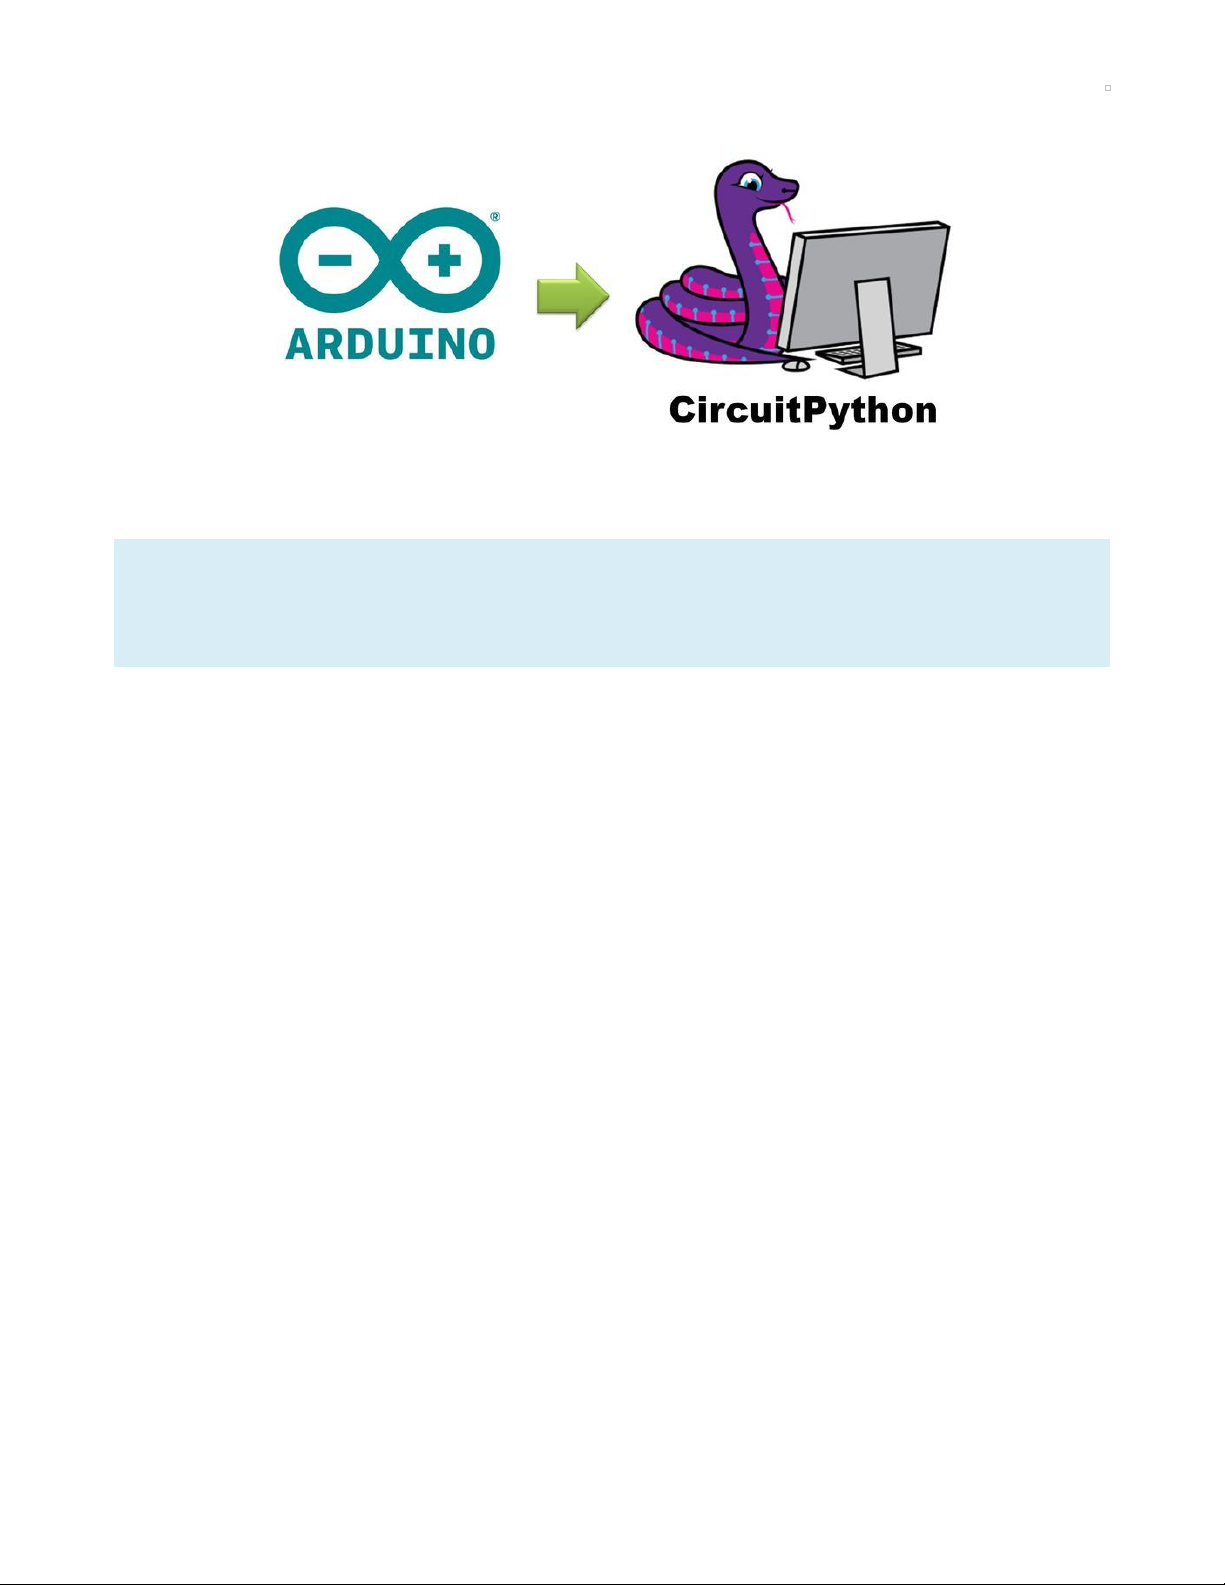
This guide will show you how to install CircuitPython on a variety of SAMD21-based boards!
The easiest method for installing CircuitPython is through the UF2 bootloader. UF2 is a slick piece of code
that runs on your microcontroller, and it allows the board to appear as a drive on your computer. From
there, you can simply drag-and-drop the CircuitPython installer! We will need to take the following steps to
install CircuitPython on a SAMD21 board:
Install Arduino and the appropriate board definition
Download the UF2 bootloader Arduino code for your board
Upload the UF2 bootloader code to your board from Arduino
Download the CircuitPython installer for your board
Copy the CircuitPython installer to your board
Test it!
Note that you only need to perform these steps once. Once you have installed CircuitPython on your
board, you write CircuitPython code for it over and over again!
© Adafruit Industries https://learn.adafruit.com/installing-circuitpython-on-samd21-boards Page 3 of 25
Page 4
Not every SAMD21 board is covered in this guide. We try to cover the most popular ones, and
CircuitPython is being updated all the time to support new boards, so keep checking back!
© Adafruit Industries https://learn.adafruit.com/installing-circuitpython-on-samd21-boards Page 4 of 25
Page 5
Installing the Arduino Board Definition
There are a couple of ways to install UF2 onto your board. The easiest method is to download the pre-
generated Arduino code and upload it to your board from the Arduino Integrated Development
Environment (IDE).
The Arduino installation method only works if your board comes pre-loaded with the Arduino
bootloader. If you can upload Arduino programs to your board, then you're in luck! Continue with the
rest of the guide.
If you cannot upload Arduino code to your board (for example, you designed your own board with a
factory-fresh SAMD21 chip), then you will need to install the UF2
.bin
file. This will require an Atmel ICE or
other JTAG programmer.
Install Arduino
If you have not already done so, head to arduino.cc (https://adafru.it/lDg), download, and install the latest
Arduino IDE. Note that this guide was written and tested with Arduino version 1.8.7. If you run into issues
uploading code, you might want to try this specific version.
This guide (https://adafru.it/D3z) will show you how to install the Arduino software, if you need some
assistance.
Add Board Manager URL
Some SAMD21 boards will require additional definition files to be installed. If your board is not found in the
Board Manager
, you will need to tell Arduino where to find more definition files from the Internet.
Open Arduino, and click File > Preferences. To the right of the Additional Boards Manager URLs, click on
the Additional URLs window button .
© Adafruit Industries https://learn.adafruit.com/installing-circuitpython-on-samd21-boards Page 5 of 25
Page 6
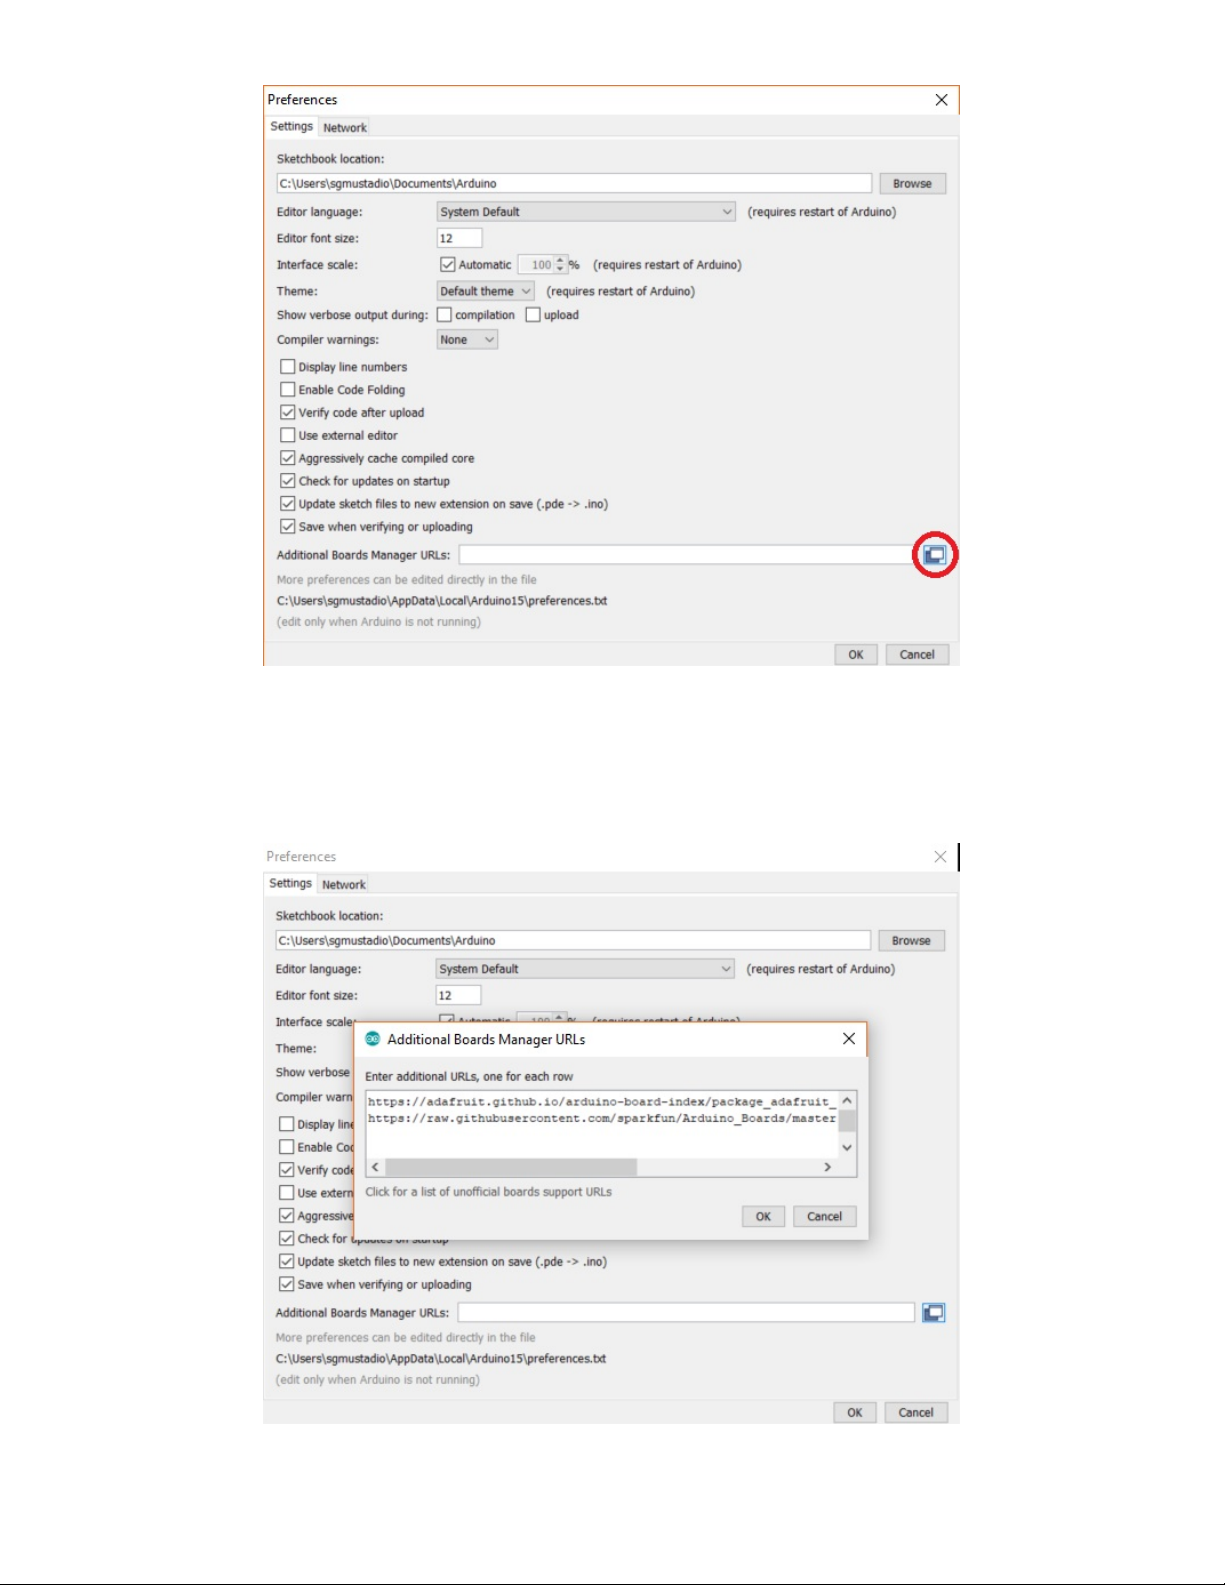
Take a look at the
Board Definition Packages
table at the end of this page, and locate your board. If you
see a
Package URL
listed, copy it into a new line in this window. If you do not see a
Package URL
listed
next to your board, you can skip this step.
You are welcome to have multiple board manager URLs listed here. Just note that each one needs to be
on a separate line.
© Adafruit Industries https://learn.adafruit.com/installing-circuitpython-on-samd21-boards Page 6 of 25
Page 7
Click OK to close the
Additional Boards Manager URLs
window, and click OK once more to close the
Preferences
window.
Install Board Definition
A board definition tells the Arduino IDE how to upload code to your particular board, which pins to use,
etc. Arduino comes with a number of board definitions installed by default, including the Arduino Uno,
Arduino Mega, and Arduino Nano. However, many SAMD21 boards are not supported by default in
Arduino, which means we need to add them.
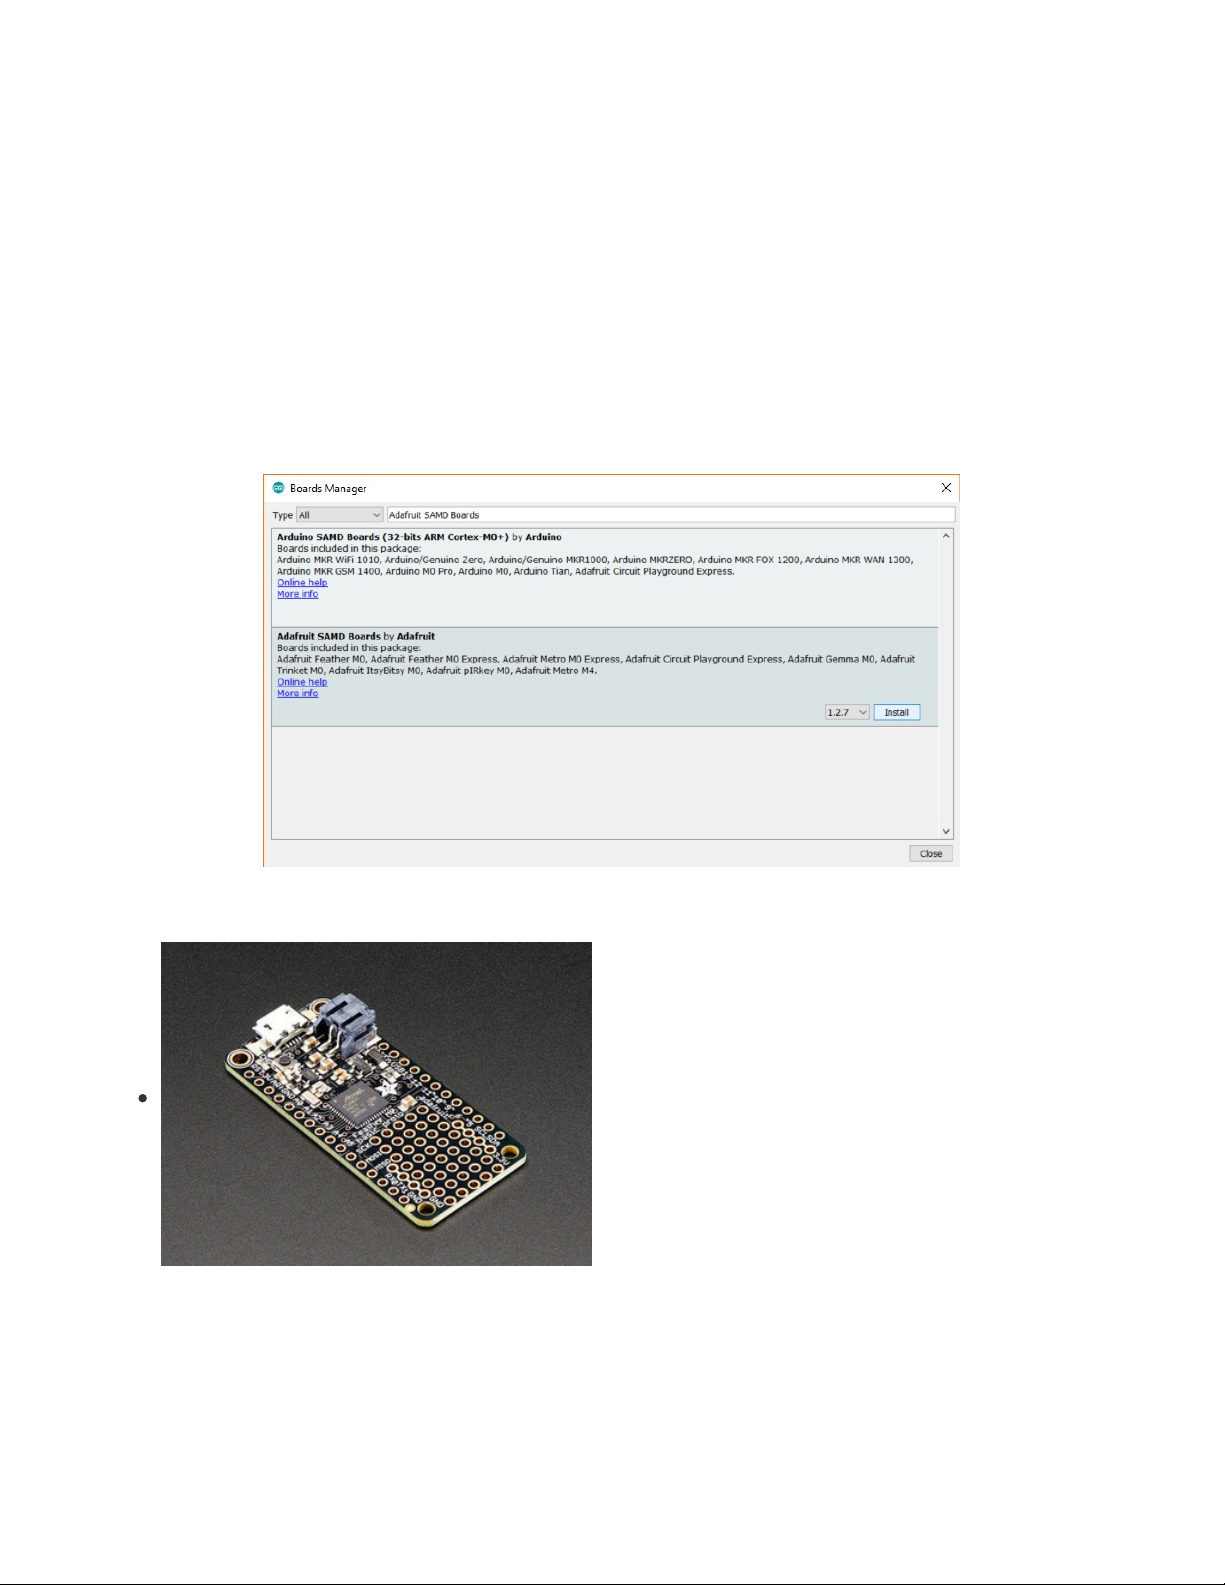
Click Tools > Board > Boards Manager... This will bring up the
Boards Manager
window.
From the
Board Definition Packages
table below, find your board, and copy the
Package Name
. Search
for this name, and click on the Install button that appears when you hover your mouse over the package's
box.
Once the installation process has completed, click Close to exit the
Board Manager
.
Board Definition Packages
Adafruit Feather M0 Basic Proto (https://adafru.it/s1d)
Package URL:
https://adafruit.github.io/arduino-board-
index/package_adafruit_index.json
Package Name:
Adafruit SAMD Boards
© Adafruit Industries https://learn.adafruit.com/installing-circuitpython-on-samd21-boards Page 7 of 25
Page 8
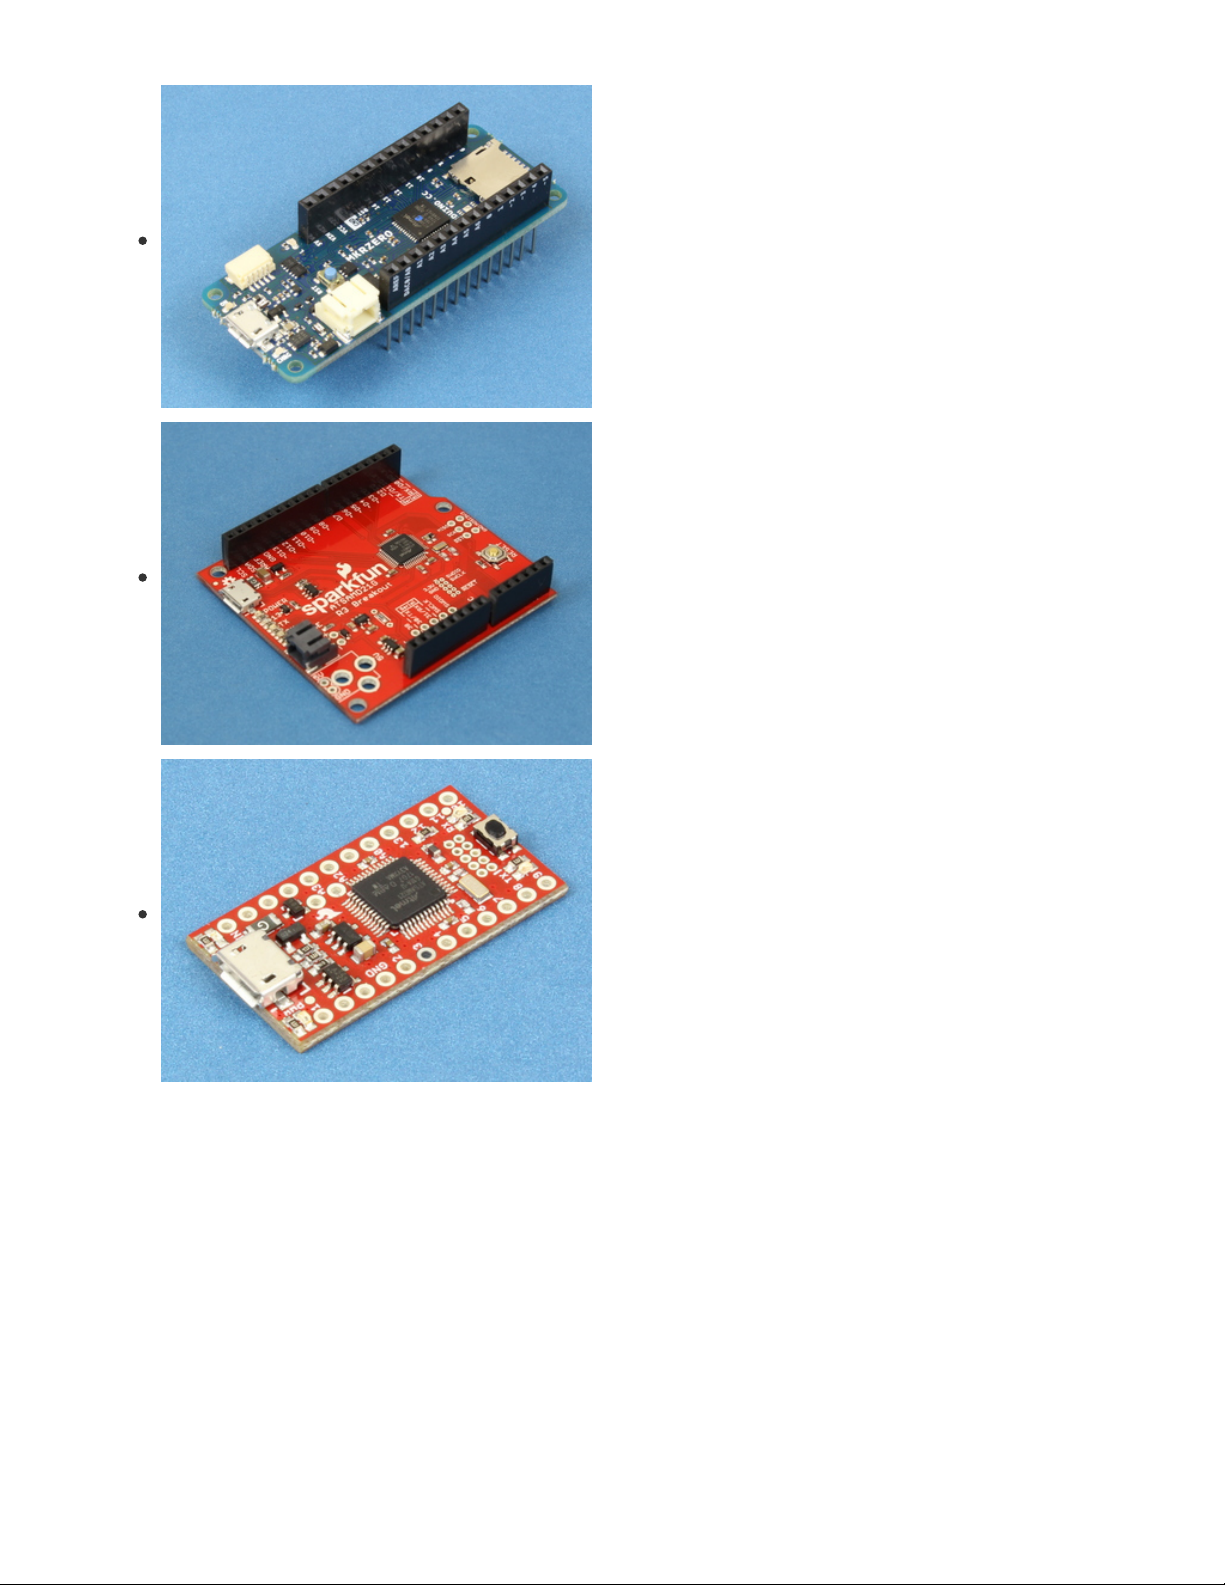
Arduino MKRZero (https://adafru.it/DiY)
Package Name:
Arduino SAMD Boards
SparkFun SAMD21 Dev Breakout (https://adafru.it/DJd)
Package URL:
Click for address (https://adafru.it/D3A)
Package Name:
SparkFun SAMD Boards
SparkFun SAMD21 Mini Breakout (https://adafru.it/DiZ)
Package URL:
Click for address (https://adafru.it/D3A)
Package Name:
SparkFun SAMD Boards
© Adafruit Industries https://learn.adafruit.com/installing-circuitpython-on-samd21-boards Page 8 of 25
Page 9

Installing the UF2 Bootloader
Originally developed by Microsoft, the USB Flashing Format (UF2) (https://adafru.it/vPE) is a way of
programming microcontrollers. With UF2, a microcontroller will enumerate as a mass storage device over
USB (i.e. a USB drive). You can then drag-and-drop code onto the drive, and UF2 will re-program the
microcontroller with your code. This process makes it easier to program microcontrollers, as you no longer
need a special programming device (like a JTAG programmer) or a special program (such as Arduino).
Adafruit has forked the UF2 code and added support for specific SAMD21 and SAMD51 boards, making it
even easier to load UF2 onto your board!
Windows 7 Drivers
If you're using Windows 7, you need to install a driver before continuing (not needed for Windows 10)
If you're using Windows 7, use the link below visit the Adafruit drivers page. You will not need to install
drivers on Mac, Linux or Windows 10.
https://adafru.it/BhH
Using .ino sketches to update your bootloader on a SAMD21 only works for UF2 bootloader releases
v3.9.0 and later. Don't use an earlier version: it will brick your board.
Download the UF2 Arduino Installer
Navigate to the Adafruit uf2-samdx1 GitHub repository (https://adafru.it/Dj0) and click on Releases.
Alternatively, you can just click on this link to go directly there:
https://adafru.it/D3C
Newer releases of the UF2 bootloader are found at the top of the page. Find the
.ino
file with your board's
name and with the newest version number. The file will have the following naming scheme (with [your
board's name] replaced by the name of your board and vx.x.x-adafruit.x replaced by the newest release
number):
update-bootloader-[your board's name]-vx.x.x-adafruit.x.ino
For example, if you wanted to download the UF2 installer for the Arduino MKRZero, you would look for a
filename like
update-bootloader-mkrzero-vx.x.x-adafruit.x.ino
. Click on that name to download the
.ino
file.
https://adafru.it/BhH
https://adafru.it/D3C
© Adafruit Industries https://learn.adafruit.com/installing-circuitpython-on-samd21-boards Page 9 of 25
Page 10

Note that in the screenshot, the newest file is v2.0.0-adafruit.7. The particular version number might be
different for you; just download whatever is newest!
Upload UF2 with Arduino
In Arduino, click on File > Open..., and locate your downloaded
.ino
file. Select it, and click Open. If you
get a pop-up window stating that the file "needs to be inside a sketch folder" with the same name,
click OK.
Do not use an update-bootloader .ino sketch if the sketch's version number is earlier than v3.9.0: it
will brick your board. (The board bootloader can be earlier than that; it's just the sketch that should be
newer.) We have tried to delete all the defective earlier ones, but you may find one somewhere.
Feel free to take a look at the code. Most of it should be a series of unreadable raw bytes in hexadecimal
format. This is the bootloader in bytecode! The rest of the program simply uploads this code to the correct
spot in memory on your microcontroller.
Make sure your board is connected to your computer. In Arduino, go to Tools > Board, and select your
board (I'll use MKRZero in this example). Go to Tools > Port, and select the serial port associated with your
board (e.g. COM3 on Windows or /dev/tty.usbmodemfd1441 on macOS).
© Adafruit Industries https://learn.adafruit.com/installing-circuitpython-on-samd21-boards Page 10 of 25
Page 11

Click the Upload button.
© Adafruit Industries https://learn.adafruit.com/installing-circuitpython-on-samd21-boards Page 11 of 25
Page 12

You should see a message at the bottom of the Arduino IDE that says
Done uploading
if your code has
been successfully compiled and flashed to your board.
Most Arduino-compatible boards have an onboard LED. If UF2 was flashed successfully, you should see
this LED slowly pulsing on and off.
With or without the LED, you should see a new drive appear on your computer. Open your file
explorer/finder and look at your list of available drives. The UF2 drive should be called [board name]BOOT
© Adafruit Industries https://learn.adafruit.com/installing-circuitpython-on-samd21-boards Page 12 of 25
Page 13

in all capital letters. Click on it, and you should see the files
CURRENT.UF2, INDEX.HTM
,
and
INFO_UF2.TXT
.
If you see this, then the UF2 bootloader was installed successfully. Hooray!
Learning More About UF2
If you would like to understand more about how UF2 works and the contents of the files on your UF2
drive, check out the UF2 Bootloader Details page on this tutorial (https://adafru.it/D3D).
© Adafruit Industries https://learn.adafruit.com/installing-circuitpython-on-samd21-boards Page 13 of 25
Page 14

Installing CircuitPython
Once you have UF2 installed on your board, you will need to download and install the latest version of
CircuitPython for your particular board. Note that the steps are the same for installing and updating
CircuitPython.
Caveats for CircuitPython on Non-Express Boards
On one hand, its pretty cool we can install CircuitPython on any SAMD21 processor. But there's a few
gotchas:
Boards that don't have SPI flash on them need to put the filesystem in flash, that means you only get
about 48 KB of filesystem space
That extra filesystem allocation means less CircuitPython firmware space
So some things like long-ints and audio playback, are not supported on these builds!
You will have plain digital IO, I2C, SPI, UART, analog inputs, basic DAC output, capacitive touch.
Download the Latest Version of CircuitPython
Navigate to the CircuitPython GitHub repository (https://adafru.it/tB7), and click on the Releases tab.
Alternatively, this link will take you there:
You only have to install CircuitPython ONCE, after that you are free to code all you like without going
through this process again until it's time to upgrade!
Up until March, 2019, CircuitPython releases were downloaded from the Adafruit CircuitPython GitHub
repository.
Starting April, 2019, Adafruit encourages developers to download CircuitPython from the CircuitPython.org
website (https://adafru.it/Em8). The site is arranged by board and it makes finding code easier. The board
must have a pull request in by a developer to add CircuitPython capability and have it accepted by the
CircuitPython team to be listed in the CircuitPython.org repository. Both Adafruit and non-Adafruit boards
are on that site.
https://adafru.it/Em8
https://adafru.it/Em8
© Adafruit Industries https://learn.adafruit.com/installing-circuitpython-on-samd21-boards Page 14 of 25
Page 15

For now, the releases will also be on GitHub under the Adafruit umbrella, but this may change as the
migration continues to CircuitPython.org.
https://adafru.it/tBa
Scroll down, and look for the latest release for your particular board. Specifically, you will want the
.uf2
file
for your board.
https://adafru.it/tBa
© Adafruit Industries https://learn.adafruit.com/installing-circuitpython-on-samd21-boards Page 15 of 25
Page 16

Note that the most recent releases are located at the top of the page. The file will have the following
naming scheme (with [your board's name] replaced by the name of your board and x.x.x replaced by the
newest release number):
adafruit-circuitpython-[your board's name]-x.x.x.uf2
For example, if you wanted to download the CircuitPython installation file for the Arduino MKRZero, you
look for the filename adafruit-circuitpython-arduino_mkrzero-x.x.x.uf2. Click on the name to download
the
.uf2
file.
Want to check out the bleeding edge? The latest automated buildes are in https://adafruit-circuit-
python.s3.amazonaws.com/index.html?prefix=bin
Plug in your board using a USB cable.
Start the UF2 Bootloader
If you just uploaded UF2 to your board, it should run the UF2 bootloader by default.
A bootloader is a program that runs on your microcontroller that waits to receive a new program.
Once it receives that program, it writes the new program to the microcontroller's memory. Upon reset,
the microcontroller will begin running the new program instead of the bootloader (unless you
specifically tell the microcontroller to run the bootloader instead).
If, at any point, you need to access the UF2 bootloader, you can tap the
RESET
button on your board
twice in quick succession.
Almost all microcontroller boards will have a Reset button. Note that it might be labeled
RESET
or
RST
. For
example, the MKR Zero has a Reset button located next to the battery connector.
© Adafruit Industries https://learn.adafruit.com/installing-circuitpython-on-samd21-boards Page 16 of 25
Page 17

With UF2, you need to tap this button twice. If it does not work on the first try, give it another shot! It might
take a few tries to get the rhythm correct.
If your board has an onboard LED, it should begin to fade on and off slowly. Additionally, you should see a
new drive appear on your computer with the name [your board's name]BOOT . For example, a MKR Zero will
appear as MKRZEROBOOT .
If you see the -BOOT drive, it means that you are in bootloader mode. We can now install or update
CircuitPython.
Locate the
.uf2
file that you downloaded and copy it to the -BOOT drive.
© Adafruit Industries https://learn.adafruit.com/installing-circuitpython-on-samd21-boards Page 17 of 25
Page 18

Wait a moment, and the -BOOT drive should disappear. Your board will reset, and a CIRCUITPY drive will
show up on your computer. If you see this, you know that you've installed CircuitPython correctly!
© Adafruit Industries https://learn.adafruit.com/installing-circuitpython-on-samd21-boards Page 18 of 25
Page 19

Test It!
Most CircuitPython boards have an LED built into the board, which makes testing very easy! Create a
blank document named code.py in the CIRCUITPY drive.
Open the file with your editor of choice (e.g. Notepad on Windows, TextEdit on macOS), and enter the
following code:
import board
import digitalio
import time
pin_name = board.L
led = digitalio.DigitalInOut(pin_name)
led.direction = digitalio.Direction.OUTPUT
while True:
led.value = True
time.sleep(0.1)
led.value = False
time.sleep(0.1)
Note! You might have to change board.L to another value. Find your board in the list below to see which
value you should use.
Adafruit Feather M0 Basic Proto (https://adafru.it/s1d): board.D13
Arduino MKR Zero (https://adafru.it/Dka): board.L
SparkFun SAMD21 Dev Breakout (https://adafru.it/DJd): board.LED
SparkFun SAMD21 Mini Breakout (https://adafru.it/DiZ): board.LED
Save the program. Your board should reset automatically, and the onboard LED should begin blinking
rapidly.
© Adafruit Industries https://learn.adafruit.com/installing-circuitpython-on-samd21-boards Page 19 of 25
Page 20

If you see the LED flashing, you know that CircuitPython is up and running on your board!
WARNING! Make sure you unmount the CIRCUITPY drive before resetting or unplugging your
CircuitPython-enabled board (especially on Windows). Some operating systems (like Windows) have
delayed writes to drives, which could corrupt the filesystem on the board. If this happens, you will
need to reinstall CircuitPython.
© Adafruit Industries https://learn.adafruit.com/installing-circuitpython-on-samd21-boards Page 20 of 25
Page 21

Learning CircuitPython
If you are ready to dive into CircuitPython, we recommend this guide to get started:
https://adafru.it/cpy-welcome
There are several other guides that are good references as you continue working and playing with
CircuitPython:
CircuitPython Essentials (https://adafru.it/cpy-essentials)
CircuitPython API Reference (https://adafru.it/Dkb)
CircuitPython 101: Functions (https://adafru.it/Czt)
Looking for some fun project ideas? Check out these tutorials for some inspiration:
Infrared Hand Gesture Robot Control Glove (https://adafru.it/Dkc)
Data Logging (https://adafru.it/Dkd)
Hacking Ikea Lamps with Circuit Playground Express (https://adafru.it/BXt)
CircuitPython-Powered 3-minute Nightlight (https://adafru.it/Dke)
Matrix Keypad (https://adafru.it/Dkf) (with CircuitPython)
https://adafru.it/cpy-welcome
© Adafruit Industries https://learn.adafruit.com/installing-circuitpython-on-samd21-boards Page 21 of 25
Page 22

Advanced: Creating Your Own Port
If you want to port CircuitPython to your own Microchip ATSAMD21 board, there are several steps you will
need to take.
This is for advanced users only! You will need access to a Linux or Unix-based operating system and
know your way around a command line. The details for building the projects are located in the
repositories and not covered here.
1. Create a UF2 Port
Before you can get CircuitPython onto your board, you will need to create a UF2 bootloader unique to
your board.
Clone the Adafruit uf2-samdx1 repository (https://adafru.it/Dj0). If you have already cloned the repository,
you will need to update your forked copy with the following commands. First, check to see if you have the
upstream repository added with:
git remote -v
If you do not see upstream locations, add the Adafruit repository:
git remote add upstream https://github.com/adafruit/uf2-samdx1.git
Update your repository with any new additions to the upstream repository:
git fetch upstream
git checkout master
git rebase upstream/master
Create a new folder in
boards/
with your particular board name. Create the following files in your new
folder:
board.mk
board_config.h
Use other board files as examples for how to fill out your files.
You will need to reference the schematic for your board to find which SAMD21 pin maps to the onboard
LED (or other important peripherals for UF2). Additionally, you will need to assign a unique and legitimate
USB VID and PID to your board for the UF2 bootloader drive.
Look at the
README
in the
uf2-samdx1
repository for instructions on how to build the UF2 files for your
board (including the Arduino
.ino
program that will automatically upload the bootloader).
2. Create a CircuitPython Port
Clone the Adafruit CircuitPython repository (https://adafru.it/tB7). If you have already cloned the repository,
you will need to update your forked copy with the following commands. First, check to see if you have the
upstream repository added with:
git remote -v
© Adafruit Industries https://learn.adafruit.com/installing-circuitpython-on-samd21-boards Page 22 of 25
Page 23

If you do not see upstream locations, add the Adafruit repository:
git remote add upstream https://github.com/adafruit/circuitpython.git
Update your repository with any new additions to the upstream repository:
git fetch upstream
git checkout master
git rebase upstream/master
You will then need to synchronize the submodules in the repository:
git submodule sync
git submodule update --init --recursive
Create a new folder in
ports/atmel-samd/boards
with your board name. Create the following files in your
new folder:
board.c
mpconfigboard.h
mpconfigboard.mk
pins.c
Refer to other board files in the
atmel-samd/boards
folder as examples for what should go in each of
those files. You will need to look at the schematic for your board to see which pins map to which headers
and peripherals.
Once again, you will need a unique and legitimate USB VID and PID for the CIRCUITPY drive (assigned in
mpconfigboard.mk
). The PID (and possibly the VID) should be different from the value used for UF2.
Add your board's name to the TRAVIS_BOARDS list in
.travis.yml
(found in the top level directory of the
repository). This will tell Travis CI to automatically build CircuitPython with support for your board.
To build CircuitPython for your board, follow the instructions in the Building
CircuitPython (https://adafru.it/Bfu) tutorial.
3. Test Your Board
Use the modules found in the Adafruit_CircuitPython_BoardTest (https://adafru.it/Dkg) repository to test
the various pins and features of your board. Note that you will need some hardware (e.g. LEDs, resistors,
EEPROM) for the tests. Refer to the README in the repository for more detailed instructions.
4. Create Pull Requests
Feel free to fork any of the repositories, make your changes, and submit a pull request. We recommend
reading Contribute to CircuitPython with Git and GitHub (https://adafru.it/Dkh) to get a better
understanding of how to contribute to the CircuitPython project. We would love to have your board port as
part of CircuitPython!
5. Update Mu (Optional)
The Mu editor (https://adafru.it/Be6) is quickly becoming a fan favorite for writing CircuitPython programs.
If you would like to have your board supported in Mu, you will need to fork the Mu repository, make a few
changes, and submit a pull request.
© Adafruit Industries https://learn.adafruit.com/installing-circuitpython-on-samd21-boards Page 23 of 25
Page 24

The documentation for building Mu can be found here:
https://mu.readthedocs.io/en/latest/setup.html (https://adafru.it/DJJ). However, I've outlined a brief
overview for modifying and building Mu below.
First, fork the Mu repository to your own GitHub account. Next, clone it on your computer:
git clone https://github.com/[YOUR GITHUB USERNAME]/mu
Install the necessary dependencies (these were tested on Ubuntu 16.04):
sudo apt install libffi6 libffi-dev libssl-dev
sudo pip3 install virtualenv
Create a virtual environment:
virtualenv -p /usr/bin/python3 --system-site-packages ~/mu-venv
Activate the virtual environment:
source ~/mu-venv/bin/activate
In the Mu repository directory, install necessary packages:
cd mu
pip install -r requirements.txt
pip install --editable .
Add the USB VID/PID of your board to
mu/modes/adafruit.py
.
Build and run:
make run
Check that you can communicate with the new boards from Mu's serial terminal. If so, commit your work
and submit a pull request!
© Adafruit Industries https://learn.adafruit.com/installing-circuitpython-on-samd21-boards Page 24 of 25
Page 25

© Adafruit Industries Last Updated: 2021-03-05 05:59:26 PM EST Page 25 of 25
 Loading...