

Page 1
Quickstart - Raspberry Pi RP2040 with BLE and CircuitPython
Created by Brent Rubell
Last updated on 2021-03-26 11:44:36 PM EDT
Page 2

2
3
3
7
7
7
9
9
9
11
11
12
12
13
15
16
16
18
18
18
18
20
23
27
28
Guide Contents
Guide Contents
Overview
Parts
Bluetooth Low Energy Basics
Bluetooth Terms
Making a Bluetooth Connection
Assembly
Adafruit Feather RP2040 Wiring
Raspberry Pi Pico RP2040 Wiring
Upgrade RP2040 AirLift Firmware
Upload Serial Passthrough Code
Download NINA Firmware
Flash AirLift using Web Serial ESPTool
Enable Chrome's Web Serial API
Flash AirLift using esptool.py
Burning nina-fw with esptool
Verifying the Upgraded Firmware Version
Code Usage
Install CircuitPython Libraries
Install Adafruit Bluefruit LE Connect App
Code Setup
Code Usage
NeoPixel Color
Adapting Existing CircuitPython BLE Code for AirLift BLE
BLE Technical Details
© Adafruit Industries https://learn.adafruit.com/quickstart-raspberry-pi-rp2040-with-ble-and-circuitpython Page 2 of 29
Page 3

Overview
Add Bluetooth Low Energy (BLE) connectivity to your Raspberry Pi RP2040 project by adding an Adafruit
AirLift ESP32 co-processor. The AirLift's ESP32 module can be placed into either a WiFi mode (we've
published a guide about using the AirLift's WiFi mode with Pico here (https://adafru.it/RlC)) or BLE mode,
giving you the option of adding two different methods of wireless connectivity to your RP2040 project.
This guide will cover getting started using BLE to connect an RP2040 board with the Bluefruit LE Connect
App along with examples for a UART echo server and wirelessly changing the color of a NeoPixel RGB
LED.
A few notes before we begin:
You can not use the WiFi and BLE mode on the Adafruit AirLift simultaneously , so select your
transport
wisely
(https://adafru.it/Cio).
CircuitPython's AirLift support only provides BLE peripheral support , BLE central support is under
development. This means you can not connect the RP2040 to BLE devices such as heart rate
monitors or thermometers, but you can make the RP2040 act as a BLE peripheral.
Parts
© Adafruit Industries https://learn.adafruit.com/quickstart-raspberry-pi-rp2040-with-ble-and-circuitpython Page 3 of 29
Page 4

Adafruit Feather RP2040
A new chip means a new Feather, and the Raspberry Pi RP2040 is no exception. When we saw this chip
we thought "this chip is going to be awesome when we give it the Feather...
Out of Stock
Out of
Stock
© Adafruit Industries https://learn.adafruit.com/quickstart-raspberry-pi-rp2040-with-ble-and-circuitpython Page 4 of 29
Page 5
Raspberry Pi Pico RP2040
The Raspberry Pi foundation changed single-board computing when they released the Raspberry Pi
computer, now they're ready to...
Out of Stock
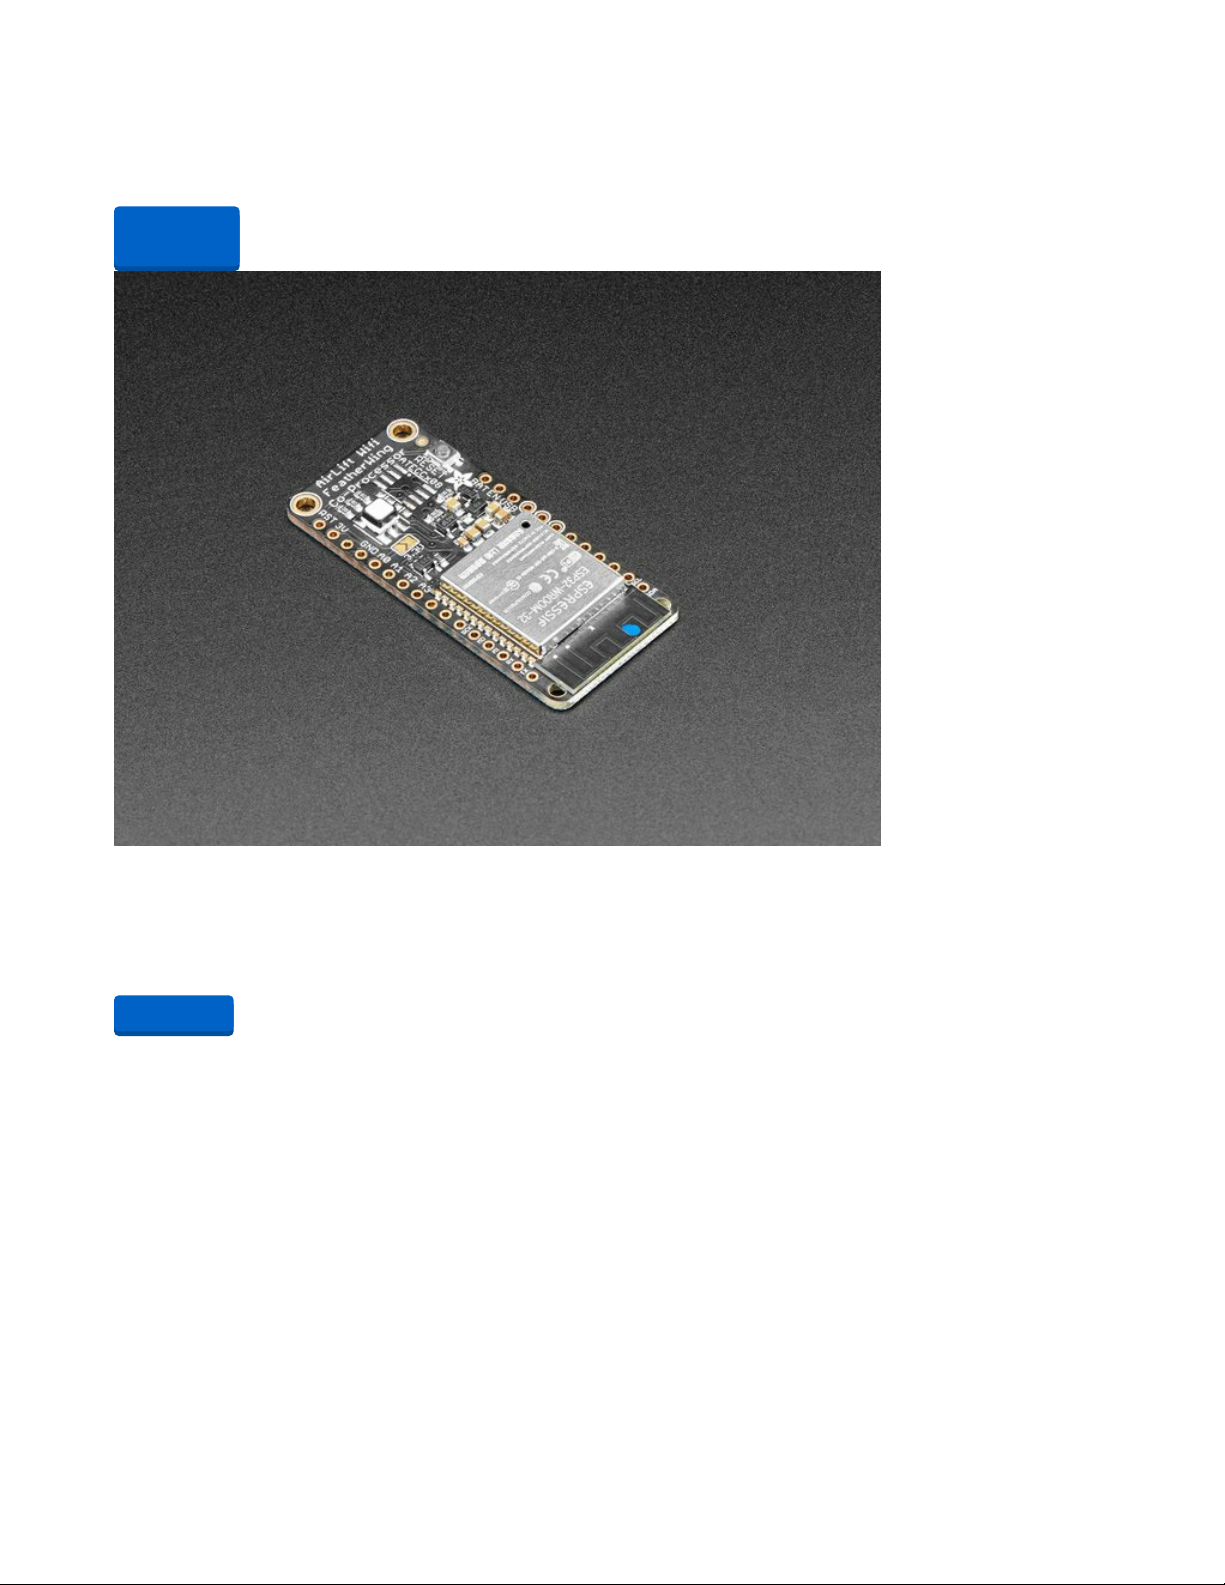
Adafruit AirLift FeatherWing – ESP32 WiFi Co-Processor
Give your Feather project a lift with the Adafruit AirLift FeatherWing - a FeatherWing that lets you use the
powerful ESP32 as a WiFi co-processor. You probably have your...
$12.95
In Stock
Out of
Stock
Add to Cart
© Adafruit Industries https://learn.adafruit.com/quickstart-raspberry-pi-rp2040-with-ble-and-circuitpython Page 5 of 29
Page 6
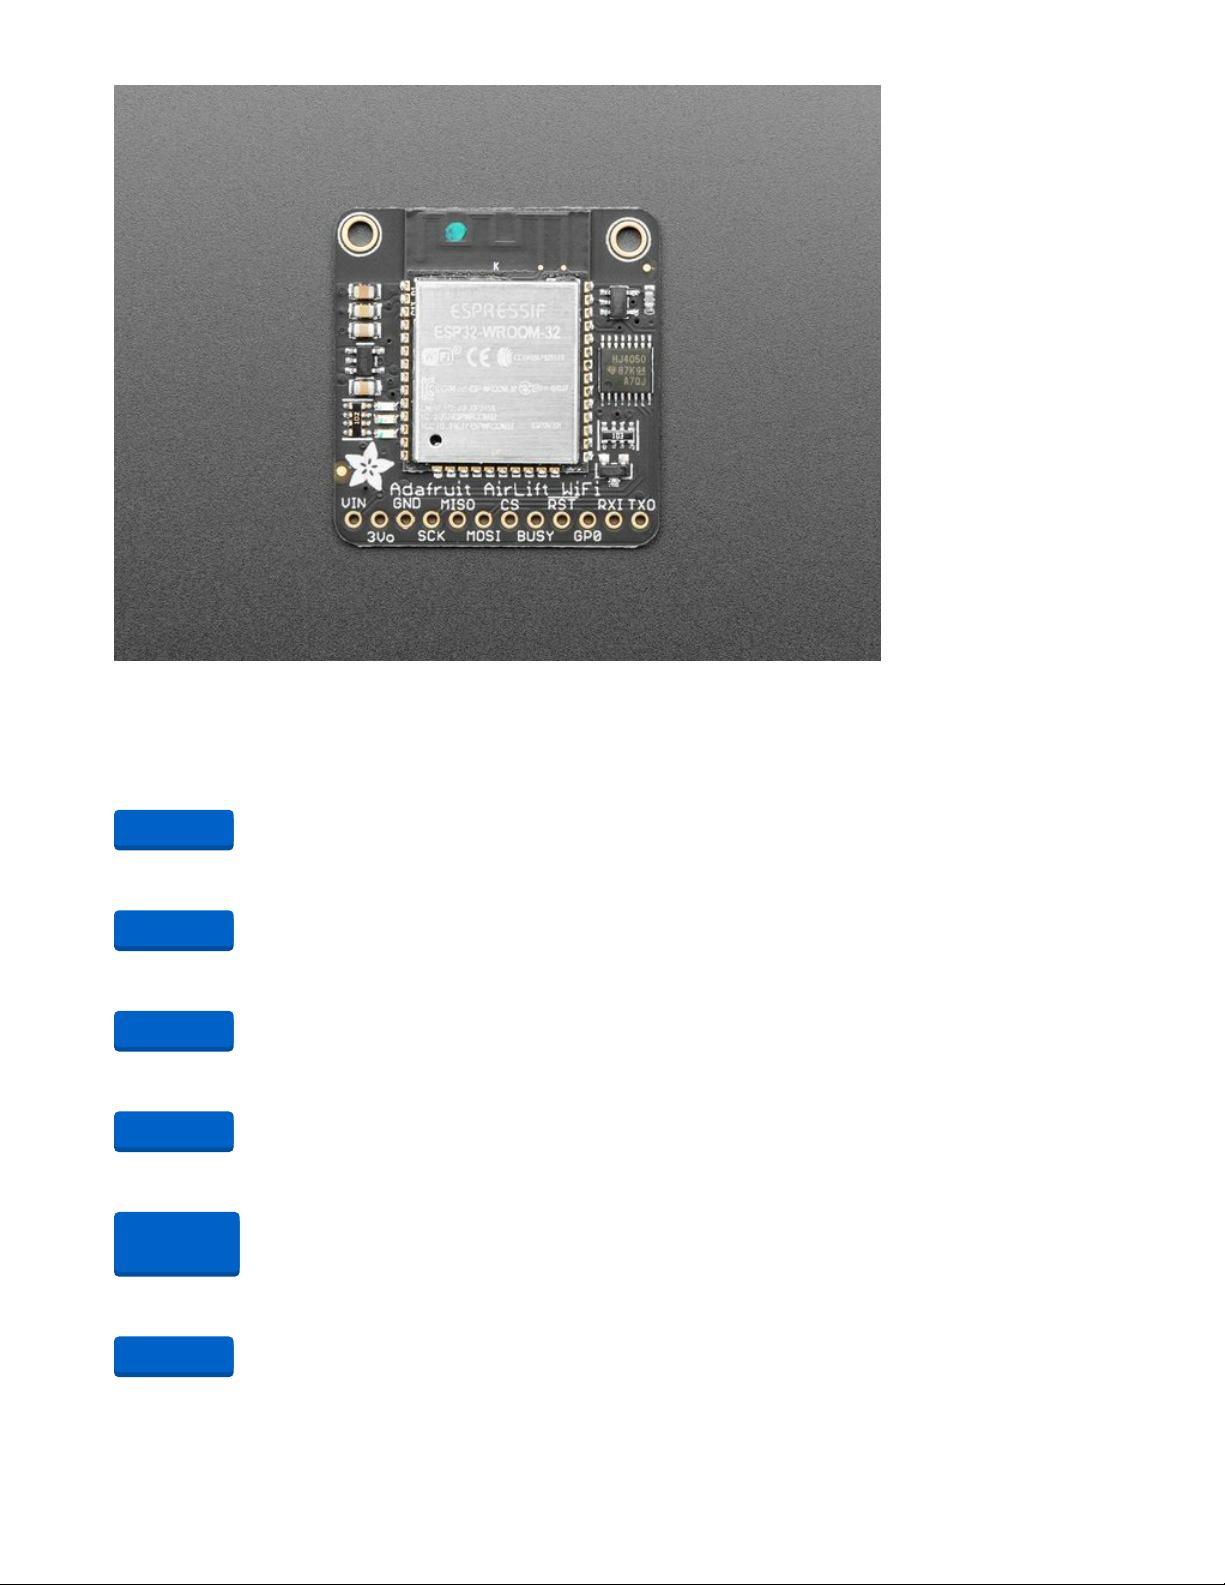
Adafruit AirLift – ESP32 WiFi Co-Processor Breakout Board
Give your plain ol' microcontroller project a lift with the Adafruit AirLift - a breakout board that lets you use
the powerful ESP32 as a WiFi co-processor. You probably...
$9.95
In Stock
1 x FeatherWing Doubler
FeatherWing Doubler - Prototyping Add-on For All Feather Boards
1 x USB-C Cable
USB-C Cable for RP2040 Feather
1 x USB Cable
USB cable - USB A to Micro-B - 3 foot long
1 x Breadboard
Full sized breadboard
1 x Breadboarding Wires
Breadboarding wire bundle
Add to Cart
Add to Cart
Add to Cart
Add to Cart
Out of
Stock
Add to Cart
© Adafruit Industries https://learn.adafruit.com/quickstart-raspberry-pi-rp2040-with-ble-and-circuitpython Page 6 of 29
Page 7
Bluetooth Low Energy Basics
The nRF52840 uses Bluetooth Low Energy, or BLE. BLE is a wireless communication protocol used by
many devices, including mobile devices. You'll be able to communicate with your nRF52840 board using
your mobile phone!
There's a few terms and concepts commonly used in BLE with which you may want to familiarise yourself.
This will help you understand what your code is doing when you're using CircuitPython and BLE.
The major concepts can be broken down into two categories: connection set up and communication. The
first deals with setting up connections between devices, such as between your mobile phone and the
nRF52840 board. The second deals with communication between the devices once they are connected.
Bluetooth Terms
Central - The host computer. This is often a mobile device such as a phone or tablet, or it could be a
desktop or laptop.
Peripheral - The connected device. Examples of peripherals are: heart rate monitor, smart watch, or
fitness tracker. The CircuitPython code we have so far is designed to make the Adafruit nRF52840
devices work as peripherals.
Advertising - Information sent by the peripheral during connection set up. When a device advertises,
it is transmitting the name of the device and describing its capabilities. The central looks for an
advertising peripheral to connect to, and uses that information to determine what the peripheral is
capable of.
Service - A function the peripheral provides. The peripheral advertises its services. A really common
service that we use is the UART service, which acts like a hardware UART and is a way of
bidirectionally sending information to and from devices.
Packet - Data transmitted by a device. BLE devices and host computers transmit and receive data in
small bursts called packets.
Making a Bluetooth Connection
To use these terms in the context of connecting to your Adafruit nRF52840:
You run CircuitPython code that makes your board act as a peripheral by advertising its name and
the services it's capable of.
You start up Adafruit's Bluefruit LE Connect app on an Android or iOS device in central mode, that
device becomes the central, and begins listening for the peripheral.
You set up the connection between the nRF52840 peripheral and the Bluefruit LE Connect app, and
the app discovers the details about the services that the peripheral is capable of.
Once this connection is made, you can use CircuitPython code to read packets sent from the
Bluefruit LE Connect app to your nRF52840 board. For example, you can receive data describing
screen button presses or RGB color values.
© Adafruit Industries https://learn.adafruit.com/quickstart-raspberry-pi-rp2040-with-ble-and-circuitpython Page 7 of 29
Page 8

Now that you have a general idea of basic BLE terms and concepts, it's time to install the Bluefruit LE
Connect application, and run some CircuitPython demos!
© Adafruit Industries https://learn.adafruit.com/quickstart-raspberry-pi-rp2040-with-ble-and-circuitpython Page 8 of 29
Page 9
Assembly
Adafruit sells Airlift hardware in multiple (https://adafru.it/JDc) form (https://adafru.it/EDW)
factors (https://adafru.it/RlD) in order to be compatible with many microcontroller boards. While each
microcontroller board and airlift hardware combination has its own wiring scheme, we suggest either
using the wiring below or referencing the AirLift product guide.
Adafruit Feather RP2040 Wiring
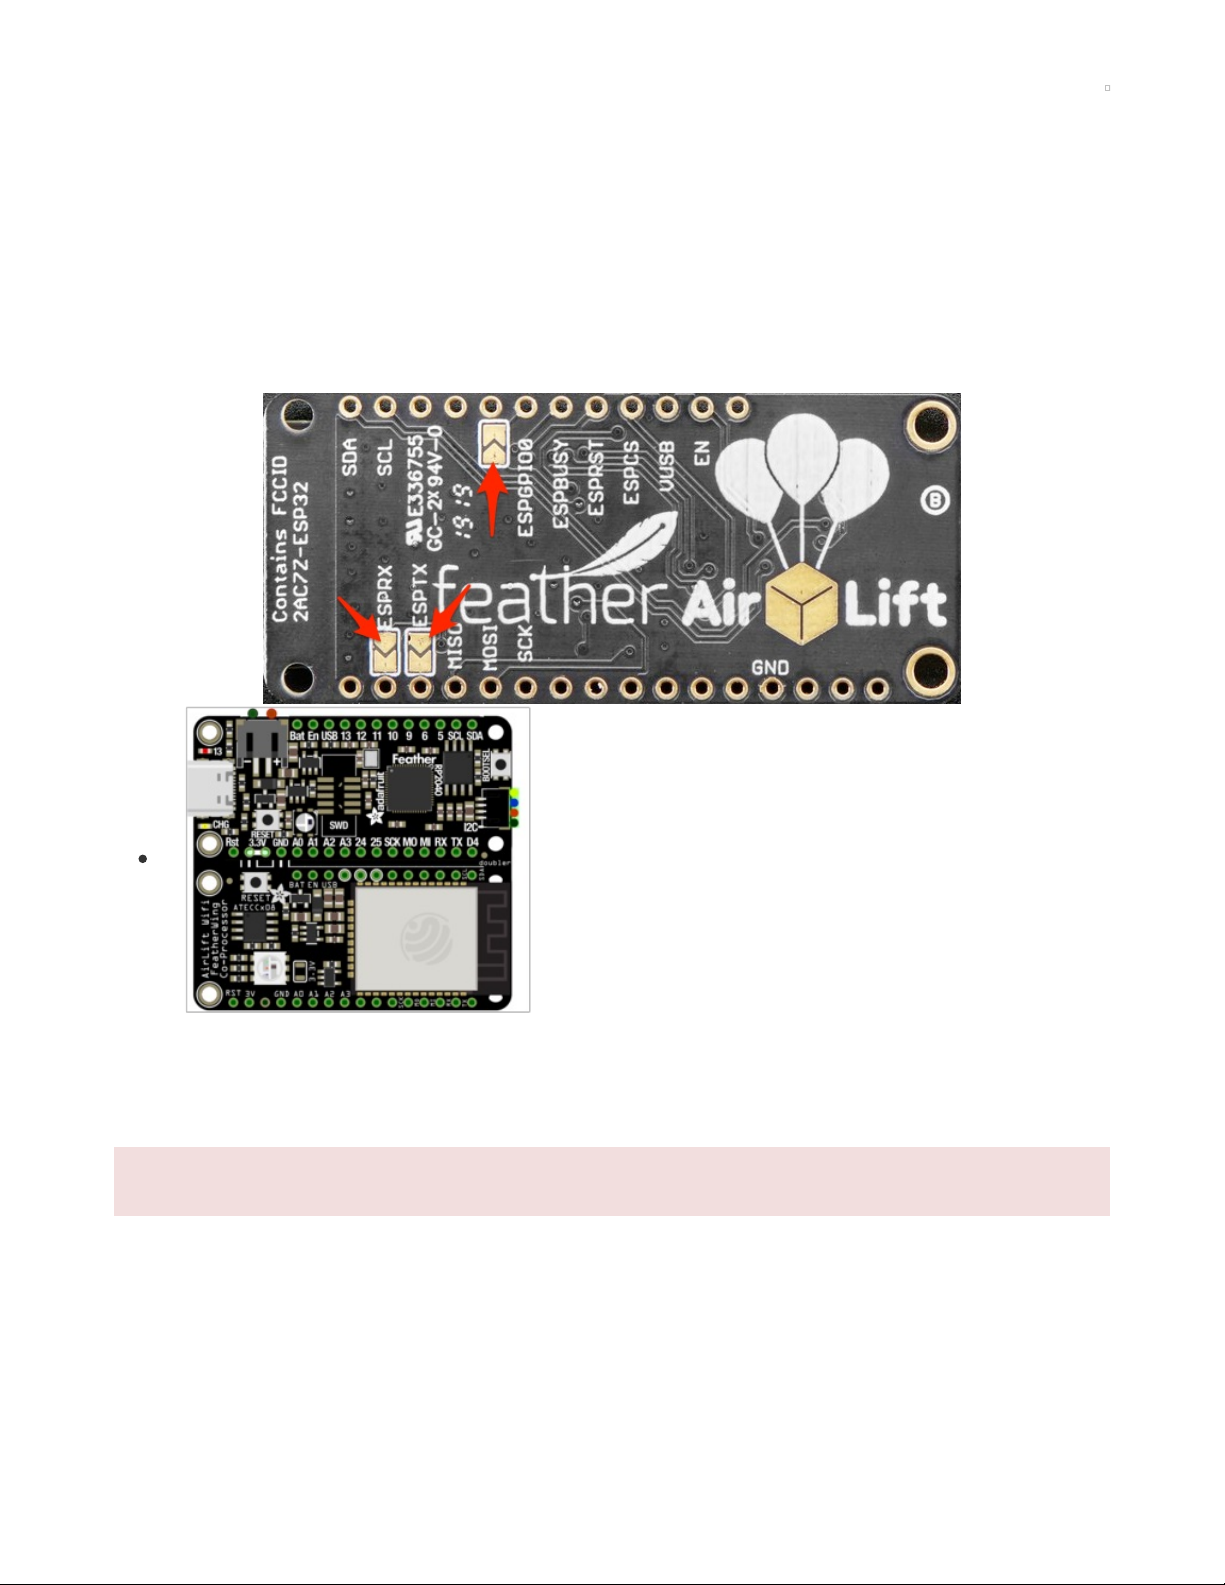
To use the AirLift FeatherWing with BLE, you will need to solder the three jumpers closed on the bottom
of the AirLift FeatherWing:
After soldering the jumpers closed, we suggest using the
FeatherWing Doubler (https://adafru.it/kBi) to connect a
Feather RP2040 and an AirLift FeatherWing side-by-side.
Raspberry Pi Pico RP2040 Wiring
If you're using a Raspberry Pi Pico RP2040, make the following connections between the Pico RP2040
and an Adafruit AirLift breakout.
You MUST use the Pico's VSYS pin for powering the AirLift Breakout.
© Adafruit Industries https://learn.adafruit.com/quickstart-raspberry-pi-rp2040-with-ble-and-circuitpython Page 9 of 29
Page 10

Pico VSYS to AirLift Vin
Pico GND to AirLift GND
Pico GP13 (SPI1 CSn) to AirLift CS
Pico GP14 to AirLift BUSY
Pico GP16 to AirLift !RST
Pico GP9 to AirLift GPIO0
Pico GP0 to AirLift RXI
Pico GP1 to AirLift TX0
For more information about the UART peripheral and pinouts
of the Pico, check out this guide (https://adafru.it/Qsd).
© Adafruit Industries https://learn.adafruit.com/quickstart-raspberry-pi-rp2040-with-ble-and-circuitpython Page 10 of 29
Page 11

Upgrade RP2040 AirLift Firmware
Upload Serial Passthrough Code
If you have already installed CircuitPython, back up any code and files you have on your CIRCUITPY
drive. It will be overwritten by the code you're going to upload to your board. You should not end up
losing any files on the QSPI flash, but it's a good idea to back them up anyways.
Download the UF2 for your board to your Desktop:
https://adafru.it/Rod
https://adafru.it/Roe
To enter bootloader mode, start with your RP2040 board
unplugged from USB.
Press and hold the BOOTSEL button (highlighted in red in
the image of the Feather RP2040, but all RP2040 boards
should include this button), continue to hold it while plugging
it into USB, and wait for the RPI-RP2 drive to appear before
releasing the button.
You will see a new disk drive appear called RPI-RP2. The
board is now in bootloader mode.
Find the UF2 file you downloaded. Drag that file to the RPI-RP2 drive on your computer in your operating
system file manager/finder.
https://adafru.it/Rod
https://adafru.it/Roe
© Adafruit Industries https://learn.adafruit.com/quickstart-raspberry-pi-rp2040-with-ble-and-circuitpython Page 11 of 29
Page 12

The board's LED should flash, RPI-RPI2 will disappear. Your board should re-enumerate USB and appear
as a COM or Serial port on your computer. Make a note of the serial port by checking the Device
Manager (Windows) or typing ls /dev/cu* or /dev/tty* (Mac or Linux) in a terminal.
Download NINA Firmware
Click the link below to download the latest version of the NINA firmware. Unzip it and save the .bin file to
your desktop.
To support BLE on the ESP32 AirLift, you'll need NINA_W102-1.7.1.bin or later.
https://adafru.it/G3D
Next, you'll need to flash the firmware to your ESP32 AirLift module. If you're using the Google Chrome
browser, you may follow the instructions below for programming using our web-based ESPTool.
Otherwise, scroll down and follow the instructions for flashing using the Python esptool.py program.
Flash AirLift using Web Serial ESPTool
If you have a computer with the Google Chrome browser, we've created the WebSerial ESPTool as an
option for programming ESP32 boards.
Safari and Firefox, etc are
not
supported because we need Web Serial and only Chrome is supporting it
to the level needed. If you're using an unsupported browser , you'll need to upgrade using the Python
esptool.py program on your computer (Scroll down to
Upgrade with esptool.py,
)
https://adafru.it/G3D
© Adafruit Industries https://learn.adafruit.com/quickstart-raspberry-pi-rp2040-with-ble-and-circuitpython Page 12 of 29
Page 13

Enable Chrome's Web Serial API
At the time of this tutorial, you'll need to enable the Serial API,
which is really easy.
Visit chrome://flags from within Chrome. Find and enable
the Experimental Web Platform features
Restart Chrome
Next, navigate to https://adafruit.github.io/Adafruit_WebSerial_ESPTool (https://adafru.it/PMB). In the topright corner of your browser, select 115200 as the baud rate and click the Connect button.
You will get a pop-up asking you to select the Pico's COM or Serial port. You may want to remove all other
USB devices so only the ESP32-S2 board is attached, that way there's no confusion over multiple ports!
Click Connect.
© Adafruit Industries https://learn.adafruit.com/quickstart-raspberry-pi-rp2040-with-ble-and-circuitpython Page 13 of 29
Page 14

It may timeout for a bit until it succeeds. On success, you will
see that it is Connected and will print out a unique MAC
address identifying the board.
Once you have successfully connected, a command toolbar
will appear.
Verify that the offset is 0x0 and choose the nina-fw .bin file
you downloaded above.
Click the program button to flash the firmware to your ESP32.
© Adafruit Industries https://learn.adafruit.com/quickstart-raspberry-pi-rp2040-with-ble-and-circuitpython Page 14 of 29
Page 15

ESPTool will take a few minutes to write firmware to your
device. After it's complete, the progress bar will disappear
and the console will print
"To run the new firmware,..."
Press the Reset button (or, on the RP2040 Pico, unplug your
device from USB power) to get out of the ROM bootloader.
Flash AirLift using esptool.py
Esptool is an application that can communicate with the ROM bootloader (https://adafru.it/LKe) in Espressif
chips.
To install esptool, run the following in your terminal :
pip3 install esptool
This guide assumes you have Python3 installed. If you have not installed it, navigate to the Python
downloads page (https://www.python.org/downloads) and install the latest release.
© Adafruit Industries https://learn.adafruit.com/quickstart-raspberry-pi-rp2040-with-ble-and-circuitpython Page 15 of 29
Page 16

Burning nina-fw with esptool
Click the link below to download the latest nina-fw .bin file. Unzip it and save the .bin file to your desktop
https://adafru.it/G3D
If you're using macOS or Linux - run the following command, replacing /dev/ttyACM0 with the serial port
of your board and NINA_W102-1.6.0 with the binary file you're flashing to the ESP32.
esptool.py --port /dev/ttyACM0 --before no_reset --baud 115200 write_flash 0 NINA_W102-1.6.0.bin
If you're using Windows - run the following command, replacing COM7 with the serial port of your board
and NINA_W102-1.6.0 with the binary file you're flashing to the ESP32
esptool.py --port COM7 --before no_reset --baud 115200 write_flash 0 NINA_W102-1.6.0.bin
The command should detect the ESP32 and will take a minute or two to upload the firmware.
If ESPTool doesn't detect the ESP32
, make sure you've uploaded the correct .UF2 file to the bootloader
and are using the correct serial port.
Once the firmware is fully uploaded, press the Reset button (or, on the RP2040 Pico, unplug your device
from USB power) to get out of the ROM bootloader.
Verifying the Upgraded Firmware Version
To verify everything is working correctly, we'll load up some CircuitPython code.
https://adafru.it/G3D
© Adafruit Industries https://learn.adafruit.com/quickstart-raspberry-pi-rp2040-with-ble-and-circuitpython Page 16 of 29
Page 17

If you were previously using your ESP32 project with CircuitPython , you'll need to first reinstall
CircuitPython firmware for your board. The QSPI flash should have retained its contents. If you don't see
anything on the CIRCUITPY volume, copy files from the backup you made earlier to CIRCUITPY .
To verify the new ESP32 WiFi firmware version is correct, follow the Connect to WiFi step in this
guide (https://adafru.it/Eao) and come back here when you've successfully run the code. The REPL output
should display the firmware version you flashed.
© Adafruit Industries https://learn.adafruit.com/quickstart-raspberry-pi-rp2040-with-ble-and-circuitpython Page 17 of 29
Page 18

Code Usage
Before continuing, ensure your AirLift's firmware is version 1.7.1 or higher for BLE to work.
Install CircuitPython Libraries
Make sure you are running the latest version of Adafruit CircuitPython (https://adafru.it/Amd) for your
board; you'll need 6.0.0 or later.
Next, you'll need to install the necessary libraries to use the hardware and BLE. Carefully follow the steps
to find and install these libraries from Adafruit's CircuitPython library bundle (https://adafru.it/uap). Our
CircuitPython starter guide has a great page on how to use the library bundle (https://adafru.it/ABU).
Install these libraries from the bundle:
adafruit_airlift
adafruit_ble
adafruit_esp32spi
adafruit_bus_device
adafruit_bluefruit_connect
adafruit_requests.mpy
neopixel.mpy
Before continuing make sure your board's lib folder or root filesystem has the files and folders listed
above copied over.
Install Adafruit Bluefruit LE Connect App
The Adafruit Bluefruit LE Connect iOS and Android apps allow you to connect to BLE peripherals. Follow
the instructions in the Bluefruit LE Connect Guide (https://adafru.it/Eg5) to download and install the app
on your phone or tablet.
Code Setup
Copy the code below to the code.py file on your CIRCUITPY drive. If you're using an AirLift Breakout, you
will need to modify the code by commenting out the default pin settings and uncommenting the code for
the AirLift breakout.
© Adafruit Industries https://learn.adafruit.com/quickstart-raspberry-pi-rp2040-with-ble-and-circuitpython Page 18 of 29
Page 19

import board
from adafruit_ble import BLERadio
from adafruit_ble.advertising.standard import ProvideServicesAdvertisement
from adafruit_ble.services.nordic import UARTService
from adafruit_airlift.esp32 import ESP32
# If you are using an AirLift FeatherWing or AirLift Bitsy Add-On,
# use the pin settings below:
esp32 = ESP32(
reset=board.D12,
gpio0=board.D10,
busy=board.D11,
chip_select=board.D13,
tx=board.TX,
rx=board.RX,
)
# If you are using an AirLift Breakout, comment out the DEFAULT lines
# above and uncomment the lines below:
# esp32 = ESP32(
# reset=board.GP16,
# gpio0=board.GP9,
# busy=board.GP14,
# chip_select=board.GP13,
# tx=board.GP0,
# rx=board.GP1,
# )
adapter = esp32.start_bluetooth()
ble = BLERadio(adapter)
uart = UARTService()
advertisement = ProvideServicesAdvertisement(uart)
while True:
ble.start_advertising(advertisement)
print("waiting to connect")
while not ble.connected:
pass
print("connected: trying to read input")
while ble.connected:
# Returns b'' if nothing was read.
one_byte = uart.read(1)
if one_byte:
print(one_byte)
uart.write(one_byte)
Your CIRCUITPY file-system should look like the following:
© Adafruit Industries https://learn.adafruit.com/quickstart-raspberry-pi-rp2040-with-ble-and-circuitpython Page 19 of 29
Page 20

Code Usage
Start the Bluefruit LE Connect App on your phone or tablet. You should see a CIRCUITPY device available
to connect to. Tap the Connect button.
You'll then see a list of Bluefruit Connect functions ("modules"). Choose the UART module.
© Adafruit Industries https://learn.adafruit.com/quickstart-raspberry-pi-rp2040-with-ble-and-circuitpython Page 20 of 29
Page 21

On the UART module page, you can type a string and press Send. You'll see that string entered, and then
see it echoed back (echoing is in gray).
© Adafruit Industries https://learn.adafruit.com/quickstart-raspberry-pi-rp2040-with-ble-and-circuitpython Page 21 of 29
Page 22

That's it!
© Adafruit Industries https://learn.adafruit.com/quickstart-raspberry-pi-rp2040-with-ble-and-circuitpython Page 22 of 29
Page 23

NeoPixel Color
This page is designed for use with the Adafruit Feather RP2040. The Raspberry Pi Pico RP2040
does not include an onboard NeoPixel LED.
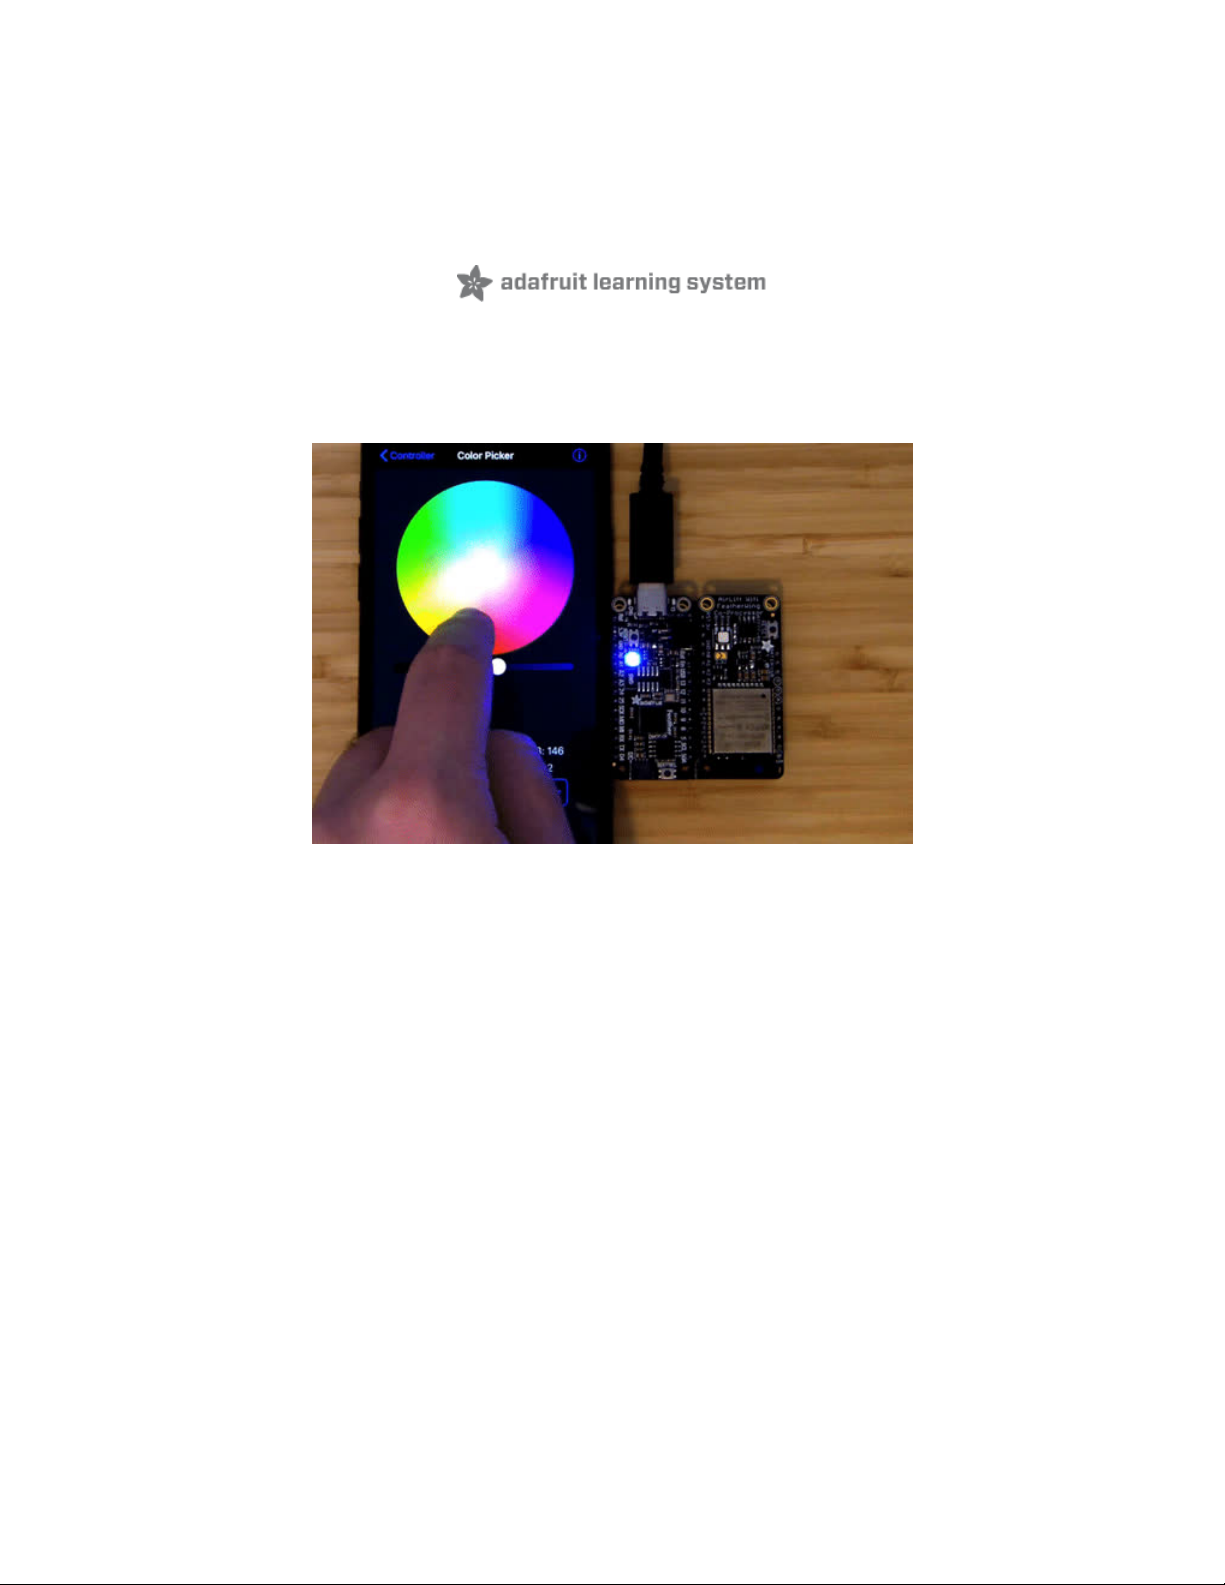
The Bluefruit LE Connect app has a Color Picker that allows you to easily set the color of NeoPixels
connected to your Adafruit Feather RP2040. In this example, we'll change the color of the onboard
NeoPIxel using CircuitPython and the Bluefruit LE Connect app.
Save the following as code.py on your CIRCUITPY drive and then connect to the board using the
Bluefruit LE Connect app.
© Adafruit Industries https://learn.adafruit.com/quickstart-raspberry-pi-rp2040-with-ble-and-circuitpython Page 23 of 29
Page 24

import board
import neopixel
from adafruit_bluefruit_connect.packet import Packet
from adafruit_bluefruit_connect.color_packet import ColorPacket
from adafruit_ble import BLERadio
from adafruit_ble.advertising.standard import ProvideServicesAdvertisement
from adafruit_ble.services.nordic import UARTService
from adafruit_airlift.esp32 import ESP32
# If you are using an AirLift FeatherWing or AirLift Bitsy Add-On,
# use the pin settings below.
# If you are using an AirLift Breakout, check that these
# choices match the wiring to your microcontroller board,
# or change them as appropriate.
esp32 = ESP32(
reset=board.D12,
gpio0=board.D10,
busy=board.D11,
chip_select=board.D13,
tx=board.TX,
rx=board.RX,
)
adapter = esp32.start_bluetooth()
ble = BLERadio(adapter)
uart_service = UARTService()
advertisement = ProvideServicesAdvertisement(uart_service)
pixels = neopixel.NeoPixel(board.NEOPIXEL, 10, brightness=0.1)
while True:
# Advertise when not connected.
ble.start_advertising(advertisement)
while not ble.connected:
pass
while ble.connected:
if uart_service.in_waiting:
packet = Packet.from_stream(uart_service)
if isinstance(packet, ColorPacket):
print(packet.color)
pixels.fill(packet.color)
Then, connect to your board using the Bluefruit LE Connect application. From the controller page,
navigate to the Color Picker page.
© Adafruit Industries https://learn.adafruit.com/quickstart-raspberry-pi-rp2040-with-ble-and-circuitpython Page 24 of 29
Page 25

Connect to your board using the Bluefruit LE Connect
application.
From the Device page, navigate to the Controller page.
On the controller page, tap the Color Picker.
Selecting a color and tapping the "Send Selected Color" button should send the red, green, and blue
values from the Bluefruit Connect App to the RP2040.
© Adafruit Industries https://learn.adafruit.com/quickstart-raspberry-pi-rp2040-with-ble-and-circuitpython Page 25 of 29
Page 26

© Adafruit Industries https://learn.adafruit.com/quickstart-raspberry-pi-rp2040-with-ble-and-circuitpython Page 26 of 29
Page 27

Adapting Existing CircuitPython BLE Code for AirLift
BLE
CircuitPython's AirLift support only provides BLE peripheral support. This means you can not use
CircuitPython BLE code to BLE devices such as thermometers to the RP2040.
We have written lots of examples (https://adafru.it/RlE) and projects for using CircuitPython's BLE
peripheral mode. However, these examples are designed to work with CircuitPython hardware that
includes a built-in BLE module such as the Nordic NRF52840.
Adapting code that uses the built-in BLE module to use the AirLift ESP32's BLE mode is simple. Add the
following line to your code to import the adafruit_airlift module:
from adafruit_airlift.esp32 import ESP32
Code that utilizes native adafruit_ble will have the following line which initializes an onboard BLE module:
ble = BLERadio()
Replace this line with the following lines below to initialize the AirLift and set up the BLERadio module for
use with the AirLift. Make sure to match the esp32 's pinout with your wiring.
esp32 = ESP32(
reset=board.D12,
gpio0=board.D10,
busy=board.D11,
chip_select=board.D13,
tx=board.TX,
rx=board.RX,
)
adapter = esp32.start_bluetooth()
ble = BLERadio(adapter)
That's it - you do not need to modify the rest of the code, it should work as-is! Visit the Adafruit Learning
System (https://adafru.it/dIu) for more guides on using Bluetooth Low Energy with CircuitPython.
© Adafruit Industries https://learn.adafruit.com/quickstart-raspberry-pi-rp2040-with-ble-and-circuitpython Page 27 of 29
Page 28

BLE Technical Details
BLE Technical Details (https://adafru.it/DN8)
© Adafruit Industries https://learn.adafruit.com/quickstart-raspberry-pi-rp2040-with-ble-and-circuitpython Page 28 of 29
Page 29

© Adafruit Industries Last Updated: 2021-03-26 11:44:36 PM EDT Page 29 of 29
 Loading...