

Page 1
Re-MakeCode the Classics: Arkanoid
Created by John Park
Last updated on 2021-02-09 12:10:51 PM EST
Page 2

2
3
3
10
10
10
11
11
13
14
15
15
17
17
18
18
20
21
21
21
22
23
23
23
23
25
26
26
27
28
28
29
Guide Contents
Guide Contents
Overview
Parts
Re-Make Arkanoid
MakeCode Arcade
Arkanoid
Load the Code
On Start
Background and Tile Map/Tiles
Make a Splash
Music, Maestro
Brick Work
Paddle Setup
Lives and Variables
Press A
Ball Update
Ball Hits Paddle
Ball Misses Paddle
Paddle Misses Ball
Ball Hits Bricks
Ball Hits Bricks
Update the PyBadge/PyGamer Bootloader
PyBadge/PyBadge LC Bootloader
PyGamer Bootloader
Hardware Checks
Load a MakeCode Game on PyGamer/PyBadge
Board Definition
Change Board screen
Bootloader Mode
Drag and Drop
Play!
Troubleshooting MakeCode Arcade
© Adafruit Industries https://learn.adafruit.com/re-makecode-the-classics-arkanoid Page 2 of 30
Page 3
Overview
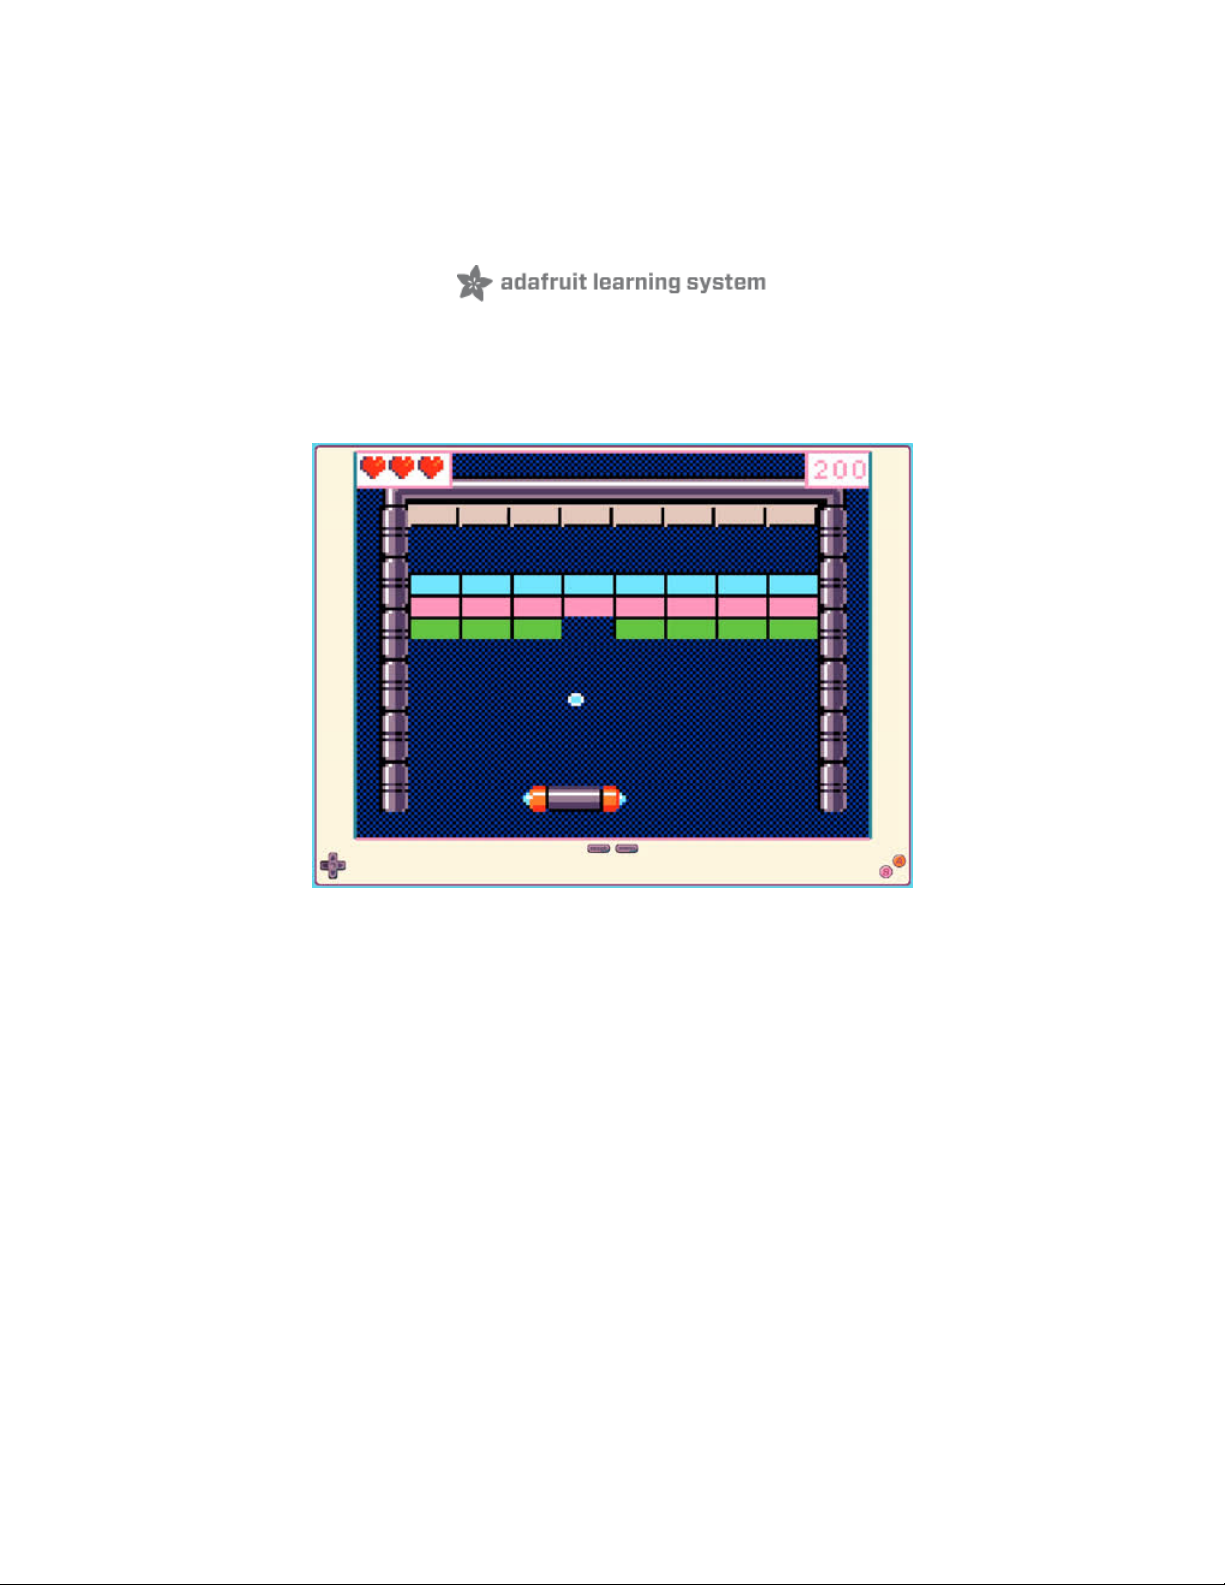
Let's Re-MakeCode a classic game:
Arkanoid
! It's lots of fun to look at classic retro games to learn what
makes them tick, and to flex your skills at building games in MakeCode Arcade.
Arkanoid
and
Breakout
were both huge hits when they came out, and they're still lots of fun to play today.
In this guide we'll focus on the essential game mechanics -- one ball, one paddle, and lots of bricks to
knock out!
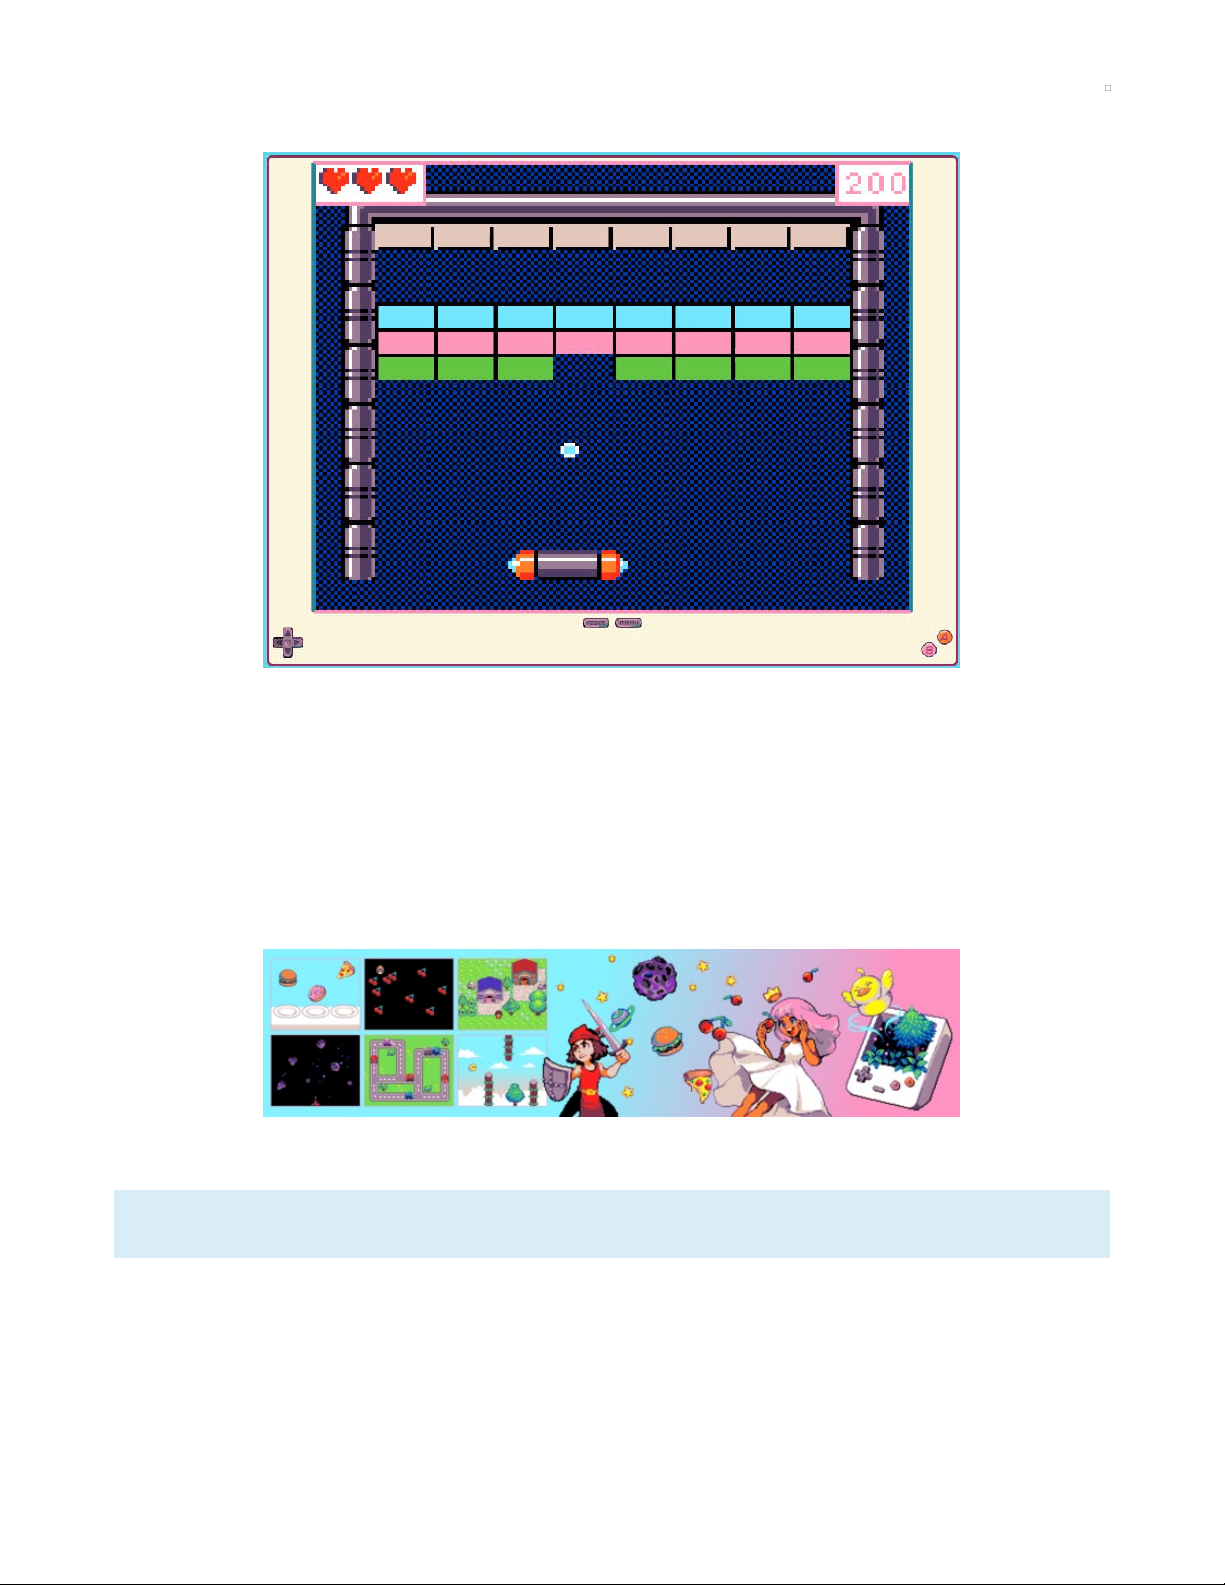
We'll also add some graphics and sound inspired by the original
Arkanoid
, and build it all in MakeCode
Arcade. Then, you can play it in your browser, or transfer the game to your PyGamer or PyBadge/PyBadge
LC for handheld fun!
Microsoft MakeCode Arcade (https://adafru.it/DD0) is a web-based beginner-friendly code editor to create
retro arcade games for the web and for microcontrollers.
Beta Zone: MakeCode Arcade is still in its beta. It might still have a few rough edges.
Parts
© Adafruit Industries https://learn.adafruit.com/re-makecode-the-classics-arkanoid Page 3 of 30
Page 4
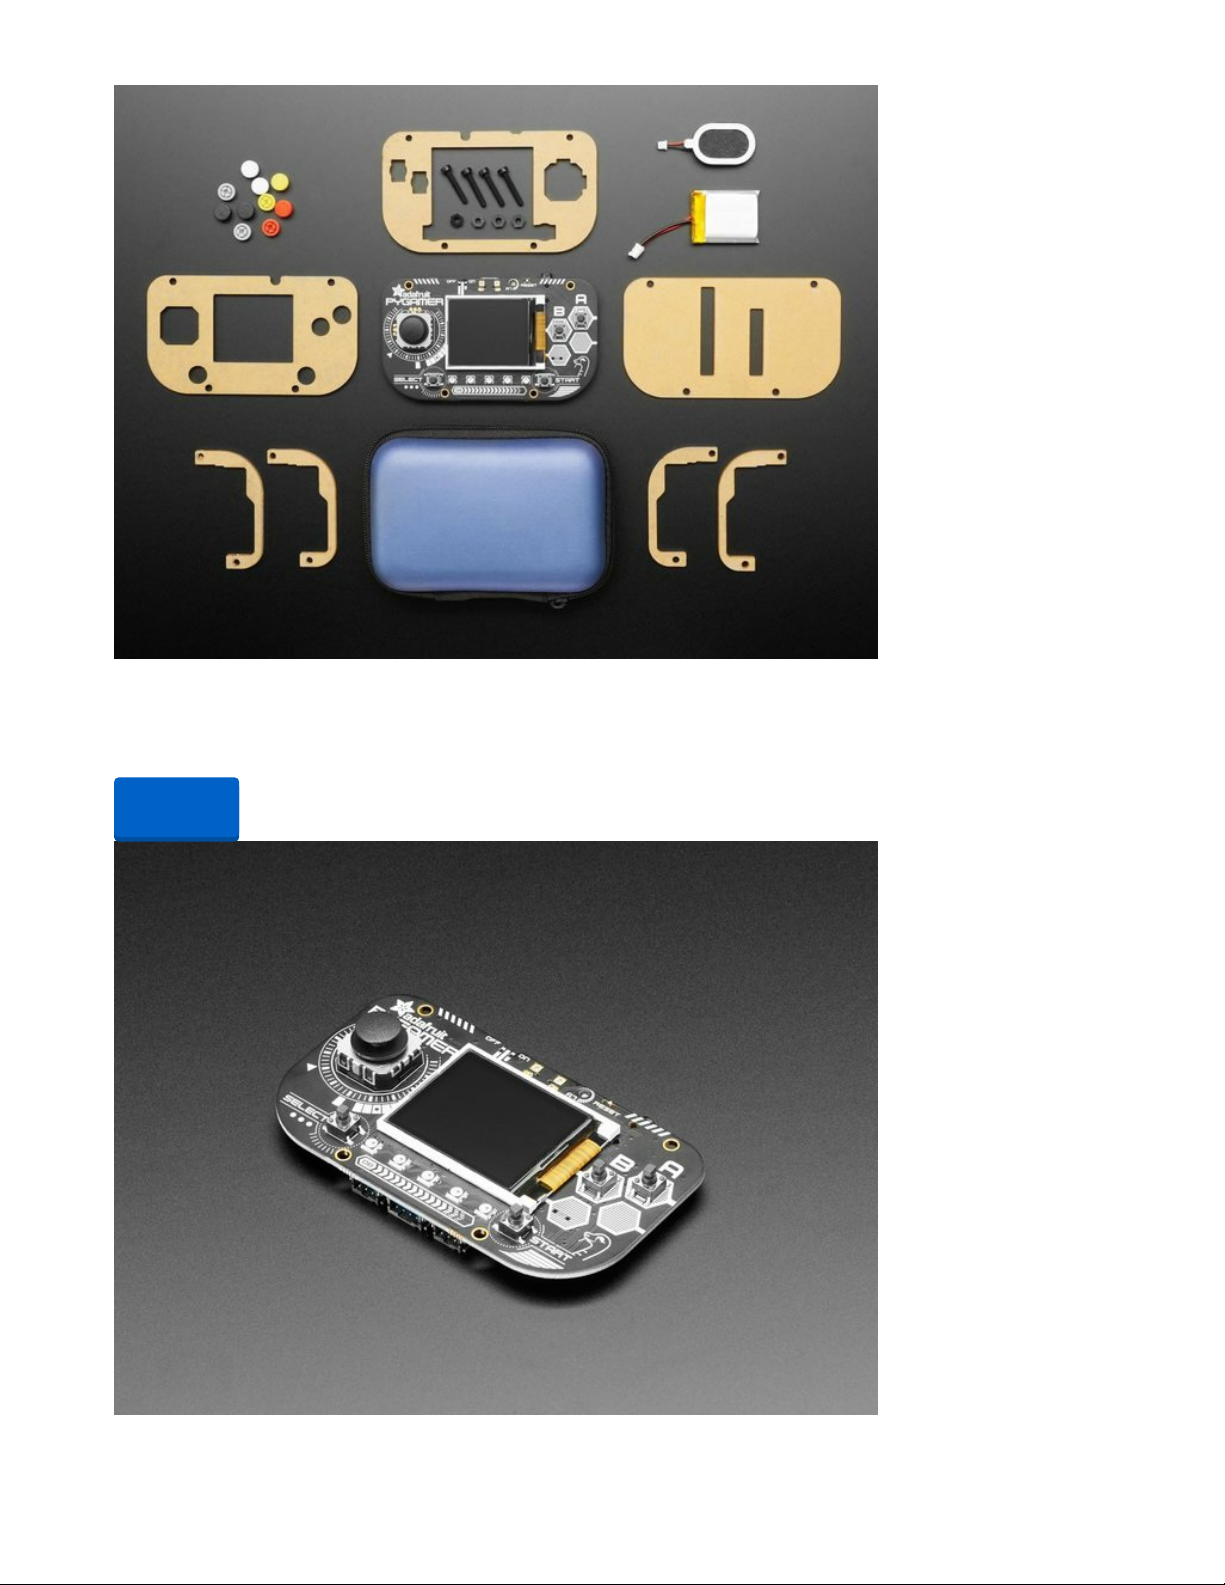
Adafruit PyGamer Starter Kit
Please note: you may get a royal blue or purple case with your starter kit (they're both lovely
colors)What fits in your pocket, is fully Open...
Out of Stock
Out of
Stock
© Adafruit Industries https://learn.adafruit.com/re-makecode-the-classics-arkanoid Page 4 of 30
Page 5
Adafruit PyGamer for MakeCode Arcade, CircuitPython or Arduino
What fits in your pocket, is fully Open Source, and can run CircuitPython, MakeCode Arcade or Arduino
games you write yourself? That's right, it's the Adafruit...
Out of Stock
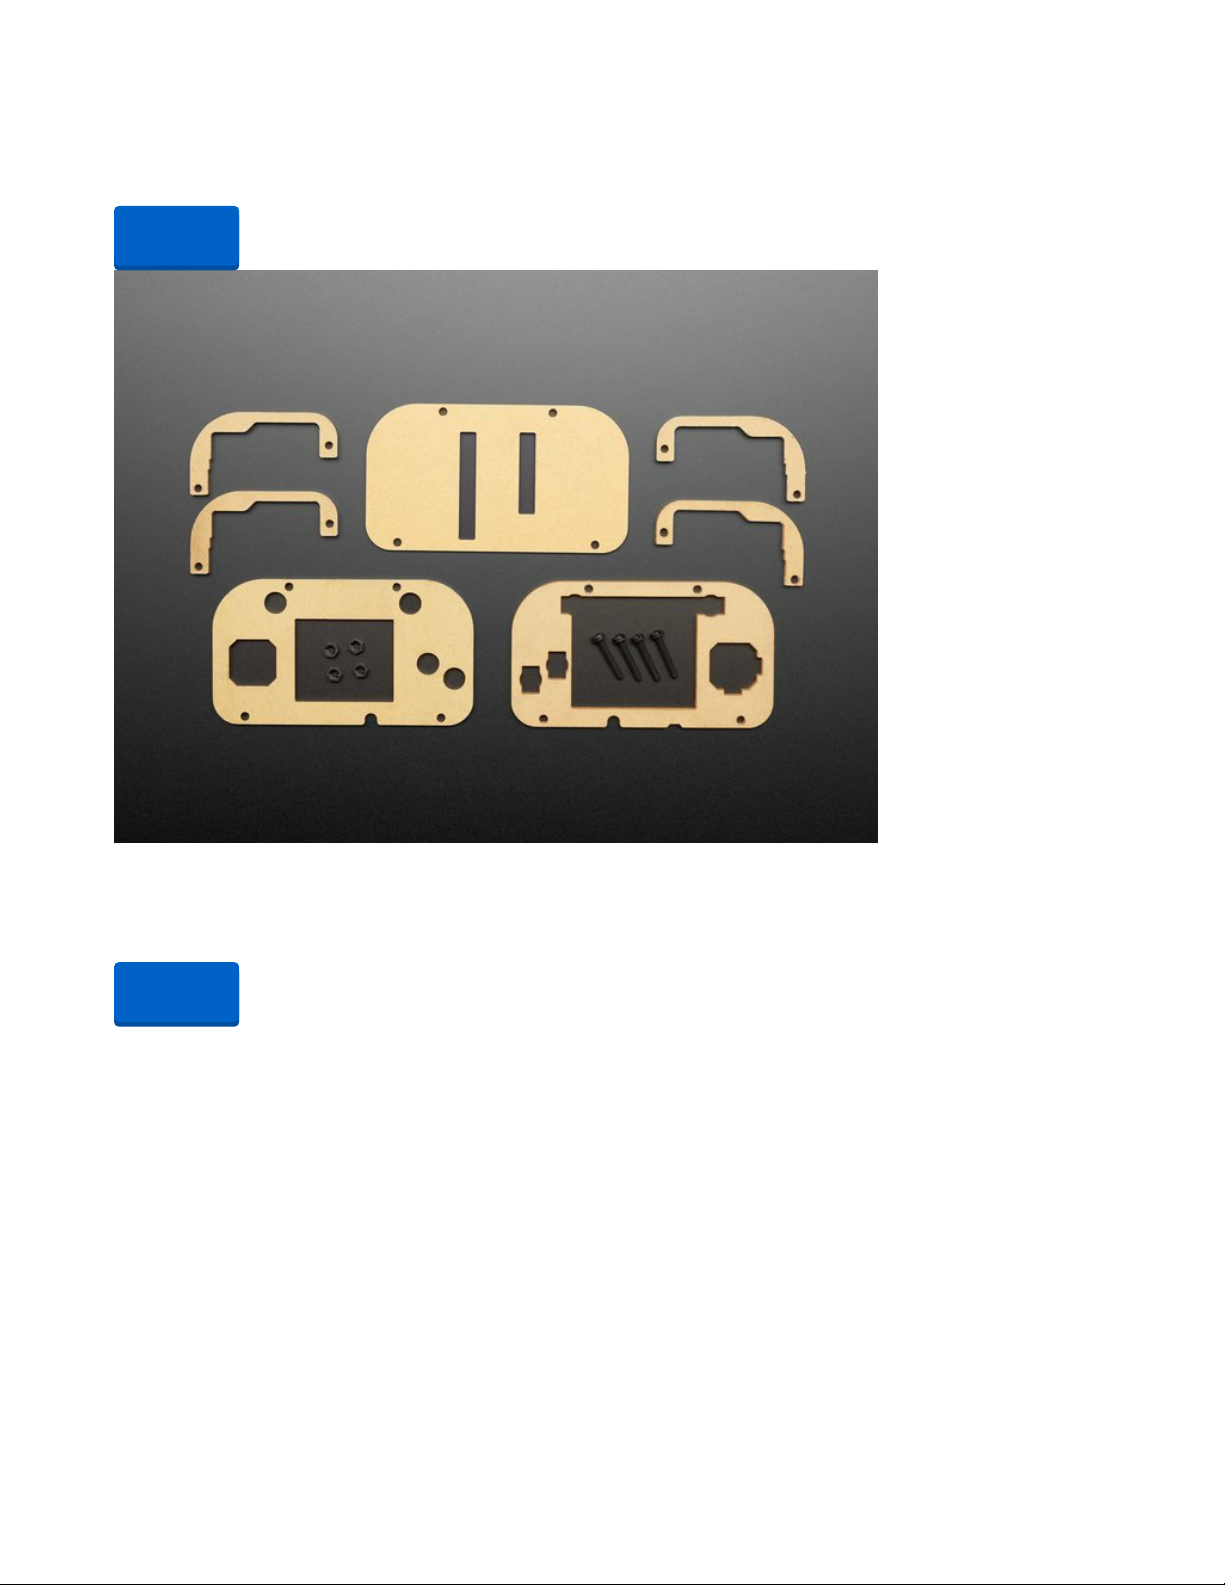
Adafruit PyGamer Acrylic Enclosure Kit
You've got your PyGamer, and you're ready to start jammin' on your favorite arcade games. You gaze
adoringly at the charming silkscreen designed by Ada-friend...
Out of Stock
Out of
Stock
Out of
Stock
© Adafruit Industries https://learn.adafruit.com/re-makecode-the-classics-arkanoid Page 5 of 30
Page 6
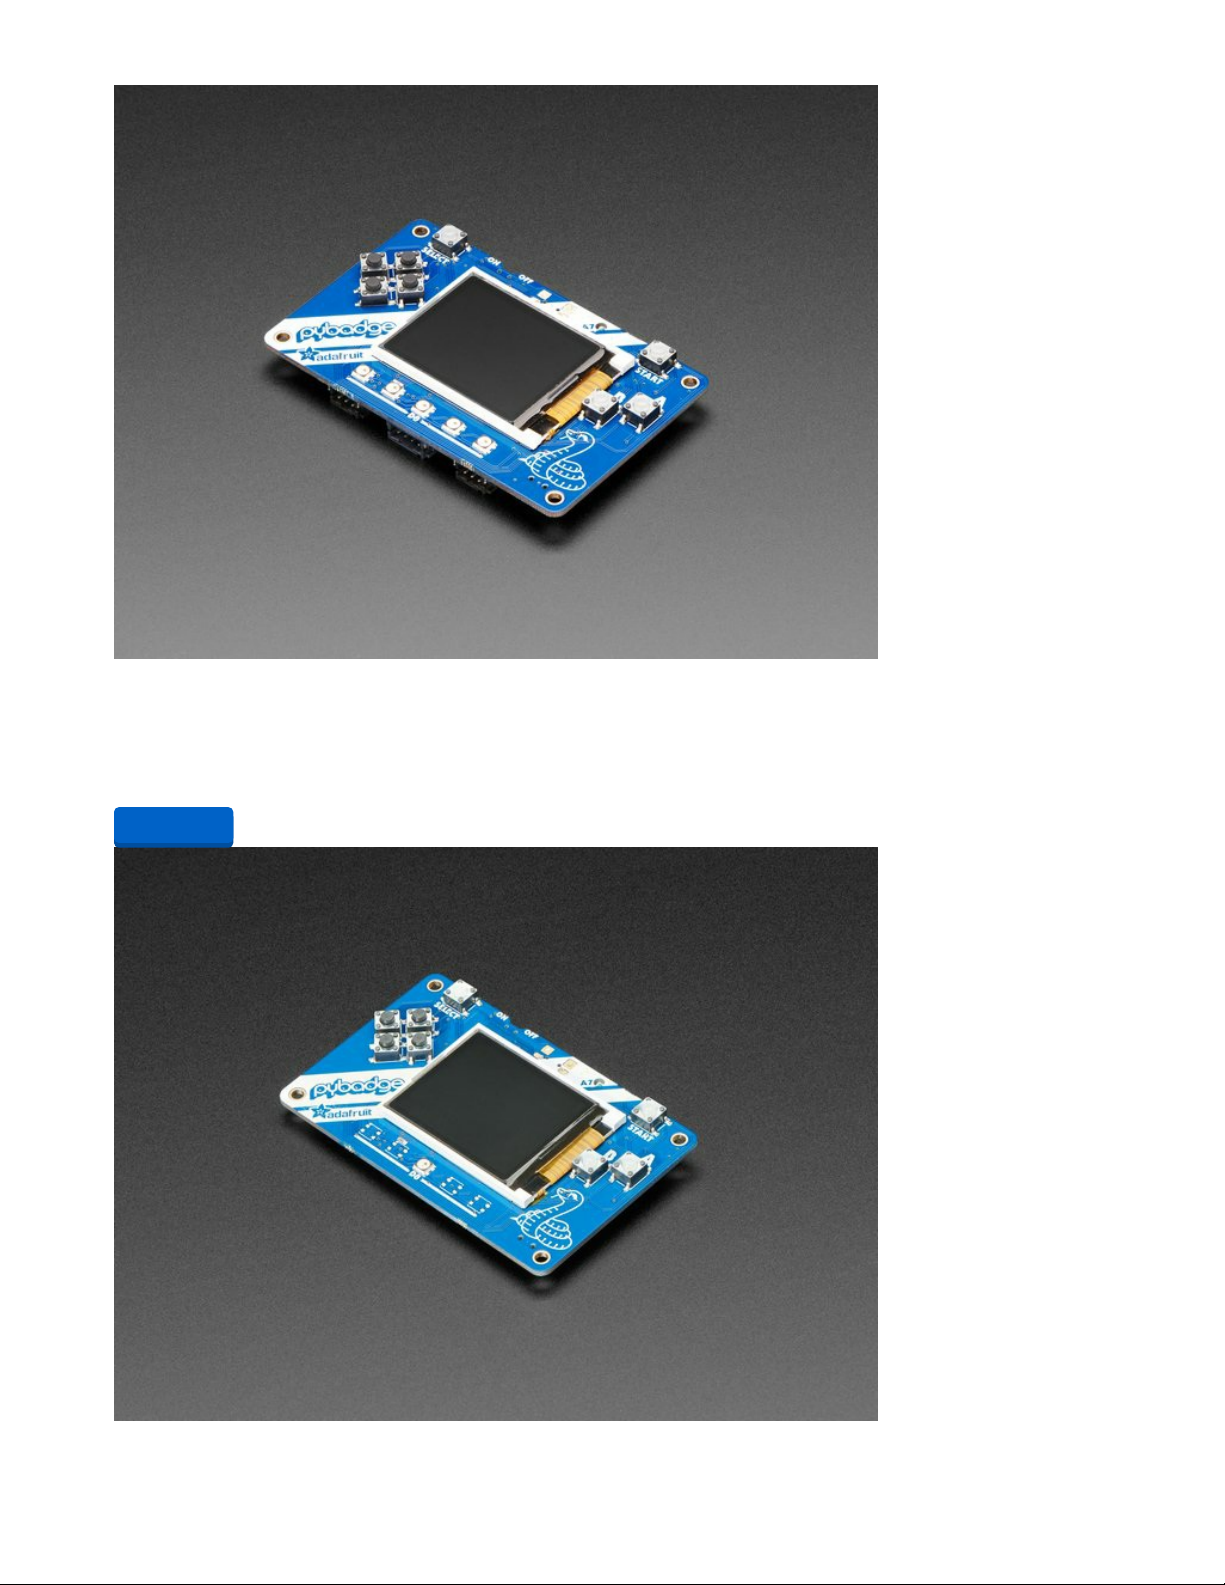
Adafruit PyBadge for MakeCode Arcade, CircuitPython, or Arduino
What's the size of a credit card and can run CircuitPython, MakeCode Arcade or Arduino? That's right, its
the Adafruit PyBadge! We wanted to see how much we...
$34.95
In Stock
Add to Cart
© Adafruit Industries https://learn.adafruit.com/re-makecode-the-classics-arkanoid Page 6 of 30
Page 7
Adafruit PyBadge LC - MakeCode Arcade, CircuitPython, or Arduino
What's the size of a credit card and can run CircuitPython, MakeCode Arcade or Arduino even when
you're on a budget? That's right, it's the Adafruit...
$24.95
In Stock
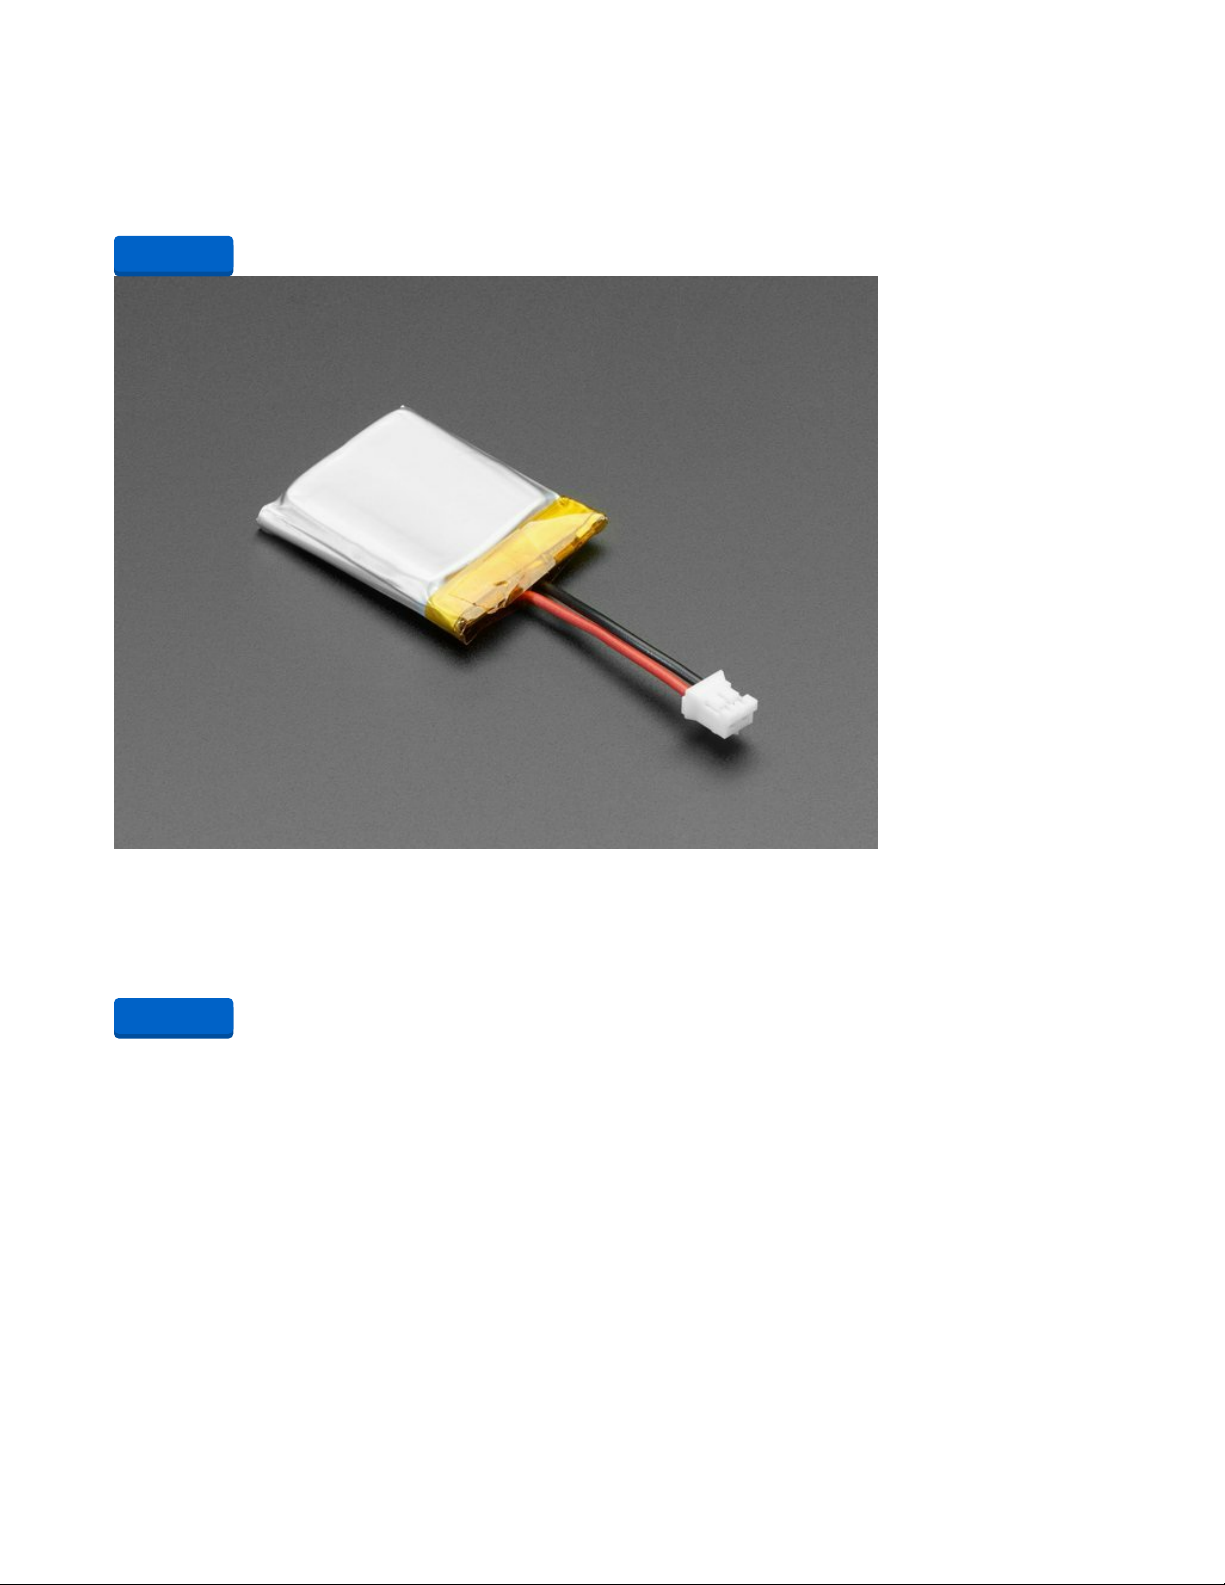
Lithium Ion Polymer Battery with Short Cable - 3.7V 350mAh
Lithium ion polymer (also known as 'lipo' or 'lipoly') batteries are thin, light and powerful. The output
ranges from 4.2V when completely charged to 3.7V. This battery...
$5.95
In Stock
Add to Cart
Add to Cart
© Adafruit Industries https://learn.adafruit.com/re-makecode-the-classics-arkanoid Page 7 of 30
Page 8

Mini Oval Speaker with Short Wires - 8 Ohm 1 Watt
Hear the good news! This wee speaker is a great addition to any audio project where you need 8 ohm
impedance and 1W or less of power. We particularly like...
$1.95
In Stock
Add to Cart
© Adafruit Industries https://learn.adafruit.com/re-makecode-the-classics-arkanoid Page 8 of 30
Page 9

USB A/Micro Cable - 2m
This is your standard USB A-Plug to Micro-USB cable. It's 2 meters long so you'll have plenty of cord to
work with for those longer extensions.
$4.95
In Stock
Add to Cart
© Adafruit Industries https://learn.adafruit.com/re-makecode-the-classics-arkanoid Page 9 of 30
Page 10
Re-Make Arkanoid
MakeCode Arcade
If you're not already familiar with the basics of MakeCode Arcade, check out this
guide (https://adafru.it/EIc) on creating a character sprite and moving it with controls.
To start, open a new Chrome browser window (Chrome works best) and go to MakeCode Arcade
beta (https://adafru.it/EQg).
These MakeCode Arcade guides are designed to take you through the fundamentals before tackling
more complex games, such as
Arkanoid
:
Pixel Art (https://adafru.it/EOl)
Animation (https://adafru.it/EOk)
Level Design (https://adafru.it/EOj)
Sparky Invaders (https://adafru.it/EYf)
Next Level Game Techniques (https://adafru.it/EYg)
Only use the Google Chrome browser with MakeCode!
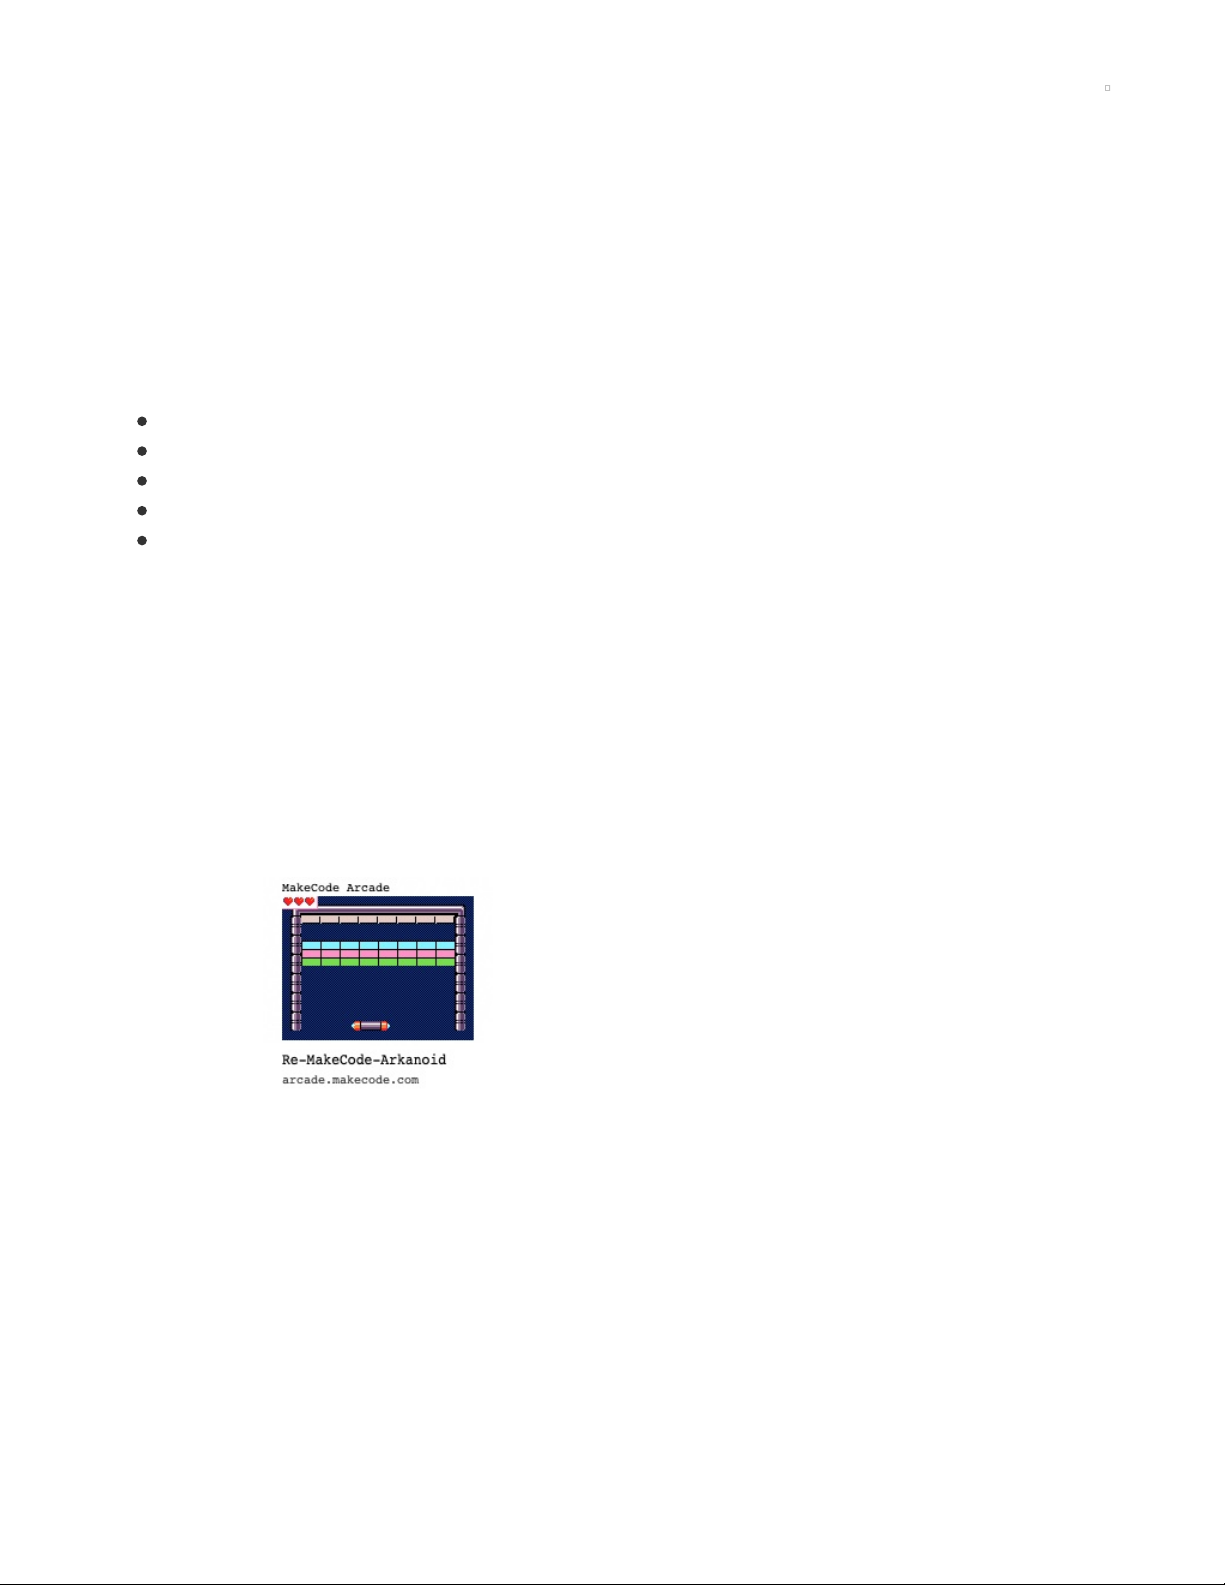
Arkanoid
We'll begin by loading a completed version of the MakeCode Arcade Arkanoid game and then take a look
at each section of the program to understand how it all works!
Start by launching MakeCode Arcade beta (https://adafru.it/EQg) using the Google Chrome web browser.
Then, download the Re-MakeCode-Arkanoid.png file by right-clicking on the image below and saving it to
your computer.
© Adafruit Industries https://learn.adafruit.com/re-makecode-the-classics-arkanoid Page 10 of 30
Page 11
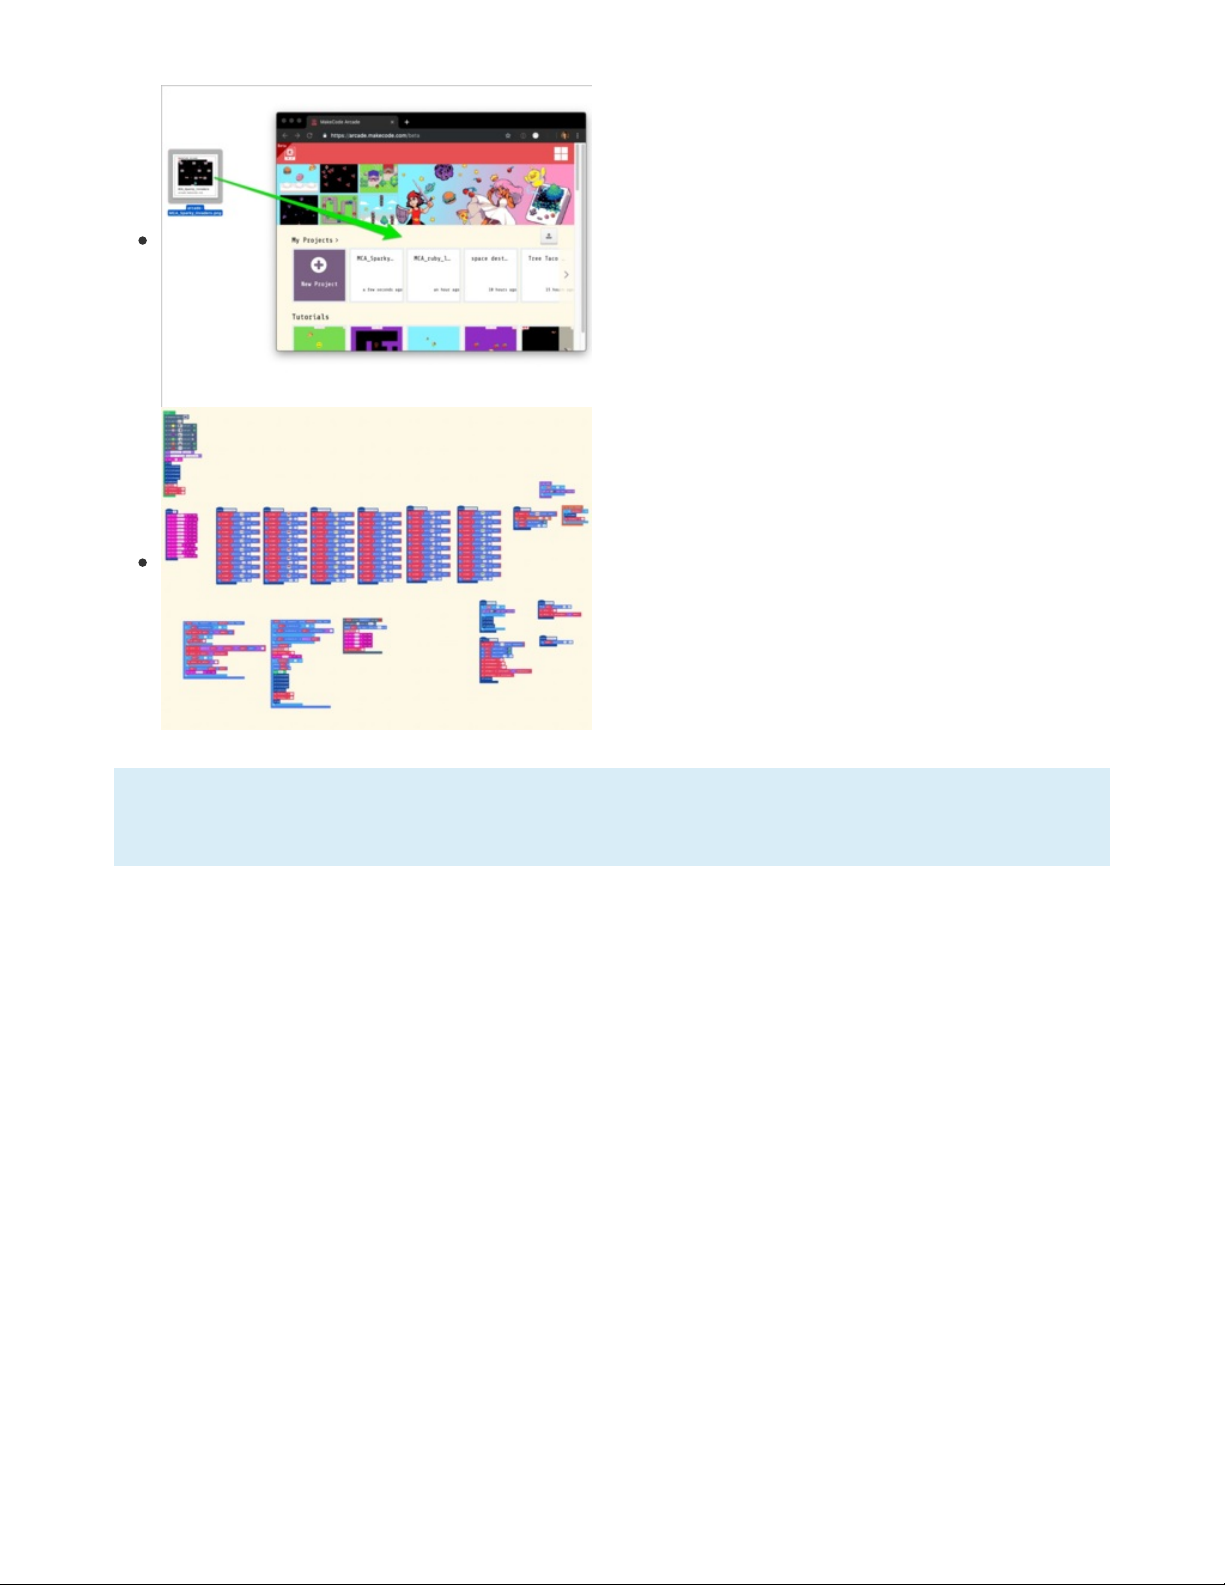
Load the Code
This is a special .png file that contains not only an image, but
the entire game is embedded in it as well!
Simply drag it from the location to which you saved the image
on your computer (such as the desktop as shown here) onto
the Chrome browser window that is already running
MakeCode Arcade (MCA). Note that the image in this graphic
is of a different game, but you'll be dragging the
Arkanoid
png
file.
This will open the code into the MCA editor.
If you're ever unsure where a MakeCode block comes from, you can often find it by matching the
block's color to a category on the left side of the editor. You can also use the handy search function!
Give the game a test play -- it's fun! Press the A button to start the game and launch the ball. Then, use the
controller d-pad/thumbstick to move the paddle left and right and bounce the ball into the bricks!
Now, we'll have a look at the blocks that make it all work.
On Start
Here's the first block set we'll use, contained within the on start loop.
© Adafruit Industries https://learn.adafruit.com/re-makecode-the-classics-arkanoid Page 11 of 30
Page 12

© Adafruit Industries https://learn.adafruit.com/re-makecode-the-classics-arkanoid Page 12 of 30
Page 13

Background and Tile Map/Tiles
We'll begin by creating the background image. You can use a
solid color for this, or create a pattern. I made a black and
blue checkerboard pattern that will read like a dark blue,
especially on the PyGamer or PyBadge screen.
The tile map will define the position of the walls for bouncing
the ball as well as determining when the ball has been missed
by the panel. Also, to create a graphical border frame similar
to the original
Arkanoid
style, we need to make six tiles that
will be placed on each of their associated color indexed spots
on the tile map.
Note that the tile for the red tile map positions is just a sliver
of the same background pattern so that it doesn't show up -- if
you leave a color on the tile map without an associated tile
the palette color of the tile map itself will show up, in this case
it would be a big red line across the bottom.
© Adafruit Industries https://learn.adafruit.com/re-makecode-the-classics-arkanoid Page 13 of 30
Page 14

Make a Splash
Once the field is in place we'll us the splash blocks to write text on screen. First "Re-MakeCode:" and
"ARKANOID" will be displayed, and require the player to press the A button to advance. Then we'll use a
second splash block to give instructions "Press 'A' button" and "to launch ball"
© Adafruit Industries https://learn.adafruit.com/re-makecode-the-classics-arkanoid Page 14 of 30
Page 15
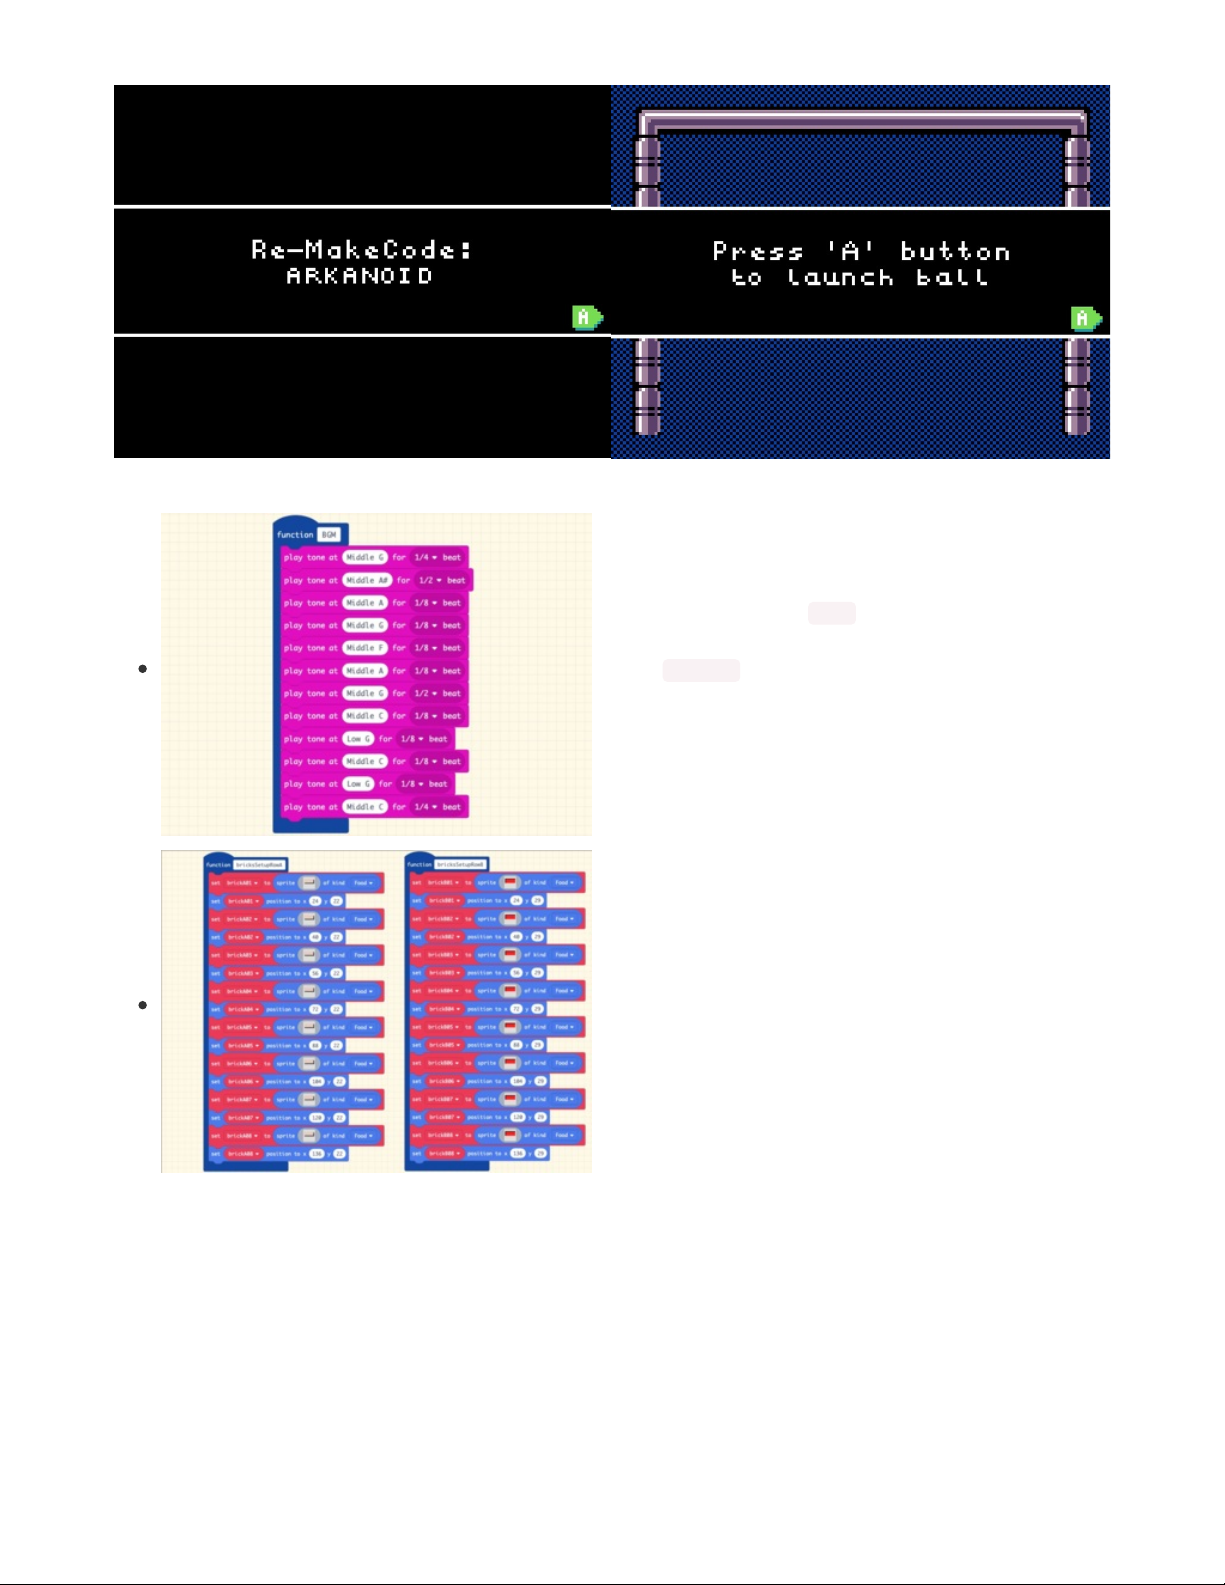
Music, Maestro
Next, we'll play the Arkanoid theme music. This is done with a
separate function, named BGM , for "background music". This
function contains the notes that we'll play, and it's triggered
with the call BGM function block.
You'll see that many parts of the game are created with
functions so that they can be called discreetly when
necessary, as well as too keep things organized -- otherwise
this on start loop, for example, would be getting really big!
Brick Work
We'll create the rows of bricks as functions as well, one
function per row of eight bricks.
Each brick is made with the set mySprite to <sprite art> of
kind Food block (Food is selected from the dropdown menu.)
© Adafruit Industries https://learn.adafruit.com/re-makecode-the-classics-arkanoid Page 15 of 30
Page 16

Rename this first one to brickA01
Here's an example of some simple sprite art for the beige and
red bricks, but you can get as fancy as you like here, just keep
the dimensions the same.
In a future guide, we'll explore creating this type of repetitive
sprite set using iterative loops and arrays, but for now, each is
made by copying and pasting the set brickA01 of type Food
block and set brickA01 position block pairs multiple times.
Note how the position y value is the same for each brick per
row, while the position x value increases by 16 pixels for each
brick.
We'll create five rows of bricks, each with its own function.
This allows us to only use some rows but not others to leave a
fun gap between rows for bonus bounces of the ball!
You can see here the rows called in our on start loop being
displayed.
© Adafruit Industries https://learn.adafruit.com/re-makecode-the-classics-arkanoid Page 16 of 30
Page 17

Paddle Setup
After the bricks are set, we call the paddleSetup function to,
well, set up the paddle!
This consists of first creating the sprite paddle of type Player.
We then set it to move with the thumbstick/d-pad buttons. By
setting the velocity to vx = 150 and vy = 0, we are constraining
it to move horizontally only, but quite quickly.
We'll prevent the paddle from leaving by turning on stay in
screen, and finally, set it to the center, bottom of the screen.
Lives and Variables
The last things we'll do in the on start loop are set the life counter to 3 and create these two variables
we'll use later:
brickCount variable will be used to determine when the player has hit the final brick for the level,
ballInPlay variable is a sort of toggle for keeping track of the state of the ball so we know when to
© Adafruit Industries https://learn.adafruit.com/re-makecode-the-classics-arkanoid Page 17 of 30
Page 18

allow the player to send a new ball into the level after they've lost a paddle life.
Press A
The next thing we set up is what to do when the player
presses the A button.
The if statement checks to see if the ball is currently in play,
based on the ballInPlay variable's value. Since we set it at 0 in
the startup, the condition is true and it'll proceed to call the
ballUpdate function, essentially launching the ball into play.
We also immediately flip the ballInPlay variable to 1 so that
pressing the A button again won't do anything until the ball
goes out of bounds.
Ball Update
When the ballUpdate function is called, here's what happens:
First, the if else block checks to see that there are still lives
left, since this function will be called both when the player
starts a level and when the ball goes out of bounds (the
player missed it with the paddle). If the life counter is at 0 it
will run the game over lose with melt effect block.
If there are more lives than 0, the ballSetup and paddleReset
functions will be called.
© Adafruit Industries https://learn.adafruit.com/re-makecode-the-classics-arkanoid Page 18 of 30
Page 19

ballSetup does a number of things! First:
Create the sprite named ball with a ball graphic of the type Projectile
Set the ball to bounce on walls and stay in screen
Set the ball's velocity down and left with vx = -60 and vy = 60
Then, we will create a few variables to help set ball speed and figure out the bounce angles:
ballInitSpeed is the initial speed of the ball
ballChangeSpeed can be used to adjust speed between levels
ballMaxVxFactor can be used as a factor to mulitply the ballInitSpeed and derive the ballMaxVx maximum
velocity on the x axis
ball position is then set to the lower near-center of the screen
The ballVx variable is set to 0, this will be used to calculate the bounce angle.
The the ballVy variable is set to the ballInitSpeed speed minus the ball's vx value.
Next, the paddleReset function is called to set the paddle
sprite back to its starting position.
© Adafruit Industries https://learn.adafruit.com/re-makecode-the-classics-arkanoid Page 19 of 30
Page 20

Ball Hits Paddle
Here we'll get to bouncing the ball off of the paddle. This isn't as simple as the wall bounce we've used
before, as it's not a canned function, and we want the player to be able to angle the ball depending on
where on the paddle they hit it.
The on sprite of kind Projectile overlaps otherSprite of kind Player block will run any time the ball (a
Projectile) hits the paddle (a Player).
Next, we set the xDiff variable to the differential between the ball's horizontal position (ball x) and the
paddle's horizontal position (paddle x).
We'll use this xDiff to help us determine where on the paddle the ball has hit.
Note: this method comes from AlexK's excellent breakout game posted on the MakeCode
forums (https://adafru.it/EYh)!
If the xDiff is equal to zero, this means the ball has hit dead center on the paddle. We actually don't want
to allow this to cause the ball to bounce off straight up and down, so we'll nudge it just a couple of pixels
and re-set the xDiff value to 2 before proceeding.
Next, we'll set the ballVx variable to the absolute of xDiff multiplied by the ballMaxVx divided by the
paddle width plus 2. This give us the velocity x value we'll need to send the ball off the paddle.
Then, we'll set the ballVy variable to the ballVx variable's value we just determined, minus the ball's initial
speed.
Now, if the differential between the ball and paddle's x positions is negative, the if xDiff < 0 block will
invert the ballVx value by mulitplying it by -1.
Now that the variables have been calculated, those values are actually applied to the ball with the set ball
velocity to vc ballVx vy BallVy block.
© Adafruit Industries https://learn.adafruit.com/re-makecode-the-classics-arkanoid Page 20 of 30
Page 21

Ball Misses Paddle
When the player misses the ball, it will hit the red wall as set in the tile map -- using the on sprite of kind
Projectile hits wall (red) allows us to take action.
First, we'll shake the camera a bit, then destroy ball with ashes effect for 20 ms.
We'll reduce the player life count by one, play a four tone sound effect, and then flip the ballInPlay
variable to zero.
Paddle Misses Ball
When the player misses the ball, it will hit the red wall as set in
the tile map -- using the on sprite of kind Projectile hits wall
(red) allows us to take action.
First, we'll shake the camera a bit, then destroy ball with
ashes effect for 20 ms.
We'll reduce the player life count by one, play a four tone
sound effect, and then flip the ballInPlay variable to zero.
Ball Hits Bricks
Similarly to the ball hitting the paddle, we use the overlap test to see when the ball ( sprite of kind
Projectile) overlaps a brick (otherSprite of kind Food).
If the ball is traveling upward (vy > 0) we invert the velocity on y and send it back down. The opposite is
true if the ball is traveling downward when it hits a brick, which happens on rebounds off the top of the
board or higher rows of bricks.
Next, we'll destroy otherSprite to get rid of the brick.
The score goes up by 200 points. Yay!
The brickCount variable is reduced by one, so we'll know when the last brick is hit.
A satisfying tone is played for a 1/4 beat.
If the final brick is hit (brickCount < or = 0) then we destroy the ball and paddle, pause a brief moment, and
then reset everything for the next level.
This includes calling the brick setup functions for the rows you want, setting the associated brickCount
value, setting ballInPlay to 0 and finally, playing the BGM music!
© Adafruit Industries https://learn.adafruit.com/re-makecode-the-classics-arkanoid Page 21 of 30
Page 22

Ball Hits Bricks
Similarly to the ball hitting the paddle, we use the overlap test
to see when the ball (sprite of kind Projectile) overlaps a brick
(otherSprite of kind Food).
If the ball is traveling upward (vy > 0) we invert the velocity on
y and send it back down. The opposite is true if the ball is
traveling downward when it hits a brick, which happens on
rebounds off the top of the board or higher rows of bricks.
Next, we'll destroy otherSprite to get rid of the brick.
The score goes up by 200 points. Yay!
The brickCount variable is reduced by one, so we'll know
when the last brick is hit.
A satisfying tone is played for a 1/4 beat.
If the final brick is hit (brickCount < or = 0) then we destroy the
ball and paddle, pause a brief moment, and then reset
everything for the next level.
This includes calling the brick setup functions for the rows you
want, setting the associated brickCount value, setting
ballInPlay to 0 and finally, playing the BGM music!
And now, the player can start up the next level by pressing A!
© Adafruit Industries https://learn.adafruit.com/re-makecode-the-classics-arkanoid Page 22 of 30
Page 23

Update the PyBadge/PyGamer Bootloader
You are at the bleeding edge of handheld, open source, game playing hardware and software, what with
your PyBadge/PyBadge LC or PyGamer! Congratulations! It's fun and exciting! It is also changing and
improving all the time, so please update your bootloaders before proceeding to put your MakeCode
Arcade games on the board!!
Among lots of other reasons, update the bootloader to prevent a problem with MacOS 10.14.4, to fix
button problems, and get the thumbstick to work!
PyBadge/PyBadge LC Bootloader
If you have a PyBadge or PyBadge LC, please go to this page
for instructions on updating the
bootloader. (https://adafru.it/EWI)
PyGamer Bootloader
If you have a PyGamer, please go to this page for instructions
on updating the bootloader. (https://adafru.it/EWJ)
A HUUUUUUGE number of people have problems because they pick a 'charge only' USB cable
rather than a "Data/Sync" cable. Make 100% sure you have a good quality syncing cable. Srsly, I can't
even express how many times people have nearly given up due to a flakey USB cable! Enter Alert
Text...
Hardware Checks
If, after updating your board's bootloader, you still think you may have a hardware problem, here's a great
way to test out all of the functions. From buttons, to the light sensor, thumbstick (PyGamer only),
accelerometer (PyGamer and PyBadge only, not the LC), and more, we've got a super nifty set of hardware
test .UF2 files you can use.
© Adafruit Industries https://learn.adafruit.com/re-makecode-the-classics-arkanoid Page 23 of 30
Page 24

Click on the link for your board below for more info and a link to the appropriate UF2 file.
https://adafru.it/EWK
https://adafru.it/EWL
Another way to do a hardware check is with the handy, dandy MakeCode Arcade Basic Hardware Test.
This was created with MakeCode Arcade and you can use it to check that your d-pad buttons or thumb
joystick can move the yellow face around the screen, and that the A and B buttons work to play a sound
(just make sure you have a speaker plugged in to the PyGamer first).
You can open this link (https://adafru.it/EWP) to get to it, or download the UF2 file below and drag it onto
your board's USB drive in bootloader mode.
https://adafru.it/EWQ
https://adafru.it/EWK
https://adafru.it/EWL
https://adafru.it/EWQ
© Adafruit Industries https://learn.adafruit.com/re-makecode-the-classics-arkanoid Page 24 of 30
Page 25

Load a MakeCode Game on PyGamer/PyBadge
Let's load a game! For example, here's a link to Run, Blinka, Run! To open the game in the MakeCode
Arcade editor, first, click the share link below. This will allow you to play the game in the browser right
away.
https://adafru.it/Fqf
Then, click on the Show Code button in the upper left corner.
The shows the code for the game, and by clicking
the Edit button in the upper right corner, it'll open into the
editor where you can upload it to your PyGamer/PyBadge.
Once you have a game working on the MakeCode Arcade
web editor, it's time to download it and flash it onto your
board.
Please only use the Google Chrome browser with MakeCode! It has WebUSB support and seems to
work best
https://adafru.it/Fqf
© Adafruit Industries https://learn.adafruit.com/re-makecode-the-classics-arkanoid Page 25 of 30
Page 26
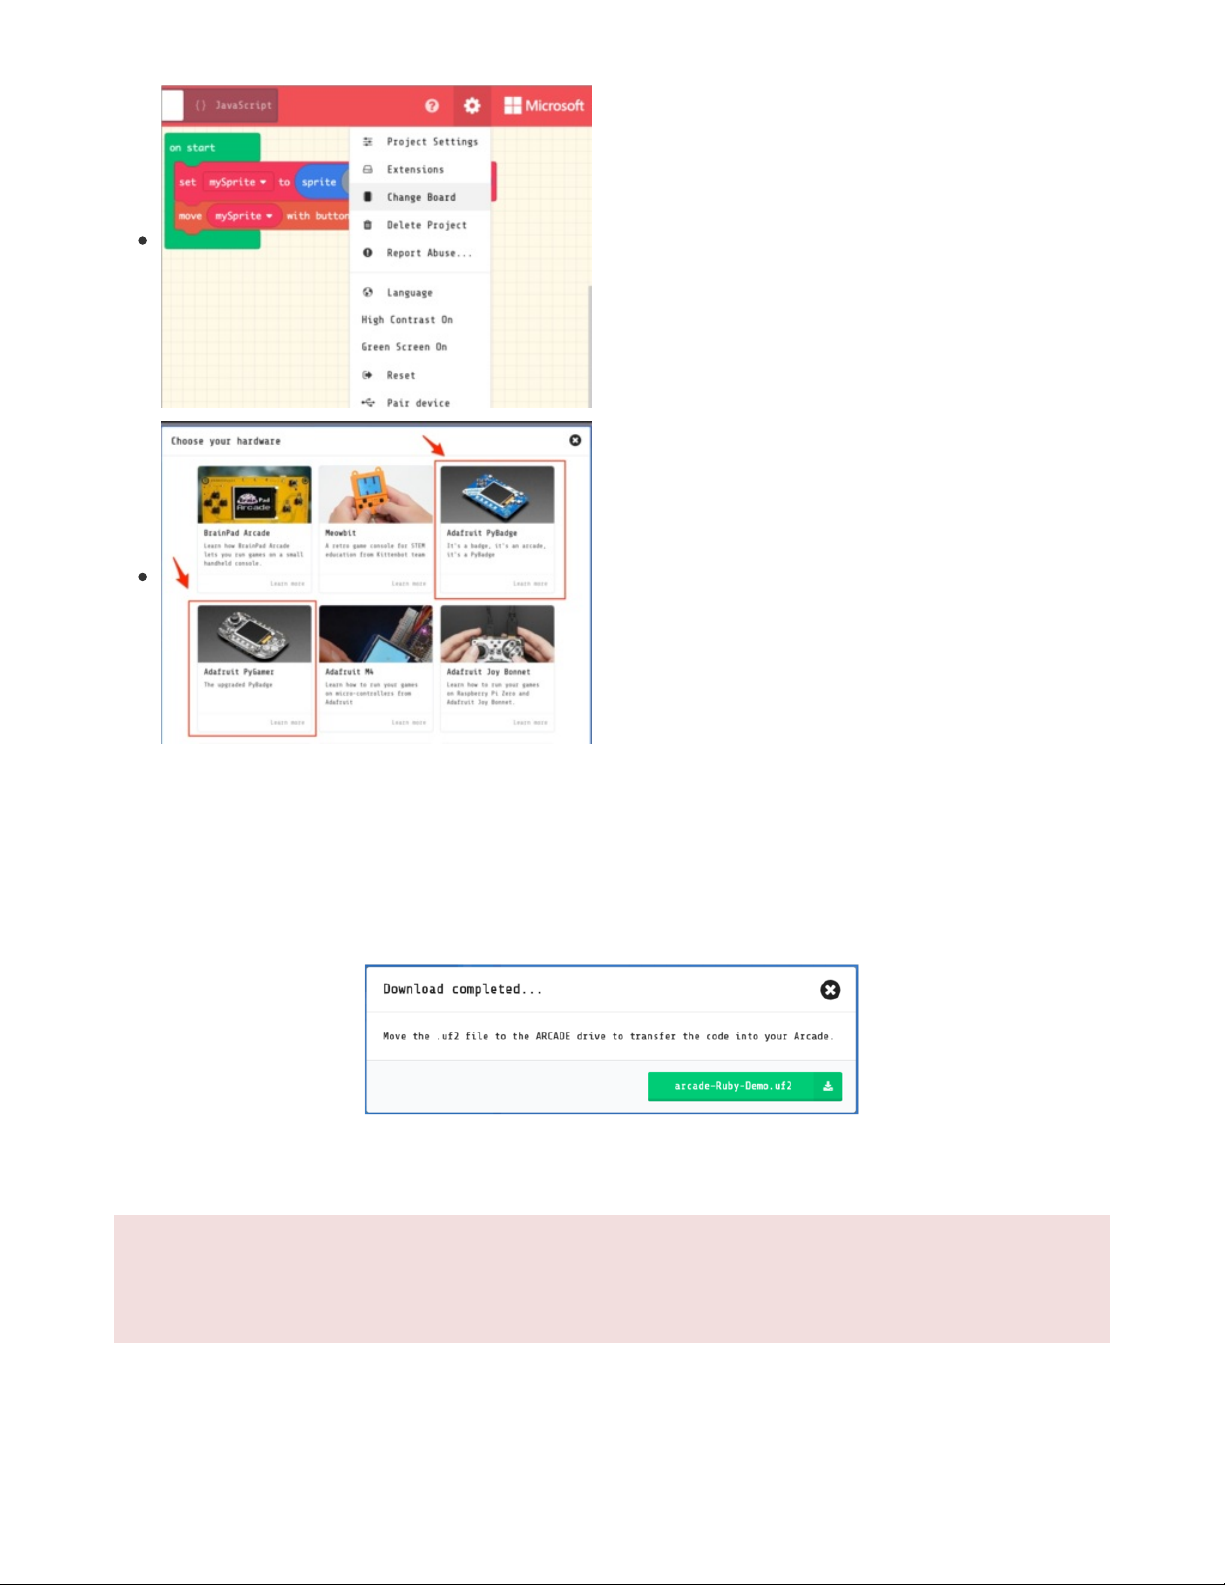
Board Definition
In order to load a game made in MakeCode Arcade onto the
PyBadge, first choose the proper board definition inside of
MakeCode. Click the gear icon and then the Change Board
item.
Change Board screen
Click on the image of your board, either the
PyBadge/PyBadge LC or the PyGamer
This will cause the game .uf2 file for your particular board to be saved to your hard drive. You only need to
do this the first time you use a new board. Thereafter you can simply click the Download button on the
MakeCode Arcade editor page.
A HUUUUUUGE number of people have problems because they pick a 'charge only' USB cable
rather than a "Data/Sync" cable. Make 100% sure you have a good quality syncing cable. Srsly, I can't
even express how many times people have nearly given up due to a flakey USB cable!
© Adafruit Industries https://learn.adafruit.com/re-makecode-the-classics-arkanoid Page 26 of 30
Page 27
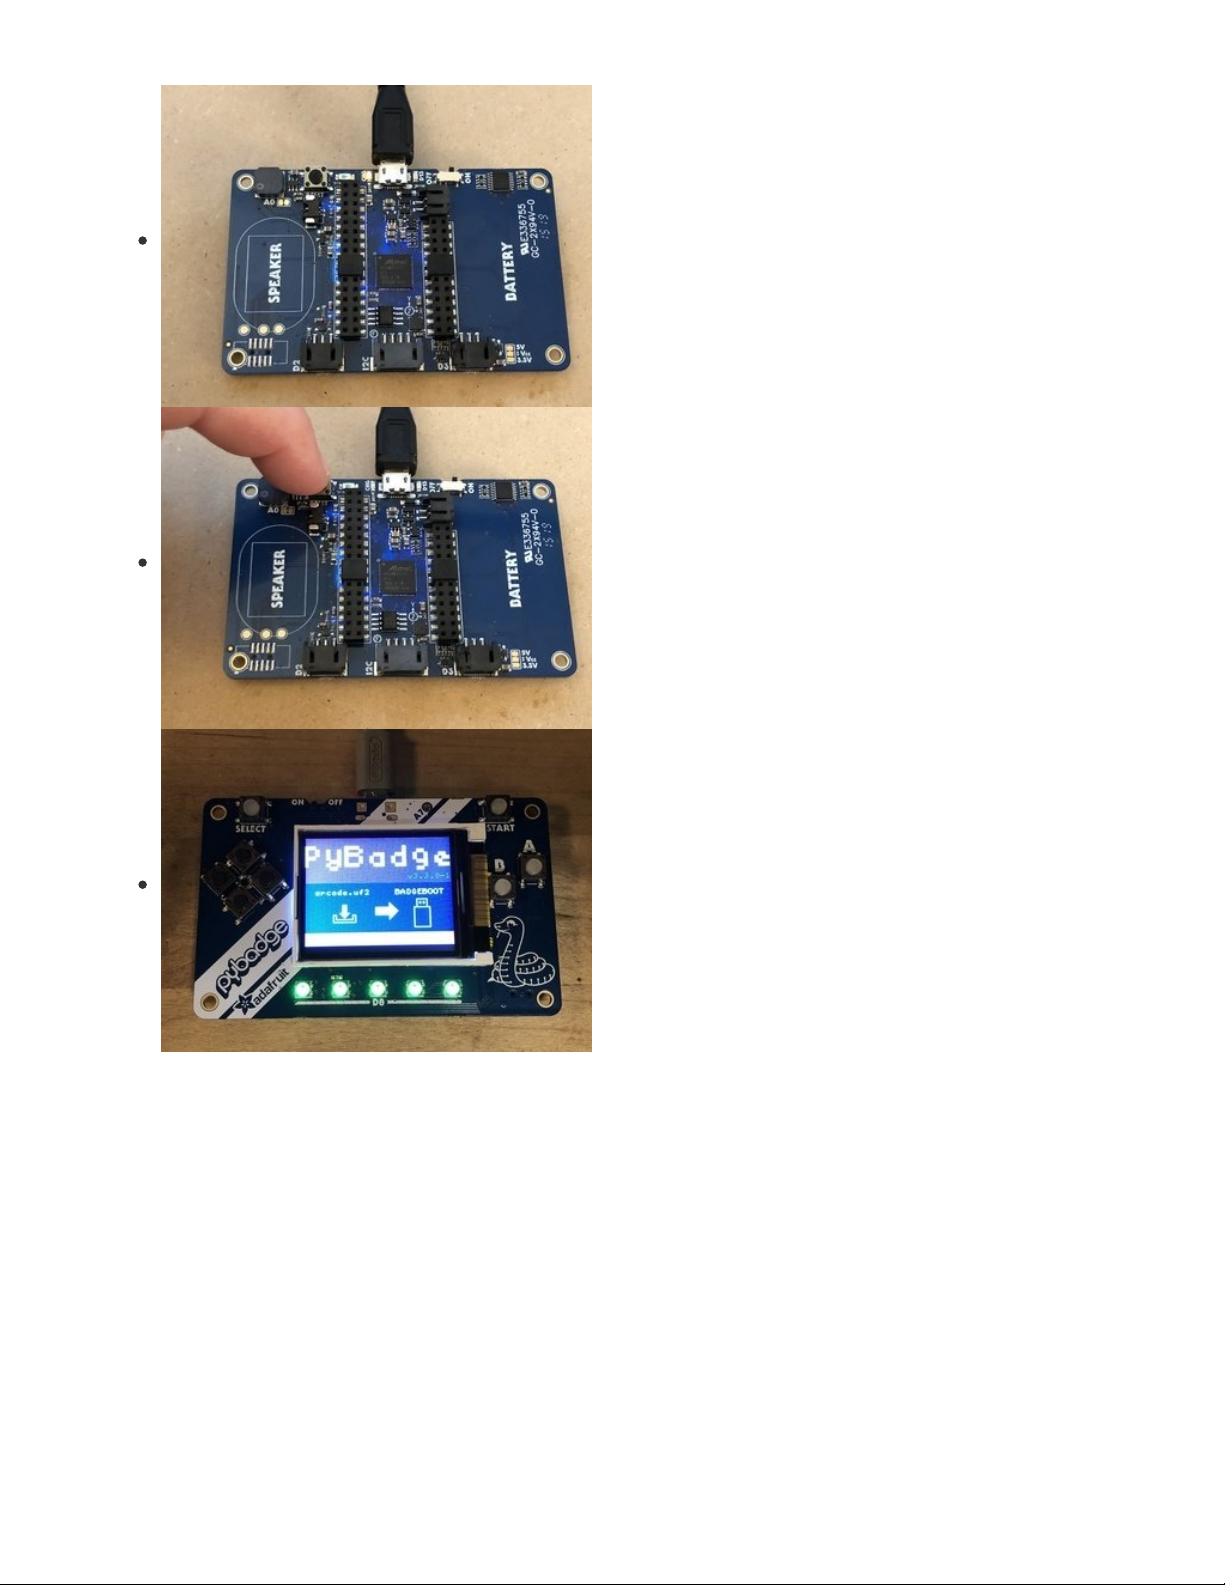
Bootloader Mode
Now, we'll put the board into bootloader mode so we can
drag on the saved .uf2 file. On the back side of the board
you'll see a reset button at the top. Make sure the board is
plugged into your computer via USB with a USB micro B to A
data cable. Also, be sure the board is turned on.
Then, press the reset button. This will initiate bootloader
mode.
When the board is in bootloader mode you'll see a screen
similar to this one show up.
© Adafruit Industries https://learn.adafruit.com/re-makecode-the-classics-arkanoid Page 27 of 30
Page 28

Drag and Drop
Now that the board is in bootloader mode, you should see a
BADGEBOOT drive show up on your computer as a USB flash
drive. Simply drag the arcade game .uf2 file onto the drive.
Play!
That's all there is to it! Once the file is copied over the board will restart and launch the game!
Keep an eye on Adafruit.com for additional game related content.
© Adafruit Industries https://learn.adafruit.com/re-makecode-the-classics-arkanoid Page 28 of 30
Page 29
Troubleshooting MakeCode Arcade
If you run into trouble with MakeCode Arcade, here are some resources for getting help:
Microsoft MakeCode Arcade Forum (https://adafru.it/EXI)
Adafruit MakeCode Forum (https://adafru.it/EXJ)
Microsoft MakeCode Arcade Discord (https://adafru.it/EXK) -- look for the #arcade channel
Adafruit MakeCode Discord () -- look for the #makecode channel
Only use the Google Chrome browser with MakeCode!
© Adafruit Industries https://learn.adafruit.com/re-makecode-the-classics-arkanoid Page 29 of 30
Page 30

© Adafruit Industries Last Updated: 2021-02-09 12:10:51 PM EST Page 30 of 30
 Loading...