

Page 1

Adafruit PiUART - USB Console and
Power Add-on for Raspberry Pi
Created by lady ada
https://learn.adafruit.com/adafruit-piuart-usb-console-and-power-add-on-for-raspberry-pi
Last updated on 2021-11-15 07:00:55 PM EST
©Adafruit Industries Page 1 of 17
Page 2

Table of Contents
Overview
Pinouts
Enabling Serial Console
• Option 1. Enabling in /boot/config.txt
• Option 2. Enabling via Raspi-Config
Setup Software
• Windows
• Mac OS X
• Linux
Test & Configure
• Mac OS X
• Linux
• Windows
Downloads
• Files
3
5
6
6
7
9
9
10
10
11
11
12
13
16
16
©Adafruit Industries Page 2 of 17
Page 3
Overview
Here's another super handy add-on for your Raspberry Pi computer, perfect for 'head-
less' setups! The PiUART(https://adafru.it/zib) adds a MicroUSB to serial connection
so you can use any serial port software to connect to the Pi's console. It plugs in and
is fast and easy to add whenever you need to connect to your Pi. Two LEDs connect
to RX and TX on the serial converter chip so you get blinking whenever data is sent
or received.
©Adafruit Industries Page 3 of 17
Page 4

We had some space left over, so the PiUART also comes with an on-off switch with a 4
Amp transistor. You can power your Pi through the microUSB port and then use the
switch whenever you want to cut power, without having to unplug the cable. Low-
power usage Pi's like the Pi Zero and A+ can thus be powered and controlled from a
single cable connected to your computer.
Heavy-hitter Pi's like the Pi 2 and Pi 3 may draw too much power from a computer
USB port, so check if your motherboard has a high-current USB port before trying.
Comes fully assembled and ready to go, plug into your Pi, and on Mac OS X install the
driver - within 2 minutes and you'll be ready to go.
Works with any Raspberry Pi computer (Pi 1, 2, 3, Zero, etc)
©Adafruit Industries Page 4 of 17
Page 5

Pinouts
We only use the 'right' strip of the dual header but to make it more mechanically
stable we have a dual header to plug into.
The 5V power pins can be fed from the MicroUSB connector when the switch is
flipped to ON. Otherwise you can leave the switch OFF and power the Pi from the
standard power port.
©Adafruit Industries Page 5 of 17
Page 6

Note this will back-power the computer USB port. We've never had an issue with this
as long as the Pi's power supply is 5V, but if you want to avoid it, cut the bottom Swit
ch Enable trace. (Also good to do if you want to make sure the switch isn't activated
by accident)
Enabling Serial Console
As of Jessie Raspbian, you may need to enable the serial console.
You can enable/disable the serial console with either editing /boot/config.txt or raspi-
config (which will edit /boot/config.txt for you)
Option 1. Enabling in /boot/config.txt
You can pop your SD card into a computer and edit config.txt with a text editor like
SimpleText, WordPad or whatnot. You can also edit on a pi with sudo nano /boot/
config.txt
At the bottom, last line, add enable_uart=1 on it's own line
©Adafruit Industries Page 6 of 17
Page 7

Option 2. Enabling via Raspi-Config
Using a monitor and keyboard, log into the shell and run
sudo raspi-config
go down to Advanced Options
Hit enter and then go down to Serial
©Adafruit Industries Page 7 of 17
Page 8

Select Yes
It should now be enabled
©Adafruit Industries Page 8 of 17
Page 9

Hit return then select Finish
When it asks you to reboot, go to Yes and hit return
OK the serial console is now enabled!
Setup Software
Windows
Windows will automatically install the CP2104 driver for use so no driver is required.
The Windows 10 driver can also be found here(https://adafru.it/yfA)if needed.
For terminal software, you can use Putty to start. Download and install Putty from
here: http://www.putty.org/(https://adafru.it/aUb)
From the list of downloads select the binary called just putty.exe from the section For
Windows on Intel x86. This will prompt you to save the file. Save it onto the Desktop
for now.
Note that this actually saves the Program itself not an installer. Simply double
click putty.exe to run putty!
©Adafruit Industries Page 9 of 17
Page 10

Mac OS X
If you are using Mac OS X you will need to install drivers. For the SiLabs chipset, you
can grab the drivers from here:
Install Mac OS X driver
https://adafru.it/tek
The download is a standard Mac installer. Accept all defaults when prompted.
Linux
Linux has the CP2104 driver built in!
Some distributions such as Ubuntu 12.10 do not include the "screen" command. Try
running the command "screen" and if you get an error message, you can install it by
typing the following command: sudo apt-get install screen
©Adafruit Industries Page 10 of 17
Page 11

Test & Configure
Mac OS X
If you are using a Mac, then all you need to do is open a Terminal window and issue
the command
ls /dev/cu.*
To list all of the available serial ports. You should see something like this:
You'll see a few items listed including a /dev/cu.Bluetooth device. You're looking for
something like /dev/cu.usbserial-NNNN or /dev/cu.SLAB_USBtoUART or /dev/
cu.usbmodem
Once you've identified the name, you can then run:
screen /dev/cu.PL2303-00001004 115200
screen /dev/cu.SLAB_USBtoUART 115200
screen /dev/cu.usbserial-A4001nCf 115200
The device will have a slightly different name than the above. One way to quickly
figure out the name is start typingscreen /dev/cu. and then press the TAB key to
auto-complete to whatever your device is called, before adding 115200 (which is the
baud rate) to the end.
You can also try screen /dev/cu.SLAB* 115200 or screen /dev/cu.PL2303*
115200 or screen /dev/cu.usbserial* 115200 To have the shell complete the
file name for you
©Adafruit Industries Page 11 of 17
Page 12

You may need to disable system integrity protection (according to feedback from a
tutorial-reader)(https://adafru.it/rlE)
Linux
If you are using Linux, its much like the above but often times the device is called/
dev/ttyUSB0 - you may want to runsudo dmesg after plugging in and looking for hints
on what the device is called.
Then use the command:
sudo screen /dev/ttyUSB0 115200
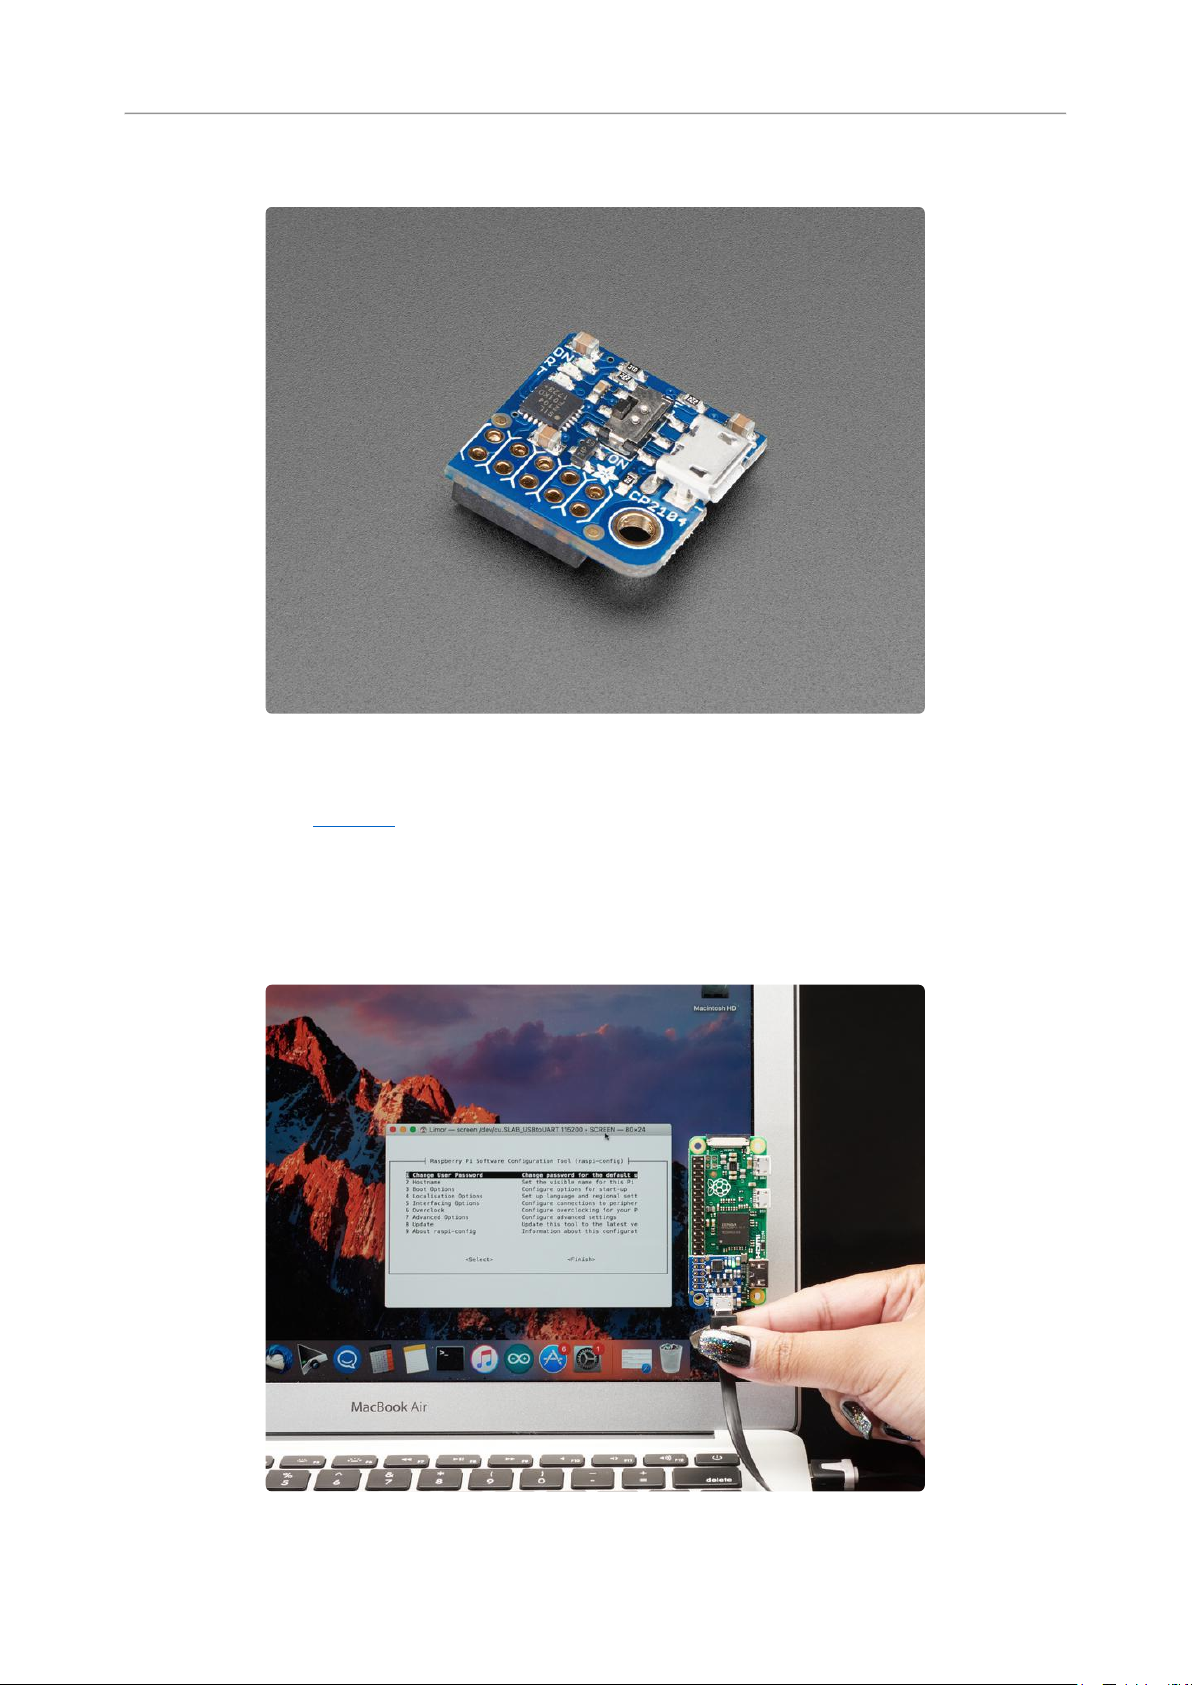
To start communication with the Pi, press ENTER and you should see the login prompt
from the Pi.
Here it is running on a Mac.
and here is what it looks like in Ubuntu.
©Adafruit Industries Page 12 of 17
Page 13

Windows
If you are using a PC, then before you start Putty, you need to know which com port is
being used for the cable. You can find this by looking in the Ports section of the Wind
ows Device Manager.
The Device Manager is accessible from the Control Panel under System.
©Adafruit Industries Page 13 of 17
Page 14

It isn't going to be COM1 so never pick that. Chances are its the one right below
COM1. It will often say "SiLabs" or "Prolific" or similar next to it. In this case it is COM7
that is in use.
Now start Putty and you will see a connection window.
©Adafruit Industries Page 14 of 17
Page 15

Select a connection type of "Serial" from the radio buttons, then set the speed to 1152
00 and the serial line to COM7
Finally click 'Open' to connect. Remember to press ENTER to start communications.
For a new installation of Raspbian, the default username is pi and the default
password is raspberry
Thats it! You are connected and can use the command line to navigate around your Pi.
©Adafruit Industries Page 15 of 17
Page 16

Once you've connected with the console you can set up your Pi to use SSH as
another means of connecting to your Pi over your local network.
Downloads
Files
EagleCAD PCB files on GitHub(https://adafru.it/yIe)
•
Fritzing object in Adafruit Fritzing library(https://adafru.it/aP3)
•
©Adafruit Industries Page 16 of 17
Page 17

©Adafruit Industries Page 17 of 17
 Loading...