

Page 1

Adding a Real Time Clock to Raspberry Pi
Created by lady ada
https://learn.adafruit.com/adding-a-real-time-clock-to-raspberry-pi
Last updated on 2021-11-15 05:51:19 PM EST
©Adafruit Industries Page 1 of 13
Page 2

Table of Contents
Overview
Wiring the RTC
Set Up & Test I2C
• Set up I2C on your Pi
• Verify Wiring (I2C scan)
Set RTC Time
• Raspberry Pi OS's with systemd
• Sync time from Pi to RTC
• Raspbian Wheezy or other pre-systemd Linux
3
3
6
6
6
7
7
10
11
©Adafruit Industries Page 2 of 13
Page 3
Overview
This tutorial requires a Raspberry Pi running a kernel with the RTC module and
DS1307 module included. Current Raspbian distros have this, but others may not!
The Raspberry Pi is designed to be an ultra-low cost computer, so a lot of things we
are used to on a computer have been left out. For example, your laptop and computer
have a little coin-battery-powered 'Real Time Clock' (RTC) module, which keeps time
even when the power is off, or the battery removed. To keep costs low and the size
small, an RTC is not included with the Raspberry Pi. Instead, the Pi is intended to be
connected to the Internet via Ethernet or WiFi, updating the time automatically from
the global ntp (nework time protocol) servers
For stand-alone projects with no network connection, you will not be able to keep the
time when the power goes out. So in this project we will show you how to add a low
cost battery-backed RTC to your Pi to keep time!
Wiring the RTC
To keep costs low, the Raspberry Pi does not include a Real Time Clock module.
Instead, users are expected to have it always connected to WiFi or Ethernet and keep
time by checking the network. Since we want to include an external module, we'll
have to wire one up.
©Adafruit Industries Page 3 of 13
Page 4

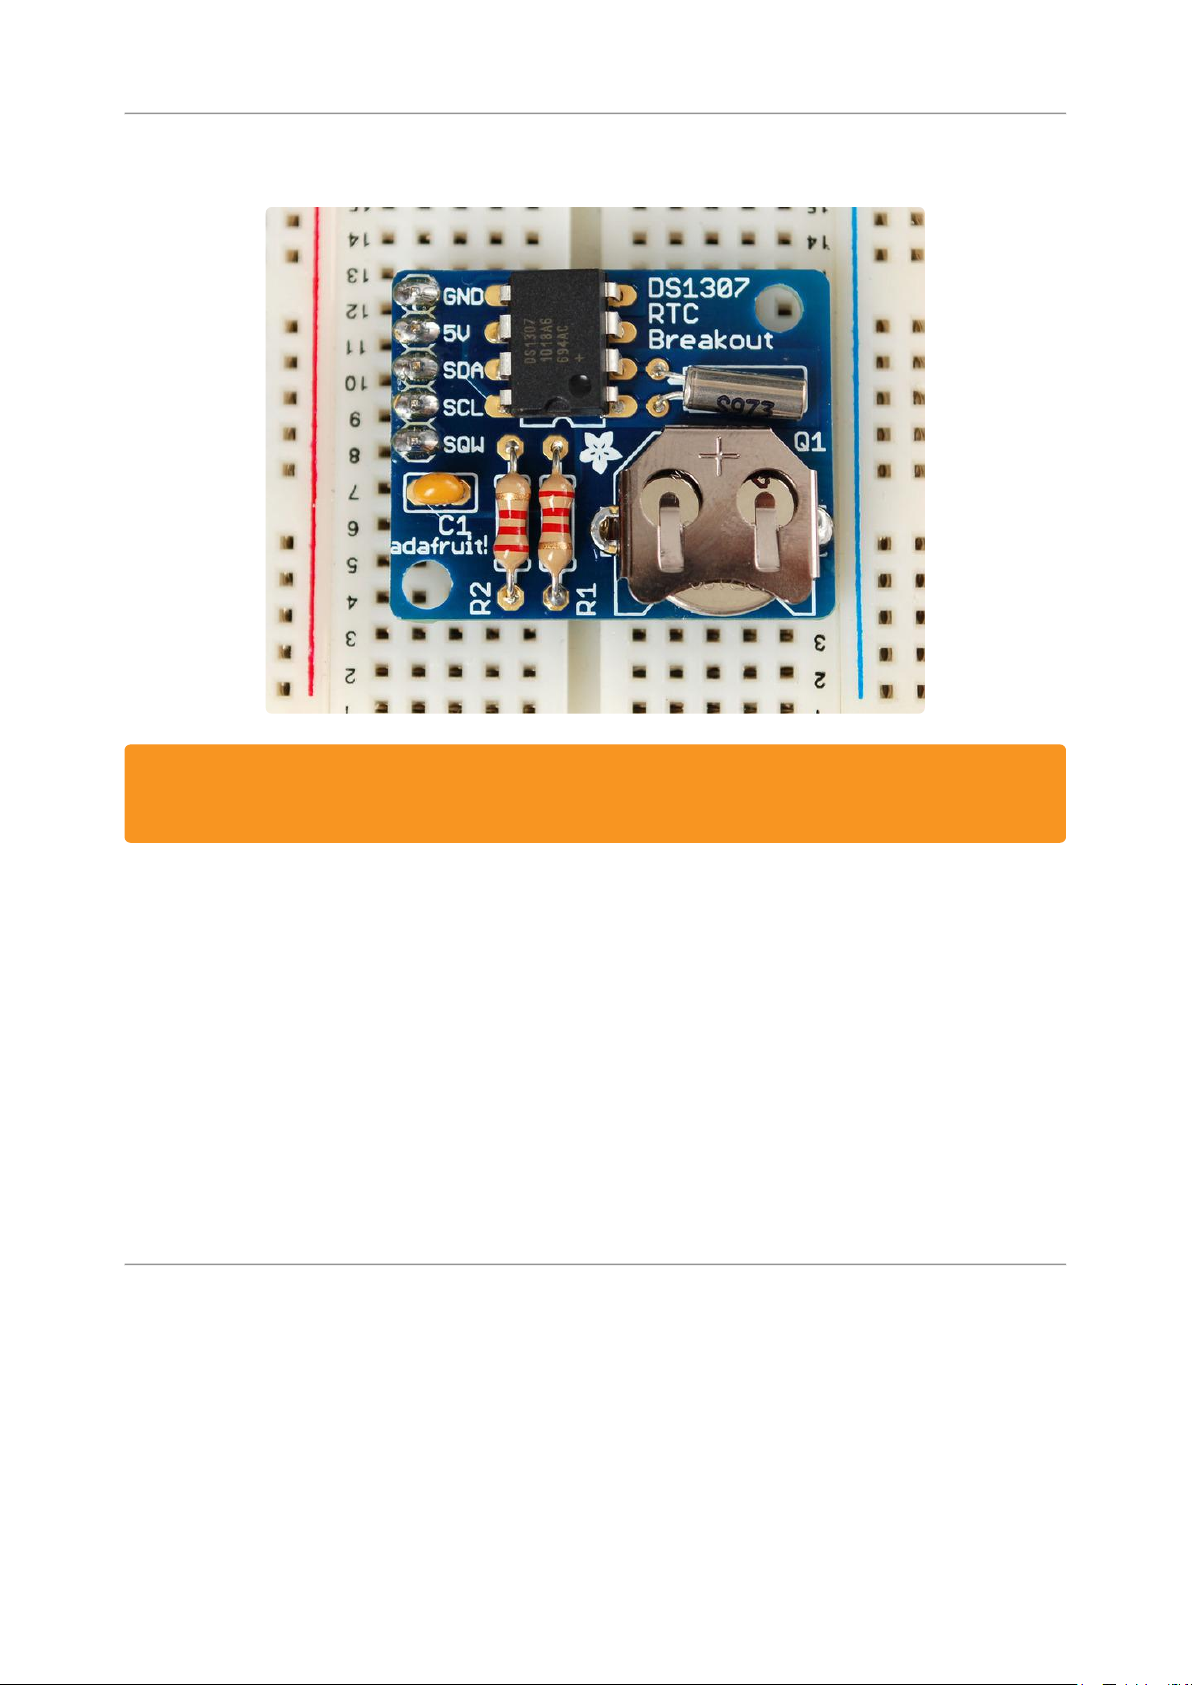
We have three different RTC we suggest, PCF8523 is inexpensive, DS1307 is most
common, and DS3231 is most precise. Any of them will do!
While the DS1307 is historically the most common, its not the best RTC chipset, we've
found!
Adafruit PiRTC - PCF8523 Real Time
Clock for Raspberry Pi
This is a great battery-backed real time
clock (RTC) that allows your Raspberry Pi
project to keep track of time if the power
is lost. Perfect for data-logging, clockbuilding,...
https://www.adafruit.com/product/3386
Adafruit PCF8523 Real Time Clock
Assembled Breakout Board
This is a great battery-backed real time
clock (RTC) that allows your
microcontroller project to keep track of
time even if it is reprogrammed, or if the
power is lost. Perfect for...
https://www.adafruit.com/product/3295
Adafruit DS1307 Real Time Clock
Assembled Breakout Board
This is a great battery-backed real time
clock (RTC) that allows your
microcontroller project to keep track of
time even if it is reprogrammed, or if the
power is lost. Perfect for...
https://www.adafruit.com/product/3296
©Adafruit Industries Page 4 of 13
Page 5
Adafruit DS3231 Precision RTC Breakout
The datasheet for the DS3231 explains
that this part is an "Extremely Accurate
I²C-Integrated RTC/TCXO/Crystal". And,
hey, it does exactly what it says...
https://www.adafruit.com/product/3013
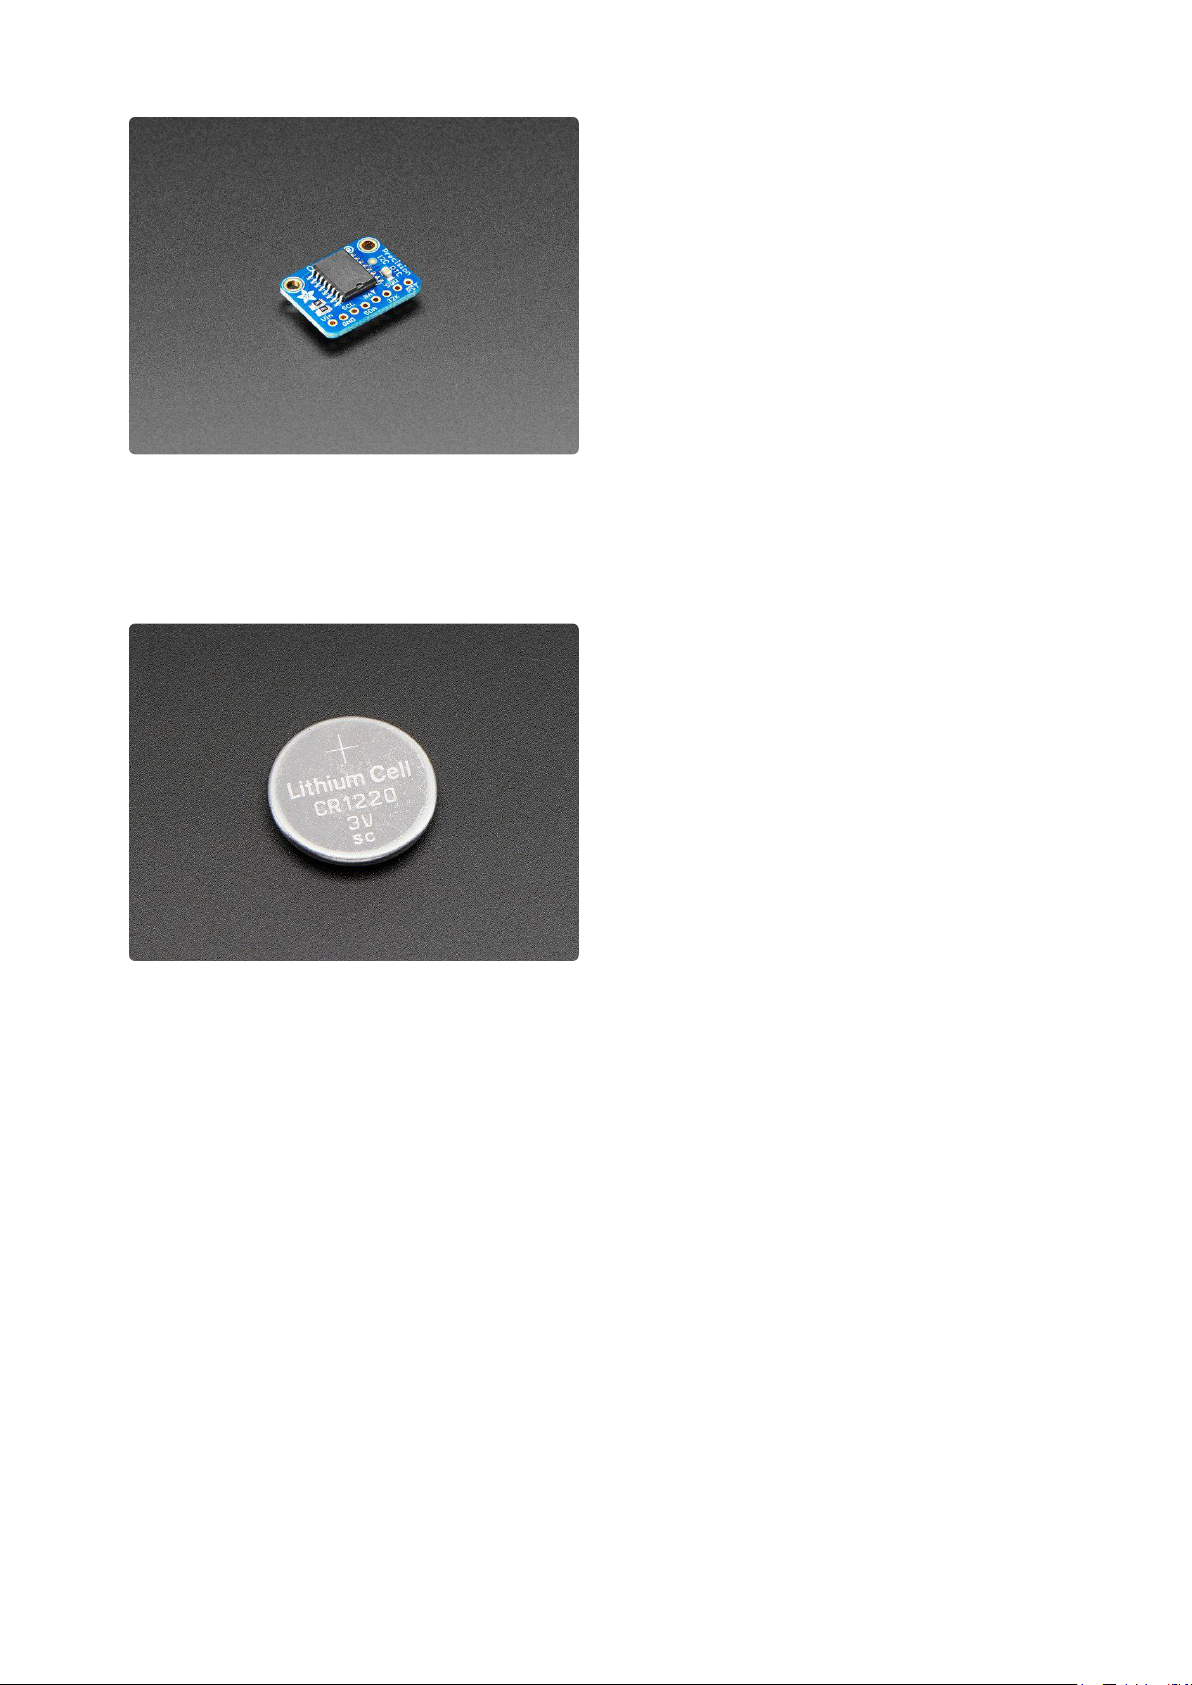
Don't forget to also install a CR1220 coin cell. In particular the DS1307 wont work at all
without it and none of the RTCs will keep time when the Pi is off and no coin battery is
in place.
CR1220 12mm Diameter - 3V Lithium Coin
Cell Battery
These are the highest quality &
Wiring is simple:
Connect VCC on the breakout board to the 5.0V pin of the Pi (if using DS1307)
1.
Connect VCC on the breakout board to the 3.3V pin of the Pi (if using PCF8523
or DS3231)
Connect GND on the breakout board to the GND pin of the Pi
2.
Connect SDA on the breakout board to the SDA pin of the Pi
3.
Connect SCL on the breakout board to the SCL pin of the Pi
4.
capacity batteries, the same as shipped
with the iCufflinks,iNecklace, Datalogging
and GPS Shields, GPS HAT, etc. One
battery per order...
https://www.adafruit.com/product/380
©Adafruit Industries Page 5 of 13
Page 6

Set Up & Test I2C
Set up I2C on your Pi
You'll also need to set up i2c on your Pi, to do so, run sudo raspi-config and under Ad
vanced select I2C and turn it on.
For more details, check out our tutorial on Raspberry Pi i2c setup and testing at http:/
/learn.adafruit.com/adafruits-raspberry-pi-lesson-4-gpio-setup/configuring-i2c(https://
adafru.it/aTI)
Reboot once you've done that with sudo reboot
Verify Wiring (I2C scan)
Verify your wiring by running
sudo apt-get install python-smbus i2c-tools
to install the helper software and then sudo i2cdetect -y 1 at the command line,
you should see ID #68 show up - that's the address of the DS1307, PCF8523 or
DS3231!
©Adafruit Industries Page 6 of 13
Page 7

If you have a much older Pi 1, you will have to run sudo i2cdetect -y 0 as the I2C
bus address changed from 0 to 1
Once you have the Kernel driver running, i2cdetect will skip over 0x68 and
display UU instead, this means its working!
Set RTC Time
Now that we have the module wired up and verified that you can see the module with
i2cdetect, we can set up the module.
Don't forget to set up I2C in the previous step!
Raspberry Pi OS's with systemd
This should be the case for any current release. For much older releases without
systemd, skip to the next section.
Thanks to kd8twg for the hints!(https://adafru.it/ne3)
You can add support for the RTC by adding a device tree overlay. Run
sudo nano /boot/config.txt
to edit the pi configuration and add whichever matches your RTC chip:
dtoverlay=i2c-rtc,ds1307
©Adafruit Industries Page 7 of 13
Page 8

or
dtoverlay=i2c-rtc,pcf8523
or
dtoverlay=i2c-rtc,ds3231
to the end of the file
Save it and run sudo reboot to start again. Log in and run sudo i2cdetect -y 1
to see the UU show up where 0x68 should be
Disable the "fake hwclock" which interferes with the 'real' hwclock
sudo apt-get -y remove fake-hwclock
•
sudo update-rc.d -f fake-hwclock remove
•
sudo systemctl disable fake-hwclock
•
©Adafruit Industries Page 8 of 13
Page 9

Now with the fake-hw clock off, you can start the original 'hardware clock' script.
Run sudo nano /lib/udev/hwclock-set and comment out these three lines:
#if [ -e /run/systemd/system ] ; then
# exit 0
#fi
Also comment out the two lines
/sbin/hwclock --rtc=$dev --systz --badyear
and
/sbin/hwclock --rtc=$dev --systz
©Adafruit Industries Page 9 of 13
Page 10

Sync time from Pi to RTC
When you first plug in the RTC module, it's going to have the wrong time because it
has to be set once. You can always read the time directly from the RTC with sudo
hwclock -r
(ignore use of deprecated -D parameter)
You can see, the date at first is invalid! You can set the correct time easily. First run da
te to verify the time is correct. Plug in Ethernet or WiFi to let the Pi sync the right
time from the Internet. Once that's done, run sudo hwclock -w to write the time,
and another sudo hwclock -r to read the time
Once the time is set, make sure the coin cell battery is inserted so that the time is
saved. You only have to set the time once
©Adafruit Industries Page 10 of 13
Page 11

That's it! Next time you boot the time will automatically be synced from the RTC
module
hwclock: ioctl(RTC_RD_TIME) to /dev/rtc0 to read the time failed: Invalid argument
If you are getting an error message like this when trying to read/write to the RTC,
make sure you have a good coin cell battery installed.
Raspbian Wheezy or other pre-systemd Linux
First, load up the RTC module by running
sudo modprobe i2c-bcm2708
sudo modprobe i2c-dev
sudo modprobe rtc-ds1307
Then, as root (type in sudo bash) run
echo ds1307 0x68 > /sys/class/i2c-adapter/i2c-1/new_device
If you happen to have an old Rev 1 Pi, type in
echo ds1307 0x68 > /sys/class/i2c-adapter/i2c-0/new_device
You can then type in exit to drop out of the root shell.
Then check the time with sudo hwclock -r which will read the time from the DS1307
module. If this is the first time the module has been used, it will report back Jan 1
2000, and you'll need to set the time
©Adafruit Industries Page 11 of 13
Page 12

First you'll need to get the right time set on the Pi, the easiest way is to connect it up
to Ethernet or Wifi - it will automatically set the time from the network. Once the time
is correct (check with the date command), run sudo hwclock -w to write the system
time to the RTC
You can then verify it with sudo hwclock -r
Next, you'll want to add the RTC kernel module to the /etc/modules list, so its loaded
when the machine boots. Run sudo nano /etc/modules and add rtc-ds1307 at the end
of the file (the image below says rtc-1307 but its a typo)
©Adafruit Industries Page 12 of 13
Page 13

Older pre-Jessie raspbian is a little different. First up, you'll want to create the DS1307
device creation at boot, edit /etc/rc.local by running
sudo nano /etc/rc.local
and add:
echo ds1307 0x68 > /sys/class/i2c-adapter/i2c-0/new_device (f
or v1 raspberry pi)
echo ds1307 0x68 > /sys/class/i2c-adapter/i2c-1/new_device (f
or v2 raspberry pi)
sudo hwclock -s (both versions)
before exit 0 (we forgot the hwclock -s part in the screenshot below)
That's it! Next time you boot the time will automatically be synced from the RTC
module
©Adafruit Industries Page 13 of 13
 Loading...