

Page 1
Pi Hole Ad Blocker with Pi Zero W
Created by lady ada
Last updated on 2020-12-21 12:02:53 PM EST
Page 2

2
3
5
5
6
7
7
8
9
9
9
10
11
13
13
15
15
18
19
23
25
25
27
27
30
Guide Contents
Guide Contents
Overview
Project Parts
Pi Zero W base parts
Pi OLED Display Addition
Other things you may need...
Using a Pi 3 Instead of Pi Zero W
Prepare the Pi
Install Pi Hole
Pre-Check
Change Hostname
Run Pi Hole Installer
Configuration
Test Admin Page
Test Blocking
Install PiOLED
Install 2x20 Header
Install CircuitPython Libraries
Update stats.py program
Test & Stats at Startup
Install Mini PiTFT
Install 2x20 Header
Python Setup
Update the stats.py program
Test & Stats at Startup
© Adafruit Industries https://learn.adafruit.com/pi-hole-ad-blocker-with-pi-zero-w Page 2 of 33
Page 3
Overview
A long time ago we made a Pi into a WiFi gateway that also blocked ads but the Pi Hole project does a
way
better job!
This project will make your Pi Zero W act as a DNS ( Domain Name Server) The kind of device that tells
you that adafruit.com is known as IP address 104.20.38.240.
Except Pi Hole DNS will do a special trick, when it is asked for the IP address of ads.adserver.com (for
example) it will return nothing! So you will never even connect to the ad server and get the ad. Your
connection will be faster, less data, and no intrusive ads. It works great on computers, tablets, phones, etc.
Even if you cannot run an ad-blocker plugin on your phone or tablet, this will work and ad-blockerdetectors can't tell you're running it.
Unlike our WiFi gateway demo, you do not have to set up the Pi as your access point, you will only use it
as a DNS ad blocker so it will not act as a bottleneck
© Adafruit Industries https://learn.adafruit.com/pi-hole-ad-blocker-with-pi-zero-w Page 3 of 33
Page 4

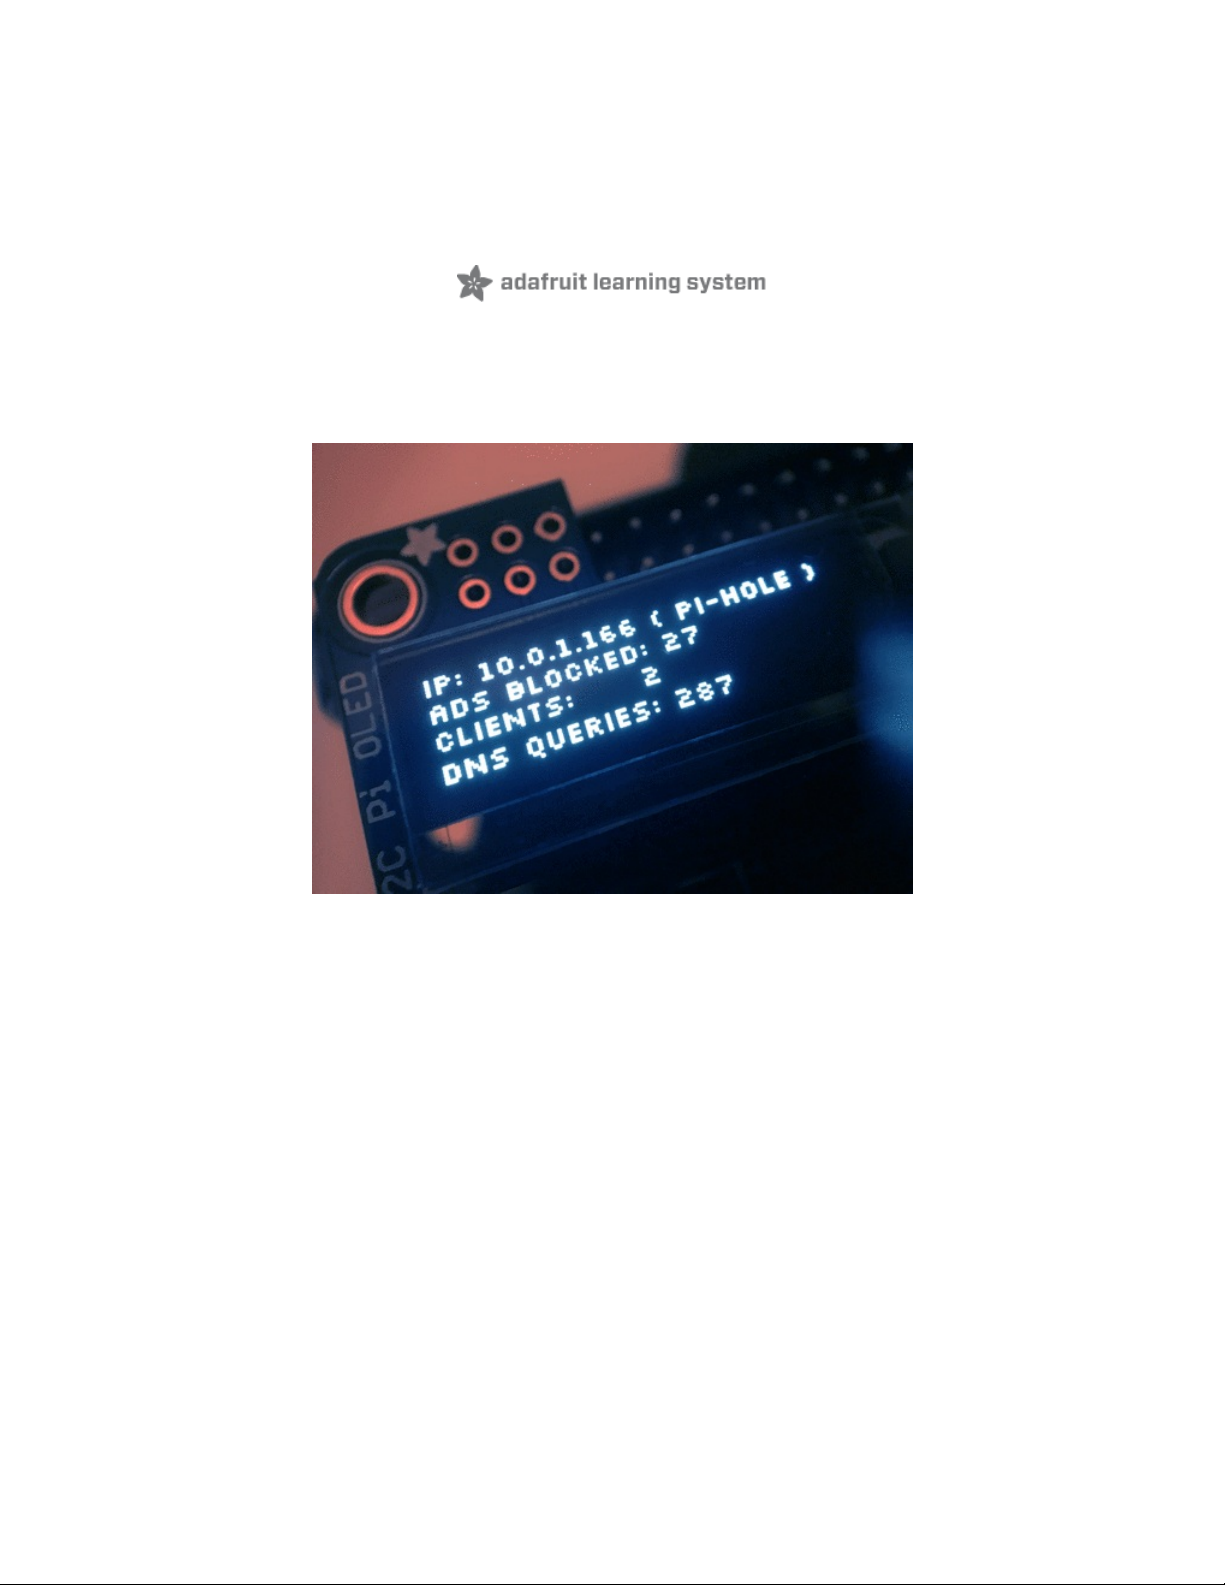
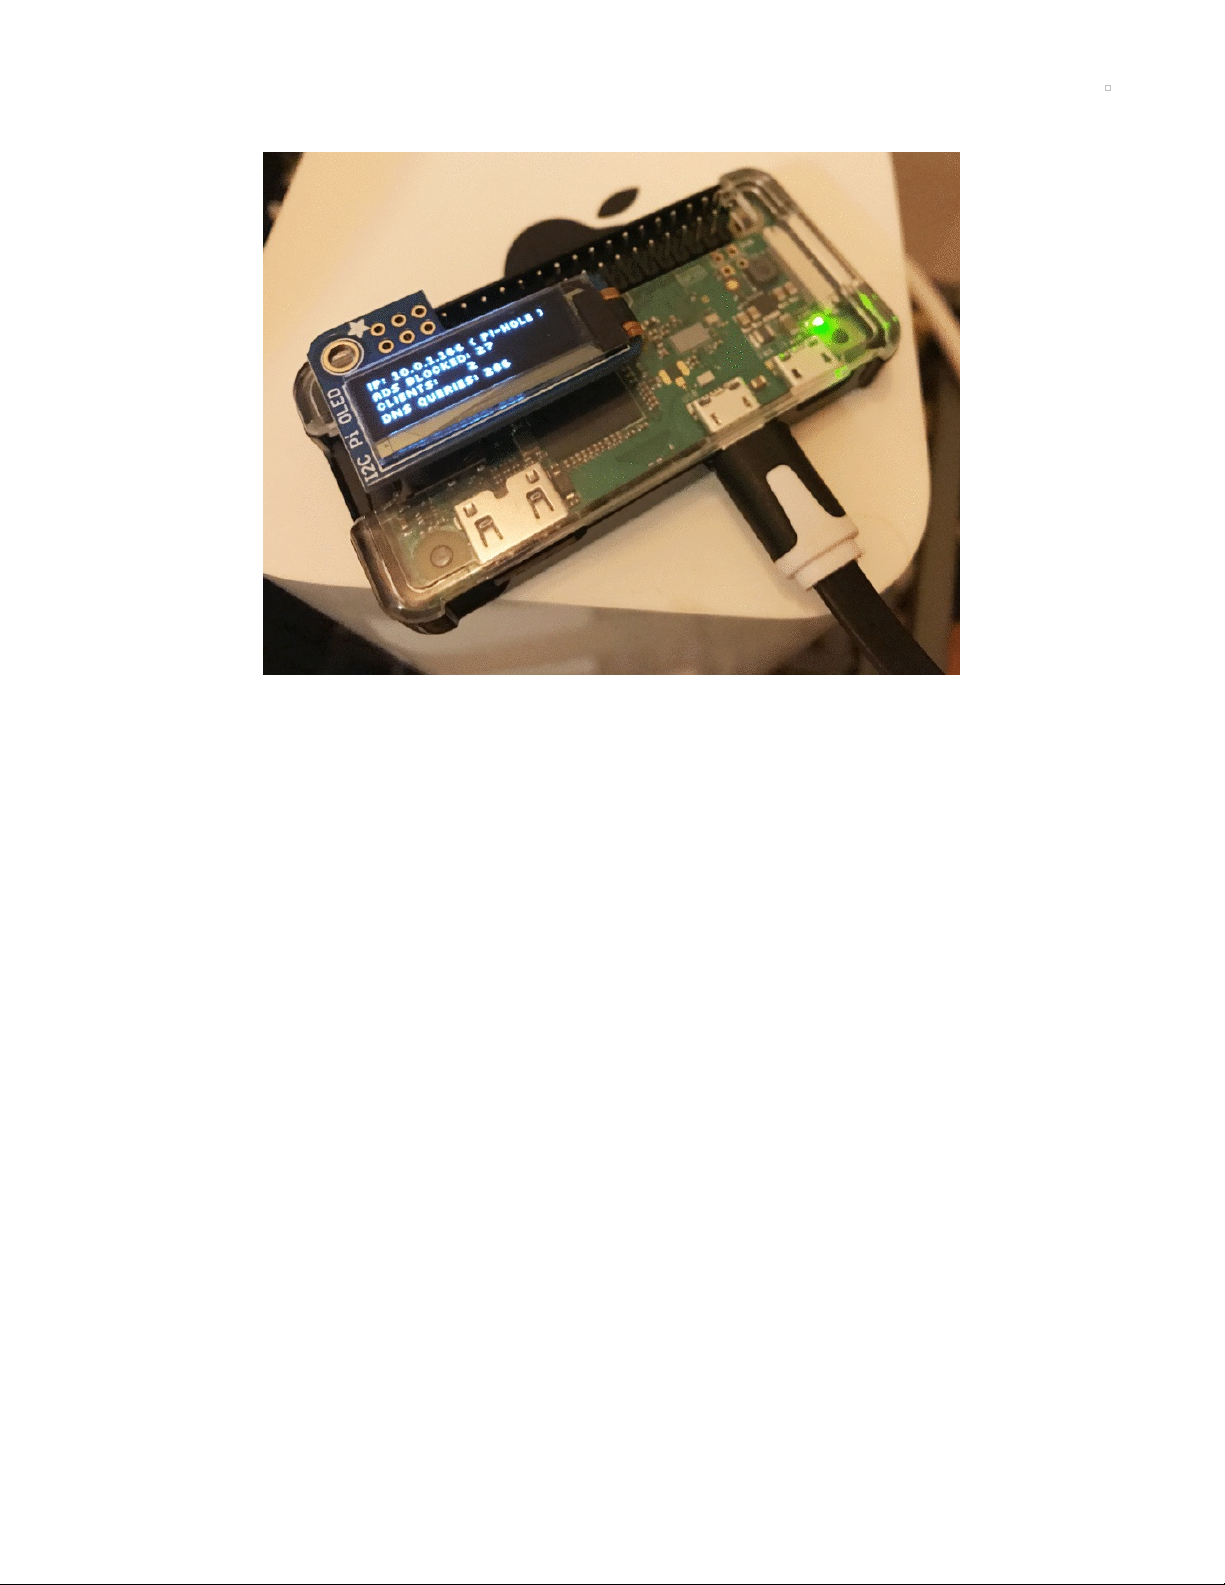
We upgraded our Pi Zero Pi Hole with a little display, that makes setting up clients easy and also gives you
some nifty stats!
Follow along with this guide to DIY your own
© Adafruit Industries https://learn.adafruit.com/pi-hole-ad-blocker-with-pi-zero-w Page 4 of 33
Page 5
Project Parts
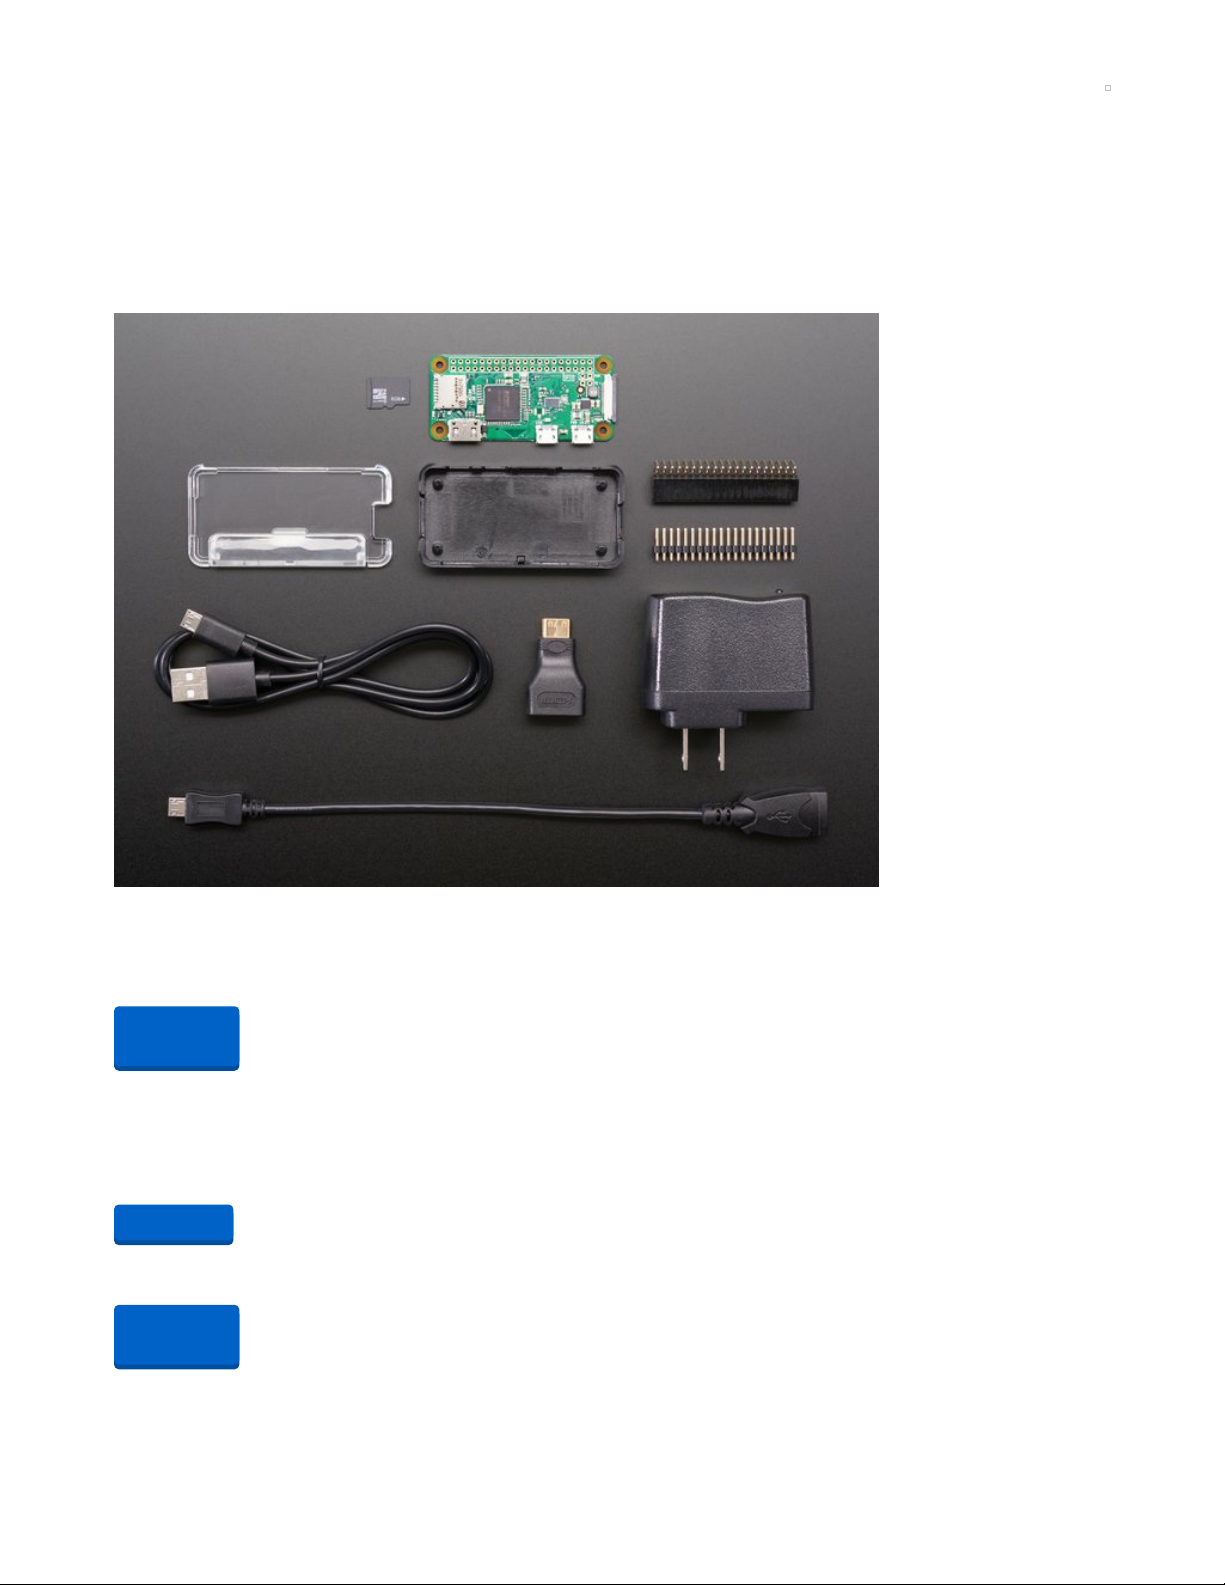
This project can be done with any Raspberry Pi, but for the most adorably compact version we're using a
Pi Zero W - this has enough power to do what we want, and has built in WiFi too!
Pi Zero W base parts
Its easiest if you pick up a Pi Zero W budget pack as it contains most everything you need
Raspberry Pi Zero W Budget Pack - Includes Pi Zero W
Remember those cereal commercials that would always say, "part of a complete breakfast"? Well the Pi
Zero's a lot like that bowl of cereal - while it's...
Out of Stock
But you can also just DIY with the minimum requirements:
1 x Pi Zero W
the type of low cost game-changing product Raspberry Pi's known for - the super light, super lean
microcomputer we've come to know and low, but now with built-in WiFi.
1 x 4G or larger SD Card
You will be burning this card with Raspbian Jessie Lite so its ok if its blank or pre-burned
1 x Adafruit Pi Zero Enclosure
Adafruit's classic, sturdy plastic enclosure. Keeps your Pi Zero safe and sleek.
Out of
Stock
Add to Cart
Out of
Stock
© Adafruit Industries https://learn.adafruit.com/pi-hole-ad-blocker-with-pi-zero-w Page 5 of 33
Page 6
1 x 5V 1A USB wall adapter
This one is plenty good and you can use any Micro USB cable with it
1 x 5V 2.4A USB wall adapter
Super powerful for any uses, and comes with a built in MicroUSB cable
Pi OLED Display Addition
If you want to add an OLED display (which is suggested!) you'll also need:
Adafruit PiOLED - 128x32 Monochrome OLED Add-on for Raspberry Pi
If you're looking for the most compact li'l display for a Raspberry Pi (most likely a
$14.95
In Stock
If you are using a Pi Zero W you'll need to add 2x20 headers too
1 x 2x20 Male Header
Solder this in to plug in Pi HATs, GPIO cables, etc as you would into a normal Pi. Requires soldering
or
1 x 2x20 No-Solder Hammer Headers
If your soldering isn't quite up to scratch, or you just don't own a soldering iron yet, then these nifty
Add to Cart
Add to Cart
Add to Cart
Add to Cart
Out of
Stock
© Adafruit Industries https://learn.adafruit.com/pi-hole-ad-blocker-with-pi-zero-w Page 6 of 33
Page 7
hammer headers from Pimoroni might be just what you need.
Other things you may need...
You also need a way to burn that SD card!
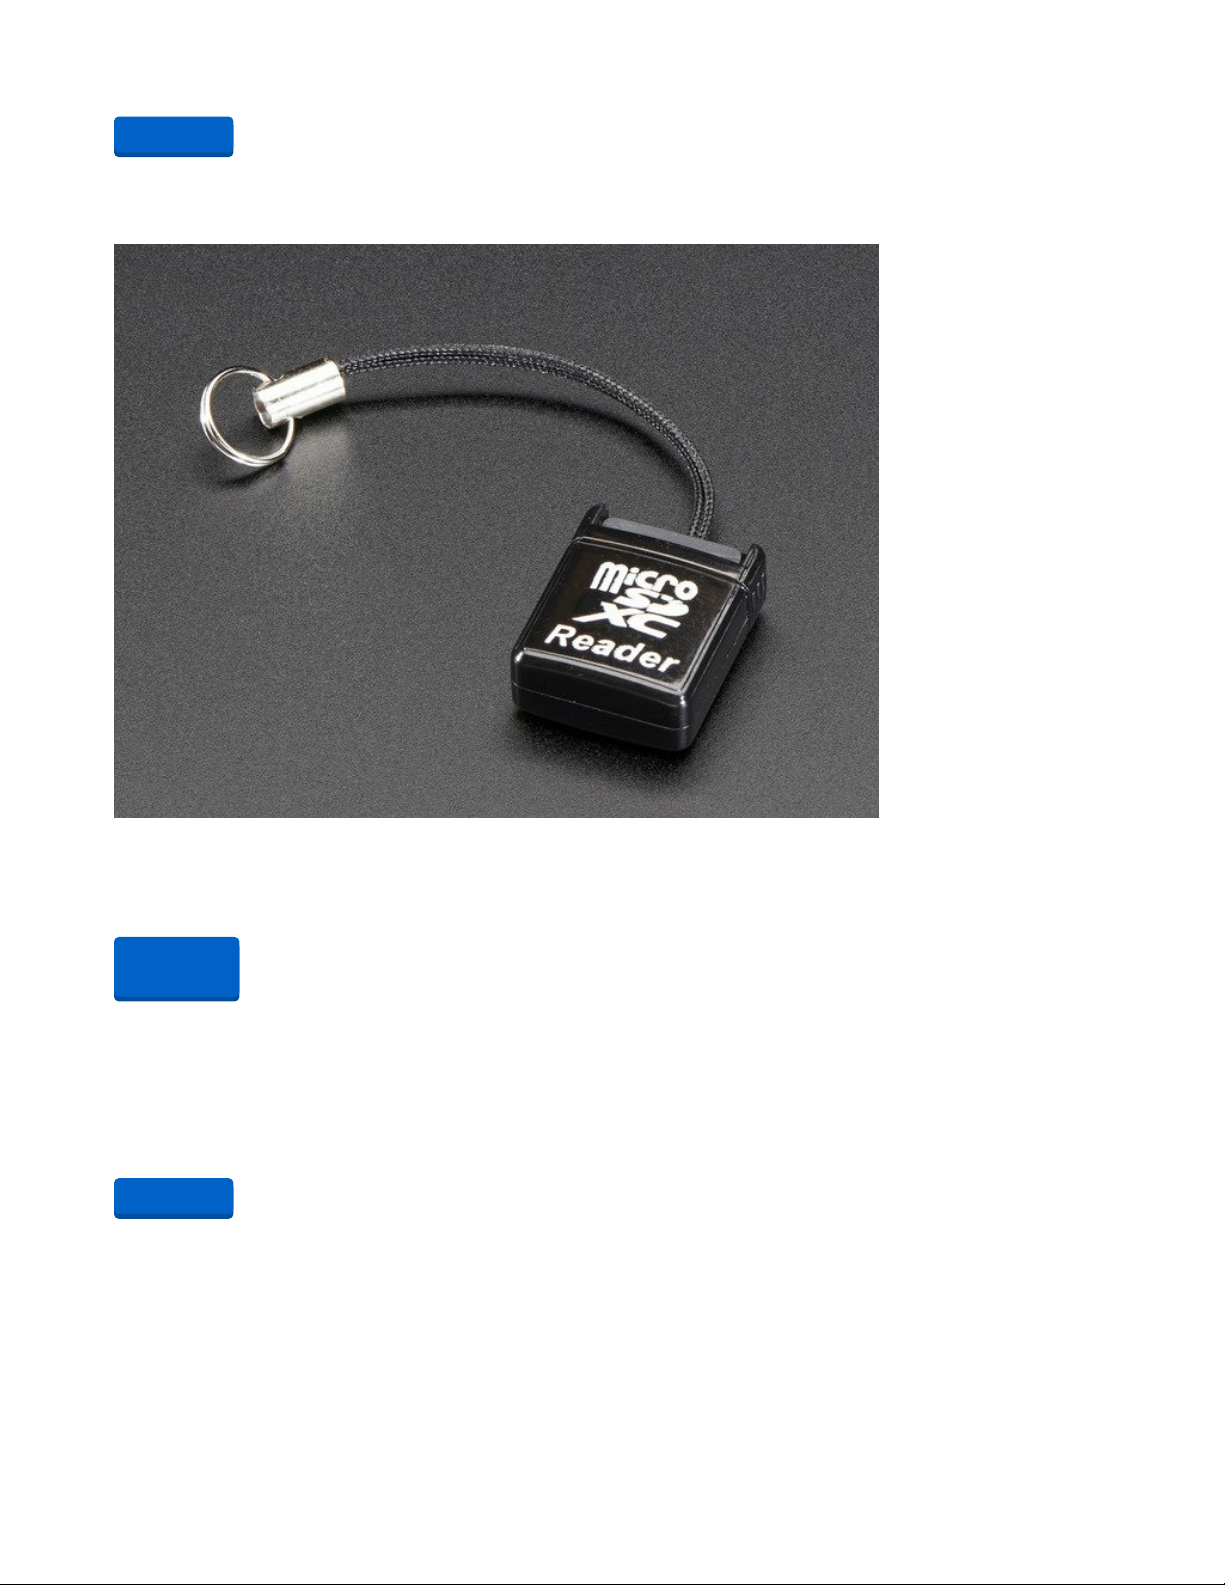
USB MicroSD Card Reader/Writer - microSD / microSDHC / microSDXC
This is the cutest little microSD card reader/writer - but don't be fooled by its adorableness! It's wicked fast
and supports up to 64 GB SDXC cards! Simply slide the card into...
Out of Stock
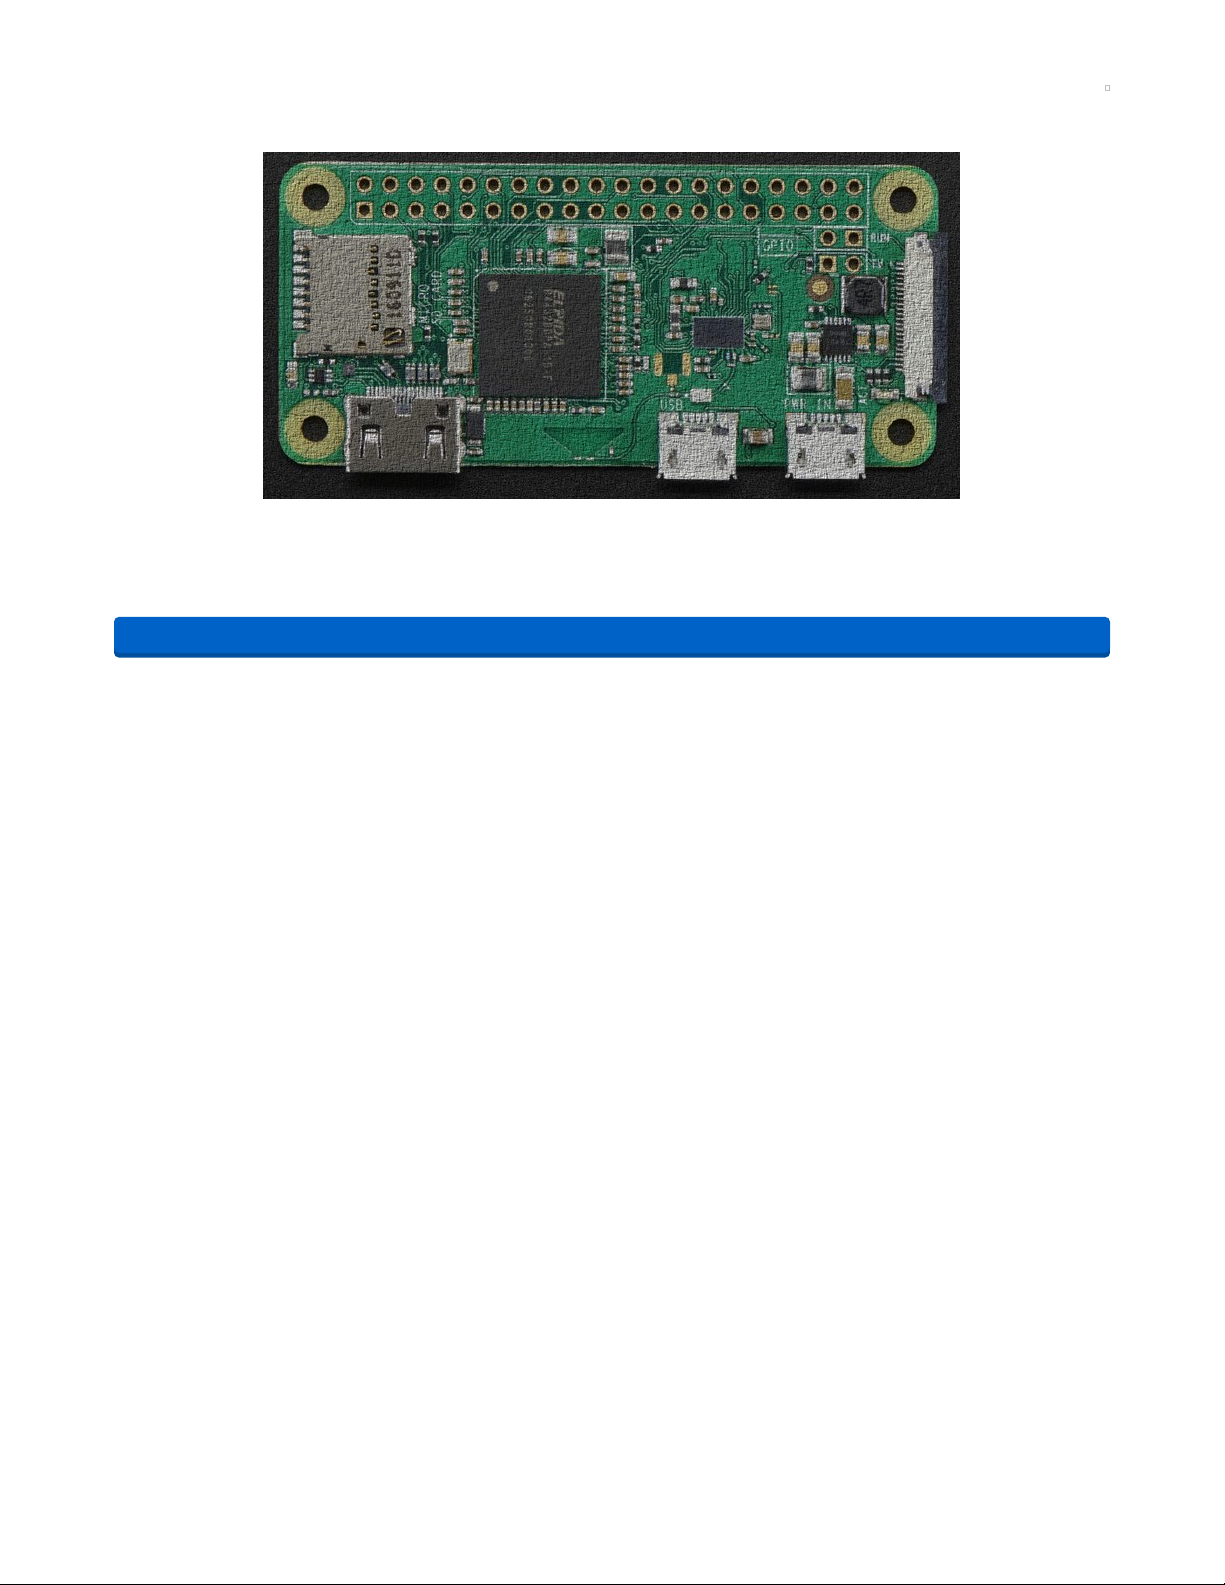
Using a Pi 3 Instead of Pi Zero W
Instead of a Pi Zero W you can directly substitute in a Pi 3 which also has built in WiFi, you won't need the
2x20 header in that case
1 x Raspberry Pi 3
Raspberry Pi 3 with WiFi built in!
Add to Cart
Out of
Stock
Add to Cart
© Adafruit Industries https://learn.adafruit.com/pi-hole-ad-blocker-with-pi-zero-w Page 7 of 33
Page 8
Prepare the Pi
The Pi Zero W is a very minimal computer, so it requires a little work to get it up and running.
We have a guide on how to set up your Pi Zero W 'headless' which is how we recommend you get started.
Check out the guide for how to do that!
https://adafru.it/yuC
Here's the quick-start for people with some experience:
1. Download the latest 'Lite' Raspbian (https://adafru.it/fQi) to your computer
2. Burn the Lite Raspbian to your micro SD card (https://adafru.it/dDL) using your computer
3. Re-plug the SD card into your computer (don't use your Pi yet!) and set up your wifi connection by
editing supplicant.conf (https://adafru.it/yuD)
4. Activate SSH support (https://adafru.it/yuD)
5. Plug the SD card into the Pi Zero W
6. If you have an HDMI monitor we recommend connecting it up via the mini HDMI adapter we provide
in the budget pack - so you can see that it's booting OK
7. Plug in power to the Pi Zero W - you will see the green LED flicker a little. The Pi Zero will reboot
while it sets up so wait a good 10 minutes
8. If you are running Windows on your computer, install Bonjour support so you can use .local names,
you'll need to reboot Windows after installation (https://adafru.it/lPE)
9. You can then ssh into raspberrypi.local (https://adafru.it/jvB)
https://adafru.it/yuC
© Adafruit Industries https://learn.adafruit.com/pi-hole-ad-blocker-with-pi-zero-w Page 8 of 33
Page 9
Install Pi Hole
Use the following instructions to install Pi Hole:
https://github.com/pi-hole/pi-hole/#one-step-automated-install (https://adafru.it/PqC)
Pre-Check
OK once you have set your Pi up and the WiFi is connecting to your home or office network, and your can
ssh into it, continue with these easy steps! If you cannot connect via ssh yet, go back and read some of
our guides until you are able to log into your Pi.
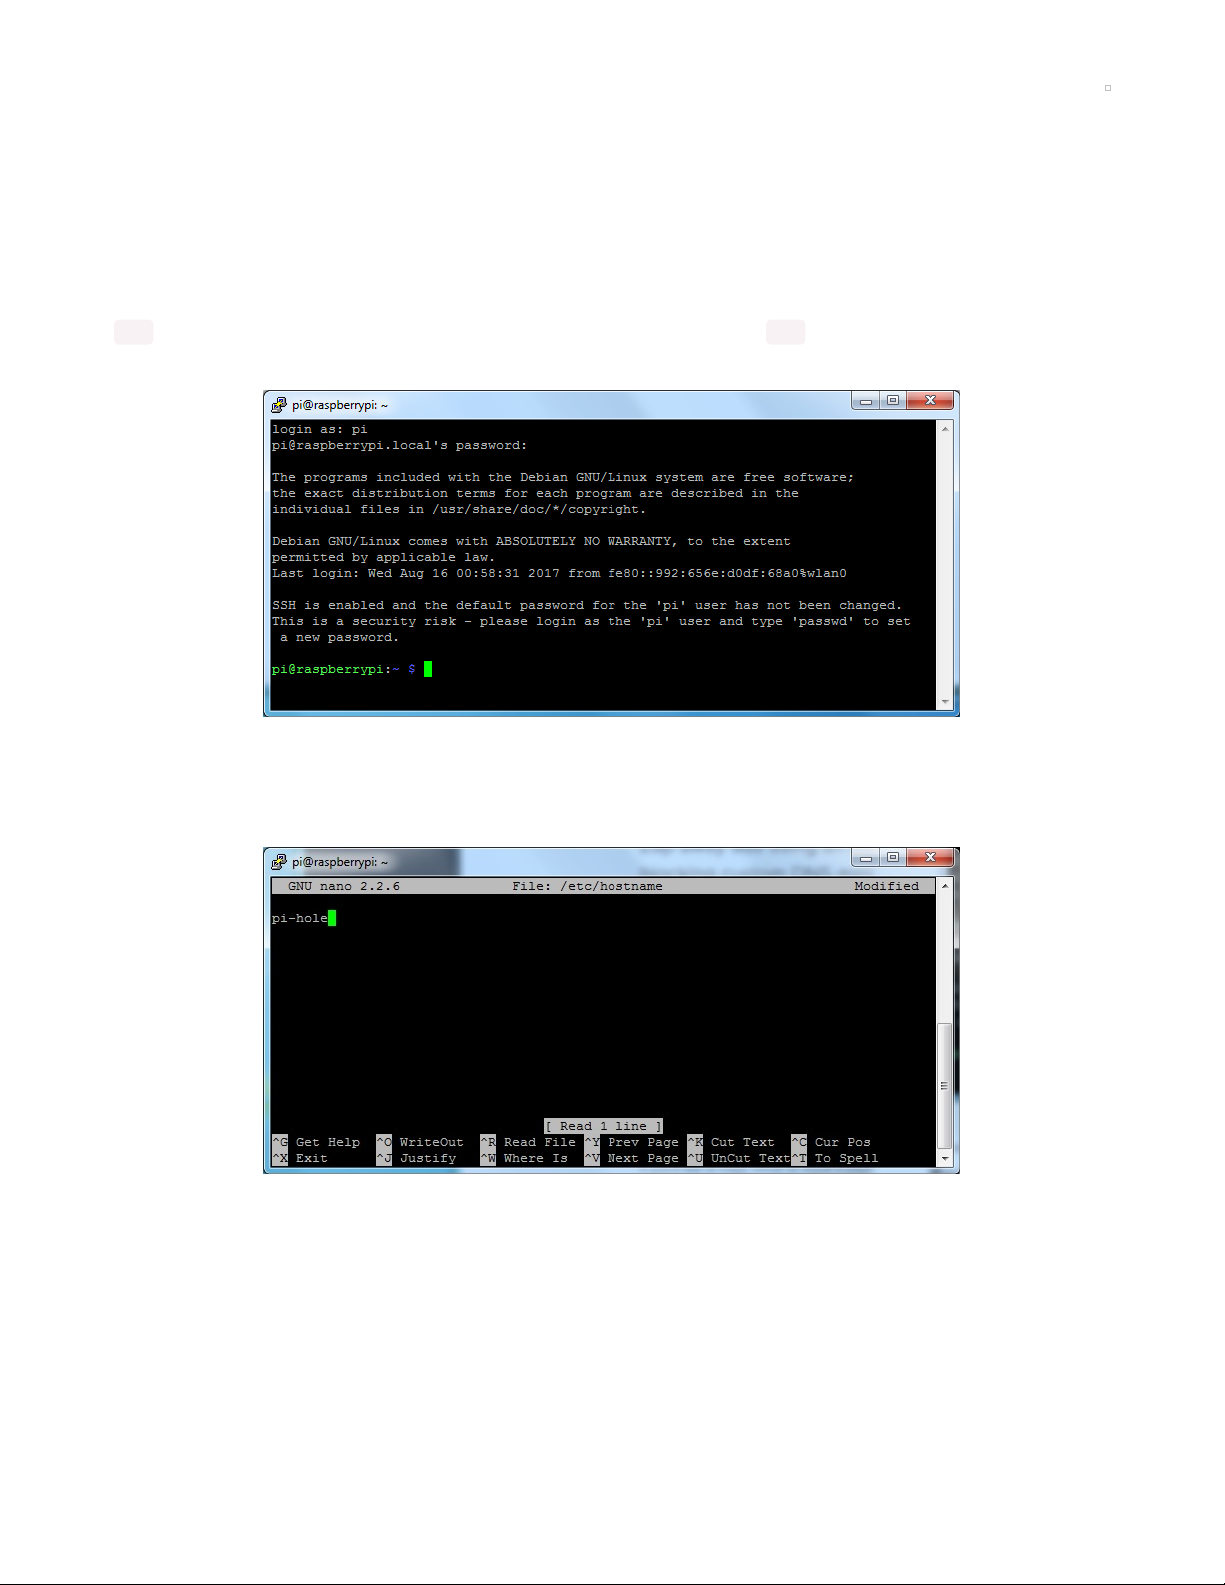
Change Hostname
I like to do this first so I dont get confused between all the different Pi's in the house
Edit the hostname with sudo nano /etc/hostname and put something else on that first line, like pi-hole
Also change it in the hosts file with sudo nano /etc/hosts to match the same name. It's probably the last
line:
© Adafruit Industries https://learn.adafruit.com/pi-hole-ad-blocker-with-pi-zero-w Page 9 of 33
Page 10
Reboot and when you ssh in again, use pi-hole.local
Now's also a good time to change the Pi's password with passwd
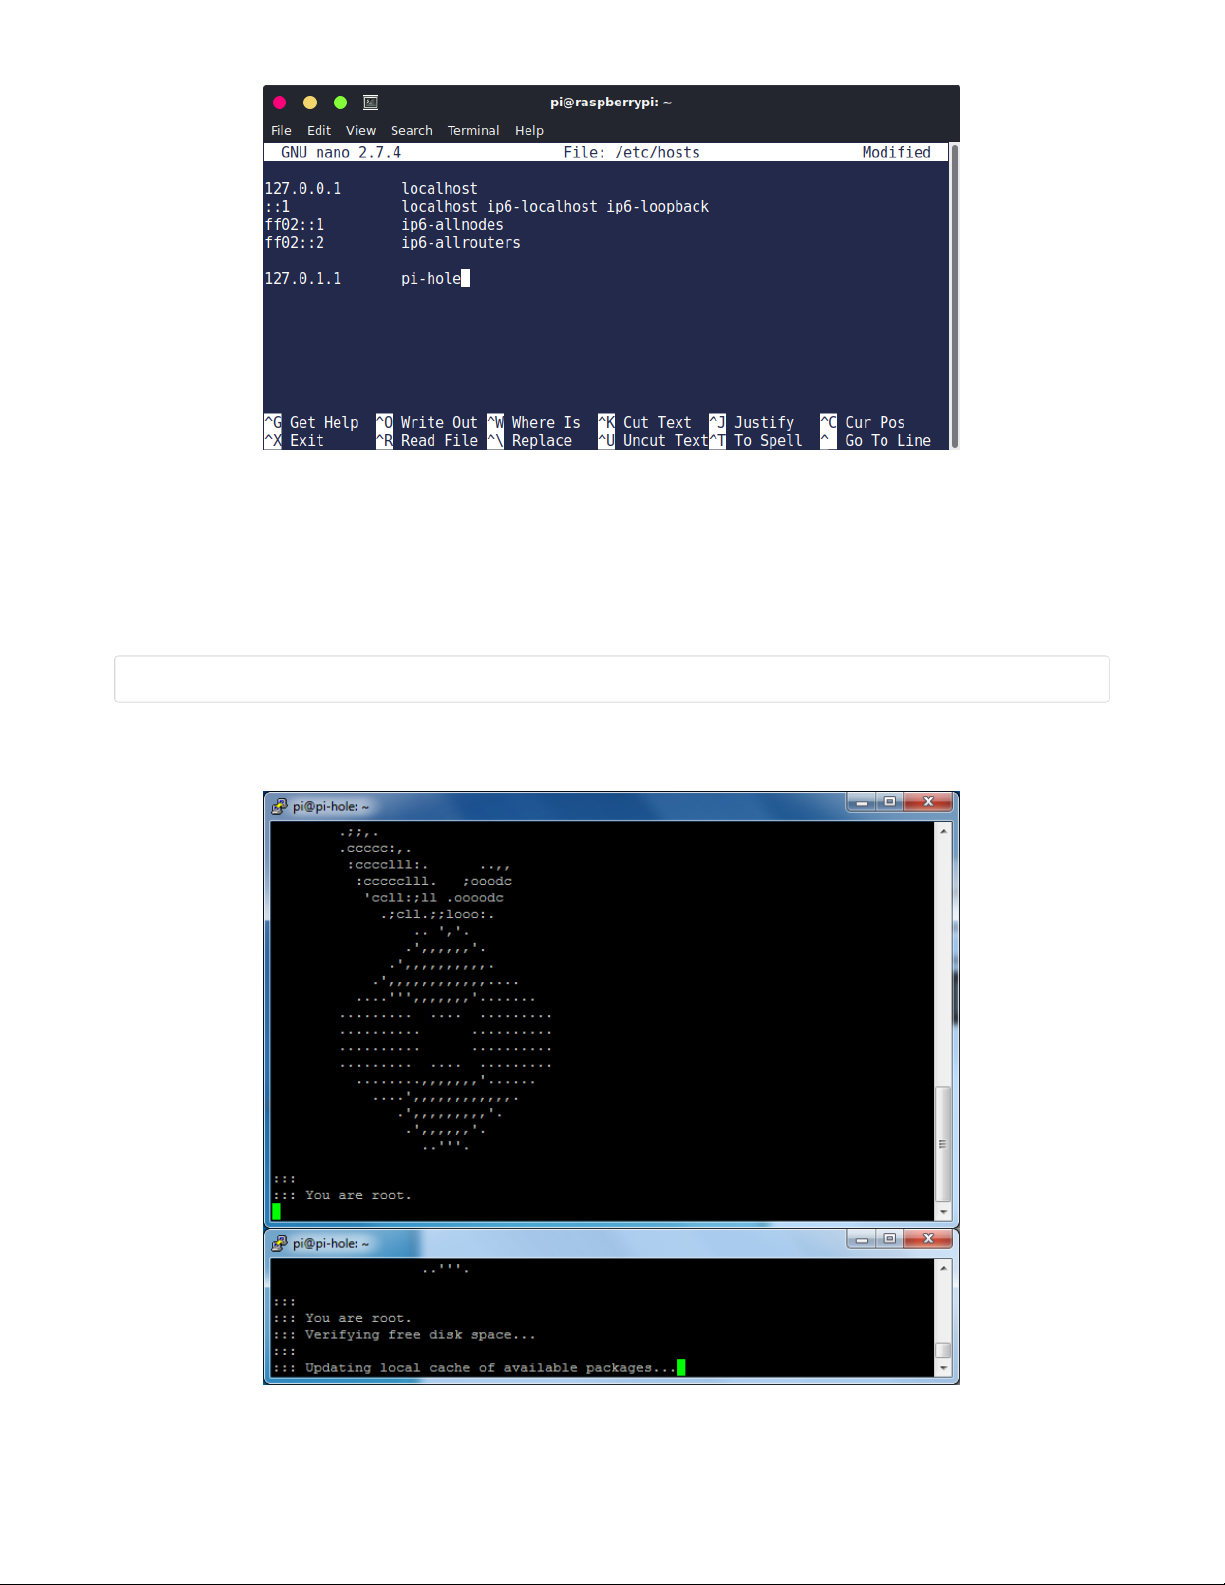
Run Pi Hole Installer
There's more information on how installation at https://pi-hole.net/ (https://adafru.it/yuE) - as of the writing
of this guide, its easier to just run:
curl -sSL https://install.pi-hole.net | bash
It will take quite a while to install, and may seem to 'hang' at points. Just let it do its thing for about 20
minutes!
© Adafruit Industries https://learn.adafruit.com/pi-hole-ad-blocker-with-pi-zero-w Page 10 of 33
Page 11

Configuration
Pick who will be the upstream DNS (for non-ad blocked sites)
- Google is fine and will probably be up all the time
99% of people will use IPv4 - if you need IPv6 you'd know!
© Adafruit Industries https://learn.adafruit.com/pi-hole-ad-blocker-with-pi-zero-w Page 11 of 33
Page 12

The installer will automatically try to set the
dynamic
IP
address it got from your router to be fixed. This works well
enough, if you have an advanced network set up, you can
configure a custom IP address
The Web Interface is kinda cool, and is password protected.
We'll be showing most of the stats on the little OLED but we
still need the API to be running so keep this on
It will keep installing! Just hold tight...
When its done you'll get this final config screen! Copy & paste the password into another window for now
© Adafruit Industries https://learn.adafruit.com/pi-hole-ad-blocker-with-pi-zero-w Page 12 of 33
Page 13

Test Admin Page
On your desktop computer or tablet, visit http://pi-hole.local/admin/ (https://adafru.it/yuF) And you should
see an administration panel!
Test Blocking
On your tablet, phone, computer, etc - Set up your DNS server in the network settings to be the IP
address of the Pi
© Adafruit Industries https://learn.adafruit.com/pi-hole-ad-blocker-with-pi-zero-w Page 13 of 33
Page 14

You
may
need to restart your network or browser to have it kick in, also there may be some cached ads
so don't worry if not everything is blocked. Visit your favorite site with ads (not adafruit.com cuz we don't
have any! :) and see the difference!
Now that you've got that done, lets continue and install the display!
© Adafruit Industries https://learn.adafruit.com/pi-hole-ad-blocker-with-pi-zero-w Page 14 of 33
Page 15

Install PiOLED
Our little PiOLED add on makes a very cute and easy way to display the Pi Hole stats. We were inspired to
add this when we saw this tweet!
What a perfect use! Here's how to add it on for some nice stats. It also displays the hostname and IP
address so if you forget it you can just look at the display. It will also tick up when its in use so you can tell
its working.
Install 2x20 Header
If you are using a Pi Zero you'll need to solder in or somehow attach a 2x20 header so you can plug in the
Pi OLED. Use either a plain 2x20 header and solder it in using an iron + some solder... (https://adafru.it/drI)
© Adafruit Industries https://learn.adafruit.com/pi-hole-ad-blocker-with-pi-zero-w Page 15 of 33
Page 16

Break-away 0.1" 2x20-pin Strip Dual Male Header
If we could eat headers, we'd have them for breakfast, lunch, and dinner. But we can't :( So we're making
the best of it and selling them!This...
Out of Stock
Or you can use Hammer headers which do not need soldering!
Out of
Stock
© Adafruit Industries https://learn.adafruit.com/pi-hole-ad-blocker-with-pi-zero-w Page 16 of 33
Page 17

GPIO Hammer Headers - Solderless Raspberry Pi Connectors
If your soldering isn't quite up to scratch, or you just don't own a soldering iron yet, then these nifty
hammer headers from
$6.50
In Stock
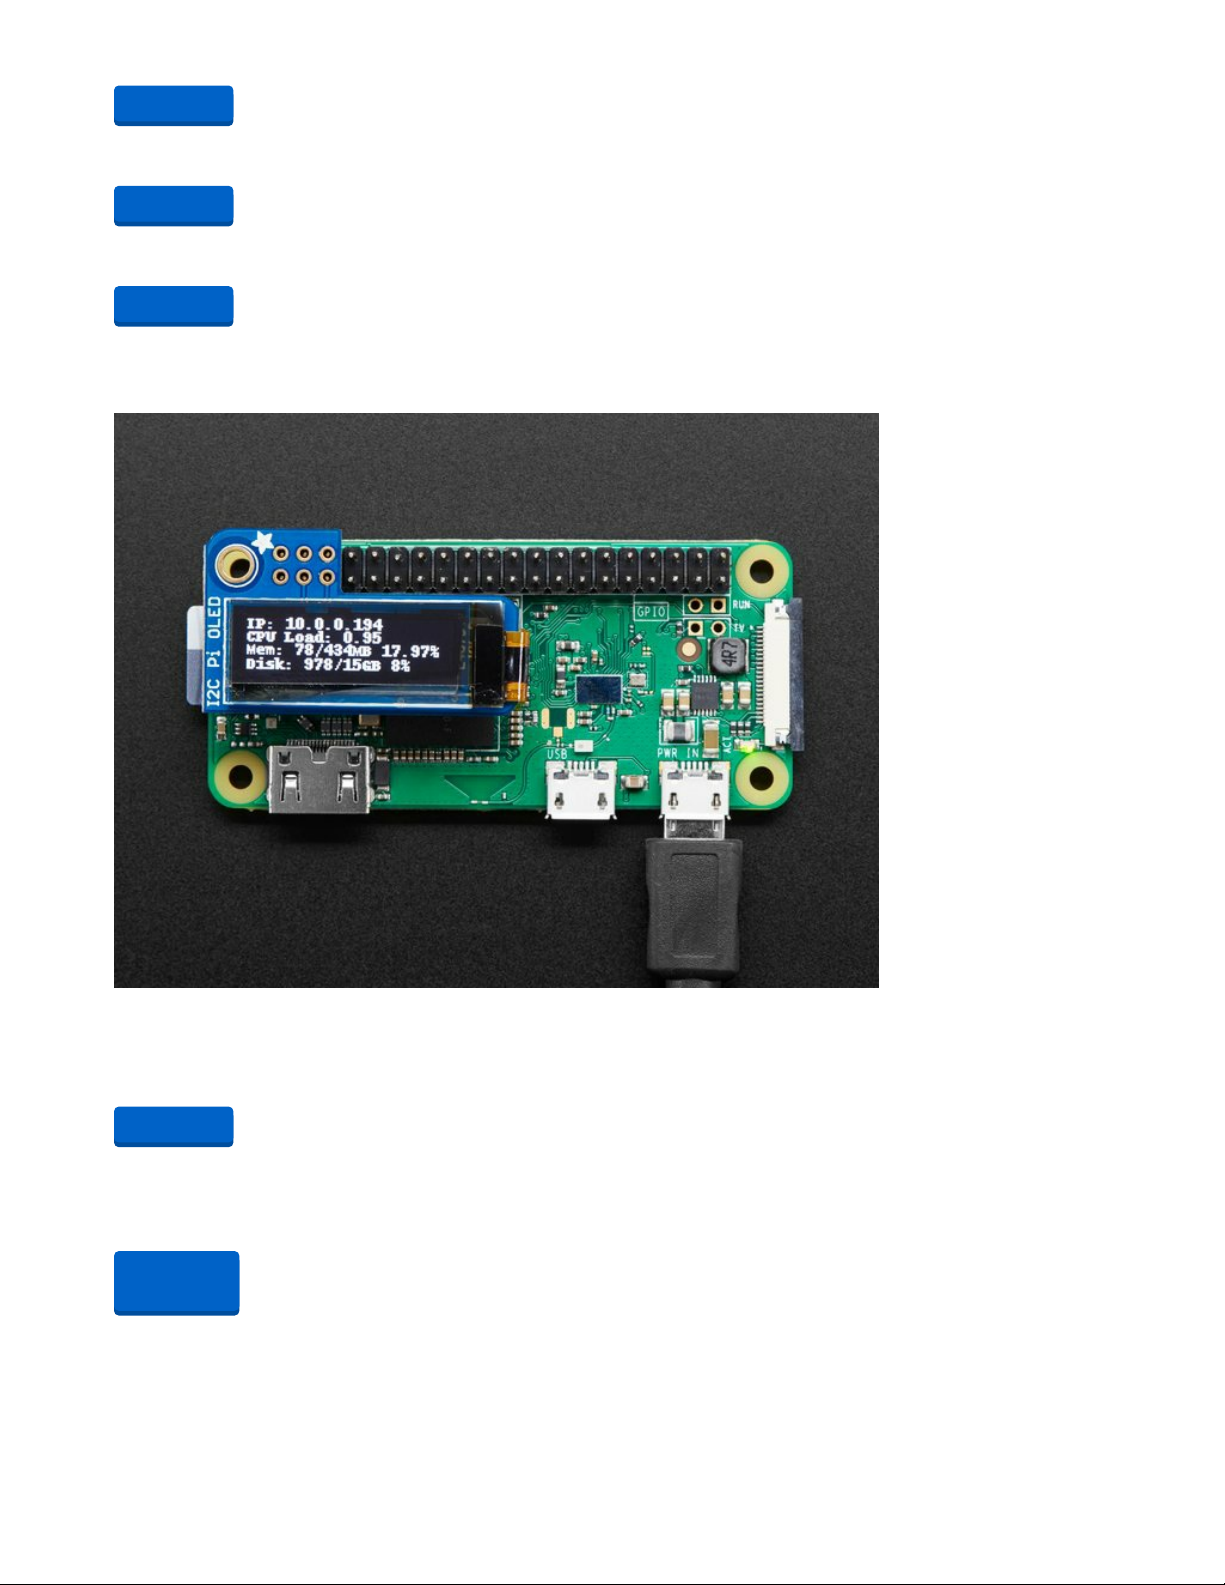
Either way, you'll want to end up with something like this:
Add to Cart
© Adafruit Industries https://learn.adafruit.com/pi-hole-ad-blocker-with-pi-zero-w Page 17 of 33
Page 18

Install CircuitPython Libraries
This guide assumes that you've gotten your Raspberry Pi up and running, and have CircuitPython
installed. If not, check out the guide:
https://adafru.it/Deo
To install the library for the Pi OLED (https://adafru.it/u1f), enter the following into the terminal:
sudo apt-get install python3-pip
sudo pip3 install adafruit-circuitpython-ssd1306
We also need PIL to allow using text with custom fonts. There are several system libraries that PIL relies
on, so installing via a package manager is the easiest way to bring in everything:
sudo apt-get install python3-pil
And let's also make sure the requests module is installed:
sudo pip3 install requests
A nice font really helps with this little OLED display, something other than the default PIL font. First thing I
did is update the font so its a little clearer. I used Kottke's free Silkscreen font which looks great on small
screens. (https://adafru.it/yvb)
It's easy to install on your Pi, run
cd ~
wget http://kottke.org/plus/type/silkscreen/download/silkscreen.zip
unzip silkscreen.zip
https://adafru.it/Deo
© Adafruit Industries https://learn.adafruit.com/pi-hole-ad-blocker-with-pi-zero-w Page 18 of 33
Page 19

Update stats.py program
Here's the new stats.py code which uses the PiOLED.
Create a new file with nano ~pi/stats.py and paste this code below in! Then save it.
# Copyright (c) 2017 Adafruit Industries
# Author: Ladyada, Tony DiCola & James DeVito
#
# Permission is hereby granted, free of charge, to any person obtaining a copy
# of this software and associated documentation files (the "Software"), to deal
# in the Software without restriction, including without limitation the rights
# to use, copy, modify, merge, publish, distribute, sublicense, and/or sell
# copies of the Software, and to permit persons to whom the Software is
# furnished to do so, subject to the following conditions:
#
# The above copyright notice and this permission notice shall be included in
# all copies or substantial portions of the Software.
#
# THE SOFTWARE IS PROVIDED "AS IS", WITHOUT WARRANTY OF ANY KIND, EXPRESS OR
# IMPLIED, INCLUDING BUT NOT LIMITED TO THE WARRANTIES OF MERCHANTABILITY,
# FITNESS FOR A PARTICULAR PURPOSE AND NONINFRINGEMENT. IN NO EVENT SHALL THE
# AUTHORS OR COPYRIGHT HOLDERS BE LIABLE FOR ANY CLAIM, DAMAGES OR OTHER
# LIABILITY, WHETHER IN AN ACTION OF CONTRACT, TORT OR OTHERWISE, ARISING FROM,
# OUT OF OR IN CONNECTION WITH THE SOFTWARE OR THE USE OR OTHER DEALINGS IN
# THE SOFTWARE.
# This example is for use on (Linux) computers that are using CPython with
# Adafruit Blinka to support CircuitPython libraries. CircuitPython does
# not support PIL/pillow (python imaging library)!
# Import Python System Libraries
import json
import subprocess
© Adafruit Industries https://learn.adafruit.com/pi-hole-ad-blocker-with-pi-zero-w Page 19 of 33
Page 20

import time
# Import Requests Library
import requests
# Import Blinka
from board import SCL, SDA
import busio
import adafruit_ssd1306
# Import Python Imaging Library
from PIL import Image, ImageDraw, ImageFont
api_url = 'http://localhost/admin/api.php'
# Create the I2C interface.
i2c = busio.I2C(SCL, SDA)
# Create the SSD1306 OLED class.
# The first two parameters are the pixel width and pixel height. Change these
# to the right size for your display!
disp = adafruit_ssd1306.SSD1306_I2C(128, 32, i2c)
# Leaving the OLED on for a long period of time can damage it
# Set these to prevent OLED burn in
DISPLAY_ON = 10 # on time in seconds
DISPLAY_OFF = 50 # off time in seconds
# Clear display.
disp.fill(0)
disp.show()
# Create blank image for drawing.
# Make sure to create image with mode '1' for 1-bit color.
width = disp.width
height = disp.height
image = Image.new('1', (width, height))
# Get drawing object to draw on image.
draw = ImageDraw.Draw(image)
# Draw a black filled box to clear the image.
draw.rectangle((0, 0, width, height), outline=0, fill=0)
# Draw some shapes.
# First define some constants to allow easy resizing of shapes.
padding = -2
top = padding
bottom = height - padding
# Move left to right keeping track of the current x position
# for drawing shapes.
x = 0
# Load nice silkscreen font
font = ImageFont.truetype('/home/pi/slkscr.ttf', 8)
while True:
# Draw a black filled box to clear the image.
draw.rectangle((0, 0, width, height), outline=0, fill=0)
# Shell scripts for system monitoring from here :
# https://unix.stackexchange.com/questions/119126/command-to-display-memory-usage-disk-usage-and-cpu-load
cmd = "hostname -I | cut -d\' \' -f1 | tr -d \'\\n\'"
IP = subprocess.check_output(cmd, shell=True).decode("utf-8")
© Adafruit Industries https://learn.adafruit.com/pi-hole-ad-blocker-with-pi-zero-w Page 20 of 33
Page 21

IP = subprocess.check_output(cmd, shell=True).decode("utf-8")
cmd = "hostname | tr -d \'\\n\'"
HOST = subprocess.check_output(cmd, shell=True).decode("utf-8")
cmd = "top -bn1 | grep load | awk " \
"'{printf \"CPU Load: %.2f\", $(NF-2)}'"
CPU = subprocess.check_output(cmd, shell=True).decode("utf-8")
cmd = "free -m | awk 'NR==2{printf " \
"\"Mem: %s/%sMB %.2f%%\", $3,$2,$3*100/$2 }'"
MemUsage = subprocess.check_output(cmd, shell=True).decode("utf-8")
cmd = "df -h | awk '$NF==\"/\"{printf " \
"\"Disk: %d/%dGB %s\", $3,$2,$5}'"
Disk = subprocess.check_output(cmd, shell=True).decode("utf-8")
# Pi Hole data!
try:
r = requests.get(api_url)
data = json.loads(r.text)
DNSQUERIES = data['dns_queries_today']
ADSBLOCKED = data['ads_blocked_today']
CLIENTS = data['unique_clients']
except KeyError:
time.sleep(1)
continue
draw.text((x, top), "IP: " + str(IP) +
" (" + HOST + ")", font=font, fill=255)
draw.text((x, top + 8), "Ads Blocked: " +
str(ADSBLOCKED), font=font, fill=255)
draw.text((x, top + 16), "Clients: " +
str(CLIENTS), font=font, fill=255)
draw.text((x, top + 24), "DNS Queries: " +
str(DNSQUERIES), font=font, fill=255)
# skip over original stats
# draw.text((x, top+8), str(CPU), font=font, fill=255)
# draw.text((x, top+16), str(MemUsage), font=font, fill=255)
# draw.text((x, top+25), str(Disk), font=font, fill=255)
# Display image.
disp.image(image)
disp.show()
time.sleep(DISPLAY_ON)
disp.fill(0)
disp.show()
time.sleep(DISPLAY_OFF)
Running the OLED for a long period of time without changing the display can cause burn in. For that
reason, the version of stats.py above does not show the information constantly.
You'll notice its very similar to the original stats.py but we've added PiHole API support. Here's how we did
that!
First up, Pi Hole stats are available through the web server, in json format, so we need to add web
requests and json parsing to python. Then set the URL for the API access, which is localhost (the same
computer) and through the admin page:
© Adafruit Industries https://learn.adafruit.com/pi-hole-ad-blocker-with-pi-zero-w Page 21 of 33
Page 22

import subprocess
import json
import requests
api_url = 'http://localhost/admin/api.php'
We load up the nice Silkscreen font here, in 8 point type. Note that we have to have the full path of the
file.
# Load nice silkscreen font
font = ImageFont.truetype("/home/pi/slkscr.ttf", 8)
This is where we grab the API data. I put it in a try block, so it would retry in case the API access failed for
some reason
# Pi Hole data!
try:
r = requests.get(api_url)
data = json.loads(r.text)
DNSQUERIES = data['dns_queries_today']
ADSBLOCKED = data['ads_blocked_today']
CLIENTS = data['unique_clients']
except:
time.sleep(1)
continue
If you want to print out different info, run this small script in python to see what is available:
import json
import requests
api_url = 'http://localhost/admin/api.php'
r = requests.get(api_url)
data = json.loads(r.text)
print(data)
You can also customize the display printout, but i liked having the IP first, then the pi hole stats below:
© Adafruit Industries https://learn.adafruit.com/pi-hole-ad-blocker-with-pi-zero-w Page 22 of 33
Page 23

draw.text((x, top), "IP: " + str(IP) + "( " + HOST + ")", font=font, fill=255)
draw.text((x, top+8), "Ads Blocked: " + str(ADSBLOCKED), font=font, fill=255)
draw.text((x, top+16), "Clients: " + str(CLIENTS), font=font, fill=255)
draw.text((x, top+24), "DNS Queries: " + str(DNSQUERIES), font=font, fill=255)
Test & Stats at Startup
Once you have the script saved, you can run it with sudo python3 ~pi/stats.py and look on the OLED to
make sure you see your IP address and such!
Lastly we just want to make this run at boot. We'll do that the easy way by editing /etc/rc.local with sudo
nano /etc/rc.local and adding sudo python3 ~pi/stats.py & before exit 0
Then save and you can reboot to test it out
© Adafruit Industries https://learn.adafruit.com/pi-hole-ad-blocker-with-pi-zero-w Page 23 of 33
Page 24

© Adafruit Industries https://learn.adafruit.com/pi-hole-ad-blocker-with-pi-zero-w Page 24 of 33
Page 25

Install Mini PiTFT
We've updated our popular PiOLED script for use with the Mini PiTFT (https://adafru.it/HBK), a 135x240
Color TFT add-on for your Raspberry Pi. This cute little display has
two
tactile buttons on GPIO pins that
we'll use to make a simple user-interface display for your Pi-Hole.
Your browser does not support the video tag.
Adafruit Mini PiTFT - 135x240 Color TFT Add-on for Raspberry Pi
If you're looking for the most compact li'l color display for a Raspberry Pi (most likely a
$14.95
In Stock
Install 2x20 Header
If you are using a Pi Zero, you'll need to solder on or somehow attach a 2x20 header so you can plug in
the Pi OLED. Use either a plain 2x20 header and solder it in using an iron + some
solder... (https://adafru.it/drI)
Break-away 0.1" 2x20-pin Strip Dual Male Header
If we could eat headers, we'd have them for breakfast, lunch, and dinner. But we can't :( So we're making
the best of it and selling them!This...
Out of Stock
Or you can use Hammer headers which do not need soldering.
Add to Cart
Out of
Stock
© Adafruit Industries https://learn.adafruit.com/pi-hole-ad-blocker-with-pi-zero-w Page 25 of 33
Page 26

GPIO Hammer Headers - Solderless Raspberry Pi Connectors
If your soldering isn't quite up to scratch, or you just don't own a soldering iron yet, then these nifty
hammer headers from
$6.50
In Stock
Either way, you'll want to end up with something like this:
Add to Cart
© Adafruit Industries https://learn.adafruit.com/pi-hole-ad-blocker-with-pi-zero-w Page 26 of 33
Page 27

Python Setup
This guide assumes that you've gotten your Raspberry Pi up and running, have CircuitPython installed,
and have installed CircuitPython libraries for the Mini PiTFT. If not, follow the steps in the guide below and
come back to this page when you've completed them.
https://adafru.it/HBL
Update the stats.py program
Here's the new stats.py code which uses the Mini PiTFT.
Create a new file using nano ~pi/stats.py and paste the code below in. Then, save the code.
# -*- coding: utf-8 -*# Import Python System Libraries
import time
import json
import subprocess
# Import Requests Library
import requests
#Import Blinka
import digitalio
import board
# Import Python Imaging Library
from PIL import Image, ImageDraw, ImageFont
import adafruit_rgb_display.st7789 as st7789
api_url = 'http://localhost/admin/api.php'
# Configuration for CS and DC pins (these are FeatherWing defaults on M0/M4):
cs_pin = digitalio.DigitalInOut(board.CE0)
dc_pin = digitalio.DigitalInOut(board.D25)
reset_pin = None
# Config for display baudrate (default max is 24mhz):
BAUDRATE = 64000000
# Setup SPI bus using hardware SPI:
spi = board.SPI()
# Create the ST7789 display:
disp = st7789.ST7789(spi, cs=cs_pin, dc=dc_pin, rst=reset_pin, baudrate=BAUDRATE,
width=135, height=240, x_offset=53, y_offset=40)
# Create blank image for drawing.
# Make sure to create image with mode 'RGB' for full color.
height = disp.width # we swap height/width to rotate it to landscape!
width = disp.height
image = Image.new('RGB', (width, height))
rotation = 90
# Get drawing object to draw on image.
draw = ImageDraw.Draw(image)
# Draw a black filled box to clear the image.
draw.rectangle((0, 0, width, height), outline=0, fill=(0, 0, 0))
disp.image(image, rotation)
https://adafru.it/HBL
© Adafruit Industries https://learn.adafruit.com/pi-hole-ad-blocker-with-pi-zero-w Page 27 of 33
Page 28

disp.image(image, rotation)
# Draw some shapes.
# First define some constants to allow easy resizing of shapes.
padding = -2
top = padding
bottom = height-padding
# Move left to right keeping track of the current x position for drawing shapes.
x = 0
# Alternatively load a TTF font. Make sure the .ttf font file is in the
# same directory as the python script!
# Some other nice fonts to try: http://www.dafont.com/bitmap.php
font = ImageFont.truetype('/usr/share/fonts/truetype/dejavu/DejaVuSans.ttf', 24)
# Turn on the backlight
backlight = digitalio.DigitalInOut(board.D22)
backlight.switch_to_output()
backlight.value = True
# Add buttons as inputs
buttonA = digitalio.DigitalInOut(board.D23)
buttonA.switch_to_input()
while True:
# Draw a black filled box to clear the image.
draw.rectangle((0, 0, width, height), outline=0, fill=0)
# Shell scripts for system monitoring from here:
# https://unix.stackexchange.com/questions/119126/command-to-display-memory-usage-disk-usage-and-cpu-load
cmd = "hostname -I | cut -d\' \' -f1"
IP = "IP: "+subprocess.check_output(cmd, shell=True).decode("utf-8")
cmd = "hostname | tr -d \'\\n\'"
HOST = subprocess.check_output(cmd, shell=True).decode("utf-8")
cmd = "top -bn1 | grep load | awk '{printf \"CPU Load: %.2f\", $(NF-2)}'"
CPU = subprocess.check_output(cmd, shell=True).decode("utf-8")
cmd = "free -m | awk 'NR==2{printf \"Mem: %s/%s MB %.2f%%\", $3,$2,$3*100/$2 }'"
MemUsage = subprocess.check_output(cmd, shell=True).decode("utf-8")
cmd = "df -h | awk '$NF==\"/\"{printf \"Disk: %d/%d GB %s\", $3,$2,$5}'"
Disk = subprocess.check_output(cmd, shell=True).decode("utf-8")
cmd = "cat /sys/class/thermal/thermal_zone0/temp | awk \'{printf \"CPU Temp: %.1f C\", $(NF-0) / 1000}\'" # py
lint: disable=line-too-long
# Pi Hole data!
try:
r = requests.get(api_url)
data = json.loads(r.text)
DNSQUERIES = data['dns_queries_today']
ADSBLOCKED = data['ads_blocked_today']
CLIENTS = data['unique_clients']
except KeyError:
time.sleep(1)
continue
y = top
if not buttonA.value: # just button A pressed
draw.text((x, y), IP, font=font, fill="#FFFF00")
y += font.getsize(IP)[1]
draw.text((x, y), CPU, font=font, fill="#FFFF00")
y += font.getsize(CPU)[1]
draw.text((x, y), MemUsage, font=font, fill="#00FF00")
y += font.getsize(MemUsage)[1]
draw.text((x, y), Disk, font=font, fill="#0000FF")
y += font.getsize(Disk)[1]
© Adafruit Industries https://learn.adafruit.com/pi-hole-ad-blocker-with-pi-zero-w Page 28 of 33
Page 29

draw.text((x, y), "DNS Queries: {}".format(DNSQUERIES), font=font, fill="#FF00FF")
else:
draw.text((x, y), IP, font=font, fill="#FFFF00")
y += font.getsize(IP)[1]
draw.text((x, y), HOST, font=font, fill="#FFFF00")
y += font.getsize(HOST)[1]
draw.text((x, y), "Ads Blocked: {}".format(str(ADSBLOCKED)), font=font, fill="#00FF00")
y += font.getsize(str(ADSBLOCKED))[1]
draw.text((x, y), "Clients: {}".format(str(CLIENTS)), font=font, fill="#0000FF")
y += font.getsize(str(CLIENTS))[1]
draw.text((x, y), "DNS Queries: {}".format(str(DNSQUERIES)), font=font, fill="#FF00FF")
y += font.getsize(str(DNSQUERIES))[1]
# Display image.
disp.image(image, rotation)
time.sleep(.1)
You'll notice it's very similar to the original stats.py, but we've added PiHole API support. Here's how we
did that:
First up, Pi Hole stats are available through the web server, in JSON format, so we need to add web
requests and JSON parsing to Python. Then set the URL for the API access, which is localhost (the same
computer) and through the admin page:
# Import Python System Libraries
import time
import json
import subprocess
# Import Requests Library
import requests
api_url = 'http://localhost/admin/api.php'
We load up the nice DejaVuSans font here. Note that we have to have the full path of the file.
# Alternatively load a TTF font. Make sure the .ttf font file is in the
# same directory as the python script!
# Some other nice fonts to try: http://www.dafont.com/bitmap.php
font = ImageFont.truetype('/usr/share/fonts/truetype/dejavu/DejaVuSans.ttf', 24)
This is where we grab the API data. I put it in a try block, so it would retry in case the API access failed for
some reason
# Pi Hole data!
try:
r = requests.get(api_url)
data = json.loads(r.text)
DNSQUERIES = data['dns_queries_today']
ADSBLOCKED = data['ads_blocked_today']
CLIENTS = data['unique_clients']
except KeyError:
time.sleep(1)
continue
If you want to print out different info, run this small script in python to see what is available:
© Adafruit Industries https://learn.adafruit.com/pi-hole-ad-blocker-with-pi-zero-w Page 29 of 33
Page 30

import json
import requests
api_url = 'http://localhost/admin/api.php'
r = requests.get(api_url)
data = json.loads(r.text)
print(data)
Since the MiniTFT has
two
tactile push-buttons, we modified the script to print out extra information from
the Raspberry Pi when you press the top button.
if not buttonA.value: # just button A pressed
draw.text((x, y), IP, font=font, fill="#FFFF00")
y += font.getsize(IP)[1]
draw.text((x, y), CPU, font=font, fill="#FFFF00")
y += font.getsize(CPU)[1]
draw.text((x, y), MemUsage, font=font, fill="#00FF00")
y += font.getsize(MemUsage)[1]
draw.text((x, y), Disk, font=font, fill="#0000FF")
y += font.getsize(Disk)[1]
draw.text((x, y), "DNS Queries: {}".format(DNSQUERIES), font=font, fill="#FF00FF")
else:
draw.text((x, y), IP, font=font, fill="#FFFF00")
y += font.getsize(IP)[1]
draw.text((x, y), HOST, font=font, fill="#FFFF00")
y += font.getsize(HOST)[1]
draw.text((x, y), "Ads Blocked: {}".format(str(ADSBLOCKED)), font=font, fill="#00FF00")
y += font.getsize(str(ADSBLOCKED))[1]
draw.text((x, y), "Clients: {}".format(str(CLIENTS)), font=font, fill="#0000FF")
y += font.getsize(str(CLIENTS))[1]
draw.text((x, y), "DNS Queries: {}".format(str(DNSQUERIES)), font=font, fill="#FF00FF")
y += font.getsize(str(DNSQUERIES))[1]
Test & Stats at Startup
Once you have the script saved, you can run it with sudo python3 ~pi/stats.py
© Adafruit Industries https://learn.adafruit.com/pi-hole-ad-blocker-with-pi-zero-w Page 30 of 33
Page 31

Look on the Mini PiTFT to make sure you see your IP address
along with some statistics from Pi-Hole.
Pushing the top button should display
extra
statistics about
the Pi such as its hostname, CPU load, memory utilization,
disk usage, and DNS queries.
Lastly we just want to make this run at boot. We'll do that the easy way by editing /etc/rc.local with sudo
nano /etc/rc.local and adding sudo python3 ~pi/stats.py & before exit 0
© Adafruit Industries https://learn.adafruit.com/pi-hole-ad-blocker-with-pi-zero-w Page 31 of 33
Page 32

Then save and you can reboot to test it out
© Adafruit Industries https://learn.adafruit.com/pi-hole-ad-blocker-with-pi-zero-w Page 32 of 33
Page 33

© Adafruit Industries Last Updated: 2020-12-21 12:02:53 PM EST Page 33 of 33
 Loading...