

Page 1
No-Solder LED Disco Tie with Bluetooth
Created by Collin Cunningham
Last updated on 2021-02-08 06:46:27 PM EST
Page 2

2
3
3
6
8
8
10
10
10
15
15
16
18
18
19
21
21
22
22
23
23
24
26
26
26
27
28
Guide Contents
Guide Contents
Overview
What you'll need
Plus …
CircuitPython on Circuit Playground Bluefruit
Install or Update CircuitPython
Software
Install Bluefruit Connect & Neopixel libraries
Upload code
Prepare NeoPixels
Cut input wires
Remove extra neopixels
Add Battery Pocket
Cut & arrange materials
Iron pocket in place
Assembly and Wiring
Position neopixel strip
Sew NeoPixels
Attach Circuit Playground Bluefruit
Wiring Diagram
Wire the NeoPixel Strip
Connect the Battery
Use it
Download app
Connect via BLE
Change animation
Change Color
© Adafruit Industries https://learn.adafruit.com/no-solder-circuit-playground-bluetooth-disco-tie Page 2 of 30
Page 3
Overview
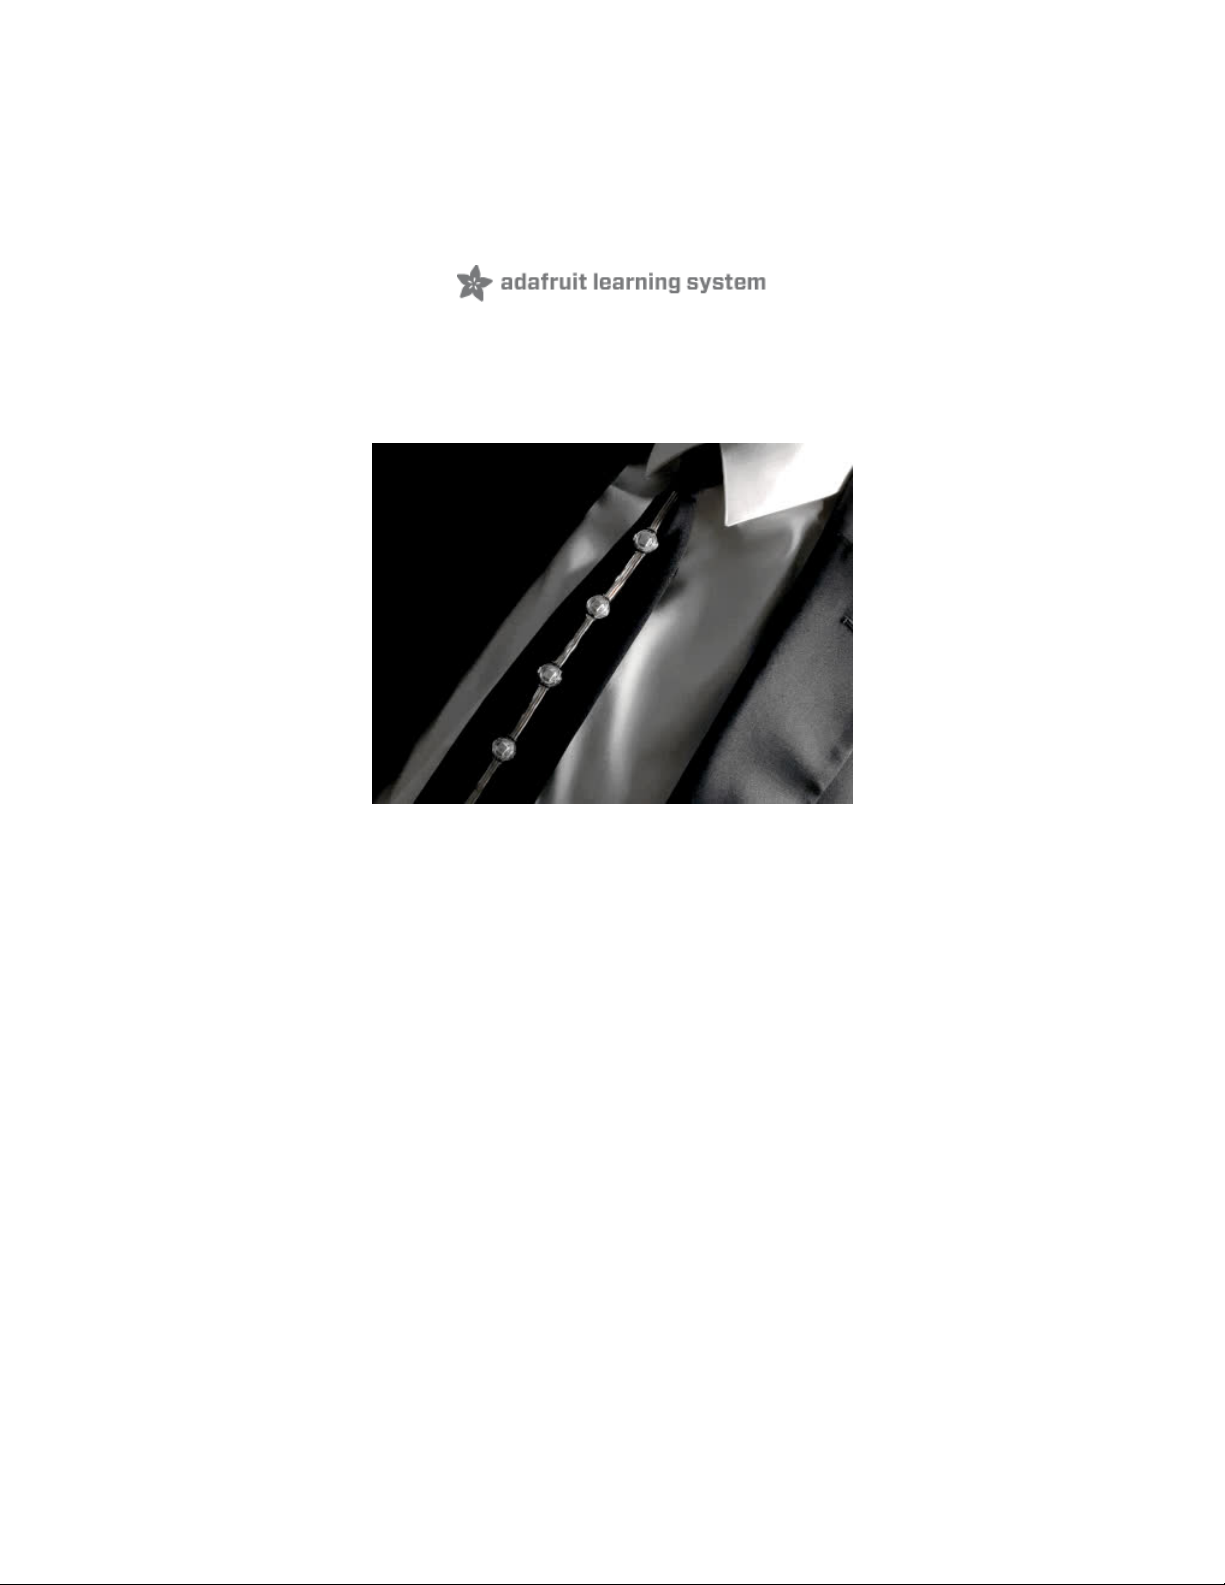
Merge a timeless fashion standard with sound-reactive, full-color LED animation, and control it all
wirelessly from your phone.
Inspired by John G (https://adafru.it/GKB), this update to the classic Ampli-Tie (https://adafru.it/CdT) uses
Circuit Playground Bluefruit and Neopixel LEDs to turn your tie into a portable, customizable light show –
with no soldering required. This one's guaranteed to get you noticed on the dance floor and the vast
majority of formal events.
What you'll need
© Adafruit Industries https://learn.adafruit.com/no-solder-circuit-playground-bluetooth-disco-tie Page 3 of 30
Page 4

Circuit Playground Bluefruit - Bluetooth Low Energy
Circuit Playground Bluefruit is our third board in the Circuit Playground series, another step towards a
perfect introduction to electronics and programming. We've...
$24.95
In Stock
Add to Cart
© Adafruit Industries https://learn.adafruit.com/no-solder-circuit-playground-bluetooth-disco-tie Page 4 of 30
Page 5
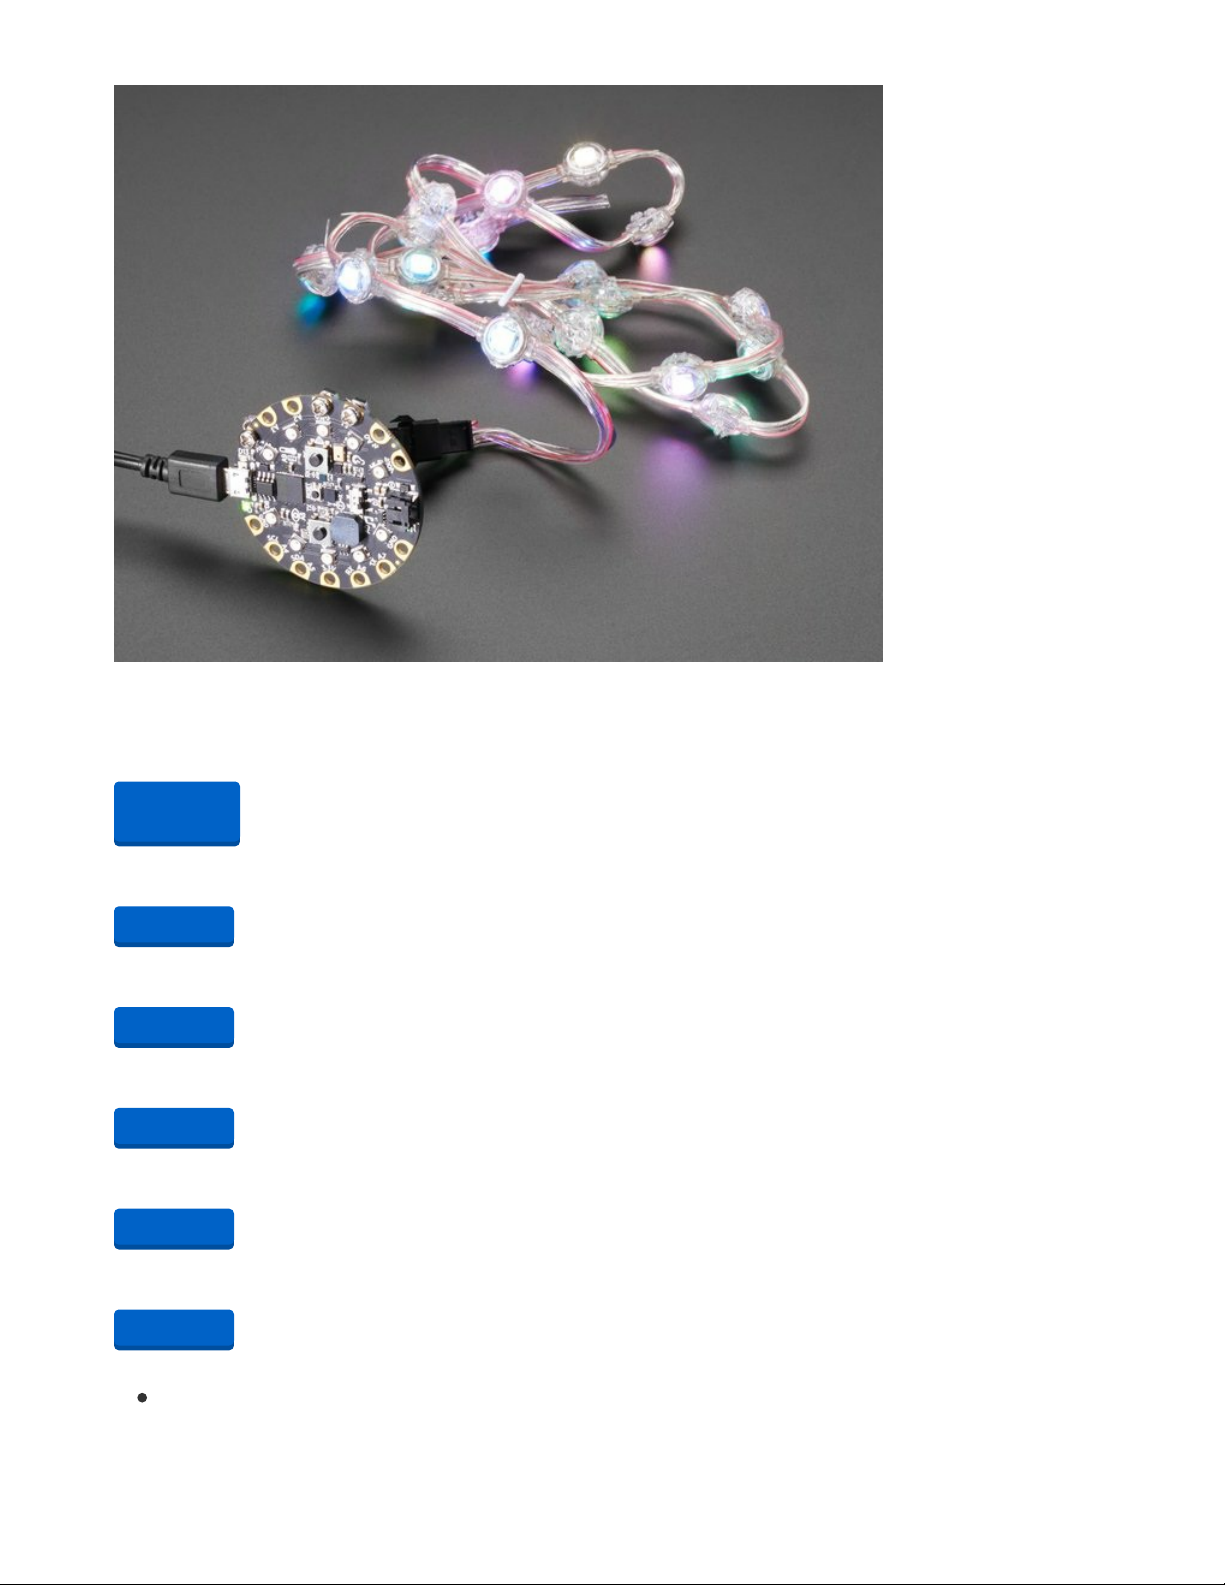
Adafruit NeoPixel LED Dots Strand - 20 LEDs at 2" Pitch
Attaching NeoPixel strips to your costume can be a struggle as the flexible PCBs can crack when bent too
much. So how to add little dots of color? Use these stranded NeoPixel dots!...
$27.50
In Stock
USB cable - USB A to Micro-B
This here is your standard A to micro-B USB cable, for USB 1.1 or 2.0. Perfect for connecting a PC to your
Metro, Feather, Raspberry Pi or other dev-board or...
$2.95
In Stock
Add to Cart
Add to Cart
© Adafruit Industries https://learn.adafruit.com/no-solder-circuit-playground-bluetooth-disco-tie Page 5 of 30
Page 6
Bolt-On Kit for Circuit Playground, micro:bit, Flora or Gemma
You have a Circuit Playground Express, and want to connect some wires to it for adding LEDs or sensors
or speakers? You can use our...
Out of Stock
1 x Lithium Ion Polymer Battery - 3.7v 1200mAh
The power
1 x Wire Strippers
For exposing leads
1 x Scissors
For trimming wires, thread, & more
1 x Pocket Screwdriver
For securing the wires
1 x Sewing Needes
Sew those pixels
Plus …
Breakaway or Clip-on Tie (https://adafru.it/GKC) - if you want a nice one, see this one in the
Out of
Stock
Add to Cart
Add to Cart
Add to Cart
Add to Cart
Add to Cart
© Adafruit Industries https://learn.adafruit.com/no-solder-circuit-playground-bluetooth-disco-tie Page 6 of 30
Page 7

shop (https://adafru.it/GLa) but any tie will do.
Fabric (for battery pocket)
Thread
10mm Hem Tape (https://adafru.it/GKD)
Iron & Ironing Board
iPhone/iPad (iOS 11.3 or later) or Android device w BLE (Android 4.4 or later)
© Adafruit Industries https://learn.adafruit.com/no-solder-circuit-playground-bluetooth-disco-tie Page 7 of 30
Page 8
CircuitPython on Circuit Playground Bluefruit
Install or Update CircuitPython
Follow this quick step-by-step to install or update CircuitPython on your Circuit Playground Bluefruit.
https://adafru.it/FNK
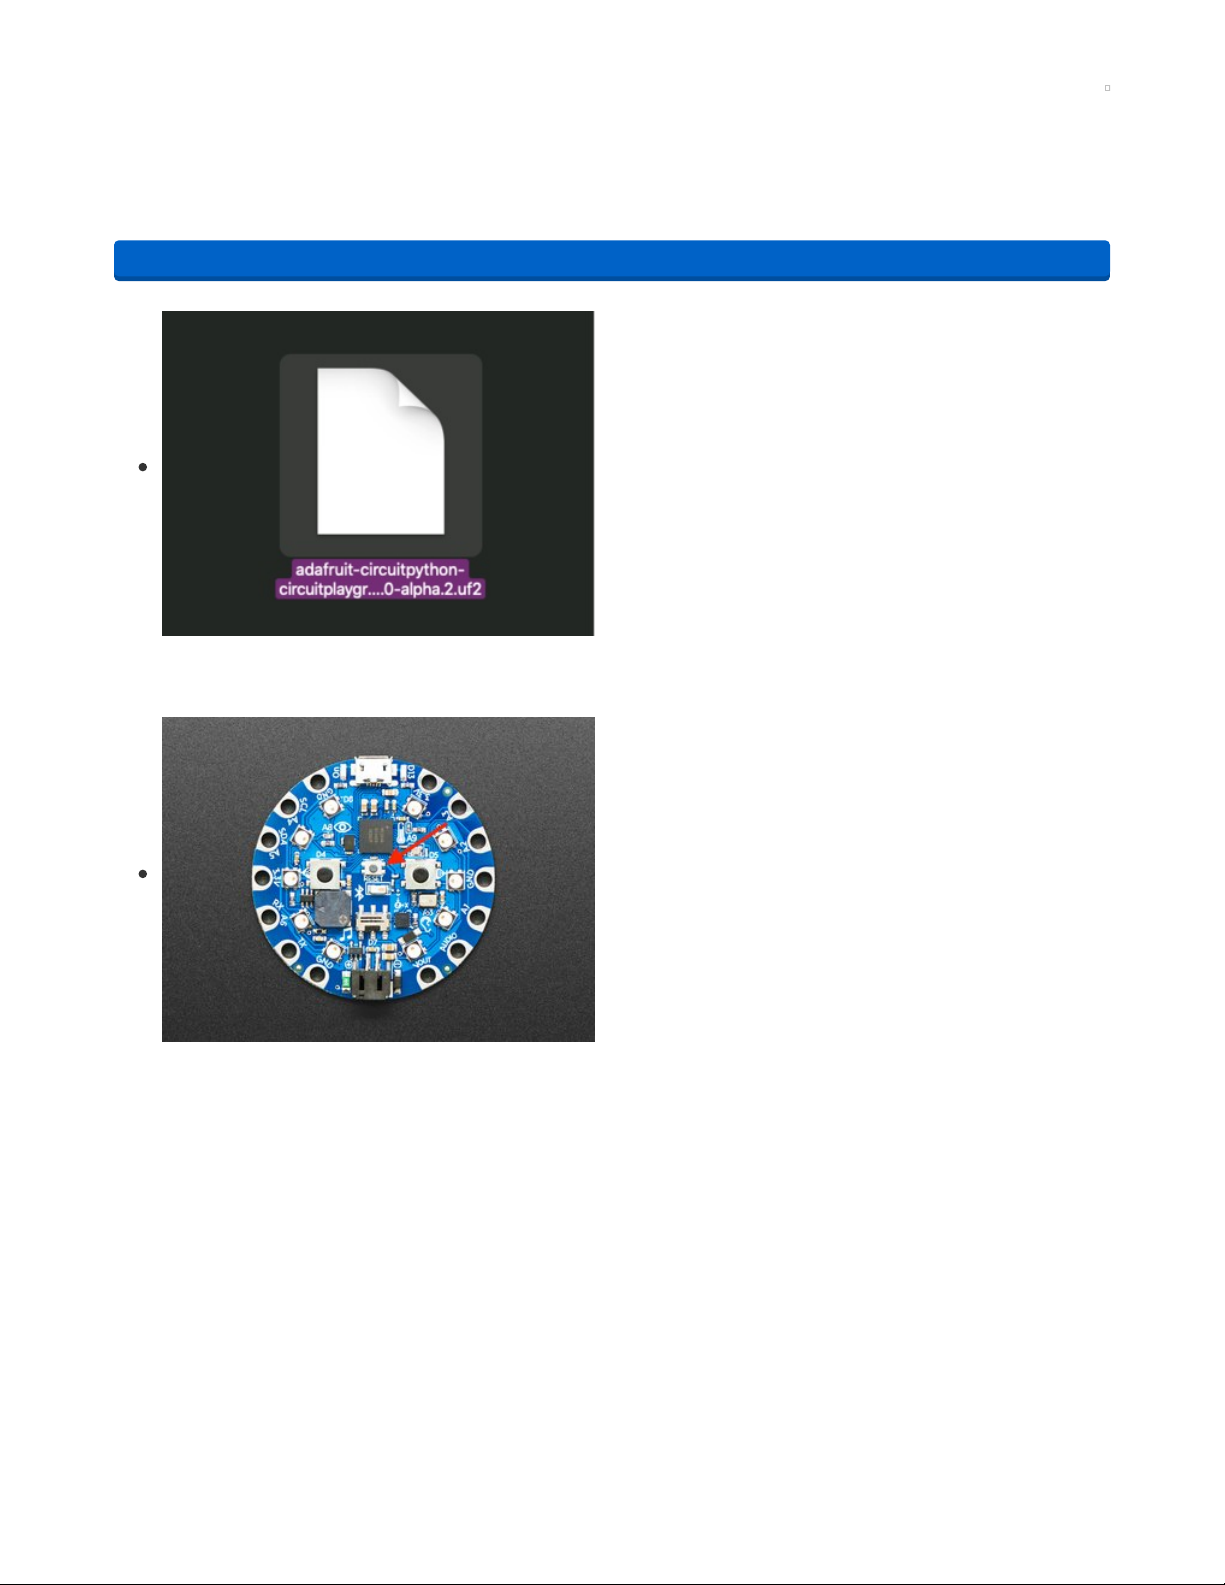
Click the link above and download the latest UF2 file
Download and save it to your Desktop (or wherever is handy)
Plug your Circuit Playground Bluefruit into your computer
using a known-good data-capable USB cable.
A lot of people end up using charge-only USB cables and it
is very frustrating! So make sure you have a USB cable you
know is good for data sync.
Double-click the small Reset button in the middle of the CPB
(indicated by the red arrow in the image). The ten NeoPixel
LEDs will all turn red, and then will all turn green. If they turn
all red and stay red, check the USB cable, try another USB
port, etc. The little red LED next to the USB connector will
pulse red - this is ok!
If double-clicking doesn't work the first time, try again.
Sometimes it can take a few tries to get the rhythm right!
(If double-clicking doesn't do it, try a single-click!)
https://adafru.it/FNK
© Adafruit Industries https://learn.adafruit.com/no-solder-circuit-playground-bluetooth-disco-tie Page 8 of 30
Page 9
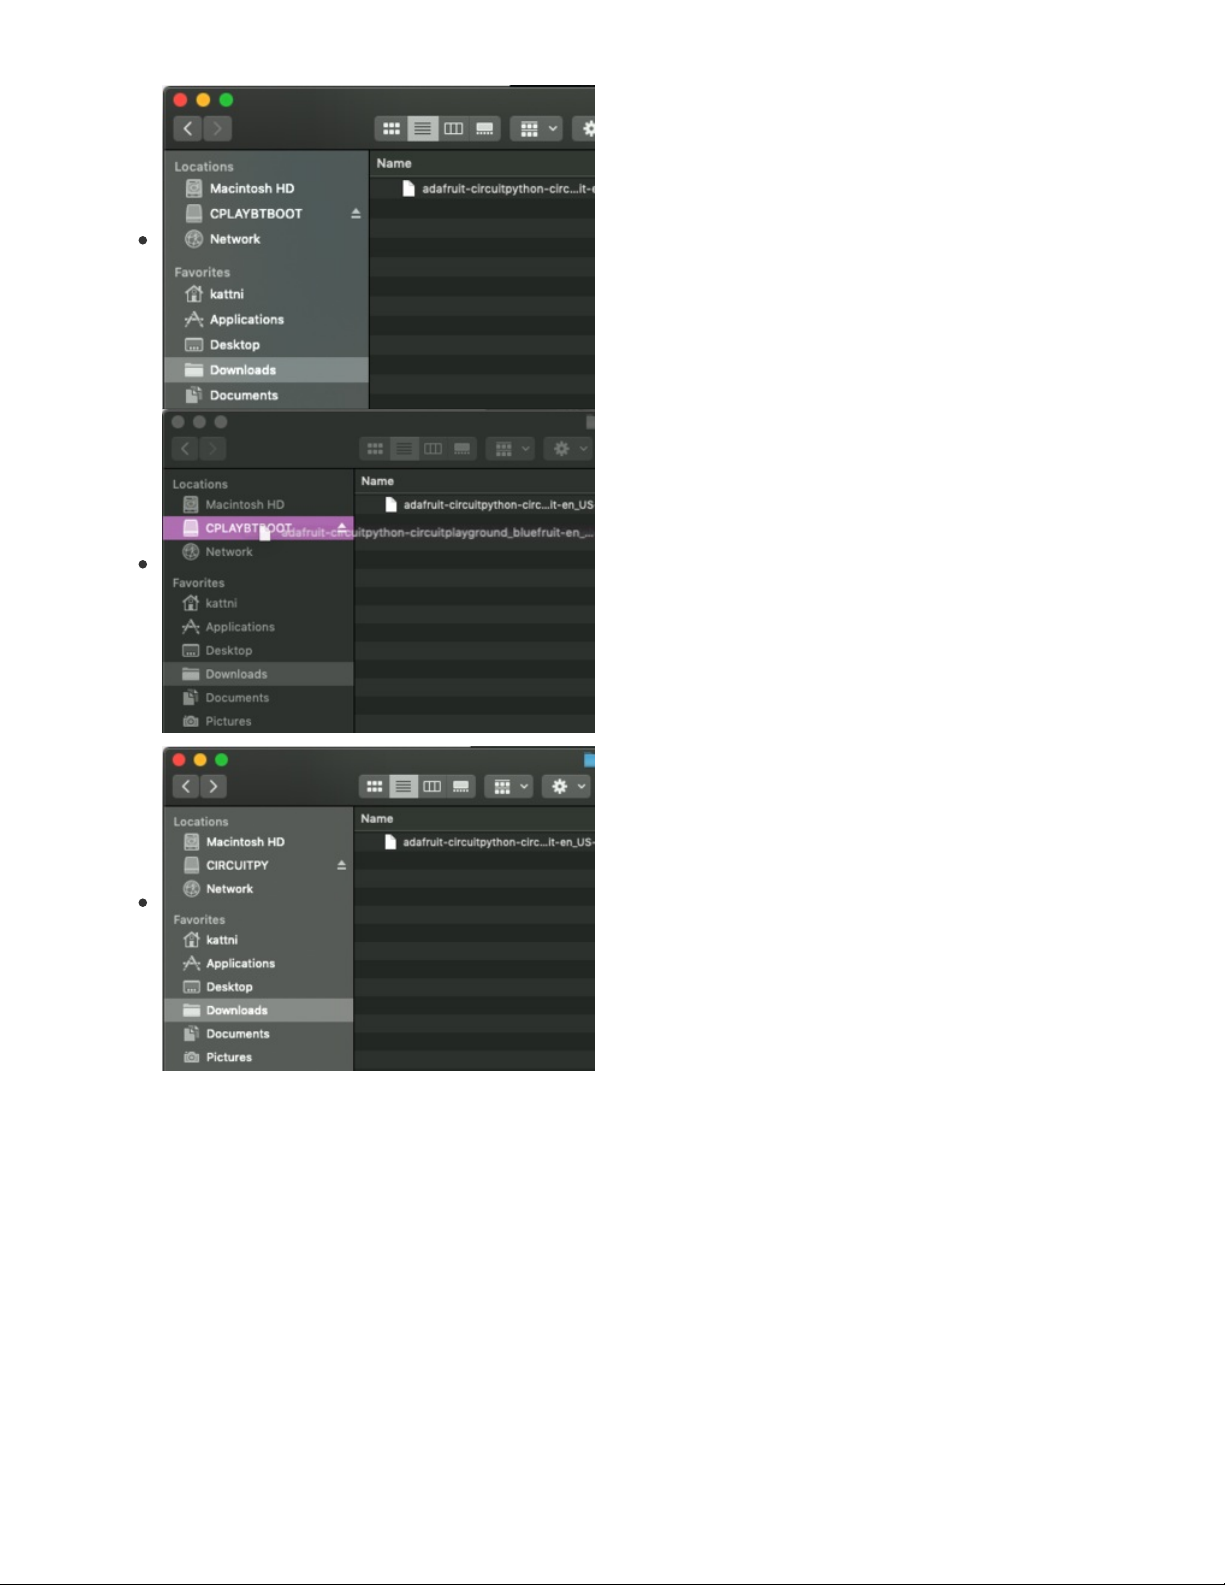
You will see a new disk drive appear called CPLAYBTBOOT.
Drag the adafruit_circuitpython_etc.uf2 file to
CPLAYBTBOOT.
The LEDs will turn red. Then, the CPLAYBTBOOT drive will
disappear and a new disk drive called CIRCUITPY will
appear.
That's it, you're done! :)
© Adafruit Industries https://learn.adafruit.com/no-solder-circuit-playground-bluetooth-disco-tie Page 9 of 30
Page 10

Software
Now that CircuitPython is installed on the CPB, we can move on to installing the project software.
Install Bluefruit Connect & Neopixel libraries
The project code requires three code libraries to assist with Bluetooth communication. Click the link
below to download the CircuitPython library bundle:
https://adafru.it/ENC
Unzip the library bundle, and open the lib folder inside. You'll need to copy three libraries from this folder
to the CIRCUITPY drive's lib folder.
Locate the folders named adafruit_bluefruit_connect & adafruit_ble and copy them to
the CIRCUITPY drive's lib folder.
Locate the file named neopixel.mpy and copy it to the CIRCUITPY drive's lib folder.
Your CIRCUITPY drive's file structure should now look like this:
Upload code
Copy the code below and paste it into a new text file.
Save the text file as code.py to the root of the CIRCUITPY drive.
"""
LED Disco Tie with Bluetooth
=========================================================
Give your suit an sound-reactive upgrade with Circuit
Playground Bluefruit & Neopixels. Set color and animation
mode using the Bluefruit LE Connect app.
https://adafru.it/ENC
© Adafruit Industries https://learn.adafruit.com/no-solder-circuit-playground-bluetooth-disco-tie Page 10 of 30
Page 11

mode using the Bluefruit LE Connect app.
Author: Collin Cunningham for Adafruit Industries, 2019
"""
# pylint: disable=global-statement
import time
import array
import math
import audiobusio
import board
import neopixel
from adafruit_ble import BLERadio
from adafruit_ble.advertising.standard import ProvideServicesAdvertisement
from adafruit_ble.services.nordic import UARTService
from adafruit_bluefruit_connect.packet import Packet
from adafruit_bluefruit_connect.color_packet import ColorPacket
from adafruit_bluefruit_connect.button_packet import ButtonPacket
ble = BLERadio()
uart_service = UARTService()
advertisement = ProvideServicesAdvertisement(uart_service)
# User input vars
mode = 0 # 0=audio, 1=rainbow, 2=larsen_scanner, 3=solid
user_color= (127,0,0)
# Audio meter vars
PEAK_COLOR = (100, 0, 255)
NUM_PIXELS = 10
NEOPIXEL_PIN = board.A1
# Use this instead if you want to use the NeoPixels on the Circuit Playground Bluefruit.
# NEOPIXEL_PIN = board.NEOPIXEL
CURVE = 2
SCALE_EXPONENT = math.pow(10, CURVE * -0.1)
NUM_SAMPLES = 160
# Restrict value to be between floor and ceiling.
def constrain(value, floor, ceiling):
return max(floor, min(value, ceiling))
# Scale input_value between output_min and output_max, exponentially.
def log_scale(input_value, input_min, input_max, output_min, output_max):
normalized_input_value = (input_value - input_min) / \
(input_max - input_min)
return output_min + \
math.pow(normalized_input_value, SCALE_EXPONENT) \
* (output_max - output_min)
# Remove DC bias before computing RMS.
def normalized_rms(values):
minbuf = int(mean(values))
samples_sum = sum(
float(sample - minbuf) * (sample - minbuf)
for sample in values
)
return math.sqrt(samples_sum / len(values))
def mean(values):
return sum(values) / len(values)
© Adafruit Industries https://learn.adafruit.com/no-solder-circuit-playground-bluetooth-disco-tie Page 11 of 30
Page 12

def volume_color(volume):
return 200, volume * (255 // NUM_PIXELS), 0
# Set up NeoPixels and turn them all off.
pixels = neopixel.NeoPixel(NEOPIXEL_PIN, NUM_PIXELS, brightness=0.1, auto_write=False)
pixels.fill(0)
pixels.show()
mic = audiobusio.PDMIn(board.MICROPHONE_CLOCK, board.MICROPHONE_DATA,
sample_rate=16000, bit_depth=16)
# Record an initial sample to calibrate. Assume it's quiet when we start.
samples = array.array('H', [0] * NUM_SAMPLES)
mic.record(samples, len(samples))
# Set lowest level to expect, plus a little.
input_floor = normalized_rms(samples) + 10
# Corresponds to sensitivity: lower means more pixels light up with lower sound
input_ceiling = input_floor + 500
peak = 0
def wheel(wheel_pos):
# Input a value 0 to 255 to get a color value.
# The colours are a transition r - g - b - back to r.
if wheel_pos < 0 or wheel_pos > 255:
r = g = b = 0
elif wheel_pos < 85:
r = int(wheel_pos * 3)
g = int(255 - wheel_pos*3)
b = 0
elif wheel_pos < 170:
wheel_pos -= 85
r = int(255 - wheel_pos*3)
g = 0
b = int(wheel_pos*3)
else:
wheel_pos -= 170
r = 0
g = int(wheel_pos*3)
b = int(255 - wheel_pos*3)
return (r, g, b)
def rainbow_cycle(delay):
for j in range(255):
for i in range(NUM_PIXELS):
pixel_index = (i * 256 // NUM_PIXELS) + j
pixels[i] = wheel(pixel_index & 255)
pixels.show()
time.sleep(delay)
def audio_meter(new_peak):
mic.record(samples, len(samples))
magnitude = normalized_rms(samples)
# Compute scaled logarithmic reading in the range 0 to NUM_PIXELS
c = log_scale(constrain(magnitude, input_floor, input_ceiling),
input_floor, input_ceiling, 0, NUM_PIXELS)
# Light up pixels that are below the scaled and interpolated magnitude.
pixels.fill(0)
for i in range(NUM_PIXELS):
if i < c:
pixels[i] = volume_color(i)
# Light up the peak pixel and animate it slowly dropping.
© Adafruit Industries https://learn.adafruit.com/no-solder-circuit-playground-bluetooth-disco-tie Page 12 of 30
Page 13

if c >= new_peak:
new_peak = min(c, NUM_PIXELS - 1)
elif new_peak > 0:
new_peak = new_peak - 1
if new_peak > 0:
pixels[int(new_peak)] = PEAK_COLOR
pixels.show()
return new_peak
pos = 0 # position
direction = 1 # direction of "eye"
def larsen_set(index, color):
if index < 0:
return
else:
pixels[index] = color
def larsen(delay):
global pos
global direction
color_dark = (int(user_color[0]/8), int(user_color[1]/8),
int(user_color[2]/8))
color_med = (int(user_color[0]/2), int(user_color[1]/2),
int(user_color[2]/2))
larsen_set(pos - 2, color_dark)
larsen_set(pos - 1, color_med)
larsen_set(pos, user_color)
larsen_set(pos + 1, color_med)
if (pos + 2) < NUM_PIXELS:
# Dark red, do not exceed number of pixels
larsen_set(pos + 2, color_dark)
pixels.write()
time.sleep(delay)
# Erase all and draw a new one next time
for j in range(-2, 2):
larsen_set(pos + j, (0, 0, 0))
if (pos + 2) < NUM_PIXELS:
larsen_set(pos + 2, (0, 0, 0))
# Bounce off ends of strip
pos += direction
if pos < 0:
pos = 1
direction = -direction
elif pos >= (NUM_PIXELS - 1):
pos = NUM_PIXELS - 2
direction = -direction
def solid(new_color):
pixels.fill(new_color)
pixels.show()
def map_value(value, in_min, in_max, out_min, out_max):
out_range = out_max - out_min
in_range = in_max - in_min
return out_min + out_range * ((value - in_min) / in_range)
speed = 6.0
© Adafruit Industries https://learn.adafruit.com/no-solder-circuit-playground-bluetooth-disco-tie Page 13 of 30
Page 14

wait = 0.097
def change_speed(mod, old_speed):
new_speed = constrain(old_speed + mod, 1.0, 10.0)
return(new_speed, map_value(new_speed, 10.0, 0.0, 0.01, 0.3))
def animate(pause, top):
# Determine animation based on mode
if mode == 0:
top = audio_meter(top)
elif mode == 1:
rainbow_cycle(0.001)
elif mode == 2:
larsen(pause)
elif mode == 3:
solid(user_color)
return top
while True:
ble.start_advertising(advertisement)
while not ble.connected:
# Animate while disconnected
peak = animate(wait, peak)
# While BLE is connected
while ble.connected:
if uart_service.in_waiting:
try:
packet = Packet.from_stream(uart_service)
# Ignore malformed packets.
except ValueError:
continue
# Received ColorPacket
if isinstance(packet, ColorPacket):
user_color = packet.color
# Received ButtonPacket
elif isinstance(packet, ButtonPacket):
if packet.pressed:
if packet.button == ButtonPacket.UP:
speed, wait = change_speed(1, speed)
elif packet.button == ButtonPacket.DOWN:
speed, wait = change_speed(-1, speed)
elif packet.button == ButtonPacket.BUTTON_1:
mode = 0
elif packet.button == ButtonPacket.BUTTON_2:
mode = 1
elif packet.button == ButtonPacket.BUTTON_3:
mode = 2
elif packet.button == ButtonPacket.BUTTON_4:
mode = 3
# Animate while connected
peak = animate(wait, peak)
Once the project code is saved to CIRCUITPY as code.py, the software is all set – time to move on to
assembling the hardware.
© Adafruit Industries https://learn.adafruit.com/no-solder-circuit-playground-bluetooth-disco-tie Page 14 of 30
Page 15

Prepare NeoPixels
First thing to do is trim the neopixel LED strip to match the length of the tie. The 20" breakaway
tie (https://adafru.it/GKC) can fit a length of 9 NeoPixels. If you're using a different tie, be sure to find the
appropriate length before cutting.
Regular scissors can be dulled or damaged by cutting wire,
so make sure you use a pair of wire cutters or scissors
designed to cut metal, like these (https://adafru.it/dQj).
We'll be cutting the strip at two points indicated by dashed red lines in the image below.
Cut input wires
© Adafruit Industries https://learn.adafruit.com/no-solder-circuit-playground-bluetooth-disco-tie Page 15 of 30
Page 16

Cut the male pin connector (the one with 2 extra wires
hanging to one side) from the strip. Cut close to the
connector itself to provide extra length. This is the end of the
strip that will connect to the Circuit Playground Bluefruit.
Use wire strippers to remove about 15mm of insulation from
the end of each freshly cut wire.
Gently twist each bundle of wire strands to keep them from
fraying.
Remove extra neopixels
© Adafruit Industries https://learn.adafruit.com/no-solder-circuit-playground-bluetooth-disco-tie Page 16 of 30
Page 17

Starting from the end you just cut, count out a length of 9
NeoPixels.
Cut the strip after the ninth neopixel, leaving as much of a
tail as possible.
Don't strip or split the wires at this end.
When you're all done, the finished strip should look like the image above.
© Adafruit Industries https://learn.adafruit.com/no-solder-circuit-playground-bluetooth-disco-tie Page 17 of 30
Page 18

Add Battery Pocket
To safely hold the lipo battery, we'll create a simple pocket on the back side of the tie.
This pocket will be attached to the tie using heat-activated hem tape, but you could easily recreate it
using traditional sewing if you prefer.
Cut & arrange materials
Cut a piece of fabric 60mm x 75mm in size.
Cut 4 strips of hem tape; 2 x 75mm, & 2 x 15mm
Arrange the pieces of hem tape in the shape of the pocket
near the bottom of the tie’s back seam. Leave a gap in the
middle of the pocket's bottom to allow the battery's wiring to
pass through.
Carefully place the pocket fabric on top of the hem tape.
Make sure the tape is at the outer edges of the pocket – you
won't be able to reposition it after ironing.
© Adafruit Industries https://learn.adafruit.com/no-solder-circuit-playground-bluetooth-disco-tie Page 18 of 30
Page 19

Iron pocket in place
Gently place a piece of scrap fabric over everything to protect the pocket fabric while ironing.
Apply firm pressure with a hot iron for 10 to 20 seconds. Move the iron back and forth to fix the pocket
evenly in place.
Once you’re done, check to make sure the pocket is fully adhered to the tie.
© Adafruit Industries https://learn.adafruit.com/no-solder-circuit-playground-bluetooth-disco-tie Page 19 of 30
Page 20

© Adafruit Industries https://learn.adafruit.com/no-solder-circuit-playground-bluetooth-disco-tie Page 20 of 30
Page 21

Assembly and Wiring
Assemble all components with needle and thread and a bit of wiring.
Position neopixel strip
Find the vertical center line of the tie and mark it using pins
or tailor’s chalk.
Position the strip along the center line so that about an inch
of wire hangs over the tie's tip.
Tuck the excess tail of the wire strip near the neck into the
tie's knot.
© Adafruit Industries https://learn.adafruit.com/no-solder-circuit-playground-bluetooth-disco-tie Page 21 of 30
Page 22

Sew NeoPixels
Sew each NeoPixel in place by passing thread through the
top layer of fabric and wrapping around one end of the
NeoPixel capsule. Then do the same for the other end of the
capsule.
To keep the strip aligned while you work, sew the top,
bottom, and middle NeoPixels first.
Attach Circuit Playground Bluefruit
© Adafruit Industries https://learn.adafruit.com/no-solder-circuit-playground-bluetooth-disco-tie Page 22 of 30
Page 23
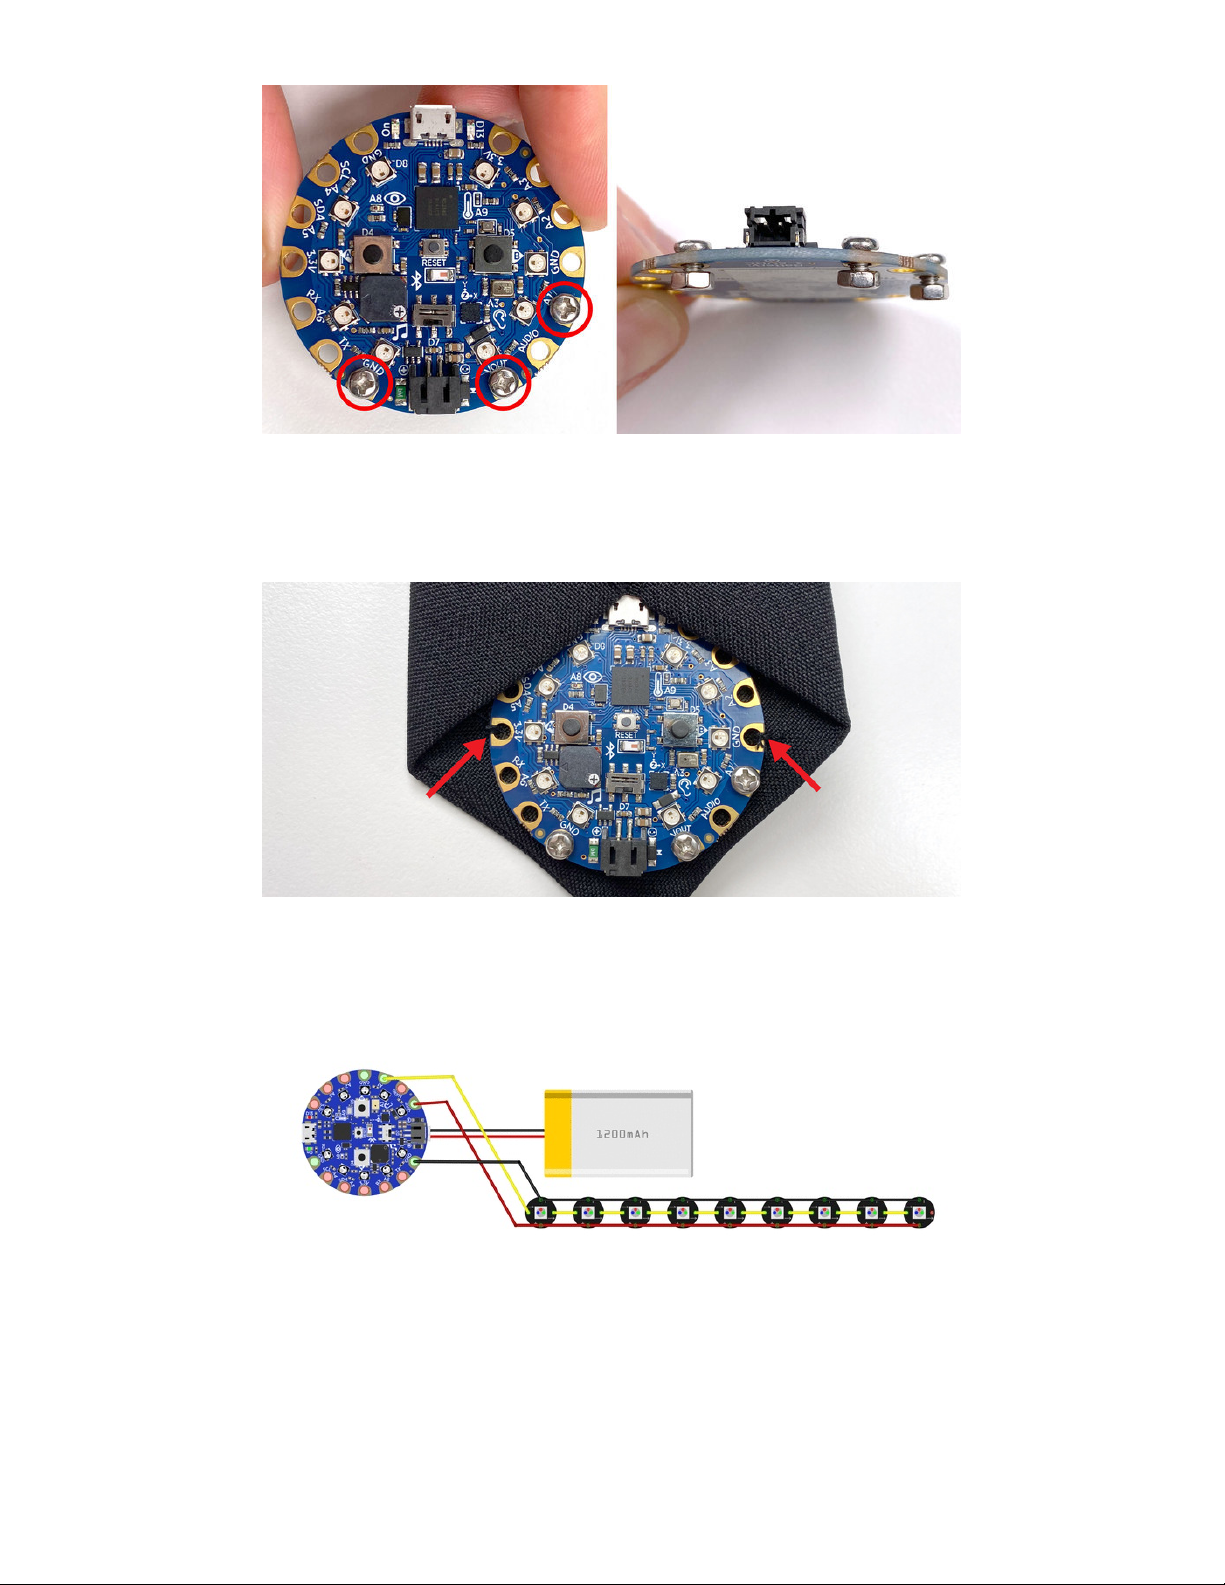
Mount bolts to the CPB's GND, VOUT, & A1 pads. Leave them a bit loose so you can easily thread wire
around the screw later on.
Position the CPB at the bottom of the back of the tie so that the micro USB port tucks slightly under the
tie's fold.
Sew the CPB in place by stitching the GND and 3.3V pads securely to the top layer of fabric.
Wiring Diagram
Below is a diagram showing all the electrical connections which need to be made. Click the image for a
larger view.
Wire the NeoPixel Strip
© Adafruit Industries https://learn.adafruit.com/no-solder-circuit-playground-bluetooth-disco-tie Page 23 of 30
Page 24

The three wires from the NeoPixel strip connect to the
following pads on the CPB:
Red wire -> VOUT
Middle wire -> A1
Remaining wire -> GND
Bend the wires over the bottom edge of the tie and secure
the exposed wires to their respective pads by tightening the
bolts with a small screwdriver.
Connect the Battery
© Adafruit Industries https://learn.adafruit.com/no-solder-circuit-playground-bluetooth-disco-tie Page 24 of 30
Page 25

Slide the lipo battery into the pocket while feeding its wire connector through the opening at the pockets
end.
Connect the battery to the black JST port on the CPB.
Congrats - your new tie is powered up and ready to wear!
© Adafruit Industries https://learn.adafruit.com/no-solder-circuit-playground-bluetooth-disco-tie Page 25 of 30
Page 26

Use it
Download app
Adafruit's Bluefruit LE Connect (https://adafru.it/GLc) app is a free, multi-faceted Bluetooth LE toolkit that
we'll use to control the tie's lighting and animation. Download and install the app on your mobile device
below:
https://adafru.it/FxK
https://adafru.it/f4G
Connect via BLE
Ensure your mobile device has Bluetooth enabled, and launch the app. The startup screen will display a
list of nearby Bluetooth LE devices the app can connect to.
https://adafru.it/FxK
https://adafru.it/f4G
© Adafruit Industries https://learn.adafruit.com/no-solder-circuit-playground-bluetooth-disco-tie Page 26 of 30
Page 27
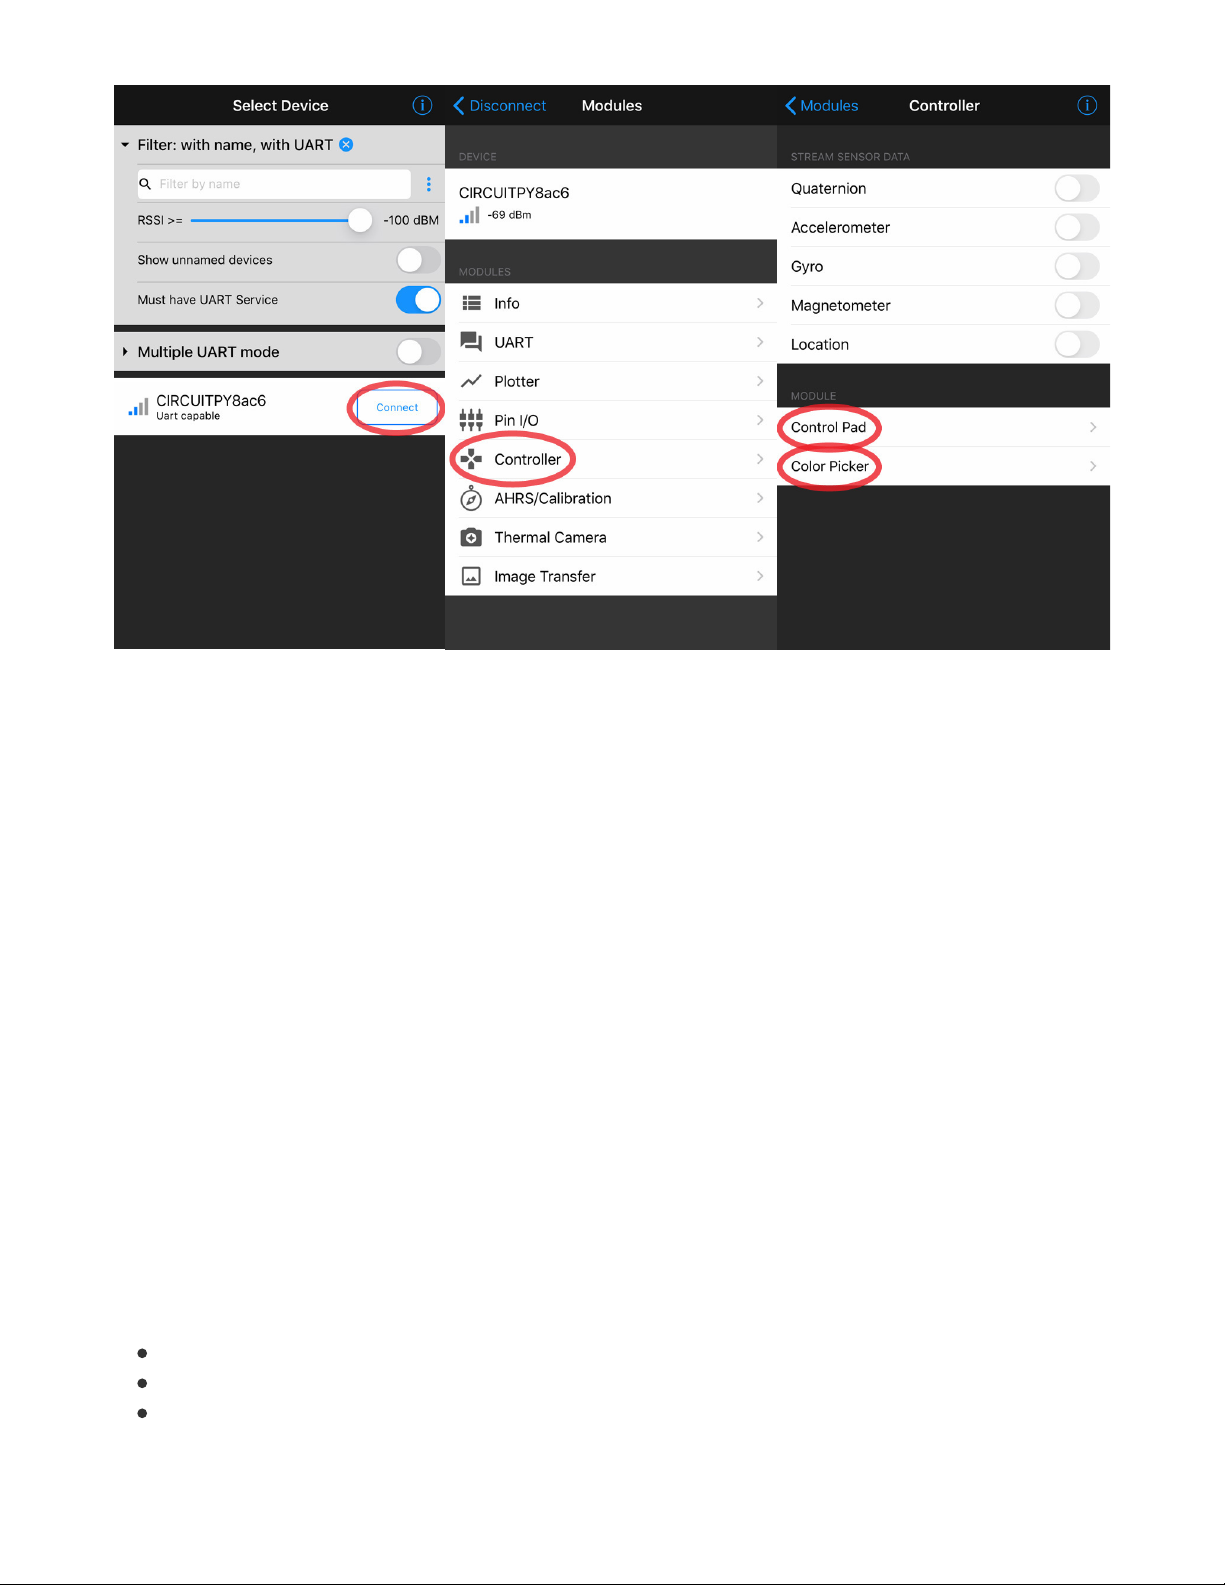
Find the device with a name beginning with CIRCUITPY and click Connect on the button to the right.
Once connected, tap the table row titled Controller. This is the module we'll use to control the tie's color
and animations.
Change animation
The tie has 4 animation modes:
Audio Meter - Live sound level detected by the CPB
Rainbow Cycle - All LEDs fade across color spectrum
Larsen Scanner - LEDs move up & down, ‘cylon’ style
© Adafruit Industries https://learn.adafruit.com/no-solder-circuit-playground-bluetooth-disco-tie Page 27 of 30
Page 28

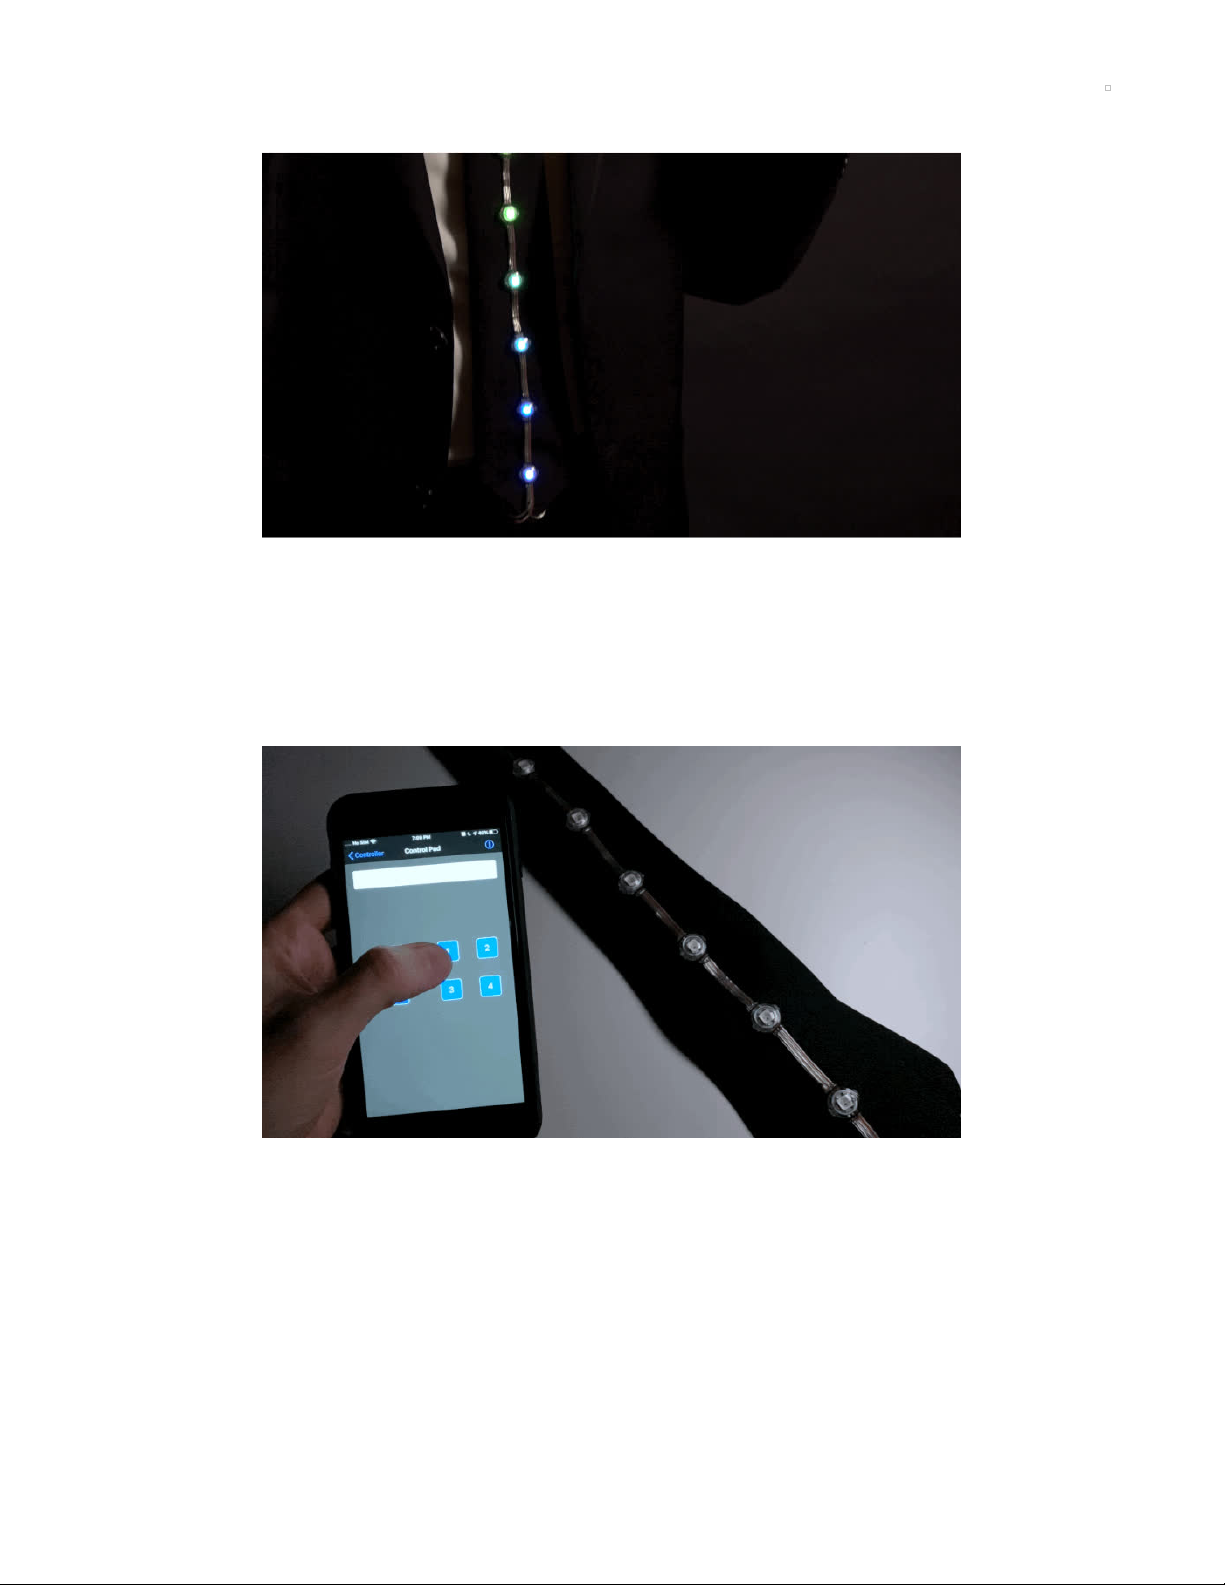
Solid Color - All LEDs same color
From the Controller view, tap Control Pad. A game controller button interface will appear.
Here's a breakdown of what each Control Pad button does:
Button 1 – change to Audio Meter mode
Button 2 – change to Rainbow Cycle mode
Button 3 – change to Larsen Scanner mode
Button 4 – change to Solid Color mode
Up Arrow Button - Speed up Larsen Scanner
Down Arrow Button - Slow down Larsen Scanner
Change Color
© Adafruit Industries https://learn.adafruit.com/no-solder-circuit-playground-bluetooth-disco-tie Page 28 of 30
Page 29

From the Controller view, tap Color Picker – a color wheel interface will appear. The Color Picker will
allow you to change the color of the Larsen Scanner and Solid Color animation modes.
Touch a point on the color wheel to select a hue and drag the slider below to adjust color brightness.
Press the Send button to send color data to the tie.
© Adafruit Industries https://learn.adafruit.com/no-solder-circuit-playground-bluetooth-disco-tie Page 29 of 30
Page 30

© Adafruit Industries Last Updated: 2021-02-08 06:46:27 PM EST Page 30 of 30
 Loading...