

Page 1
Adafruit MLX90640 IR Thermal Camera
Created by Kattni Rembor
Last updated on 2021-02-09 12:10:57 PM EST
Page 2

2
3
6
6
7
7
8
8
9
9
9
9
9
10
10
10
10
10
10
11
11
11
11
11
11
12
12
12
12
13
14
14
18
18
18
19
19
20
23
24
24
24
24
28
28
28
28
Guide Contents
Guide Contents
Overview
Pinouts
Power Pins
I2C Logic Pins
STEMMA Connectors
Arduino Libraries
Library Installation
Arcada Libraries
Install Libraries
Adafruit Arcada
If you aren't running Arduino IDE 1.8.10 or later, you'll need to install all of the following!
Adafruit NeoPixel
Adafruit FreeTouch
Adafruit Touchscreen
Adafruit SPIFlash
Adafruit Zero DMA
Adafruit GFX
Adafruit ST7735
Adafruit ILI9341
Adafruit LIS3DH
Adafruit Sensor
Adafruit ImageReader
ArduinoJson
Adafruit ZeroTimer
Adafruit TinyUSB
Adafruit WavePlayer
SdFat (Adafruit Fork)
Audio - Adafruit Fork
Arduino Docs
Arduino Thermal Camera
Loading the Example
Python & CircuitPython
CircuitPython Microcontroller Wiring
Python Computer Wiring
CircuitPython Installation of MLX90640 Library
Python Installation of MLX90640 Library
CircuitPython & Python Usage
Python Docs
CircuitPython Thermal Camera
CircuitPython Microcontroller Wiring
CircuitPython Installation of Additional Libraries
CircuitPython PyBadge/PyGamer Thermal Camera
Downloads
Files
Schematic
Fab Print
© Adafruit Industries https://learn.adafruit.com/adafruit-mlx90640-ir-thermal-camera Page 2 of 29
Page 3
Overview
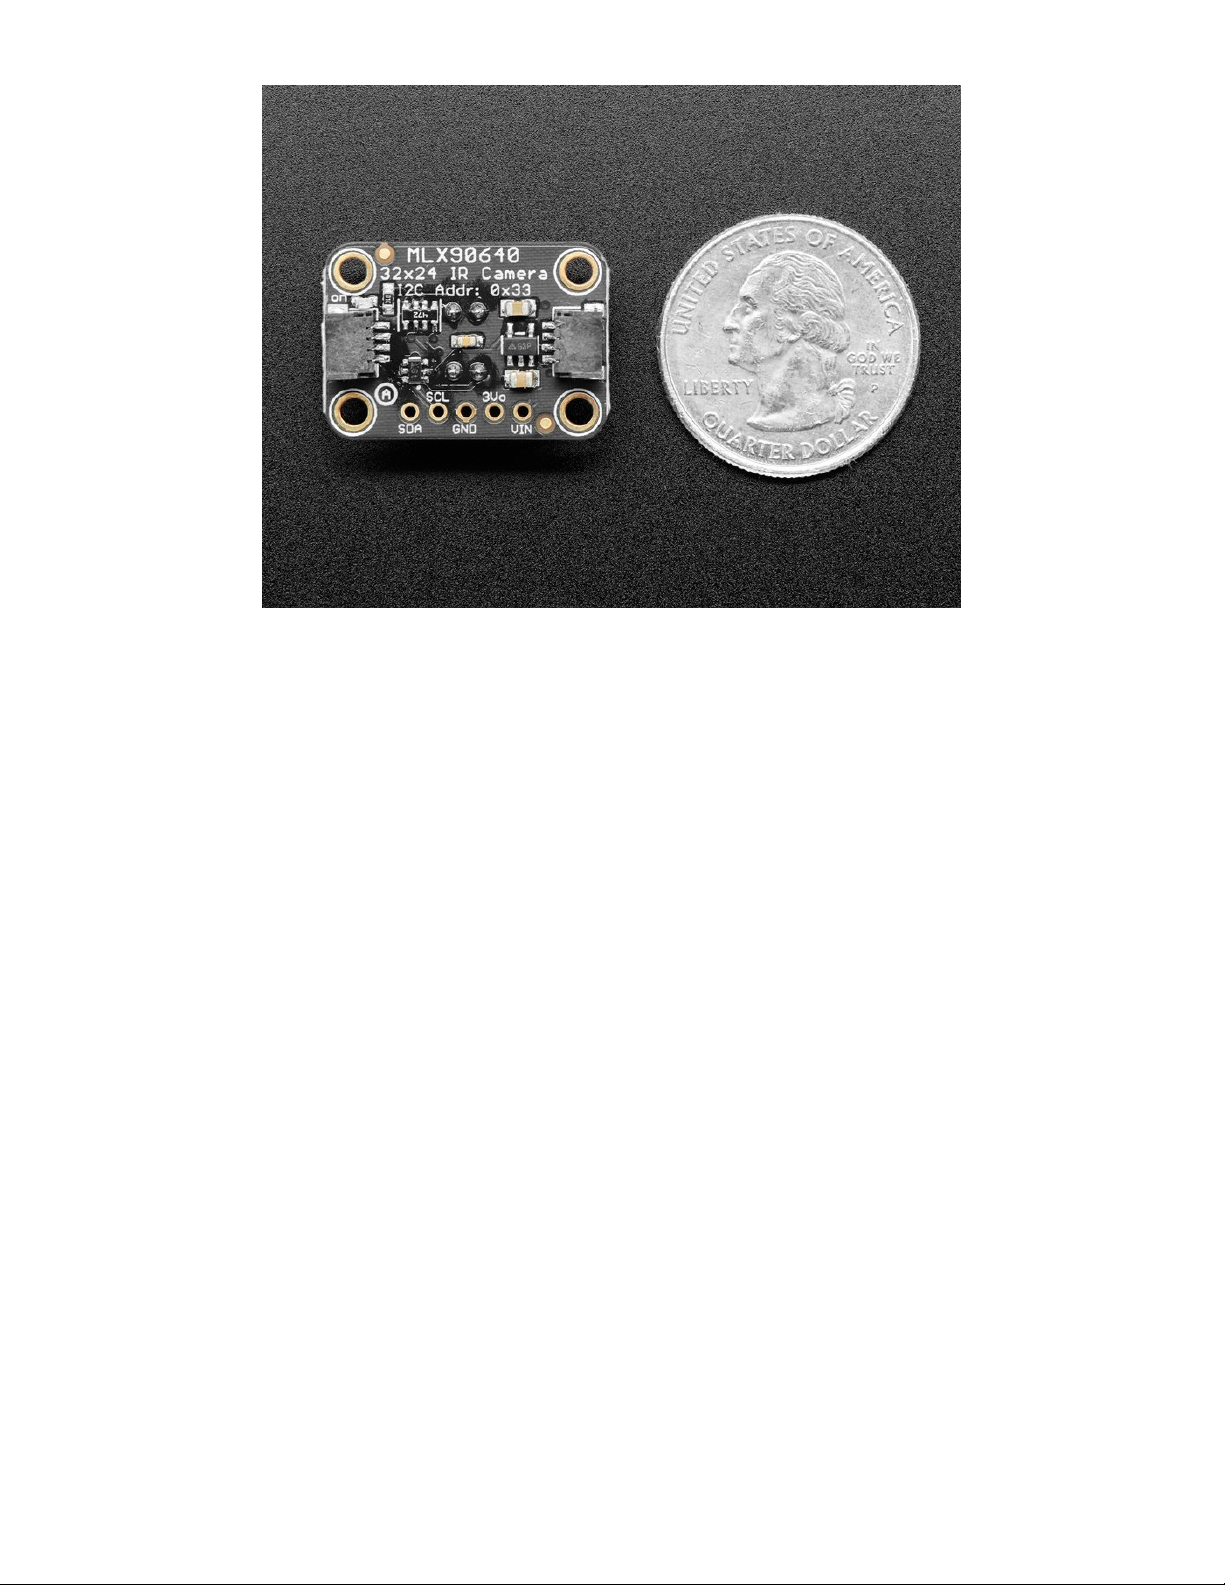
You can now add affordable heat-vision to your project with an Adafruit MLX90640 Thermal Camera
Breakout. This sensor contains a 24x32 array of IR thermal sensors. When connected to your
microcontroller (or Raspberry Pi) it will return an array of 768 individual infrared temperature readings
over I2C. It's like those fancy thermal cameras, but compact and simple enough for easy integration.
There are two versions: one with a wider 110°x70° field of view (https://adafru.it/IDi) and one with a
narrower 55°x35° field of view (https://adafru.it/HNe).
© Adafruit Industries https://learn.adafruit.com/adafruit-mlx90640-ir-thermal-camera Page 3 of 29
Page 4
This part will measure temperatures ranging from -40°C to 300°C with an accuracy of +- 2°C (in the 0-
100°C range). With a maximum frame rate of 16 Hz (the theoretical limit is 32Hz but we were not able to
practically achieve it), It's perfect for creating your own human detector or mini thermal camera. We have
code for using this sensor on an Arduino or compatible (the sensor communicates over I2C) or on a
Raspberry Pi with Python. If using an Arduino-compatible, you'll need a processor with at least 20KB RAM
- a SAMD21 (M0) or SAMD51 (M4) chipset will do nicely. On the Pi, you can even perform interpolation
processing with help from the SciPy python library and get some pretty nice results!
This sensor reads the data twice per frame, in a checker-board pattern, so it's normal to see a checker-
board dither effect when moving the sensor around - the effect isn't noticeable when things move slowly.
© Adafruit Industries https://learn.adafruit.com/adafruit-mlx90640-ir-thermal-camera Page 4 of 29
Page 5
To make it easy to use, we hand-soldered it on a breakout board with a 3.3V regulator and level shifting.
So you can use it with any 3V or 5V microcontroller or computer. We've even included SparkFun
qwiic (https://adafru.it/Fpw) compatible STEMMA QT (https://adafru.it/Ft4) connectors for the I2C bus
so you don't even need to solder! Just plug-n-play with any of our STEMMA QT (JST SH) cables.
Even better - We've done all the hard work here, with example code and supporting software libraries to
get you up in running in just a few lines of Arduino (https://adafru.it/IDj) or Python
code (https://adafru.it/IBv).
© Adafruit Industries https://learn.adafruit.com/adafruit-mlx90640-ir-thermal-camera Page 5 of 29
Page 6

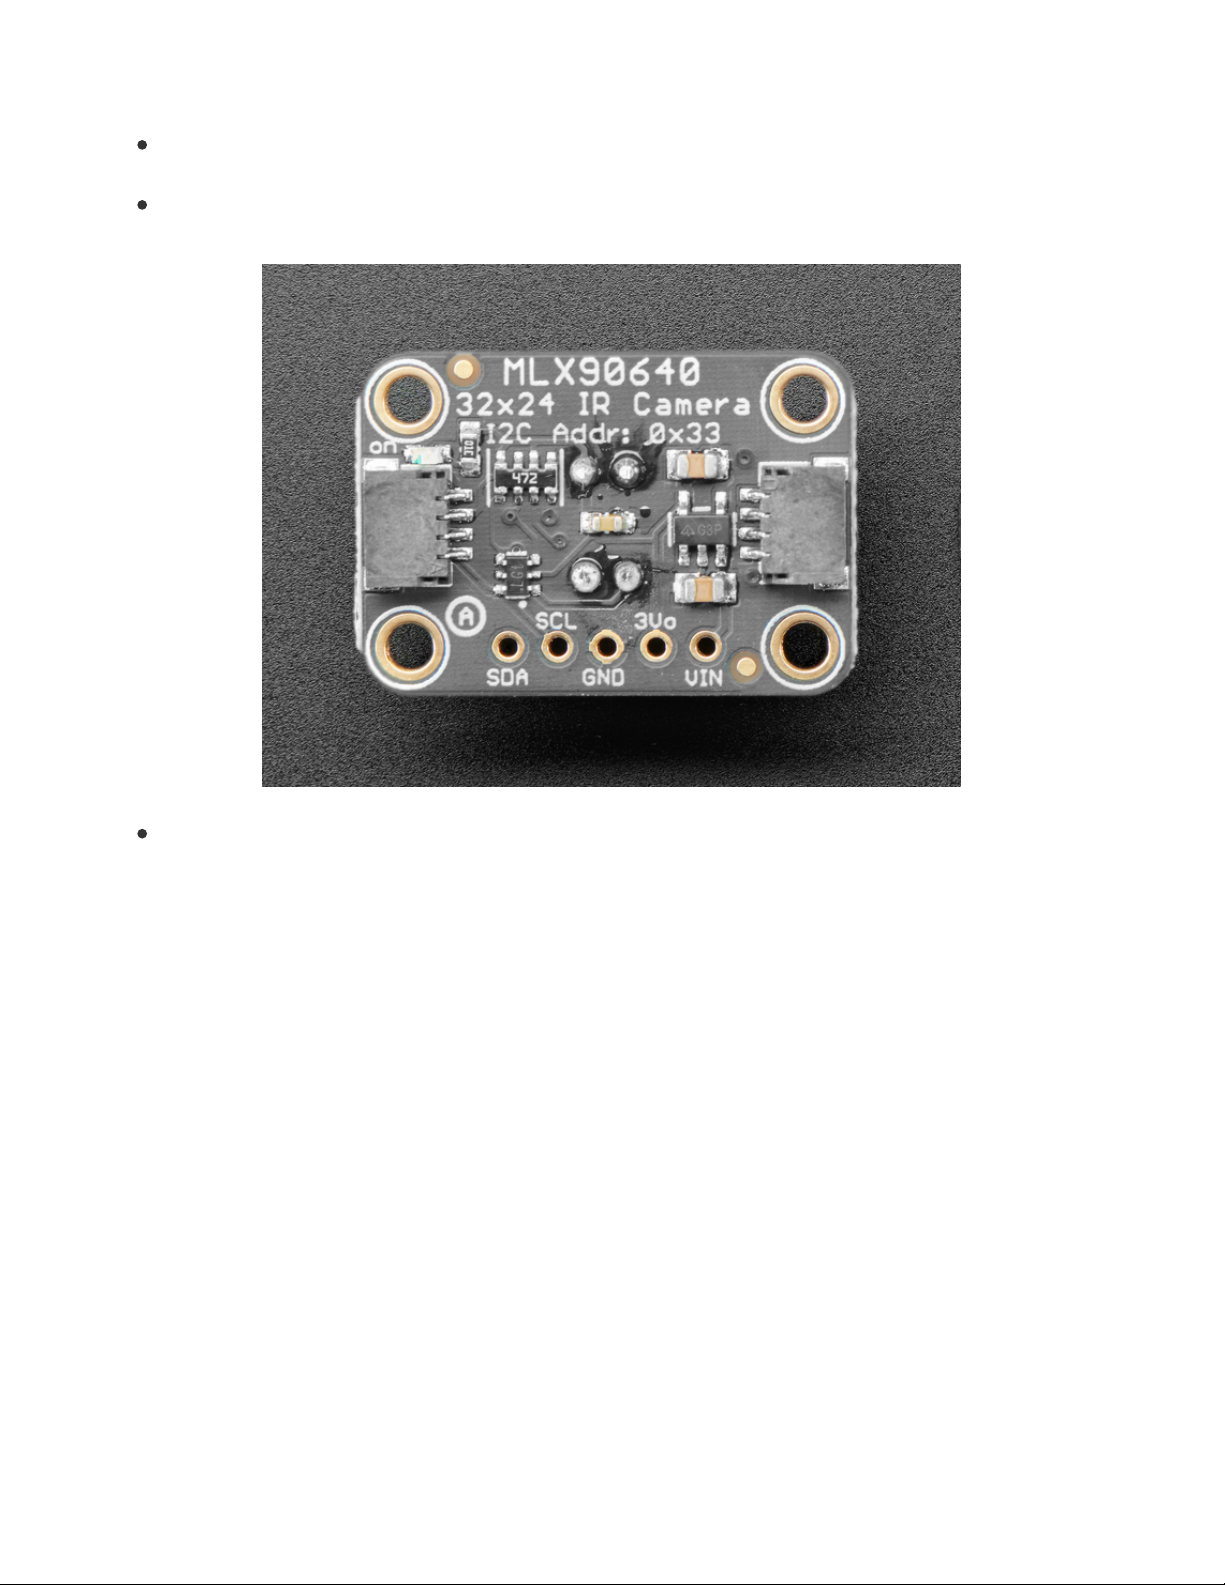
Pinouts
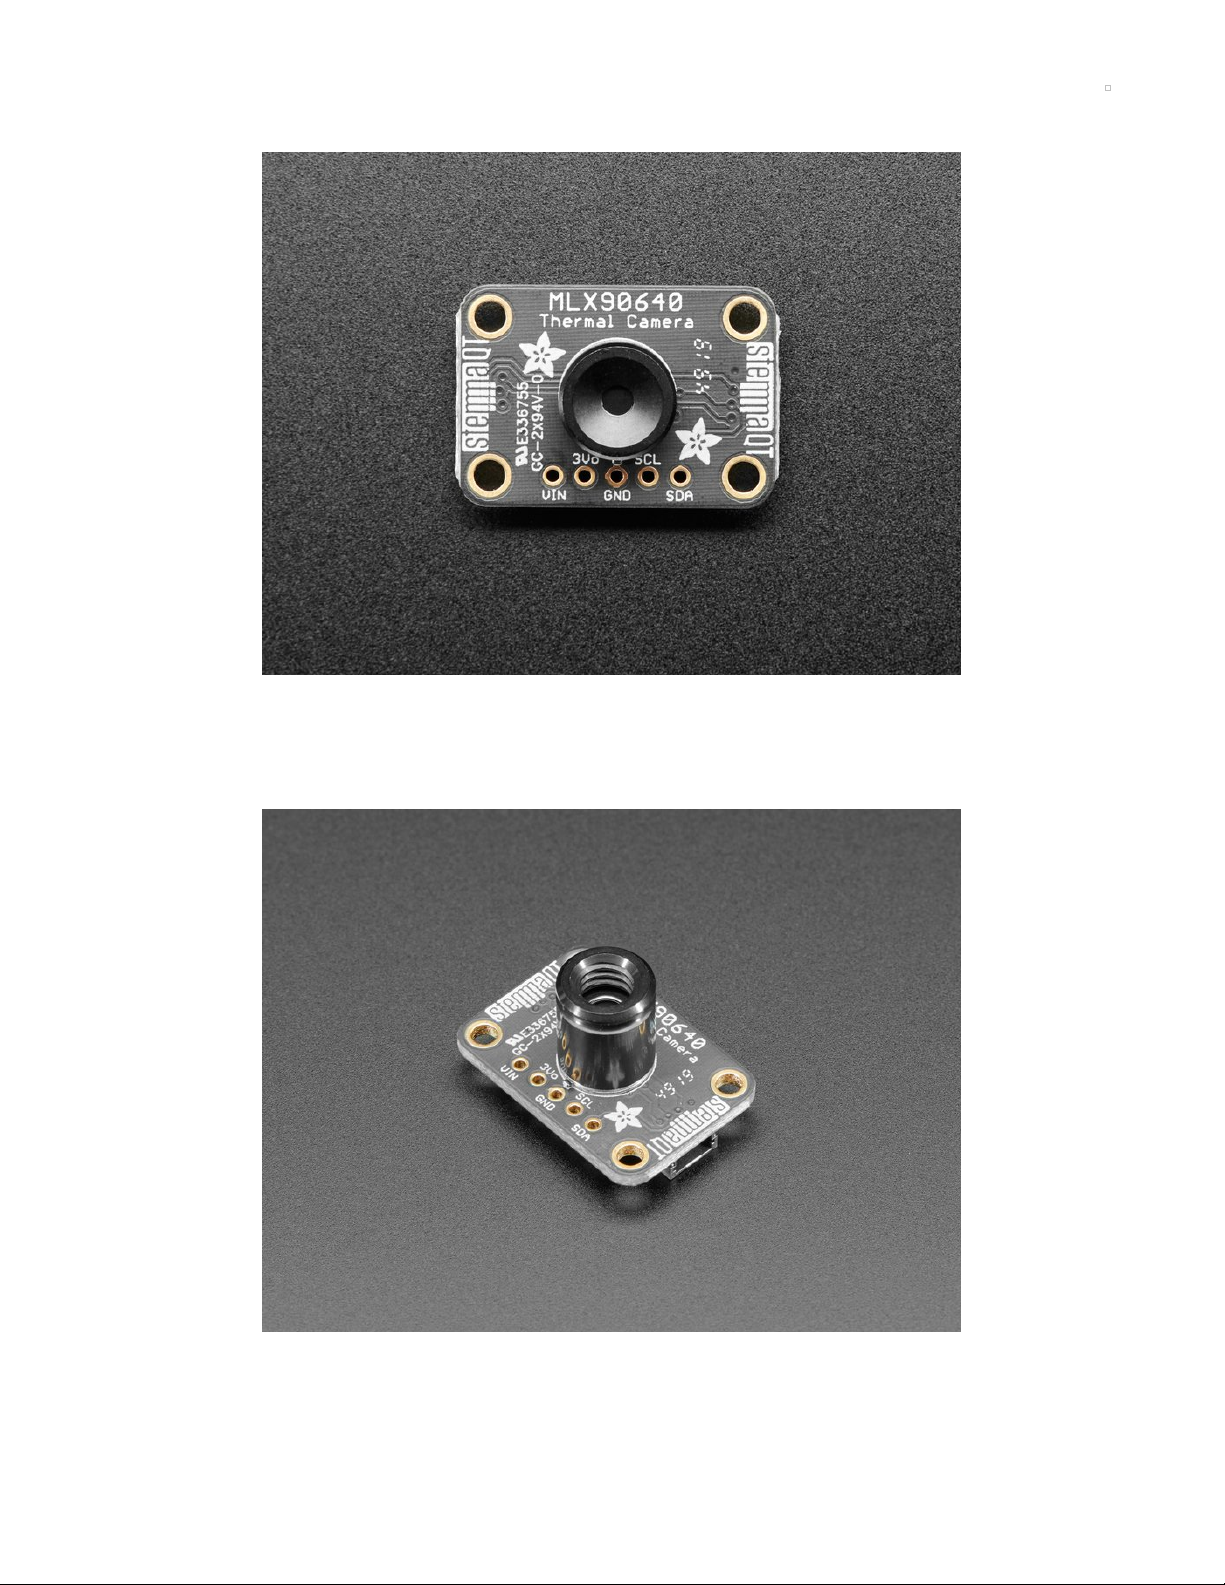
There is no difference between the breakout for the 55°x35° field of view and the 110°x70° field of view
thermal cameras. There is also no difference in the code used with either thermal camera. The only
difference is the length of the lens. The only way to tell which thermal camera breakout you have is to
identify the length of the lens. The longer lens, shown above on the left, is on the 55°x35° field of view
thermal camera and is approximately 11.25mm long. The shorter lens, shown above on the right, is on the
110°x70° field of view thermal camera and is approximately 5.7mm long.
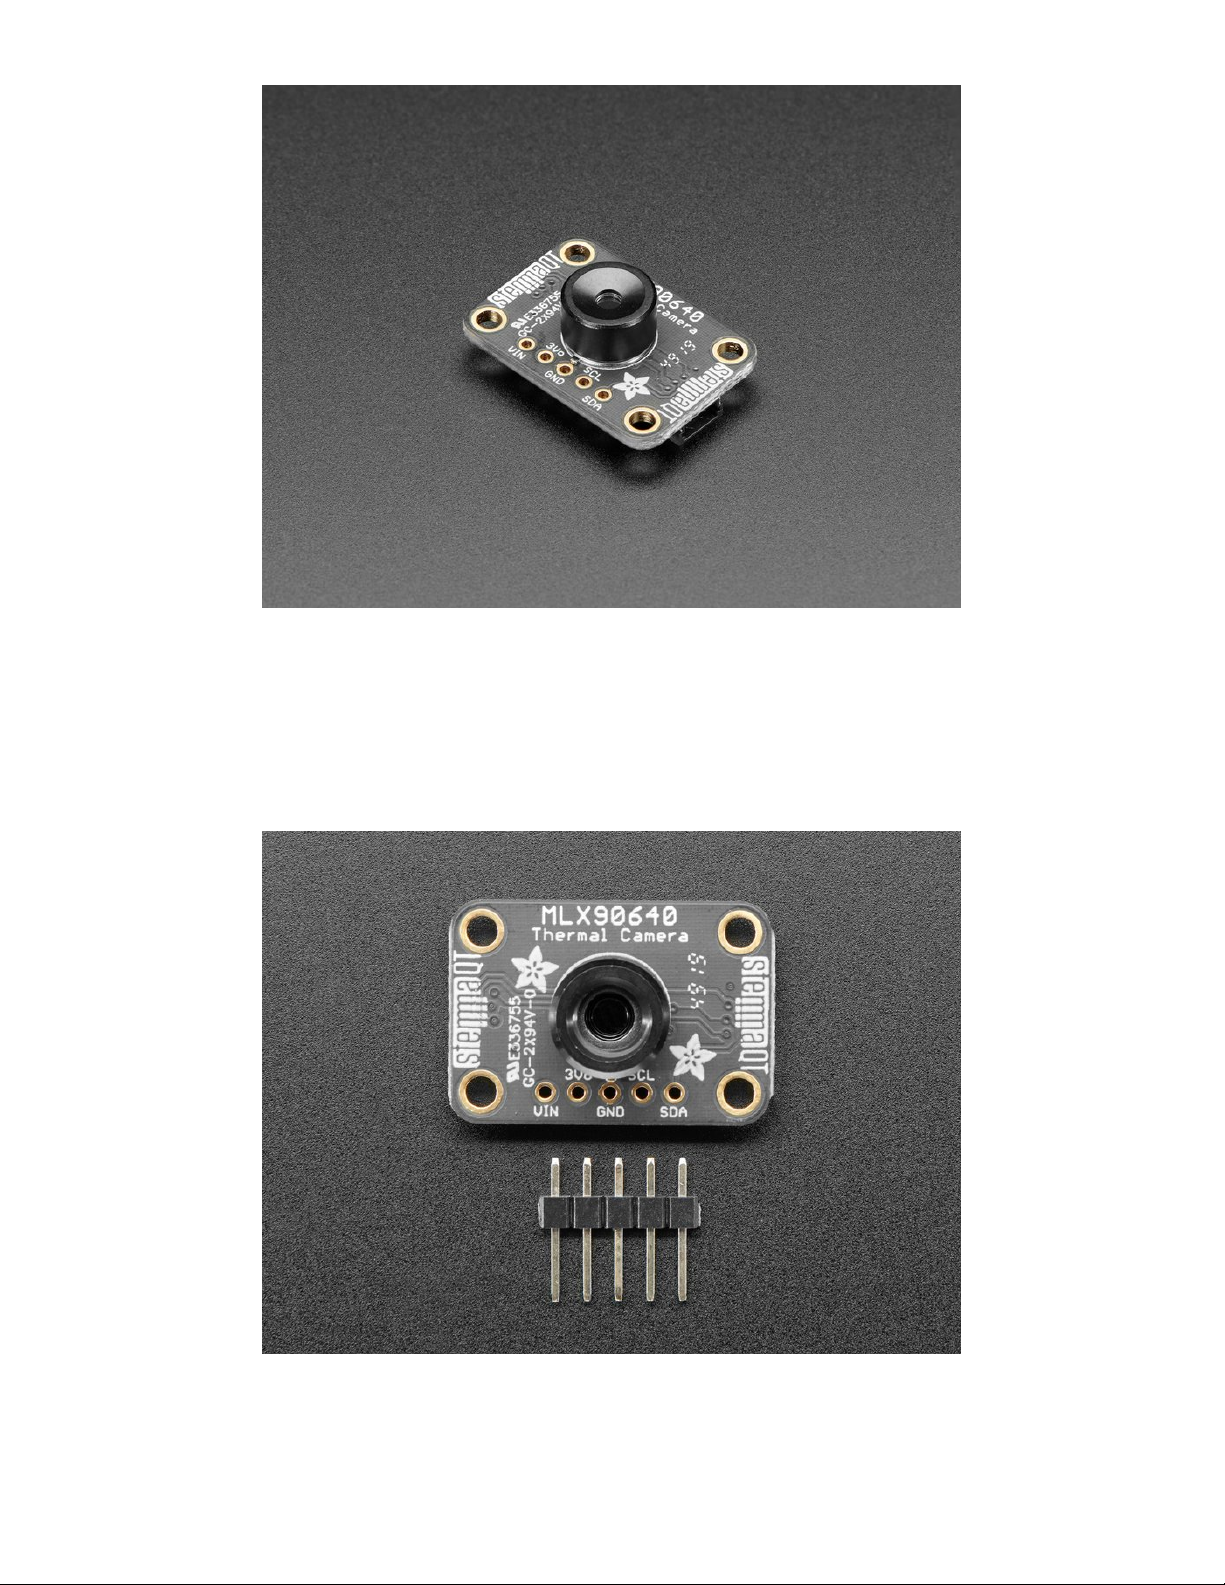
Power Pins
VIN - this is the power pin. Since the sensor chip uses 3 VDC, we have included a voltage regulator
on board that will take 3-5VDC and safely convert it down. To power the board, give it the same
power as the logic level of your microcontroller - e.g. for a 5V microcontroller like Arduino, use 5V
3V - this is the 3.3V output from the voltage regulator, you can grab up to 100mA from this if you like
GND - common ground for power and logic
© Adafruit Industries https://learn.adafruit.com/adafruit-mlx90640-ir-thermal-camera Page 6 of 29
Page 7
I2C Logic Pins
SCL - I2C clock pin, connect to your microcontroller I2C clock line. This pin is level shifted so you
can use 3-5V logic, and there's a 4.7K pullup on this pin.
SDA - I2C data pin, connect to your microcontroller I2C data line. This pin is level shifted so you can
use 3-5V logic, and there's a 4.7K pullup on this pin.
STEMMA Connectors
STEMMA QT (https://adafru.it/Ft4) - These connectors on the back of this breakout allow you to
connect to dev boards with STEMMA QT connectors or to other things with various associated
accessories (https://adafru.it/Ft6)
© Adafruit Industries https://learn.adafruit.com/adafruit-mlx90640-ir-thermal-camera Page 7 of 29
Page 8
Arduino Libraries
You're going to need to install a few libraries to use this sensor. These are all in the Arduino Library
Manager, so they're quite easy to install.
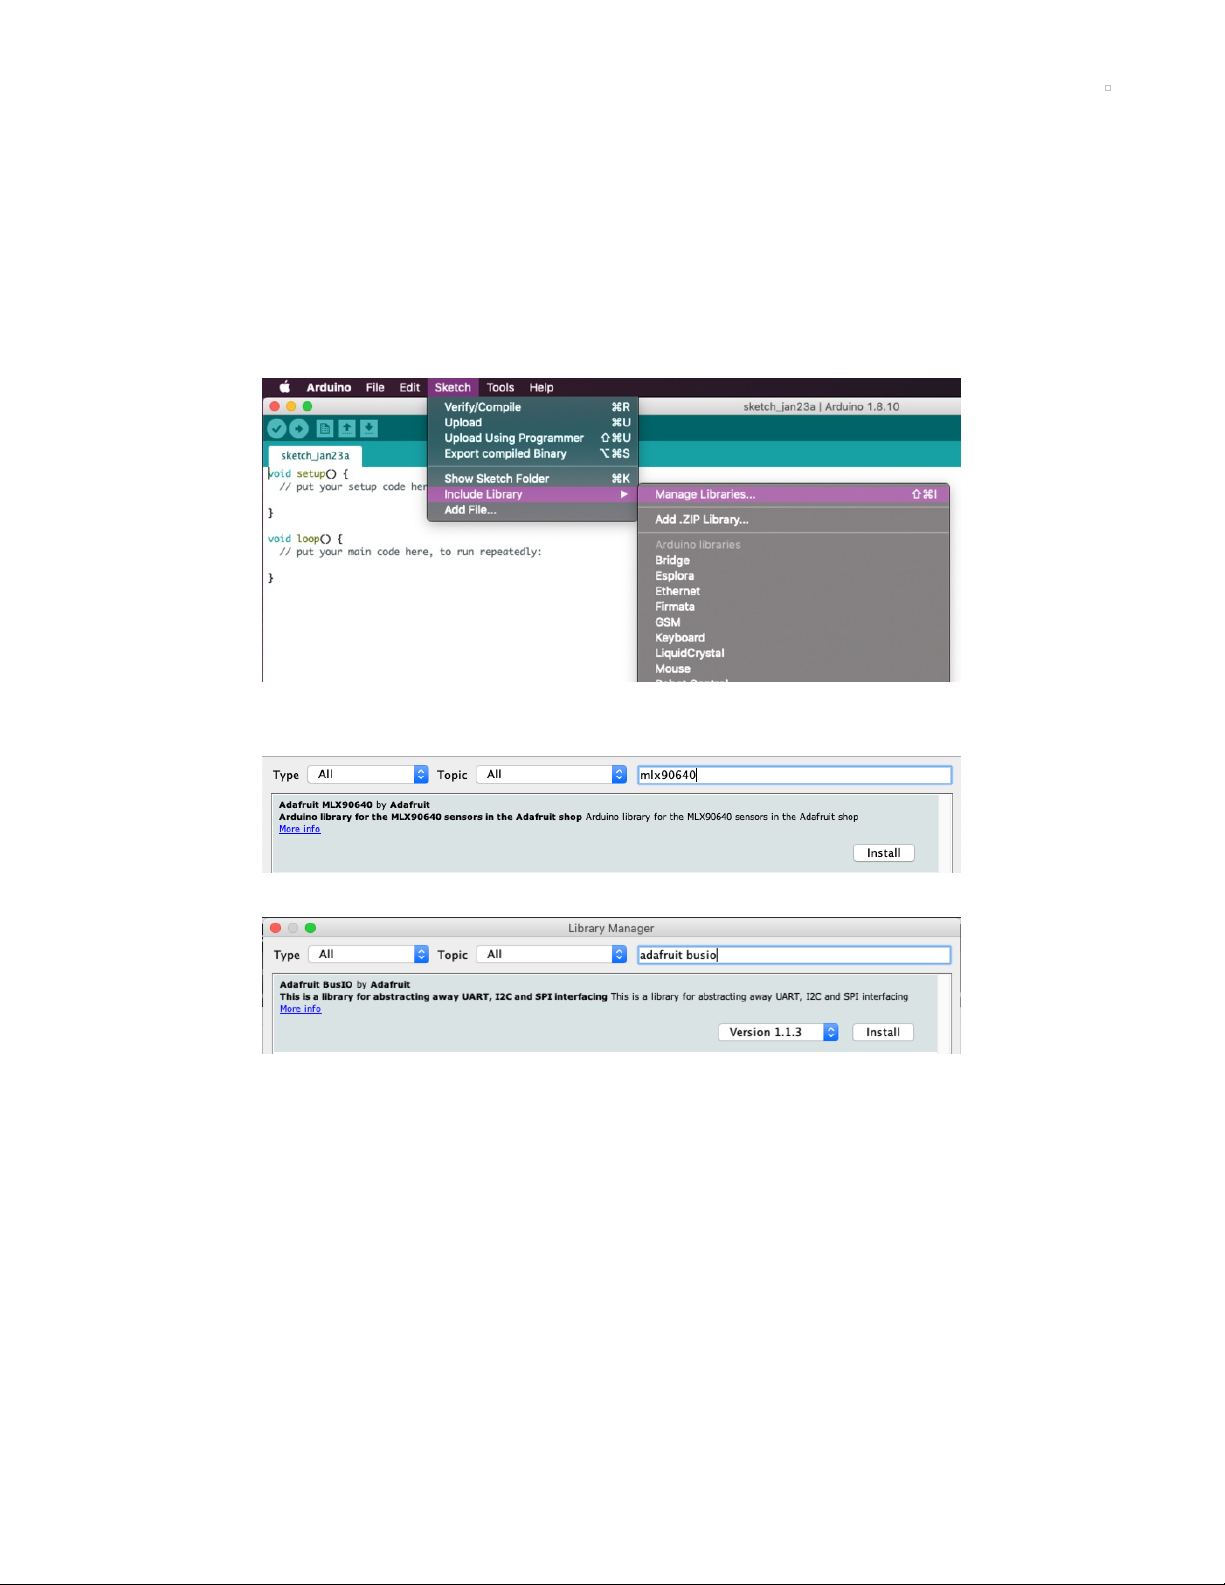
Library Installation
You're going to need to install a few libraries to use this sensor. These are all in the Arduino Library
Manager, so they're quite easy to install.
You can install the Adafruit MLX90640 Library for Arduino using the Library Manager in the Arduino IDE.
Click the Manage Libraries... menu item, search for Adafruit MLX90640, and select the Adafruit
MLX90640 library:
Then follow the same process for the Adafruit BusIO library.
In the next page, you'll install all the libraries used for Arcada, which is another dependency.
© Adafruit Industries https://learn.adafruit.com/adafruit-mlx90640-ir-thermal-camera Page 8 of 29
Page 9
Arcada Libraries
OK now that you have Arduino IDE set up, drivers installed if necessary and you've practiced uploading
code, you can start installing all the Libraries we'll be using to program it.
There's a lot of libraries!
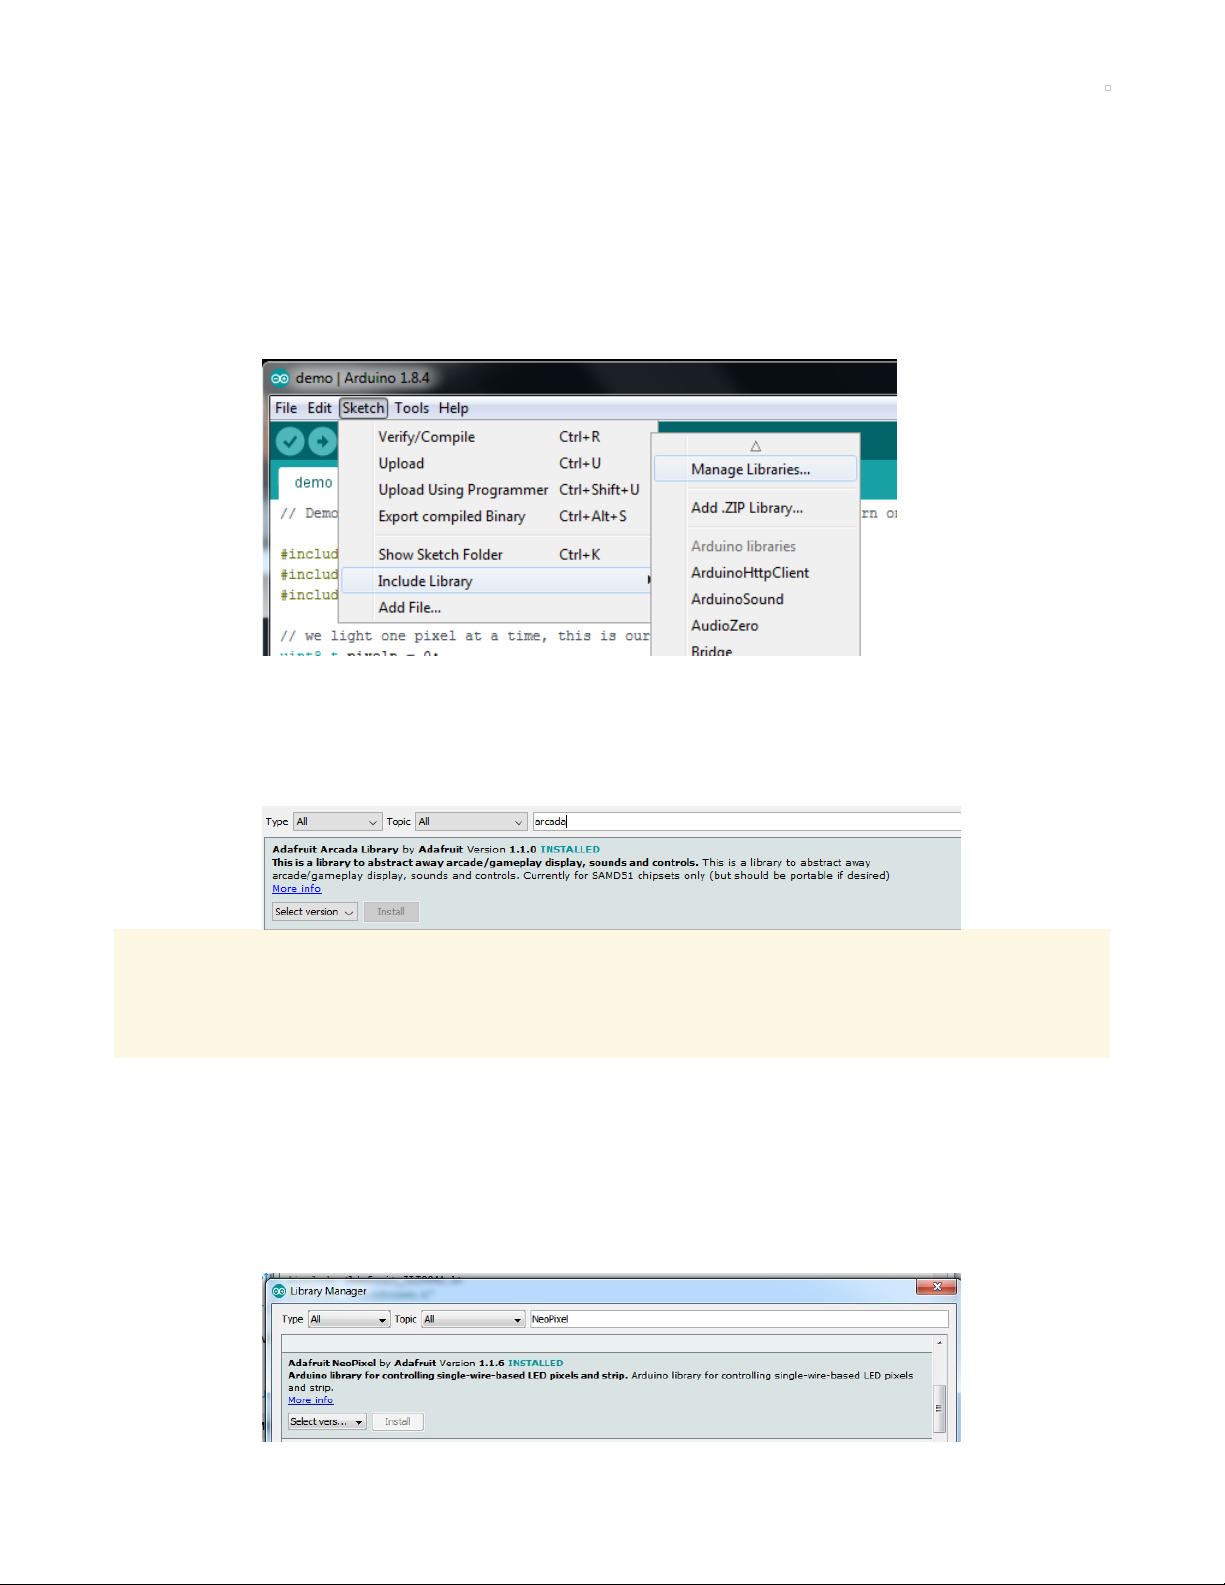
Install Libraries
Open up the library manager...
And install the following libraries:
Adafruit Arcada
This library generalizes the hardware for you so you can read the joystick, draw to the display, read files,
etc. without having to worry about the underlying methods
If you use Arduino 1.8.10 or later, the IDE will automagically install all the libraries you need to run all
the Arcada demos when you install Arcada. We strongly recommend using the latest IDE so you don't
miss one of the libraries!
If you aren't running Arduino IDE 1.8.10 or later, you'll need to install
all
of the following!
Adafruit NeoPixel
This will let you light up the status LEDs on the front/back
© Adafruit Industries https://learn.adafruit.com/adafruit-mlx90640-ir-thermal-camera Page 9 of 29
Page 10

Adafruit FreeTouch
This is the open source version of QTouch for SAMD21 boards
Adafruit Touchscreen
Used by Adafruit Arcada for touchscreen input (required even if your Arcada board does not have a
touchscreen)
Adafruit SPIFlash
This will let you read/write to the onboard FLASH memory with super-fast QSPI support
Adafruit Zero DMA
This is used by the Graphics Library if you choose to use DMA
Adafruit GFX
This is the graphics library used to draw to the screen
If using an older (pre-1.8.10) Arduino IDE, locate and install Adafruit_BusIO (newer versions do this one
automatically).
Adafruit ST7735
The display on the PyBadge/PyGamer & other Arcada boards
© Adafruit Industries https://learn.adafruit.com/adafruit-mlx90640-ir-thermal-camera Page 10 of 29
Page 11
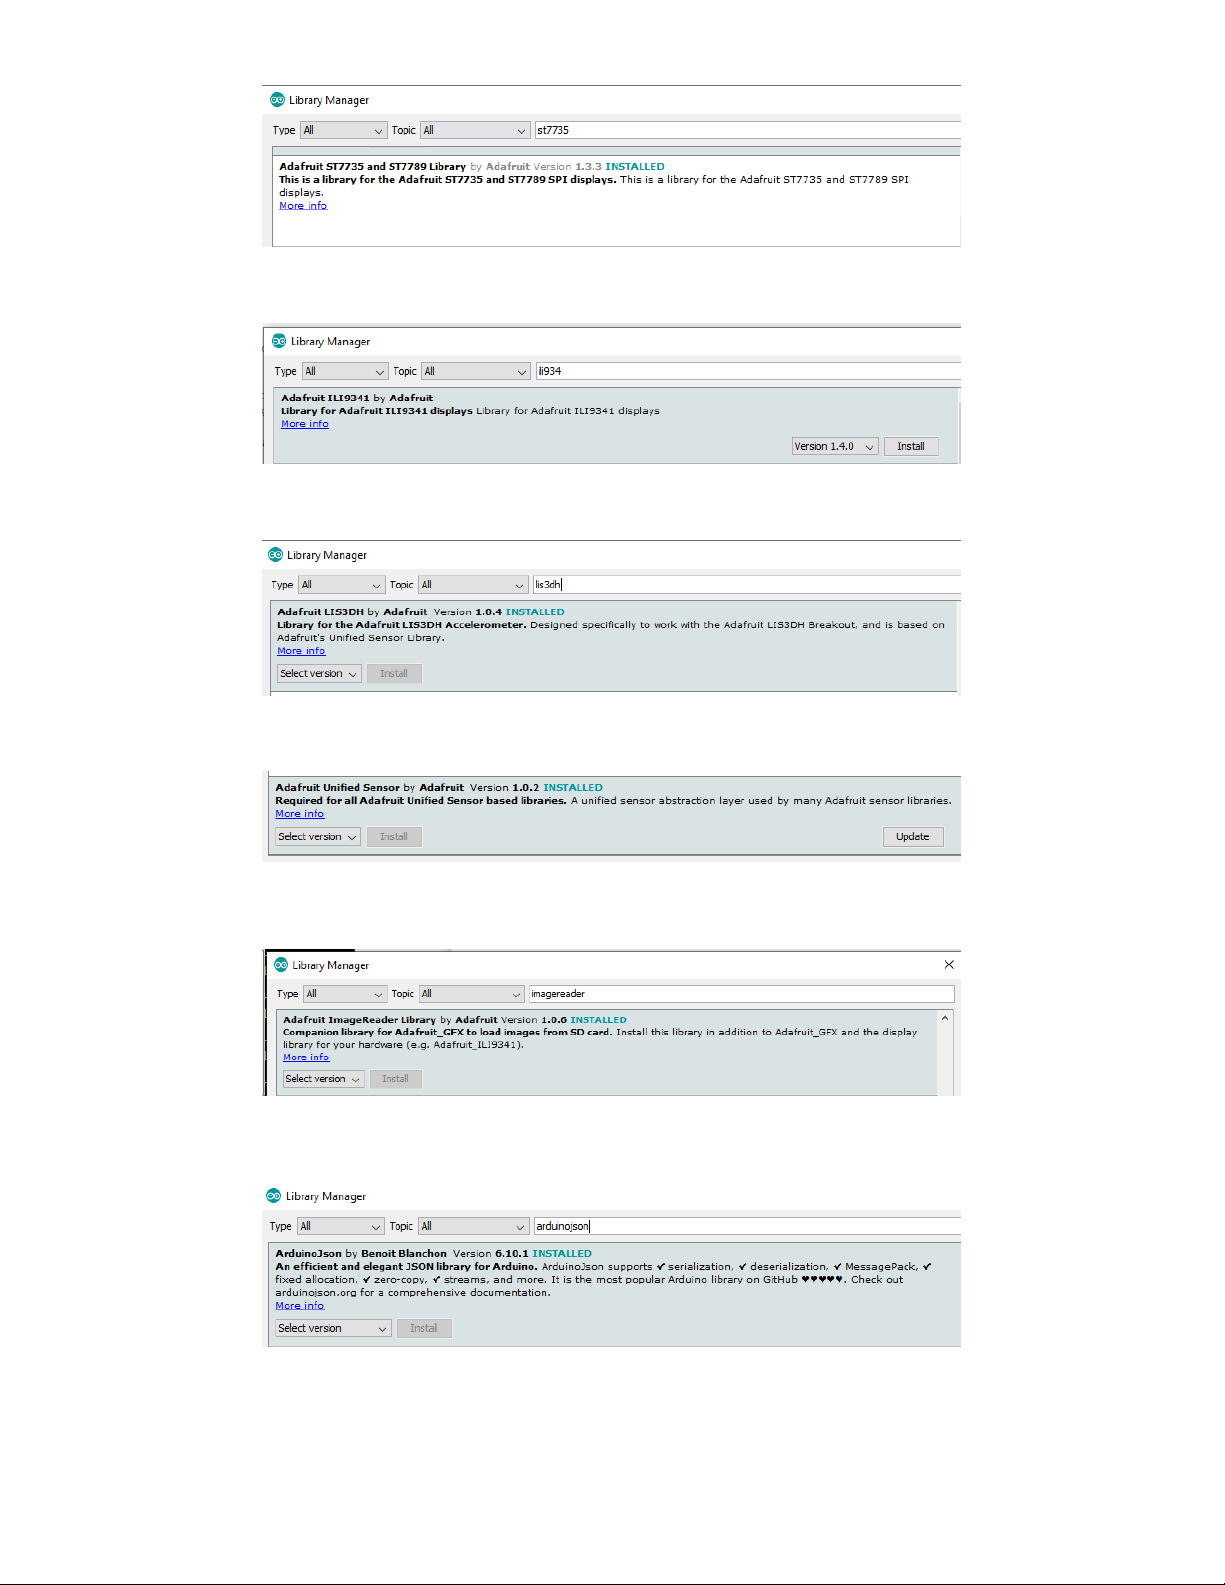
Adafruit ILI9341
The display on the PyPortal & other Arcada boards
Adafruit LIS3DH
For reading the accelerometer data, required even if one is not on the board
Adafruit Sensor
Needed by the LIS3DH Library, required even if one is not on the board
Adafruit ImageReader
For reading bitmaps from SPI Flash or SD and displaying
ArduinoJson
We use this library to read and write configuration files
Adafruit ZeroTimer
We use this library to easily set timers and callbacks on the SAMD processors
© Adafruit Industries https://learn.adafruit.com/adafruit-mlx90640-ir-thermal-camera Page 11 of 29
Page 12

Adafruit TinyUSB
This lets us do cool stuff with USB like show up as a Keyboard or Disk Drive
Adafruit WavePlayer
Helps us play .WAV sound files.
SdFat (Adafruit Fork)
The Adafruit fork of the really excellent SD card library that gives a lot more capability than the default SD
library
Audio - Adafruit Fork
Our fork of the Audio library provides a toolkit for building streaming audio projects.
© Adafruit Industries https://learn.adafruit.com/adafruit-mlx90640-ir-thermal-camera Page 12 of 29
Page 13

Arduino Docs
Arduino Docs (https://adafru.it/IzA)
© Adafruit Industries https://learn.adafruit.com/adafruit-mlx90640-ir-thermal-camera Page 13 of 29
Page 14

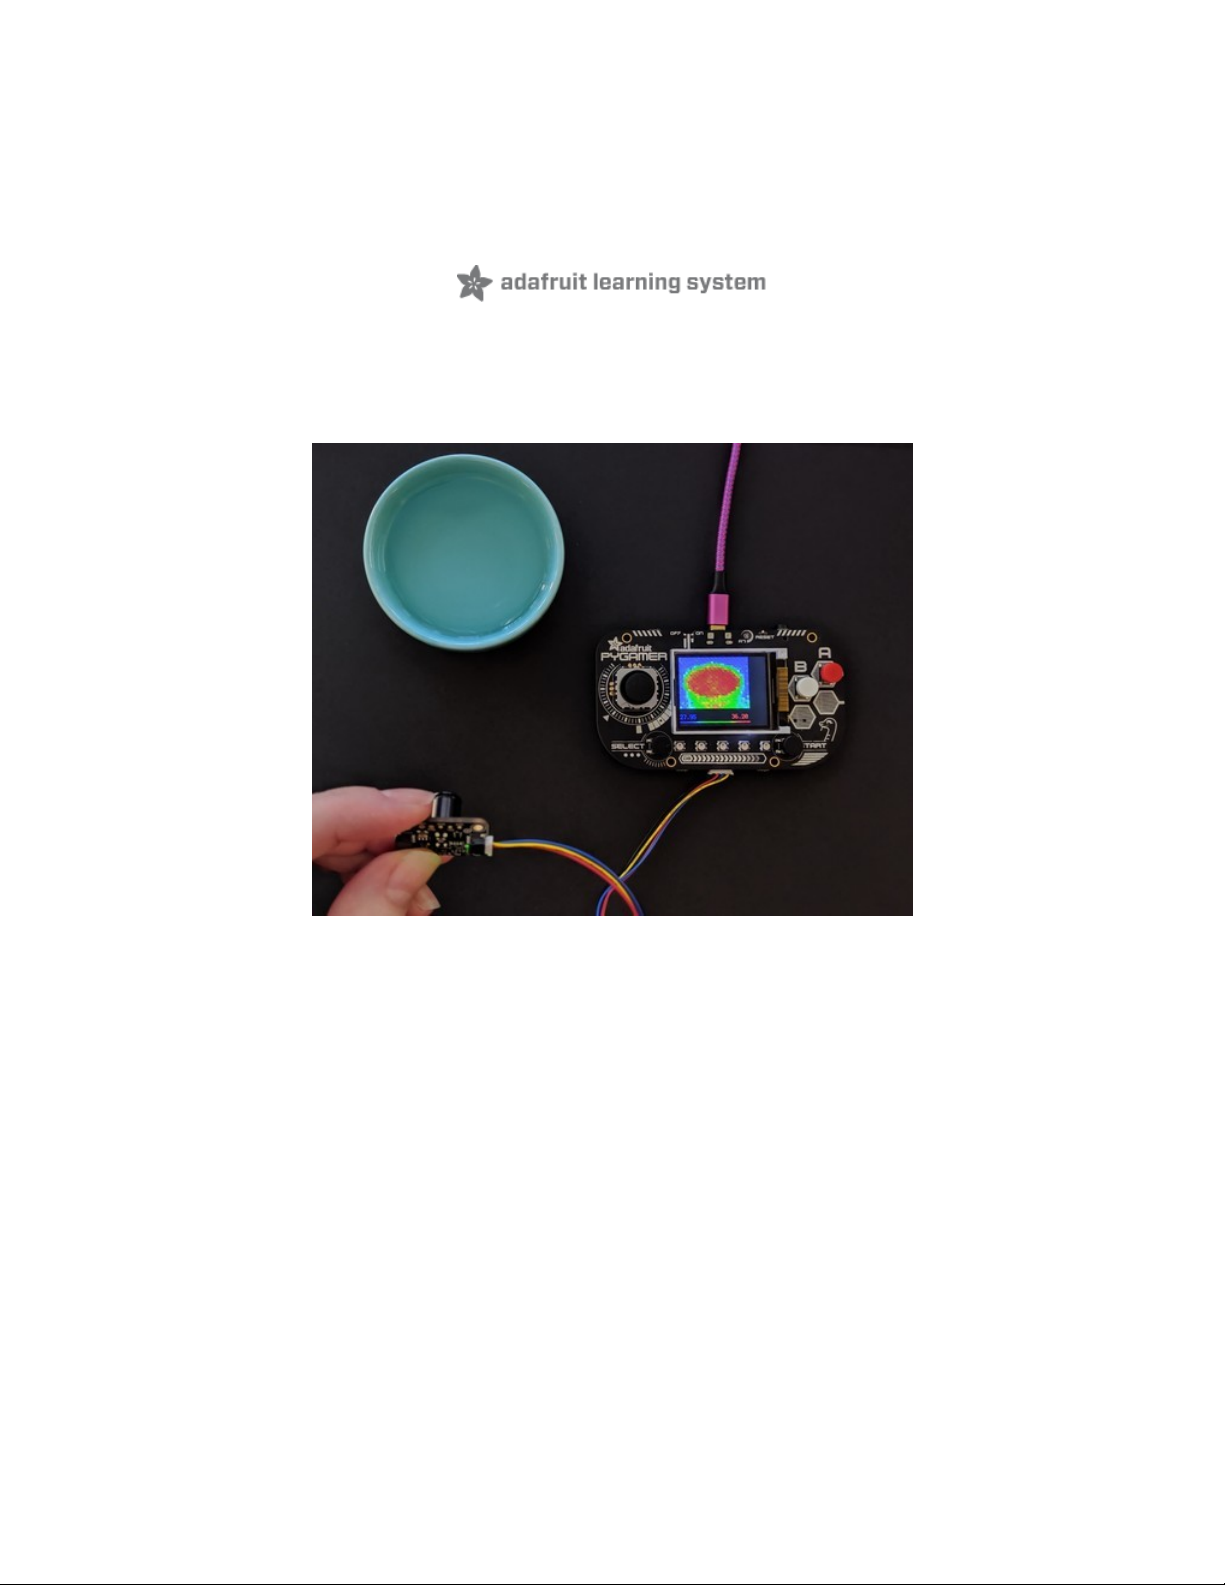
Arduino Thermal Camera
The PyBadge and PyGamer boards both have displays built in, as well as STEMMA I2C connectors. The
MLX90640 comes with STEMMA QT/QWIIC connectors to allow for attaching the board easily to projects
with no soldering required. Adafruit sells a STEMMA to STEMMA QT cable (https://adafru.it/IDk) that
allows you to plug this breakout into the STEMMA connector found on a number of Adafruit
microcontroller boards, including PyBadge and PyGamer. The following example uses the PyBadge or
PyGamer and the MLX90640 to create a super easy-to-assemble thermal camera with a display!
Start by following your board's guide on installing Arduino IDE, and support for the board you have. Then,
follow the instructions on the Arduino page in this guide (https://adafru.it/IDl) to install the base libraries
needed for this breakout. Finally, install the Adafruit Arcada libraries (https://adafru.it/EUk) (there's a
lot
of
em!).
Loading the Example
Go to File > Examples > Adafruit MLS90640 >
MLX90640_arcadacam to open the ArcadaCam Arduino
thermal camera example, and then load it onto your PyBadge
or PyGamer.
Now point the thermal camera at various objects to see a heat map displayed on your board!
© Adafruit Industries https://learn.adafruit.com/adafruit-mlx90640-ir-thermal-camera Page 14 of 29
Page 15
#include <Adafruit_MLX90640.h>
#include "Adafruit_Arcada.h"
Adafruit_Arcada arcada;
Adafruit_MLX90640 mlx;
float frame[32*24]; // buffer for full frame of temperatures
//low range of the sensor (this will be blue on the screen)
#define MINTEMP 20
//high range of the sensor (this will be red on the screen)
#define MAXTEMP 35
//the colors we will be using
const uint16_t camColors[] = {0x480F,
0x400F,0x400F,0x400F,0x4010,0x3810,0x3810,0x3810,0x3810,0x3010,0x3010,
0x3010,0x2810,0x2810,0x2810,0x2810,0x2010,0x2010,0x2010,0x1810,0x1810,
0x1811,0x1811,0x1011,0x1011,0x1011,0x0811,0x0811,0x0811,0x0011,0x0011,
0x0011,0x0011,0x0011,0x0031,0x0031,0x0051,0x0072,0x0072,0x0092,0x00B2,
0x00B2,0x00D2,0x00F2,0x00F2,0x0112,0x0132,0x0152,0x0152,0x0172,0x0192,
0x0192,0x01B2,0x01D2,0x01F3,0x01F3,0x0213,0x0233,0x0253,0x0253,0x0273,
0x0293,0x02B3,0x02D3,0x02D3,0x02F3,0x0313,0x0333,0x0333,0x0353,0x0373,
0x0394,0x03B4,0x03D4,0x03D4,0x03F4,0x0414,0x0434,0x0454,0x0474,0x0474,
0x0494,0x04B4,0x04D4,0x04F4,0x0514,0x0534,0x0534,0x0554,0x0554,0x0574,
0x0574,0x0573,0x0573,0x0573,0x0572,0x0572,0x0572,0x0571,0x0591,0x0591,
0x0590,0x0590,0x058F,0x058F,0x058F,0x058E,0x05AE,0x05AE,0x05AD,0x05AD,
0x05AD,0x05AC,0x05AC,0x05AB,0x05CB,0x05CB,0x05CA,0x05CA,0x05CA,0x05C9,
0x05C9,0x05C8,0x05E8,0x05E8,0x05E7,0x05E7,0x05E6,0x05E6,0x05E6,0x05E5,
0x05E5,0x0604,0x0604,0x0604,0x0603,0x0603,0x0602,0x0602,0x0601,0x0621,
0x0621,0x0620,0x0620,0x0620,0x0620,0x0E20,0x0E20,0x0E40,0x1640,0x1640,
0x1E40,0x1E40,0x2640,0x2640,0x2E40,0x2E60,0x3660,0x3660,0x3E60,0x3E60,
0x3E60,0x4660,0x4660,0x4E60,0x4E80,0x5680,0x5680,0x5E80,0x5E80,0x6680,
0x6680,0x6E80,0x6EA0,0x76A0,0x76A0,0x7EA0,0x7EA0,0x86A0,0x86A0,0x8EA0,
0x8EC0,0x96C0,0x96C0,0x9EC0,0x9EC0,0xA6C0,0xAEC0,0xAEC0,0xB6E0,0xB6E0,
0xBEE0,0xBEE0,0xC6E0,0xC6E0,0xCEE0,0xCEE0,0xD6E0,0xD700,0xDF00,0xDEE0,
0xDEC0,0xDEA0,0xDE80,0xDE80,0xE660,0xE640,0xE620,0xE600,0xE5E0,0xE5C0,
0xE5A0,0xE580,0xE560,0xE540,0xE520,0xE500,0xE4E0,0xE4C0,0xE4A0,0xE480,
© Adafruit Industries https://learn.adafruit.com/adafruit-mlx90640-ir-thermal-camera Page 15 of 29
Page 16

0xE460,0xEC40,0xEC20,0xEC00,0xEBE0,0xEBC0,0xEBA0,0xEB80,0xEB60,0xEB40,
0xEB20,0xEB00,0xEAE0,0xEAC0,0xEAA0,0xEA80,0xEA60,0xEA40,0xF220,0xF200,
0xF1E0,0xF1C0,0xF1A0,0xF180,0xF160,0xF140,0xF100,0xF0E0,0xF0C0,0xF0A0,
0xF080,0xF060,0xF040,0xF020,0xF800,};
uint16_t displayPixelWidth, displayPixelHeight;
void setup() {
if (!arcada.arcadaBegin()) {
Serial.print("Failed to begin");
while (1);
}
arcada.displayBegin();
// Turn on backlight
arcada.setBacklight(255);
Serial.begin(115200);
//while (!Serial);
arcada.display->fillScreen(ARCADA_BLACK);
displayPixelWidth = arcada.display->width() / 32;
displayPixelHeight = arcada.display->width() / 32; //Keep pixels square
delay(100);
Serial.println("Adafruit MLX90640 Camera");
if (! mlx.begin(MLX90640_I2CADDR_DEFAULT, &Wire)) {
arcada.haltBox("MLX90640 not found!");
}
Serial.println("Found Adafruit MLX90640");
Serial.print("Serial number: ");
Serial.print(mlx.serialNumber[0], HEX);
Serial.print(mlx.serialNumber[1], HEX);
Serial.println(mlx.serialNumber[2], HEX);
mlx.setMode(MLX90640_CHESS);
mlx.setResolution(MLX90640_ADC_18BIT);
mlx.setRefreshRate(MLX90640_8_HZ);
Wire.setClock(1000000); // max 1 MHz
}
void loop() {
uint32_t timestamp = millis();
if (mlx.getFrame(frame) != 0) {
Serial.println("Failed");
return;
}
int colorTemp;
for (uint8_t h=0; h<24; h++) {
for (uint8_t w=0; w<32; w++) {
float t = frame[h*32 + w];
// Serial.print(t, 1); Serial.print(", ");
t = min(t, MAXTEMP);
t = max(t, MINTEMP);
uint8_t colorIndex = map(t, MINTEMP, MAXTEMP, 0, 255);
colorIndex = constrain(colorIndex, 0, 255);
//draw the pixels!
© Adafruit Industries https://learn.adafruit.com/adafruit-mlx90640-ir-thermal-camera Page 16 of 29
Page 17

arcada.display->fillRect(displayPixelWidth * w, displayPixelHeight * h,
displayPixelHeight, displayPixelWidth,
camColors[colorIndex]);
}
}
Serial.print((millis()-timestamp) / 2); Serial.println(" ms per frame (2 frames per display)");
Serial.print(2000.0 / (millis()-timestamp)); Serial.println(" FPS (2 frames per display)");
}
© Adafruit Industries https://learn.adafruit.com/adafruit-mlx90640-ir-thermal-camera Page 17 of 29
Page 18
Python & CircuitPython
It's easy to use the MLX90640 sensor with Python and CircuitPython, and the Adafruit CircuitPython
MLX90640 (https://adafru.it/IBv) module. This module allows you to easily write Python code that reads
temperature using the thermal camera.
You can use this sensor with any CircuitPython microcontroller board or with a computer that has GPIO
and Python thanks to Adafruit_Blinka, our CircuitPython-for-Python compatibility
library (https://adafru.it/BSN).
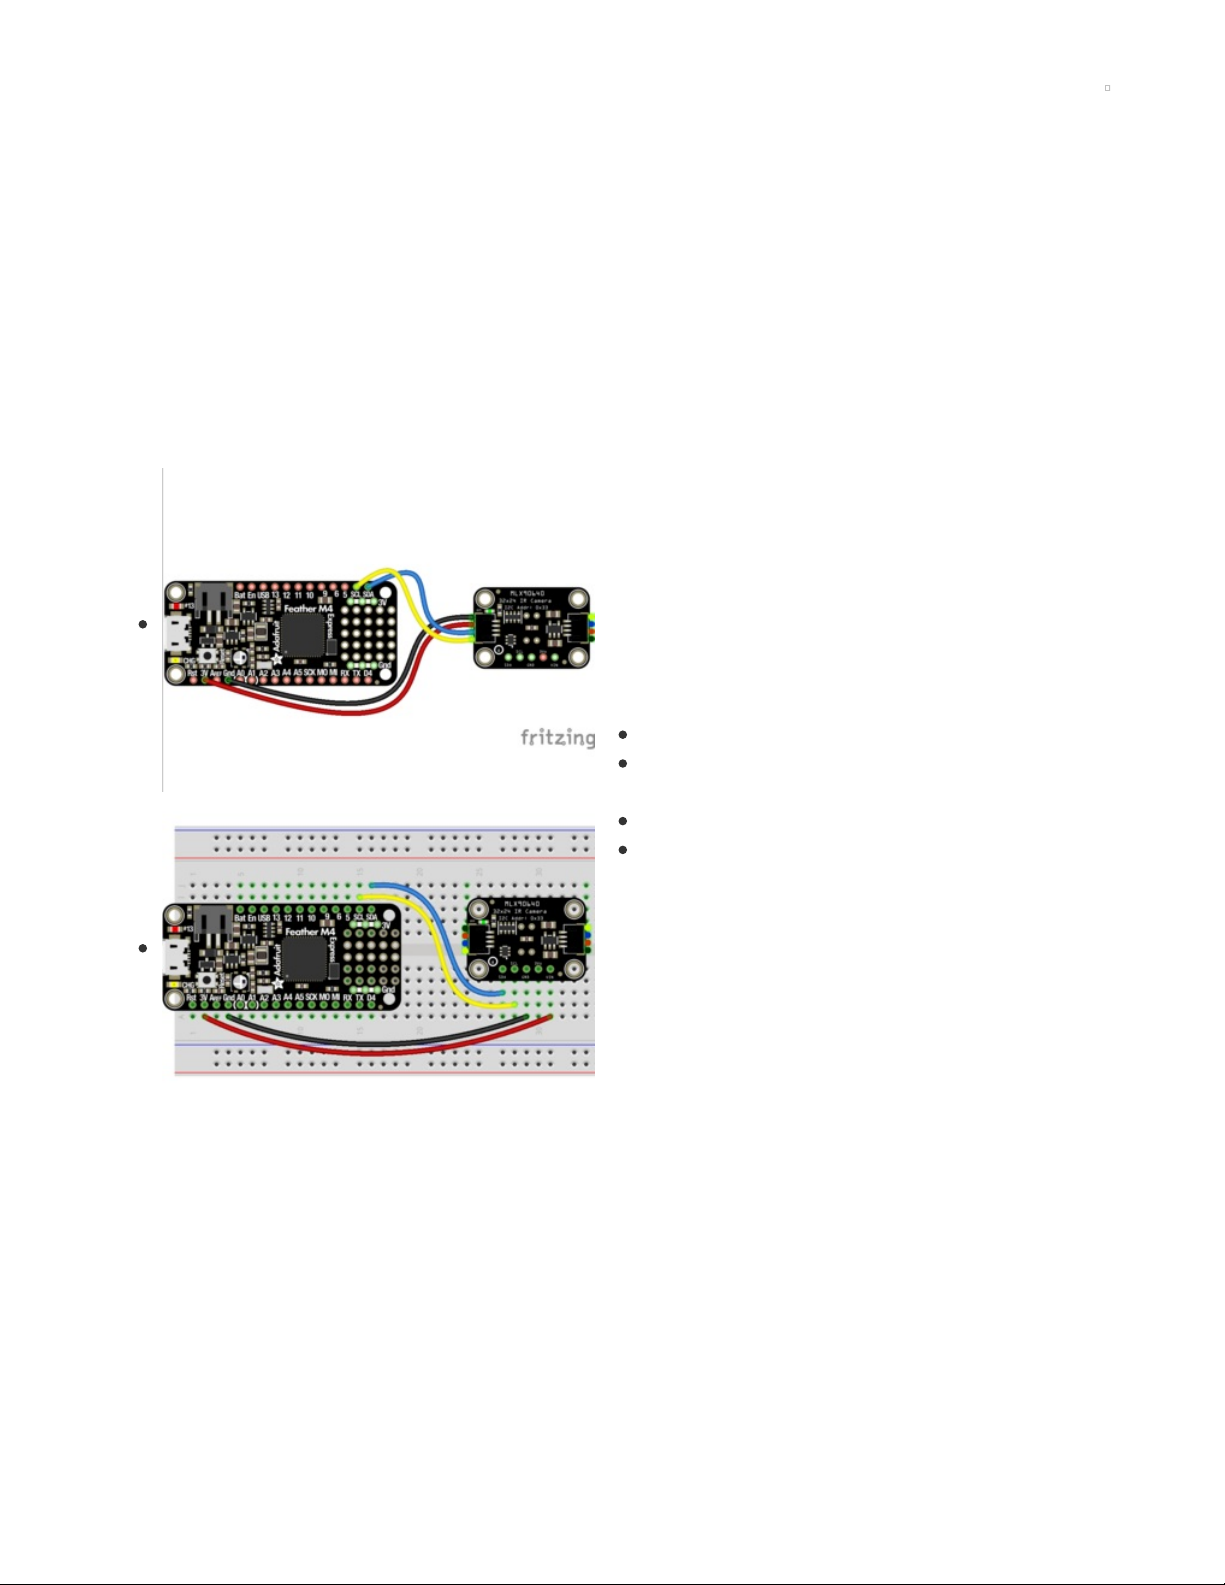
CircuitPython Microcontroller Wiring
First wire up a MLX90640 to your board for an I2C connection, exactly as shown below. Here's an
example of wiring a Feather M4 to the sensor with I2C:
Board 3V to sensor VIN (red wire)
Board GND to sensor GND (black
wire)
Board SCL to sensor SCL (yellow wire)
Board SDA to sensor SDA (blue wire)
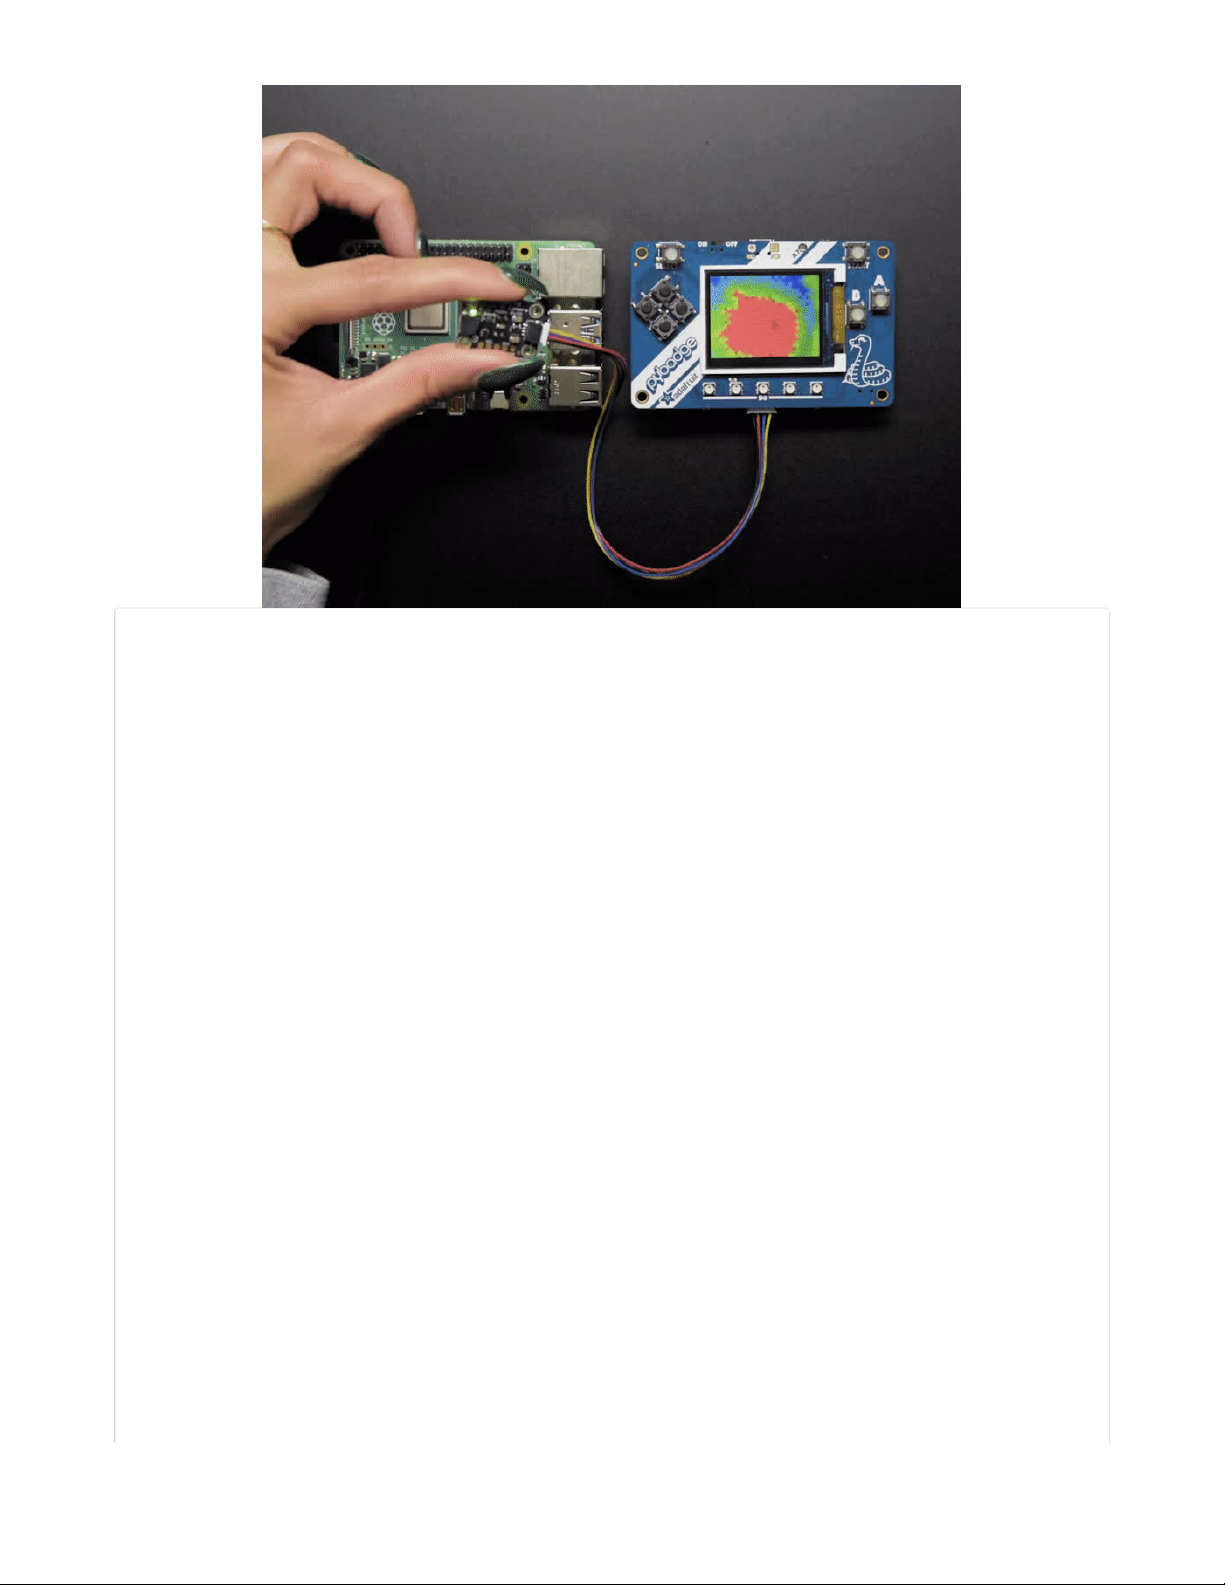
Python Computer Wiring
Since there are
dozens
of Linux computers/boards you can use, we will show wiring for Raspberry Pi. For
other platforms, please visit the guide for CircuitPython on Linux to see whether your platform is
supported (https://adafru.it/BSN).
Here's the Raspberry Pi wired with I2C:
© Adafruit Industries https://learn.adafruit.com/adafruit-mlx90640-ir-thermal-camera Page 18 of 29
Page 19

Pi 3V to sensor VCC (red wire)
Pi GND to sensor GND (black
wire)
Pi SCL to sensor SCL (yellow wire)
Pi SDA to sensor SDA (blue wire)
CircuitPython Installation of MLX90640 Library
You'll need to install the Adafruit CircuitPython MLX90640 (https://adafru.it/IBv) library on your
CircuitPython board.
First make sure you are running the latest version of Adafruit CircuitPython (https://adafru.it/Amd) for your
board.
Next you'll need to install the necessary libraries to use the hardware--carefully follow the steps to find
and install these libraries from Adafruit's CircuitPython library bundle (https://adafru.it/ENC). Our
CircuitPython starter guide has a great page on how to install the library bundle (https://adafru.it/ABU).
You'll need to manually install the necessary libraries from the bundle:
adafruit_mlx90640.mpy
adafruit_bus_device
Before continuing, make sure your board's lib folder has the adafruit_mlx90640.mpy, and
adafruit_bus_device files and folders copied over.
Python Installation of MLX90640 Library
You'll need to install the Adafruit_Blinka library that provides the CircuitPython support in Python. This
© Adafruit Industries https://learn.adafruit.com/adafruit-mlx90640-ir-thermal-camera Page 19 of 29
Page 20

may also require enabling I2C on your platform and verifying you are running Python 3. Since each
platform is a little different, and Linux changes often, please visit the CircuitPython on Linux guide to get
your computer ready (https://adafru.it/BSN)!
Once that's done, from your command line run the following command:
sudo pip3 install adafruit-circuitpython-mlx90640
If your default Python is version 3 you may need to run 'pip' instead. Just make sure you aren't trying to
use CircuitPython on Python 2.x, it isn't supported!
CircuitPython & Python Usage
To demonstrate the usage of the sensor we'll run the mlx90640_simpletest.py program which prints the
temperatures or shows them as ASCII. As this example is too complicated to run from the REPL, you'll
save the following code to your board as code.py and connect to the serial console to see the output.
© Adafruit Industries https://learn.adafruit.com/adafruit-mlx90640-ir-thermal-camera Page 20 of 29
Page 21

# SPDX-FileCopyrightText: 2021 ladyada for Adafruit Industries
# SPDX-License-Identifier: MIT
import time
import board
import busio
import adafruit_mlx90640
PRINT_TEMPERATURES = False
PRINT_ASCIIART = True
i2c = busio.I2C(board.SCL, board.SDA, frequency=800000)
mlx = adafruit_mlx90640.MLX90640(i2c)
print("MLX addr detected on I2C")
print([hex(i) for i in mlx.serial_number])
mlx.refresh_rate = adafruit_mlx90640.RefreshRate.REFRESH_2_HZ
frame = [0] * 768
while True:
stamp = time.monotonic()
try:
mlx.getFrame(frame)
except ValueError:
# these happen, no biggie - retry
continue
print("Read 2 frames in %0.2f s" % (time.monotonic() - stamp))
for h in range(24):
for w in range(32):
t = frame[h * 32 + w]
if PRINT_TEMPERATURES:
print("%0.1f, " % t, end="")
if PRINT_ASCIIART:
c = "&"
# pylint: disable=multiple-statements
if t < 20:
c = " "
elif t < 23:
c = "."
elif t < 25:
c = "-"
elif t < 27:
c = "*"
elif t < 29:
c = "+"
elif t < 31:
c = "x"
elif t < 33:
c = "%"
elif t < 35:
c = "#"
elif t < 37:
c = "X"
# pylint: enable=multiple-statements
print(c, end="")
print()
print()
© Adafruit Industries https://learn.adafruit.com/adafruit-mlx90640-ir-thermal-camera Page 21 of 29
Page 22

If you change the values for the variables at the top of the program, you can switch from printing out an
ASCII image to printing out the temperatures in a grid. Change PRINT_TEMPERATURES to True and
PRINT_ASCIIART to False , so that the two lines are as follows:
PRINT_TEMPERATURES = True
PRINT_ASCIIART = False
Connect to the serial console to see the temperatures printed out in a grid. Fitting them all in a proper
grid involved making my terminal window significantly larger than the default size.
That's all there is to using the MLX90640 with CircuitPython!
© Adafruit Industries https://learn.adafruit.com/adafruit-mlx90640-ir-thermal-camera Page 22 of 29
Page 23

Python Docs
Python Docs (https://adafru.it/IxD)
© Adafruit Industries https://learn.adafruit.com/adafruit-mlx90640-ir-thermal-camera Page 23 of 29
Page 24

CircuitPython Thermal Camera
The MLX90640 comes with STEMMA QT/QWIIC connectors which makes it super simple to plug into
projects with no soldering needed. Adafruit sells a STEMMA to STEMMA QT cable (https://adafru.it/IDk)
that allows you to plug this breakout into the STEMMA connector found on a number of Adafruit
microcontroller boards, including PyBadge and PyGamer. The following example uses the PyBadge or
PyGamer and the MLX90640 to create a super easy-to-assemble thermal camera with a display!
CircuitPython Microcontroller Wiring
First wire up a MLX90640 to your PyBadge or PyGamer exactly as shown below. Here's an example of
wiring a PyBadge to the sensor with I2C using the STEMMA to STEMMA QT cable (https://adafru.it/IDk):
Plug the larger end (STEMMA/Grove) of the cable into
the PyBadge/PyGamer.
Plug the smaller end (STEMMA QT) of the cable into
the MLX90640.
CircuitPython Installation of Additional Libraries
On the previous page, you installed the Adafruit CircuitPython MLX90640 (https://adafru.it/IBv) library on
your CircuitPython board.
First make sure you are running the latest version of Adafruit CircuitPython (https://adafru.it/Amd) for your
board.
Next you'll need to install the necessary libraries to use this example -- carefully follow the steps to find
and install these libraries from Adafruit's CircuitPython library bundle (https://adafru.it/ENC). Our
CircuitPython starter guide has a great page on how to install the library bundle (https://adafru.it/ABU).
You'll need to manually install two additional libraries from
the bundle:
adafruit_display_text
simpleio.mpy
Before continuing, make sure your board's lib folder has the
adafruit_mlx90640.mpy, adafruit_bus_device,
adafruit_display_text and simpleio.mpy files and
folders copied over.
CircuitPython PyBadge/PyGamer Thermal Camera
© Adafruit Industries https://learn.adafruit.com/adafruit-mlx90640-ir-thermal-camera Page 24 of 29
Page 25

Save the following code to your PyBadge or PyGamer as code.py.
# SPDX-FileCopyrightText: 2021 ladyada for Adafruit Industries
# SPDX-License-Identifier: MIT
import time
import board
import busio
import displayio
import terminalio
from adafruit_display_text.label import Label
from simpleio import map_range
import adafruit_mlx90640
number_of_colors = 64 # Number of color in the gradian
last_color = number_of_colors - 1 # Last color in palette
palette = displayio.Palette(number_of_colors) # Palette with all our colors
## Heatmap code inspired from: http://www.andrewnoske.com/wiki/Code_-_heatmaps_and_color_gradients
color_A = [
[0, 0, 0],
[0, 0, 255],
[0, 255, 255],
[0, 255, 0],
[255, 255, 0],
[255, 0, 0],
[255, 255, 255],
]
color_B = [[0, 0, 255], [0, 255, 255], [0, 255, 0], [255, 255, 0], [255, 0, 0]]
color_C = [[0, 0, 0], [255, 255, 255]]
color_D = [[0, 0, 255], [255, 0, 0]]
color = color_B
NUM_COLORS = len(color)
def MakeHeatMapColor():
for c in range(number_of_colors):
value = c * (NUM_COLORS - 1) / last_color
idx1 = int(value) # Our desired color will be after this index.
if idx1 == value: # This is the corner case
red = color[idx1][0]
green = color[idx1][1]
blue = color[idx1][2]
else:
idx2 = idx1 + 1 # ... and before this index (inclusive).
fractBetween = value - idx1 # Distance between the two indexes (0-1).
red = int(
round((color[idx2][0] - color[idx1][0]) * fractBetween + color[idx1][0])
)
green = int(
round((color[idx2][1] - color[idx1][1]) * fractBetween + color[idx1][1])
)
blue = int(
round((color[idx2][2] - color[idx1][2]) * fractBetween + color[idx1][2])
)
palette[c] = (0x010000 * red) + (0x000100 * green) + (0x000001 * blue)
MakeHeatMapColor()
# Bitmap for colour coded thermal value
© Adafruit Industries https://learn.adafruit.com/adafruit-mlx90640-ir-thermal-camera Page 25 of 29
Page 26

image_bitmap = displayio.Bitmap(32, 24, number_of_colors)
# Create a TileGrid using the Bitmap and Palette
image_tile = displayio.TileGrid(image_bitmap, pixel_shader=palette)
# Create a Group that scale 32*24 to 128*96
image_group = displayio.Group(scale=4)
image_group.append(image_tile)
scale_bitmap = displayio.Bitmap(number_of_colors, 1, number_of_colors)
# Create a Group Scale must be 128 divided by number_of_colors
scale_group = displayio.Group(scale=2)
scale_tile = displayio.TileGrid(scale_bitmap, pixel_shader=palette, x=0, y=60)
scale_group.append(scale_tile)
for i in range(number_of_colors):
scale_bitmap[i, 0] = i # Fill the scale with the palette gradian
# Create the super Group
group = displayio.Group()
min_label = Label(terminalio.FONT, max_glyphs=10, color=palette[0], x=0, y=110)
max_label = Label(
terminalio.FONT, max_glyphs=10, color=palette[last_color], x=80, y=110
)
# Add all the sub-group to the SuperGroup
group.append(image_group)
group.append(scale_group)
group.append(min_label)
group.append(max_label)
# Add the SuperGroup to the Display
board.DISPLAY.show(group)
min_t = 20 # Initial minimum temperature range, before auto scale
max_t = 37 # Initial maximum temperature range, before auto scale
i2c = busio.I2C(board.SCL, board.SDA, frequency=800000)
mlx = adafruit_mlx90640.MLX90640(i2c)
print("MLX addr detected on I2C")
print([hex(i) for i in mlx.serial_number])
# mlx.refresh_rate = adafruit_mlx90640.RefreshRate.REFRESH_2_HZ
mlx.refresh_rate = adafruit_mlx90640.RefreshRate.REFRESH_4_HZ
frame = [0] * 768
while True:
stamp = time.monotonic()
try:
mlx.getFrame(frame)
except ValueError:
# these happen, no biggie - retry
continue
# print("Time for data aquisition: %0.2f s" % (time.monotonic()-stamp))
mini = frame[0] # Define a min temperature of current image
maxi = frame[0] # Define a max temperature of current image
for h in range(24):
for w in range(32):
t = frame[h * 32 + w]
© Adafruit Industries https://learn.adafruit.com/adafruit-mlx90640-ir-thermal-camera Page 26 of 29
Page 27

if t > maxi:
maxi = t
if t < mini:
mini = t
image_bitmap[w, (23 - h)] = int(map_range(t, min_t, max_t, 0, last_color))
min_label.text = "%0.2f" % (min_t)
max_string = "%0.2f" % (max_t)
max_label.x = 120 - (5 * len(max_string)) # Tricky calculation to left align
max_label.text = max_string
min_t = mini # Automatically change the color scale
max_t = maxi
# print((mini, maxi)) # Use this line to display min and max graph in Mu
# print("Total time for aquisition and display %0.2f s" % (time.monotonic()-stamp))
Now point the thermal camera at various objects to see a heat map displayed on your board!
© Adafruit Industries https://learn.adafruit.com/adafruit-mlx90640-ir-thermal-camera Page 27 of 29
Page 28

Downloads
Files
MLX90640 datasheet (https://adafru.it/IAR)
EagleCAD files on GitHub (https://adafru.it/IAS)
3D model files on GitHub (https://adafru.it/K5E)
Fritzing object in Adafruit Fritzing Library (https://adafru.it/IAT)
Schematic
Fab Print
© Adafruit Industries https://learn.adafruit.com/adafruit-mlx90640-ir-thermal-camera Page 28 of 29
Page 29

© Adafruit Industries Last Updated: 2021-02-09 12:10:57 PM EST Page 29 of 29
 Loading...