

Page 1
Language Flashcards on the MagTag
Created by Lucian Copeland
Last updated on 2021-04-15 08:19:06 PM EDT
Page 2

2
3
4
8
8
9
9
10
11
12
12
13
13
14
18
18
18
18
19
22
22
22
23
23
25
25
28
28
32
33
34
34
37
38
40
42
42
Guide Contents
Guide Contents
Overview
Parts
Install CircuitPython
Set Up CircuitPython
Option 1 - Load with UF2 Bootloader
Try Launching UF2 Bootloader
Option 2 - Use esptool to load BIN file
Option 3 - Use Chrome Browser To Upload BIN file
CircuitPython Internet Libraries
Adafruit CircuitPython Library Bundle
CircuitPython Internet Test
Secrets File
Connect to WiFi
Getting The Date & Time
Step 1) Make an Adafruit account
Step 2) Sign into Adafruit IO
Step 3) Get your Adafruit IO Key
Step 4) Upload Test Python Code
MagTag-Specific CircuitPython Libraries
Get Latest Adafruit CircuitPython Bundle
Secrets
Simple Flashcards
Download the Software
Example Deck
How does it work?
Complicated Flashcards
Download the Software
New Deck Format
Program Flow
Code Walkthrough
Setup:
Chapter Selection:
Flashcard Session:
Wrapping up:
Other Resources
Font License:
© Adafruit Industries https://learn.adafruit.com/magtag-flashcards Page 2 of 43
Page 3

Overview
When you’re studying something that needs a lot of memorization, like learning a language, prepping for a
tough biology exam, or mastering all those pesky built-in Python functions, it’s hard to beat a good old
deck of flashcards. It’s the tried and true method of getting tough subjects to stick to your grey matter especially when you’re on a deadline, and you’ve really got to get this stuff
down
or you are going to
flunk
most heinously tomorrow, dude!
But like many old fashioned methods, flashcards can be kind of a pain! You have to spend ages writing
them all out on paper, and then somebody knocks them off the table and one goes under the fridge, and
then your buddy asks to borrow them but you’re not
finished
and you’re not going to make him a
whole
other deck,
are you
kidding,
and now the edges have gotten all bent so they don’t shuffle well any more,
and then once you’ve finally gotten everything memorized there’s nothing to do but toss them all out and
get started on the next deck. The results may be good, but the process? Frustrating.
Enter the MagTag!
With CircuitPython, you can type out your flashcards in JSON, and you’ll never be stuck writing and
shuffling huge decks of index cards again. You can sort them by chapters, support lots of different
international fonts, even share them with your slacker buddy with a simple copy-paste. Maybe not the
most
old-fashioned anymore, but it’s e-paper, so we’re pretty sure it still counts.
Thanks to Unicode font support in CircuitPython, you can quickly and easily make text for
any language
using free fonts!
© Adafruit Industries https://learn.adafruit.com/magtag-flashcards Page 3 of 43
Page 4
This guide uses the e-paper and other hardware features of the MagTag, but note that it does not
use any of the ESP32-S2 networking capabilities (WIFI, etc). Setting up WIFI is included in the
installation process for completeness, but the final project will not connect to the internet, so you can
skip those steps if you want! Just install Circuitpython and the libraries, and don't worry about
secrets.py or the internet tests. If you'd specifically like to do a connected IoT project, we've got lots of
other guides to do that - check out the full list Magtag tutorials for ideas!
Parts
The MagTag starter kit comes with a battery and some magnets included. You'll also need to grab a USB
C cable separately, if you don't have one:
Adafruit MagTag Starter Kit - 2.9" Grayscale E-Ink WiFi Display
The Adafruit MagTag combines the new ESP32-S2 wireless module and a 2.9" grayscale E-Ink display to
make a low-power IoT display that can show data on its screen...
Out of Stock
Out of
Stock
© Adafruit Industries https://learn.adafruit.com/magtag-flashcards Page 4 of 43
Page 5
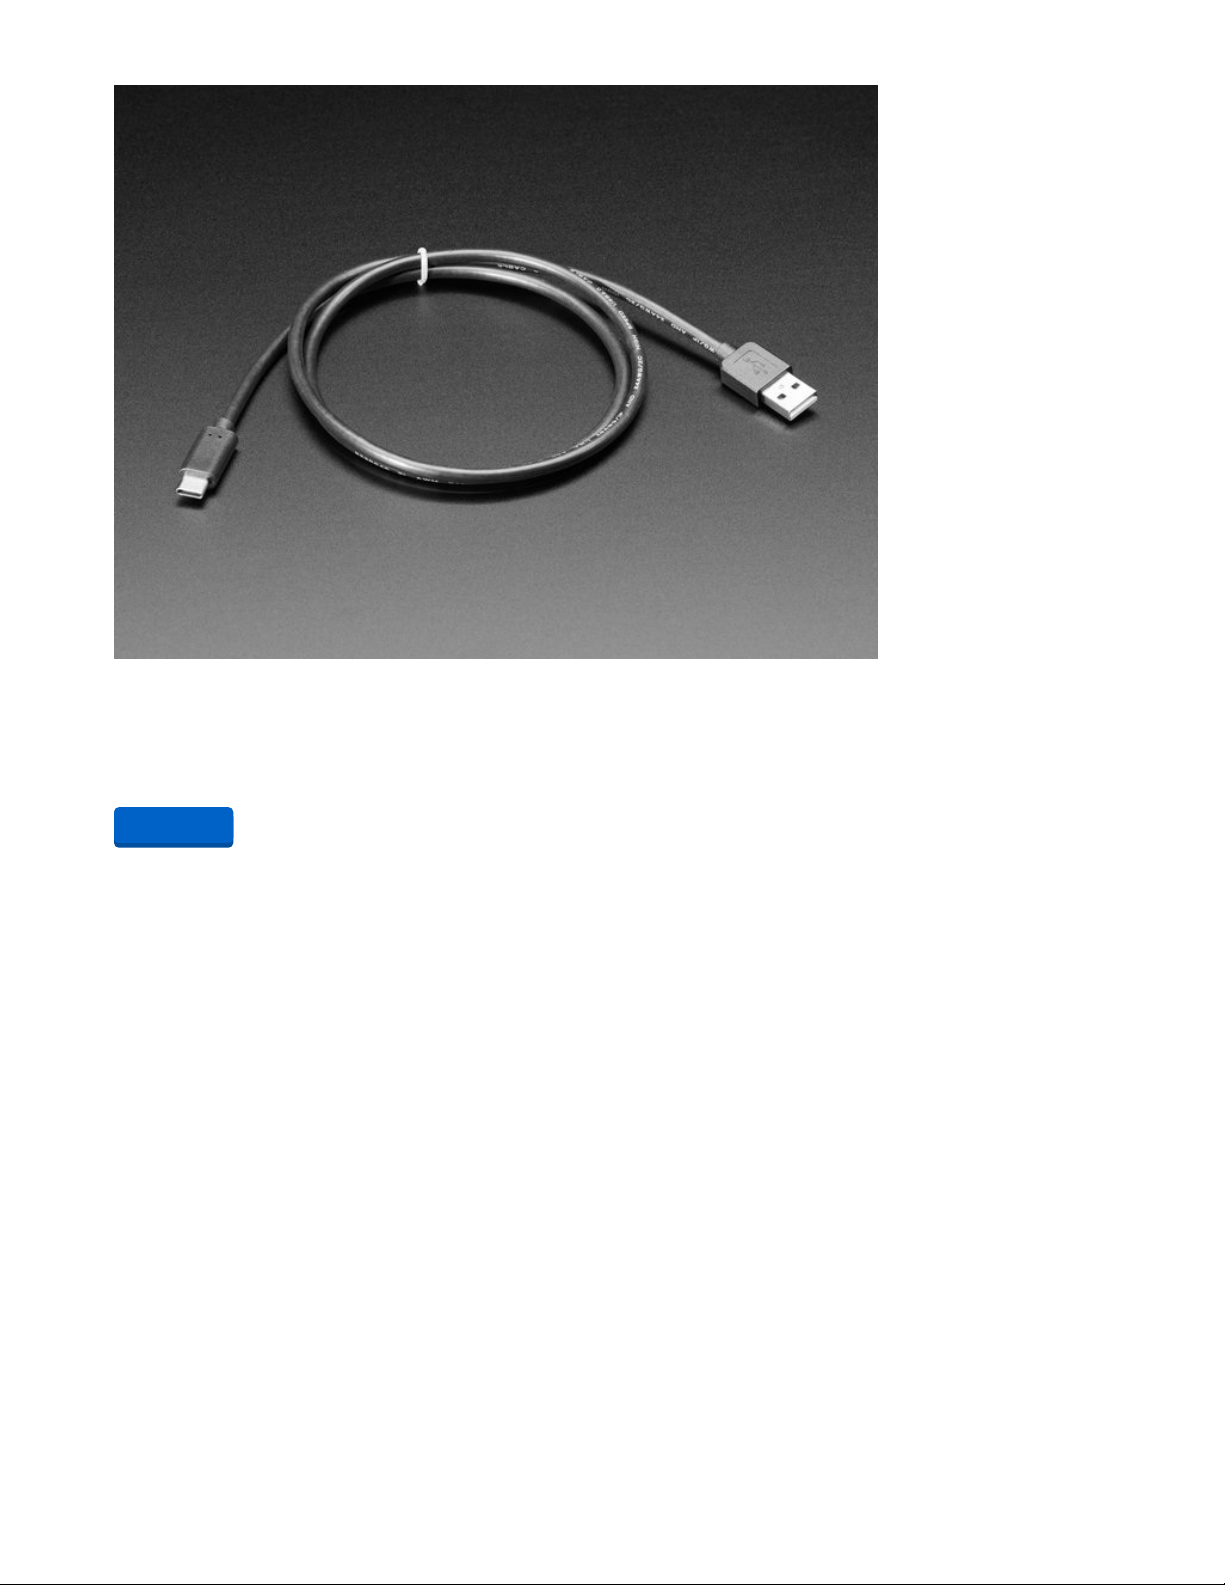
USB Type A to Type C Cable - approx 1 meter / 3 ft long
As technology changes and adapts, so does Adafruit. This USB Type A to Type C cable will help you with
the transition to USB C, even if you're still...
$4.95
In Stock
Alternatively, you can get the parts individually, if you'd like to swap out the battery or omit the magnets.
Add to Cart
© Adafruit Industries https://learn.adafruit.com/magtag-flashcards Page 5 of 43
Page 6
Adafruit MagTag - 2.9" Grayscale E-Ink WiFi Display
The Adafruit MagTag combines the new ESP32-S2 wireless module and a 2.9" grayscale E-Ink display to
make a low-power IoT display that can show data on its screen even when power...
Out of Stock
Out of
Stock
© Adafruit Industries https://learn.adafruit.com/magtag-flashcards Page 6 of 43
Page 7
Lithium Ion Polymer Battery with Short Cable - 3.7V 420mAh
Lithium ion polymer (also known as 'lipo' or 'lipoly') batteries are thin, light and powerful. The output
ranges from 4.2V when completely charged to 3.7V. This battery...
$6.95
In Stock
Mini Magnet Feet for RGB LED Matrices (Pack of 4)
Got a glorious RGB Matrix project you want to mount and display in your workspace or home? If you have
one of the matrix panels listed below, you'll need a pack of these...
$2.50
In Stock
Add to Cart
Add to Cart
© Adafruit Industries https://learn.adafruit.com/magtag-flashcards Page 7 of 43
Page 8
Install CircuitPython
CircuitPython (https://adafru.it/tB7) is a derivative of MicroPython (https://adafru.it/BeZ) designed to simplify
experimentation and education on low-cost microcontrollers. It makes it easier than ever to get
prototyping by requiring no upfront desktop software downloads. Simply copy and edit files on the
CIRCUITPY drive to iterate.
Set Up CircuitPython
Follow the steps to get CircuitPython installed on your MagTag.
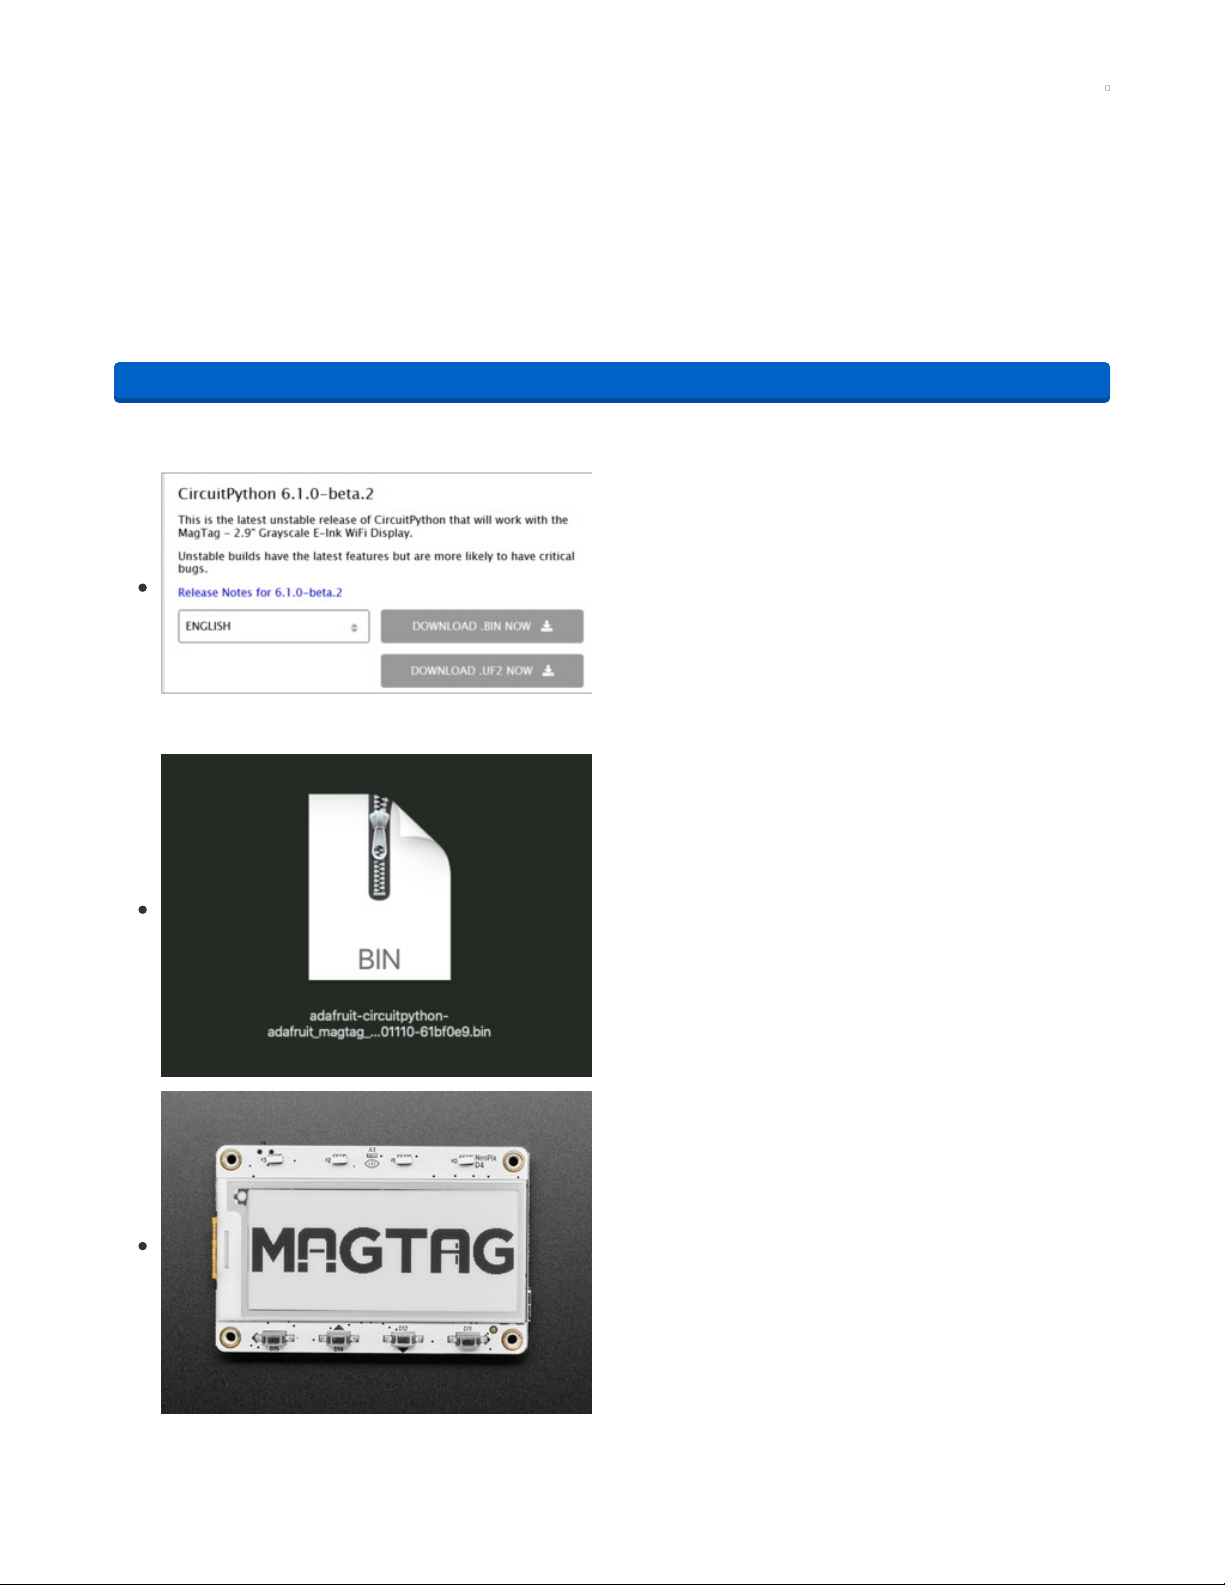
https://adafru.it/OBd
Click the link above and download the latest .BIN and .UF2
file
(depending on how you program the ESP32S2 board you may
need one or the other, might as well get both)
Download and save it to your desktop (or wherever is handy).
Plug your MagTag into your computer using a known-good
USB cable.
A lot of people end up using charge-only USB cables and it is
very frustrating! So make sure you have a USB cable you
know is good for data sync.
https://adafru.it/OBd
© Adafruit Industries https://learn.adafruit.com/magtag-flashcards Page 8 of 43
Page 9
Option 1 - Load with UF2 Bootloader
This is by far the easiest way to load CircuitPython. However it requires your board has the UF2
bootloader installed. Some early boards do not (we hadn't written UF2 yet!) - in which case you can load
using the built in ROM bootloader.
Still, try this first!
Try Launching UF2 Bootloader
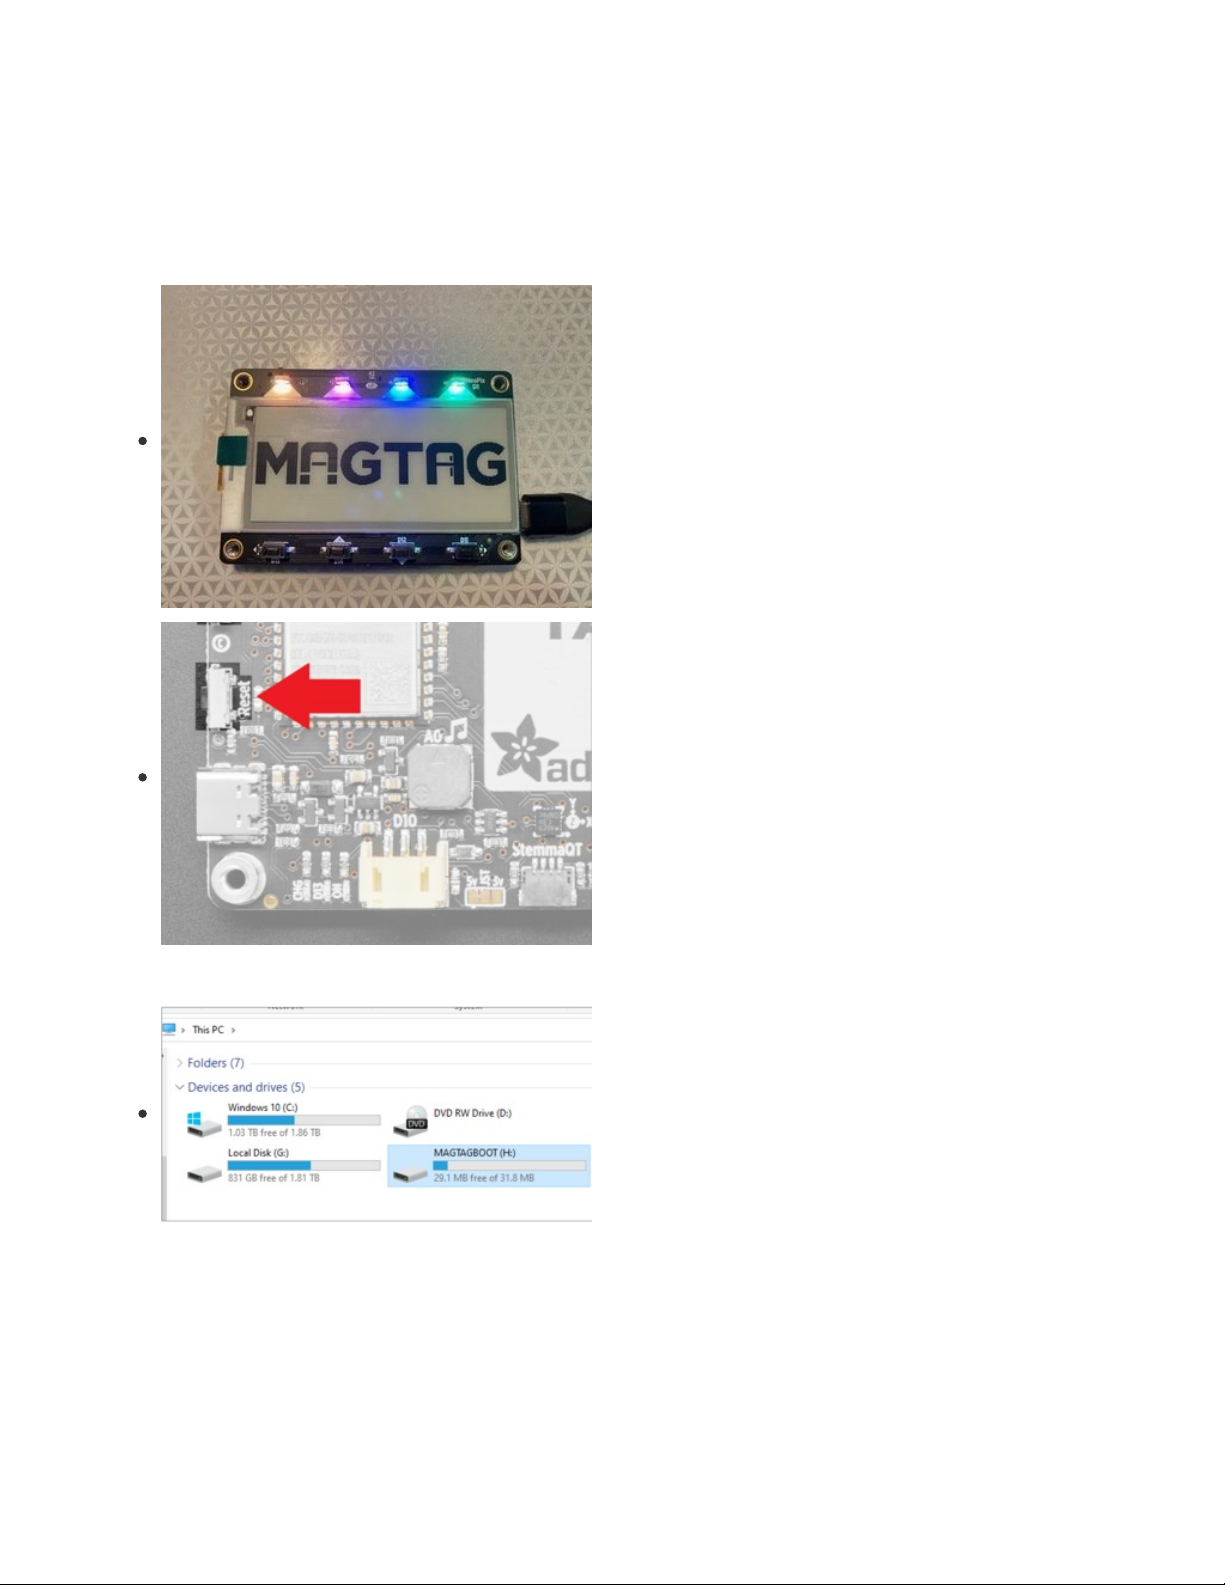
Loading CircuitPython by drag-n-drop UF2 bootloader is the
easier way and we recommend it. If you have a MagTag
where the front of the board is black, your MagTag came with
UF2 already on it.
Launch UF2 by double-clicking the Reset button (the one next
to the USB C port). You may have to try a few times to get the
timing right.
If the UF2 bootloader is installed, you will see a new disk
drive appear called MAGTAGBOOT
© Adafruit Industries https://learn.adafruit.com/magtag-flashcards Page 9 of 43
Page 10
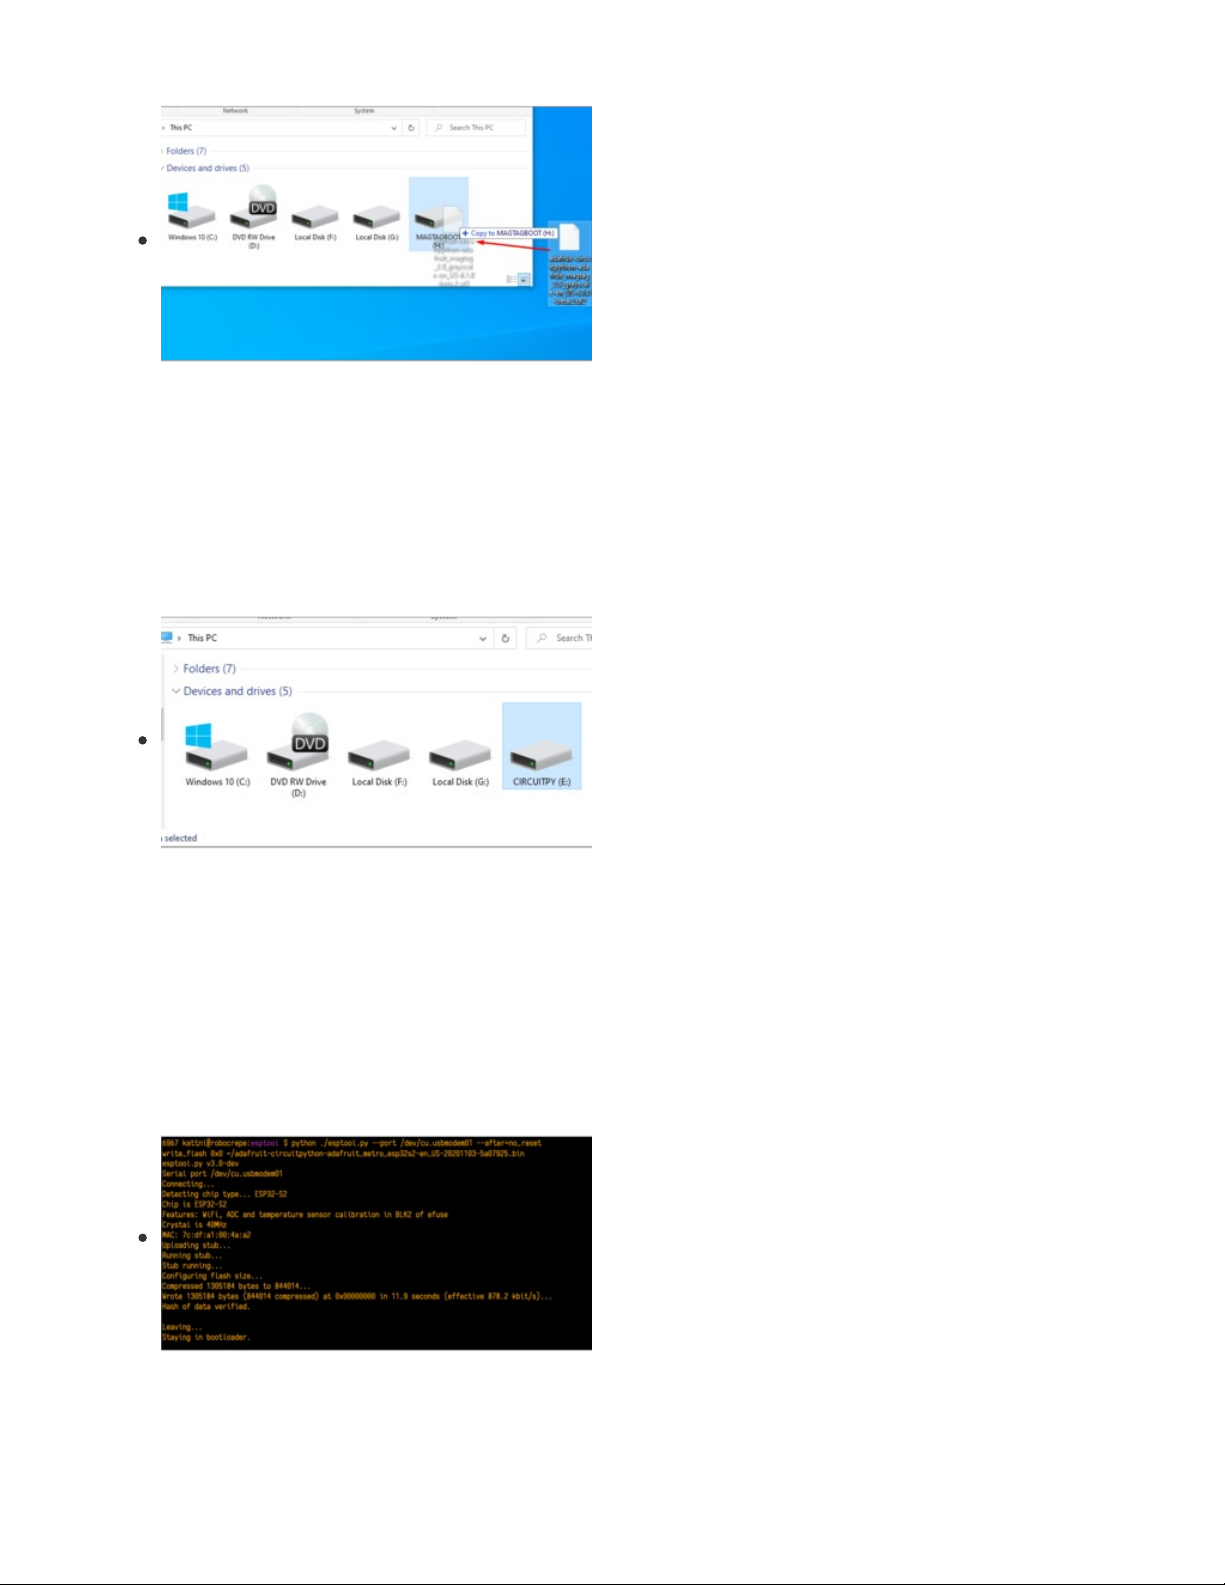
Copy the UF2 file you downloaded at the first step of this
tutorial onto the MAGTAGBOOT drive
If you're using Windows and you get an error at the end of the file copy that says Error from the file copy,
Error 0x800701B1: A device which does not exist was specified. You can ignore this error, the bootloader
sometimes disconnects without telling Windows, the install completed just fine and you can continue. If its
really annoying, you can also upgrade the bootloader (the latest version of the UF2 bootloader fixes this
warning) (https://adafru.it/Pfk)
Your board should auto-reset into CircuitPython, or you may
need to press reset. A CIRCUITPY drive will appear. You're
done! Go to the next pages.
Option 2 - Use esptool to load BIN file
If you have an original MagTag with while soldermask on the front, we didn't have UF2 written for the
ESP32S2 yet so it will not come with the UF2 bootloader.
You can upload with esptool to the ROM (hardware) bootloader instead!
Follow the initial steps found in the Run esptool and check
connection section of the ROM Bootloader
page (https://adafru.it/OBc) to verify your environment is set
up, your board is successfully connected, and which port it's
using.
In the final command to write a binary file to the board,
replace the port with your port, and replace "firmware.bin"
with the the file you downloaded above.
The output should look something like the output in the
image.
© Adafruit Industries https://learn.adafruit.com/magtag-flashcards Page 10 of 43
Page 11
Press reset to exit the bootloader.
Your CIRCUITPY drive should appear!
You're all set! Go to the next pages.
Option 3 - Use Chrome Browser To Upload BIN file
If for some reason you cannot get esptool to run, you can always try using the Chrome-browser version of
esptool we have written. This is handy if you don't have Python on your computer, or something is really
weird with your setup that makes esptool not run (which happens sometimes and isn't worth debugging!)
You can follow along on the Web Serial ESPTool (https://adafru.it/Pdq) page and either load the UF2
bootloader and then come back to Option 1 on this page, or you can download the CircuitPython BIN file
directly using the tool in the same manner as the bootloader.
© Adafruit Industries https://learn.adafruit.com/magtag-flashcards Page 11 of 43
Page 12

CircuitPython Internet Libraries
To use the internet-connectivity built into your ESP32-S2 with CircuitPython, you must first install a number
of libraries. This page covers that process.
Adafruit CircuitPython Library Bundle
Download the Adafruit CircuitPython Bundle. You can find the latest release here:
https://adafru.it/ENC
Download the adafruit-circuitpython-bundle-version-mpy-*.zip bundle zip file, and unzip a folder of the
same name. Inside you'll find a lib folder. The entire collection of libraries is too large to fit on
the CIRCUITPY drive. Instead, add each library as you need it, this will reduce the space usage but you'll
need to put in a little more effort.
At a minimum we recommend the following libraries, in fact we more than recommend. They're basically
required. So grab them and install them into CIRCUITPY/lib now!
adafruit_requests.mpy - A requests-like library for HTTP commands.
neopixel.mpy - Helper library to use NeoPixel LEDs, often built into the boards so they're great for
quick feedback
Once you have added those files, please continue to the next page to set up and test Internet connectivity
https://adafru.it/ENC
© Adafruit Industries https://learn.adafruit.com/magtag-flashcards Page 12 of 43
Page 13

CircuitPython Internet Test
Once you have CircuitPython installed and the minimum libraries installed we can get your board
connected to the Internet.
To get connected, you will need to start by creating a secrets.py file.
Secrets File
We expect people to share tons of projects as they build CircuitPython WiFi widgets. What we want to
avoid is people accidentally sharing their passwords or secret tokens and API keys. So, we designed all
our examples to use a secrets.py file, that is in your CIRCUITPY drive, to hold secret/private/custom data.
That way you can share your main project without worrying about accidentally sharing private stuff.
Your secrets.py file should look like this:
# This file is where you keep secret settings, passwords, and tokens!
# If you put them in the code you risk committing that info or sharing it
secrets = {
'ssid' : 'home_wifi_network',
'password' : 'wifi_password',
'aio_username' : 'my_adafruit_io_username',
'aio_key' : 'my_adafruit_io_key',
'timezone' : "America/New_York", # http://worldtimeapi.org/timezones
}
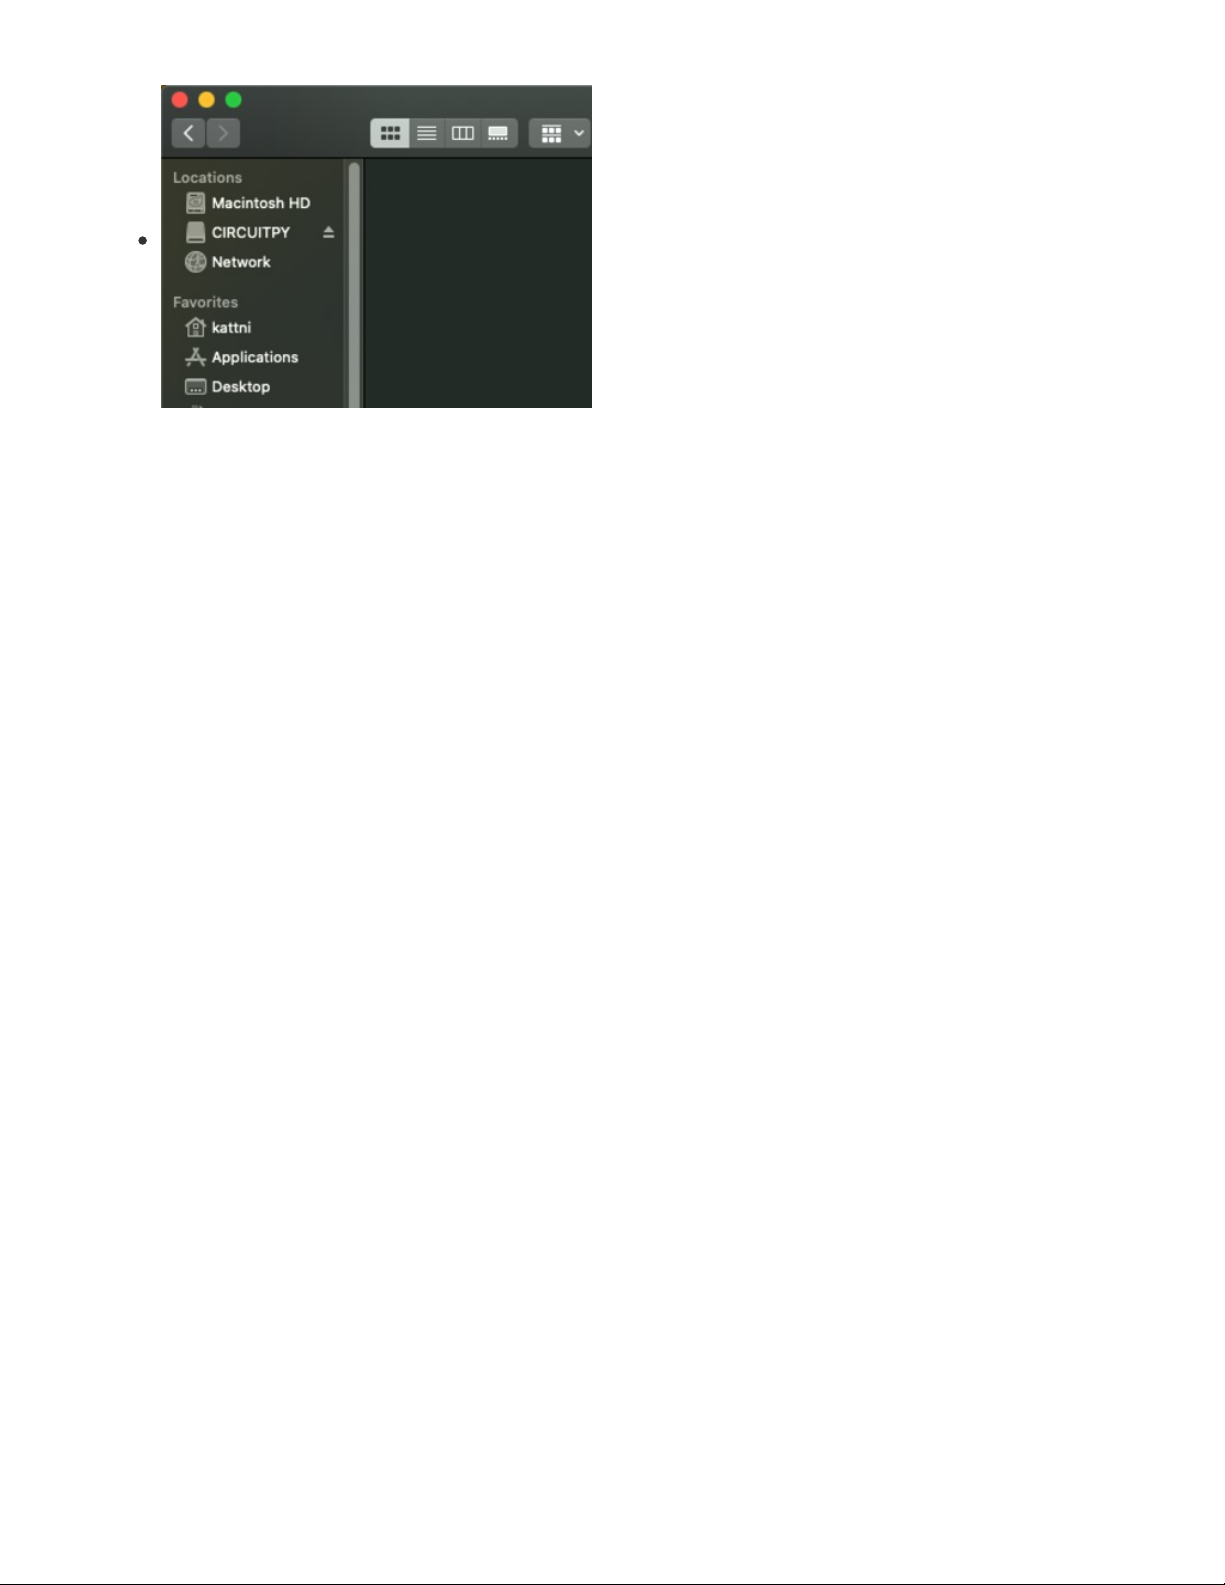
Copy and paste that text/code into a file called secrets.py and save it to your CIRCUITPY folder like so:
Inside is a python dictionary named secrets with a line for each entry. Each entry has an entry name
(say 'ssid' ) and then a colon to separate it from the entry key 'home ssid' and finally a comma ,
At a minimum you'll need to adjust the ssid and password for your local WiFi setup so do that now!
As you make projects you may need more tokens and keys, just add them one line at a time. See for
example other tokens such as one for accessing github or the hackaday API. Other non-secret data like
your timezone can also go here, just cause its called secrets doesn't mean you can't have general
customization data in there!
© Adafruit Industries https://learn.adafruit.com/magtag-flashcards Page 13 of 43
Page 14

For the correct time zone string, look at http://worldtimeapi.org/timezones (https://adafru.it/EcP) and
remember that if your city is not listed, look for a city in the same time zone, for example Boston, New
York, Philadelphia, Washington DC, and Miami are all on the same time as New York.
Of course, don't share your secrets.py - keep that out of GitHub, Discord or other project-sharing sites.
Don't share your secrets.py file, it has your passwords and API keys in it!
Connect to WiFi
OK now you have your secrets setup - you can connect to the Internet using the Requests module.
First make sure you are running the latest version of Adafruit CircuitPython (https://adafru.it/Amd) for your
board.
Next you'll need to install the necessary libraries to use the hardware--carefully follow the steps to find and
install these libraries from Adafruit's CircuitPython library bundle (https://adafru.it/zdx). Our introduction
guide has a great page on how to install the library bundle (https://adafru.it/ABU).
adafruit_requests
neopixel
Before continuing make sure your board's CIRCUITPY/lib folder or root filesystem has the above files
copied over.
Once that's done, load up the following example using Mu or your favorite editor:
© Adafruit Industries https://learn.adafruit.com/magtag-flashcards Page 14 of 43
Page 15

import ipaddress
import ssl
import wifi
import socketpool
import adafruit_requests
# URLs to fetch from
TEXT_URL = "http://wifitest.adafruit.com/testwifi/index.html"
JSON_QUOTES_URL = "https://www.adafruit.com/api/quotes.php"
JSON_STARS_URL = "https://api.github.com/repos/adafruit/circuitpython"
# Get wifi details and more from a secrets.py file
try:
from secrets import secrets
except ImportError:
print("WiFi secrets are kept in secrets.py, please add them there!")
raise
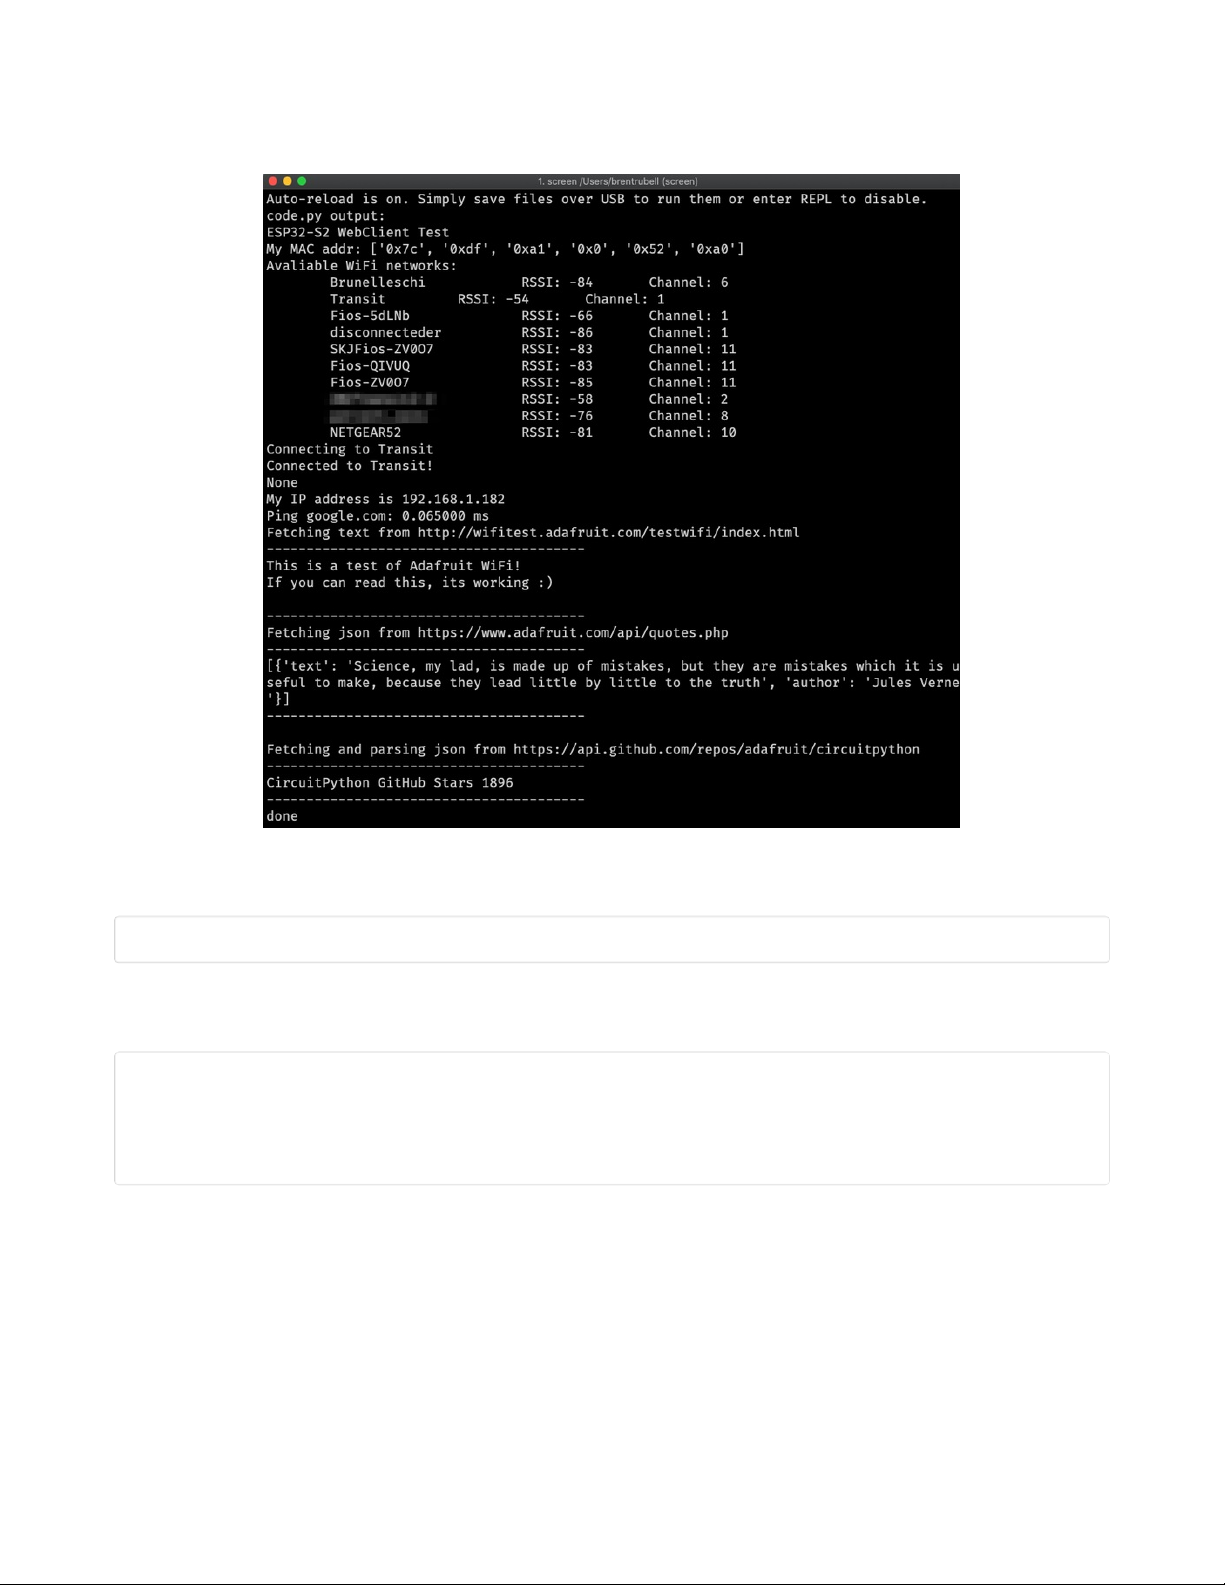
print("ESP32-S2 WebClient Test")
print("My MAC addr:", [hex(i) for i in wifi.radio.mac_address])
print("Available WiFi networks:")
for network in wifi.radio.start_scanning_networks():
print("\t%s\t\tRSSI: %d\tChannel: %d" % (str(network.ssid, "utf-8"),
network.rssi, network.channel))
wifi.radio.stop_scanning_networks()
print("Connecting to %s"%secrets["ssid"])
wifi.radio.connect(secrets["ssid"], secrets["password"])
print("Connected to %s!"%secrets["ssid"])
print("My IP address is", wifi.radio.ipv4_address)
ipv4 = ipaddress.ip_address("8.8.4.4")
print("Ping google.com: %f ms" % (wifi.radio.ping(ipv4)*1000))
pool = socketpool.SocketPool(wifi.radio)
requests = adafruit_requests.Session(pool, ssl.create_default_context())
print("Fetching text from", TEXT_URL)
response = requests.get(TEXT_URL)
print("-" * 40)
print(response.text)
print("-" * 40)
print("Fetching json from", JSON_QUOTES_URL)
response = requests.get(JSON_QUOTES_URL)
print("-" * 40)
print(response.json())
print("-" * 40)
print()
print("Fetching and parsing json from", JSON_STARS_URL)
response = requests.get(JSON_STARS_URL)
print("-" * 40)
print("CircuitPython GitHub Stars", response.json()["stargazers_count"])
print("-" * 40)
print("done")
© Adafruit Industries https://learn.adafruit.com/magtag-flashcards Page 15 of 43
Page 16
And save it to your board. Make sure the file is named code.py.
Open up your REPL, you should see something like the following:
In order, the example code...
Checks the ESP32-S2's MAC address.
print("My MAC addr:", [hex(i) for i in wifi.radio.mac_address])
Performs a scan of all access points and prints out the access point's name (SSID), signal strength (RSSI),
and channel.
print("Avaliable WiFi networks:")
for network in wifi.radio.start_scanning_networks():
print("\t%s\t\tRSSI: %d\tChannel: %d" % (str(network.ssid, "utf-8"),
network.rssi, network.channel))
wifi.radio.stop_scanning_networks()
Connects to the access point you defined in the secrets.py file, prints out its local IP address, and attempts
to ping google.com to check its network connectivity.
© Adafruit Industries https://learn.adafruit.com/magtag-flashcards Page 16 of 43
Page 17

print("Connecting to %s"%secrets["ssid"])
wifi.radio.connect(secrets["ssid"], secrets["password"])
print(print("Connected to %s!"%secrets["ssid"]))
print("My IP address is", wifi.radio.ipv4_address)
ipv4 = ipaddress.ip_address("8.8.4.4")
print("Ping google.com: %f ms" % wifi.radio.ping(ipv4))
The code creates a socketpool using the wifi radio's available sockets. This is performed so we don't need
to re-use sockets. Then, it initializes a a new instance of the requests (https://adafru.it/E9o) interface which makes getting data from the internet
really really easy.
pool = socketpool.SocketPool(wifi.radio)
requests = adafruit_requests.Session(pool, ssl.create_default_context())
To read in plain-text from a web URL, call requests.get - you may pass in either a http, or a http s url for SSL
connectivity.
print("Fetching text from", TEXT_URL)
response = requests.get(TEXT_URL)
print("-" * 40)
print(response.text)
print("-" * 40)
Requests can also display a JSON-formatted response from a web URL using a call to requests.get .
print("Fetching json from", JSON_QUOTES_URL)
response = requests.get(JSON_QUOTES_URL)
print("-" * 40)
print(response.json())
print("-" * 40)
Finally, you can fetch and parse a JSON URL using requests.get . This code snippet obtains the
stargazers_count field from a call to the GitHub API.
print("Fetching and parsing json from", JSON_STARS_URL)
response = requests.get(JSON_STARS_URL)
print("-" * 40)
print("CircuitPython GitHub Stars", response.json()["stargazers_count"])
print("-" * 40)
OK you now have your ESP32-S2 board set up with a proper secrets.py file and can connect over the
Internet. If not, check that your secrets.py file has the right ssid and password and retrace your steps until
you get the Internet connectivity working!
© Adafruit Industries https://learn.adafruit.com/magtag-flashcards Page 17 of 43
Page 18

Getting The Date & Time
A very common need for projects is to know the current date and time. Especially when you want to deep
sleep until an event, or you want to change your display based on what day, time, date, etc. it is
Determining the correct local time is really really hard. There are various time zones, Daylight Savings
dates, leap seconds, etc. Trying to get NTP time and then back-calculating what the local time is, is
extraordinarily hard on a microcontroller just isn't worth the effort and it will get out of sync as laws change
anyways.
For that reason, we have the free adafruit.io time service. Free for anyone, with a free adafruit.io account.
You
do need an account
because we have to keep accidentally mis-programmed-board from
overwhelming adafruit.io and lock them out temporarily. Again, it's free!
There are other services like WorldTimeAPI, but we don't use those for our guides because they are
nice people and we don't want to accidentally overload their site. Also, there's a chance it may
eventually go down or also require an account.
Step 1) Make an Adafruit account
It's free! Visit https://accounts.adafruit.com/ (https://adafru.it/dyy) to register and make an account if you do
not already have one
Step 2) Sign into Adafruit IO
Head over to io.adafruit.com (https://adafru.it/fsU) and click Sign In to log into IO using your Adafruit
account. It's free and fast to join.
Step 3) Get your Adafruit IO Key
Click on My Key in the top bar
You will get a popup with your Username and Key (In this screenshot, we've covered it with red blocks)
© Adafruit Industries https://learn.adafruit.com/magtag-flashcards Page 18 of 43
Page 19

Go to your secrets.py file on your CIRCUITPY drive and add three lines for aio_username , aio_key and
timezone so you get something like the following:
# This file is where you keep secret settings, passwords, and tokens!
# If you put them in the code you risk committing that info or sharing it
secrets = {
'ssid' : 'home_wifi_network',
'password' : 'wifi_password',
'aio_username' : 'my_adafruit_io_username',
'aio_key' : 'my_adafruit_io_key',
'timezone' : "America/New_York", # http://worldtimeapi.org/timezones
}
The timezone is optional, if you don't have that entry, adafruit.io will guess your timezone based on
geographic IP address lookup. You can visit http://worldtimeapi.org/timezones (https://adafru.it/EcP) to see
all the time zones available (even though we do not use worldtimeapi for time-keeping we do use the
same time zone table)
Step 4) Upload Test Python Code
This code is like the Internet Test code from before, but this time it will connect to adafruit.io and get the
local time
© Adafruit Industries https://learn.adafruit.com/magtag-flashcards Page 19 of 43
Page 20

import ipaddress
import ssl
import wifi
import socketpool
import adafruit_requests
import secrets
TEXT_URL = "http://wifitest.adafruit.com/testwifi/index.html"
JSON_QUOTES_URL = "https://www.adafruit.com/api/quotes.php"
JSON_STARS_URL = "https://api.github.com/repos/adafruit/circuitpython"
# Get wifi details and more from a secrets.py file
try:
from secrets import secrets
except ImportError:
print("WiFi secrets are kept in secrets.py, please add them there!")
raise
# Get our username, key and desired timezone
aio_username = secrets["aio_username"]
aio_key = secrets["aio_key"]
location = secrets.get("timezone", None)
TIME_URL = "https://io.adafruit.com/api/v2/%s/integrations/time/strftime?x-aio-key=%s" % (aio_username, aio_key)
TIME_URL += "&fmt=%25Y-%25m-%25d+%25H%3A%25M%3A%25S.%25L+%25j+%25u+%25z+%25Z"
print("ESP32-S2 Adafruit IO Time test")
print("My MAC addr:", [hex(i) for i in wifi.radio.mac_address])
print("Available WiFi networks:")
for network in wifi.radio.start_scanning_networks():
print("\t%s\t\tRSSI: %d\tChannel: %d" % (str(network.ssid, "utf-8"),
network.rssi, network.channel))
wifi.radio.stop_scanning_networks()
print("Connecting to %s"%secrets["ssid"])
wifi.radio.connect(secrets["ssid"], secrets["password"])
print("Connected to %s!"%secrets["ssid"])
print("My IP address is", wifi.radio.ipv4_address)
ipv4 = ipaddress.ip_address("8.8.4.4")
print("Ping google.com: %f ms" % wifi.radio.ping(ipv4))
pool = socketpool.SocketPool(wifi.radio)
requests = adafruit_requests.Session(pool, ssl.create_default_context())
print("Fetching text from", TIME_URL)
response = requests.get(TIME_URL)
print("-" * 40)
print(response.text)
print("-" * 40)
After running this, you will see something like the below text. We have blocked out the part with the secret
username and key data!
© Adafruit Industries https://learn.adafruit.com/magtag-flashcards Page 20 of 43
Page 21

Note at the end you will get the date, time, and your timezone! If so, you have correctly configured your
secrets.py and can continue to the next steps!
© Adafruit Industries https://learn.adafruit.com/magtag-flashcards Page 21 of 43
Page 22
MagTag-Specific CircuitPython Libraries
To use all the amazing features of your MagTag with CircuitPython, you must first install a number of
libraries. This page covers that process.
Get Latest Adafruit CircuitPython Bundle
Download the Adafruit CircuitPython Library Bundle. You can find the latest release here:
https://adafru.it/ENC
Download the adafruit-circuitpython-bundle-version-mpy-*.zip bundle zip file, and unzip a folder of the
same name. Inside you'll find a lib folder. The entire collection of libraries is too large to fit on the
CIRCUITPY drive. Therefore, you'll need to copy the necessary libraries to your board individually.
At a minimum, the following libraries are required. Copy the following folders or .mpy files to the lib folder
on your CIRCUITPY drive. If the library is a folder, copy the entire folder to the lib folder on your board.
Library folders (copy the whole folder over to lib):
adafruit_magtag - This is a helper library designed for using all of the features of the MagTag,
including networking, buttons, NeoPixels, etc.
adafruit_portalbase - This library is the base library that adafruit_magtag is built on top of.
adafruit_bitmap_font - There is fancy font support, and it's easy to make new fonts. This library reads
and parses font files.
adafruit_display_text - This library displays text on the screen.
adafruit_io - This library helps connect the MagTag to our free data logging and viewing service
Library files:
adafruit_requests.mpy - This library allows us to perform HTTP requests and get responses back
from servers. GET/POST/PUT/PATCH - they're all in here!
adafruit_fakerequests.mpy - This library allows you to create fake HTTP requests by using local files.
adafruit_miniqr.mpy - QR creation library lets us add easy-to-scan 2D barcodes to the E-Ink display
neopixel.mpy - This library is used to control the onboard NeoPixels.
simpleio.mpy - This library is used for tone generation.
Secrets
Even if you aren't planning to go online with your MagTag, you'll need to have a secrets.py file in the root
directory (top level) of your CIRCUITPY drive. If you do not intend to connect to wireless, it does not need
to have valid data in it. Here's more info on the secrets.py file (https://adafru.it/P3b).
https://adafru.it/ENC
© Adafruit Industries https://learn.adafruit.com/magtag-flashcards Page 22 of 43
Page 23

Simple Flashcards
We’ll start off by working through a quick app that just does the very basics we need to study. It’ll load up
some cards out of a JSON file, shuffle them, and go through them one at a time as you press the D button
on the MagTag. In the next section, we’ll add some fancier features, like sorting your cards into
categories, and letting you pick which ones you’d like to study per session.
In this code, we’ll be using a PCF font for international character sets. PCF fonts offer a little extra
efficiency compared to raw BDF (bitmap) fonts, so they’re easier to fit on CircuitPython drives. We’ll be
using one today for the Japanese Hiragana and Katakana characters used in this deck.
Download the Software
Download the code by clicking the "Download: Project Zip" and copy the files to the CIRCUITPY flash
drive that appears on your computer when you plug your MagTag in to your computer via a known good
USB cable.
Here's the program we'll be running on the code.py file in the CIRCUITPY drive.
© Adafruit Industries https://learn.adafruit.com/magtag-flashcards Page 23 of 43
Page 24

import time
import json
import terminalio
import digitalio
import random
from adafruit_magtag.magtag import MagTag
# Set up the magtag
print("Magtag Basic Flashcards")
magtag = MagTag()
# Import cards
cards = {}
with open("deck.json") as fp:
cards = json.load(fp)
# Create a text area
magtag.add_text(
text_font="yasashi20.pcf",
text_position=(
magtag.graphics.display.width // 2,
magtag.graphics.display.height // 2,
),
line_spacing=0.85,
text_anchor_point=(0.5, 0.5),
)
# Set up buttons
cur_btn = False
prev_btn = False
while True:
# Shuffle the deck
cards = sorted(cards, key=lambda _: random.random())
for card in cards:
# Show the first side and wait for the D button
text = ''.join(magtag.wrap_nicely(card[0], 20))
magtag.set_text(text)
while True:
cur_btn = magtag.peripherals.button_d_pressed
if cur_btn and not prev_btn:
print("Show Result")
time.sleep(0.1)
break
prev_btn = cur_btn
# Show the second side and wait for the D button
text = '\n'.join(magtag.wrap_nicely(card[1], 11))
text += '\n'
text += '\n'.join(magtag.wrap_nicely(card[2], 20))
print(text)
magtag.set_text(text)
while True:
cur_btn = magtag.peripherals.button_d_pressed
if cur_btn and not prev_btn:
print("Next Card")
time.sleep(0.1)
break
prev_btn = cur_btn
© Adafruit Industries https://learn.adafruit.com/magtag-flashcards Page 24 of 43
Page 25

Example Deck
In addition, here's an example "deck" of cards, written in JSON. In case you've never used JSON before, it
stands for JavaScript Object Notation: it's a format of writing data (like arrays and key-value pairs) that was
originally derived from Javascript but is now commonly used across many different programming
languages. In this example deck file, we create a list of lists, using square brackets [] to enclose the lists
and commas , to separate list elements.
[
["Monday","げつ ようび","Getsu yōbi"],
["Tuesday","か ようび","Ka yōbi"],
["Wednesday","すい ようび","Sui yōbi"],
["Thursday","もく ようび","Moku yōbi"],
["Friday","きん ようび","Kin yōbi"],
["Saturday","ど ようび","Do yōbi"],
["Sunday","にち ようび","Nichi yōbi"]
]
This particular example is written for studying Japanese, but it should work fine for any topic you want Spanish, geography, code reference, obscure Star Trek trivia, whatever. Just make sure to tweak the textdisplaying parts of the code if you add or remove “sections” of the card structure.
How does it work?
Let's walk through this code step by step. First, we import all the required libraries, and create an object
for the magtag that contains all the library features, like detecting button presses. We'll also tell the Serial
Port we've started up the program.
import time
import json
import terminalio
import digitalio
import random
from adafruit_magtag.magtag import MagTag
# Set up the magtag
print("Magtag Basic Flashcards")
magtag = MagTag()
Then, we use the json library to open our deck file, and interpret the JSON syntax into a list-of-lists that
we can use in Python.
# Import cards
cards = {}
with open("deck.json") as fp:
cards = json.load(fp)
As the last part of our setup, we create a text object to hold the sides of our flashcard. This uses the
Yasashi 20 point PCF font, which contains both english and Japanese Hira and Katakana characters (no
Kanji, though, sadly - that's a bit too much for the size of the Magtag's memory).
We'll put it right in the center of the screen.
© Adafruit Industries https://learn.adafruit.com/magtag-flashcards Page 25 of 43
Page 26

# Create a text area
magtag.add_text(
text_font="yasashi20.pcf",
text_position=(
magtag.graphics.display.width // 2,
magtag.graphics.display.height // 2,
),
line_spacing=0.85,
text_anchor_point=(0.5, 0.5),
)
To actually change the sides of the card, and to move to the next card, we'll need to detect when a
magtag button is pressed.
The magtag library contains the attribute magtag.peripherals.button_d_pressed , which will tell us whether the
D button is currently up or down. But this value by itself isn't able to detect
when
the button is pressed. To
do that, we'll create a couple of memory variables:
cur_btn = False
prev_btn = False
Whenever we want to wait for a button press, we'll enter a short while loop, and do nothing until we see
the button change from an "up" state to a "down" state.
while True:
cur_btn = magtag.peripherals.button_d_pressed
if cur_btn and not prev_btn:
print("Show Result")
time.sleep(0.1)
break
prev_btn = cur_btn
Before we actually start using the deck, we want to make sure it isn't in the same order every time.
Circuitpython doesn't have access to the random.shuffle() function, but we can fake it by using the built in
function sorted() and indexes from random.random() to achieve the same effect.
cards = sorted(cards, key=lambda _: random.random())
When we want to display text, we use the built in magtag set_text function. By using wrap_nicely , we can
make sure that the card text won't ever go off the side of the magtag - note that characters from other
languages (like Hiragana) can be larger than roman ones, so expect to change the length parameter based
on the kind of text you want to display.
# Example Hira wrapping (fewer characters)
text = '\n'.join(magtag.wrap_nicely(card[1], 11))
# Example Roman wrapping (more characters)
text += '\n'.join(magtag.wrap_nicely(card[2], 20))
# Set the contents of the text field
magtag.set_text(text)
We combine all these elements into the program's final main loop, which will run through the cards in a
random order forever, waiting on user button presses to move forward.
© Adafruit Industries https://learn.adafruit.com/magtag-flashcards Page 26 of 43
Page 27

while True:
# Shuffle the deck
cards = sorted(cards, key=lambda _: random.random())
for card in cards:
# Show the first side and wait for the D button
text = ''.join(magtag.wrap_nicely(card[0], 20))
magtag.set_text(text)
while True:
cur_btn = magtag.peripherals.button_d_pressed
if cur_btn and not prev_btn:
print("Show Result")
time.sleep(0.1)
break
prev_btn = cur_btn
# Show the second side and wait for the D button
text = '\n'.join(magtag.wrap_nicely(card[1], 11))
text += '\n'
text += '\n'.join(magtag.wrap_nicely(card[2], 20))
print(text)
magtag.set_text(text)
while True:
cur_btn = magtag.peripherals.button_d_pressed
if cur_btn and not prev_btn:
print("Next Card")
time.sleep(0.1)
break
prev_btn = cur_btn
© Adafruit Industries https://learn.adafruit.com/magtag-flashcards Page 27 of 43
Page 28

Complicated Flashcards
Our simple flashcard app already has some advantages over physical cards. But there are other features
we could add. We might want to narrow down the cards we want to study, or sort them into topics, and it
would be nice to revisit cards that we got wrong and want to study again. We're also missing a lot of basic
UI features like labels and feedback.
In this expanded example, we'll add some new features to make this app a little more advanced, such as:
A new JSON format to support multiple "chapters" of a deck
A simple menu, allowing us to pick specific parts of our deck to study from
New text areas to label the buttons and give the user more directions
NeoPixel feedback after a user hits a button (a nice-to-have, since the e-paper screen is sloooow)
Automatically add cards the user marks as "forgotten" back into the deck to be studied again.
Download the Software
Download the code by clicking the "Download: Project Zip" and copy the files to the CIRCUITPY flash
drive that appears on your computer when you plug your MagTag in to your computer via a known good
USB cable.
Here's the program we'll be running on the code.py file in the CIRCUITPY drive.
import time
import json
import terminalio
import digitalio
import random
from adafruit_display_shapes.rect import Rect
from adafruit_magtag.magtag import MagTag
magtag = MagTag()
# --------------------------------# Prepare text regions
# ---------------------------------
# Fetch list of chapters
MAX_LLEN = 8
data = {}
with open("deck.json") as fp:
data = json.load(fp)
chap_list = list(data.keys())
num_chap = len(chap_list)
list_len = min(num_chap,MAX_LLEN)
# Print list of chapters
for i in range(list_len):
magtag.add_text(
text_font=terminalio.FONT,
text_position=(10, 3+(i*10)),
line_spacing=1.0,
text_anchor_point=(0, 0), # Top left
is_data=False, # Text will be set manually
)
if i == 0:
magtag.set_text("> " + chap_list[i], i, auto_refresh=False)
else:
magtag.set_text(" " + chap_list[i], i, auto_refresh=False)
© Adafruit Industries https://learn.adafruit.com/magtag-flashcards Page 28 of 43
Page 29

# Add button labels at the bottom of the screen
BUTTON_TEXT_IDX = list_len
magtag.graphics.splash.append(Rect(0, magtag.graphics.display.height - 14,
magtag.graphics.display.width,
magtag.graphics.display.height, fill=0x0))
magtag.add_text(
text_font=terminalio.FONT,
text_position=(3, magtag.graphics.display.height - 14),
text_color=0xFFFFFF,
line_spacing=1.0,
text_anchor_point=(0, 0), # Top left
is_data=False, # Text will be set manually
)
magtag.set_text("Select Up Down Begin",
BUTTON_TEXT_IDX, auto_refresh=False)
# Add message label at the top of the screen
MSG_TEXT_IDX = list_len + 1
magtag.add_text(
text_font=terminalio.FONT,
text_position=(3, magtag.graphics.display.height - 30),
line_spacing=1.0,
text_anchor_point=(0, 0), # Top left
is_data=False, # Text will be set manually
)
magtag.set_text("Press Begin to default to all chapters", MSG_TEXT_IDX)
# Empty text region for card displays
CARD_TEXT_IDX = list_len + 2
magtag.add_text(
text_font="yasashi20.pcf",
text_position=(
magtag.graphics.display.width // 2,
magtag.graphics.display.height // 2,
),
line_spacing=0.85,
text_anchor_point=(0.5, 0.5),
)
# Button management
curr_btns = [False] * 4
prev_btns = [False] * 4
BTN_A = 0
BTN_B = 1
BTN_C = 2
BTN_D = 3
def update_button(idx, pressed):
curr_btns[idx] = pressed
if curr_btns[idx] and not prev_btns[idx]:
print("Exit menu")
return True
prev_btns[idx] = curr_btns[idx]
return False
# Cursor settings
cursor_pos = 0
list_offset = 0
selected = [False] * num_chap
btn_updated = False
# --------------------------------# Program Loop
© Adafruit Industries https://learn.adafruit.com/magtag-flashcards Page 29 of 43
Page 30

# ---------------------------------
while True:
# -------------------------------- # Chapter Select
# ---------------------------------
while True:
if btn_updated:
# Clear default message only when items are selected
if any(selected):
magtag.set_text("", MSG_TEXT_IDX, auto_refresh=False)
else:
magtag.set_text("Press Begin to default to all chapters",
MSG_TEXT_IDX, auto_refresh=False)
magtag.peripherals.neopixels.fill((128, 0, 0))
for i in range(list_len):
prefix = ""
if i == cursor_pos:
prefix += ">"
else:
prefix += " "
if selected[i + list_offset]:
prefix += "*"
else:
prefix += " "
magtag.set_text(prefix + chap_list[i+list_offset],
i, auto_refresh=False)
magtag.refresh()
magtag.peripherals.neopixels.fill((0, 0, 0))
btn_updated = False
# UP
if update_button(BTN_B, magtag.peripherals.button_b_pressed):
cursor_pos -= 1
btn_updated = True
# DOWN
if update_button(BTN_C, magtag.peripherals.button_c_pressed):
cursor_pos += 1
btn_updated = True
# SELECT
if update_button(BTN_A, magtag.peripherals.button_a_pressed):
selected[cursor_pos + list_offset] = not selected[cursor_pos + list_offset]
btn_updated = True
# BEGIN
if update_button(BTN_D, magtag.peripherals.button_d_pressed):
# if nothing was selected, default to all decks
magtag.peripherals.neopixels.fill((128, 0, 0))
if not any(selected):
selected = [True] * list_len
break
# detect if you're past the list bounds
if cursor_pos == MAX_LLEN:
cursor_pos = MAX_LLEN - 1
if (num_chap - list_offset - 1) > MAX_LLEN:
list_offset += 1
if cursor_pos == -1:
cursor_pos = 0
if list_offset > 0:
list_offset -= 1
© Adafruit Industries https://learn.adafruit.com/magtag-flashcards Page 30 of 43
Page 31

# ---------------------------------
# Deck Loop
# ---------------------------------
# Clear the menu and message box
for i in range(list_len):
magtag.set_text("", i, auto_refresh=False)
magtag.set_text("", MSG_TEXT_IDX,auto_refresh=False)
# Grab the cards from the chapters we want, and shuffle them
cards = []
for i in range(len(selected)):
if selected[i]:
cards.extend(data[chap_list[i]])
cards = sorted(cards, key=lambda _: random.random())
# make a separate holding deck for cards the user gets wrong
forgotten_cards = []
exit_called = False
while True:
for card in cards:
magtag.set_text("Exit -- -- Turn Over",
BUTTON_TEXT_IDX,auto_refresh=False)
text = '\n'.join(magtag.wrap_nicely(card[0], 11))
magtag.set_text(text, CARD_TEXT_IDX)
magtag.peripherals.neopixels.fill((0, 0, 0))
while True:
# EXIT
if update_button(BTN_A, magtag.peripherals.button_a_pressed):
exit_called = True
break
# TURN
if update_button(BTN_D, magtag.peripherals.button_d_pressed):
break
magtag.peripherals.neopixels.fill((128, 0, 0))
if exit_called:
break
magtag.set_text("Exit -- Forgot Good",
BUTTON_TEXT_IDX,auto_refresh=False)
text = '\n'.join(magtag.wrap_nicely(card[1], 11))
text += '\n'
text += '\n'.join(magtag.wrap_nicely(card[2], 20))
magtag.set_text(text, CARD_TEXT_IDX)
magtag.peripherals.neopixels.fill((0, 0, 0))
while True:
# EXIT
if update_button(BTN_A, magtag.peripherals.button_a_pressed):
exit_called = True
break
# FORGOT
if update_button(BTN_C, magtag.peripherals.button_c_pressed):
forgotten_cards.append(card)
break
# GOOD
if update_button(BTN_D, magtag.peripherals.button_d_pressed):
break
magtag.peripherals.neopixels.fill((128, 0, 0))
if exit_called:
break
# Next card
© Adafruit Industries https://learn.adafruit.com/magtag-flashcards Page 31 of 43
Page 32

# If there were forgotten cards, make them the new deck and restart
if forgotten_cards:
cards = forgotten_cards
forgotten_cards = []
else:
break
# -------------------------------- # Complete and Reset
# ---------------------------------
# Show completion text if deck was finished
if not exit_called:
magtag.set_text("-- -- -- --",
BUTTON_TEXT_IDX,auto_refresh=False)
magtag.set_text("Complete!", CARD_TEXT_IDX)
else:
exit_called = False
# Clear and reprint list of chapters
magtag.set_text("", CARD_TEXT_IDX, auto_refresh=False)
for i in range(list_len):
if i == 0:
magtag.set_text("> " + chap_list[i], i, auto_refresh=False)
else:
magtag.set_text(" " + chap_list[i], i, auto_refresh=False)
magtag.set_text("Select Up Down Begin",
BUTTON_TEXT_IDX, auto_refresh=False)
magtag.set_text("Press Begin to default to all chapters", MSG_TEXT_IDX)
# Reset cursor:
cursor_pos = 0
list_offset = 0
selected = [False] * list_len
btn_updated = False
# Done resetting, return to chapter selection
magtag.peripherals.neopixels.fill((0, 0, 0))
New Deck Format
For our new deck, we want to start organizing cards by "chapter" - like different topics in a language, or
different chapters in a textbook. To do this, we use the key-value syntax in JSON.
Instead of being a big list of smaller lists, the top level is now equivalent to a Python Dictionary, using curly
brackets {} . Each chapter name has a list of cards associated with it. In our final program, we'll be able to
study chapters by themselves or combine them together using the list of chapter names.
© Adafruit Industries https://learn.adafruit.com/magtag-flashcards Page 32 of 43
Page 33
{
"Everyday Phrases":[
["You're Welcome", "どういたしまして", "Dō Itashimashite"],
["Good Morning", "おはよう ございます", "Ohayō gozaimasu"],
["Yes", "はい", "Hai"],
["No", "いいえ", "Iie"],
["Hello", "こんにちは", "Konnichi wa"],
["Please", "おねがい します", "Onegai Shimasu"],
["Excuse Me", "すみません", "Sumimasen"],
["Thank You", "ありがとう", "Arigatō"],
],
"Days of the Week":[
["Monday","げつ ようび","Getsu yōbi"],
["Tuesday","か ようび","Ka yōbi"],
["Wednesday","すい ようび","Sui yōbi"],
["Thursday","もく ようび","Moku yōbi"],
["Friday","きん ようび","Kin yōbi"],
["Saturday","ど ようび","Do yōbi"],
["Sunday","にち ようび","Nichi yōbi"],
],
"Animals":[
["Dog","いぬ","Inu"],
["Cat","ねこ","Neko"],
["Horse","うま","Uma"],
["Monkey","さる","Saru"],
["Elephant","ぞう","Zō"],
["Rabbit","うさぎ","Usagi"],
]
}
Program Flow
This program has a couple of different modes, so we'll go over how it works first.
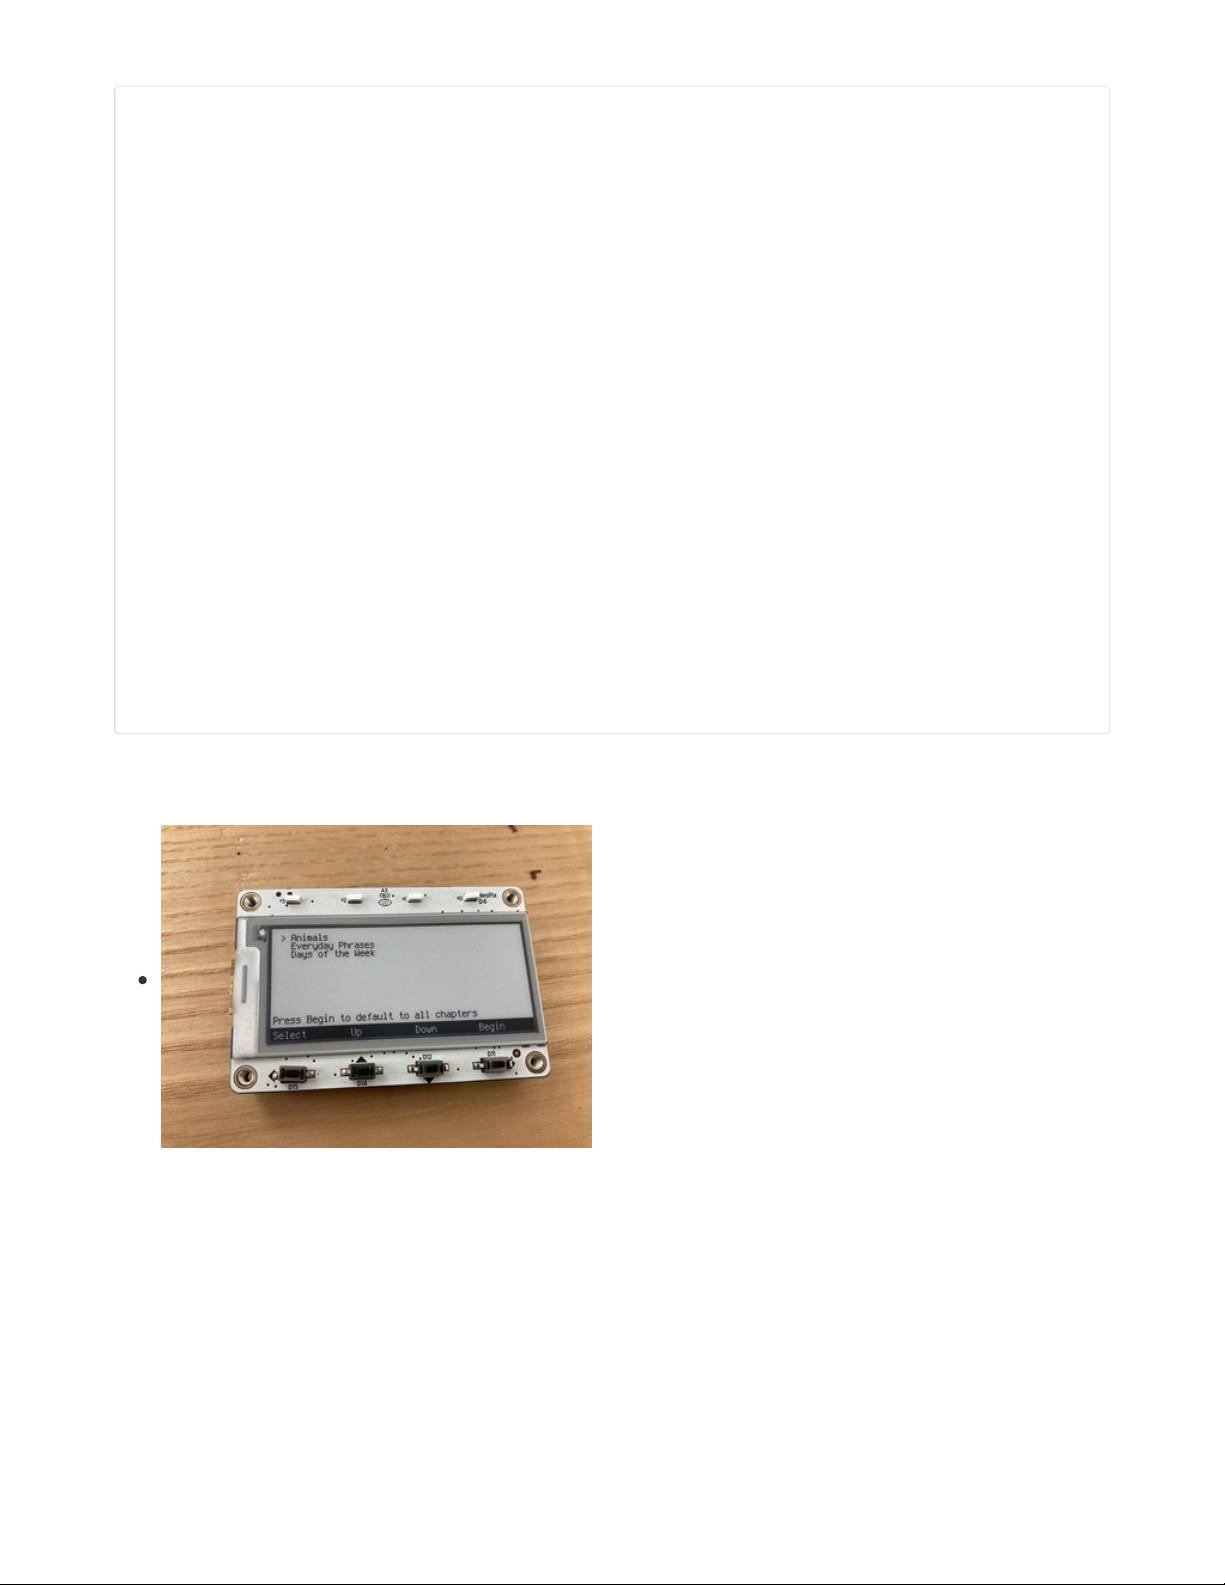
The user starts by seeing a list of the chapters in their deck,
along with a line of button labels. Hitting the Begin button
right away will simply combine all the cards into one big study
session and start up, but they can also pick specific chapters
to focus on.
© Adafruit Industries https://learn.adafruit.com/magtag-flashcards Page 33 of 43
Page 34

Users can move up and down the list with the arrow buttons,
and select different chapters with the select button. Once
they've picked the chapters you want to study, the Begin
button will start a session for only cards from those chapters.
After a user turns a card over, they can press the "Forgot"
button to mark it as incorrect. Forgotten cards automatically
get added to the end of the deck, so once they've finished the
original set, they'll need to study those cards again.
Once every card has been marked "good", the session is
complete! A congratulatory message shows, and the user
returns to the menu.
Code Walkthrough
Setup:
Just like the previous version, we start by importing the libraries we need, but note that we're using a new
one, Adafruit Shapes, which will be a part of our background display.
import time
import json
import terminalio
import digitalio
import random
from adafruit_display_shapes.rect import Rect
from adafruit_magtag.magtag import MagTag
magtag = MagTag()
© Adafruit Industries https://learn.adafruit.com/magtag-flashcards Page 34 of 43
Page 35

The file import section comes with some extra steps.
If the user has a LOT of chapters, we won't be able to fit them all on the screen at once, so we set a
maximum number of lists to display at one time with MAX_LLEN . Lists over this number won't be shown
unless the list is scrolled down.
We're going to start off by displaying all the chapters in a list, so we extract their names into a variable
called chap_list . We also store the total number of chapters with num_chap .
Finally, if the list of chapters is shorter than MAX_LLEN , we won't need to scroll. So we find the actual
length of the list we're displaying by comparing the two variables and picking the minimum.
MAX_LLEN = 8
data = {}
with open("deck.json") as fp:
data = json.load(fp)
chap_list = list(data.keys())
num_chap = len(chap_list)
list_len = min(num_chap,MAX_LLEN)
After importing the deck, we set up the various text regions. We create one for each item in the menu list,
and then add on the button labels, background shape, and a special message region for telling the user
about the "default" option if they don't actually pick any chapters.
We also create an empty text region that will eventually hold the flashcards themselves. Since the user
moves back and forth between the menu selection and the cards, we won't actually delete any objects
when we change modes - instead, we'll just fill the menu-specific text fields with empty strings when in
flashcard mode, and vice versa for menu mode.
© Adafruit Industries https://learn.adafruit.com/magtag-flashcards Page 35 of 43
Page 36

# Print list of chapters
for i in range(list_len):
magtag.add_text(
text_font=terminalio.FONT,
text_position=(10, 3+(i*10)),
line_spacing=1.0,
text_anchor_point=(0, 0), # Top left
is_data=False, # Text will be set manually
)
if i == 0:
magtag.set_text("> " + chap_list[i], i, auto_refresh=False)
else:
magtag.set_text(" " + chap_list[i], i, auto_refresh=False)
# Add button labels at the bottom of the screen
BUTTON_TEXT_IDX = list_len
magtag.graphics.splash.append(Rect(0, magtag.graphics.display.height - 14,
magtag.graphics.display.width,
magtag.graphics.display.height, fill=0x0))
magtag.add_text(
text_font=terminalio.FONT,
text_position=(3, magtag.graphics.display.height - 14),
text_color=0xFFFFFF,
line_spacing=1.0,
text_anchor_point=(0, 0), # Top left
is_data=False, # Text will be set manually
)
magtag.set_text("Select Up Down Begin", BUTTON_TEXT_IDX, auto_refresh=False)
# Add message label at the top of the screen
MSG_TEXT_IDX = list_len + 1
magtag.add_text(
text_font=terminalio.FONT,
text_position=(3, magtag.graphics.display.height - 30),
line_spacing=1.0,
text_anchor_point=(0, 0), # Top left
is_data=False, # Text will be set manually
)
magtag.set_text("Press Begin to default to all chapters", MSG_TEXT_IDX)
# Empty text region for card displays
CARD_TEXT_IDX = list_len + 2
magtag.add_text(
text_font="yasashi20.pcf",
text_position=(
magtag.graphics.display.width // 2,
magtag.graphics.display.height // 2,
),
line_spacing=0.85,
text_anchor_point=(0.5, 0.5),
)
Remember the button code from the simple flashcards example? We don't need to change it much, but we
do need to support all 4 buttons rather than just one. So we adapt the old code into a new function that
can determine out the button status by index (unfortunately, the magtag library attributes aren't indexable,
so you still need to pass those in too).
© Adafruit Industries https://learn.adafruit.com/magtag-flashcards Page 36 of 43
Page 37

# Button management
curr_btns = [False] * 4
prev_btns = [False] * 4
BTN_A = 0
BTN_B = 1
BTN_C = 2
BTN_D = 3
def update_button(idx, pressed):
curr_btns[idx] = pressed
if curr_btns[idx] and not prev_btns[idx]:
print("Exit menu")
return True
prev_btns[idx] = curr_btns[idx]
return False
As the final part of the setup process, we need some miscellaneous variables like the cursor location, the
scrolling offset for long lists, what list items have been selected, and whether any buttons have been
updated.
cursor_pos = 0
list_offset = 0
selected = [False] * num_chap
btn_updated = False
Chapter Selection:
Now we can get started with the main program loop. The first screen the user sees is the chapter
selection, where they can move a cursor up and down to select chapters. We've already printed out all the
text on this screen in the setup stage, so this is basically just a big loop to read buttons.
We have four different button detectors. The Up and Down buttons change the cursor position, Select
changes the status of the chapter in the Selected array, and Begin signals to exit the loop and start
studying flashcards (combining all of the chapters, if nothing was selected).
# UP
if update_button(BTN_B, magtag.peripherals.button_b_pressed):
cursor_pos -= 1
btn_updated = True
# DOWN
if update_button(BTN_C, magtag.peripherals.button_c_pressed):
cursor_pos += 1
btn_updated = True
# SELECT
if update_button(BTN_A, magtag.peripherals.button_a_pressed):
selected[cursor_pos + list_offset] = not selected[cursor_pos + list_offset]
btn_updated = True
# BEGIN
if update_button(BTN_D, magtag.peripherals.button_d_pressed):
# if nothing was selected, default to all decks
magtag.peripherals.neopixels.fill((128, 0, 0))
if not any(selected):
selected = [True] * list_len
break
If a button gets pressed, the program goes over the list of text areas and makes any required changes, like
moving the cursor, adding * asterisks to selected chapters, and setting the current user message, all
before refreshing the e-paper.
© Adafruit Industries https://learn.adafruit.com/magtag-flashcards Page 37 of 43
Page 38

if btn_updated:
# Clear default message only when items are selected
if any(selected):
magtag.set_text("", MSG_TEXT_IDX, auto_refresh=False)
else:
magtag.set_text("Press Begin to default to all chapters",
MSG_TEXT_IDX, auto_refresh=False)
magtag.peripherals.neopixels.fill((128, 0, 0))
for i in range(list_len):
prefix = ""
if i == cursor_pos:
prefix += ">"
else:
prefix += " "
if selected[i + list_offset]:
prefix += "*"
else:
prefix += " "
magtag.set_text(prefix + chap_list[i+list_offset],
i, auto_refresh=False)
magtag.refresh()
magtag.peripherals.neopixels.fill((0, 0, 0))
btn_updated = False
What's with the neopixel code? Since the e-paper updates slowly in comparison to how quickly we can
push buttons, it's nice to give the user a little feedback that they've actually started an action.
So every time a button is pressed, we turn on the neopixels, and once the e-paper is finished updating
and the buttons are ready to be pushed again, we turn it off.
magtag.peripherals.neopixels.fill((128, 0, 0))
magtag.peripherals.neopixels.fill((0, 0, 0))
Finally, if the chapter list is over the maximum list length, the user can scroll. This will only happen when
the cursor is at the very end or very beginning of the list, and it doesn't affect things like chapter selection,
which is the same no matter how the list is offset.
if cursor_pos == MAX_LLEN:
cursor_pos = MAX_LLEN - 1
if (num_chap - list_offset - 1) > MAX_LLEN:
list_offset += 1
if cursor_pos == -1:
cursor_pos = 0
if list_offset > 0:
list_offset -= 1
Flashcard Session:
Once a user picks a chapter and hits begin, they move into the deck loop. This is where flashcards get
displayed, and it's similar to the basic example earlier in this chapter, with a few additions. First, we clear
all the text from the menu mode:
© Adafruit Industries https://learn.adafruit.com/magtag-flashcards Page 38 of 43
Page 39

# Clear the menu and message box
for i in range(list_len):
magtag.set_text("", i, auto_refresh=False)
magtag.set_text("", MSG_TEXT_IDX,auto_refresh=False)
Then, we create a list of cards for this specific session, by combining all the cards from the chapters that
were selected in the menu, and shuffling them.
cards = []
for i in range(len(selected)):
if selected[i]:
cards.extend(data[chap_list[i]])
cards = sorted(cards, key=lambda _: random.random())
In python, you can't add to a list while you're iterating through it. Since we want to keep extending the
deck with cards that the user forgot, we'll create a temporary holding list called "forgotten_cards", and add
it on later. We'll also create a variable to detect whether the user wants to give up and go back to the
menu.
forgotten_cards = []
exit_called = False
Then, we enter the card loop. This is almost the same as the simple example. The only differences are that
the user can exit the loop using the Exit button, or add cards to the forgotten_cards list with the Forget
button. If there are any cards in forgotten_cards once the loop is finished, it'll restart the loop with those
cards as the new deck, over and over until the user has gotten them all correct.
© Adafruit Industries https://learn.adafruit.com/magtag-flashcards Page 39 of 43
Page 40

while True:
for card in cards:
magtag.set_text("Exit -- -- Turn Over",
BUTTON_TEXT_IDX,auto_refresh=False)
text = '\n'.join(magtag.wrap_nicely(card[0], 11))
magtag.set_text(text, CARD_TEXT_IDX)
magtag.peripherals.neopixels.fill((0, 0, 0))
while True:
# EXIT
if update_button(BTN_A, magtag.peripherals.button_a_pressed):
exit_called = True
break
# TURN
if update_button(BTN_D, magtag.peripherals.button_d_pressed):
break
magtag.peripherals.neopixels.fill((128, 0, 0))
if exit_called:
break
magtag.set_text("Exit -- Forgot Good",
BUTTON_TEXT_IDX,auto_refresh=False)
text = '\n'.join(magtag.wrap_nicely(card[1], 11))
text += '\n'
text += '\n'.join(magtag.wrap_nicely(card[2], 20))
magtag.set_text(text, CARD_TEXT_IDX)
magtag.peripherals.neopixels.fill((0, 0, 0))
while True:
# EXIT
if update_button(BTN_A, magtag.peripherals.button_a_pressed):
exit_called = True
break
# FORGOT
if update_button(BTN_C, magtag.peripherals.button_c_pressed):
forgotten_cards.append(card)
break
# GOOD
if update_button(BTN_D, magtag.peripherals.button_d_pressed):
break
magtag.peripherals.neopixels.fill((128, 0, 0))
if exit_called:
break
# Next card
# If there were forgotten cards, make them the new deck and restart
if forgotten_cards:
cards = forgotten_cards
forgotten_cards = []
else:
break
Wrapping up:
Once the user has finished a study session, all that's left is to clean up the screen and reset everything
back to how it started. We'll send them a message if they completed the deck (rather than exiting), and
turn off any LEDs or variables that might have been set.
© Adafruit Industries https://learn.adafruit.com/magtag-flashcards Page 40 of 43
Page 41

# Show completion text if deck was finished
if not exit_called:
magtag.set_text("-- -- -- --",
BUTTON_TEXT_IDX,auto_refresh=False)
magtag.set_text("Complete!", CARD_TEXT_IDX)
else:
exit_called = False
# Clear and reprint list of chapters
magtag.set_text("", CARD_TEXT_IDX, auto_refresh=False)
for i in range(list_len):
if i == 0:
magtag.set_text("> " + chap_list[i], i, auto_refresh=False)
else:
magtag.set_text(" " + chap_list[i], i, auto_refresh=False)
magtag.set_text("Select Up Down Begin",
BUTTON_TEXT_IDX, auto_refresh=False)
magtag.set_text("Press Begin to default to all chapters", MSG_TEXT_IDX)
# Reset cursor:
cursor_pos = 0
list_offset = 0
selected = [False] * list_len
btn_updated = False
# Done resetting, return to chapter selection
magtag.peripherals.neopixels.fill((0, 0, 0))
© Adafruit Industries https://learn.adafruit.com/magtag-flashcards Page 41 of 43
Page 42

Other Resources
Flashcard science is actually a surprisingly broad and well-researched topic! There are lots of
modifications that could be added to a program like this to help you learn faster, but weren't a good fit for
this tutorial.
The example programs given here should be a good start, but if you'd looking for inspiration on creating
your own flashcards, or making modifications to this example program, you can check out the following
links.
Pyshuffle (https://adafru.it/PF9): an extension of the program in shown this guide, which shuffles the
vocabulary within card templates to create many similar versions of each card.
Flashcards (Wikipedia): (https://adafru.it/PFa) discusses different kinds of cards and various spaced
repetition (https://adafru.it/PFb) systems, such as the Leitner system (https://adafru.it/PFc).
The Right Time to Learn (NIH) (https://adafru.it/PFd): if you'd like to get
really
technical, this is a
survey paper on the science of spaced repetition learning
Anki (https://adafru.it/PFe): well known open-source spaced repetition software
Font License:
This guide uses the Yasashisa Gothic (やさしさゴシック) (https://adafru.it/PHd) font. It's free for both
personal and commercial projects, and uses the IPA license. (https://adafru.it/PHe)
IPA summary from TLDRLegal (https://adafru.it/PHf):
The IPA license applies only to font programs and allows for a great deal of freedom in distributing them,
both commercially and non-commercially. You cannot change the name of redistributed versions of the
original software and must include a copy of the license, however.
© Adafruit Industries https://learn.adafruit.com/magtag-flashcards Page 42 of 43
Page 43

© Adafruit Industries Last Updated: 2021-04-15 08:19:06 PM EDT Page 43 of 43
 Loading...