

Page 1
Adafruit BrainCraft HAT - Easy Machine Learning for Raspberry Pi
Created by lady ada
Last updated on 2021-03-03 01:41:38 PM EST
Page 2

2
3
6
7
7
7
8
8
8
8
9
10
10
12
14
17
17
17
17
18
20
22
22
24
25
26
28
28
30
31
32
33
33
34
35
35
36
36
36
36
38
38
40
40
40
41
Guide Contents
Guide Contents
Overview
Pinouts
Power
Display
Buttons and Joystick
Sound
STEMMA QT Connector
Digital/Analog Connectors
DotStar LEDs
Fan
Required Parts
Raspberry Pi Computer
For Vision projects
For Audio Projects
Raspberry Pi Setup
Step 1 - Burn SD Card
Step 2 - Configure log-in access
Step 3 - Log in & Enable Internet
Step 4 - Update/Upgrade
Blinka Setup
Audio Setup
Install Voicecard software
Headphone/Speaker Test
Microphone Test
Fan Service Setup
Display Module Install
Installing The 1.54" Kernel Module
Kernel Module Troubleshooting
BrainCraft Audio Driver Reinstall
Camera Test
Python Usage
Joystick and Button
DotStar LEDs
GPIO JST connectors
Parts
Wiring
Code
Stemma QT
Parts
Wiring
Code
Downloads
Files
Schematic
Fab Print
© Adafruit Industries https://learn.adafruit.com/adafruit-braincraft-hat-easy-machine-learning-for-raspberry-pi Page 2 of 42
Page 3
Overview
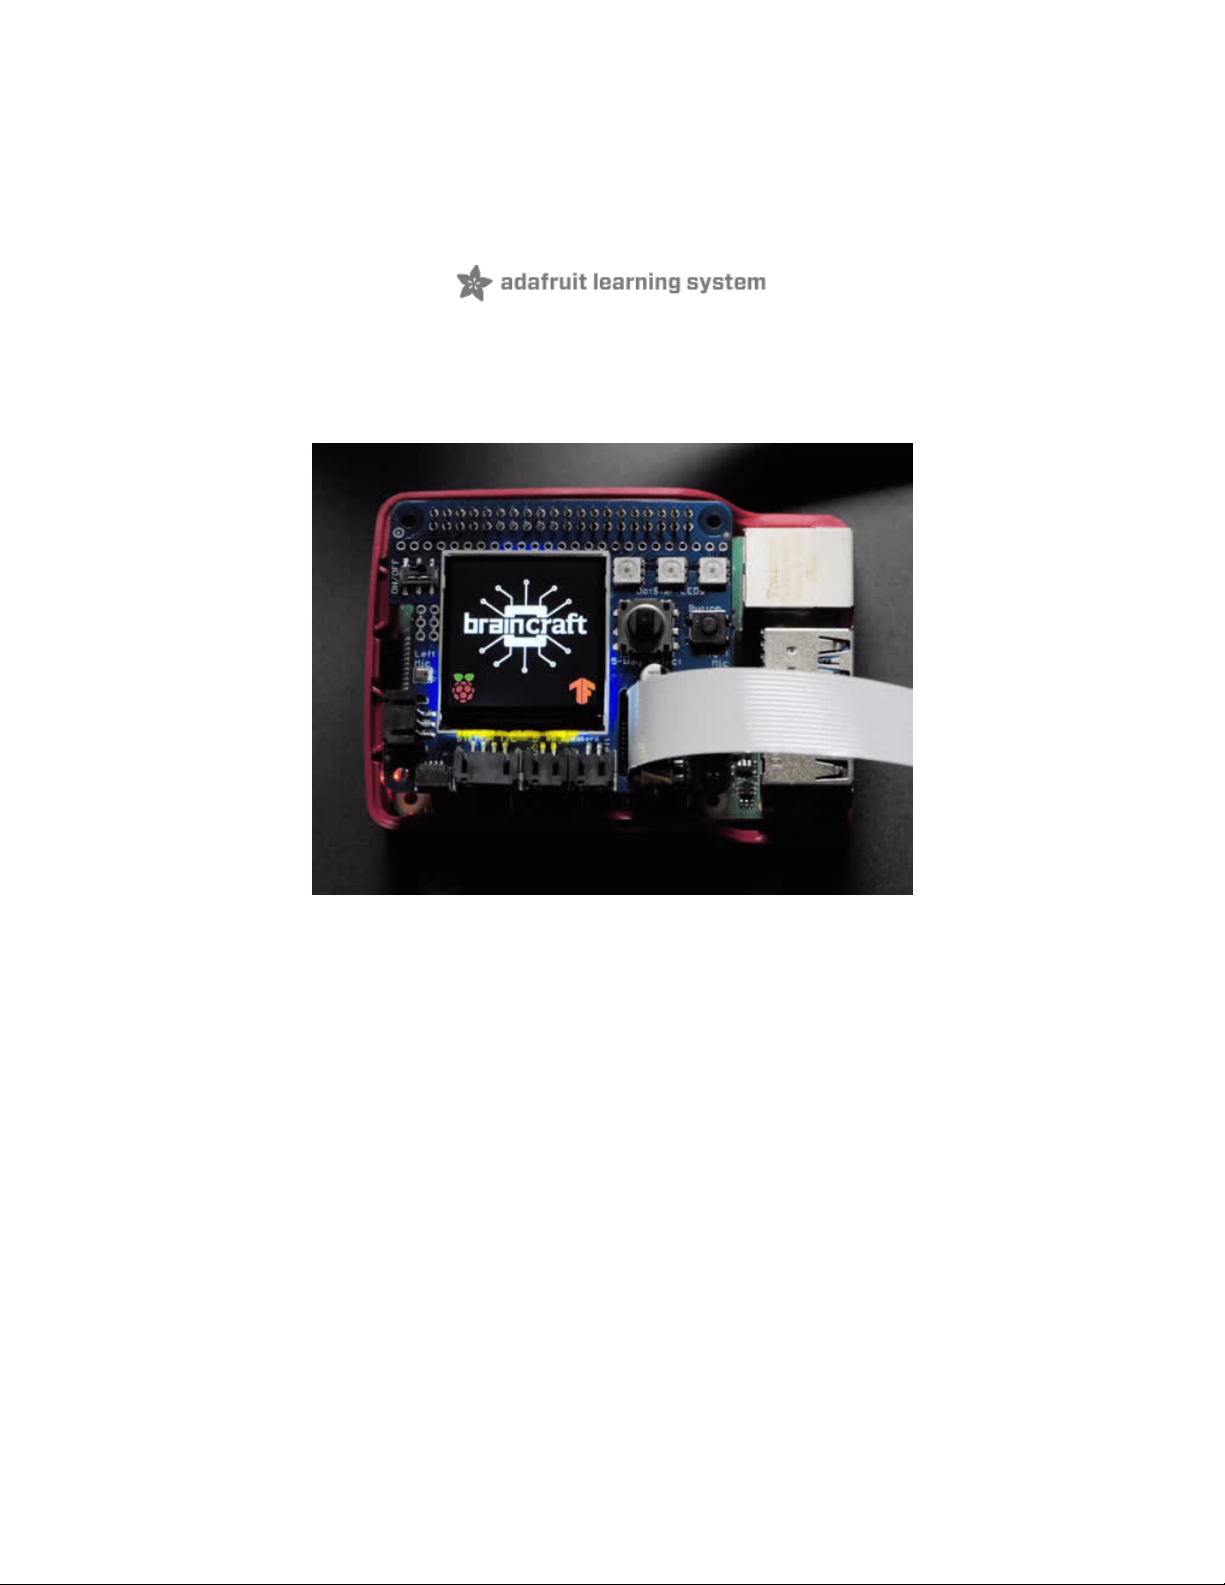
The idea behind the Adafruit BrainCraft HAT is that you’d be able to “craft brains” for Machine Learning
on the EDGE, with Microcontrollers & Microcomputers. On ASK AN ENGINEER, our founder & engineer
chatted with Pete Warden, the technical lead of the mobile, embedded TensorFlow Group on Google’s
Brain team about what would be ideal for a board like this.
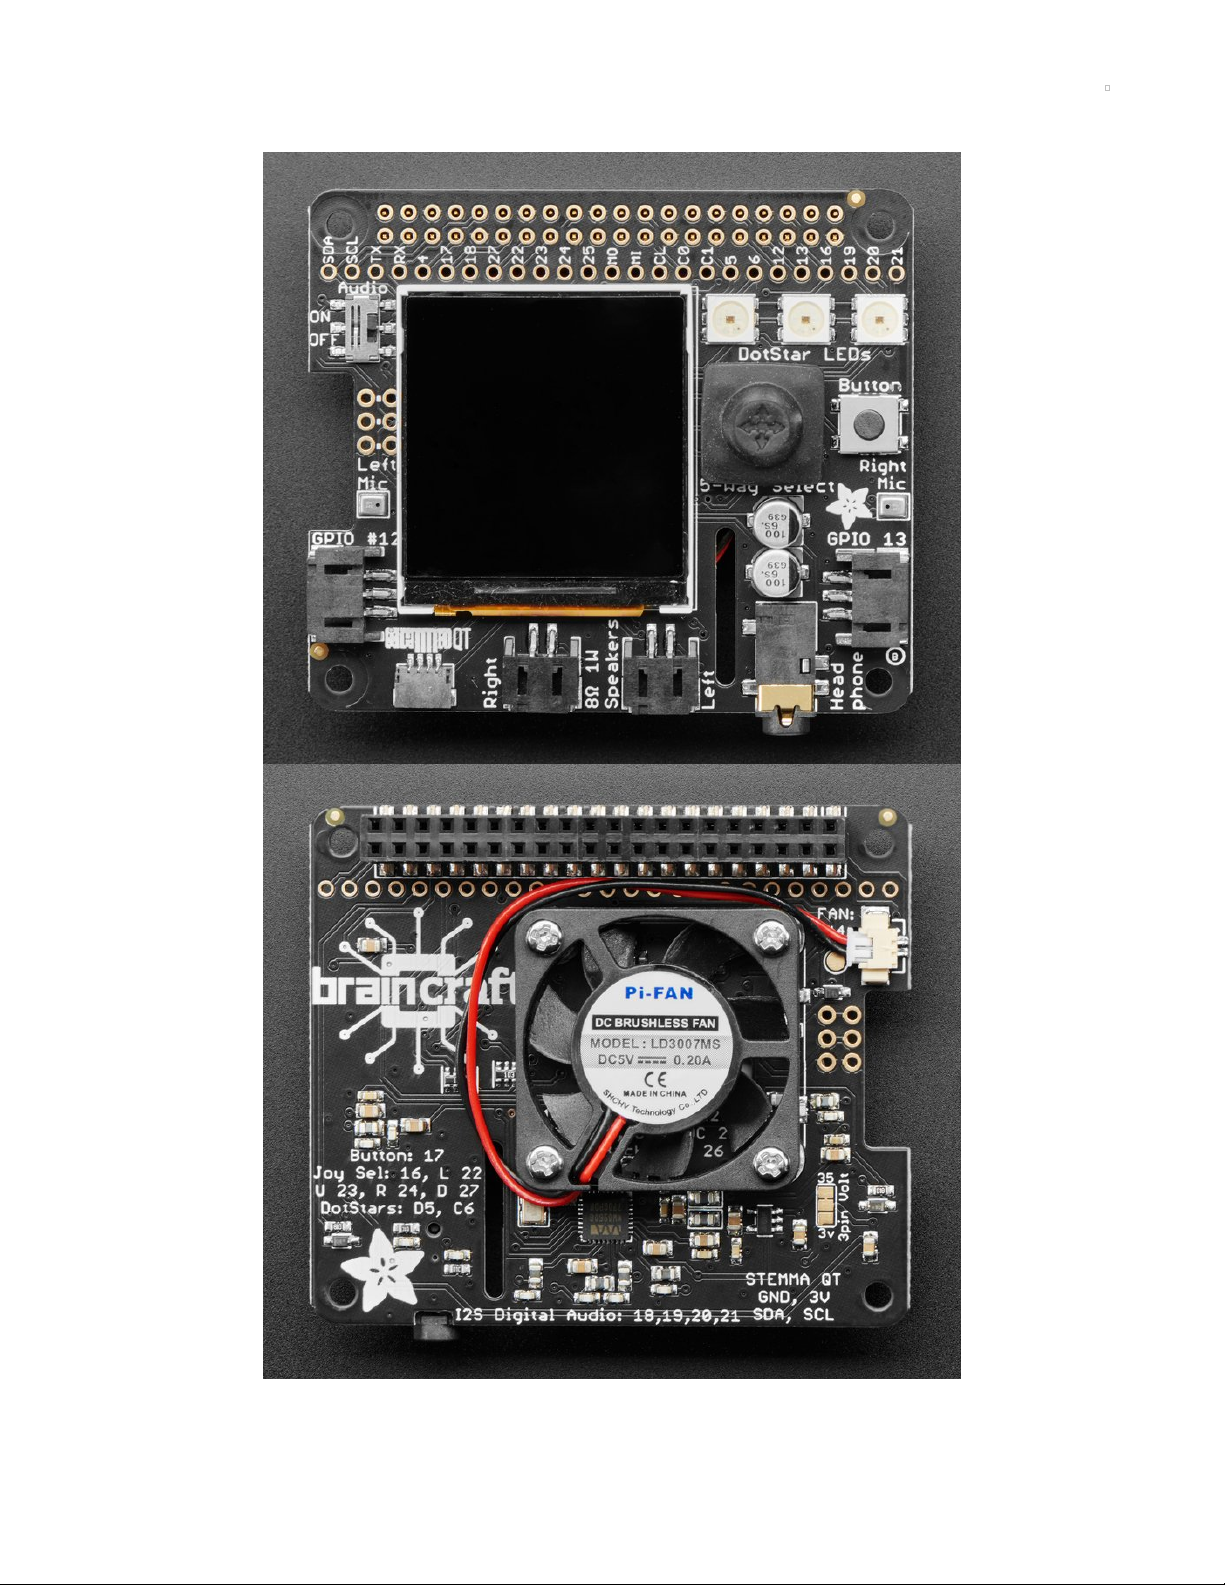
And here’s what we designed! The BrainCraft HAT has a 240×240 TFT IPS display for inference output,
slots for a camera connector cable for imaging projects, a 5 way joystick and button for UI input, left and
right microphones, stereo headphone out, a stereo 1 Watt speaker out, three RGB DotStar LEDs, two 3 pin
© Adafruit Industries https://learn.adafruit.com/adafruit-braincraft-hat-easy-machine-learning-for-raspberry-pi Page 3 of 42
Page 4
STEMMA connectors on PWM pins so they can drive NeoPixels or servos, and Grove/STEMMA/Qwiic I2C
port. This will let people build a wide range of audio/video AI projects while also allowing easy plug-in of
sensors and robotics!
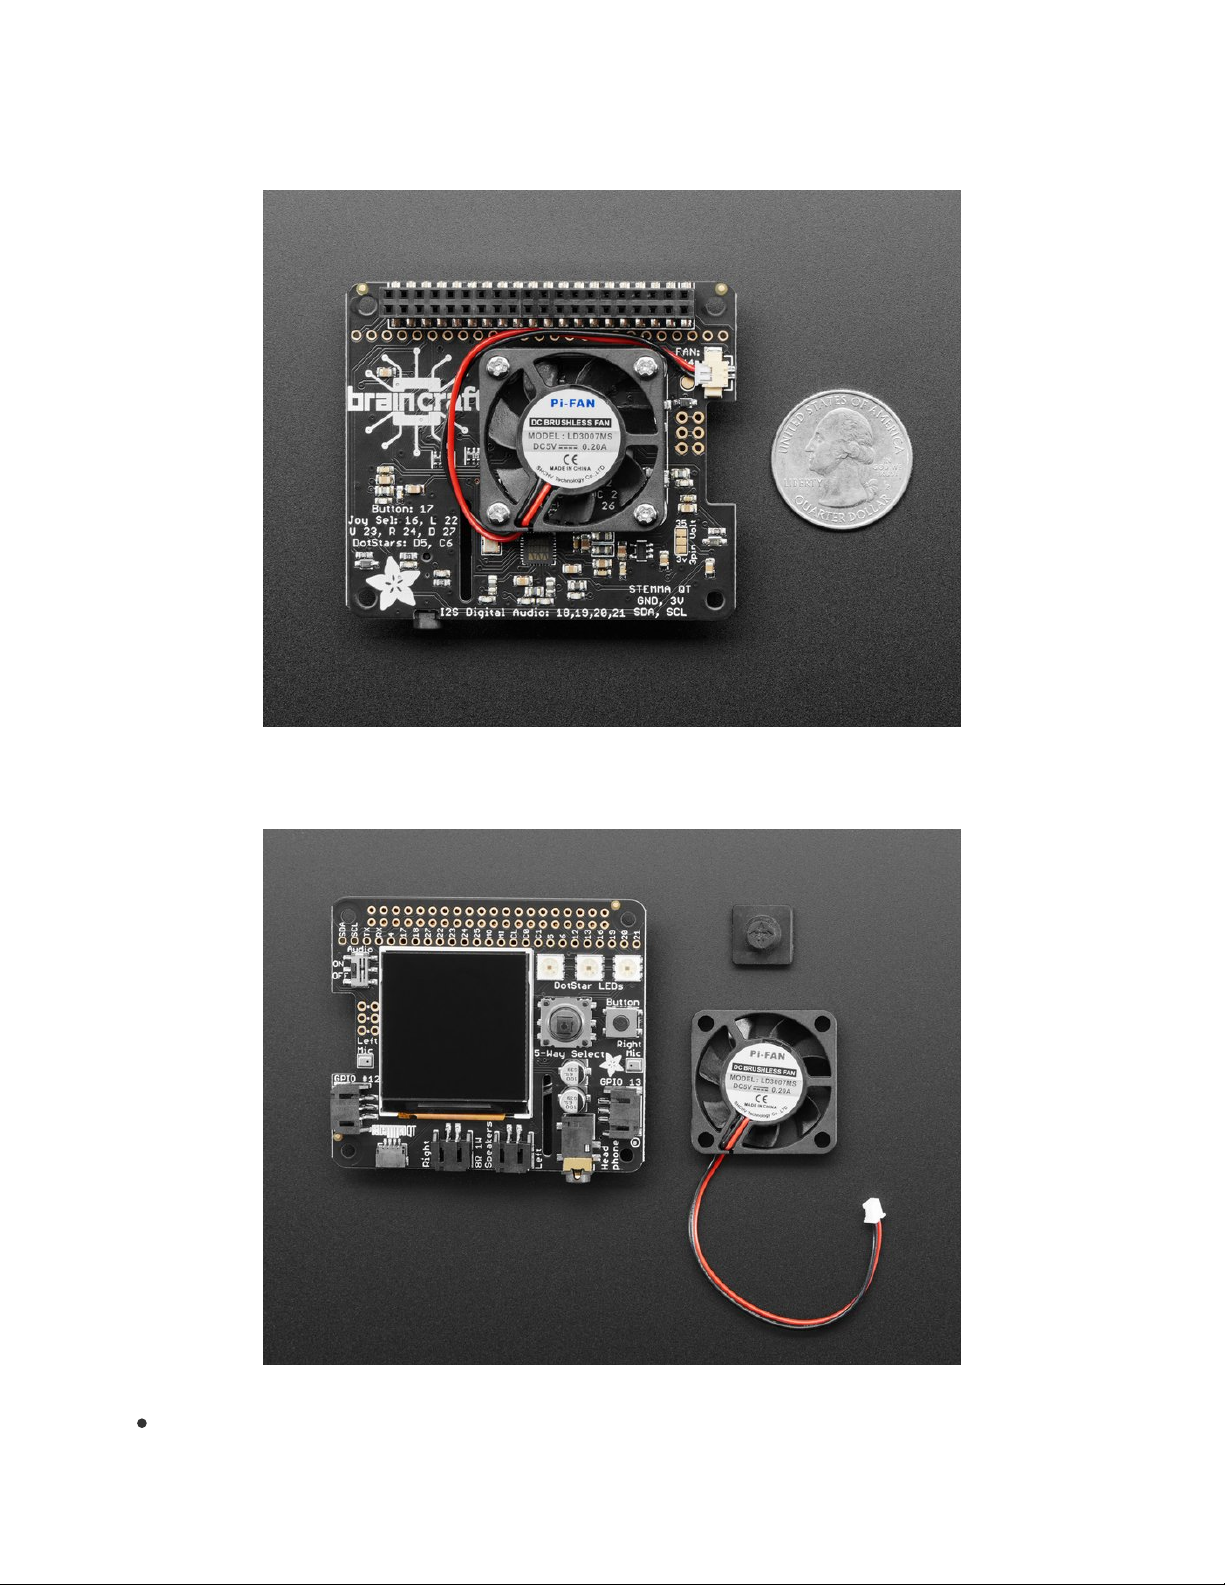
A controllable mini fan attaches to the bottom, and can be used to keep your Pi cool while doing intense AI
inference calculations. Most importantly, there’s an On/Off switch that will completely disable the audio
codec, so that when it's off, there’s no way it's listening to you.
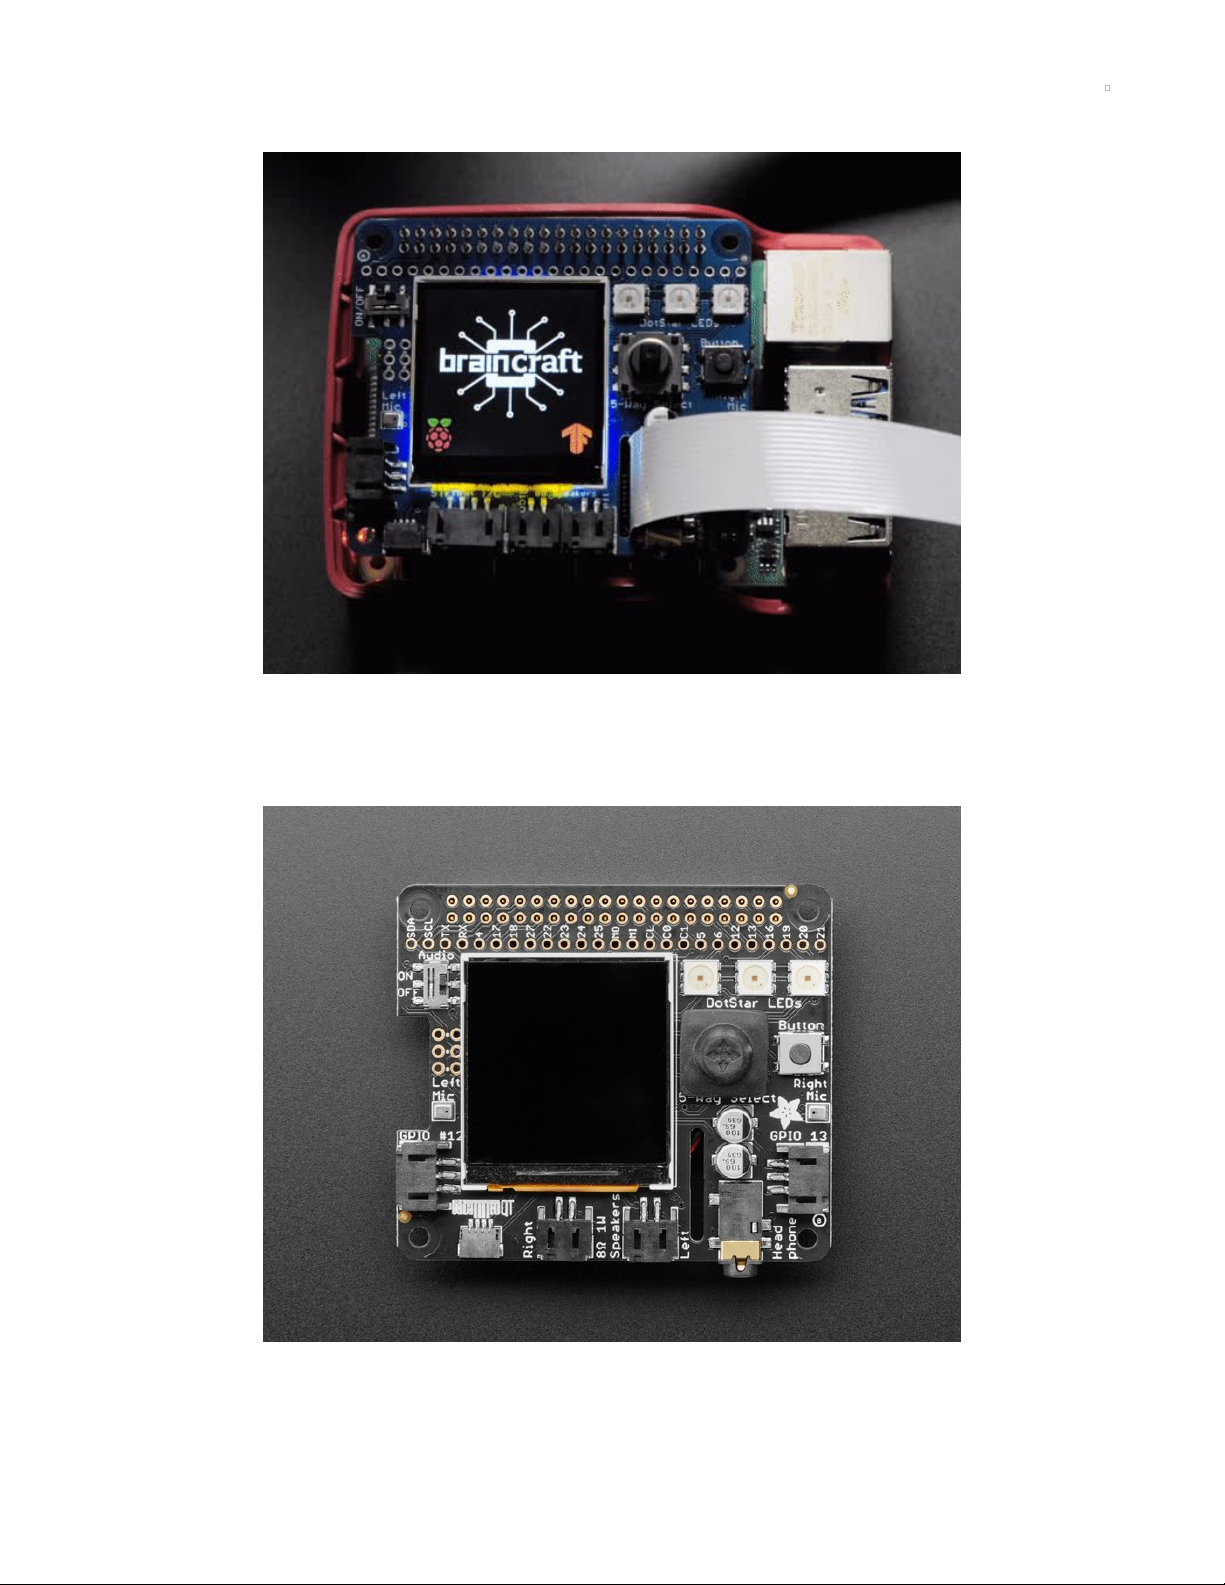
Features:
1.54" IPS TFT display with 240x240 resolution that can show text or video
© Adafruit Industries https://learn.adafruit.com/adafruit-braincraft-hat-easy-machine-learning-for-raspberry-pi Page 4 of 42
Page 5
Stereo speaker ports for audio playback - either text-to-speech, alerts or for creating a voice
assistant.
Stereo headphone out for audio playback through a stereo system, headphones, or powered
speakers.
Stereo microphone input - perfect for making your very own smart home assistants
Two 3-pin JST STEMMA connectors that can be used to connect more buttons (https://adafru.it/ICw),
a relay (https://adafru.it/NmC), or even some NeoPixels! (https://adafru.it/Cup)
STEMMA QT plug-and-play I2C por t (https://adafru.it/Ft4), can be used with any of our 50+ I2C
STEMMA QT boards (https://adafru.it/NmD), or can be used to connect to Grove I2C devices with an
adapter cable (https://adafru.it/Ndk).
5-Way Joystick + Button for user interface and control.
Three RGB DotStar LEDs for colorful LED feedback.
The STEMMA QT port means you can attach heat image sensors like the Panasonic Grid-
EYE (https://adafru.it/y8d) or MLX90640 (https://adafru.it/NmE). Heat-Sensitive cameras can be used as a
person detector, even in the dark! An external accelerometer can be attached for gesture or vibration
sensing such as machinery/industrial predictive maintenance projects
© Adafruit Industries https://learn.adafruit.com/adafruit-braincraft-hat-easy-machine-learning-for-raspberry-pi Page 5 of 42
Page 6
Pinouts
© Adafruit Industries https://learn.adafruit.com/adafruit-braincraft-hat-easy-machine-learning-for-raspberry-pi Page 6 of 42
Page 7
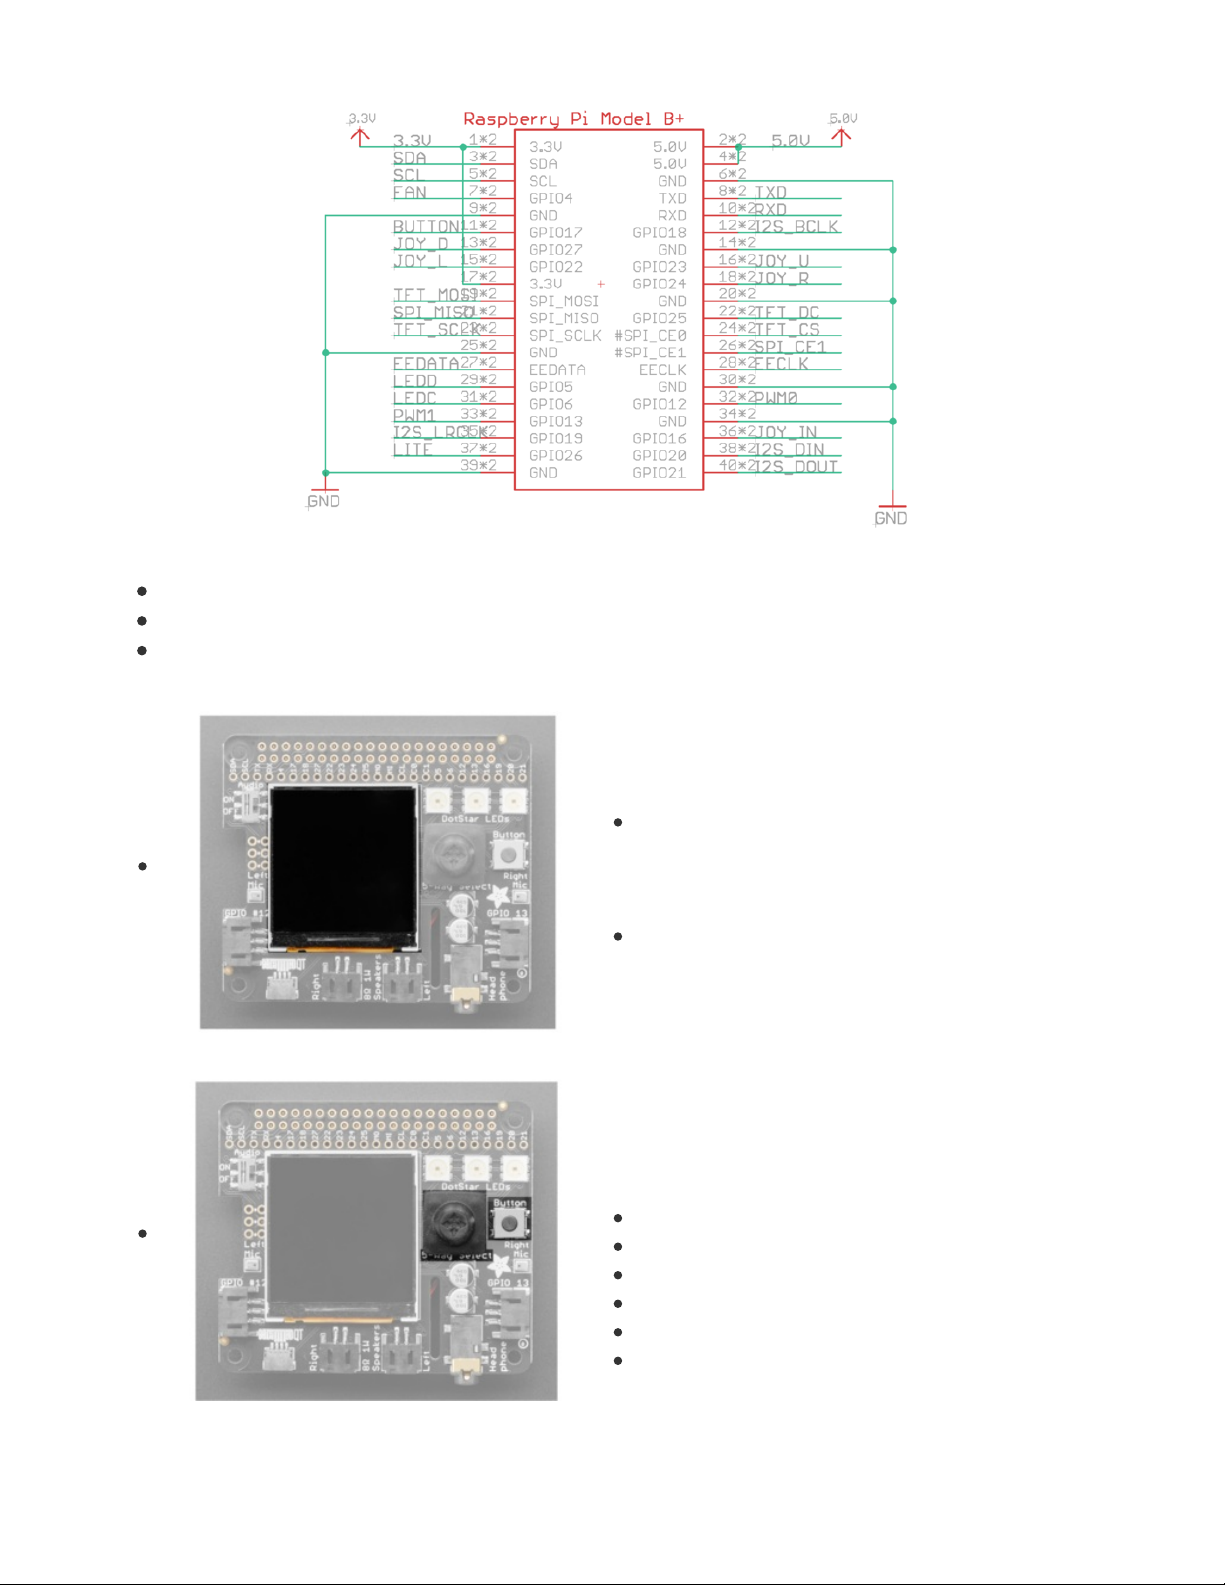
Power
5.0V - Connected to the display backlight
3.3V - Connected to the display power and also the STEMMA QT / Qwiic connector
GND - Ground for everything
Display
The display is a 1.54" wide-angle TFT LCD.
MOSI, SCK, GPIO #25, CE0 - These are the display
control pins. Note that MISO is not connected, even
though it is an SPI pin, because you cannot read back
from the display.
GPIO #26 - This is the display backlight pin. Used to turn
on and off the backlight.
Buttons and Joystick
These pins have a 10K pullup to 3.3V so when the button is
pressed or the joystick is moved/pressed, you will read a LOW
voltage on these pins.
GPIO#17 - Button
GPIO #16 - Joystick select
GPIO #22 - Joystick left
GPIO #23 - Joystick up
GPIO #24 - Joystick right
GPIO #27 - Joystick down
© Adafruit Industries https://learn.adafruit.com/adafruit-braincraft-hat-easy-machine-learning-for-raspberry-pi Page 7 of 42
Page 8
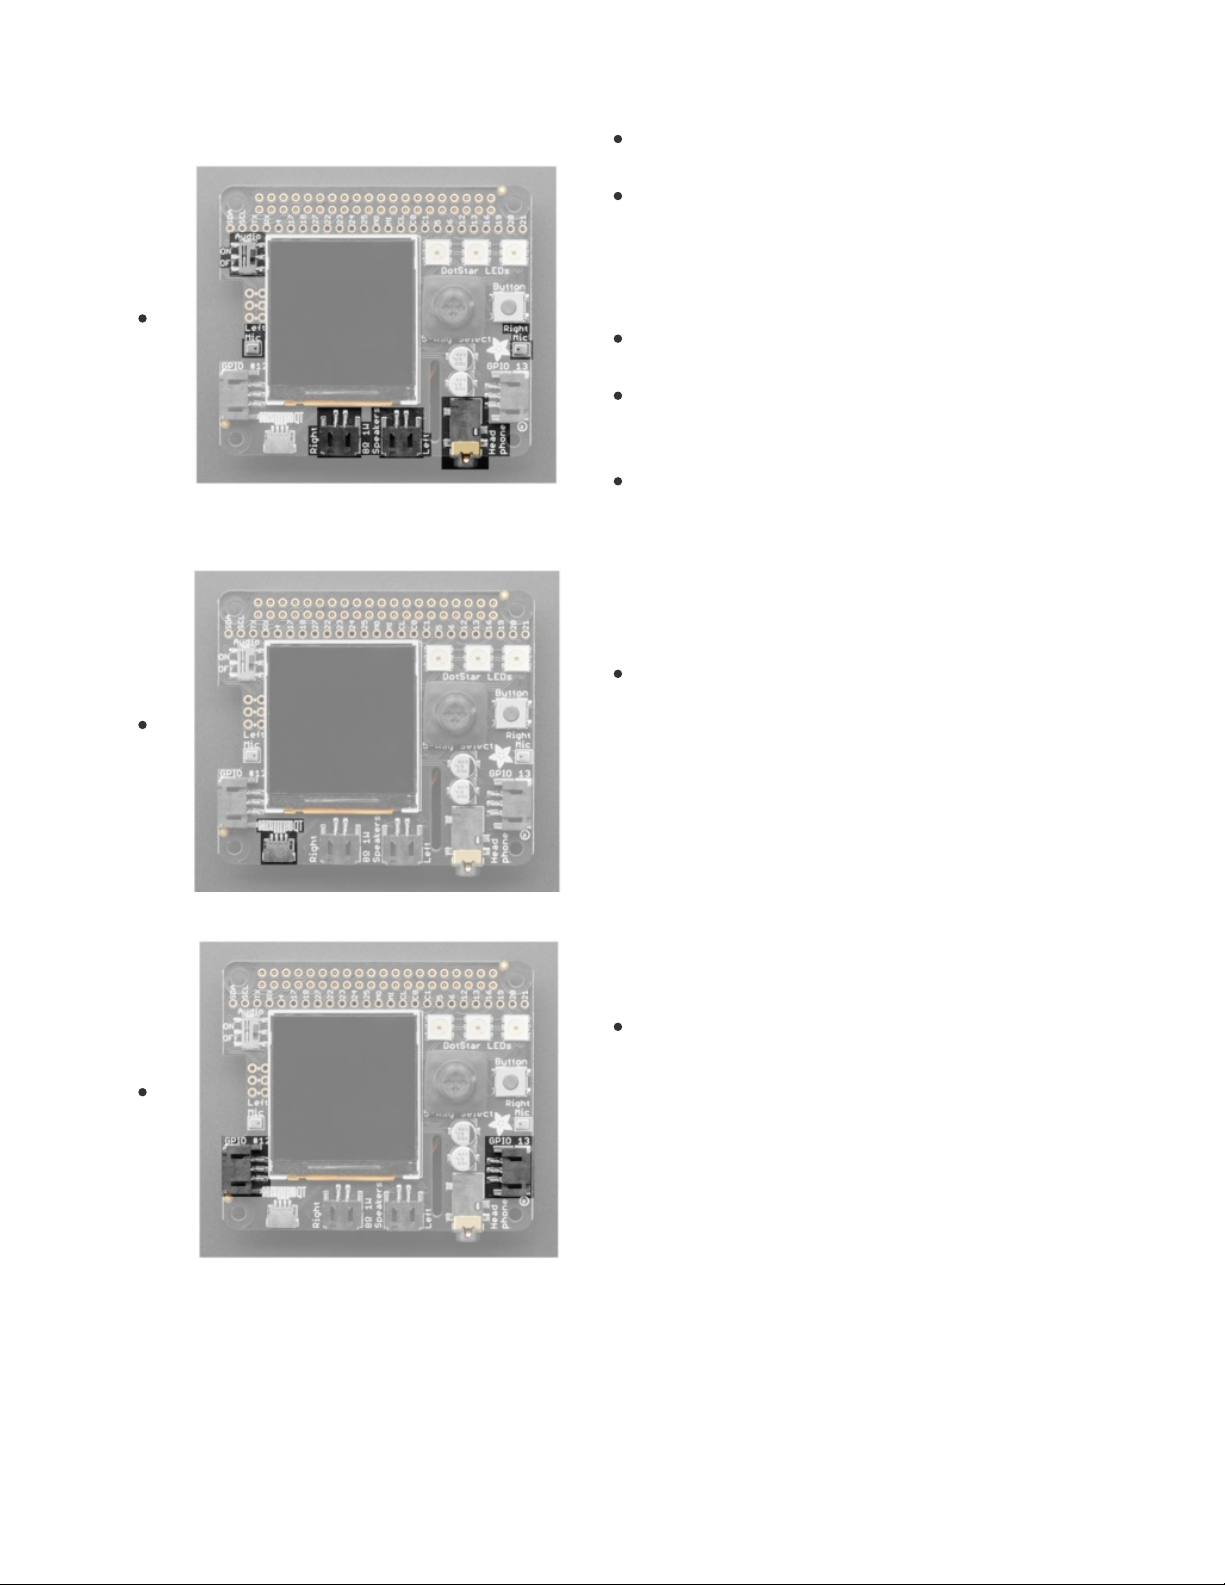
Sound
GPIO #18, GPIO#19, GPIO #20, GPIO #21 - I2S Digital
Audio.
Speakers - The two speaker connectors are located on
the bottom in the middle, labeled Right and Left. Plug in
an enclosed speaker (https://adafru.it/uyB) or use a JST
2PH cable to attach custom
speakers (https://adafru.it/drM).
Microphones - The two mics are in the middle of each
side, labeled Left Mic and Right Mic.
Headphones - A headphone jack is located on the
bottom right. Use any headphones or Line-Out to
another audio system.
On/Off Switch - Located on the left, towards the top,
switches audio on and off.
STEMMA QT Connector
SCL, SDA - I2C data for the STEMMA QT / Qwiic
connector. Not used by buttons or display. Can also use
with Grove sensors with an adapter
cable (https://adafru.it/Ndk). Great for quickly adding
sensors or accessories with plug-and-play.
Digital/Analog Connectors
GPIO#12 and GPIO #13 - 3-pin JST digital or analog
connectors. Easily connect things like
NeoPixels (https://adafru.it/Cup) or
servos (https://adafru.it/FWq) using this 2mm connector.
You can also use a generic JST cable to connect to a
breadboard. (https://adafru.it/CVg)
DotStar LEDs
© Adafruit Industries https://learn.adafruit.com/adafruit-braincraft-hat-easy-machine-learning-for-raspberry-pi Page 8 of 42
Page 9
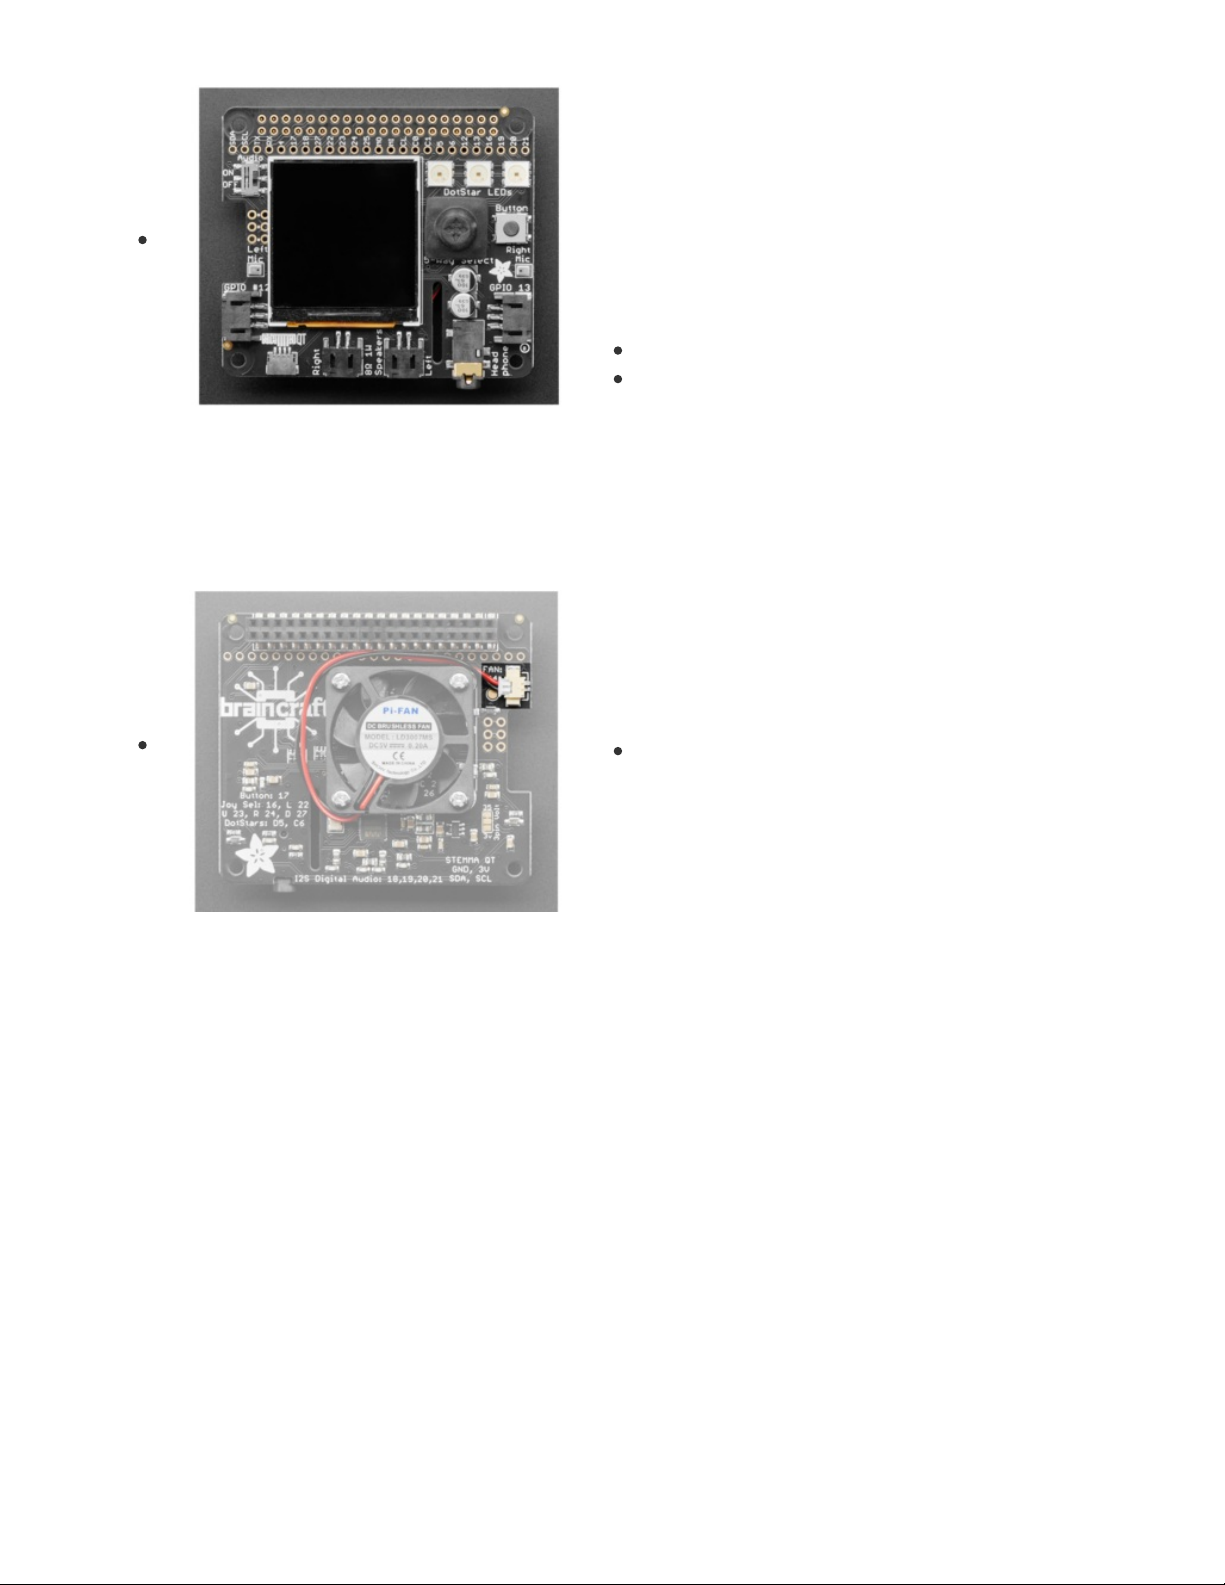
Three fully color RGB addressable LEDs can provide feedback
or a light show. Uses DotStar protocol (not NeoPixel) so any
microcomputer can easily control the lights.
GPIO #5 - DotStar LED data pin.
GPIO #6 - Dotstar LED clock pin.
Fan
GPIO #4 - The fan is on this pin.
© Adafruit Industries https://learn.adafruit.com/adafruit-braincraft-hat-easy-machine-learning-for-raspberry-pi Page 9 of 42
Page 10
Required Parts
Before you start, you'll need some parts to make your BrainCraft HAT run! At a minimum you will need
Raspberry Pi Computer
A working Raspberry Pi (Pi 4+ needed for vision projects, any Pi for audio-only projects)
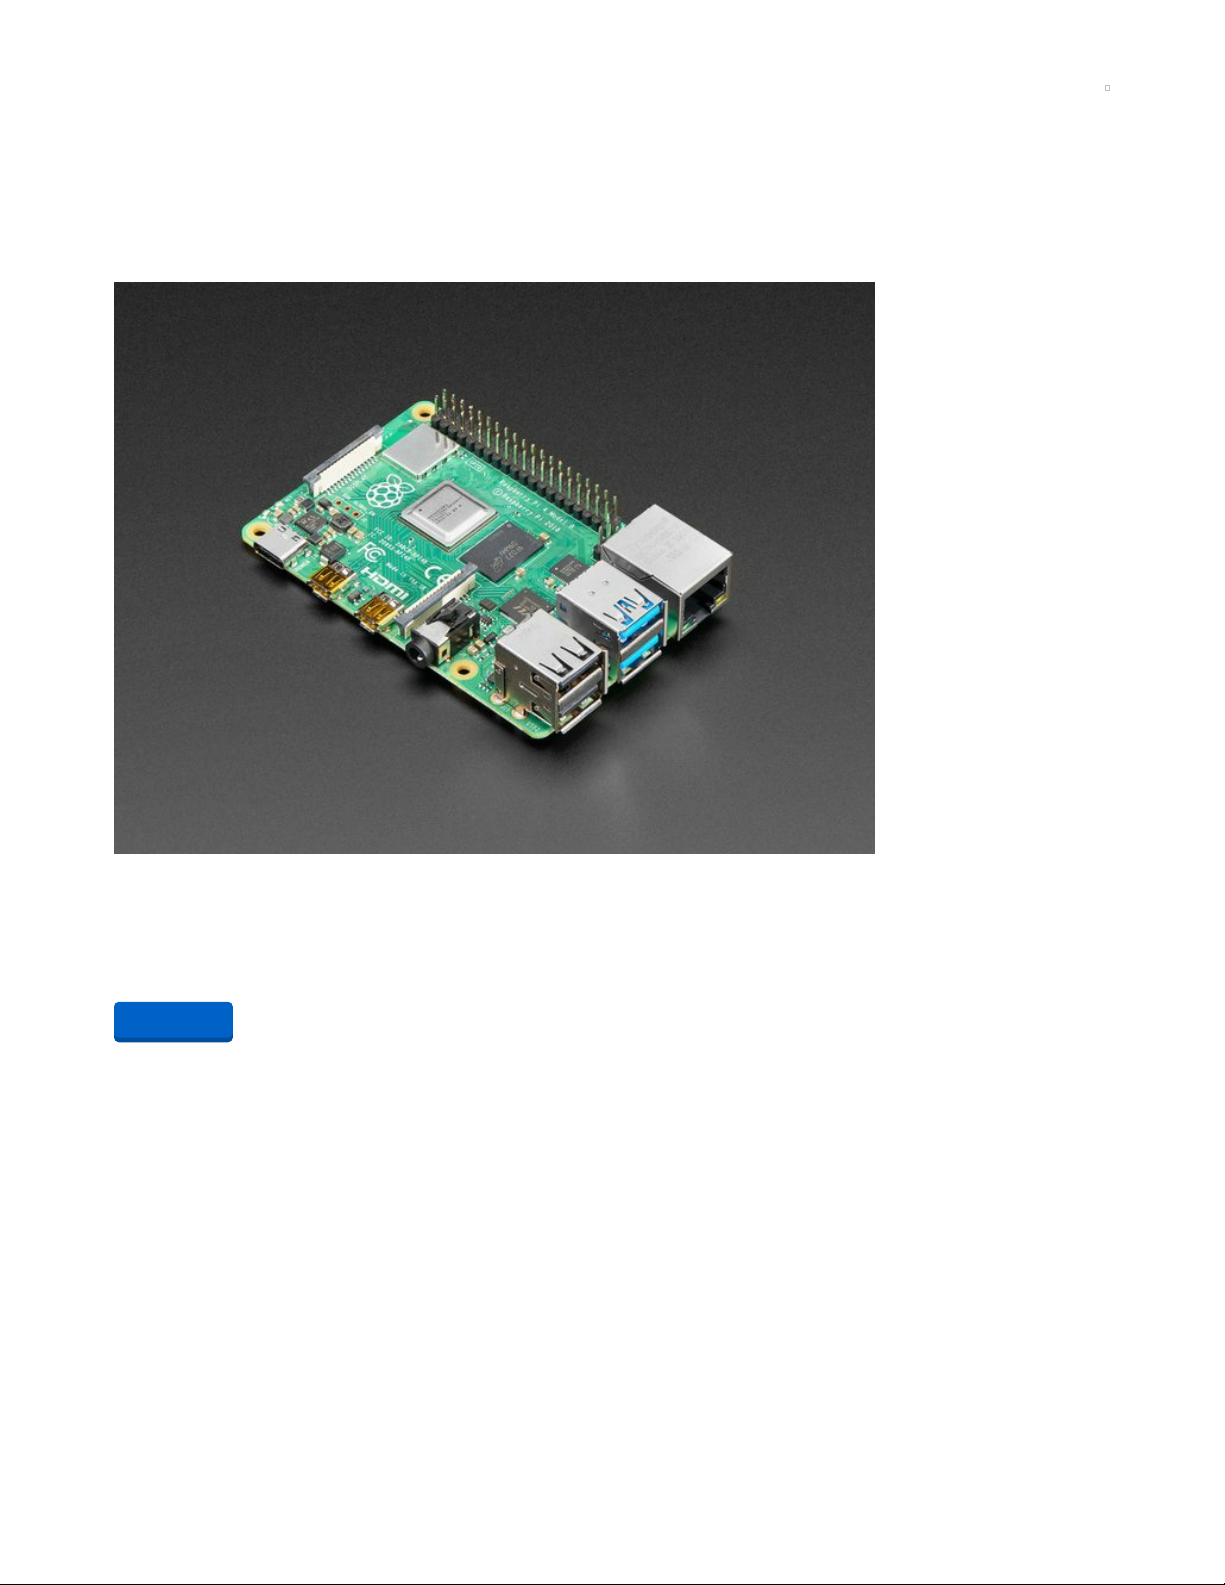
Raspberry Pi 4 Model B - 2 GB RAM
The Raspberry Pi 4 Model B is the newest Raspberry Pi computer made, and the Pi Foundation knows you
can always make a good thing better! And what could make the Pi 4 better...
$35.00
In Stock
Power supply
Add to Cart
© Adafruit Industries https://learn.adafruit.com/adafruit-braincraft-hat-easy-machine-learning-for-raspberry-pi Page 10 of 42
Page 11
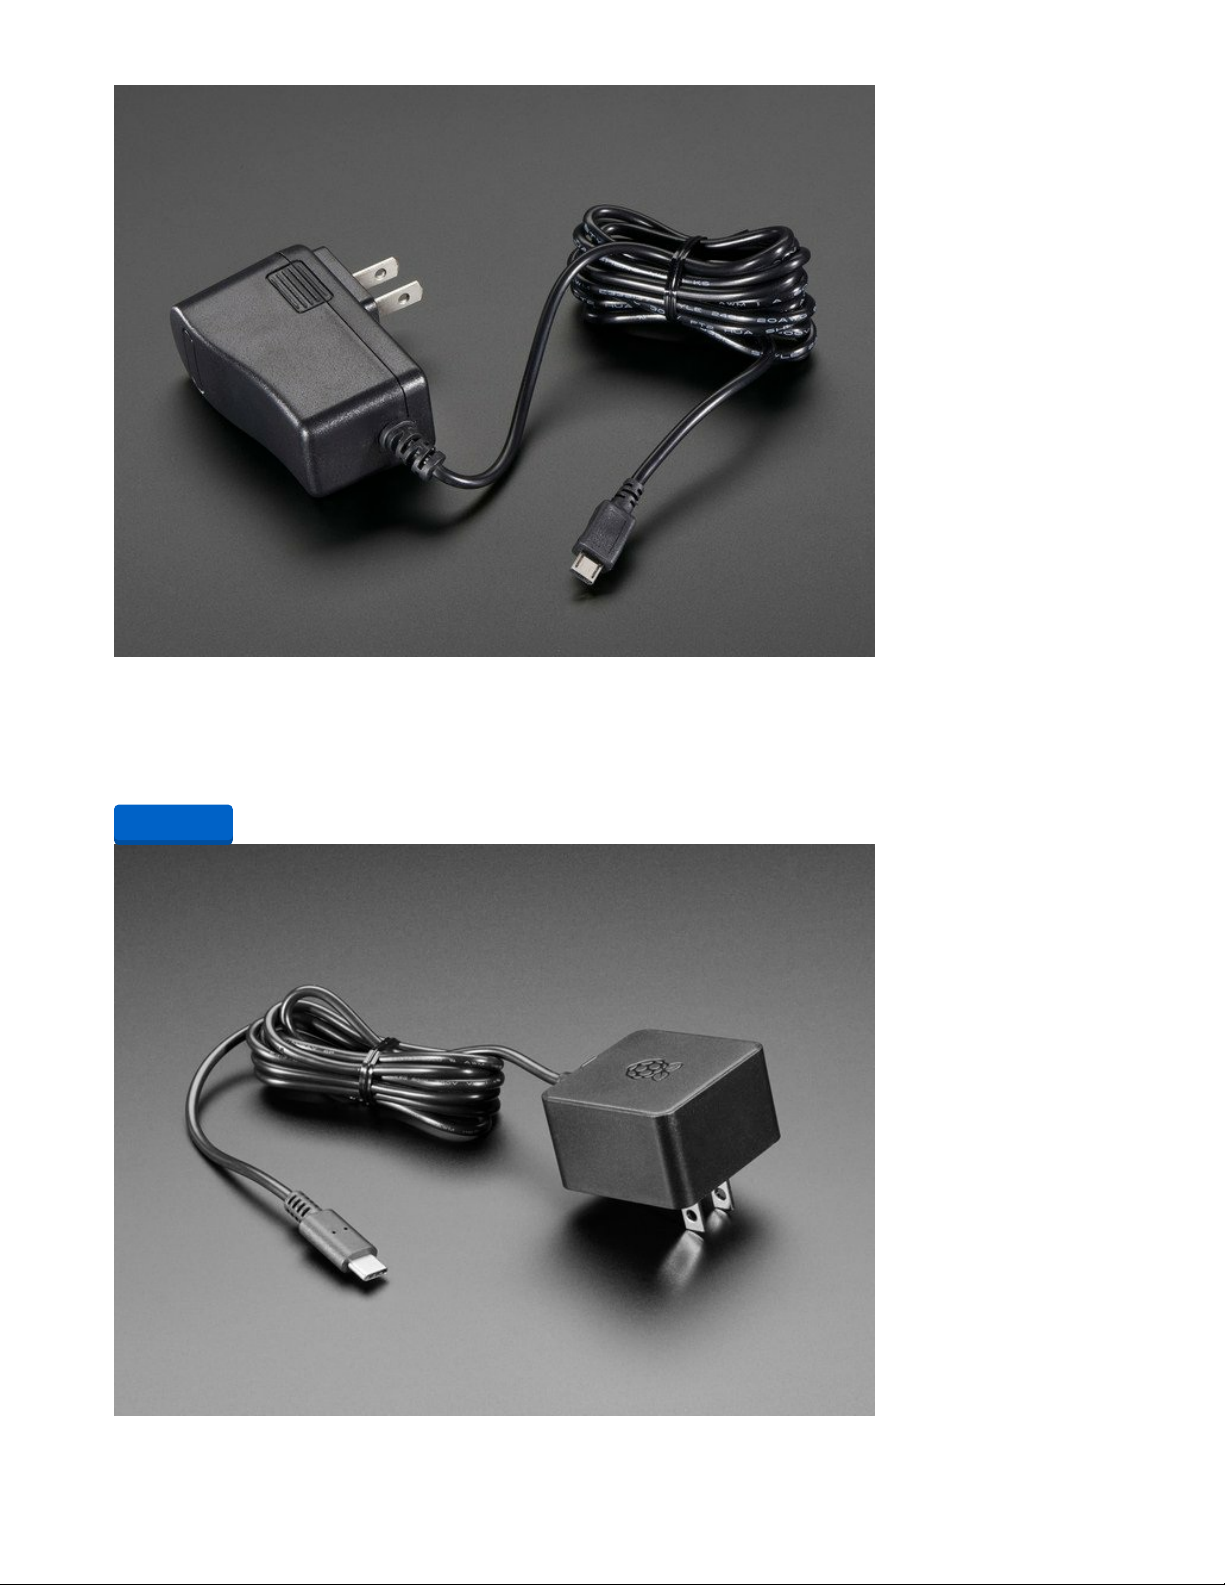
5V 2.5A Switching Power Supply with 20AWG MicroUSB Cable
Our all-in-one 5V 2.5 Amp + MicroUSB cable power adapter is the perfect choice for powering singleboard computers like Raspberry Pi, BeagleBone or anything else that's power...
$7.50
In Stock
Add to Cart
© Adafruit Industries https://learn.adafruit.com/adafruit-braincraft-hat-easy-machine-learning-for-raspberry-pi Page 11 of 42
Page 12
Official Raspberry Pi Power Supply 5.1V 3A with USB C
The official Raspberry Pi USB-C power supply is here! And of course, we have 'em in classic Adafruit black!
Super fast with just the right amount of cable length to get your Pi 4...
$7.95
In Stock
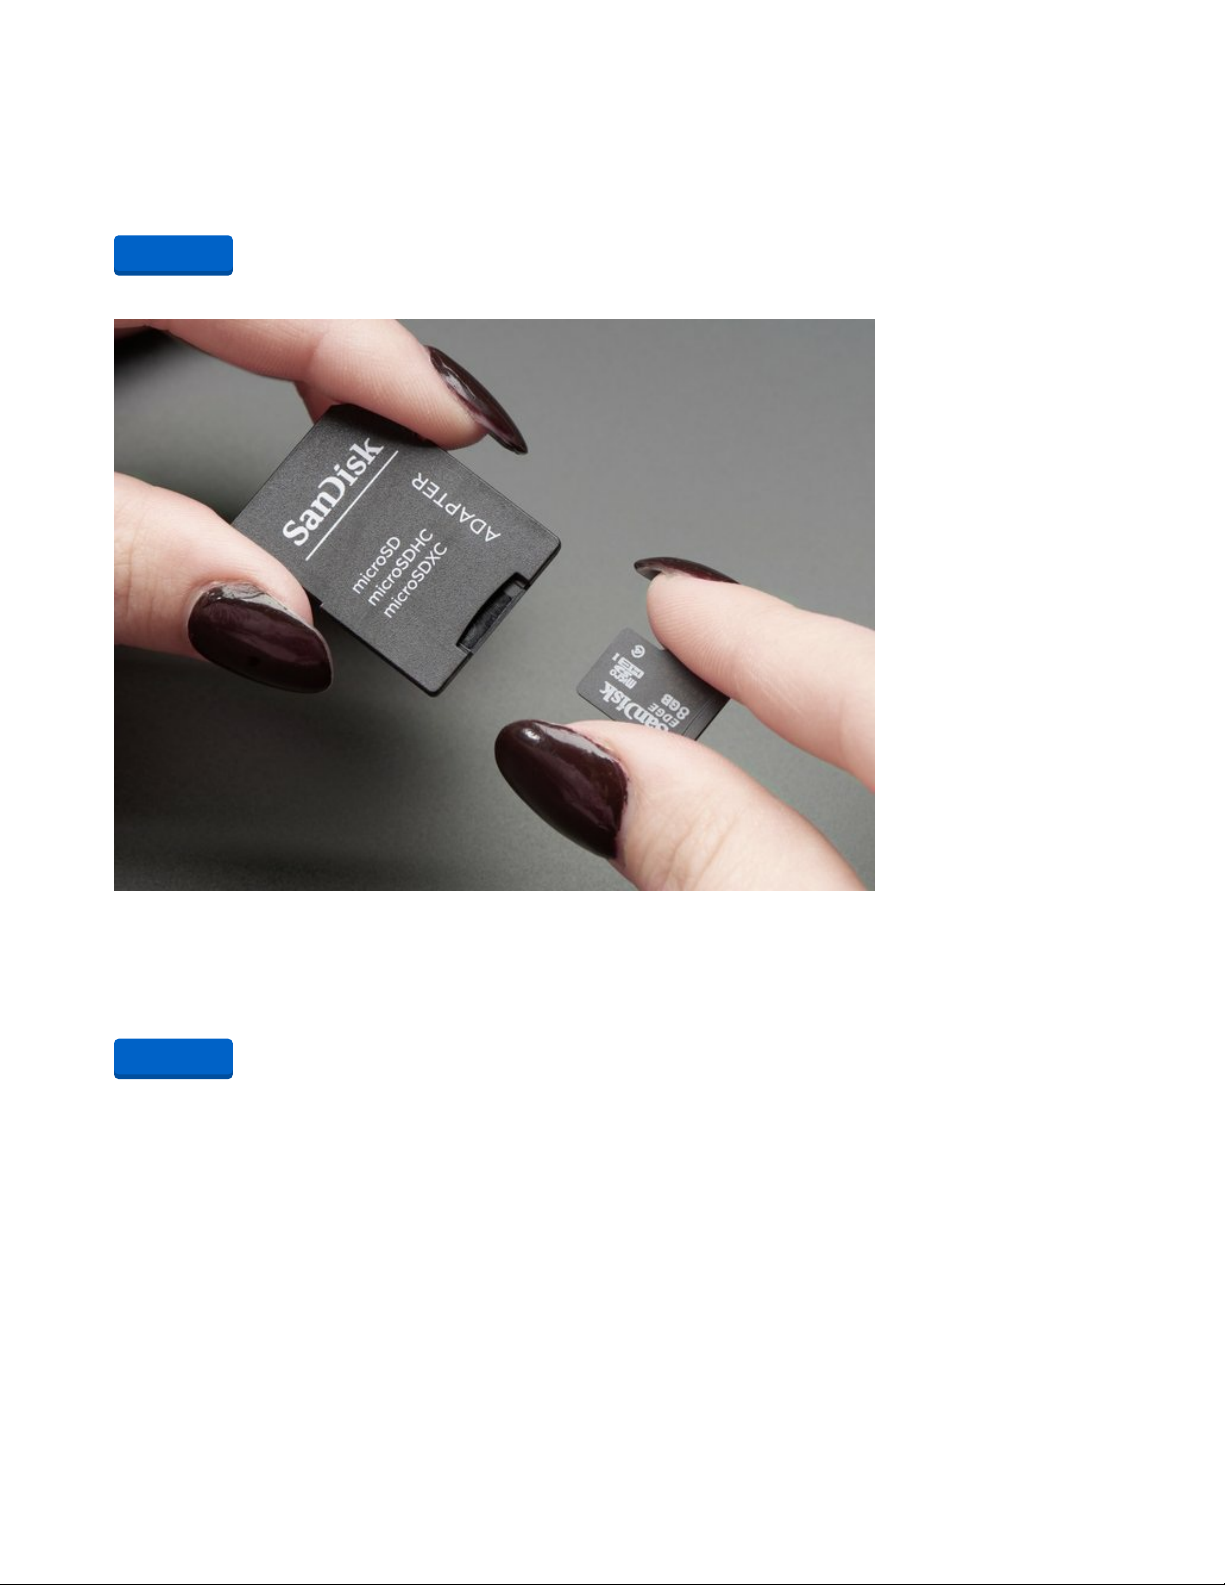
And an SD card. It can be blank or come with software on it.
SD/MicroSD Memory Card (8 GB SDHC)
Add mega-storage in a jiffy using this 8 GB class 4 micro-SD card. It comes with a SD adapter so you can
use it with any of our shields or adapters. Preformatted to FAT so it works out...
$9.95
In Stock
For Vision projects
you'll also want a Raspberry Pi camera, a long cable (optional) and camera case (optional)
Add to Cart
Add to Cart
© Adafruit Industries https://learn.adafruit.com/adafruit-braincraft-hat-easy-machine-learning-for-raspberry-pi Page 12 of 42
Page 13

Raspberry Pi Camera Board v2 - 8 Megapixels
Snap, snap! The Camera v2 is the new official camera board released by the Raspberry Pi Foundation!The
Raspberry Pi Camera Board v2 is a high quality 8...
$29.95
In Stock
Add to Cart
© Adafruit Industries https://learn.adafruit.com/adafruit-braincraft-hat-easy-machine-learning-for-raspberry-pi Page 13 of 42
Page 14

Flex Cable for Raspberry Pi Camera or Display - 1 meter
This cable will let you swap out the stock 150mm long flex cable from a Raspberry Pi Camera (either
'classic' or 'NoIR' type) or Raspberry Pi Display for a different...
$3.95
In Stock
Adafruit Raspberry Pi Camera Board Case with 1/4" Tripod Mount
This is a basic, classic Adafruit Raspberry Pi Camera Board Enclosure with a black base and a clear
top. The case is as minimal as it gets, coming in just...
$2.95
In Stock
For Audio Projects
You'll want at least a set of headphones or plug-in speakers!
Add to Cart
Add to Cart
© Adafruit Industries https://learn.adafruit.com/adafruit-braincraft-hat-easy-machine-learning-for-raspberry-pi Page 14 of 42
Page 15
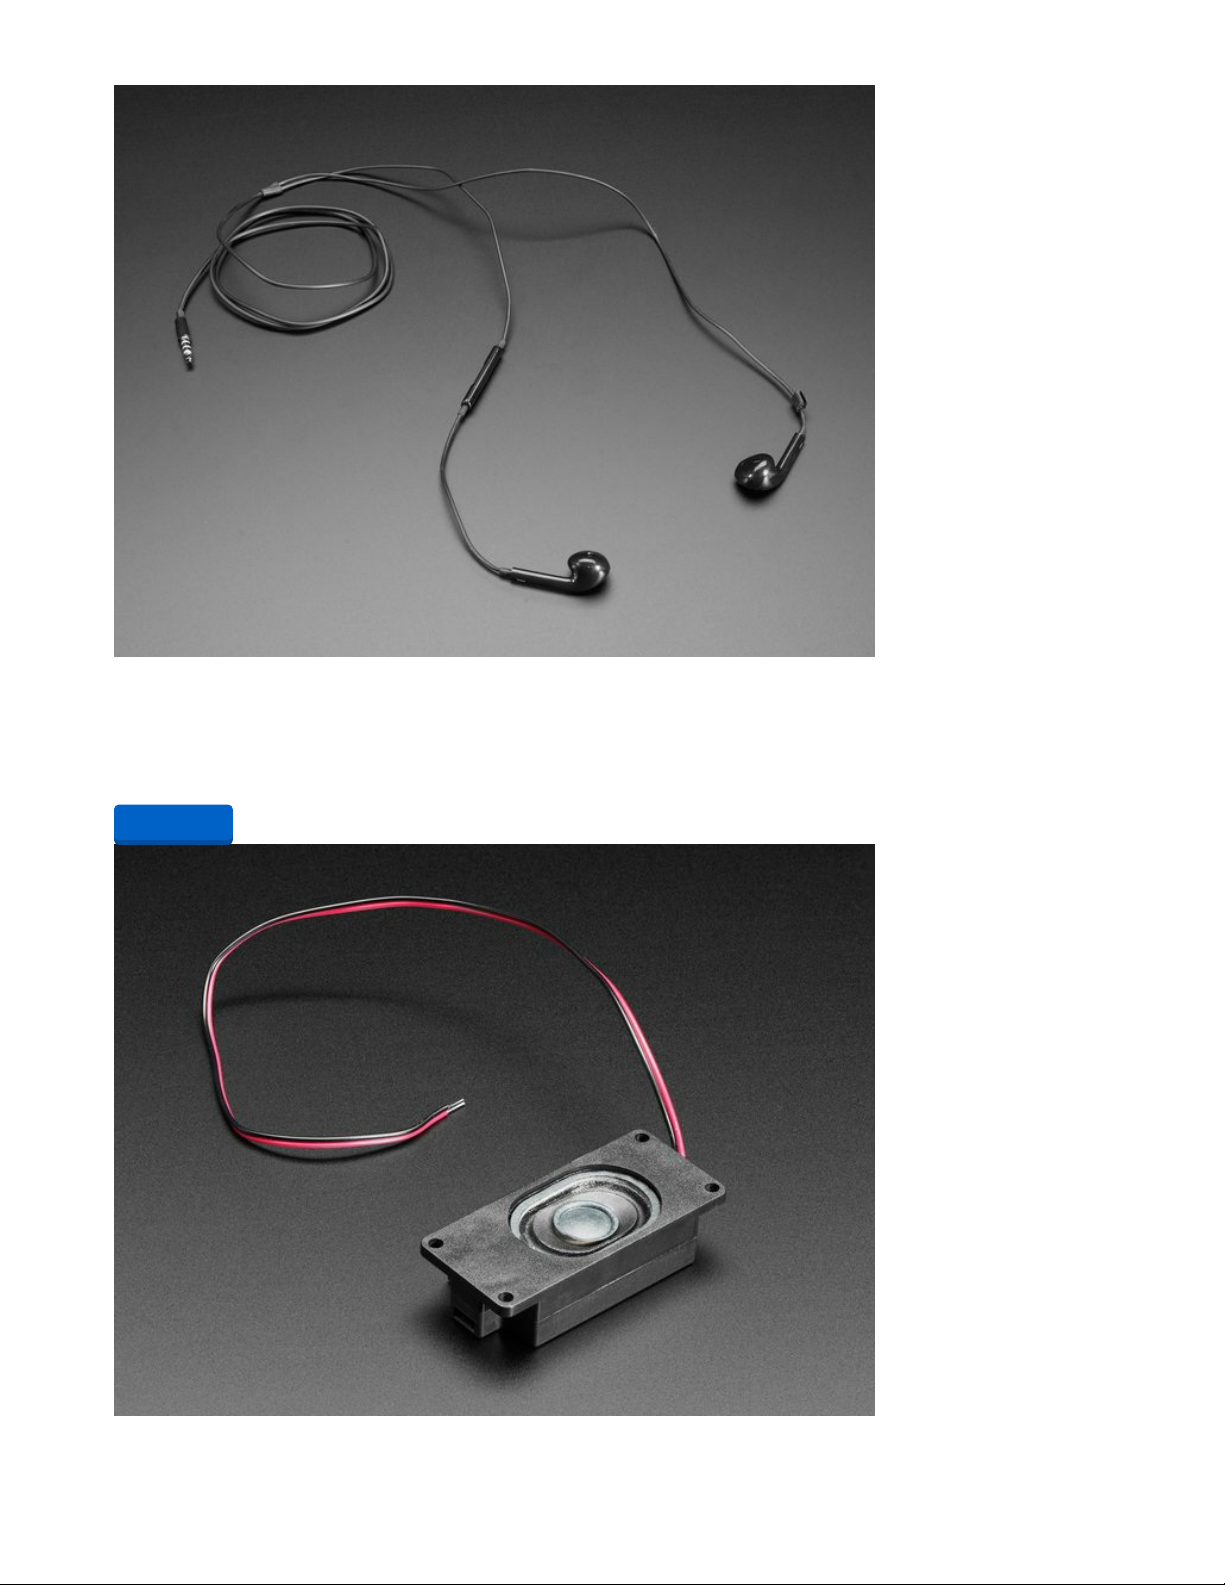
Cell-phone TRRS Headset - Earbud Headphones w/ Microphone
These earbud headphones are the perfect accessory for your FONA - they've been tested to work with our
modules - but can be used with any iOS or Android device that uses a TRRS...
$3.95
In Stock
Add to Cart
© Adafruit Industries https://learn.adafruit.com/adafruit-braincraft-hat-easy-machine-learning-for-raspberry-pi Page 15 of 42
Page 16

Mono Enclosed Speaker with Plain Wires - 3W 4 Ohm
Listen up! This single 2.8" x 1.2" speaker is the perfect addition to any audio project where you need 4
ohm impedance and 3W or less of power. We...
$3.95
In Stock
Add to Cart
© Adafruit Industries https://learn.adafruit.com/adafruit-braincraft-hat-easy-machine-learning-for-raspberry-pi Page 16 of 42
Page 17

Raspberry Pi Setup
OK now you have all your parts in order, it's time to get your Raspberry Pi computer set up with the HAT or
Bonnet.
Step 1 - Burn SD Card
Use Etcher or the Raspberry Pi Imager (https://adafru.it/dDL) to burn the latest Raspbian Lite to an SD card
(you can use full but we won't be using the desktop software and it takes up a bunch of room.
Step 2 - Configure log-in access
You'll need to be able to log into your Pi, either enable SSH access (and use and Ethernet
cable) (https://adafru.it/jvB), use a USB to serial cable, or connect a monitor and keyboard. Basically get it
so you can log in.
We have a quickstart guide here (https://adafru.it/NmF) and here that you can follow (https://adafru.it/DQA),
or there's dozens of online guides. it is assumed by the next step you are able to log in and type
commands in - ideally from a desktop computer, so you can copy and paste in some of the very long
commands!
Step 3 - Log in & Enable Internet
Once you've logged in, enable WiFi (if you have built in WiFi) with sudo raspi-config (https://adafru.it/v7D)
so you can ssh in.
Enable SSH as well if you haven't yet, also via sudo raspi-config
© Adafruit Industries https://learn.adafruit.com/adafruit-braincraft-hat-easy-machine-learning-for-raspberry-pi Page 17 of 42
Page 18

After you're done, reboot, and verify you can log into your Pi and that it has internet access by running ping
-c 3 raspberrypi.org and seeing successful responses.
Step 4 - Update/Upgrade
Now that you are logged in, perform an update/update:
sudo apt update
sudo apt-get update
sudo apt-get -y upgrade
and
sudo apt-get install -y python3-pip
sudo pip3 install --upgrade setuptools
© Adafruit Industries https://learn.adafruit.com/adafruit-braincraft-hat-easy-machine-learning-for-raspberry-pi Page 18 of 42
Page 19

OK you've now got a nice, clean, connected, and up-to-date Pi!
© Adafruit Industries https://learn.adafruit.com/adafruit-braincraft-hat-easy-machine-learning-for-raspberry-pi Page 19 of 42
Page 20

Blinka Setup
Blinka is our CircuitPython library compatibility layer. It allows many of the libraries that were written for
CircuitPython to run on CPython for Linux. To learn more about Blinka, you can check out our
CircuitPython on Linux and Raspberry Pi (https://adafru.it/BSN) guide.
We put together a script to easily make sure your Pi is correctly configured and install Blinka. It requires
just a few commands to run. Most of it is installing the dependencies.
cd ~
sudo pip3 install --upgrade adafruit-python-shell
wget https://raw.githubusercontent.com/adafruit/Raspberry-Pi-Installer-Scripts/master/raspi-blinka.py
sudo python3 raspi-blinka.py
When it asks you if you want to reboot, choose yes.
Finally, once it reboots, there are just a couple CircuitPython libraries to install for the BrainCraft HAT or
Voice Bonnet.
The DotStar library is for controlling the 3 on-board DotStar LEDs and the Motor library is for testing out the
GPIO pins.
pip3 install --upgrade adafruit-circuitpython-dotstar adafruit-circuitpython-motor adafruit-circuitpython-bmp280
© Adafruit Industries https://learn.adafruit.com/adafruit-braincraft-hat-easy-machine-learning-for-raspberry-pi Page 20 of 42
Page 21

That's it for Blinka and CircuitPython libraries.
© Adafruit Industries https://learn.adafruit.com/adafruit-braincraft-hat-easy-machine-learning-for-raspberry-pi Page 21 of 42
Page 22

Audio Setup
Start by making sure you've installed I2C support, see the previous page (Blinka Setup) on how to do
it!
Install Voicecard software
Make sure you've got the BrainCraft HAT or Voice Bonnet installed, and I2C support installed as well!
When you run sudo i2cdetect -y 1
you should see an entry under 1A, indicating the hardware sees the audio card. The number may also
appear as UU if you already installed software
At the command line run:
cd ~
sudo apt-get install -y git
git clone https://github.com/HinTak/seeed-voicecard (https://adafru.it/Nna)
cd seeed-voicecard
Depending on your kernel version, you may need to change your branch. You can check your kernel
version by typing uname -r .
If your kernel version is around 5.4, use the following:
git checkout v5.5
sudo ./install.sh
If your kernel version is 5.10 or higher, use the following:
git checkout v5.9
sudo ./install.sh
At the end you should see something like this:
© Adafruit Industries https://learn.adafruit.com/adafruit-braincraft-hat-easy-machine-learning-for-raspberry-pi Page 22 of 42
Page 23
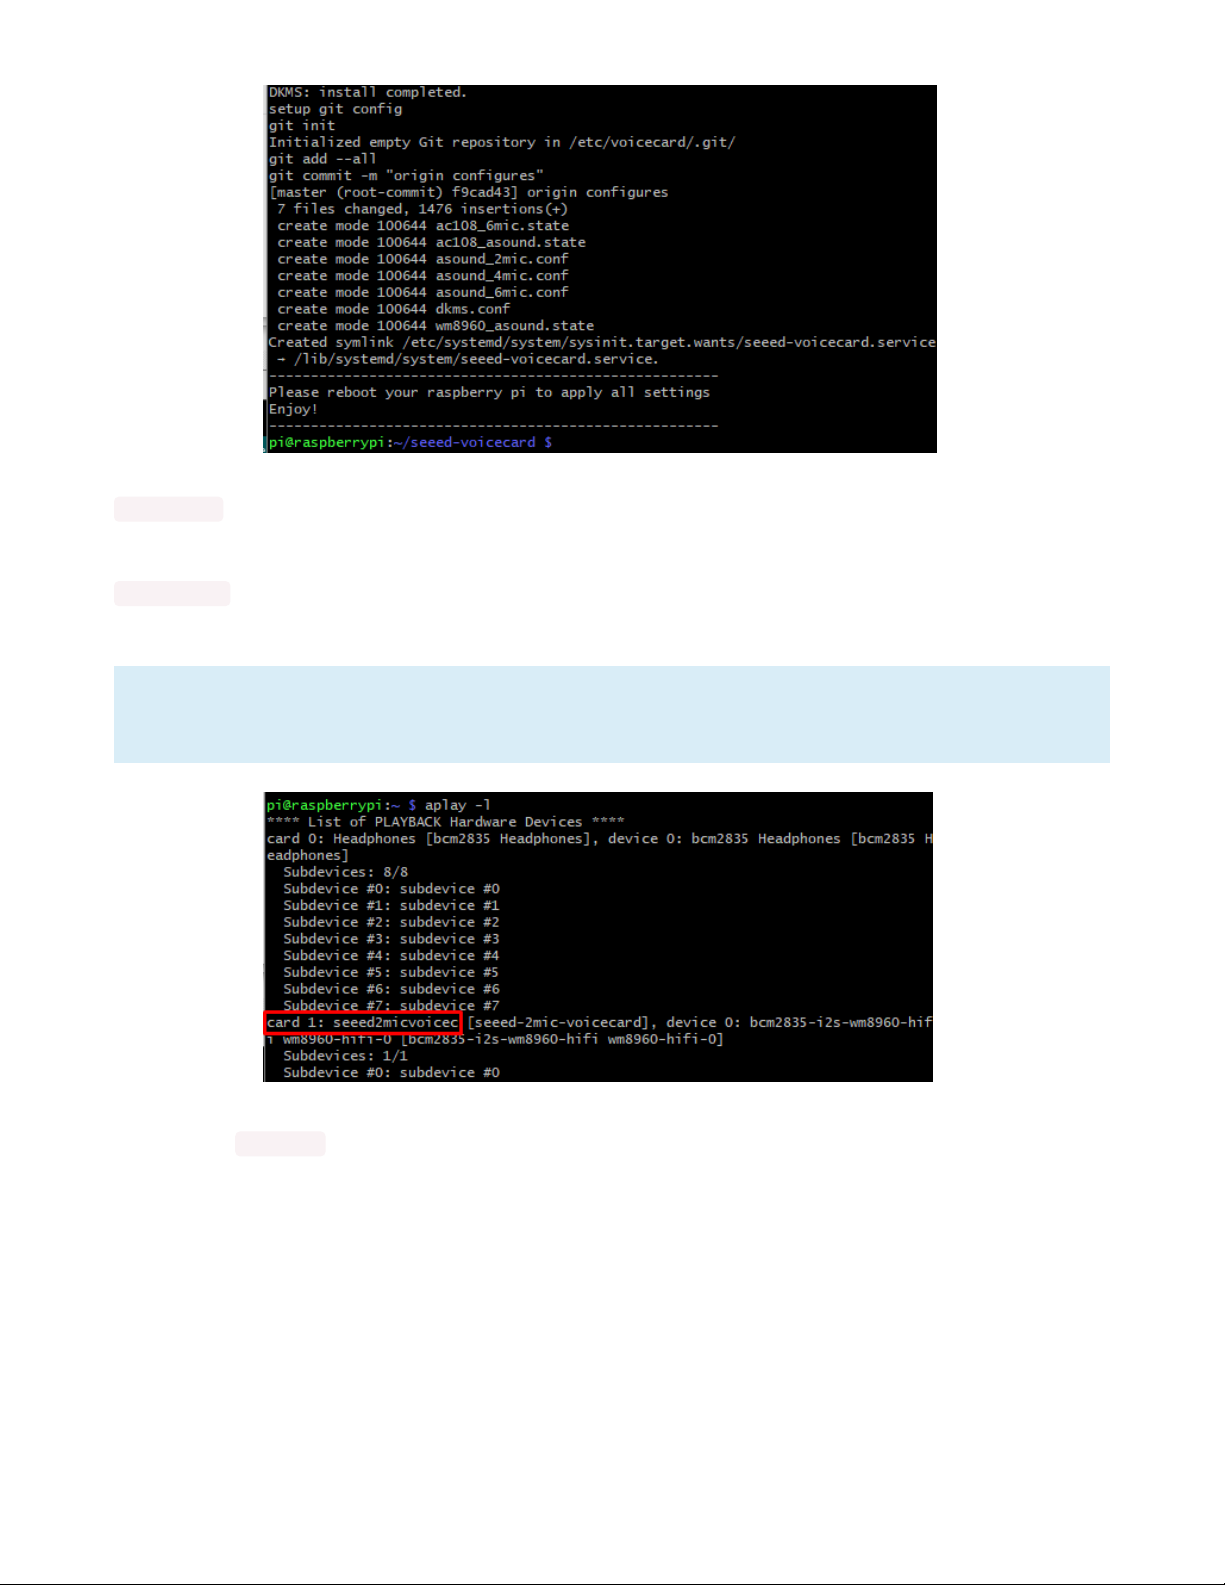
Reboot with
sudo reboot
and on reboot run
sudo aplay -l
To list all sound cards, you should see it at the bottom
On a Raspberry Pi 4, your card number may be Card 2 instead of 1 because of the second HDMI port.
You'll need to make some changes to some of the commands to reflect this further down.
If your card number differs from the above image, take note of your number.
You can use alsamixer to adjust the volume, dont forget to select the card with F6
© Adafruit Industries https://learn.adafruit.com/adafruit-braincraft-hat-easy-machine-learning-for-raspberry-pi Page 23 of 42
Page 24

A gain of about 60% is plenty loud!
Headphone/Speaker Test
Make sure the Audio On/Off switch is set to ON!
With either headphones plugged into the headphone jack or a speaker attached to the speaker port, run
speaker-test -c2
you will hear white noise coming out of the speakers/headphones!
If you don't hear anything, make sure you have the audio on/off switch set!
© Adafruit Industries https://learn.adafruit.com/adafruit-braincraft-hat-easy-machine-learning-for-raspberry-pi Page 24 of 42
Page 25

Microphone Test
There are two microphones, and now we can test that they work. This test is best done with headphones ,
not using the speaker port, because it can cause a painful feedback effect if the speakers are next to the
mics!
Run:
sudo arecord -f cd -Dhw:1 | aplay -Dhw:1
If your sound card ID is not #1, then replace the number in both of the -Dhw: parameters with your actual
number.
Then either gently rub each microphone, or speak to hear yourself echoed!
Control-C to quit when done
Your audio subsystem is now completely tested!
© Adafruit Industries https://learn.adafruit.com/adafruit-braincraft-hat-easy-machine-learning-for-raspberry-pi Page 25 of 42
Page 26

Fan Service Setup
We have a really simple fan service that will control the onboard fan. The reason we have it set up as a
service instead of keeping the fan on all the time is so that it doesn't drain too much power from the Pi
during the initial power on.
The fan service basically controls turning GPIO 4 on at startup, which is what the fan is connected to.
Installing the fan service is really simple and we have a script for doing that.
To install, just type in the following commands.
cd ~
sudo pip3 install --upgrade adafruit-python-shell
wget https://raw.githubusercontent.com/adafruit/Raspberry-Pi-Installer-Scripts/master/adafruit_fanservice.py
sudo python3 adafruit_fanservice.py
A message letting you know what the script does will come up.
When it asks you if you want to continue, select Yes.
© Adafruit Industries https://learn.adafruit.com/adafruit-braincraft-hat-easy-machine-learning-for-raspberry-pi Page 26 of 42
Page 27

That's it. You should hear the fan start up right after the script finishes running.
© Adafruit Industries https://learn.adafruit.com/adafruit-braincraft-hat-easy-machine-learning-for-raspberry-pi Page 27 of 42
Page 28

Display Module Install
There's two ways you can use the 1.54" 240x240 display on the BrainCraft HAT. For machine learning
purposes, the advanced method is the way to go, so that's what we'll be covering in this guide.
Currently there is a conflict between the BrainCraft display and audio drivers with the latest
Raspberry Pi kernel. To save you time, you may want to jump over and follow the instructions in the
Display Module Troubleshooting page to "pin" your kernel to version 5.4.
Be aware that you can only choose to do one way at a time. If you choose the advanced way, it will
install the kernel driver, which will prevent you from doing it the easy way without uninstalling the
driver first.
The easy way is to use 'pure Python 3' and Pillow library to draw to the display from within Python. This is
great for showing text, stats, images etc that you design yourself. If you want to do that, the BrainCraft HAT
has a pretty close layout to the Adafruit 1.3" Color TFT Bonnet (https://adafru.it/NFh) including the same
type of display and a joystick, though the pinouts are slightly different. If you choose this option, You can
skip this page and view the Python Setup page (https://adafru.it/NFi) for instruction for that display.
The advanced way is to install a kernel module to add support for the TFT display that will make the
console appear on the display. This is cute because you can have any program print text or draw to the
framebuffer (or, say, with pygame) and Linux will take care of displaying it for you. If you don't need the
console or direct framebuffer access, please consider using the 'pure Python' technique instead as it is not
as delicate.
If you plan on using the Pi Camera for vision projects, you will need to go with the advanced route!
Installing The 1.54" Kernel Module
We have tried to make this as easy as possible for you by providing a script that takes care of everything.
There's only a couple of dependencies needed. To get everything setup, just run the following at the
terminal:
cd ~
sudo pip3 install --upgrade adafruit-python-shell click
sudo apt-get install -y git
git clone https://github.com/adafruit/Raspberry-Pi-Installer-Scripts.git
cd Raspberry-Pi-Installer-Scripts
sudo python3 adafruit-pitft.py --display=st7789_240x240 --rotation=0 --install-type=fbcp
If you want to use the BrainCraft HAT for vision projects, you will need to install the display driver as
FBCP and not console.
© Adafruit Industries https://learn.adafruit.com/adafruit-braincraft-hat-easy-machine-learning-for-raspberry-pi Page 28 of 42
Page 29

When you get asked to reboot, reboot!
That's it! You will now have the BrainCraft HAT with a console display on it
© Adafruit Industries https://learn.adafruit.com/adafruit-braincraft-hat-easy-machine-learning-for-raspberry-pi Page 29 of 42
Page 30

Kernel Module Troubleshooting
The Raspberry Pi Kernel sometimes updates firmware, which can which can break the Frame Buffer Copy
mechanism. In this particular case, it only seems to affect the Raspberry Pi 4. The issue appears as a
garbled screen that looks like static.
To check your kernel version, run the following command:
dpkg -l raspberrypi-kernel
You should see output similar to the following. If the kernel version is 20210104 or later, then the following
fix should work.
We have a script that is able to set the kernel version to the kernel version prior to it breaking. To "pin" the
kernel version to an older version prior to it breaking, you'll need to run a few commands. You can either
SSH into the Pi or hook up an HDMI cable, though the display may appear small.
Once you'd at a command prompt, run the following commands:
cd ~
wget https://raw.githubusercontent.com/adafruit/Raspberry-Pi-Installer-Scripts/master/rpi-pin-kernel-firmware.sh
sudo sh rpi-pin-kernel-firmware.sh 1.20201126-1
After it finishes, reboot the Pi.
Once the Pi is back up, the display may appear inverted. To fix this, just run the Adafruit PiTFT script again
and reboot a second time.
© Adafruit Industries https://learn.adafruit.com/adafruit-braincraft-hat-easy-machine-learning-for-raspberry-pi Page 30 of 42
Page 31

You can check the new kernel version by running the dpkg command again:
dpkg -l raspberrypi-kernel
This time, your version should be 20201126-1.
BrainCraft Audio Driver Reinstall
If your display is a BrainCraft HAT and you have pinned your kernel, you should be running a kernel
version of around 5.4. You can check this by typing uname -r .
You may need to reinstall the audio drivers at this point to get sound working. Be sure to follow the
BrainCraft HAT Audio Setup instructions (https://adafru.it/Pf8) for a kernel version around 5.4 when
reinstalling.
© Adafruit Industries https://learn.adafruit.com/adafruit-braincraft-hat-easy-machine-learning-for-raspberry-pi Page 31 of 42
Page 32
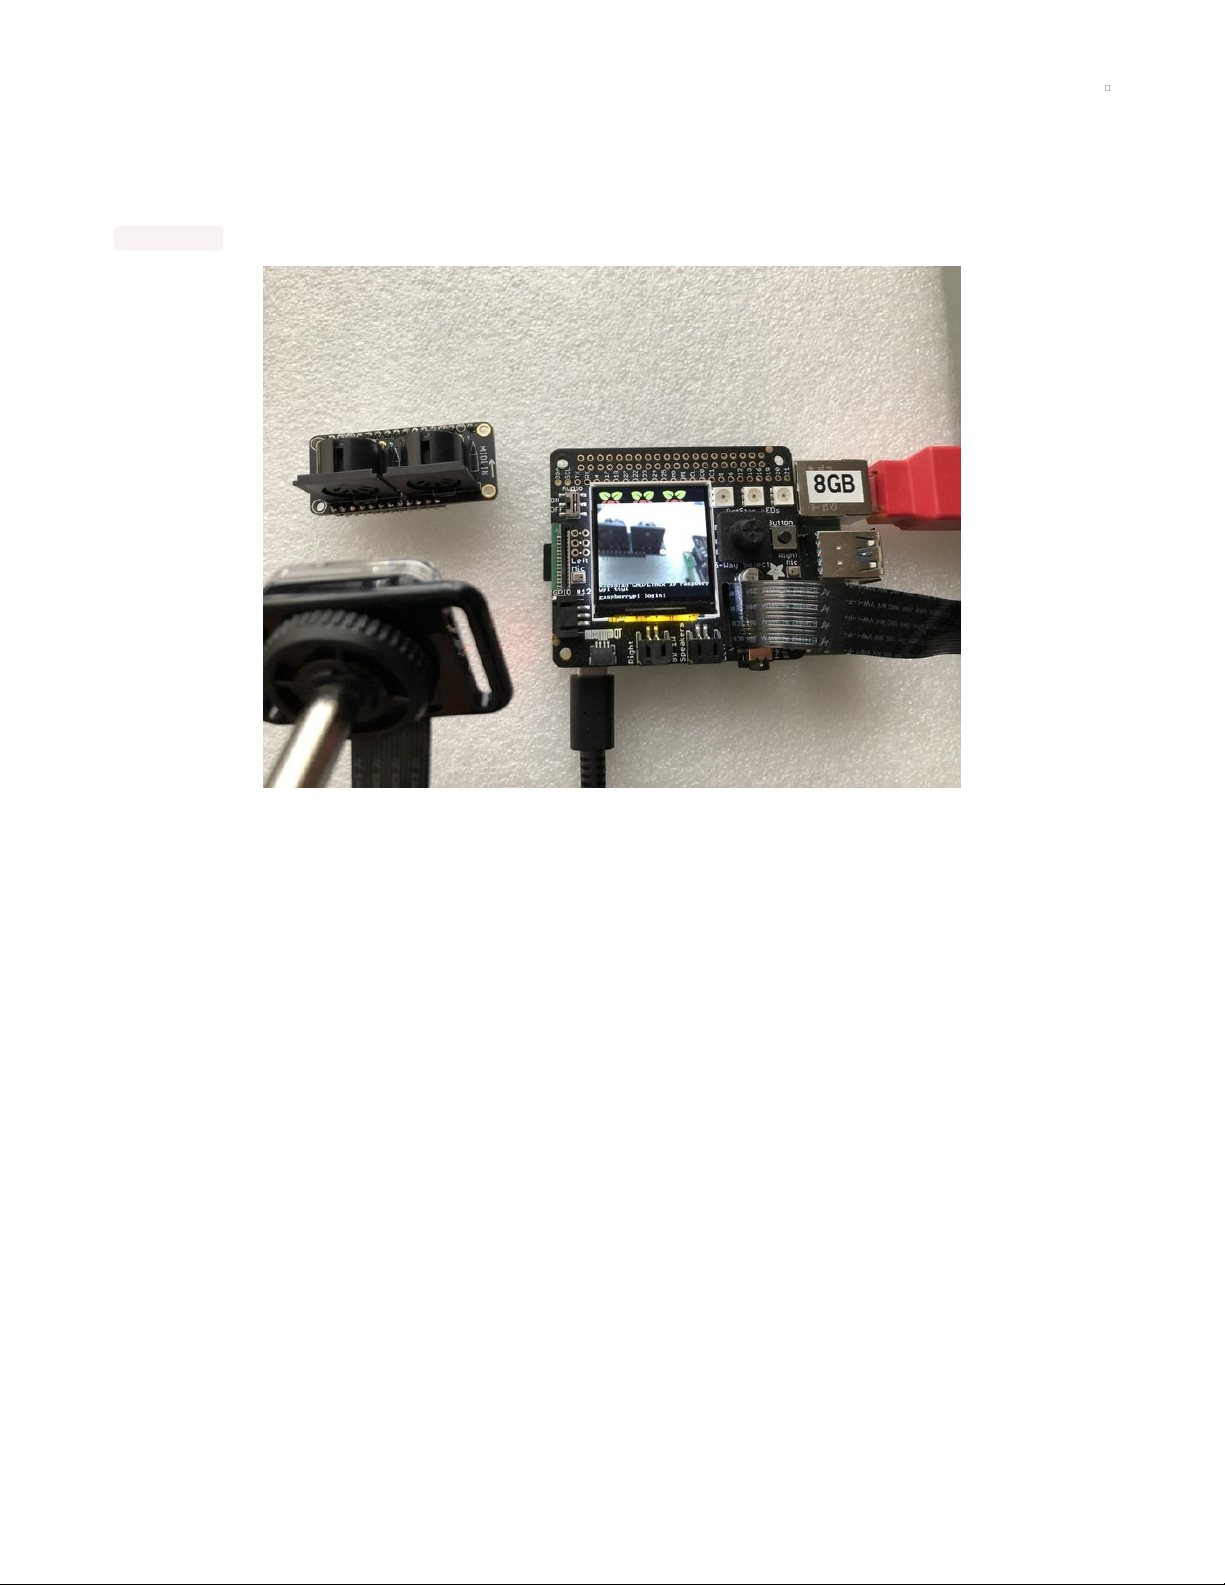
Camera Test
Now that you have everything set up, it's time to do an initial test with the camera. This should display what
the camera sees on the display.
raspistill -t 0
© Adafruit Industries https://learn.adafruit.com/adafruit-braincraft-hat-easy-machine-learning-for-raspberry-pi Page 32 of 42
Page 33

Python Usage
At this point, you should have just about everything already set up.
Besides the display, audio, and fan, this board has quite a few other useful features on it that can be
controlled through Python. We'll go through those and how to control them in Python.
Joystick and Button
The 5-way Joystick and button just use simple digitalio and each uses a separate GPIO, so they're really simple to
control. Here's a little script that will setup the GPIOs, Create Internal Pullups, and then print out the value to the
terminal.
import time
import board
from digitalio import DigitalInOut, Direction, Pull
BUTTON_PIN = board.D17
JOYDOWN_PIN = board.D27
JOYLEFT_PIN = board.D22
JOYUP_PIN = board.D23
JOYRIGHT_PIN = board.D24
JOYSELECT_PIN = board.D16
buttons = [BUTTON_PIN, JOYUP_PIN, JOYDOWN_PIN,
JOYLEFT_PIN, JOYRIGHT_PIN, JOYSELECT_PIN]
for i,pin in enumerate(buttons):
buttons[i] = DigitalInOut(pin)
buttons[i].direction = Direction.INPUT
buttons[i].pull = Pull.UP
button, joyup, joydown, joyleft, joyright, joyselect = buttons
while True:
if not button.value:
print("Button pressed")
if not joyup.value:
print("Joystick up")
if not joydown.value:
print("Joystick down")
if not joyleft.value:
print("Joystick left")
if not joyright.value:
print("Joystick right")
if not joyselect.value:
print("Joystick select")
time.sleep(0.01)
Go ahead and save the above code onto your Pi as button_test.py and run it with the following command:
python button_test.py
Now try moving the joystick and press the button and you should see it print out what you're pressing.
© Adafruit Industries https://learn.adafruit.com/adafruit-braincraft-hat-easy-machine-learning-for-raspberry-pi Page 33 of 42
Page 34

DotStar LEDs
The 3 DotStar LEDS can be controlled with the DotStar CircuitPython Library. Here's a little script that will setup
the DotStar LEDs and then color cycle them.
import time
import board
import adafruit_dotstar
DOTSTAR_DATA = board.D5
DOTSTAR_CLOCK = board.D6
dots = adafruit_dotstar.DotStar(DOTSTAR_CLOCK, DOTSTAR_DATA, 3, brightness=0.2)
def wheel(pos):
# Input a value 0 to 255 to get a color value.
# The colours are a transition r - g - b - back to r.
if pos < 0 or pos > 255:
return (0, 0, 0)
if pos < 85:
return (255 - pos * 3, pos * 3, 0)
if pos < 170:
pos -= 85
return (0, 255 - pos * 3, pos * 3)
pos -= 170
return (pos * 3, 0, 255 - pos * 3)
while True:
for j in range(255):
for i in range(3):
rc_index = (i * 256 // 3) + j * 5
dots[i] = wheel(rc_index & 255)
dots.show()
time.sleep(0.01)
Go ahead and save the above code onto your Pi as dotstar_test.py and run it with the following command:
© Adafruit Industries https://learn.adafruit.com/adafruit-braincraft-hat-easy-machine-learning-for-raspberry-pi Page 34 of 42
Page 35

python dotstar_test.py
The DotStar LEDs should start color-cycling in a rainbow.
GPIO JST connectors
GPIOs 12 and 13 are accessible with the JST connectors on either side of the BrainCraft
HAT.
Parts
For this script, we'll just need one part that isn't included with the BrainCraft HAT:
Micro Servo with 3-pin JST Cable - STEMMA Connector Compatible
This tiny little servo can rotate approximately 180 degrees (90 in each direction), and works just like the
standard kinds you're used to but smaller. You can use any...
$5.95
© Adafruit Industries https://learn.adafruit.com/adafruit-braincraft-hat-easy-machine-learning-for-raspberry-pi Page 35 of 42
Page 36

In Stock
Wiring
Connect the JST PH 3-pin plug into the GPIO #12 side of the
BrainCraftHAT
https://adafru.it/NHb
Code
import time
import board
import pulseio
from adafruit_motor import servo
SERVO_PIN = board.D12
pwm = pulseio.PWMOut(SERVO_PIN, frequency=50)
servo = servo.Servo(pwm, min_pulse=750, max_pulse=2250)
while True:
for angle in range(0, 180, 5): # 0 - 180 degrees, 5 degrees at a time.
servo.angle = angle
time.sleep(0.05)
for angle in range(180, 0, -5): # 180 - 0 degrees, 5 degrees at a time.
servo.angle = angle
time.sleep(0.05)
Go ahead and save the above code onto your Pi as servo_test.py and run it with the following command:
python servo_test.py
The servo should start sweeping back and forth in 5 degree increments.
Stemma QT
For the Stemma QT port, you can use any of our 50+ sensors, but we're going to use a script that demonstrates
using the BMP280 because it's so simple.
Parts
For this script, we'll just need a BMP280 and a Stemma QT cable:
Add to Cart
https://adafru.it/NHb
© Adafruit Industries https://learn.adafruit.com/adafruit-braincraft-hat-easy-machine-learning-for-raspberry-pi Page 36 of 42
Page 37

Adafruit BMP280 I2C or SPI Barometric Pressure & Altitude Sensor
Bosch has stepped up their game with their new BMP280 sensor, an environmental sensor with
temperature, barometric pressure that is the next generation upgrade to the...
$9.95
In Stock
Add to Cart
© Adafruit Industries https://learn.adafruit.com/adafruit-braincraft-hat-easy-machine-learning-for-raspberry-pi Page 37 of 42
Page 38

STEMMA QT / Qwiic JST SH 4-pin Cable - 100mm Long
This 4-wire cable is a little over 100mm / 4" long and fitted with JST-SH female 4-pin connectors on both
ends. Compared with the chunkier JST-PH these are 1mm pitch instead of...
$0.95
In Stock
Wiring
Connect one side of the Stemma QT cable to either port on the BMP280
Connect the other side to the Stemma QT port on the BrainCraft HAT
https://adafru.it/NHc
Code
# SPDX-FileCopyrightText: 2021 ladyada for Adafruit Industries
# SPDX-License-Identifier: MIT
"""Simpletest Example that shows how to get temperature,
pressure, and altitude readings from a BMP280"""
import time
import board
# import digitalio # For use with SPI
import busio
import adafruit_bmp280
# Create library object using our Bus I2C port
i2c = busio.I2C(board.SCL, board.SDA)
bmp280 = adafruit_bmp280.Adafruit_BMP280_I2C(i2c)
# OR create library object using our Bus SPI port
# spi = busio.SPI(board.SCK, board.MOSI, board.MISO)
# bmp_cs = digitalio.DigitalInOut(board.D10)
# bmp280 = adafruit_bmp280.Adafruit_BMP280_SPI(spi, bmp_cs)
# change this to match the location's pressure (hPa) at sea level
bmp280.sea_level_pressure = 1013.25
while True:
print("\nTemperature: %0.1f C" % bmp280.temperature)
print("Pressure: %0.1f hPa" % bmp280.pressure)
print("Altitude = %0.2f meters" % bmp280.altitude)
time.sleep(2)
Go ahead and save the above code onto your Pi as bmp280_simpletest.py and run it with the following
command:
python bmp280_simpletest.py
The terminal should start printing out the detected measurements.
Add to Cart
https://adafru.it/NHc
© Adafruit Industries https://learn.adafruit.com/adafruit-braincraft-hat-easy-machine-learning-for-raspberry-pi Page 38 of 42
Page 39

© Adafruit Industries https://learn.adafruit.com/adafruit-braincraft-hat-easy-machine-learning-for-raspberry-pi Page 39 of 42
Page 40

Downloads
Files
ST7789 datasheet (https://adafru.it/LZA)
EagleCAD PCB files on GitHub (https://adafru.it/NFB)
3D Model on GitHub (https://adafru.it/OAN)
Fritzing object in Adafruit Fritzing Library (https://adafru.it/NFD)
Schematic
© Adafruit Industries https://learn.adafruit.com/adafruit-braincraft-hat-easy-machine-learning-for-raspberry-pi Page 40 of 42
Page 41

Fab Print
© Adafruit Industries https://learn.adafruit.com/adafruit-braincraft-hat-easy-machine-learning-for-raspberry-pi Page 41 of 42
Page 42

© Adafruit Industries Last Updated: 2021-03-03 01:41:38 PM EST Page 42 of 42
 Loading...