

Page 1
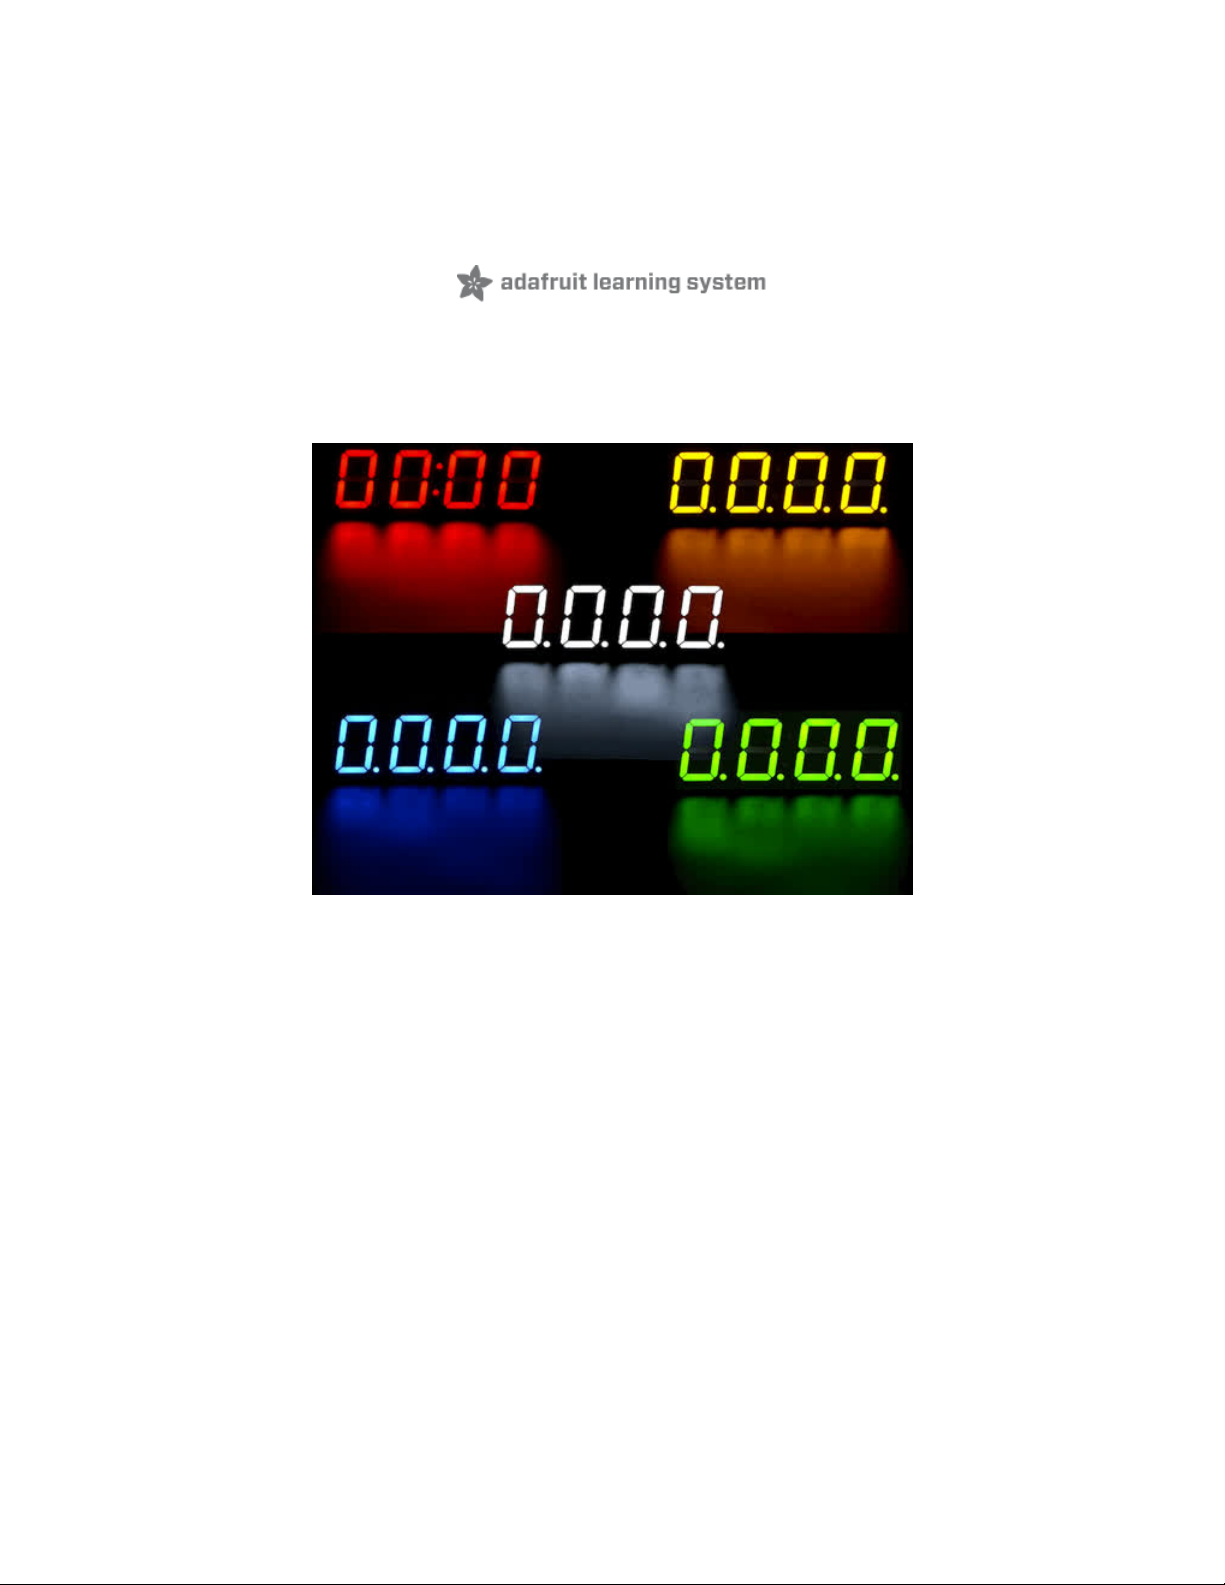
Adafruit 7-Segment LED FeatherWings
Created by lady ada
Last updated on 2020-05-18 07:37:41 PM EDT
Page 2
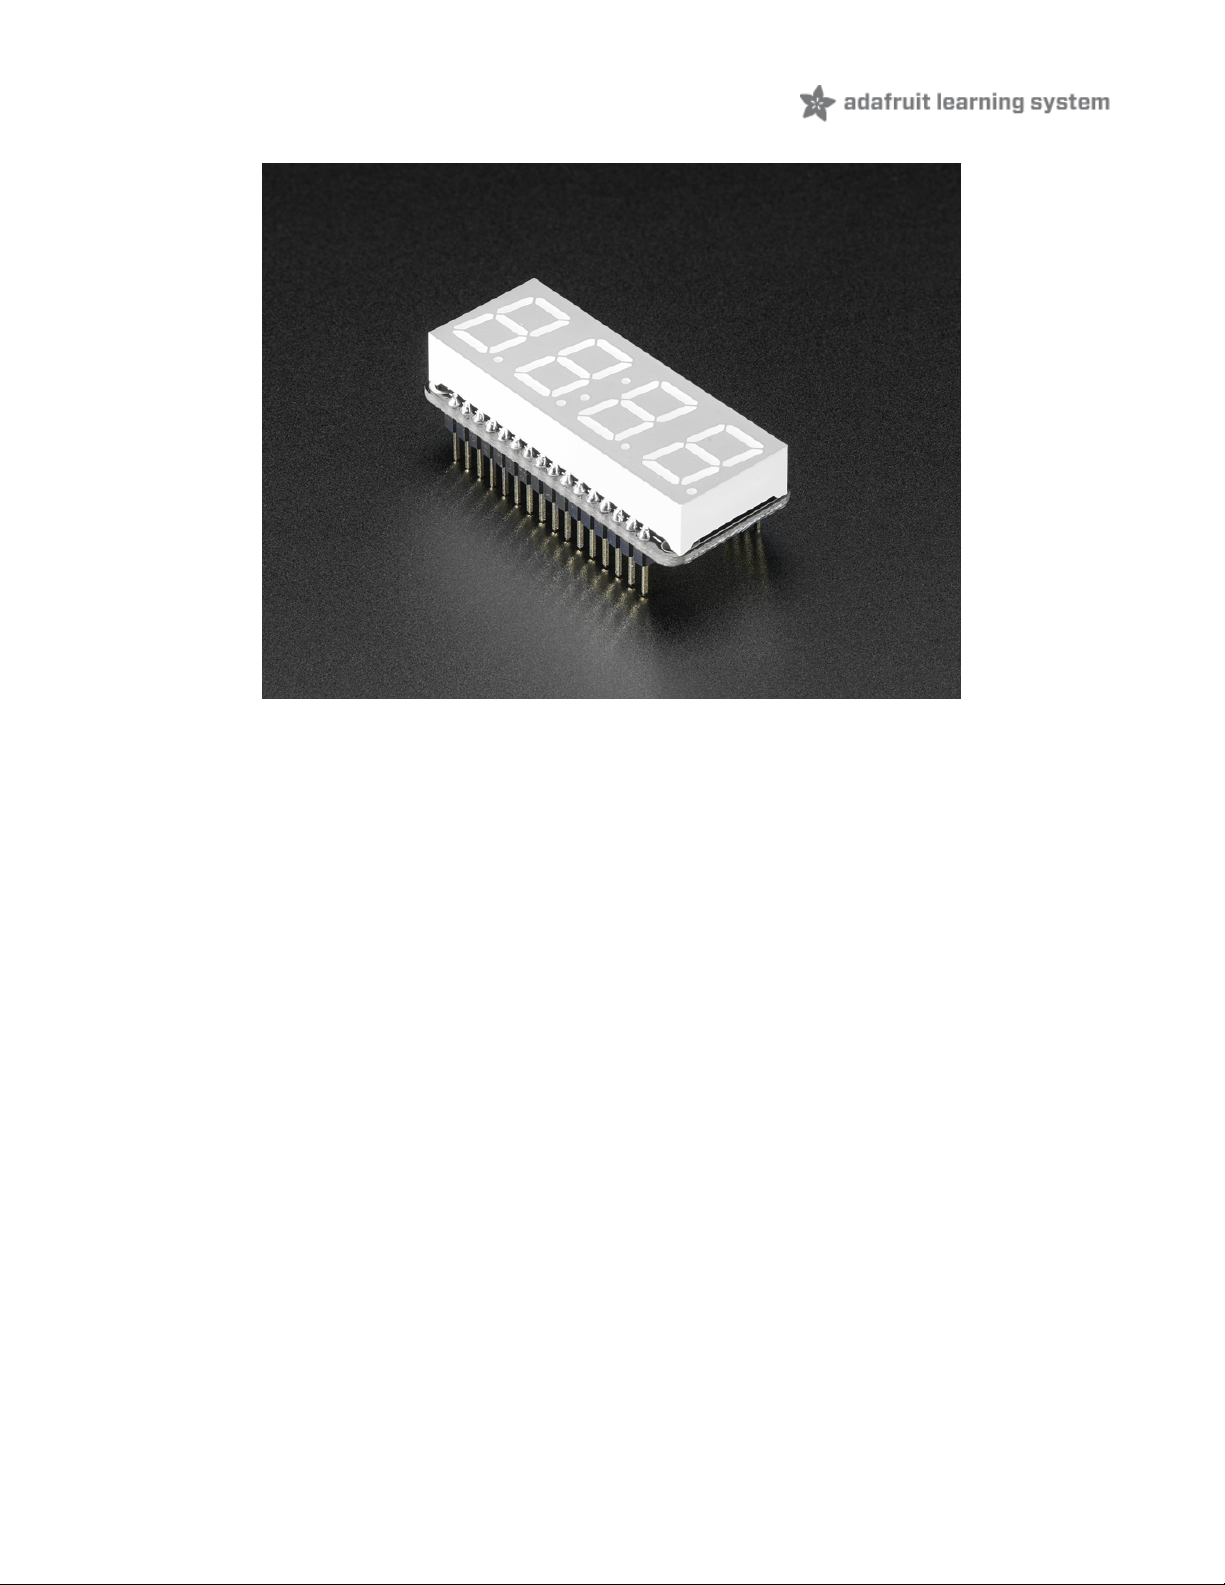
Overview
One segment? No way dude! 7-Segments for life!
This is the Adafruit 0.56" 4-Digit 7-Segment Display w/ FeatherWing Combo Pack! Available in Blue,
Green (http://adafru.it/3107), Red (http://adafru.it/3108), White (http://adafru.it/3109), and Yellow (http://adafru.it/3110)!
7-Segment Matrices like these are 'multiplexed' - so to control all the seven-segment LEDs you need 14 pins. That's a
lot of pins, and there are driver chips like the MAX7219 (http://adafru.it/453) that can control a matrix for you but there's
a lot of wiring to set up and they take up a ton of space. Here at Adafruit we feel your pain! After all, wouldn't it be
awesome if you could control a matrix without tons of wiring? That's where these LED Matrix
FeatherWings (http://adafru.it/3088) come in!
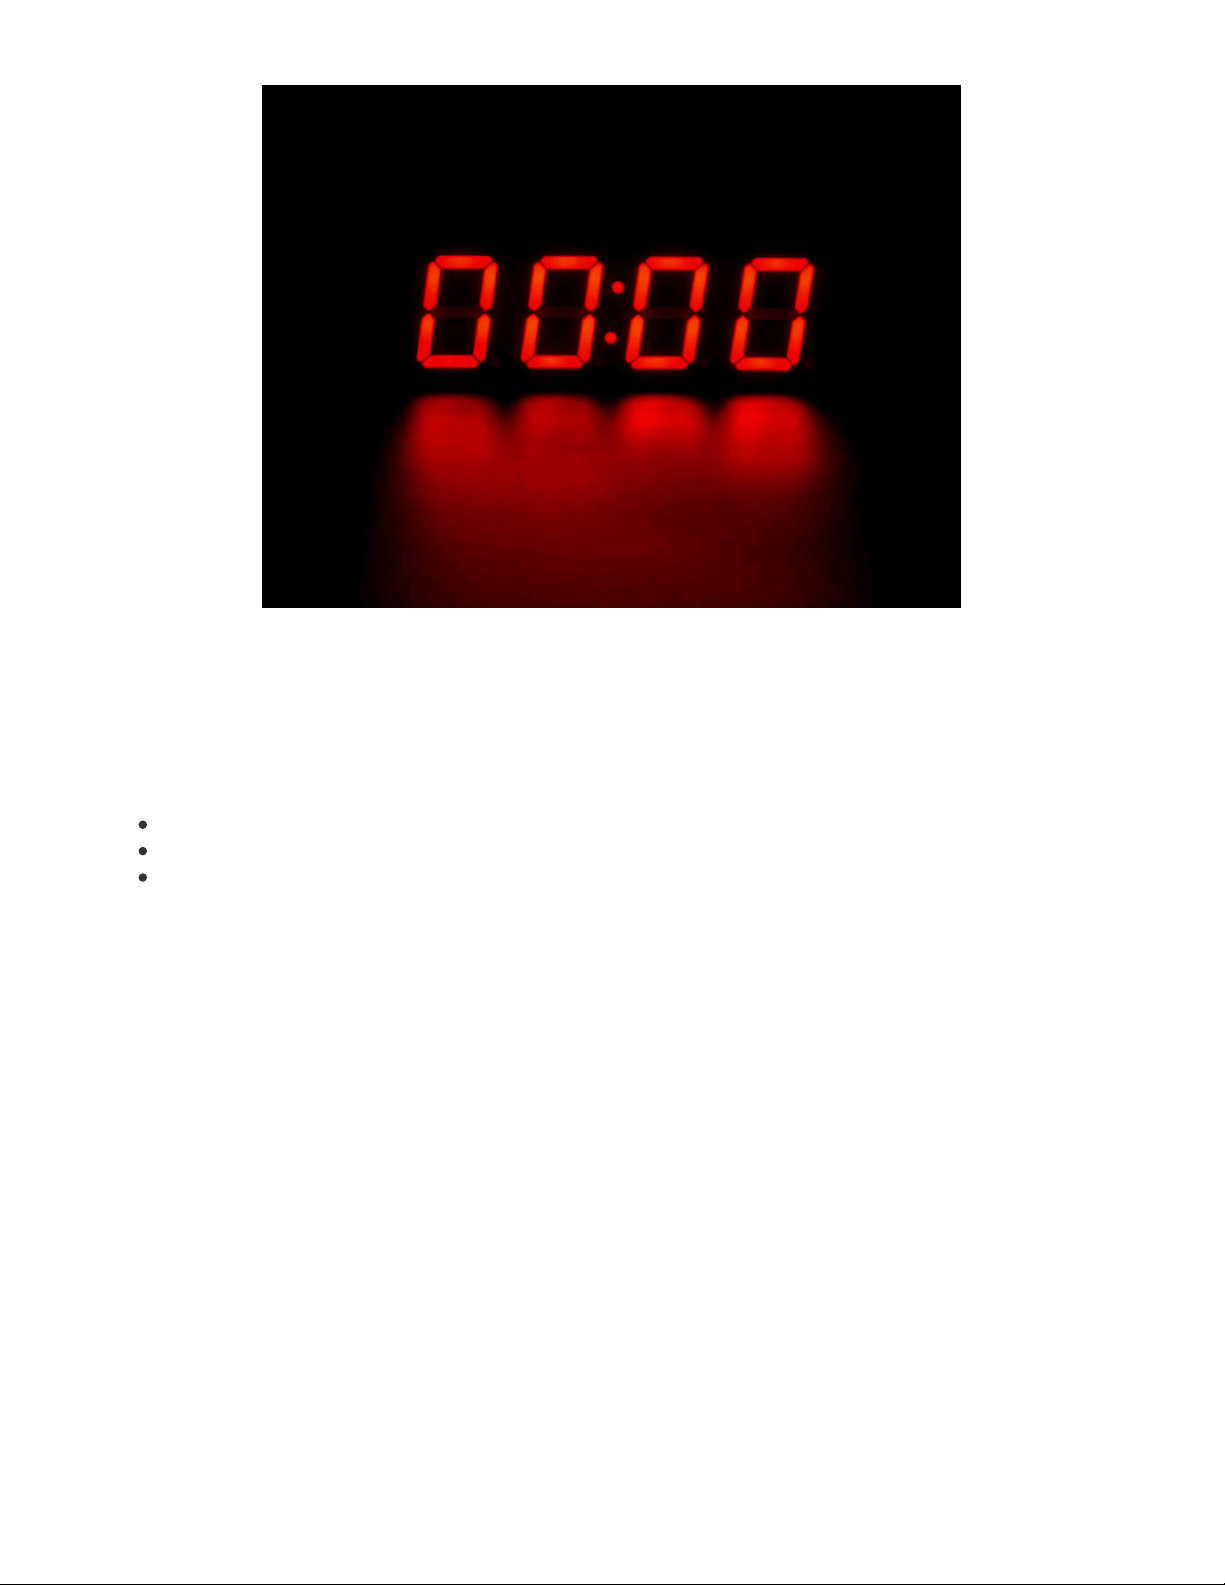
The 7-segment FeatherWing backpack makes it really easy to add a 4-digit numeric display with decimal points and
even 'second colon dots' for making a clock.
© Adafruit Industries https://learn.adafruit.com/adafruit-7-segment-led-featherwings Page 3 of 31
Page 3
The LEDs themselves do not connect to the Feather. Instead, a matrix driver chip (HT16K33) does the multiplexing for
you. The Feather simply sends i2c commands to the chip to tell it what LEDs to light up and it is handled for you. This
takes a lot of the work and pin-requirements off the Feather. Since it uses only I2C for control, it works with any
Feather and can share the I2C pins for other sensors or displays.
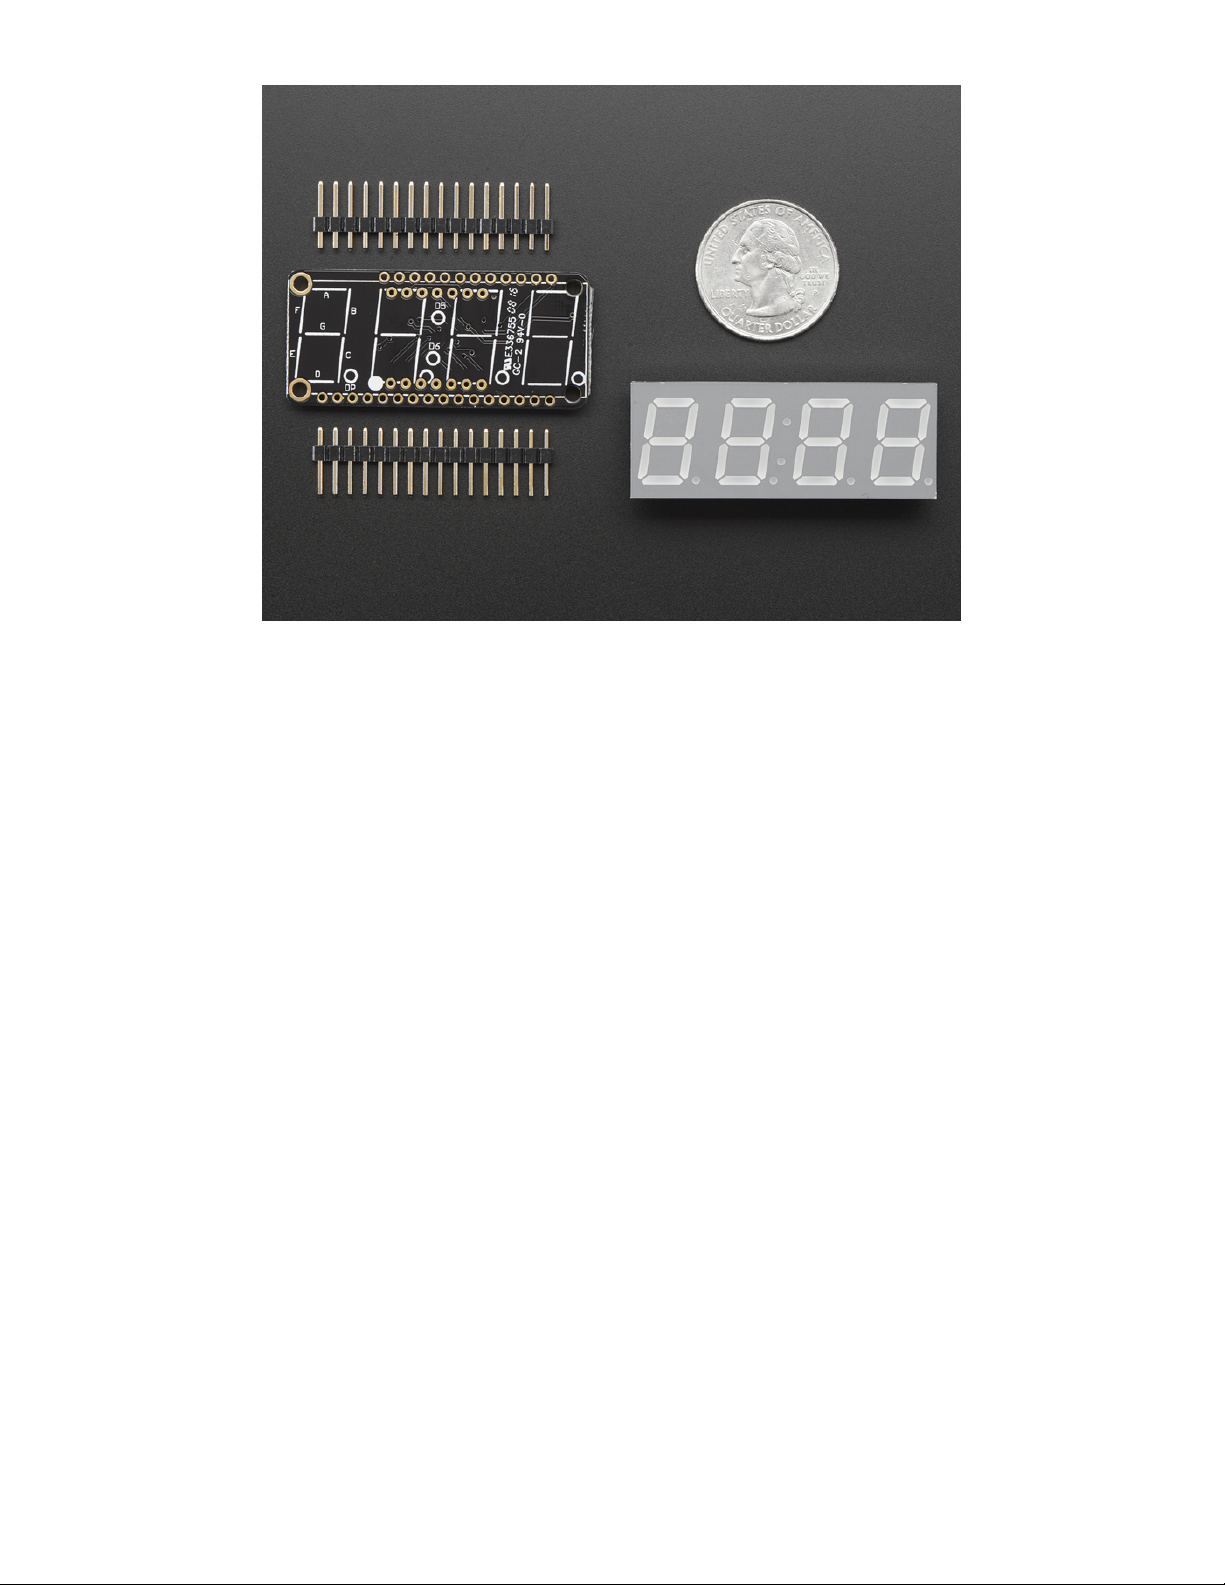
The product kit comes with:
A fully tested and assembled Adafruit 4-Digit 7-Segment LED Matrix Display FeatherWing (http://adafru.it/3088)
Ultra-bright 4-digit 0.56" tall seven-segment display
Two sixteen pin headers
A bit of soldering is required to attach the matrix onto the FeatherWing but its very easy to do and only takes about 5
minutes!
© Adafruit Industries https://learn.adafruit.com/adafruit-7-segment-led-featherwings Page 4 of 31
Page 4
Of course, in classic Adafruit fashion, we also have a detailed tutorial showing you how to solder, wire and control the
display (https://adafru.it/aW8). We even wrote a very nice library for the backpacks so you can get running in under half
an hour, displaying images on the matrix or numbers on the 7-segment (https://adafru.it/aLI). If you've been eyeing
matrix displays but hesitated because of the complexity, his is the solution you've been looking for!
© Adafruit Industries https://learn.adafruit.com/adafruit-7-segment-led-featherwings Page 5 of 31
Page 5
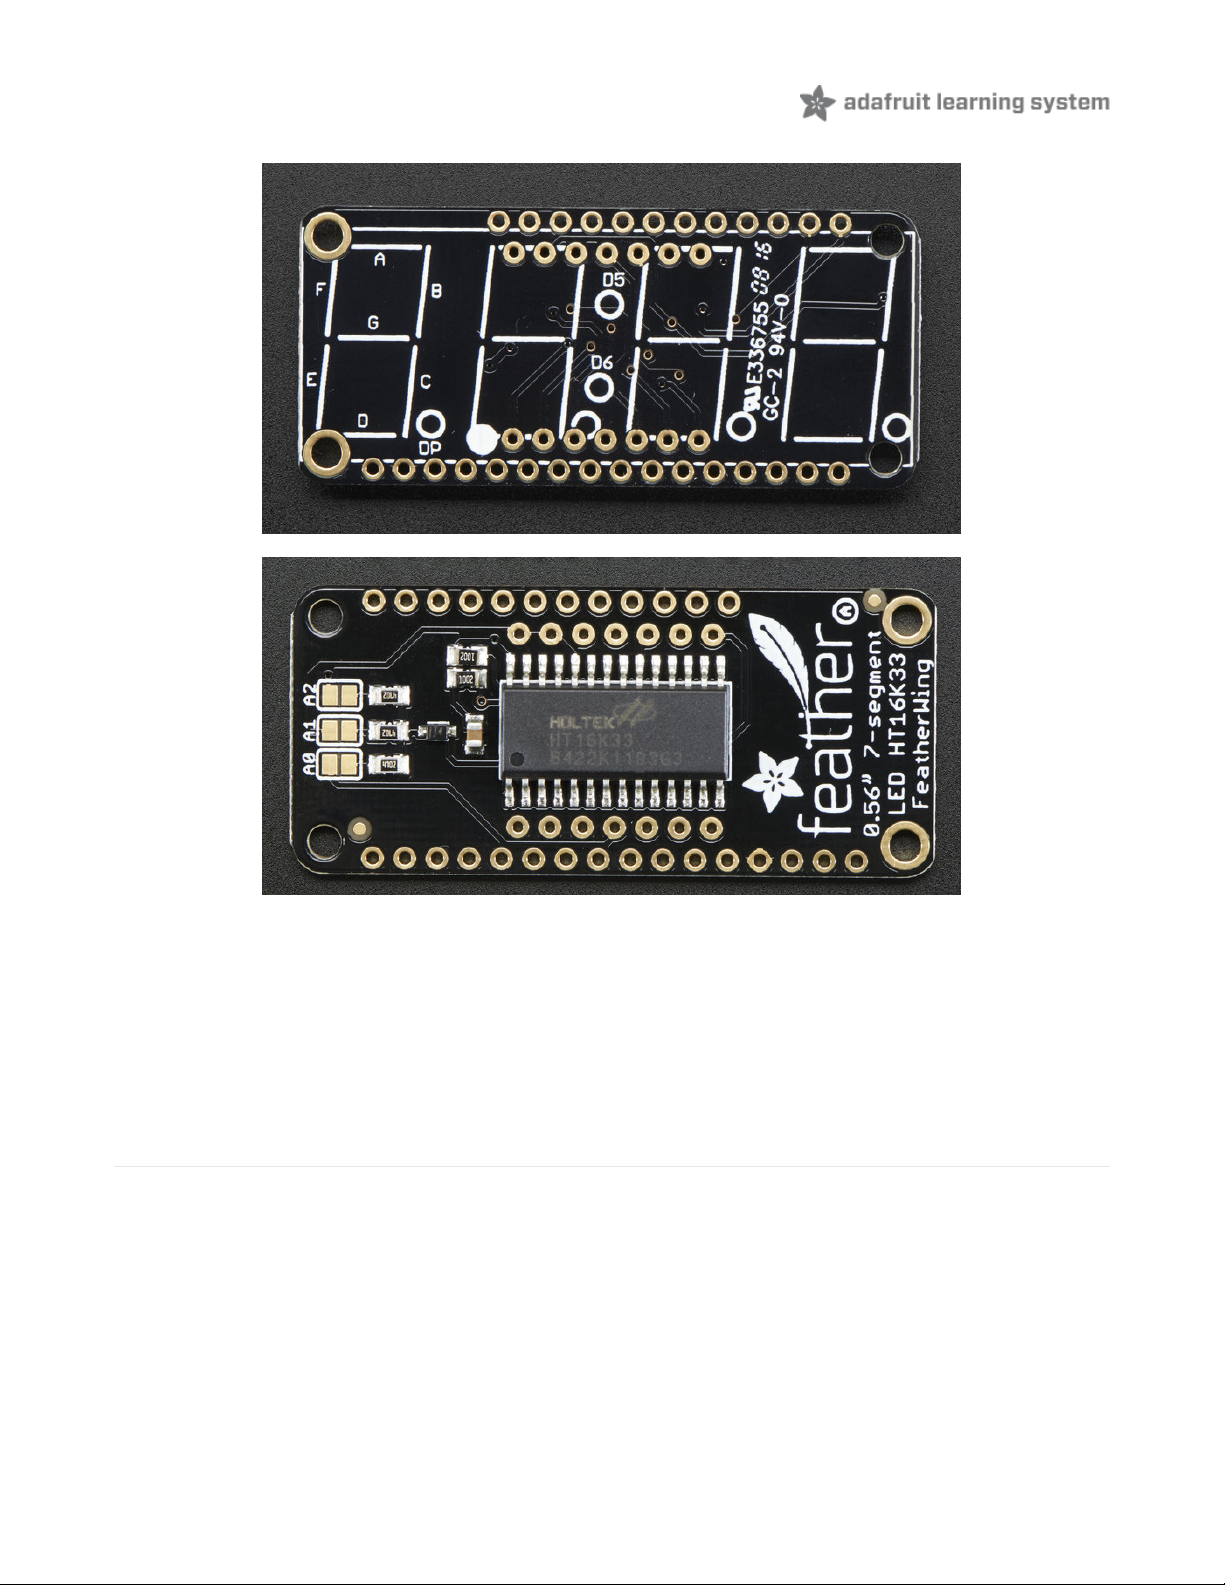
Pinouts
The 7-segment backpack makes it really easy to add a 4-digit numeric display with decimal points and even 'second
colon dots' for making a clock
The LEDs themselves do not connect to the Feather. Instead, a matrix driver chip (HT16K33) does the multiplexing for
you. The Feather simply sends i2c commands to the chip to tell it what LEDs to light up and it is handled for you. This
takes a lot of the work and pin-requirements off the Feather. Since it uses only I2C for control, it works with any
Feather and can share the I2C pins for other sensors or displays.
Power Pins
© Adafruit Industries https://learn.adafruit.com/adafruit-7-segment-led-featherwings Page 6 of 31
Page 6
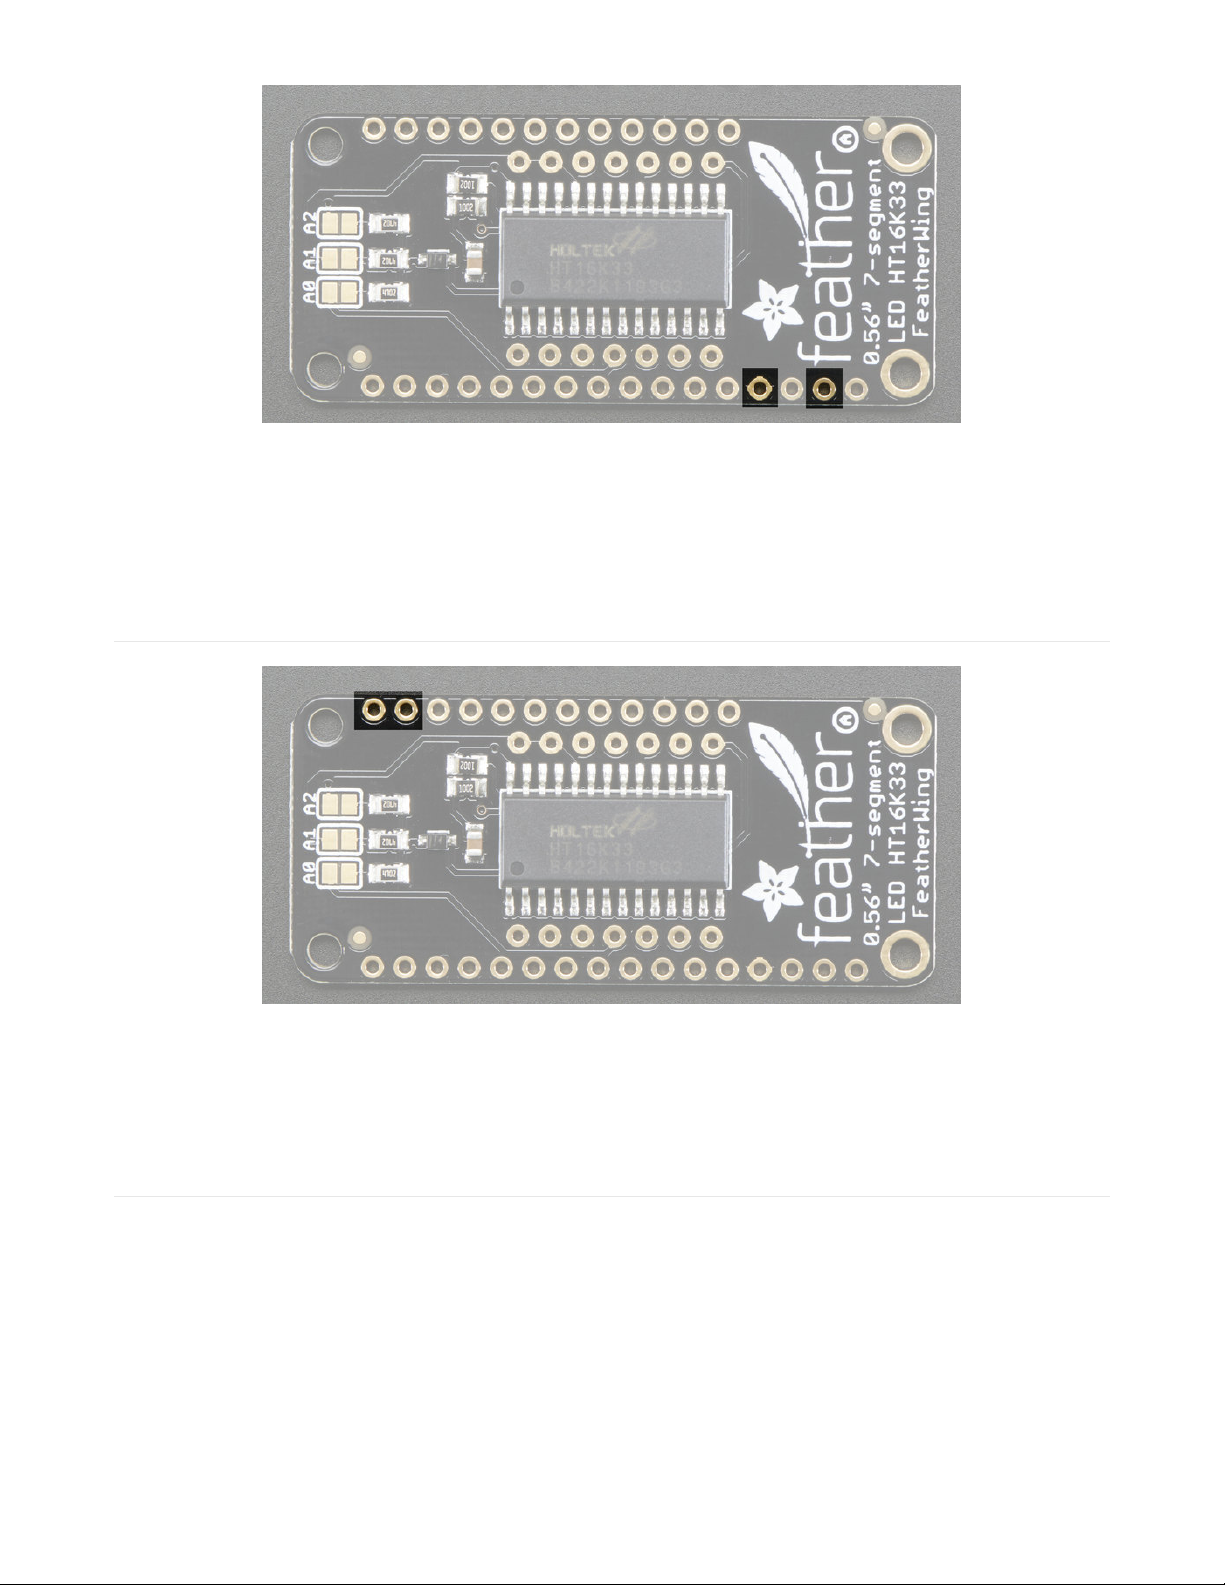
The LED matrix uses only the 3V and GND pins for power and logic. Current draw depends on how many LEDs are lit
but you can approximate it as about 40mA for most uses. Check the PCB file/schematic to verify which pin is ground!
Note that the 3.3V power supply is a tiny bit lower than the forward voltage for the pure green, blue and white LED
matrices but we didn't find any significant degredation in brightness. Really, they're still very bright.
I2C pins
All LED control is done over I2C using the HT16K33 interface library. This means SDA and SCL must be connected, see
above for those pins.
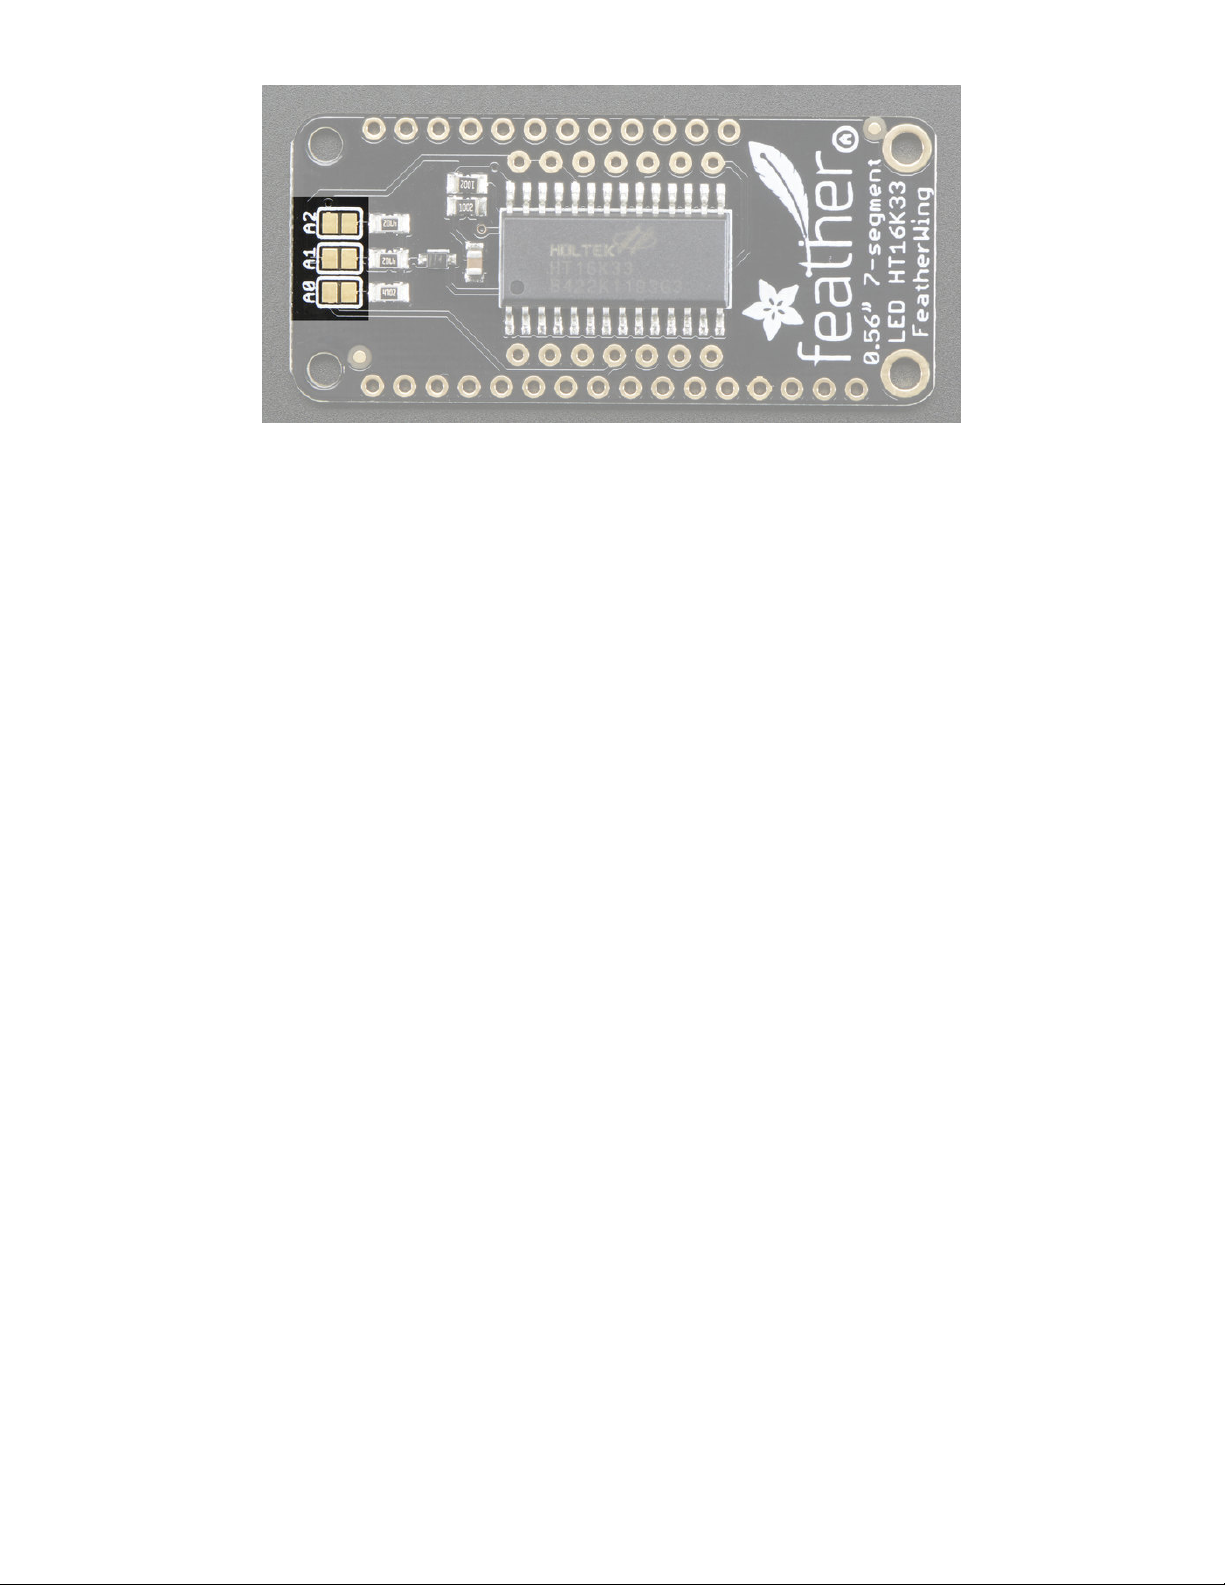
The default address is 0x70 but you can change the address to 0x71-0x77 by bridging solder onto the address pins.
Address Jumpers
© Adafruit Industries https://learn.adafruit.com/adafruit-7-segment-led-featherwings Page 7 of 31
Page 7
Changing Addresses
You can change the address of a backpack very easily. Look on the back to find the two or three A0, A1 or A2 solder
jumpers. Each one of these is used to hardcode in the address. If a jumper is shorted with solder, that sets the
address. A0 sets the lowest bit with a value of 1, A1 sets the middle bit with a value of 2 and A2 sets the high bit with a
value of 4. The final address is 0x70 + A2 + A1 + A0. So for example if A2 is shorted and A0 is shorted, the address is
0x70 + 4 + 1 = 0x75. If only A1 is shorted, the address is 0x70 + 2 = 0x72
© Adafruit Industries https://learn.adafruit.com/adafruit-7-segment-led-featherwings Page 8 of 31
Page 8
Assembly
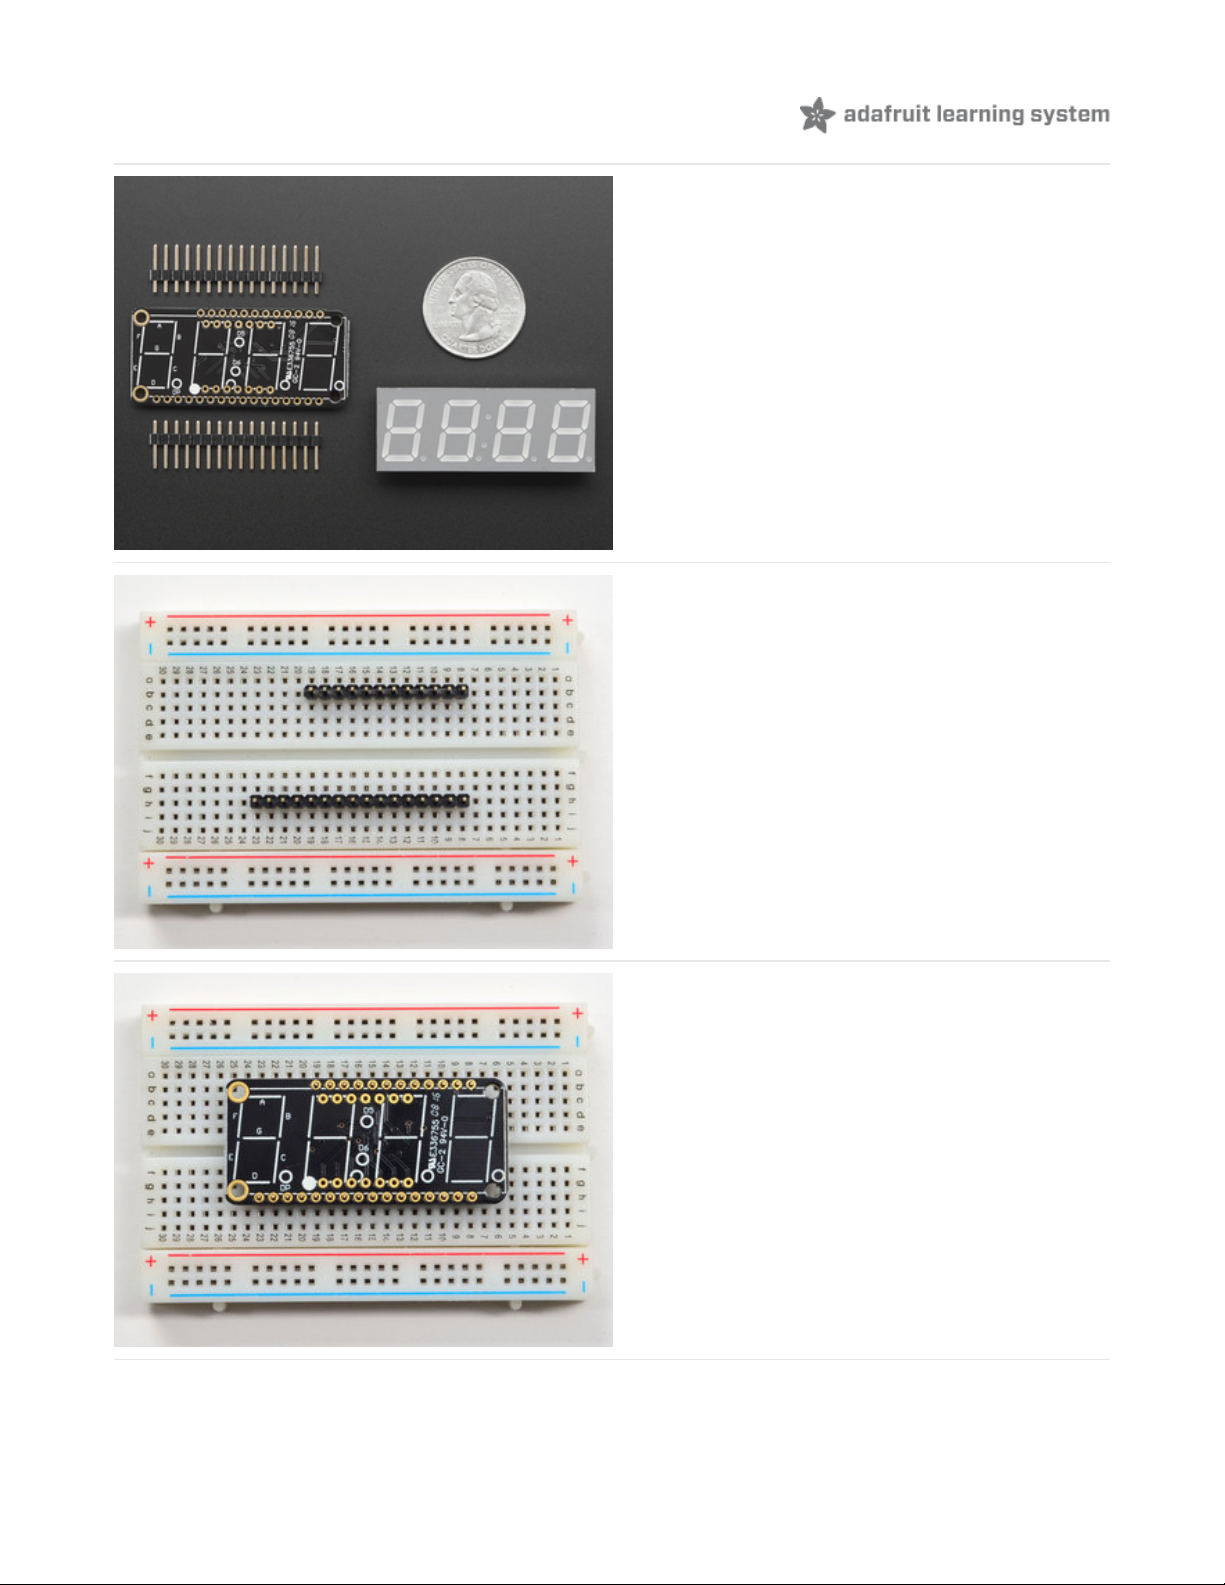
When you buy a pack from Adafruit, it comes with the
fully tested and assembled backpack as well as a 7-
segment display in one of the colors we provide (say,
red, yellow, blue or green). You'll need to solder the
matrix onto the backpack but it's an easy task.
Prepare the header strips:
You'll need a 16-pin and a 12-pin strip of header to
attach the Featherwing to your Feather. Cut the header
strip to length if necessary. It will be easier to solder if
you insert it into a breadboard - long pins down
Add the FeatherWing PCB:
Place the circuit board over the pins so that the short
pins poke through the breakout pads
© Adafruit Industries https://learn.adafruit.com/adafruit-7-segment-led-featherwings Page 9 of 31
Page 9
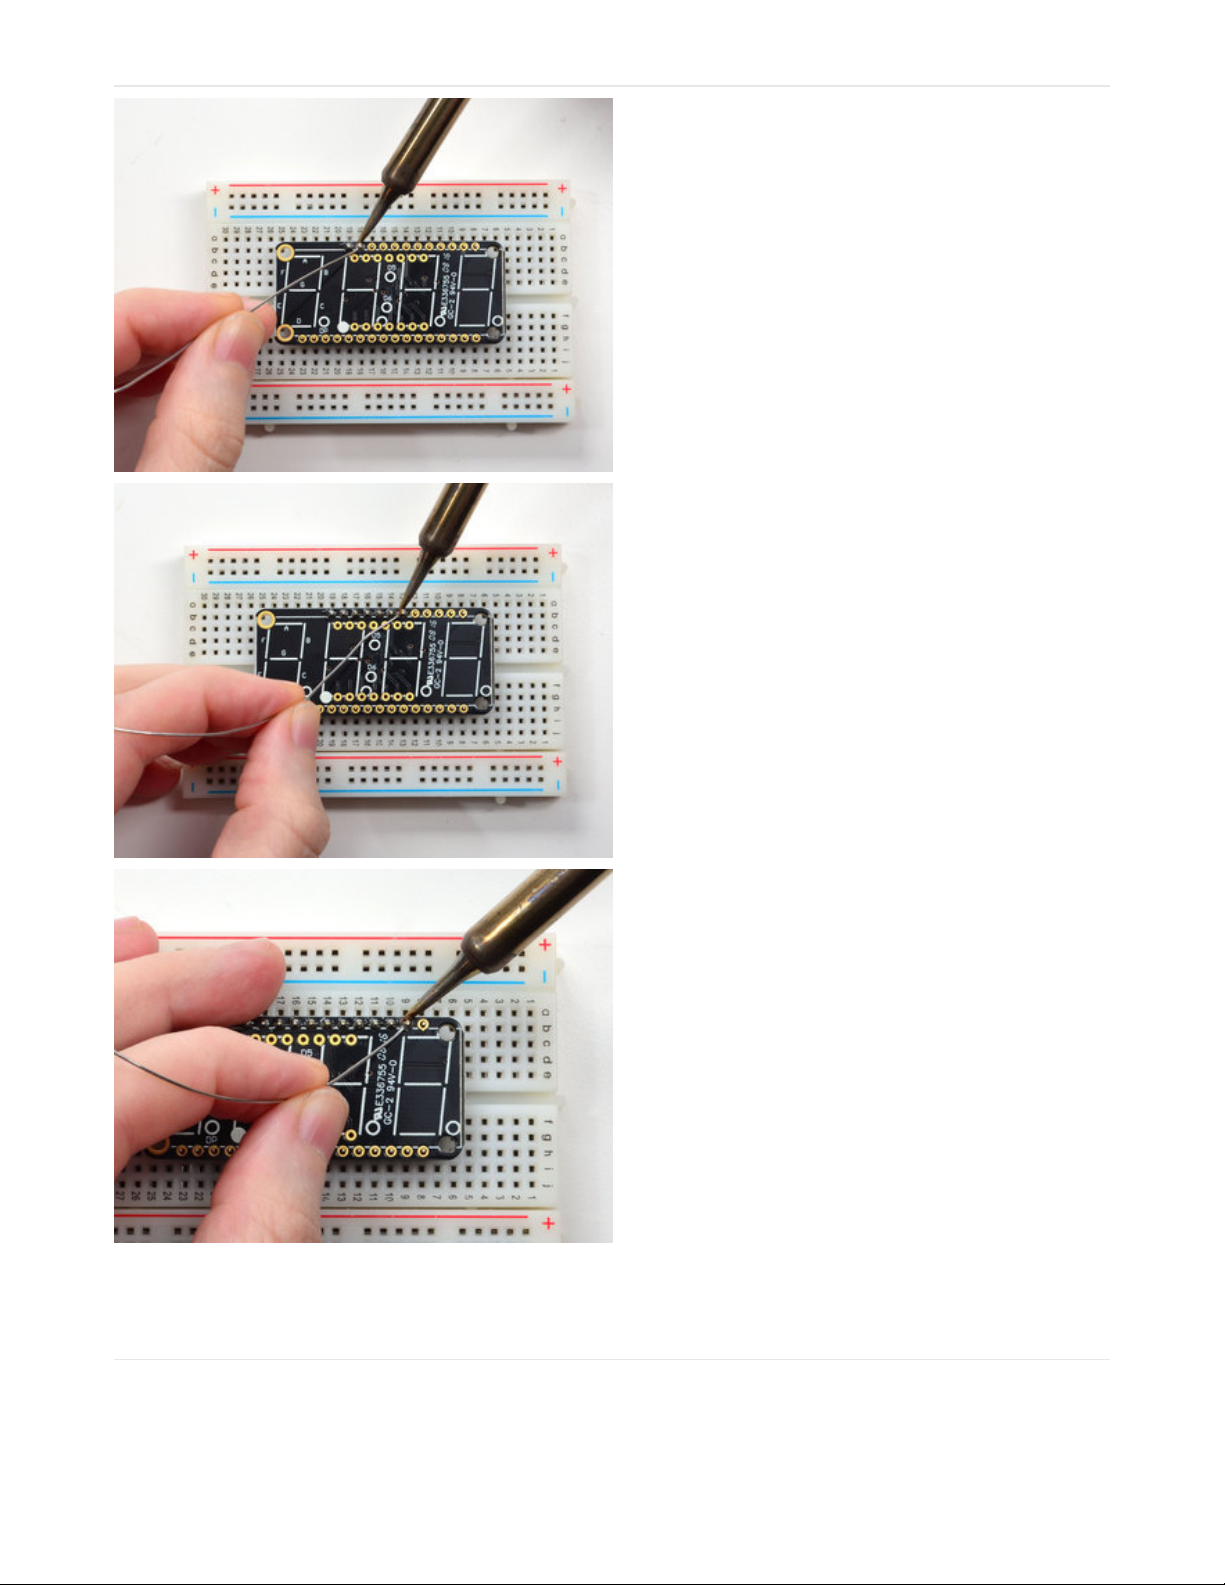
And Solder!
Be sure to solder all pins for reliable electrical contact.
(For tips on soldering, be sure to check out our Guide to
Excellent Soldering
(https://adafru.it/aTk)
).
© Adafruit Industries https://learn.adafruit.com/adafruit-7-segment-led-featherwings Page 10 of 31
Page 10
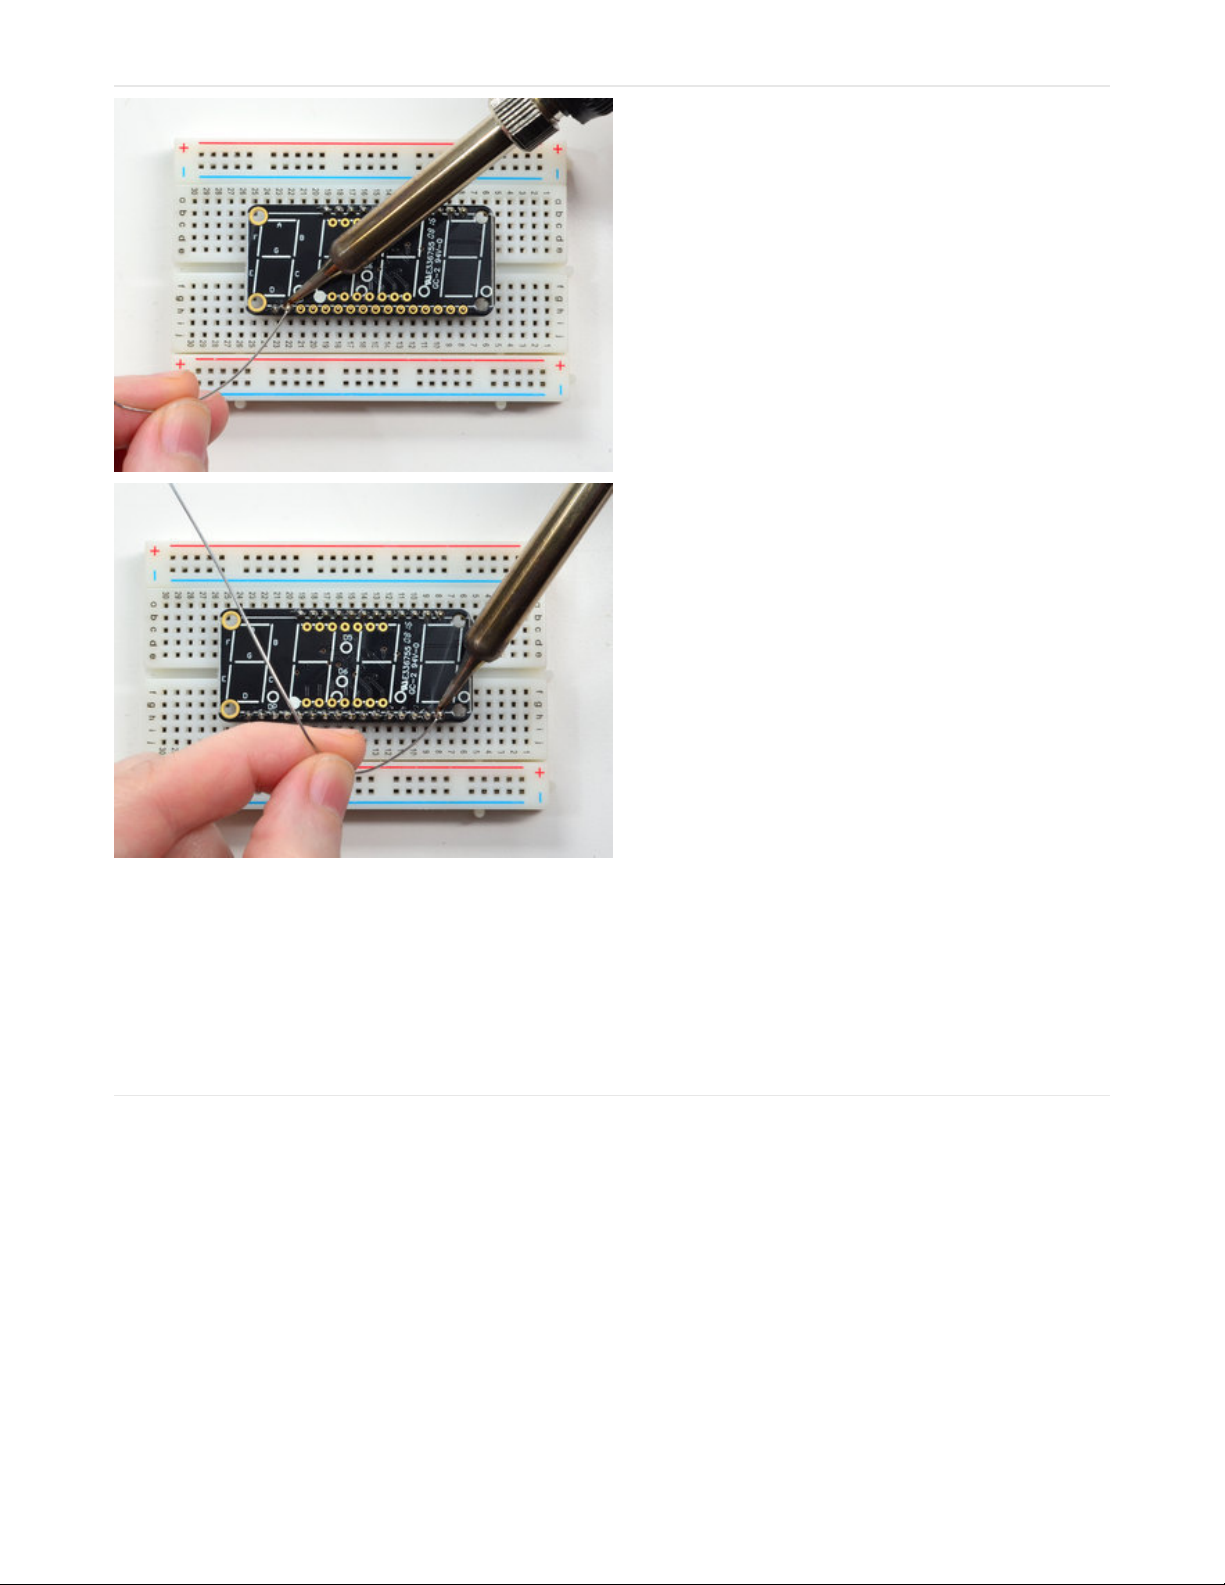
Do both strips completely!
© Adafruit Industries https://learn.adafruit.com/adafruit-7-segment-led-featherwings Page 11 of 31
Page 11

Check your solder joints visually and continue onto the
next step
Next we'll attach the LED matrix
Check the Matrix and line it up next to the FeatherWing
Be careful to NOT PUT THE DISPLAY ON UPSIDE
DOWN OR IT WONT WORK!! Check the image to make
sure the 'decimal point' dots are on the bottom,
matching the silkscreen.
© Adafruit Industries https://learn.adafruit.com/adafruit-7-segment-led-featherwings Page 12 of 31
Page 12
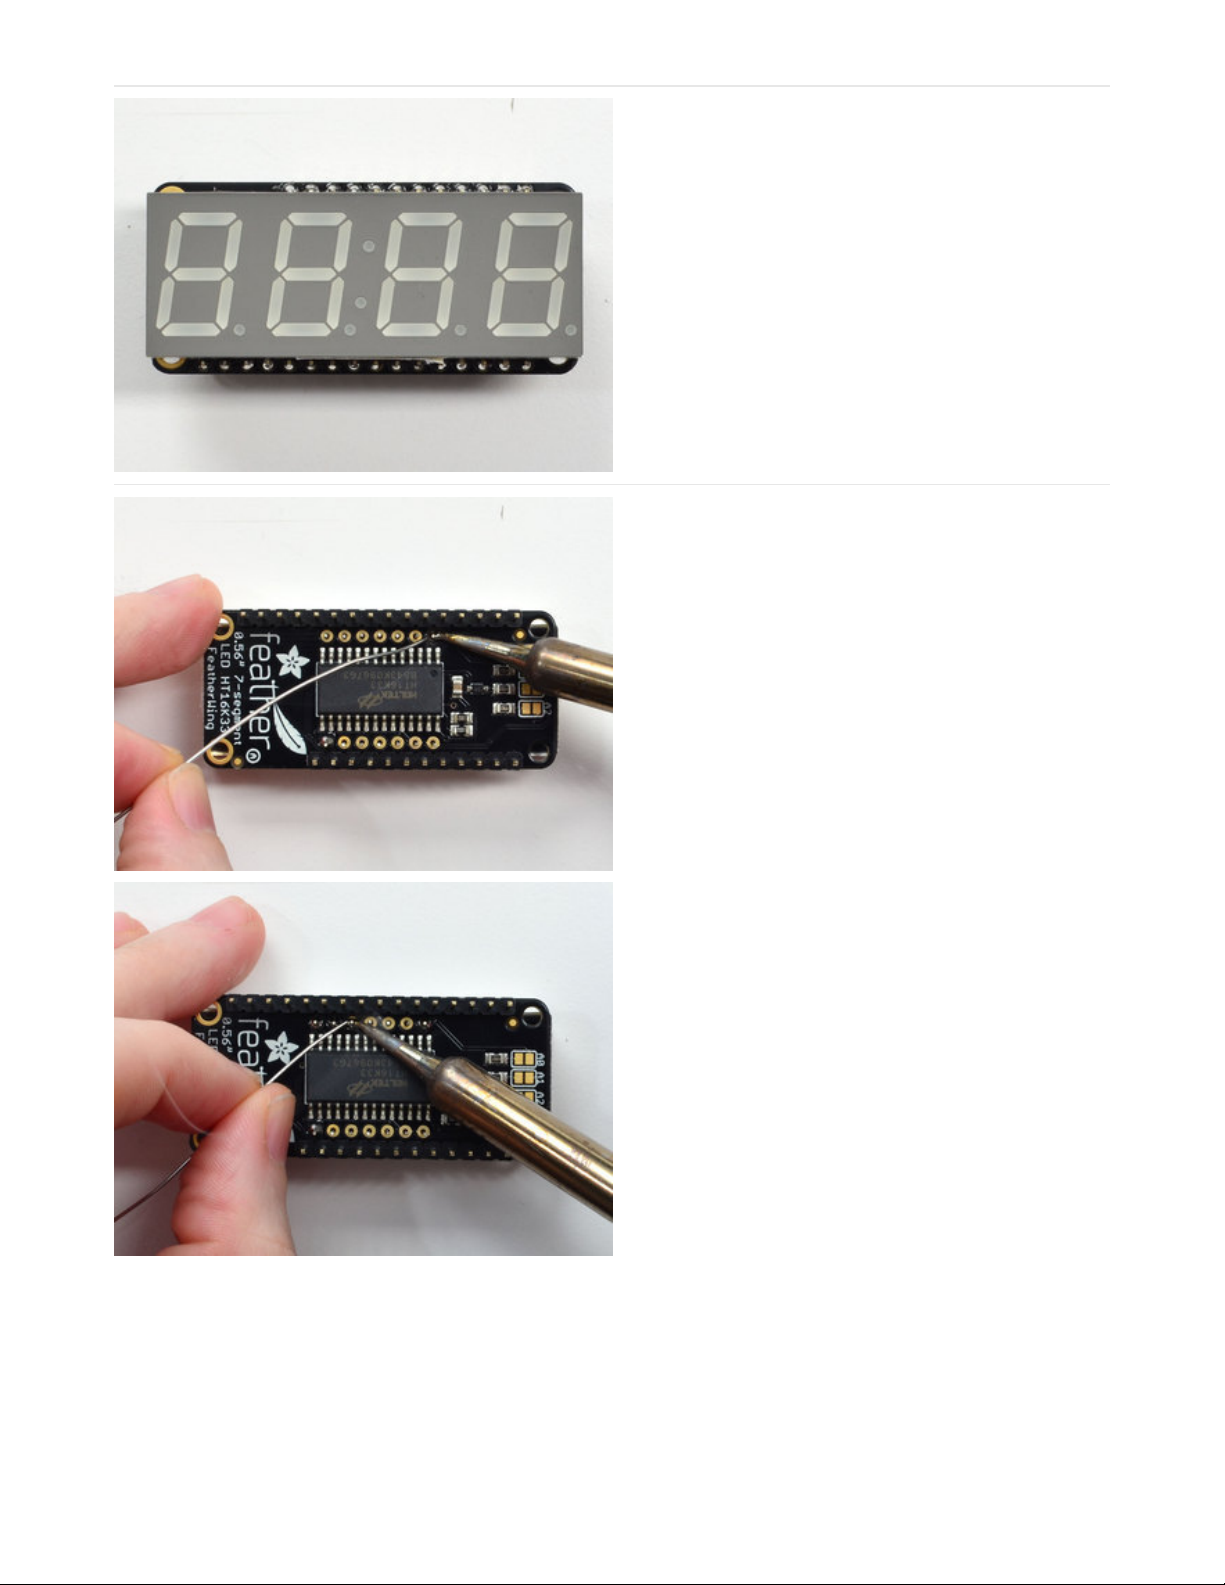
Slot the LED module on top, check again that you have
it right way up!
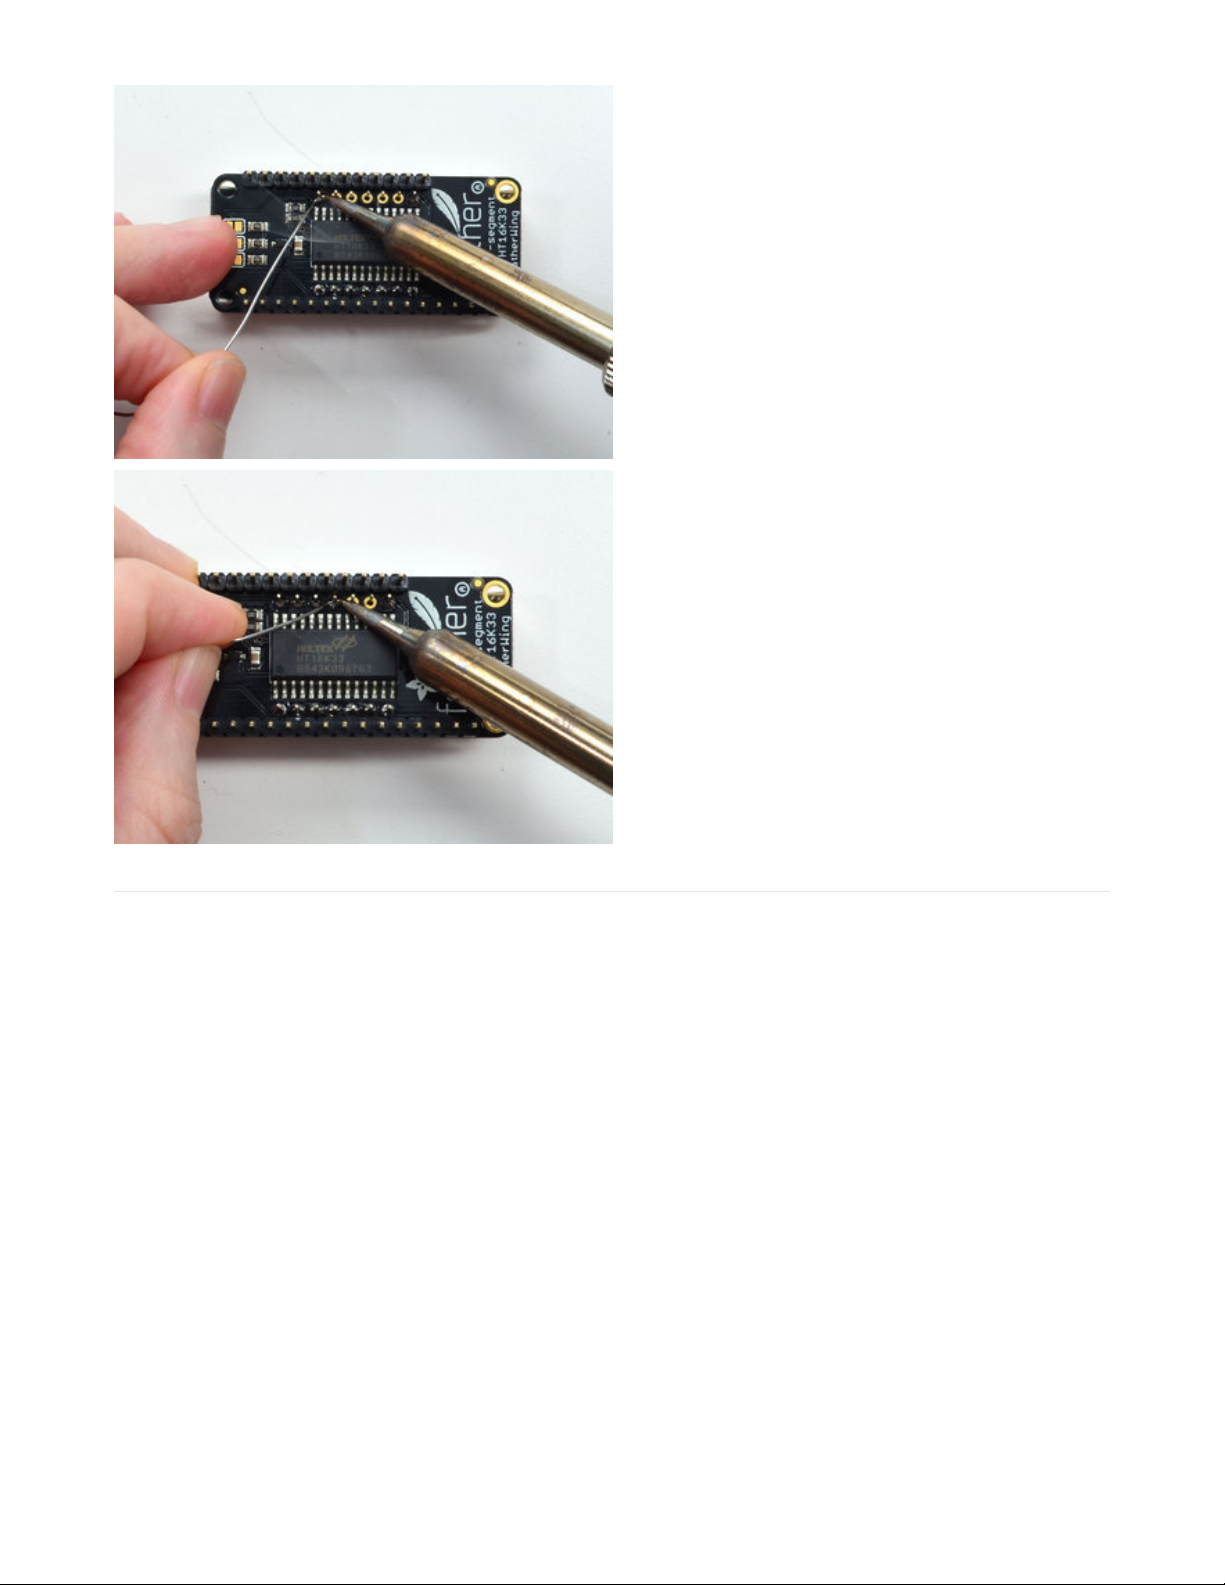
Solder the matrix in place. Note this will be a little
tougher because there's not as much space. Go slow,
do one pin at a time and you can clip it after each point if
you need!
© Adafruit Industries https://learn.adafruit.com/adafruit-7-segment-led-featherwings Page 13 of 31
Page 13
© Adafruit Industries https://learn.adafruit.com/adafruit-7-segment-led-featherwings Page 14 of 31
Page 14
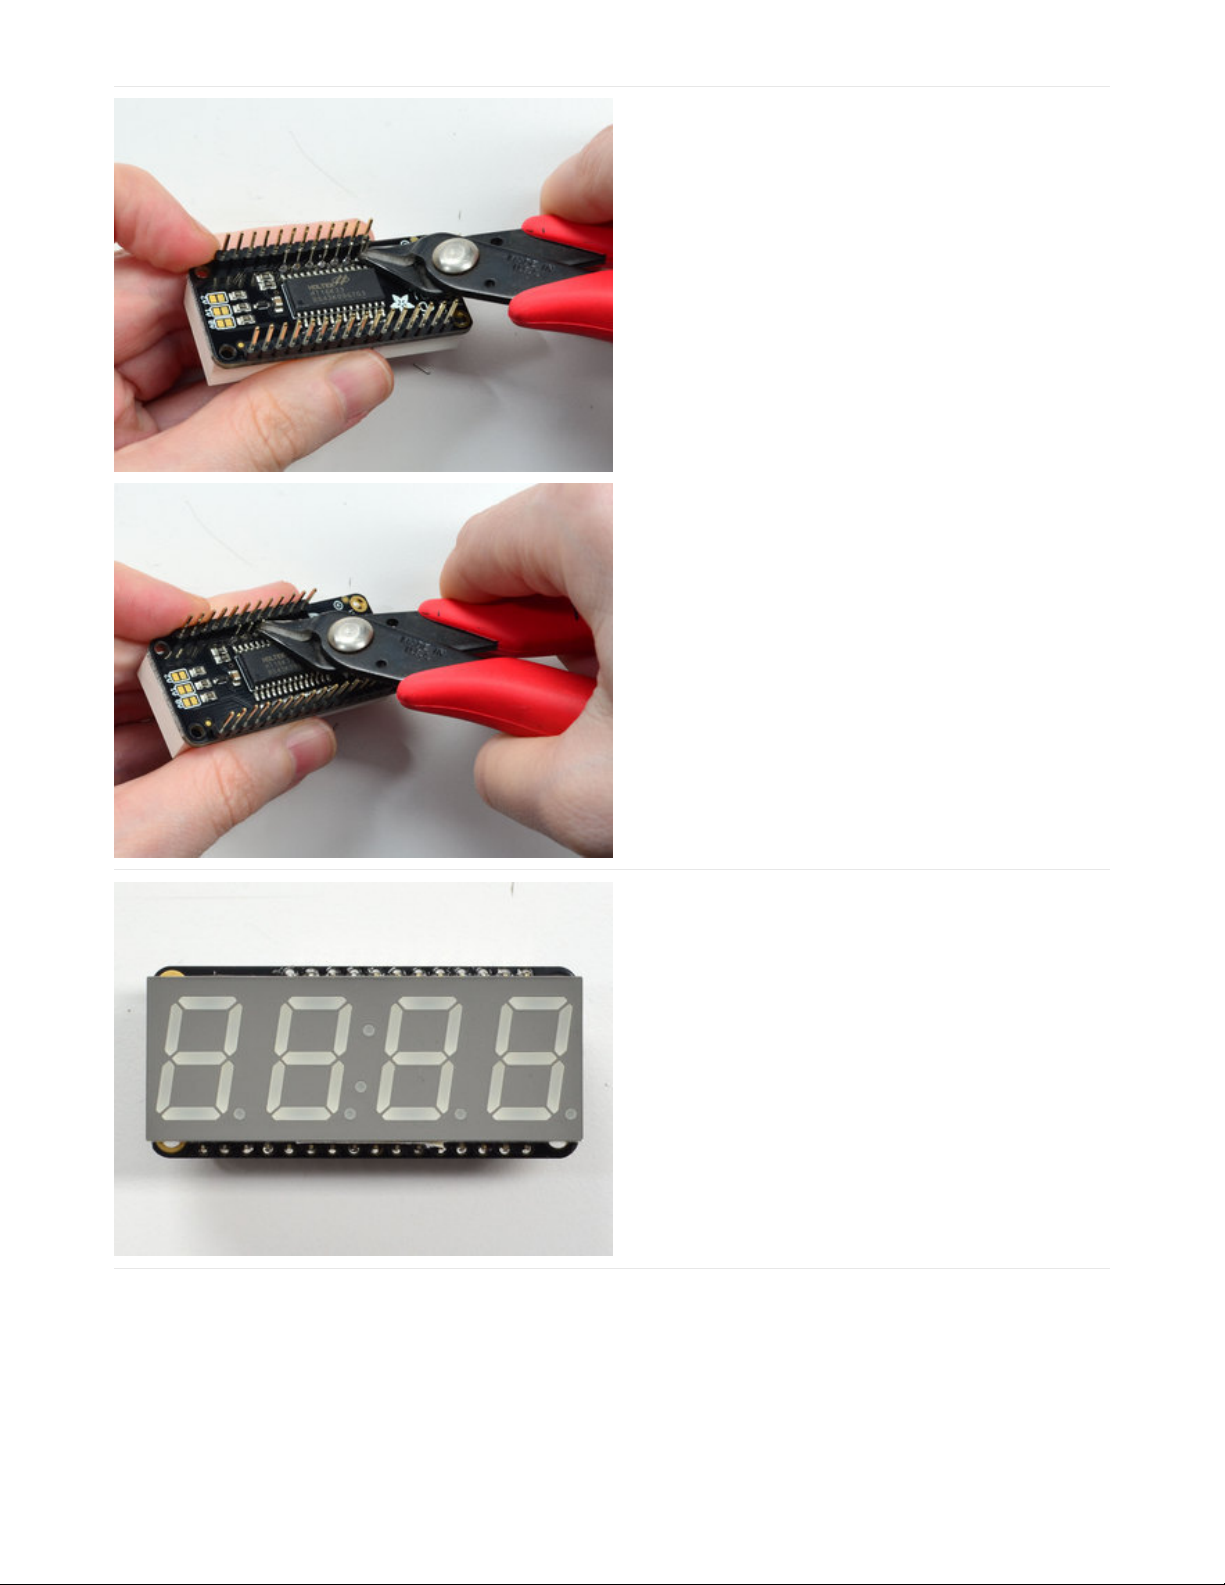
Once soldered, clip each wire short
You're done! You can now install software and get
blinking
© Adafruit Industries https://learn.adafruit.com/adafruit-7-segment-led-featherwings Page 15 of 31
Page 15
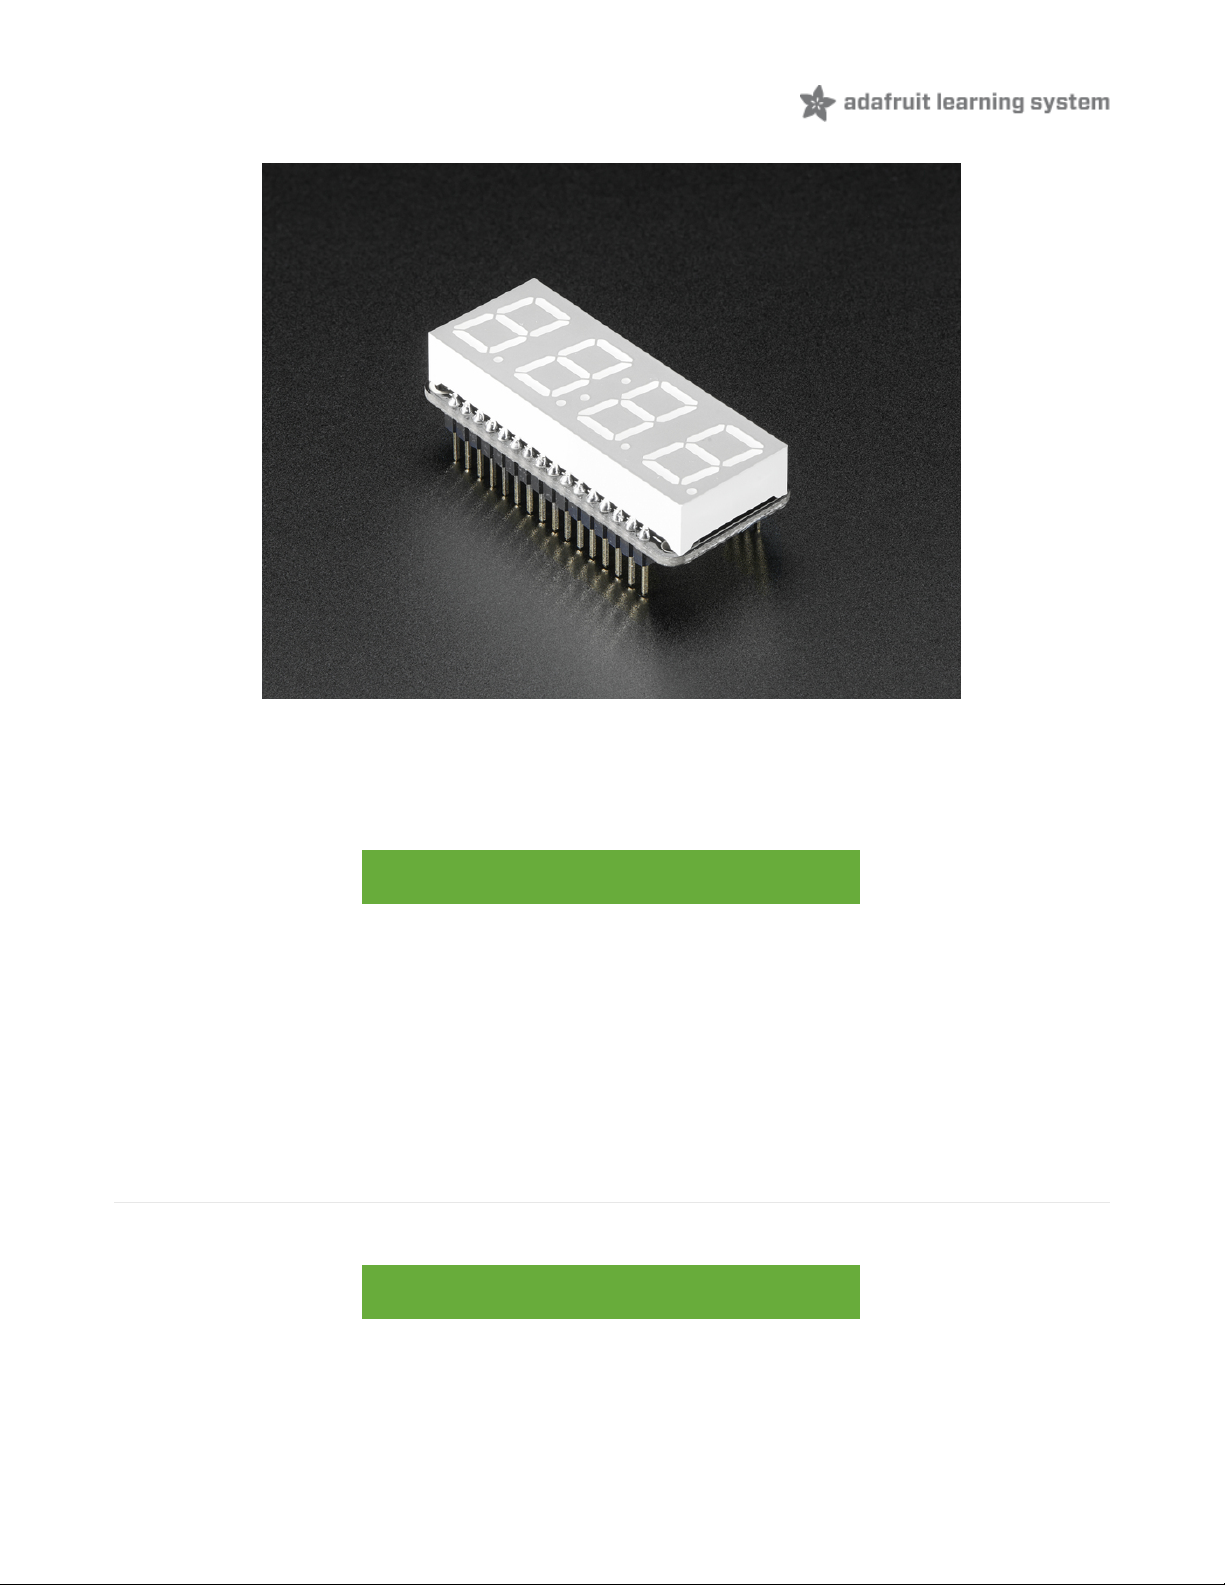
Arduino Usage
To talk to the LED helper chip you'll need to use our Arduino Adafruit LED Backpack library from
github (https://adafru.it/aLI).
To download you can visit the repository, or simply click on this button:
https://adafru.it/ncm
https://adafru.it/ncm
Rename the uncompressed folder Adafruit_LEDBackpack. Check that the Adafruit_LEDBackpack folder contains
Adafruit_LEDBackpack.cpp and Adafruit_LEDBackpack.h Place the Adafruit_LEDBackpack library folder your
arduinosketchfolder
/libraries/ folder.
You may need to create the
libraries
subfolder if it's your first library. We also have a great tutorial on Arduino library
installation at:
http://learn.adafruit.com/adafruit-all-about-arduino-libraries-install-use (https://adafru.it/aYM)
Install Adafruit GFX
You will need to do the same for the Adafruit_GFX library available here (https://adafru.it/aJa)
https://adafru.it/cBB
https://adafru.it/cBB
Rename the uncompressed folder Adafruit_GFX and check that the Adafruit_GFX folder contains Adafruit_GFX.cpp
and Adafruit_GFX.h
© Adafruit Industries https://learn.adafruit.com/adafruit-7-segment-led-featherwings Page 16 of 31
Page 16
Place the Adafruit_GFX library folder your
arduinosketchfolder
/libraries/ folder like you did with the LED Backpack
library
If using an older (pre-1.8.10) version of the Arduino IDE, also locate and install Adafruit_BusIO (https://adafru.it/Ldl)
(newer versions do this automatically when installing Adafruit_GFX with the Arduino Library Manager).
GFX isn’t actually used for the 7-segment display, it's only for the matrix backpacks but it's still required by the library
so please install it to avoid errors! Restart the IDE.
Run Test!
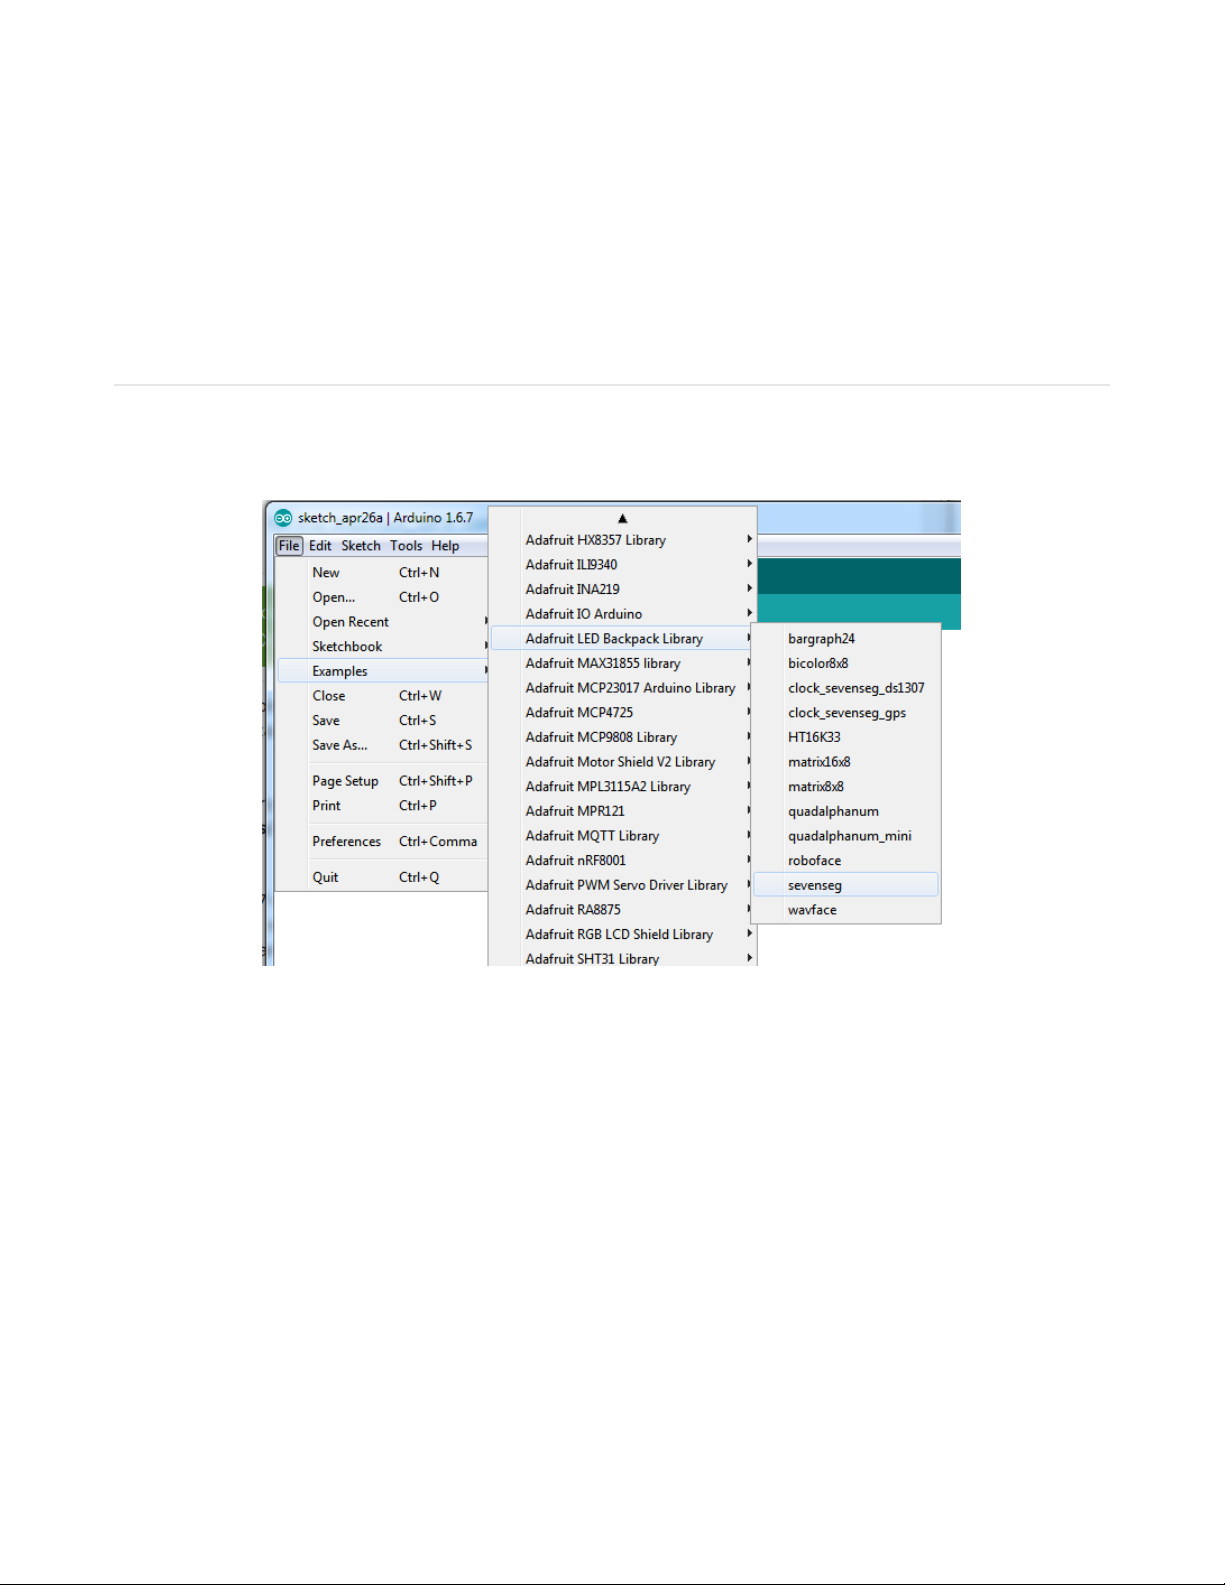
Once you've restarted you should be able to select the File->Examples->Adafruit_LEDBackpack->sevenseg example
sketch. Upload it to your Feather as usual. You should see a basic test program that goes through a bunch of different
routines.
© Adafruit Industries https://learn.adafruit.com/adafruit-7-segment-led-featherwings Page 17 of 31
Page 17
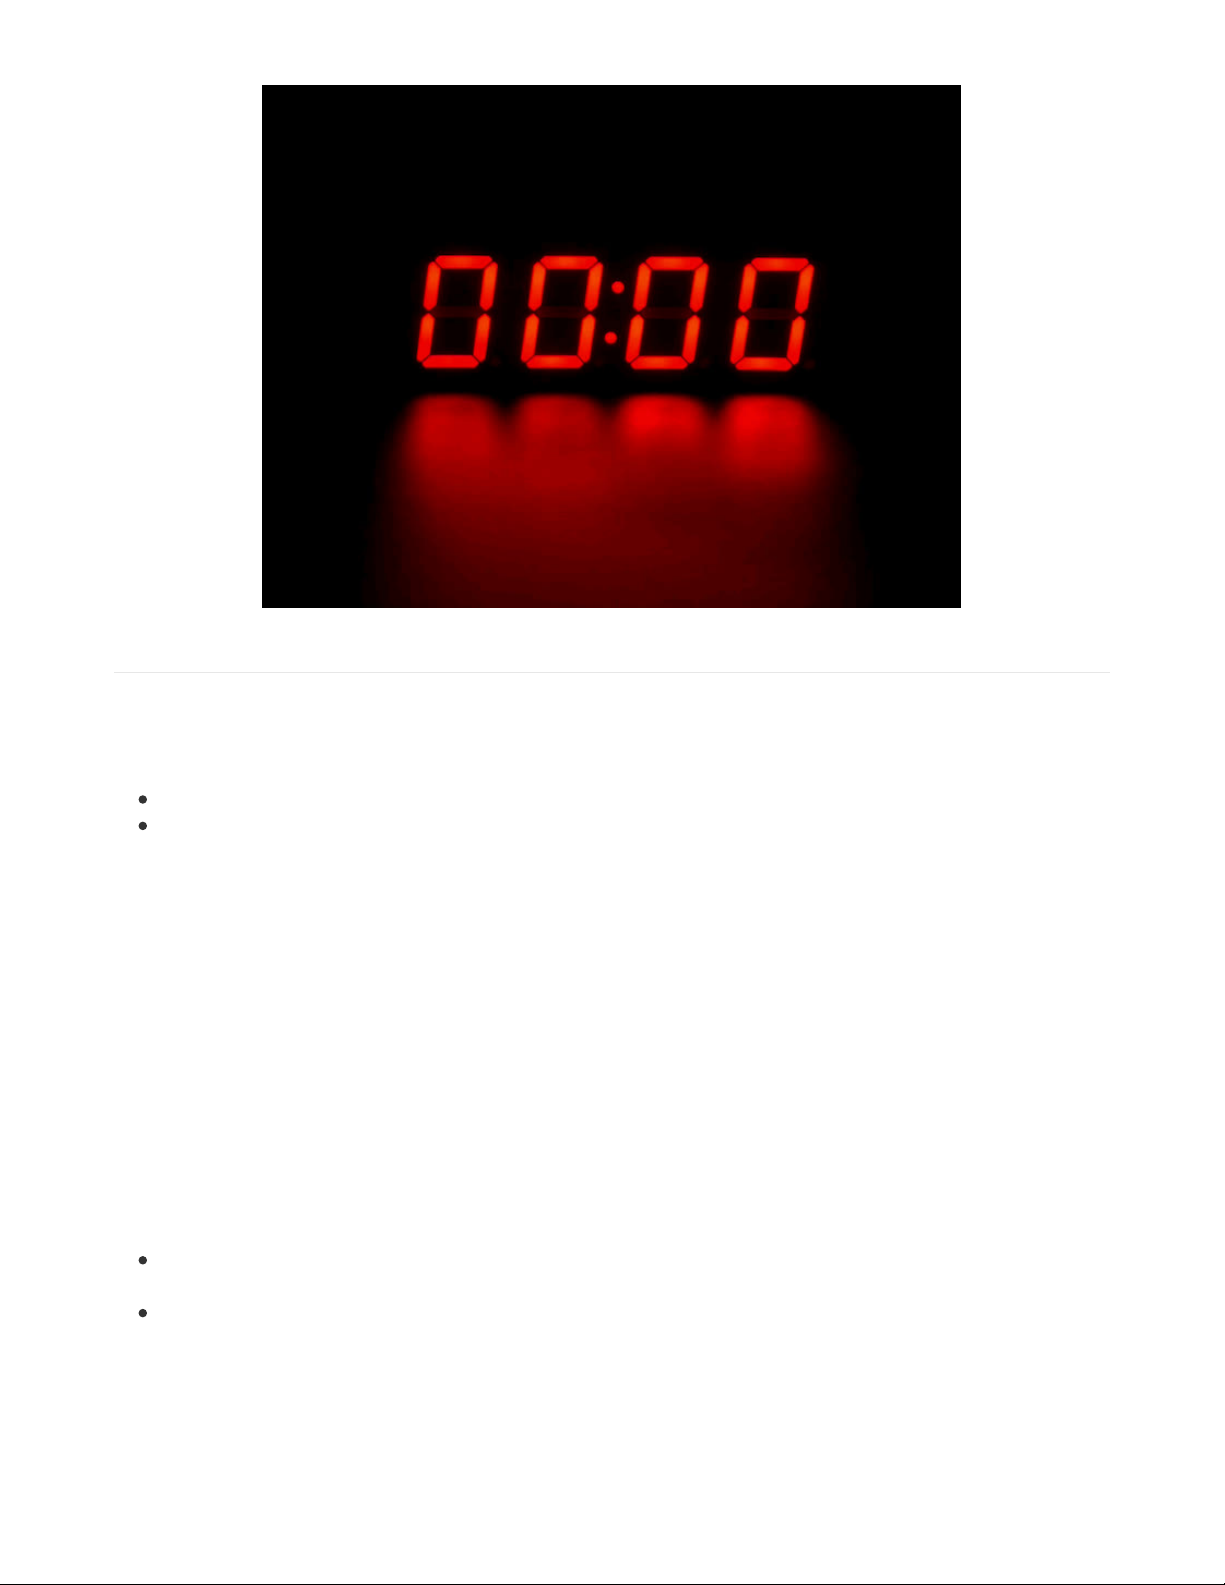
Library Reference
Once you're happy that the matrix works, you can write your own sketches.
There's a few ways you can draw to the display. The easiest is to just call print - just like you do with Serial
print(
variable,
HEX) - this will print a hexidecimal number, from 0000 up to FFFF
print(
variable,
DEC) or print(
variable
) - this will print a decimal integer, from 0000 up to 9999
If you need more control, you can call writeDigitNum(
location, number
) - this will write the
number
(0-9) to a single
location. Location #0 is all the way to the left, location #2 is the colon dots so you probably want to skip it, location #4
is all the way to the right.
If you want a decimal point, call writeDigitNum(
location, number
, true) which will paint the decimal point. To draw the
colon, use drawColon(
true or false
)
If you want even more control, you can call writeDigitRaw(
location,bitmask
) to draw a raw 8-bit mask (as stored in a
uint8_t) to that location.
All the drawing routines only change the display memory kept by the Arduino. Don't forget to call writeDisplay() after
drawing to 'save' the memory out to the matrix via I2C.
There are also a few small routines that are special to the backpack:
setBrightness(
brightness
)- will let you change the overall brightness of the entire display. 0 is least bright, 15 is
brightest and is what is initialized by the display when you start
blinkRate(
rate
) - You can blink the entire display. 0 is no blinking. 1, 2 or 3 is for display blinking.
© Adafruit Industries https://learn.adafruit.com/adafruit-7-segment-led-featherwings Page 18 of 31
Page 18
CircuitPython
Adafruit CircuitPython Module Install
To use the LED backpack with your Adafruit CircuitPython (https://adafru.it/BlM) board you'll need to install
the Adafruit_CircuitPython_HT16K33 (https://adafru.it/u1E) module on your board. Remember this module is for
Adafruit CircuitPython firmware and not MicroPython.org firmware!
First make sure you are running the latest version of Adafruit CircuitPython (https://adafru.it/tBa) for your board. Next
you'll need to install the necessary libraries to use the hardware--read below and carefully follow the referenced steps
to find and install these libraries from Adafruit's CircuitPython library bundle (https://adafru.it/zdx).
Bundle Install
For express boards that have extra flash storage, like the Feather/Metro M0 express and Circuit Playground express,
you can easily install the necessary libraries with Adafruit's CircuitPython bundle (https://adafru.it/zdx). This is an all-in-
one package that includes the necessary libraries to use the LED backpack display with CircuitPython. For details on
installing the bundle, read about CircuitPython Libraries (https://adafru.it/ABU).
Remember for non-express boards like the Trinket M0, Gemma M0, and Feather/Metro M0 basic you'll need to
manually install the necessary libraries (https://adafru.it/ABU) from the bundle:
adafruit_ht16k33
adafruit_bus_device
adafruit_register
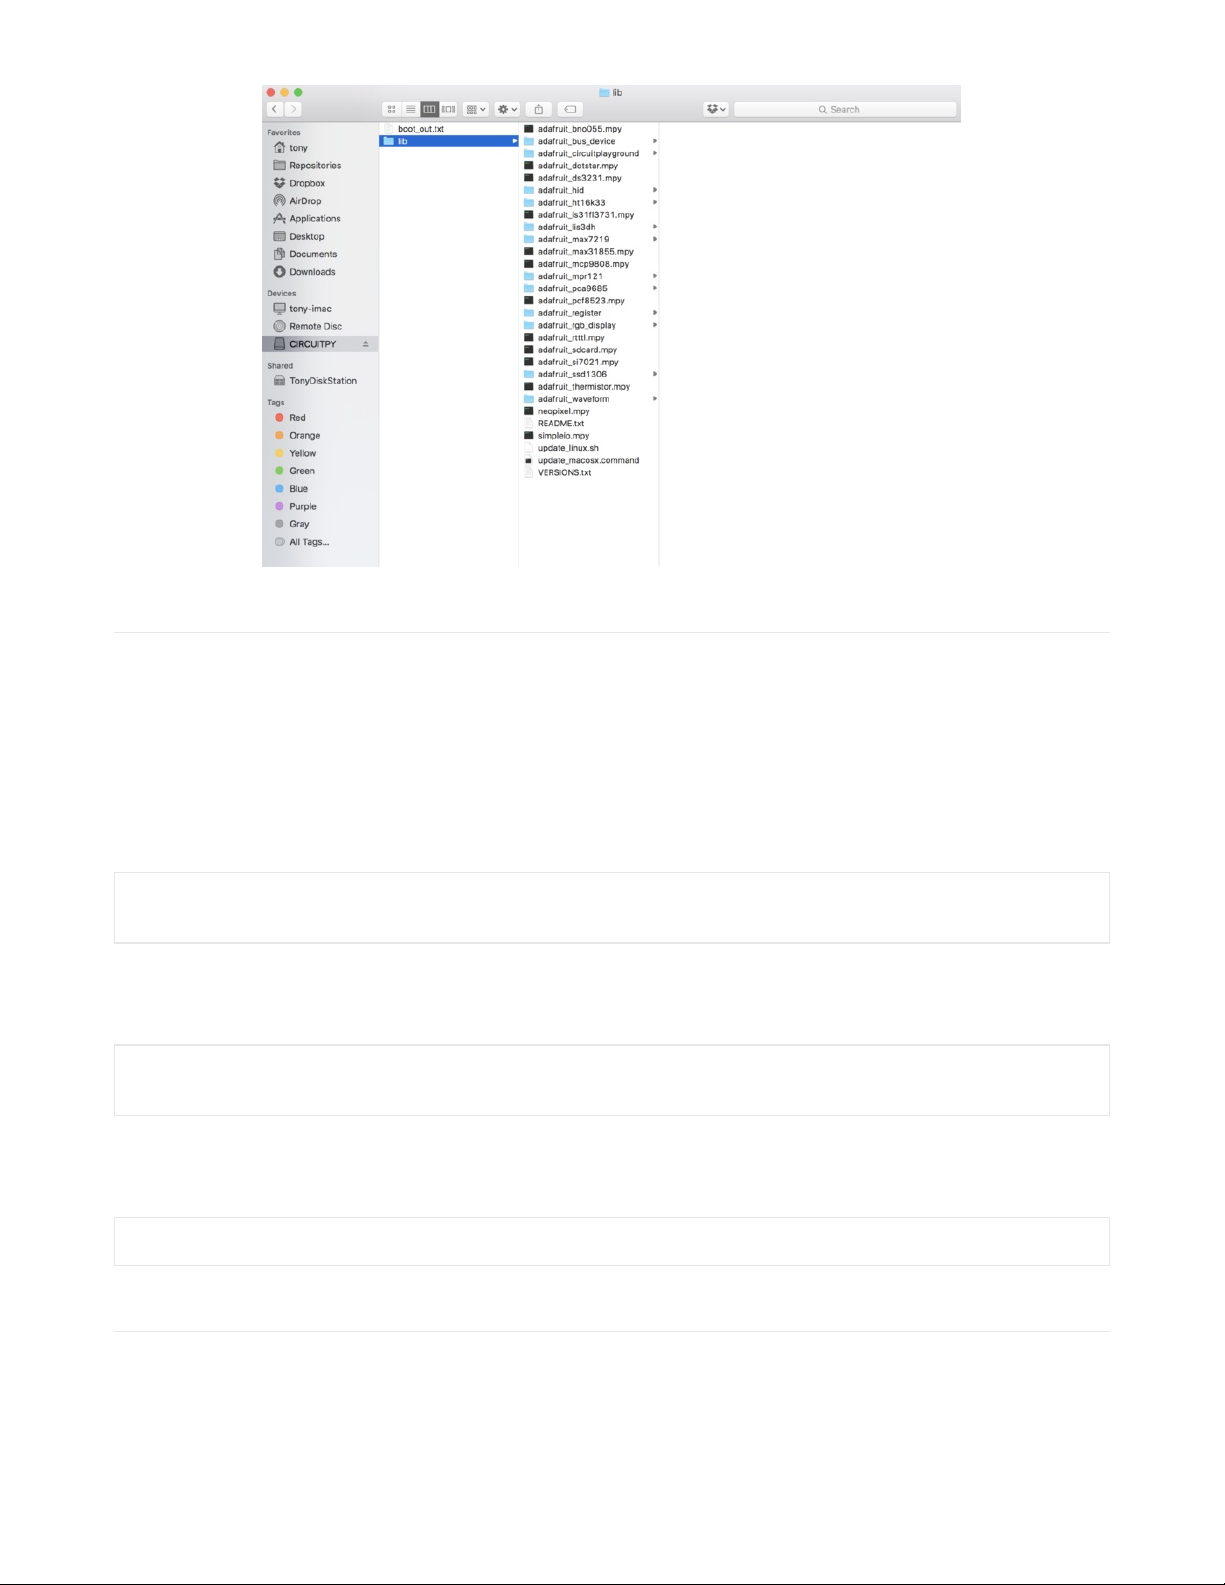
If your board supports USB mass storage, like the M0-based boards, then simply drag the files to the board's file
system. Note on boards without external SPI flash, like a Feather M0 or Trinket/Gemma M0, you might run into
issues on Mac OSX with hidden files taking up too much space when drag and drop copying, see this page for a
workaround (https://adafru.it/u1d).
If your board doesn't support USB mass storage, like the ESP8266, then use a tool like ampy to copy the file to the
board (https://adafru.it/s1f). You can use the latest version of ampy and its new directory copy
command (https://adafru.it/q2A) to easily move module directories to the board.
Before continuing make sure your board's lib folder or root filesystem has at least
the adafruit_ht16k33, adafruit_bus_device, and adafruit_register folders/modules copied over.
© Adafruit Industries https://learn.adafruit.com/adafruit-7-segment-led-featherwings Page 19 of 31
Page 19
Usage
The following section will show how to control the LED backpack from the board's Python prompt / REPL. You'll walk
through how to control the LED display and learn how to use the CircuitPython module built for the display.
First connect to the board's serial REPL (https://adafru.it/Awz)so you are at the CircuitPython >>> prompt.
I2C Initialization
First you'll need to initialize the I2C bus for your board. First import the necessary modules:
import board
import busio as io
Note if you're using the ESP8266 or other boards which do not support hardware I2C you need to import from the
bitbangio module instead of busio:
import board
import bitbangio as io
Now for either board run this command to create the I2C instance using the default SCL and SDA pins (which will be
marked on the boards pins if using a Feather or similar Adafruit board):
i2c = io.I2C(board.SCL, board.SDA)
LED Matrix
To use a LED matrix you'll first need to import the adafruit_ht16k33.matrix module and create an instance of the
appropriate Matrix class. There are three classes currently available to use:
© Adafruit Industries https://learn.adafruit.com/adafruit-7-segment-led-featherwings Page 20 of 31
Page 20
Matrix8x8 - This is for a simple 8x8 matrix (square or round pixels, they're both the same driver and code).
Matrix16x8 - This is for a 16x8 matrix (i.e. double the width of the 8x8 matrices). For the LED Matrix FeatherWing
you want to use this Matrix16x8 class.
Matrix8x8x2 - This is for a 8x8 bi-color matrix.
For example to use the Matrix16x8 class import the module and create an instance with:
import adafruit_ht16k33.matrix
matrix = adafruit_ht16k33.matrix.Matrix16x8(i2c)
The above command will create the matrix class using the default I2C address of the display (0x70). If you've changed
the I2C address (like when using multiple backpacks or displays) you can override it in the initializer using an
optional address keyword argument.
For example to create an instance of the Matrix8x8 class on address 0x74:
matrix = adafruit_ht16k33.matrix.Matrix8x8(i2c, address=0x74)
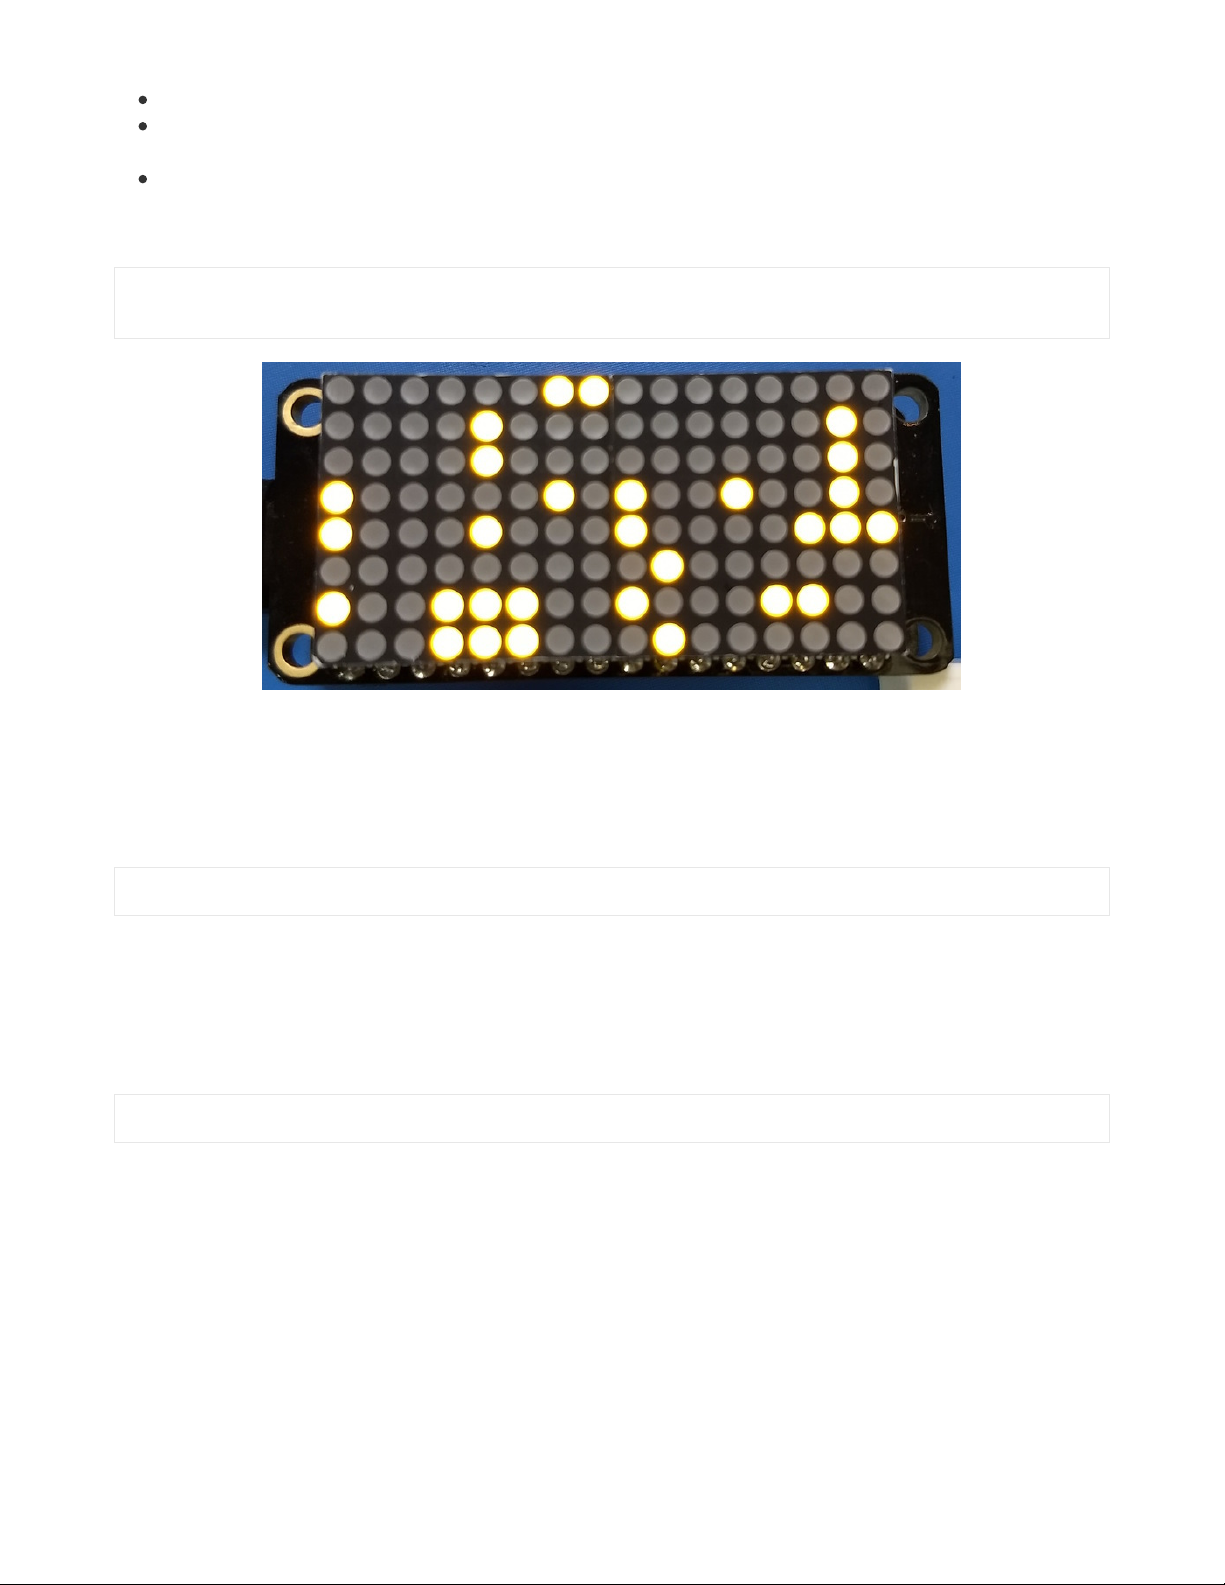
You might notice the matrix turns on to a 'jumbled' collection of random LEDs. Don't worry! The display isn't broken,
right now the module that controls it doesn't clear the display state on startup so you might see noise from random
memory values.
To clear the display and turn all the pixels off you can use the fill command with a color of 0 (off):
matrix.fill(0)
© Adafruit Industries https://learn.adafruit.com/adafruit-7-segment-led-featherwings Page 21 of 31
Page 21

By default the display will update automatically. This way you do not need to call the show function every time you
update the display buffer. However, this means it is being sent the contents of the display buffer with every change.
This can slow things down if you're trying to do something fancy. If you think you're running into that issue, you can
simply turn the auto write feature off. Then you will need to call show to update the display.
# auto write can be turned off
matrix.auto_write = False
# and fill is same as before
matrix.fill(0)
# but now you have to call show()
matrix.show()
To turn all the pixels on you can use fill with a color of 1 (on):
matrix.fill(1)
If you're using the bi-color matrix you can even use a fill color of 2 or 3 to change to different colors of red, green, and
yellow (red + green).
Next you can set pixels on the display by accessing them using x,y coordinates and setting a color:
X position - X position of the pixel on the matrix.
Y position - Y position of the pixel on the matrix.
Color - 0 for off, 1 for on (or one of the LEDs for bi-color display), 2 or 3 for other bi-color display colors.
© Adafruit Industries https://learn.adafruit.com/adafruit-7-segment-led-featherwings Page 22 of 31
Page 22
The general way to set a pixel is:
matrix[x,y] = color
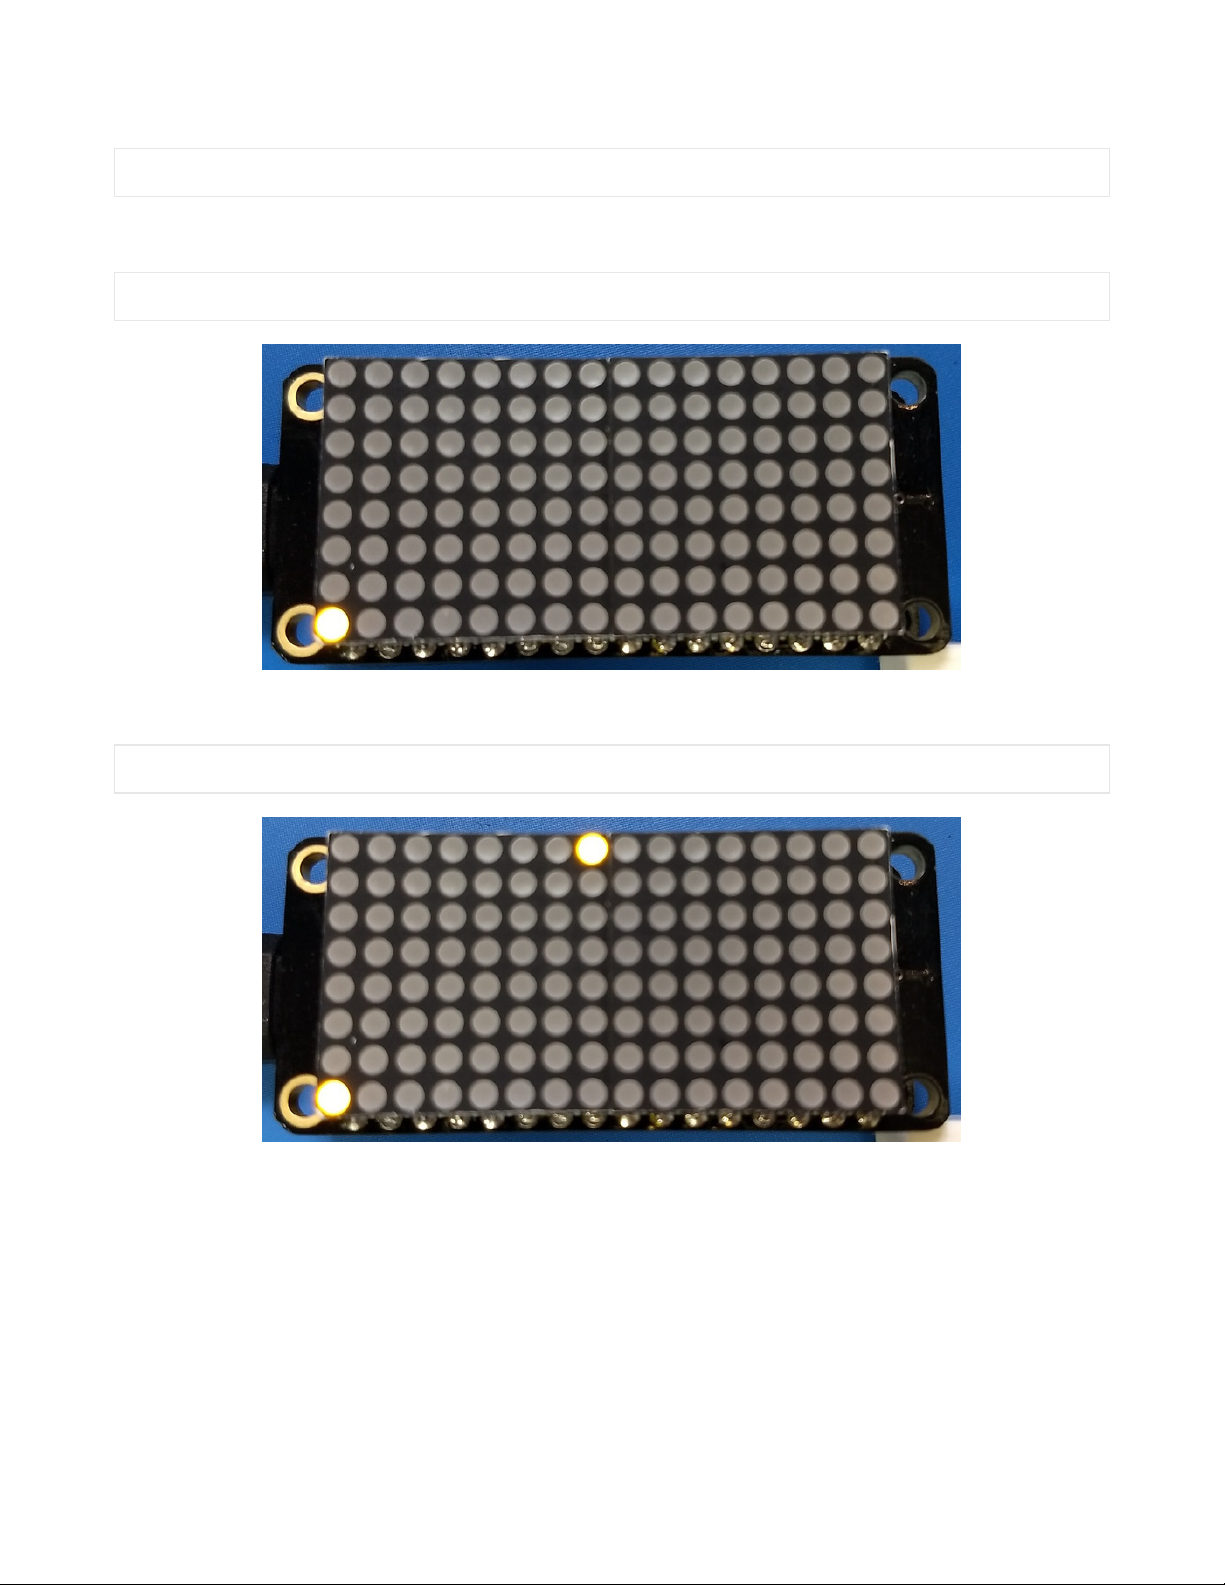
For example to set the first pixel at position 0, 0 to on:
matrix[0, 0] = 1
Or to set the opposite corner pixel at position 7, 7 to on:
matrix[7, 7] = 1
That's all there is to controlling the pixels on a LED matrix! Right now the matrix library is simple and only exposes
basic pixel control. In the future more advanced drawing commands might be avaialable.
Brightness and Blinking
You can change the brightness of the entire display with the brightness property. This property has a value from 0 to
15 where 0 is the lowest brightness and 15 is the highest brightness. Note that you don't need to call show after
calling brightness, the change is instant.
For example to set the brightness to the minimum:
© Adafruit Industries https://learn.adafruit.com/adafruit-7-segment-led-featherwings Page 23 of 31
Page 23
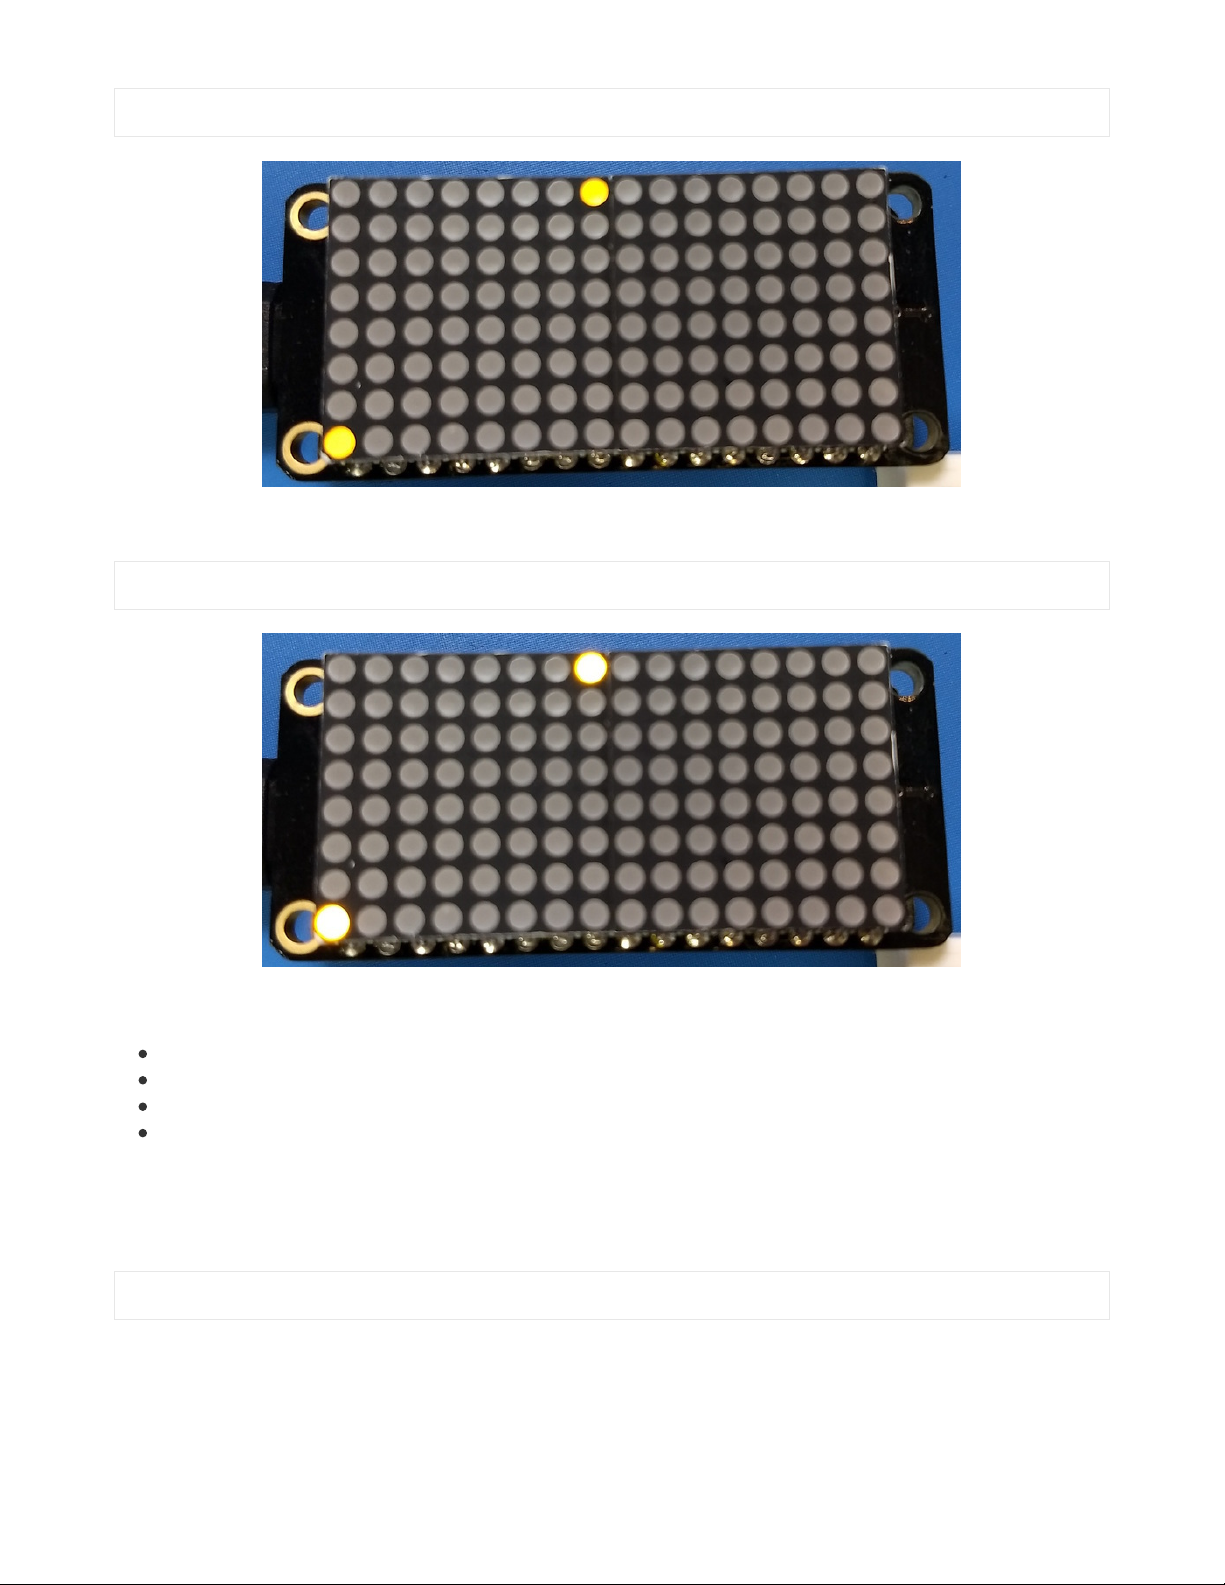
matrix.brightness = 0
Or to set it back to maximum:
matrix.brightness = 15
You can also make the entire display blink at 3 different rates using the blink_rate property, which has a value 0 to 3:
0 = no blinking
1 = fast blinking (~once a 1/2 second)
2 = moderate blinking (~once a second)
3 = slow blinking (~once every 2 seconds)
Again you don't need to call show after setting the blink rate, the change will immediately take effect.
For example to blink quickly:
matrix.blink_rate = 1
And to stop blinking:
© Adafruit Industries https://learn.adafruit.com/adafruit-7-segment-led-featherwings Page 24 of 31
Page 24
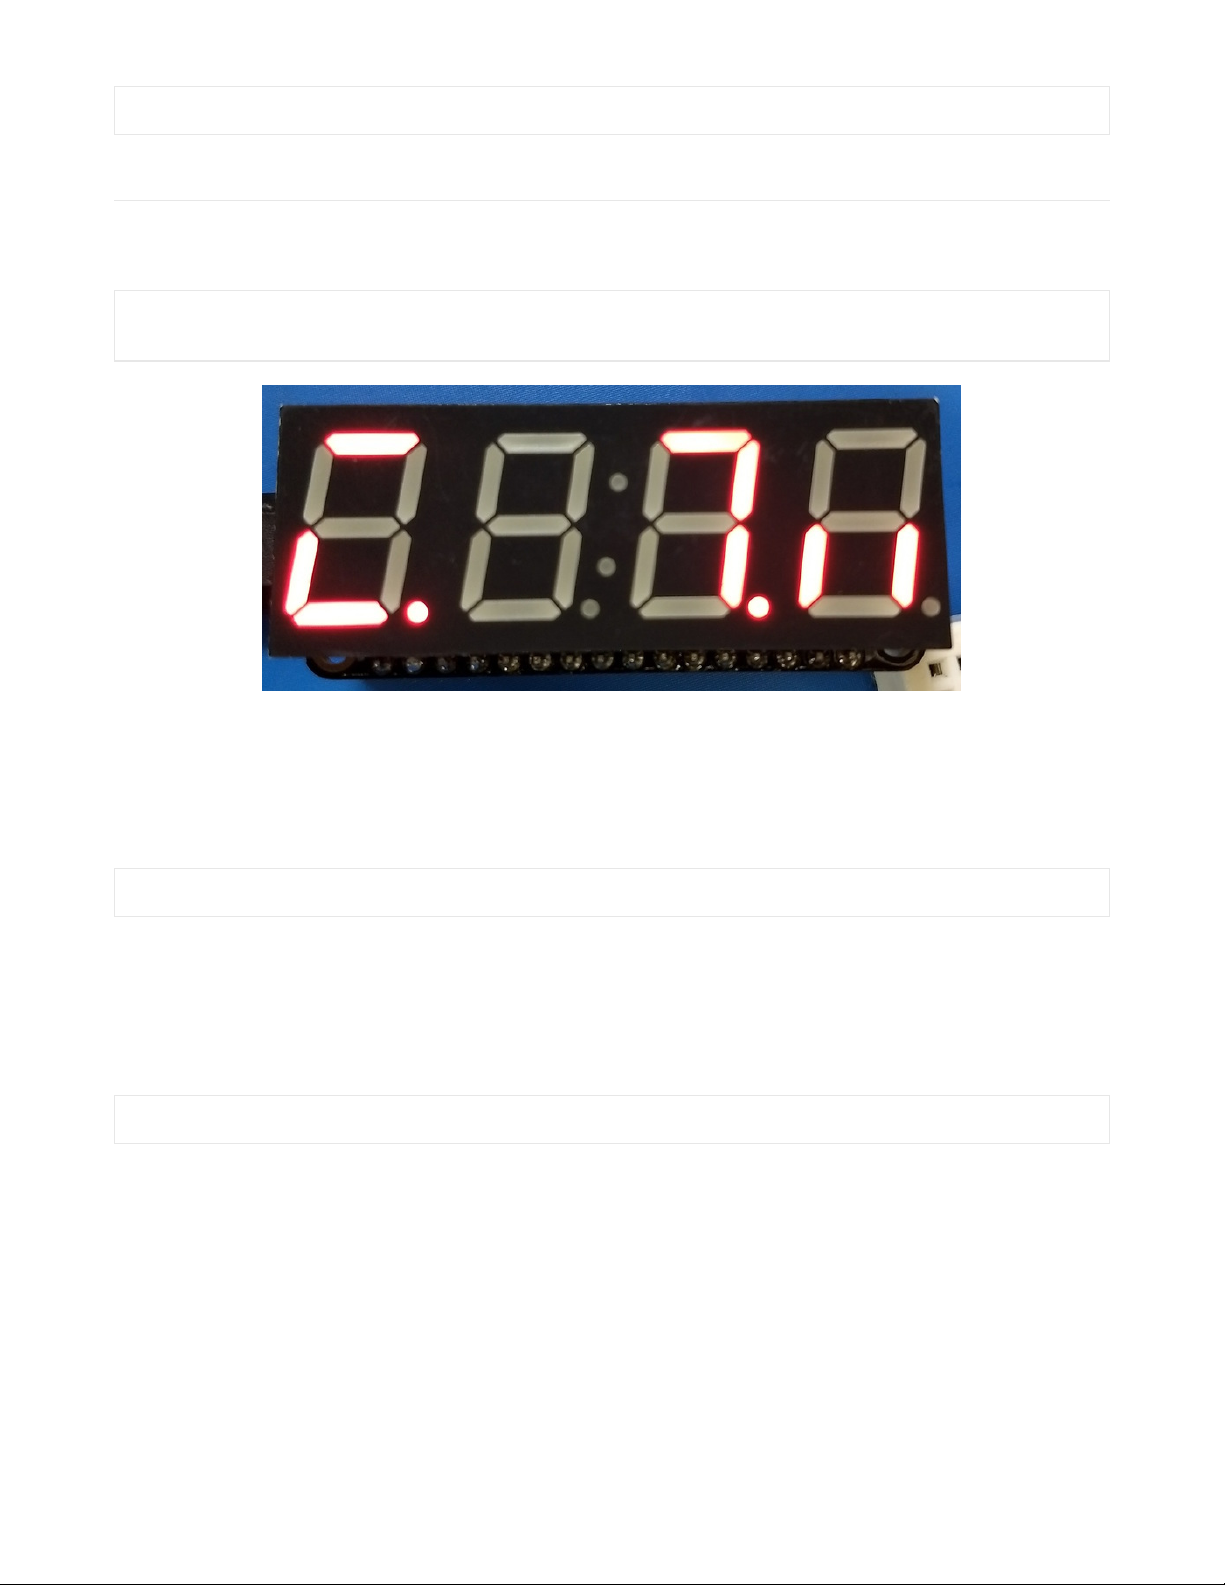
matrix.blink_rate = 0
LED 7-segment Display
To use a 7-segment display you'll first need to import the adafruit_ht16k33.segments module and create an instance
of the Seg7x4 class.
import adafruit_ht16k33.segments
display = adafruit_ht16k33.segments.Seg7x4(i2c)
The above command will create the 7-segment class using the default I2C address of the display (0x70). If you've
changed the I2C address (like when using multiple backpacks or displays) you can override it in the initializer using an
optional address keyword argument.
For example to create an instance of the Seg7x4 class on address 0x74:
display = adafruit_ht16k33.Seg7x4(i2c, address=0x74)
You might notice the display turns on to a 'jumbled' collection of random LEDs. Don't worry! The display isn't broken,
right now the module that controls it doesn't clear the display state on startup so you might see noise from random
memory values.
To clear the display and turn all the LEDs off you can use the fill command with a color of 0 (off):
display.fill(0)
© Adafruit Industries https://learn.adafruit.com/adafruit-7-segment-led-featherwings Page 25 of 31
Page 25
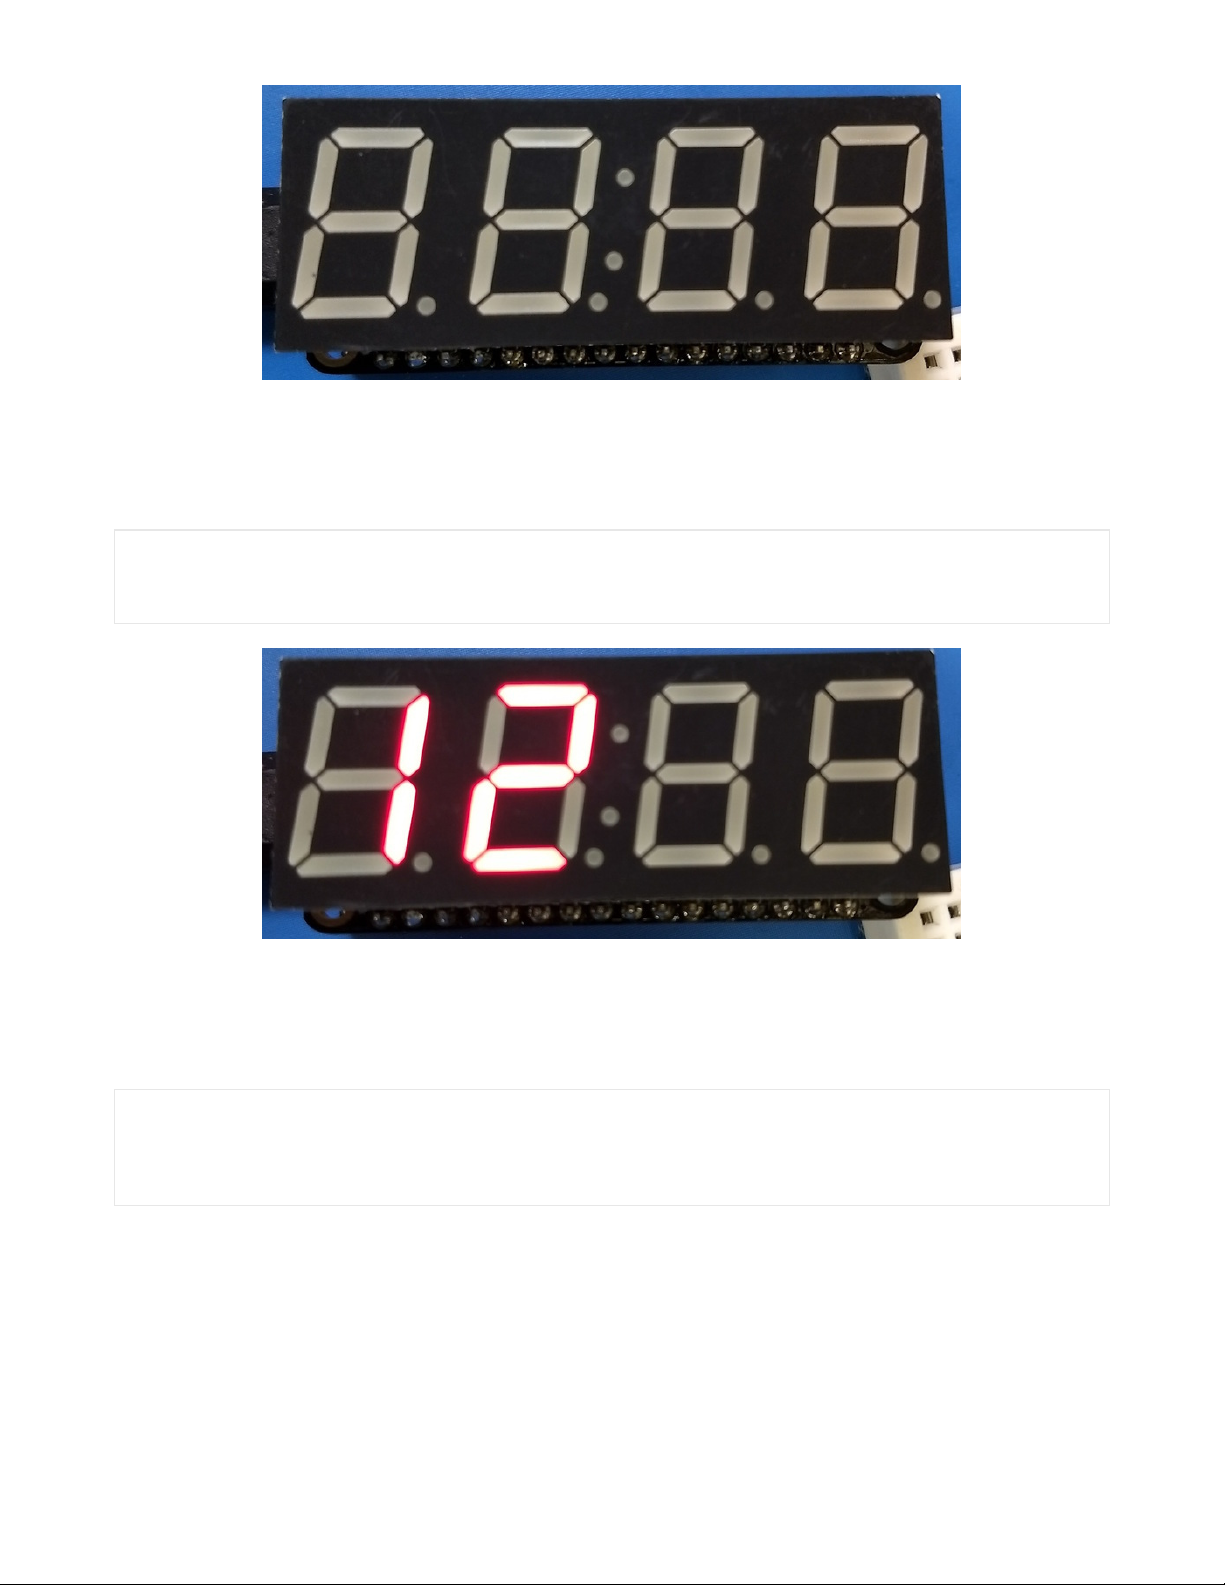
Setting Individual Digits
You can put a numeric value in any of the display's 4 positions by accessing it using the index of the position. For
example to set position 0 to the number 1 and position 1 to the number 2 call:
display[0] = '1'
display[1] = '2'
display.show()
Display Numbers and Hex Values
You can also use the print function to write to the entire display. Remember the display only has 4 digits so a best
effort will be made to display the number--you might need to round the number or adjust it to fit!
display.print(1234)
display.show()
display.print(3.141)
display.show()
© Adafruit Industries https://learn.adafruit.com/adafruit-7-segment-led-featherwings Page 26 of 31
Page 26
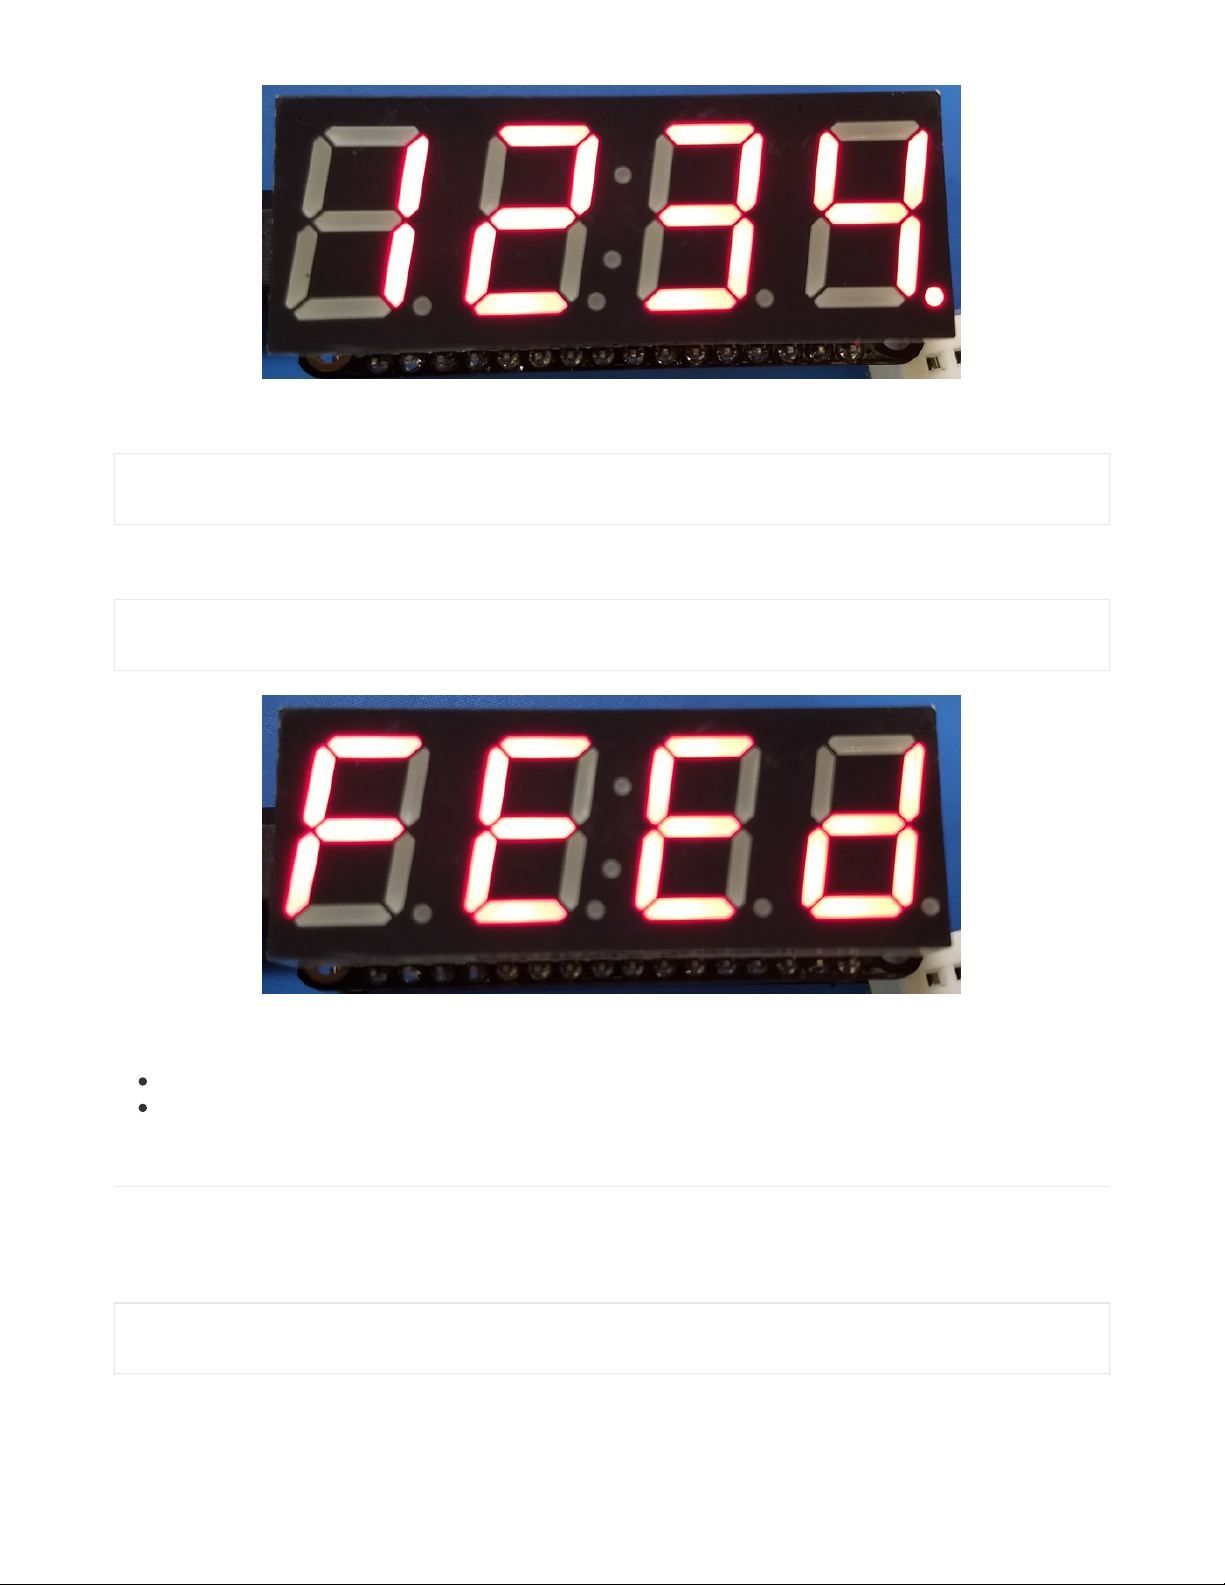
To display hex values, pass in a string to print. The hex characters A-F can be displayed.
display.print('FEED')
display.show()
If you want to work with actual integer values, then use the built in string formatting.
display.print('{:x}'.format(65261))
display.show()
You can pass some special characters to the display to control extra capabilities:
Colon - Use ':' to turn the colon on, you don't need to specify the position parameter. Use ';' to turn the colon off.
Hex character - Use a character 'a' through 'f' to display a high hex character value at a specified position.
LED 14-segment Quad Alphanumeric Display
To use a 14-segment quad alphanumeric display it's almost exactly the same as the 7-segment display, but with a
slightly different class name. Import the adafruit_ht16k33.segments module again but this time create an instance of
the Seg14x4 class.
import adafruit_ht16k33.segments
display = adafruit_ht16k33.segments.Seg14x4(i2c)
The above command will create the 14-segment class using the default I2C address of the display (0x70). If you've
© Adafruit Industries https://learn.adafruit.com/adafruit-7-segment-led-featherwings Page 27 of 31
Page 27
changed the I2C address (like when using multiple backpacks or displays) you can override it in the initializer using an
optional address keyword argument.
For example to create an instance of the Seg14x4 class on address 0x74:
display = adafruit_ht16k33.segments.Seg14x4(i2c, address=0x74)
You might notice the display turns on to a 'jumbled' collection of random LEDs. Don't worry! The display isn't broken,
right now the module that controls it doesn't clear the display state on startup so you might see noise from random
memory values.
To clear the display and turn all the LEDs off you can use the fill command with a color of 0 (off):
display.fill(0)
display.show()
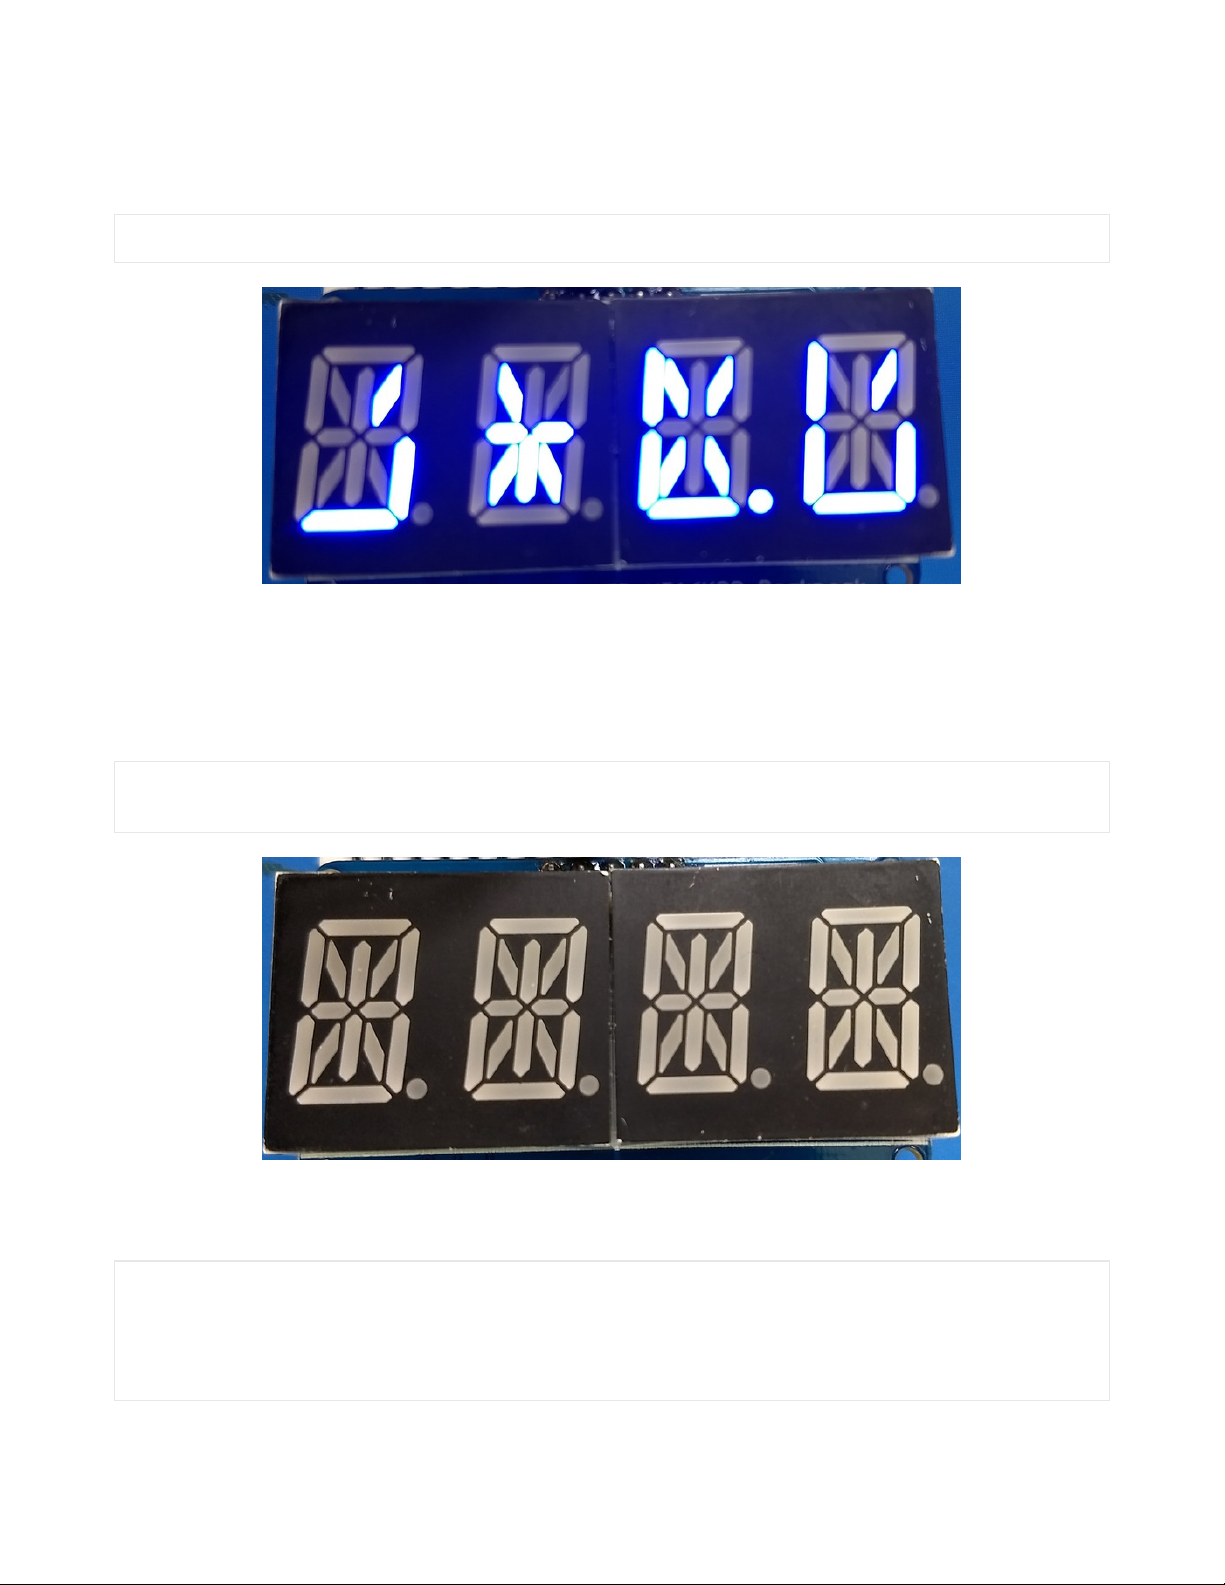
To access the individual digits, it's the same as with the 7-segment display. However, the 14-segment display can take
any alphanumeric character. For example:
display[0] = 'C'
display[1] = 'I'
display[2] = 'P'
display[3] = 'Y'
display.show()
© Adafruit Industries https://learn.adafruit.com/adafruit-7-segment-led-featherwings Page 28 of 31
Page 28
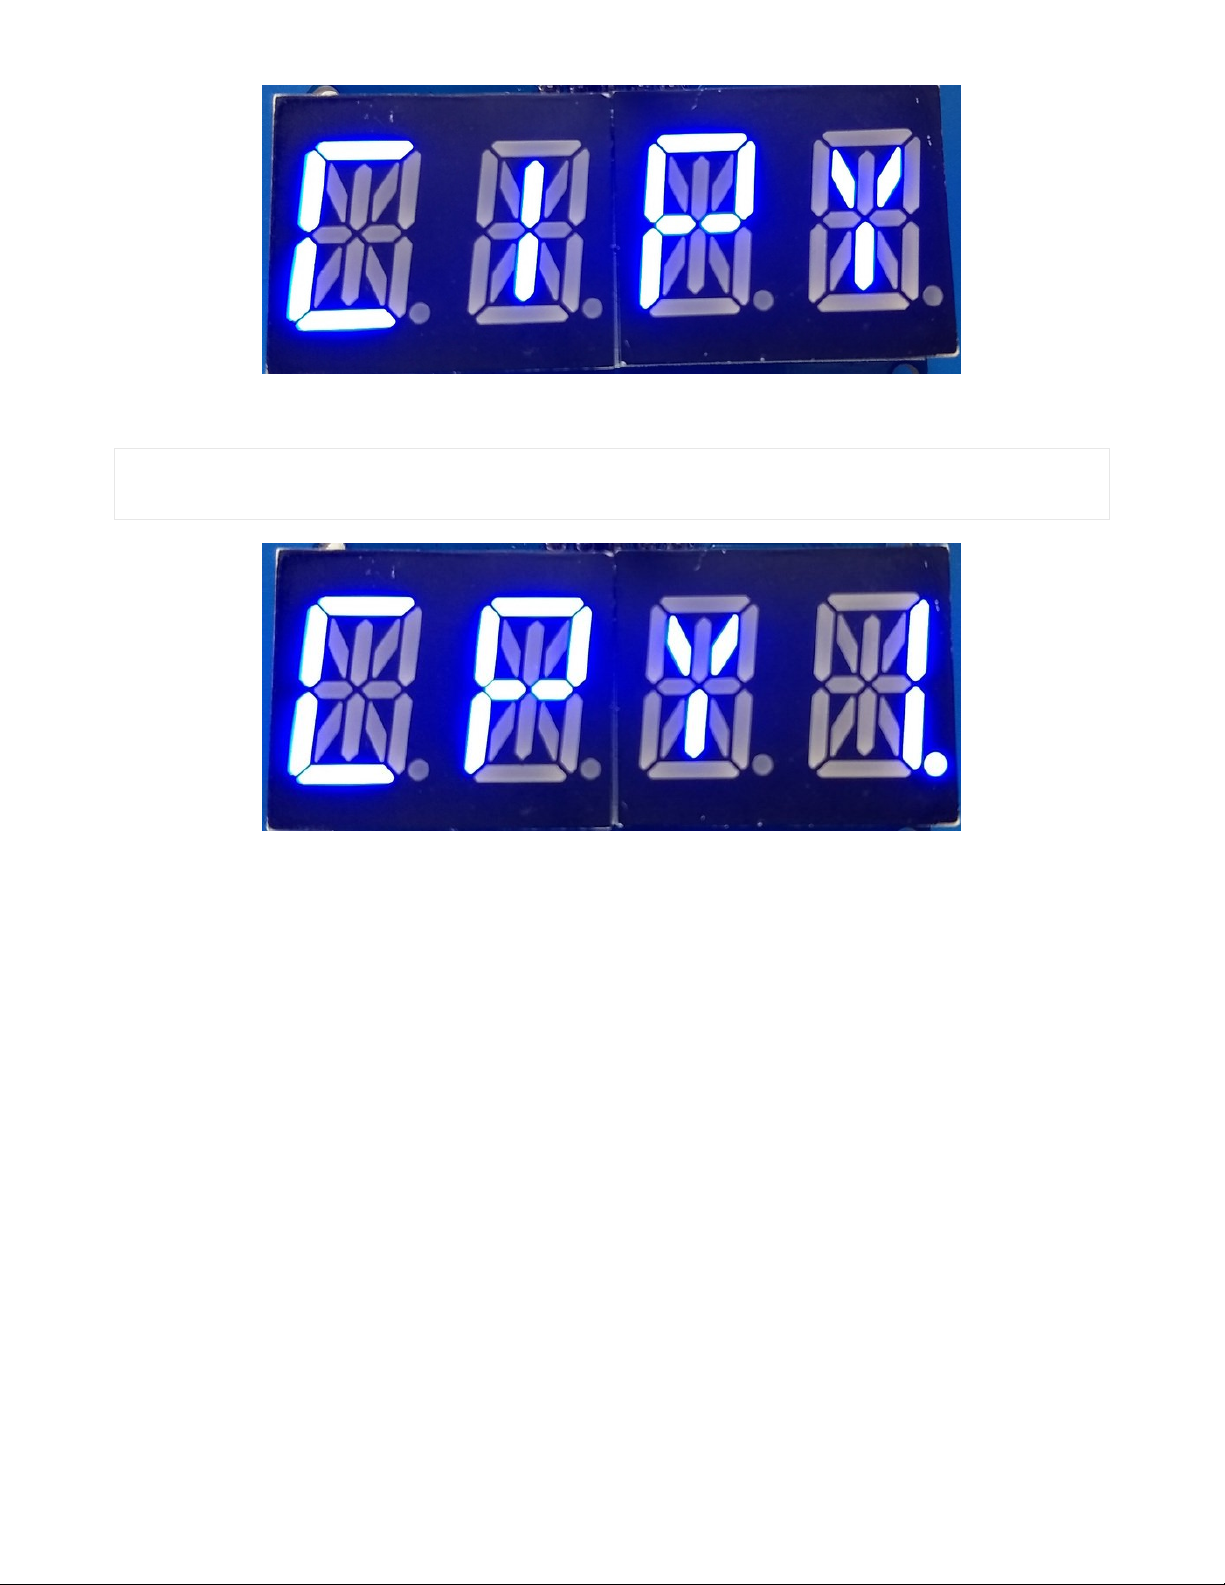
You can use the print function to write to the entire display.
display.print('CPY!')
display.show()
© Adafruit Industries https://learn.adafruit.com/adafruit-7-segment-led-featherwings Page 29 of 31
Page 29
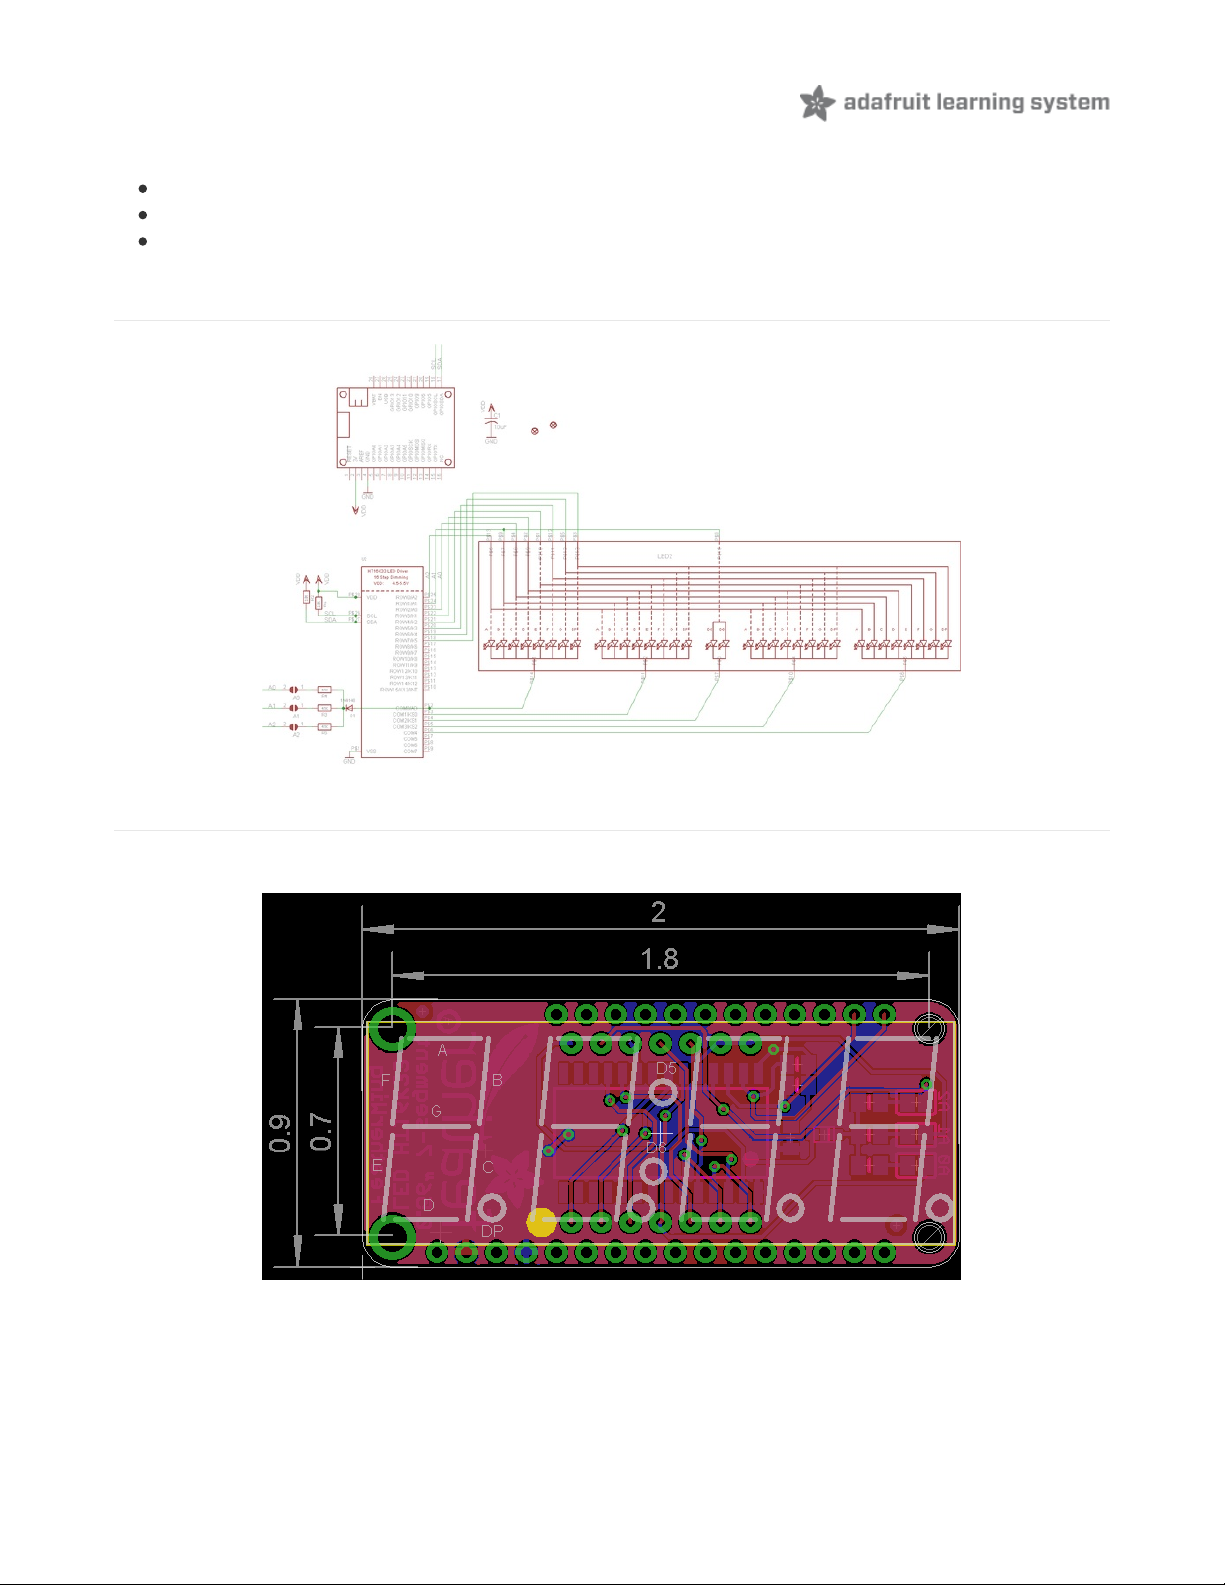
Downloads
Arduino LED Backpack Library (https://adafru.it/mau)
EagleCAD Featherwing PCB files (https://adafru.it/nco)
Fritzing objects in Adafruit Fritzing library (https://adafru.it/aP3)
Schematic
Fabrication Print
Dimensions in inches
© Adafruit Industries https://learn.adafruit.com/adafruit-7-segment-led-featherwings Page 30 of 31
Page 30

© Adafruit Industries Last Updated: 2020-05-18 07:37:41 PM EDT Page 31 of 31
 Loading...