

Page 1

1999 RL Online Reference Owner's Manual
Use these links (and links throughout this manual) to navigate through this reference.
For a printed owner's manual, click on authorized manuals or go to www.helminc.com.
Contents
Introduction ......................................................................................................................................... i
A Few Words About Safe
t
y.................................................................................................................ii
Driver and Passenger Safety ..............................................................................................................5
Proper use and care of your vehicle's seat belts, and Supplemental Restraint System.
Instruments and Controls.................................................................................................................51
Instrument panel indicator and gauge, and how to use dashboard and steering column controls.
Comfort and Convenience Features ............................................................................................. 119
How to operate the climate control system, the audio system, and other convenience features.
Before Driving..................................................................................................................................16
7
What gasoline to use, how to break-in your new vehicle, and how to load luggage and other cargo.
Driving ..............................................................................................................................................17
9
The proper way to start the engine, shift the transmission, and park, plus towing a trailer.
Maintenance.....................................................................................................................................20
1
The Maintenance Schedule shows you when you need to take your vehicle to the dealer.
Appearance Care..............................................................................................................................261
Tips on cleaning and protecting your vehicle. Things to look for if your vehicle ever needs body repairs.
Taking Care of the Unexpected......................................................................................................269
This section covers several problems motorists sometimes experience, and how to handle them.
Technical Information.....................................................................................................................29
3
ID numbers, dimensions, capacities, and technical information.
Warranty and Customer Relations (U.S. and Canada)................................................................30
7
A summary of the warranties covering your new Acura, and how to contact us.
Authorized Manuals (U.S. only)......................................................................................................313
How to order manuals and other technical literature.
Index...................................................................................................................................................... I
Service Information Summary
A summary of information you need when you pull up to the fuel pump.
Accord Value Package Audio System
Owner's Identification Form
Navigation System
Your Vehicle at a Glance ..................................................................................................................................2
Page 2

Introduction
Your Acura Navigation System is a
highly-sophisticated location system
that uses satellites and a map
database to show you where you are
and to help guide you to a desired
destination.
The Navigation System receives
signals from the Global Positioning
System, a network of 24 satellites in
orbit around the earth. By receiving
signals from several of these
satellites, the Navigation System can
determine the latitude and longitude
of your car.
In addition, a gyroscopic sensor and
a speed sensor in your car keep track
of the direction and speed of travel at
all times.
The Navigation System applies this
location, direction, and speed
information to the maps and calcu-
lates a route to the destination you
enter. As you drive to that
destination, the System provides
guidance.
The Navigation System is easy to use.
The locations of many places of
business and entertainment are
already entered in the system. You
can select any of them as a desti-
nation by pressing only one or two of
the controls.
If a desired destination is not in the
system's database, you can enter its
address and the system will direct
you to it. This destination can be
saved for reuse at a later date.
As you drive, the Navigation System
provides visual and audio driving
instructions so you do not have to
take your eyes off the road. These
instructions are provided in advance
of the actual driving maneuver so
you have time to slow down and
change lanes if necessary.
Read this manual thoroughly so you
are familiar with all the Navigation
System's features. Afterwards, keep
this manual in the glove box of your
car so you can refer to at any time.
Navigation System
Page 3

Introduction
Important Safety Information
The Navigation System can distract
your attention from the road if you
focus on the screen or operate the
system's controls while driving.
You should always enter information
into the system before you begin
driving. Then, as you drive, you can
listen to the audio instructions or
glance at the screen.
The Navigation System is designed
to provide route information to help
you reach your destination. However,
this route guidance may sometimes
conflict with road conditions such as
street closures, road construction,
and detours.
Additionally, the system itself has
certain limitations (see page 52).
Therefore, you must verify the audio
and visual route information
provided by the system by carefully
observing the roadway, signs and
signals, etc. If you are unsure,
proceed with caution. Always use
your own good judgment, and obey
traffic laws while driving.
Navigation System
Operating the Navigation
System controls while you are
driving can take your attention
away from the road, causing a
crash in which you could be
seriously injured or killed.
Enter information into the
system only when your car is
stopped.
Page 4

System Controls
Screen
All selections and instructions are
displayed on the screen. In addition,
the display is a "touch screen" — you
can enter information into the
system by touching images on the
screen with your finger. For example,
when you need to enter a street
name, a keyboard will be displayed.
You can "type in" the street name by
touching the individual characters on
the screen.
Clean the screen with a soft, damp
cloth. You may use a mild cleaner
intended for eyeglasses or computer
screens. Harsher chemicals may
damage the screen.
ZOOM buttons
When you are displaying a map,
these buttons allow you to change
the scale. ZOOM IN reduces the
scale, showing less area with greater
detail. ZOOM OUT increases the
scale, showing more area with less
detail. Refer to page 34.
SET UP button
Pressing this button displays a menu
of system options. See page 38.
MAP/GUIDE button
Pressing this button switches the
display between a map and the
guidance screen. See page 34.
MENU button
Pressing this button changes the
display from the current instructions
to a menu.
CANCEL button
Pressing this button cancels the
current display and returns to the
previous screen display.
ENTER button
Press this button to get the system
to accept a selection.
BRIGHTNESS control
Slide this knob back and forth to
change the brightness of the screen
display. The brightness can also be
adjusted in the "Set-up" menu, and
will change when your turn the
headlights on and off. See page 38.
Navigation System
Page 5

System Controls
JOYSTICK
The joystick moves left, right, up,
and down. Use the joystick to move
the highlighting around the display,
to scroll through a list, or to look
around a displayed map. After
making a selection in a menu or list,
push in on the joystick to enter the
selection into the system.
In almost all cases, you can enter a
selection into the system by pushing
on the joystick, or by touching the
appropriate image on the screen.
Navigation System
Page 6

System Start-up
When you turn the ignition switch to
ON (II), it takes several seconds
before the Navigation System turns
on the display.
The first display is the Acura
Navigation System Logo. This
remains for several seconds, then
changes to display the disclaimer
shown on the right. Read this
disclaimer carefully so you under-
stand it.
To use the system, either press the
Enter button, push in on the Joystick,
or touch the "OK" box on the screen.
The Main Menu will come on the
display.
If you do not press either of those
buttons or touch "OK", the screen
will go dark after 30 seconds. If you
are not planning to use the Navi-
gation System at this time, touch the
SHUT DOWN box on the display. To
return to the disclaimer, press any
button.
If you leave the ignition switch in
Accessory (I) or ON (II) without
starting the engine, and do not
perform any operations on the
system, it will automatically turn off
after five minutes.
If you are entering information into
the system, it will not turn off in five
minutes. This allows you to enter in a
destination before starting the
engine and driving away.
Navigation System
Page 7

Main Menu
The Main Menu gives you five
different ways to enter a desired
destination.
Address
This option requires you to enter the
city, and the address in that city that
you want to go to. See page 9 for
detailed instructions.
Intersection
This option allows you to enter the
names of two streets in a city. The
system will guide you to the inter-
section of those two streets. This is
useful if you know the general
location of your destination, but not
the exact address. See page 13.
Places
The system has been programmed
with the locations of many busi-
nesses, parks, hospitals, etc. This
option lets you scan these, by
category, and select the one you
want as your destination. See page
19 for complete information.
Previous Destination
When you enter a destination with
any of the other options, it is saved
by the system. Use this option to
select it again. See page 26.
Navigation System
Page 8

Main Menu, Selecting By Address
Map Input
This option allows you to point to a
destination on a displayed map. The
system will then guide you to that
point. See page 27.
To select one of the five options, do
either of the following.
Use the joystick to move the
highlighting to the desired option,
then push in on the joystick or
press the Enter button.
Touch the desired option on the
screen.
Selecting By Address
To select the "Address" option in the
Main Menu, do either of the
following.
Push the joystick up or down to
move the highlighting to the
Address box. Then push on the
joystick or press the Enter button.
Touch the Address box on the
screen with your finger.
After you select the option, the
display changes to:
If you select the "City" option first,
you can enter the name of the city
that is your destination. If you select
the "Street" option first, the system
will list all cities that contain the
street name that you enter. This may
be helpful if the street runs through
several cities, and you are not sure of
the exact one your destination is in.
Select either the "City" or "Street"
option by touching the box on the
screen, or by using the joystick to
move the highlighting to the desired
option, then pushing in on the
joystick or pressing the Enter button.
Navigation System
Page 9

Selecting By Address
Selecting the City
When you select the City option, the
display changes to:
The name of your current location is
displayed. If your desired destination
is in the same location, select "Find".
If not, use the displayed letters to
enter the name of the destination
city. Enter each letter by doing one
of the following.
Move the highlighting to each
desired letter with the joystick,
then push on the joystick to enter
that letter.
Touch each desired letter on the
screen.
Each entered letter will appear on
the top of the display. Use the
"Space" box to enter a space
between words. Use the "Delete"
box to erase a letter entered
incorrectly.
As you enter the city name, the
system searches its database for a
name that matches the letters you
are entering. When it finds only one
city that matches, it completes the
entry of the name for you. Select
"Find" to select that city.
CONTINUED
Navigation System
Page 10

Selecting By Address
If the system does not find an exact
match, continue entering the name
of the city. Select "Find" when you
are finished.
All cities and towns in the database
are listed. Cities and towns in the
non-detailed coverage area will have
an "*" next to their names. If you
select one of these cities or towns,
the system will not give you the
option to enter a street address. It
will guide you to the center of that
city or town. See "Outlying Areas" on
page 25.
The display changes to:
The city selected by the system, or
the city you entered, is at the top of
the list. To scroll through this list
city by city, push the joystick up or
down. To scroll up or down a screen
at a time, use the Zoom In or Zoom
Out buttons, or touch one of the
triangles in the upper right corner of
the screen. When you find the
desired city, do either of the follow-
ing.
Highlight it with the joystick, then
push the Enter button or joystick.
Touch the name on the screen.
You can also select a city by entering
only the first one or two letters in its
name. Then select "Find".
For example, if you enter only "L",
the system will display a list of all
cities with names that start with the
letter "L".
Use the joystick, the Zoom In/Out
buttons or the triangles on the
screen to scroll through the list.
When you find the desired city,
select it as explained above.
If you do not find the city, or have
made a mistake, you can return to
the previous display by pressing the
CANCEL button. Pressing the Menu
button will return you to the Main
Menu.
Navigation System
Page 11

Selecting By Address
Selecting the Street Address
After you have selected the city, or
directly if you select the "Street"
option in the beginning screen, the
display changes to:
Enter the street name in the same
way that you entered the name of
the city. If the street name includes
numbers (228th Place, for example)
select the Number box on the screen.
The display will change to:
Enter the numbers, then select the
Letter box on the screen to return to
the alphabet display. Complete the
street name, then select "Find".
To enter the name of a major
highway, you must use the full name,
including a hyphen. For interstates,
use an "I" (I-80). For U.S. highways,
use "US" (US-18). For state
highways, use the two-character
state designation (CA-101). For
county roads, use the appropriate
designation (G-2, for example).
The system will display a list of
street names, with the name you
entered, or the closest match to that
name, at the top of the list.
CONTINUED
Navigation System
Page 12

Selecting By Address
Use the joystick, the ZOOM
IN/OUT buttons, or the triangles in
the upper right corner of the screen
to scroll through the list. When you
find the desired street, do either of
the following.
Highlight it with the joystick, then
push the Enter button or joystick.
Touch the name on the screen.
As with the city name, you do not
have to enter the full street name.
You can enter just one or two of the
beginning characters, then select
"Find". The system will display a list
of street names beginning with that
character or group of characters.
Use the joystick, the ZOOM
IN/OUT buttons, or the triangles on
the screen to scroll through the list.
When you find the desired street,
select it with the joystick, the Enter
button, or by touching the screen.
After you have completed the street
name, the display changes to:
Enter the address number of your
destination. When you have finished,
select "Done".
The system displays the acceptable
address range. If you try to enter a
number outside that range, you will
be given an error message.
If you did not select a city in the
beginning, and the street name you
selected appears in more than one
city, you will see:
Select the desired destination city
from the list.
After you have entered the city and
street address, the system will ask
for the type of route that you desire,
calculate the route, and give you
your first route instruction. See
"Traveling To Your Destination" on
page 30.
Navigation System
Page 13

Selecting By Intersection
To select the "Intersection" option in
the Main Menu, do either of the
following.
Push the joystick up or down to
move the highlighting to the
Intersection box. Then push on
the joystick or press the Enter
button.
Touch the Intersection box on the
screen with your finger.
After you select the option, the
display changes to:
If you select the "City" option first,
you can enter the name of the city
that is your destination. If you select
the "Street" option first, the system
has you enter the names of the two
intersecting streets. It will then list
all cities that contain that inter-
section. This may be helpful in an
urban area that has many cities next
to each other, and you are not sure
of the exact one your destination is
in.
Touch the box on the screen, or use
the joystick to move the highlighting
to the desired option, then push on
the joystick or press the Enter
button.
Navigation System
Page 14

Selecting By Intersection
Selecting the City
When you select the City option, the
display changes to:
The name of your current location is
displayed. If your desired destination
is in the same location, select "Find".
If not, use the displayed letters to
enter the name of the destination
city. Enter each letter by doing
either of the following.
Move the highlighting to each
letter with the joystick, then push
on the joystick to enter that letter.
Touch each desired letter on the
screen.
The letters you enter are displayed
in the box at the top. Use the Space
box to create a space between words.
Use the Delete box to erase any
spelling errors. When you have
entered the city name, select "Find".
As you enter the city name, the
system searches its database for a
name that matches the letters you
are entering. When it finds only one
city that matches, it completes the
entry of the name for you. Select
"Find" to select that city.
If the system does not find an exact
match, continue entering the name
of the city. Select "Find" when you
are finished.
All cities and towns in the database
are listed. Cities and towns in the
non-detailed coverage area will have
a "*" next to their names. If you
select one of these cities or towns,
the system will not give you the
option to enter an intersection. It will
guide you to the center of that city or
town. See "Outlying Areas" on page
25.
Navigation System
Page 15

Selecting By Intersection
The display changes to:
The closest match to the entered city
is at the top of the list. To scroll
through this list city by city, push the
joystick up or down. To scroll up or
down a screen at a time, use the
Zoom In/Out buttons, or touch the
triangles in the upper right corner of
the screen.
When you find the desired city, do
either of the following.
Highlight it with the joystick, then
push the Enter button or joystick.
Touch the name on the screen.
You may also select a city by
entering only the first character or
first few characters of the name. The
system will display a list of city
names beginning with that character
or characters. Scroll through the list,
find the desired city, and select it as
described.
If you change your mind or have
made an error, press the CANCEL
button to return to the previous
screen. Pressing the MENU button
returns you to the Main Menu.
Navigation System
Page 16

Selecting By Intersection
Selecting the Intersection
After you have selected the city, or
directly if you select the "Street"
option in the beginning screen, the
display changes to:
Enter the street name with the
joystick, or by touching the charac-
ters on the screen. If the street name
includes numbers (228th Place, for
example) select the Number box on
the screen. The display will change
to:
Enter the numbers, then select the
Letter box on the screen to return to
the alphabet display. Complete the
street name, then select "Find".
To enter the name of a major
highway, you must use the full name,
including a hyphen. For interstates,
use an "I" (1-80). For U.S. highways,
use "US" (US-180). For state high-
ways, use the two-character state
designation (CA-101). For county
roads, use the appropriate
designation (G-2, for example).
Navigation System
Page 17

Selecting By Intersection
If the system finds more than one
street with that same or similar
name, it will display a list of street
names.
Use the joystick, the ZOOM
IN/OUT buttons, or the triangles in
the upper right corner of the screen
to scroll through the list. When you
find the desired street, select it with
the joystick, the Enter button, or by
touching the name on the screen.
After you have selected the first
street, the display changes to:
Enter the name of the intersecting
street in the same way that you
entered the first street.
You may also enter just the first one
or two characters of the street name.
The system will give you a list of
intersecting streets, starting with
streets that begin with the letter or
letters you entered. Scroll through
that list, find the desired street, then
select it.
CONTINUED
Navigation System
Page 18

Selecting By Intersection
If you did not select a city in the
beginning, and the intersection you
entered appears in more than one
city, you will see:
Select the desired destination city
from the list.
There is a possibility, although small,
that the two streets you entered
intersect more than once in the
selected city. If this is the case, you
will see:
Select the desired intersection with
the joystick, the Enter button, or by
touching the screen.
After you have entered all the
information, the system will ask for
the type of route that you desire,
calculate the route, and give you
your first route instruction. See
"Traveling To Your Destination" on
page 30.
Navigation System
Page 19

Selecting By Places
To select the "Places" option in the
Main Menu, do either of the follow-
ing.
Push the joystick up or down to
move the highlighting to the
Places box. Then push on the
joystick or press the Enter button.
Touch the Places box on the
screen with your finger.
After you select the option, the
display changes to:
This menu shows you the categories
of places that are stored in the
system. Each category has a
sub-category.
Auto Service
The sub-categories are: Acura
Roadside Assistance; Acura Dealer;
Gas station.
Banking
The sub-categories are: Banks; ATM.
Community
The sub-categories are: City hall;
Civic center; Convention center;
Court house; Library; School.
Emergency
The sub-categories are: Hospitals;
Police agencies; Acura Roadside
Assistance.
Hotel/Motel
Directs you to hotels and motels in
the area you designate.
Leisure
The sub-categories are: Amusement
parks; Golf courses; Entertainment;
Marinas; Museums; Parks; Per-
forming arts; Recreation; Stadiums;
Tourist attractions.
Restaurant
This category is broken down into
types of food; American, French,
Japanese, etc., giving you a selection
of restaurants by each type.
Shopping
The sub-categories are: Shopping
malls; Supermarkets.
CONTINUED
Navigation System
Page 20

Selecting By Places
Travel
The sub-categories are: Airports;
Automobile club offices; Bus
stations; Inter-city train stations;
Parking (Covered), Parking (Open);
Local transit; Tourist Information;
Ferry terminal; Outlying areas.
Note: The "Outlying Areas"
sub-category will help you find cities
and towns that are not in major
metropolitan areas. See page 24.
List all
Selecting this option allows to find
the destination in the system by the
place name. This option can be
helpful if you are not sure what
category your desired destination
falls under.
Phone Number
This option allows you to select a
destination by its telephone number.
Only telephone numbers of places
stored in the system under the
"Places" option are recognized. The
system does not recognize telephone
numbers you may enter under
"Personal Addresses."
Select the desired category by doing
either of the following.
Highlight it with the joystick, then
push the joystick or the Enter
button.
Touch the name on the screen.
If you select "Phone Number", the
display changes to:
Enter the 10 digit telephone number
(including area code) with the
joystick, or by touching the numbers
on the screen.
Navigation System
Page 21

Selecting By Places
If the telephone number you entered
is stored in the system, the system
will ask for the type of route that you
desire, calculate the route, and give
you your first route instruction, See
"Traveling To Your Destination" on
page 30.
If the telephone number you entered
is not recognized by the system, no
destination is shown in the display.
You can return to the Main Menu by
pressing the Cancel button.
If you select other categories (except
for Hotel/Motel, which does not
have a sub-category), the system will
then display the sub-category screen.
For example, if you select "Leisure",
you will see this sub-category screen:
Use the joystick to scroll through the
list and find the specific sub-category
you desire. Select that sub-category
by pushing the joystick or the Enter
button, or by touching the screen.
The display then changes to:
CONTINUED
Navigation System
Page 22

Selecting By Places
Place Name
Requires you to enter the name of
your destination — for example,
entering "Mark Taper Forum" after
selecting the "Performing Arts"
sub-category.
Sort by Distance to Travel
The system lists all the places in the
sub-category you have selected,
starting with the closest to your
current location.
Within a City
After you select a city, the system
lists all the places in that city that fit
the sub-category.
Highlight the desired selection, then
push the joystick or the Enter button,
or touch the desired selection on the
screen.
Place Name
When you select this option, you will
see the following screen.
Use the displayed letters to enter the
name of the place you want to go by
doing either of the following.
Move the highlighting to each
letter with the joystick, then push
on the joystick to enter that letter.
Touch each desired letter on the
screen.
The letters you enter are displayed
in the box at the top. Use the Space
box to create a space between words.
Use the Delete box to erase any
spelling errors. When you have
entered the name, select "Find".
Navigation System
Page 23

Selecting By Places
The system then displays a list of
places in the selected sub-category,
starting with those that come closest
to matching what you entered. Use
the joystick, the ZOOM IN/OUT
buttons, or the triangles in the upper
right corner of the screen to scroll
through the list. Select the desired
destination by pushing the joystick
or the Enter button, or by touching
the screen.
Sort by Distance to Travel
When you select this option, the
system gives you a list of all the
places in the sub-category. This list
is arranged by distance from your
current location, with the closest at
the top of the list.
The distance and direction to each
destination are shown in the upper
right corner of the screen. The
distance shown is straight-line
distance ("as the crow flies"), not
driving distance. The actual distance
on a calculated route will be longer.
Use the joystick, the ZOOM
IN/OUT buttons, or the triangles in
the upper right corner of the screen
to scroll through the list. Select the
desired destination by doing either
of the following.
Push the joystick up or down to
move the highlighting to the
desired destination. Then push on
the joystick or the Enter button.
Touch the desired destination box
on the screen with your finger.
Navigation System
Page 24

Selecting By Places
Within a City
When you select this option, you will
see the following display.
Use the displayed letters to enter the
name of the desired city.
Move the highlighting to each
letter with the joystick, then push
on the joystick to enter that letter.
Touch each letter on the screen.
Each entered letter will appear on
the top of the display. Use the
"Space" box to enter a space be-
tween words. Use the "Delete" box
to erase a letter entered incorrectly.
As you enter the city name, the
system searches its database for a
name that matches the letters you
are entering. When it finds only one
city that matches, it completes the
entry of the name for you. Select
"Find" to select that city.
If the system does not find an exact
match, continue entering the name
of the city. Select "Find" when you
are finished.
The system then displays a list of
cities, with the name that most
closely matches what you entered at
the top. Use the joystick, the ZOOM
IN/OUT buttons, or the triangles in
the upper right corner of the screen
to scroll through the list. When you
find the desired city, do either of the
following.
Highlight it with the joystick, then
push the joystick or the Enter
button.
Touch the name on the screen.
You may also select a city by
entering only the first character or
first few characters of the name. The
system will display a list of city
names beginning with that character
or characters. Scroll through the list,
find the desired city, and select it as
described.
Navigation System
Page 25

Selecting By Places
Once you have selected the city, the
system will display a list of places in
that city that fit the desired category.
Scroll through that list, find the
desired destination, then use the
joystick, Enter button, or screen
touch to select it.
Once you have selected a destination,
the system will ask for the type of
route that you desire, calculate the
route, and give you your first route
instruction, See "Traveling To Your
Destination" on page 30.
Outlying Areas
Cities in the detailed map coverage
area are fully mapped (see "Map
Coverage" on page 55). You can
select specific street addresses and
intersections as destinations.
Cities and towns in the non-detailed
map coverage area are not fully
mapped. These are denoted in the
City list by a "*" next to the name.
Only major federal, state, and county
roads leading to and through these
cities and towns are mapped. You
cannot select a street address or
intersection if you select one of these
cities or towns as a destination. The
system will guide you to the center
of that city or town; you may then
have to ask directions to your final
destination.
Because only major roads are
mapped in these outlying areas, the
calculated route may not be the
shortest possible. You may be aware
of secondary roads that shorten the
travel distance and time.
Navigation System
Page 26

Selecting A Previous Destination
Every time you use one of the Main
Menu options to enter a destination,
that destination is saved by the
system. It saves the last 20
destinations entered. Use the
"Previous Destination" option to
select one of those destinations.
To select the Previous Destination
option in the Main Menu, do either
of the following.
Push the joystick up or down to
move the highlighting to the
Previous Destination box. Then
push on the joystick or press the
Enter button.
Touch the Previous Destination
box on the screen with your finger.
After you select the option, the
display changes to:
The system lists the last 20 desti-
nations entered, with the most
recent appearing first. Scroll through
this list by pushing the joystick up
and down, using the ZOOM IN/OUT
buttons, or by touching the triangles
in the upper right corner of the
screen.
When you find the desired desti-
nation, touch the name on the screen,
or highlight it, then push the joystick
or the Enter button.
Once you have selected the desti-
nation, the system will ask for the
type of route that you desire,
calculate the route, and give you
your first route instruction. See
"Traveling To Your Destination" on
pag
e 30.
Navigation System
Page 27

Selecting By Map Input
To select the "Map Input" option in
the Main Menu, do either of the
following.
Push the joystick up or down to
move the highlighting to the Map
Input box. Then push on the
joystick or press the Enter button.
Touch the Map Input box on the
screen with your finger.
After you select the option, the
display changes to:
Current Position
The Current Position option assumes
that you are looking for a destination
in the immediate area.
Select this option by touching the
screen, or by highlighting the box
and pushing the joystick or the Enter
button. The display changes to:
CONTINUED
Navigation System
Page 28

Selecting By Map Input
If the map is hard to read, use the
Zoom buttons to change the scale.
Press ZOOM IN to get greater detail,
and ZOOM OUT to get less detail.
After changing the scale, give the
system several seconds to redraw
the map on the screen.
The red arrow is your current
position. Find your desired desti-
nation by pushing the joystick left,
right, up, or down. The map will
move in the same direction.
Use the joystick to position the
crosshairs on your desired desti-
nation. Then push in on the joystick
or press the Enter button. The
address of the location you have
selected will appear at the top of the
screen.
If the displayed address is not your
desired destination, move the
joystick left, right, up, or down to
move the crosshairs, then push in on
the joystick or press the Enter
button again.
If this is the desired destination,
push the joystick or the Enter button
again. The system will then calculate
the route to that destination. See
"Traveling To Your Destination" on
page 30.
A City
Select this option by touching the
screen, or by pushing the joystick or
the Enter button. The display
changes to:
Use the displayed letters to enter the
name of the destination city.
Navigation System
Page 29

Selecting By Map Input
Move the highlighting to each
desired letter with the joystick,
then push in on the joystick to
enter that letter.
Touch each desired letter on the
screen.
Each entered letter will appear on
the top of the display. Use the
"Space" box to enter a space be-
tween words. Use the "Delete" box
to erase a letter entered incorrectly.
The system searches the database
for a name that matches the letters
you are entering. When it finds only
one city that matches, it completes
the entry for you. Select "Find" to
select that city. If the system does
not complete the entry, select "Find"
after you have entered all or part of
the name. The system then displays
a list of city names, starting with
those that most closely match the
name you entered.
Push the joystick up or down to
scroll through the list city by city. To
scroll up or down a screen at a time,
use the ZOOM/IN OUT buttons, or
touch one of the triangles in the
upper right corner of the screen.
When you find the desired city, do
either of the following.
Highlight it with the joystick, then
push the joystick or the Enter
button.
Touch the name on the screen.
After you have entered the desired
city, the display changes to a map.
The starting location will be the Civic
Center/City Hall of the selected city.
Refer to "Current Position" on the
previous pages for instructions on
finding and entering your desired
destination.
Navigation System
Page 30

Traveling To Your Destination
After you have selected your desti-
nation, the display changes to:
This display is asking you to confirm
the route you would like. You have
four options.
If you select "Change Method", the
display changes to:
Direct Route
Calculate a route that is the most
direct and will take the least time.
Easy Route
Calculate a route that minimizes the
number of turns needed.
Minimize Freeways
Calculate a route that avoids freeway
travel. If that is not possible, keep
the amount of freeway travel to a
minimum.
Minimize Toll Roads
Calculate a route that avoids, or
minimizes travel on toll roads.
Navigation System
Page 31

Traveling To Your Destination
Select the type of route that you
desire by touching the screen, or by
pushing the joystick or the Enter
button. Confirm your choice by
selecting "OK". The display changes
back to:
The system will then take several
seconds to calculate your route.
After calculating the route, the
system displays a map of your
current location. The calculated
route will be highlighted as a blue
line. An audio instruction will tell you
to proceed to the highlighted route.
CONTINUED
Navigation System
Page 32

Traveling To Your Destination
Once you are driving on the route,
the display changes to the Guidance
Screen shown.
Navigation System
Distance to Next
Driving Maneuver
Location of Next
Driving Maneuver
Direction of Next
Driving Maneuver
Distance to
Destination
Direction to
Destination
Time to
Destination
Touch to hear
voice instruction
Current Location
Guidance Screen
Page 33

Traveling To Your Destination
The Guidance Screen shows you the
next driving maneuver you have to
perform. As you get near this
maneuver, you will hear a tone,
followed by a voice reminder. If you
are driving on a city or country road.
This reminder is given one-half mile
before you have to make the maneu-
ver. If you are driving on a freeway
or toll road, this reminder occurs at
one mile.
If the distance between the next two
driving maneuvers is very small,
both maneuvers are displayed on the
screen and the voice will remind you
of both of them at the same time.
You may hear the voice at any time
by touching the Voice box on the
screen. The voice will inform you of
the next maneuver, and how far you
have to travel to reach it.
When you have almost reached the
location of the driving maneuver, the
left side of the display changes to:
This graph and the distance re-
maining count down as you get
closer to the maneuver. The voice
will again remind you.
Navigation System
Page 34

Traveling To Your Destination
The Map Screen
You can switch between the
guidance screen and the map screen
by pressing the MAP/GUIDE button.
The calculated route is shown by the
blue line. As with the guidance
screen, the voice will advise you of
approaching maneuvers. You can
touch the Voice box on the screen at
any time to be reminded of the next
maneuver.
Use the ZOOM IN/OUT buttons to
change the scale of the map.
Zooming in increases the detail,
while zooming out gives you a view
of a wide area. After changing the
scale, give the system several
seconds to update the display.
In the three closest map scales (1/20,
1/8, and 1/2 mile per half inch) the
map is oriented so your direction of
travel is always up the screen. You
can change this by touching the
North pointer in the upper right
corner of the screen. The map will
reorient so North is always up and
your direction of travel moves
around the screen.
In the smaller map scales (above 1/2
mile per half inch,) the map is always
oriented with North going up. You
cannot change the orientation.
To view other areas on the map,
move the joystick left, right, up, or
down. The map will shift in that
direction. If you push in on the
joystick, the address of the location
pointed to will appear on the screen.
To return the map to your current
location, press either the MAP/
GUIDE button or the CANCEL
button.
The display automatically changes to
the map screen when you reach your
destination. Press the MENU button
to return to the Main Menu.
Navigation System
Page 35

Traveling To Your Destination
GPS Signal Strength
Green — Strong
Yellow — Weak
Nothing — No signal
North Pointer
(In 1/20,1/8, and 1/2 mile
map scales, touch to
change map orientation)
Blue line — Calculated route
White —Hospital
Yellow — Shopping Mall
Orange — University
Dark Green — Park
Medium Green — Golf Course
Gray — Airport/Stadium/Business
Light Blue — Body of Water
Map Scale Adjustment
(Appears only when you
press Zoom In/Out buttons)
Map Screen
Map Scale
(Miles per half inch)
Pressing the or icons while
following the calculated route shows
you the current vehicle location
(address, latitude, longitude, and
elevation). Touch "RETURN" to see
the map screen.
Navigation System
Direction to
Destination
Distance to
Destination
Time to
Destination
Current Road
Current Location
Page 36

Traveling To Your Destination
Going Off the Route
If you leave the calculated route,
"Off-route" is displayed on the top of
the screen.
The system will recalculate the route
from your current location and
direction to the desired destination;
then give you a new route instruction.
This recalculation is done automati-
cally unless you set it to manual in
the Setup Menu. See "System Setup"
on page 38.
If this option is set to "Automatic",
you will see a "Recalculation in
Progress" message for several
seconds, followed by a new guidance
screen.
If this option is set to "Manual", you
will hear a tone when the "Off-route"
message is displayed. You must
press the Enter button before the
system will recalculate your route.
Modifying the Route
Several functions in the system allow
you to view the route the system has
calculated. You can then have the
system recalculate portions of the
route. This is helpful if you are
aware of road conditions along the
calculated route that you wish to
avoid.
With the map screen displayed, you
can push the MAP/GUIDE button at
any time to display the guidance
screen. Move the Joystick up or
down to see the Direction List. This
shows you all the route instructions
between your current location and
your destination.
Instructions that have already been
executed cannot be displayed.
Navigation System
Page 37
Traveling To Your Destination
To return to the guidance screen,
press the MAP/GUIDE button. The
system automatically returns to the
guidance screen in about 10 seconds
if you do nothing.
From the guidance screen, push the
joystick down to see the upcoming
route instructions one at a time.
Each push displays the next instruc-
tion in the sequence. Push the
joystick up to move backward
through the sequence to the current
instruction. The display returns to
the current route instruction in about
10 seconds if you stop moving the
joystick.
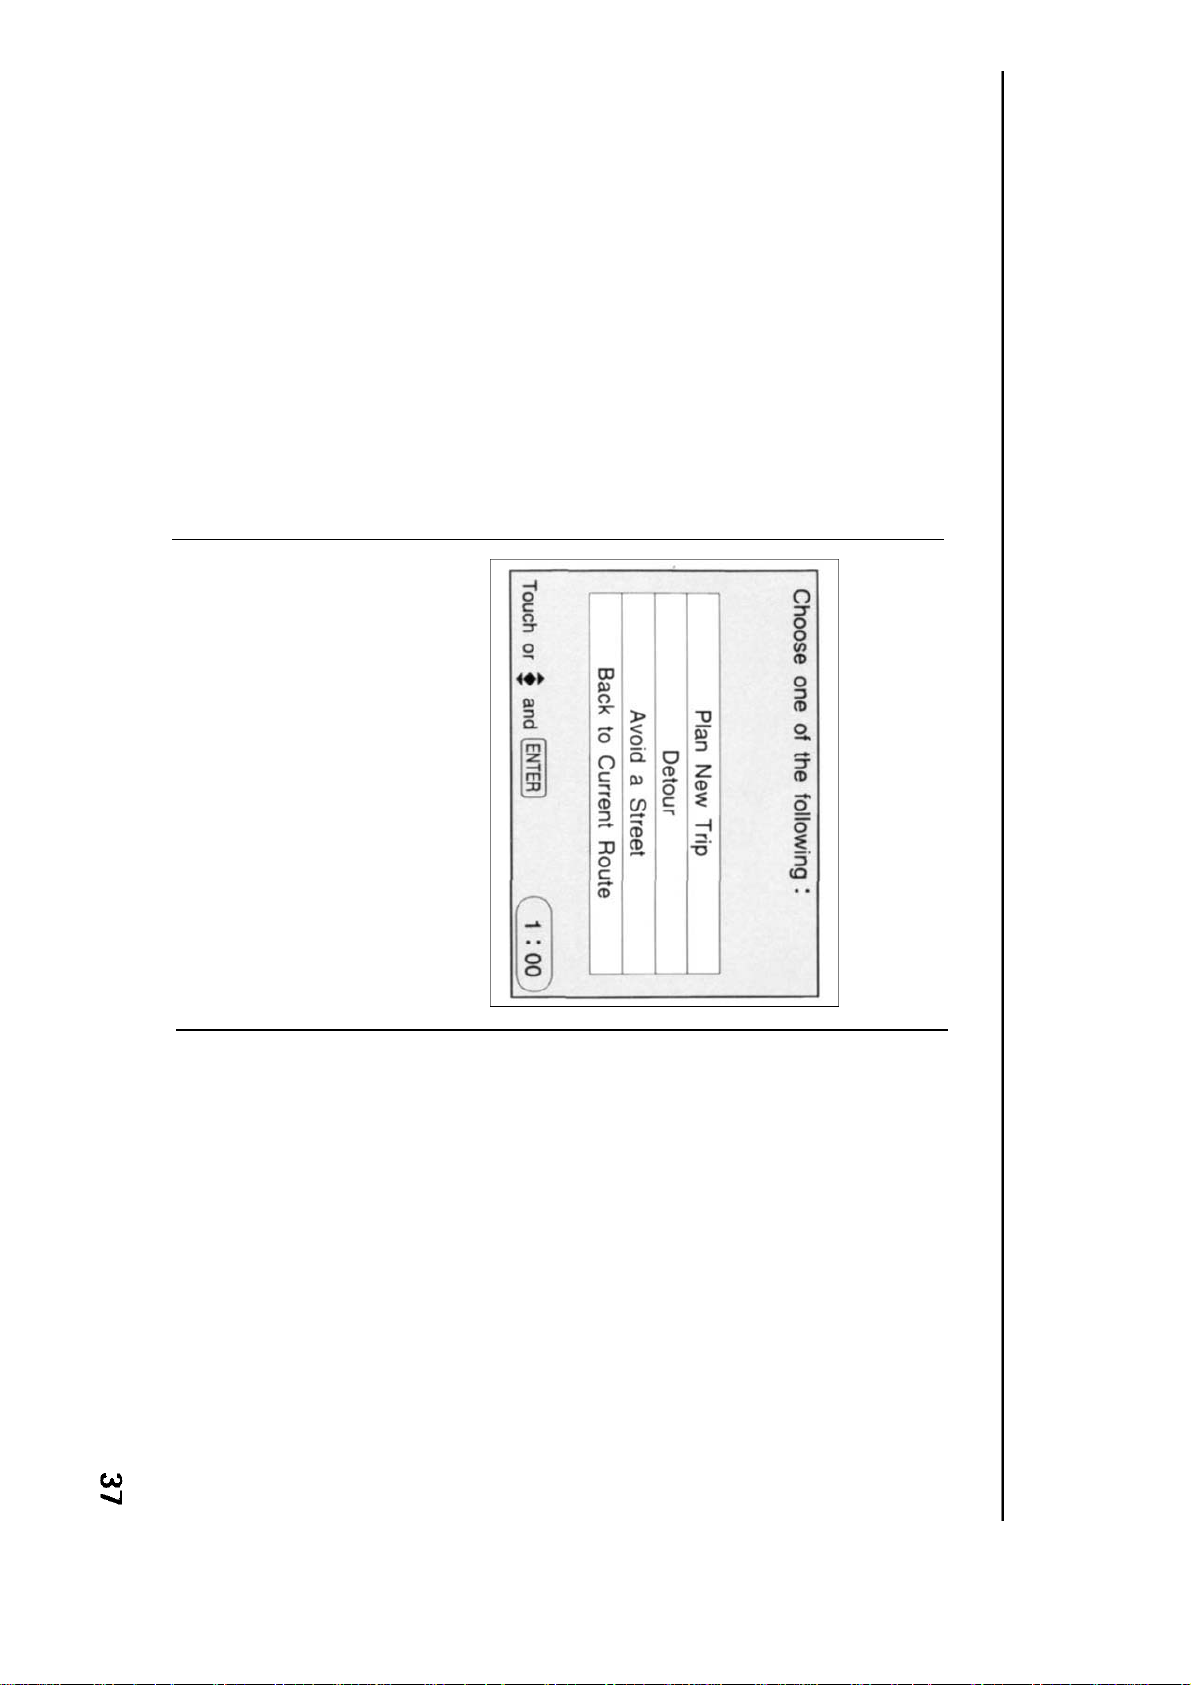
Pressing the Menu button with the
guidance screen displayed changes
the display to:
This menu lets you cancel or modify
the current calculated route.
Plan New Trip
Selecting this option cancels the
current route and destination. The
display returns to the "Main Menu".
Auto Detour
Select this option if you encounter as
unexpected obstacle, such as a
closed road or extremely heavy
traffic congestion. The system will
calculate a route from your current
location that detours you off the
original route, and then back onto it
after a certain distance.
Avoid a Street
This option lets you delete a street or
streets from the current calculated
route. This is helpful if you know of
road construction or other snags on
the prescribed route.
Back to Current Route
Selecting this option returns you to
the original guidance screen.
Navigation System
Page 38

System Setup
The Setup screen allows you to
change and update information in
the system. To display the Set-up
screen, press the Setup button.
To make selections on this screen,
do either of the following.
Use the joystick to highlight the
desired choice. Then push the
joystick.
Touch the desired choice with
your finger.
Volume
Adjust the volume of the tone and
voice. If you turn the voice off, you
will no longer hear reminders when
you approach the next driving
maneuver. You can still hear re-
minders by touching the Voice box
on the Guidance or Map screen.
Display
Adjust the brightness of the display.
In all settings, except Off, the screen
will dim when you turn on the
headlights. The brightness of the
screen with the headlights on and off
is higher in the Day setting than in
the Night setting. The Auto setting
gives the widest range of brightness
— using the Day brightness when
the headlights are off, and the Night
brightness when the headlights are
on. Use the brightness control on the
front of the system to fine-tune the
brightness to your liking.
When the headlights are on, you can
brighten the display by pushing the
Enter button and holding it for ten
seconds. Push and hold the button
again to return the display to its
original brightness.
Use Off to turn off the screen if you
are not using the system to find a
destination. Push any button to turn
the screen back on.
Navigation System
Page 39
System Setup
ReRoute
This option allows you to select
either manual or automatic
recalculation when you go off-route.
See page 36.
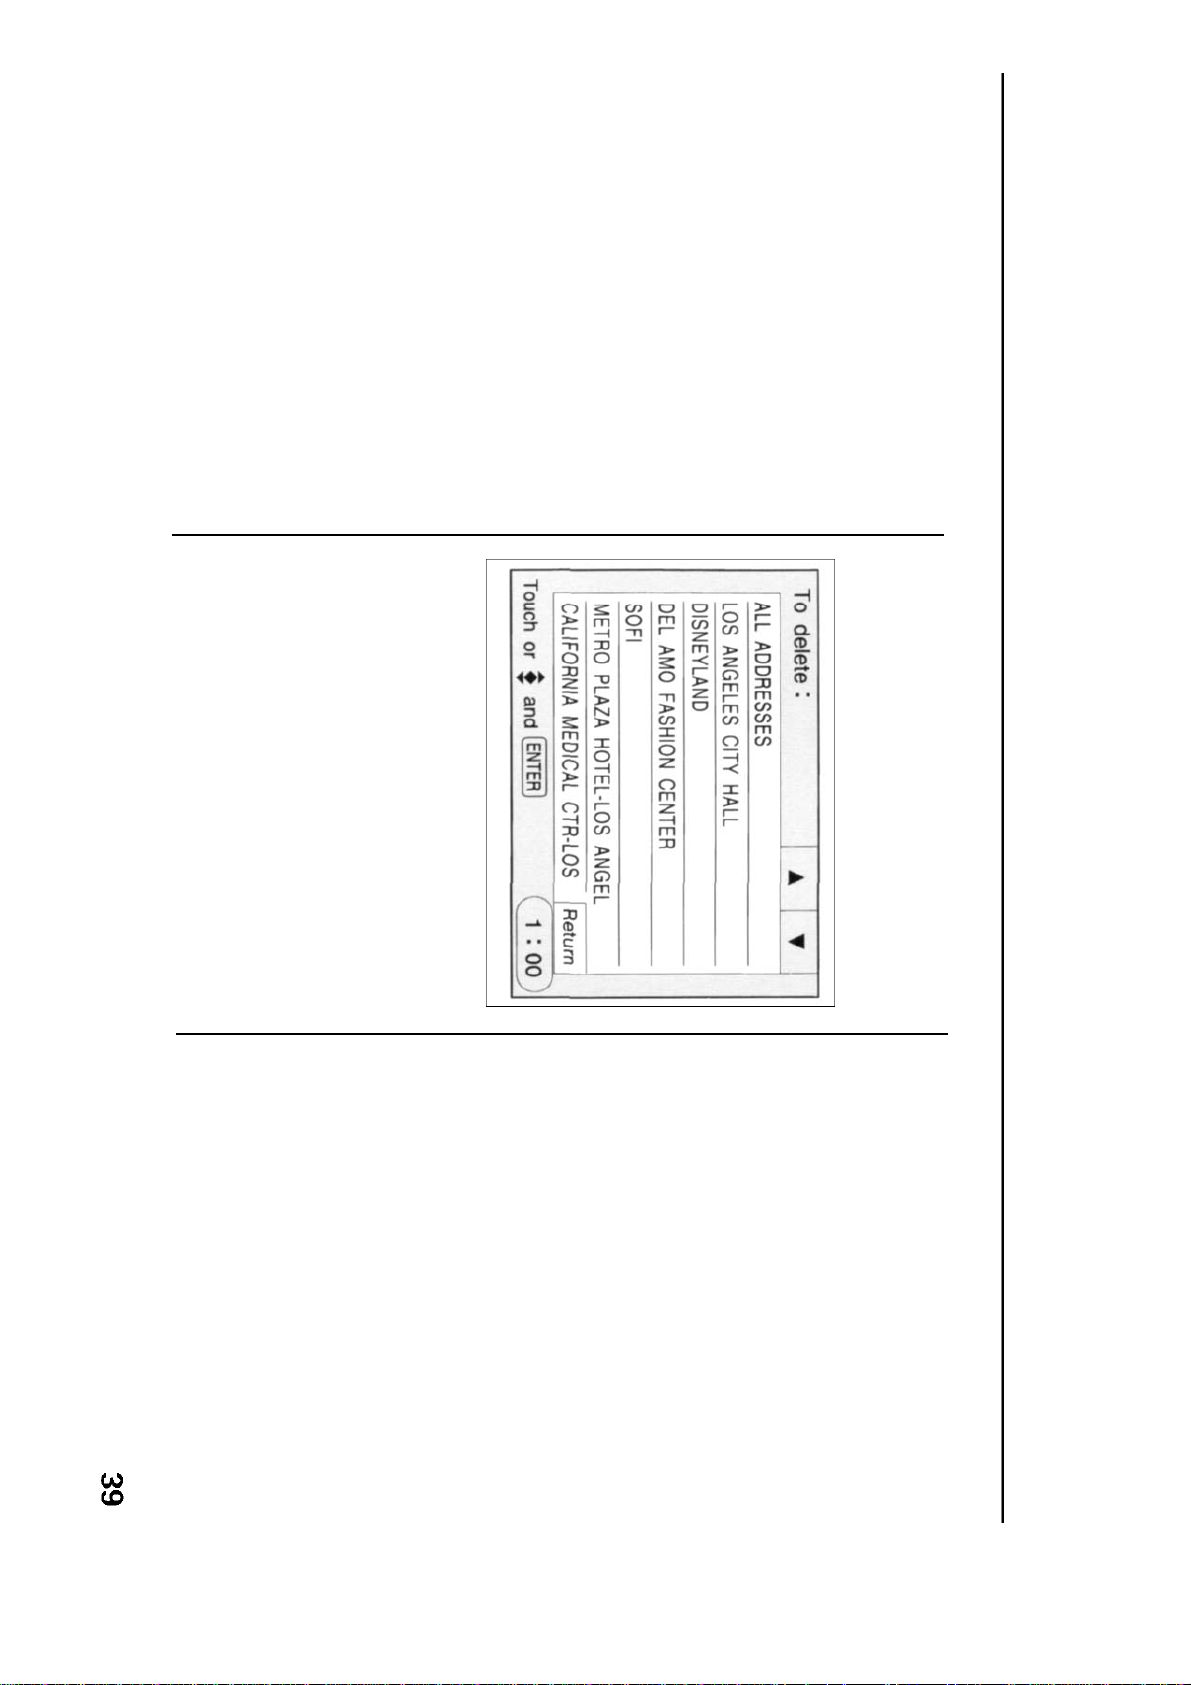
Address
This option allows you to add, modify,
and delete information in the
Personal Address list, and to delete
information from the Previous
Address list.
To use this Address option with the
Personal Address list, see "Personal
Addresses" on page 43.
When you select the Previous
Address option, the display changes
to:
Use the joystick, the ZOOM
IN/OUT buttons, or the triangles in
the upper right corner of the screen
to scroll through the list. Find the
address you want to delete, highlight
it, then push the joystick or the
Enter button. The highlighted
address will be deleted, and the
addresses below it will shift up.
Navigation System
Page 40

System Setup
Position Correction
Use this option if the position of the
vehicle in a map display does not
match your actual position.
The system relies on satellites for
positioning information. Buildings,
tunnels and other objects can block
receipt of these signals, requiring
the system to use "dead reckoning"
to determine your location and
direction. This can sometimes lead
to small errors in positioning.
If you find that the map position is
not correct (for example, you are
sitting at a intersection, but the
display shows you have already gone
through the intersection), stop the
car. The car must be at a full stop
before you can correct the position.
Push the Setup icon to display the
Setup screen, then select the
Location Correction option. This will
return you to the map display. Use
the joystick to move the location
arrow to the correct location. Touch
the arrows in the lower left side of
the screen to rotate the arrow so it is
pointing in the correct direction.
When you have finished, press the
Enter button. If you do not press the
Enter button, the new position will
automatically be entered when the
vehicle starts to move.
Navigation System
Page 41

System Setup
Save Current Location
This option tells the system to store
the current location for later use. It
does not change or cancel the route
instructions you are using at the time
to reach a destination.
For example, you are following the
system's directions to get to a
destination. You are sitting at a stop
light and notice a curio shop on the
corner. You do not have time to visit
it right now, but you would like to in
the future. This option saves the
location of the intersection so you
can select it as a destination at a later
date.
To save the location (while the
vehicle is stopped), press the Setup
button. When the Setup screen
appears, select Save Current Loca-
tion. While the system is saving the
location, the option bar says "Saving
Current Location...". After the
location is saved, select Return to
change back to the Guidance/Map
Screen.
The current location is saved in the
previous destination list. Use the
Previous Destination option in the
Main Menu to select it. It will appear
in that list as "Save" followed by the
location.
PIN
This option allows you to change
your Personal Identification Number.
See "Personal Addresses" on page
43.
Clock
This option lets you set the clock
that appears in the lower right
corner of most screens. When you
select this option, the display
changes to:
CONTINUED
Navigation System
Page 42

System Setup
If the time zone is incorrect, select
the correct time zone by highlighting
it, then pushing the joystick or Enter
button, or by touching the proper
time zone box with your finger.
Change the hour or minutes setting
by selecting the proper box. For
example, to change 10:41 to 10:44,
select the "Minute +" box three
times.
When you have finished, select the
Return box.
Info
Selecting this option displays
information about the Navigation
System's software.
When you have finished reviewing
this information, select Return to go
back to the Setup screen.
Return
This option returns you to the screen
that was displayed before you
pressed the Setup button.
Navigation System
Page 43

Personal Addresses
The Personal Addresses function
allows two different users to store up
to 50 destinations each. To access
and use these destinations requires a
Personal Identification Number
(PIN). This number can be up to
four digits long.
Entering a PIN
To set up or change your own PIN,
first display the Setup screen by
pressing the Setup button. Then
select the PIN option. The display
changes to:
Note which user this screen is for. If
you are User 2 and the display says
"You are User 1", select the User 2
box. The display will change to "You
are User 2".
Use the keypad to enter your PIN
(touch the numbers on the screen,
or use the joystick and Enter button).
The numbers will not be displayed,
only asterisks are shown. When you
have entered your PIN, select Done.
NOTE:
There are no PINs in the system
when it is new. If this is the first time
a PIN is being set up, select Done
without entering any numbers.
If you have entered the PIN cor-
rectly, the display changes to:
Enter your new PIN (up to four
digits). Then select Done.
Navigation System
Page 44

Personal Addresses
The display then changes slightly,
asking you to re-enter the new PIN.
This is to validate the number you
have selected. Enter the same
number, then select Done. If you
have entered the same number both
times, the display returns to the Set-
up screen. If not, the system repeats
the "Enter New PIN-Re-enter New
PIN" cycle until you do.
Entering Personal Addresses
Each user can store up to 50
addresses in the system. To begin
entering a personal address, select
the Setup screen. On that screen,
select "Address-Personal". The
display then changes to:
Verify that the right user is displayed,
enter your PIN, then select Done.
The display changes to:
Navigation System
Page 45

Personal Addresses
Select "New Address" at the top of
the list. The display changes to:
The Name box is highlighted. You
can use this box to give the entry a
name or title that you will recognize
later, such as "Doctor Smith" or
"Rialto Theatre". If you do not give
the address a name, the system will
assign one: "Address 1", "Address 2",
etc.
Select the Name box by pressing the
joystick or by touching the box with
your finger. The display changes to:
Use the displayed letters to enter the
desired name by doing either of the
following.
Move the highlighting to each
desired letter with the joystick,
then push on the joystick to enter
that letter.
Touch each desired letter on the
screen.
Each entered letter will appear on
the top of the display. Use the
"Space" box to enter a space be-
tween words. Use the "Delete" box
to erase a letter entered incorrectly.
CONTINUED
Navigation System
Page 46

Personal Addresses
Once you have entered the name,
select "Done". The display returns
to:
Select the address box by high-
lighting it with the joystick, then
pushing the joystick or the Enter
button, or by touching the Address
box with your finger. The display
changes to:
This menu gives you three ways to
enter the desired address.
Address
This option requires you to enter the
city and address you wish to store.
The operation is the same as
selecting the "Address" option in the
Main Menu. Refer to "Selecting By
Address" on page 8 for detailed
instructions.
Places
This option allows you to select one
of the locations already stored in the
system as one of your personal
addresses. See "Selecting By Places"
on page 19 for instructions.
Previous Destination
This option allows you to store one
of the locations in the Previous
Destinations list in your Personal
Address list. See "Selecting A
Previous Destination" on page 26 for
instructions.
Navigation System
Page 47

Personal Addresses
After you have used one of these
three options to enter the address,
the display changes back to:
If desired, you can enter the tele-
phone number of this location. If the
address was chosen with the
"Places" option, and it has the
telephone number, that telephone
number is entered automatically.
Select the Phone box with the
joystick or by touching the box on
the screen. The display changes to:
Enter the telephone number,
including the area code, by touching
each digit on the screen, or by using
the joystick to highlight each digit,
then pushing the joystick or the
Enter button. When you have
entered the complete phone number,
select Done.
The system will then display every-
thing that you have entered.
Navigation System
Page 48

Personal Addresses
Verify the information you have
entered. If something is incorrect,
select the box with the incorrect
information either by highlighting
the box with the joystick, then
pushing the joystick or Enter button,
or by touching the box on the screen.
Repeat the process of entering the
information in that box.
If all the information is correct,
select Done. This will return you to
your personal address list.
If you want to enter another personal
address, select New Address. If not,
select Return.
Updating a Personal Address
To change information in a
previously-stored personal address,
press the Setup icon to select the
Setup menu. As before, select
Address — Personal in that menu,
verify the user, then enter your PIN.
Your personal address list will be
displayed.
Use the joystick, the ZOOM
IN/OUT buttons, or touch the
triangles in the upper right corner of
the screen to scroll through the list.
Select the location you wish to
update by doing one of the following.
Use the joystick to highlight the
location, then push on the joystick
or the Enter button.
Touch the location box on the
screen with your finger.
The display changes to:
Navigation System
Page 49

Personal Addresses
To remove that location from your
personal address list, select "To
Erase". The system will remove all
the information about that location
from the list, then return the display
to the personal address list.
To change information in that listing,
select "To Update". The information
about that location will be displayed.
Select the appropriate box, "Name",
"Address", or "Phone Number", that
needs updating. Follow the
instructions under "Entering
Personal Addresses" to change the
information in that box.
After you have completed the
changes, and verified them on the
screen, select Done to return to your
personal address list.
Repeat this process to update or
delete another location in your
personal address list. If you are
finished, select Return.
Selecting a Personal Address as a
Destination
Selecting a personal address entry
for use by the Navigation System is
done from the Main Menu.
CONTINUED
Navigation System
Page 50

Personal Addresses
Select the "Previous Destination"
option. The display changes to:
The first entry in this list is
"Personal Addresses". Select this
entry with the joystick or by
touching the screen.
Verify that the correct user is
selected, then enter your PIN.
Your Personal Address list will then
be displayed.
Use the joystick, the ZOOM
IN/OUT buttons, or touch the
triangles in the upper right corner of
the screen to scroll through the list.
When you find the desired location,
highlight and select it by pushing on
the joystick or Enter button, or select
it by touching the location box on the
screen.
The system takes that as your
desired destination and begins to
calculate the route. See "Traveling
To Your Destination" on page 30.
Navigation System
Page 51

System Security
If the battery goes dead or is
disconnected for any reason, you will
have to enter a security code into the
Navigation System before you can
use it again.
You should have received a card that
contains the Navigation System's
four-digit security code and serial
number. Keep this card in a safe
place. In addition, you should write
the system's serial number in this
Owner's Manual. If you lose the card,
you must obtain the security code
from your Acura dealer. To do this,
you will need the system's serial
number.
After the battery is reconnected, and
you turn the ignition switch on, you
will see:
Enter the four-digit code, then select
Done. If you have entered it cor-
rectly, the display will change to the
Disclaimer screen.
You have three chances to enter the
correct code. If all three are incor-
rect, the system must remain on for
one hour before you can enter the
code again.
Because the power was disconnected,
the system needs time to reinitialize
parts of the database. It may be
several minutes before you see the
Disclaimer screen.
Navigation System
Page 52

System Limitations
Although your Acura Navigation
System is one of the most highly-
sophisticated pieces of equipment
you will find in a modern automobile,
you may find during its use that it
has certain limitations.
The system uses signals from the
Global Positioning System (GPS) to
aid in determining its current
location. The GPS is operated by the
U.S. Department of Defense. For
security reasons, there are certain
inaccuracies built into the GPS that
the Navigation System must
constantly compensate for. This can
cause occasional positioning errors
of up to several hundred feet.
For example, in urban areas where
streets are close together, this could
cause the system to show that you
are traveling on a street that parallels
the street you are actually on. The
system will, under most
circumstances, correct itself after
several seconds.
Although the system will direct you
to your desired destination, it may
not always do it by what you consid-
er to be the most direct route.
Navigation System
Page 53

System Limitations
You will find that the points of
interest listings in the "Places"
option are not as complete in
outlying areas as they are in metro-
politan areas. For example, only
limited numbers of gas stations,
restaurants, supermarkets, banks,
etc. in outlying areas are included.
This means you may not find places
listed that you know exist. This is
also true for police agencies and
hospitals. In outlying areas, facilities
listed may not be the closest. Always
check with local information sources
if you need law enforcement or
hospital services.
Acura has made every effort to
verify that the system's database was
accurate at the time it was created.
However, businesses do fail or move
to new locations, and new businesses
start in the old locations. For this
reason, you may occasionally find
"inaccurate" information when you
select and drive to a point of interest
(for example, a restaurant is now a
jewelry store). The number of these
inaccuracies will increase as time
goes on.
You may find that the system
occasionally "reboots". This is
indicated by the display returning to
the logo screen. A reboot can be
caused by a number of things, such
as entering data too quickly, or by
excessive heat or shock. It does not
necessarily indicate a problem that
requires service. After the system
completes the reboot, it should allow
you to complete whatever functions
you were performing before the
reboot.
Navigation System
Page 54

Customer Assistance
If you find errors in the database,
you can report them to Acura Client
Services.
Telephone: (800) 382-2238
Fax: (310) 783-3535
E-mail:
NAVI@AMERHONDA.COM
Mail:
Acura Navi
American Honda Motor Co., Inc.
MS 500-2S-1A
1919 Torrance Blvd.
Torrance, CA 90501-2746
Acura is continually expanding the
scope of the Navigation System.
Upgraded software will be made
available to Navigation System
owners periodically, usually in the
fall of each year.
For the first two years after you
purchased or leased your Acura, you
can obtain these upgrades free of
charge. Installation of a different
database if you travel or relocate to a
different coverage area is also free
of charge.
Beginning in the third year, you may
obtain these upgrades and coverage
area changes after paying an annual
royalty fee. This fee covers a one
year period from anniversary date to
anniversary date of your car's
original delivery to the first owner.
Your Acura dealer will also charge
you an installation fee for each
upgrade or coverage area change.
You are not required to pay the
annual royalty fee. If you are
satisfied with the current database
coverage of your car's Navigation
System, you can continue using it at
no cost. If you decide at some point
in the future that you would like an
upgraded database or different
coverage area, you may pay the
royalty fee and installation charge to
your Acura dealer at that time.
For further information, contact your
Acura dealer or Acura Client
Services.
Hard Disk Removal
The system's database is stored on a
removable hard disk.
To remove the hard disk:
1. Remove the key from the ignition
switch. You can damage the hard
disk if you remove it with the
ignition ON (II).
2. Locate the control unit. It is in the
trunk underneath the package
shelf.
Navigation System
Page 55

Customer Assistance
3. Slide the door up.
4. Push the Eject button. The hard
disk cartridge will pop out of the
slot.
5. Pull the cartridge straight out.
To install the hard disk cartridge,
make sure the label is facing up.
Slide the cartridge into the slot until
it clicks and the cartridge is locked in
place.
Map Coverage
The cities and metropolitan areas
listed below are fully mapped. Only
major streets, roads, and highways
are mapped outside these areas. See
"Outlying Areas" on page 25.
If you desire more detailed
information on map coverage,
contact any Acura dealer. You may
also contact Acura Client Services by
telephone, mail, fax, or e-mail at the
addresses and numbers shown on
page 54 .
Coverage Area 1
California
Los Angeles/San Diego
Metropolitan area
Sacramento Metropolitan area
San Francisco Bay area
(approximately Monterey to
Sonoma)
Nevada
Las Vegas Metropolitan area
Coverage Area 2
Arizona
Phoenix Metropolitan area
Colorado
Denver/Boulder/Colorado
Springs Metropolitan area
Idaho
Sun Valley
Montana
None
New Mexico
Albuquerque
Oregon
Portland/Salem Metropolitan
area
Utah
Park City
CONTINUED
Navigation System
Page 56

Customer Assistance
Washington
Seattle/Tacoma/Olympia
Metropolitan area
Coverage Area 3
Iowa
None
Illinois (Southwestern half)
East St. Louis Metropolitan area
Kansas
Kansas City/Leavenworth
Metropolitan area
Michigan (Western half of
Upper Penninsula)
None
Minnesota
Minneapolis/St. Paul
Metropolitan area
Missouri
Kansas City Metropolitan area
St. Louis Metropolitan area
Nebraska
None
North Dakota
Fargo Metropolitan area
South Dakota
None
Wisconsin (Northern half)
None
Coverage Area 4
Arkansas
None
Louisiana
New Orleans Metropolitan
area
Mississippi
None
Oklahoma
None
Tennessee
None
Texas
Austin Metropolitan area
Dallas/Fort Worth Metropolitan
area
Houston Metropolitan area
San Antonio Metropolitan area
Coverage Area 5
Illinois
Chicago Metropolitan area (to
Wisconsin border)
Indiana
Gary/Hammond Metropolitan
area
Indianapolis Metropolitan area
Kokomo Metropolitan area
Navigation System
Page 57

Customer Assistance
Michigan
Boyne City
Charlevoix
Detroit Metropolitan area
(including Ann Arbor, Pontiac,
and Flint)
Elk Rapids
Grand Rapids Metropolitan area
Harbor Springs
Lansing Metropolitan area
Petosky
Traverse City Metropolitan area
Ohio
None
Wisconsin (Southern half)
None
Coverage Area 6
Indiana (Southern half)
None
Kentucky
None
Maryland
None
New York (Western half)
None
Ohio
Columbus/Marysville
Metropolitan area
Pennsylvania (Eastern half)
Pittsburgh Metropolitan area
Tennessee
Knoxville/Farragut
Metropolitan area
West Virginia
Harper's Ferry Metropolitan
area
Coverage Area 7
Connecticut
Bridgeport
Danbury
Hartford Metropolitan area
New Haven Metropolitan area
Norwalk
Stanford
Maine
None
Massachusetts
Boston Metropolitan area
Springfield Metropolitan area
New Hampshire
Manchester
Nashua
New Jersey (Northern half)
Newark Metropolitan area
CONTINUED
Navigation System
Page 58

Customer Assistance
New York (Eastern half)
Cooperstown
New York City Metropolitan
area
Rhode Island
Providence Metropolitan area
Vermont
None
Coverage Area 8
Delaware
Wilmington Metropolitan area
Maryland
Baltimore/Washington D.C.
Metropolitan area
New Jersey (Southern half)
Atlantic City/Cape May
Metropolitan area
Camden Metropolitan area
Trenton Metropolitan area
North Carolina (Eastern part)
None
Pennsylvania (Eastern half)
Philadelphia Metropolitan area
Virginia
Alexandria
Arlington
Fairfax
Falls Church
Manassas
Manassas Park
Richmond Metropolitan area
Williamsburg/Norfolk/Virginia
Beach Metropolitan area
Coverage Area 9
Alabama
None
Florida
Fort Myers Metropolitan area
Jacksonville Metropolitan area
Miami/Fort Lauderdale/
West Palm
Beach Metropolitan area
Orlando Metropolitan area
Tampa Bay/St. Petersburg
Metropolitan area
Georgia
Atlanta Metropolitan area
North Carolina
Charlotte Metropolitan area
Raleigh-Durharn Metropolitan
area
Winston-Salem/Greensboro
Metropolitan area
South Carolina
Rock Hill Metropolitan area
Navigation System
Page 59

NOTE:
The digitized map database reflects conditions as they existed at various points in time before production. Accordingly,
your copy may contain inaccurate or incomplete data or information due to the passage of time, road construction,
changing conditions, or other causes.
In addition, this database does not include, analyze, process, consider, or reflect any of the following categories of
information:
Navigation System
Neighborhood quality or safety
Population density
Availability or proximity of law
enforcement
Emergency, rescue, medical, or
other assistance
Construction work, zones, or
hazards
Road and lane closures
Legal restrictions (such as vehicular
type, weight, load, height, and speed
restrictions)
Road slope or grade
Bridge height, width, weight or other
limits
Road, traffic or traffic facilities safety
or conditions
Weather conditions
Pavement characteristics or
conditions
Special events
Traffic congestion
Travel time
We assume no liability for any incident that may result from an error in the program, or from changed conditions not
noted above.
Page 60

Table of Contents
Introduction........................................ 2System Controls................................. 4System Start-up..................................
6
Main Menu......................................... 7Selecting By Address........................ 8Selecting By Intersection................
13
Selecting By Places..........................
19
Outlying Areas.............................
25
Selecting A Previous Destination.. 26Selecting By Map Input...................
27
Traveling To Your Destination......
30
The Map Screen ..........................
34
Going Off the Route.................... 36Modifying the Route...................
36
System Setup.................................... 38
Personal Addresses......................... 43
Entering a PIN............................. 43
Entering Personal Addresses..... 43Updating a Personal Address..... 48Selecting a Personal Address as
a Destination............................ 49
System Security............................... 51
System Limitations..........................
52
Customer Assistance.......................
54
Navigation System
Use these links (and links throughout this manual) to navigate through this reference.
For a printed owner's manual, click on authorized manuals or go to www.helminc.com.
Refer to 1999 RL Owner's Manual for more information.
Alpha Index
Page 61

Your Car at a Glance
MIRROR
CONTROLS
(P.98)
INSTRUMENT
PANEL
(P.53)
AIRBAG
(P.9)
DIGITAL
CLOCK
(P.108)
CLIMATE CONTROL
SYSTEM
(P.120)
AUDIO SYSTEM
(P.127)
AUTOMATIC
TRANSMISSION
(P.182)
HOOD RELEASE
HANDLE
(P.170)
DRIVING POSITION
MEMORY
(P.100)
POWER WINDOW
SWITCHES
(P.105)
TRUNK RELEASE
BUTTON
(P.86)
FUEL FILL DOOR
HANDLE
(P.169)
Page 62

Your Car at a Glance
WINDSHIELD WIPERS/WASHERS
(P.
68, 70)
HAZARD WARNING LIGHTS
(P. 70)
REAR WINDOW DEFOGGER
(P. 70)
FOG LIGHTS
(P.
67)
HEADLIGHTS/TURN SIGNALS
(P.
63, 66)
INSTRUMENT PANEL BRIGHTNESS
(P. 66)
CRUISE CONTROL
(P. 73)
STEERING WHEEL
ADJUSTMENT
(P. 71)
TRACTION CONTROL
(P. 191)
Page 63

Important Safety Precautions
You'll find many safety
recommendations throughout this
section, and throughout this manual.
The recommendations on this page
are the ones we consider to be the
most important.
Always Wear Your Seat Belt
A seat belt is your best protection in
all types of collisions. Airbags
supplement seat belts, but airbags
are designed to inflate only in a
moderate to severe frontal collision.
So even though your car is equipped
with airbags, make sure you and
your passengers always wear your
seat belts, and wear them properly.
(See page 14.)
Restrain All Children
Children are safest when they are
properly restrained in the back seat,
not the front seat. A child who is too
small for a seat belt must be properly
restrained in a child safety seat. (See
page 19.)
Be Aware of Airbag Hazards
While airbags can save lives, they
can cause serious or fatal injuries to
occupants who sit too close to them,
or are not properly restrained.
Infants, young children, and short
adults are at the greatest risk. Be
sure to follow all instructions and
warnings in this manual. (See page
9.)
Don't Drink and Drive
Alcohol and driving don't mix. Even
one drink can reduce your ability to
respond to changing conditions, and
your reaction time gets worse with
every additional drink. So don't drink
and drive, and don't let your friends
drink and drive, either.
Control Your Speed
Excessive speed is a major factor in
crash injuries and deaths. Generally,
the higher the speed the greater the
risk, but serious accidents can also
occur at lower speeds. Never drive
faster than is safe for current
conditions, regardless of the
maximum speed posted.
Keep Your Car in Safe Condition
Having a tire blowout or a
mechanical failure can be extremely
hazardous. To reduce the possibility
of such problems, check your tire
pressures and condition frequently,
and perform all regularly scheduled
maintenance. (See page 204.)
Driver and Passenger Safety
Page 64

Your Car's Safety Features
(1) Safety Cage
(2) Crush Zones
(3) Seats & Seat-Backs
(4) Head Restraints
(5) Collapsible Steering Column
(6) Seat Belts
(7) Front Airbags
(8) Side Airbags
(9) Seat Belt Tensioners
(10) Door Locks
Your car is equipped with many
features that work together to
protect you and your passengers
during a crash.
Some safety features do not require
any action on your part. These
include a strong steel framework
that forms a safety cage around the
passenger compartment; front and
rear crush zones that are designed to
crumple and absorb energy during a
crash; a collapsible steering column;
and seat belt tensioners that
automatically tighten the front seat
belts in the event of a crash.
These safety features are designed
to reduce the severity of injuries in a
crash. However, you and your
passengers can't take full advantage
of these safety features unless you
remain sitting in a proper position
and always wear your seat belts
properly. In fact, some safety
features can contribute to injuries if
they are not used properly.
Driver and Passenger Safety
Page 65

Your Car's Safety Features
Seat Belts
For your safety, and the safety of
your passengers, your car is
equipped with seat belts in all seating
positions.
Your seat belt system also
includes a light on the
instrument panel to remind you and
your passengers to fasten your seat
belts.
Why Wear Seat Belts
Seat belts are the single most
effective safety device for adults and
larger children. (Infants and smaller
children must be properly restrained
in child seats.)
Not wearing a seat belt properly
increases the chance of serious
injury or death in a crash, even
though your car has airbags.
In addition, most states and all
Canadian provinces require you to
wear seat belts.
When properly worn, seat belts:
Keep you connected to the vehicle
so you can take advantage of the
car's built-in safety features.
Help protect you in almost every
type of crash, including frontal,
side, and rear impacts and
rollovers.
Help keep you from being thrown
against the inside of the car and
against other occupants.
Keep you from being thrown out
of the car.
Help keep you in a good position
should the airbags ever deploy. A
good position reduces the risk of
injury from an inflating airbag, and
allows you to get the best
advantage from the airbag.
Of course, seat belts cannot
completely protect you in every
crash. But in most cases, seat belts
can reduce your risk of serious
injury.
What you should do: Always wear
your seat belt, and make sure you
wear it properly.
Driver and Passenger Safety
Not wearing a seat belt properly
increases the chance of serious
injury or death in a crash, even
if you have airbags.
Be sure you and your
passengers always wear seat
belts and wear them properly.
Page 66

Your Car's Safety Features
Airbags
Your car has a Supplemental
Restraint System (SRS) with front
airbags to help protect the heads and
chests of the driver and a front seat
passenger during a moderate to
severe frontal collision.
Your car also has side airbags to help
protect the upper torso of the driver
or a front seat passenger during a
moderate to severe side impact.
The most important things you need
to know about your airbags are:
Airbags do not replace seat belts.
They are designed to supplement
the seat belts.
Airbags offer no protection in rear
impacts, rollovers, or minor
frontal or side collisions.
Airbags can pose serious hazards.
To do their job, airbags must
inflate with tremendous force and
speed. So while airbags help save
lives, they can cause minor injuries,
or more serious or even fatal
injuries if occupants are not
properly restrained or sitting
properly.
What you should do: Always wear
your seat belt properly, and sit
upright and as far back as possible
from the steering wheel or
dashboard.
Driver and Passenger Safety
Page 67

Your Car's Safety Features
Seats & Seat-Backs
Your car's seats are designed to keep
you in a comfortable, upright
position so you can take full
advantage of the protection offered
by seat belts and the energy
absorbing materials in the seats.
How you adjust your seats and seat-
backs can also affect your safety. For
example, sitting too close to the
steering wheel or dashboard
increases the risk of you or your
passenger being injured by striking
the inside of the car, or by an
inflating airbag.
Reclining a seat-back too far reduces
the seat belt's effectiveness and
increases the chance that the seat's
occupant will slide under the seat
belt in a crash and be seriously
injured.
What you should do: Move the front
seats as far back as possible, and
keep adjustable seat-backs in an
upright position whenever the car is
moving.
Head Restraints
Head restraints can help protect you
from whiplash and other injuries. For
maximum protection, the back of
your head should rest against the
center of the head restraint.
Door Locks
Keeping your doors locked reduces
the chance of being thrown out of
the car during a crash. It also helps
prevent occupants from accidentally
opening a door and falling out, and
outsiders from unexpectedly opening
your doors.
Driver and Passenger Safety
Page 68

Your Car's Safety Features
Pre-Drive Safety Checklist
To make sure you and your
passengers get the maximum
protection from your car's safety
features, check the following each
time before you drive away:
All adults, and children who have
outgrown child safety seats, are
wearing their seat belts and
wearing them properly (see page
14).
Any infant or small child is
properly restrained in a child seat
in the back seat (see page 19).
Front seat occupants are silting
upright and as far back as possible
from the steering wheel and
dashboard (see page 12).
Seat-backs are upright (see page
13).
Head restraints are properly
adjusted (see page 14).
All doors are closed and locked
(see page 12).
All cargo is properly stored or
secured (see page 176).
The rest of this section gives more
detailed information about how you
can maximize your safety.
Remember, however, that no safety
system can prevent all injuries or
deaths that can occur in severe
crashes, even when seat belts are
properly worn and the airbags deploy.
Driver and Passenger Safety
Page 69

Protecting Adults
Introduction
The following pages provide
instructions on how to properly
protect the driver and other adult
occupants.
These instructions also apply to
children who have outgrown child
seats and are large enough to wear
lap/shoulder belts. (See page 34 for
important additional guidelines on
how to properly protect larger
children.)
1. Close and Lock the Doors
After everyone has entered the car,
be sure the doors are closed and
locked.
Your car has a door monitor light on
the instrument panel to indicate
when a specific door is not tightly
closed.
For safety, locking the doors reduces
the chance that a passenger,
especially a child, will open a door
while the car is moving and
accidentally fall out. It also reduces
the chance of someone being thrown
out of the car during a crash.
For security, locked doors can
prevent an outsider from
unexpectedly opening a door when
you come to a stop.
See page 81 for how to lock the
doors.
2.Adjust the Front Seats
Any driver who sits too close to the
steering wheel is at risk of being
seriously injured or killed by striking
the steering wheel or from being
struck by an inflating front airbag
during a crash.
Driver and Passenger Safety
Page 70

Protecting Adults
To reduce the chance of injury, wear
your seat belt properly, sit upright
with your back against the seat, and
move the seat as far back as possible
from the steering wheel while still
maintaining full control of the car.
Also make sure your front seat
passenger moves the seat as far to
the rear as possible.
Most shorter drivers can get far
enough away from the steering
wheel and still reach the pedals.
However, if you are concerned about
sitting too close, we recommend that
you investigate whether some type
of adaptive equipment may help.
Once your seat is adjusted correctly,
rock it back and forth to make sure
the seat is locked in position.
See page 93 for how to adjust the
front seats.
3 .Adjust the Seat-Backs
Adjust the driver's seat-back to a
comfortable, upright position,
leaving ample space between your
chest and the airbag cover in the
center of the steering wheel. If you
sit too close to the steering wheel,
you could be injured if the front
airbag inflates.
A front passenger should also adjust
the seat-back to an upright position,
but as far from the dashboard as
possible. A passenger who sits too
close to the dashboard could be
injured if the front airbag inflates.
CONTINUED
Driver and Passenger Safety-
Sitting too close to a front
airbag can result in serious
injury or death if the front
airbags inflate.
Always sit as far back from the
front airbags as possible.
Page 71

Protecting Adults
Reclining a seat-back so that the
shoulder part of the belt no longer
rests against the occupant's chest
reduces the protective capability of
the belt. It also increases the chance
of sliding under the belt in a crash
and being seriously injured. The
farther a seat-back is reclined, the
greater the risk of injury.
See page 94 for how to adjust seat-
backs.
4.Adjust the Head Restraints
Before driving, make sure everyone
with an adjustable head restraint has
properly positioned the head
restraint. The restraint should be
positioned so the back of the
occupant's head rests against the
center of the restraint. A taller
person should adjust the restraint as
high as possible.
Properly adjusted head restraints
will help protect occupants from
whiplash and other crash injuries.
See page 95 for how to adjust the
head restraints.
5.Fasten and Position the Seat
Belts
Insert the latch plate into the buckle,
then tug on the belt to make sure the
belt is securely latched. Also check
that the belt is not twisted, because a
twisted belt can cause serious
injuries in a crash.
Driver and Passenger Safety
Reclining the seat-back too far
can result in serious injury or
death in a crash.
Adjust the seat-back to an
upright position and sit well
back in the seat.
Improperly positioning head
restraints reduces their
effectiveness and you can be
seriously injured in a crash.
Make sure head restraints are
in place and positioned properly
before driving.
Page 72

Protecting Adults
Position the lap part of the belt as
low as possible across your hips,
then pull up on the shoulder part of
the belt so the lap part fits snugly.
This lets your strong pelvic bones
take the force of a crash and reduces
the chance of internal injuries.
If necessary, pull up on the belt again
to remove any slack from the
shoulder part, then check that the
belt rests across the center of your
chest and over your shoulder. This
spreads the forces of a crash over
the strongest bones in your upper
body.
If the seat belt touches or crosses
your neck, or if it crosses your arm
instead of your shoulder, you need to
adjust the seat belt anchor height.
To adjust the height of a front seat
belt anchor, press the release button
and slide the anchor up or down as
needed (it has four positions).
Never place the shoulder portion of a
lap/shoulder belt under your arm or
behind your back. This could cause
very serious injuries in a crash.
CONTINUED
Driver and Passenger Safety
Improperly positioning the seat
belts can cause serious injury
or death in a crash.
Make sure all seat belts are
properly positioned before
driving.
Page 73

Protecting Adults
If a seat belt does not seem to work
as it should, it may not protect the
occupant in a crash. No one should
sit in a seat with an inoperative seat
belt. Anyone using a seat belt that is
not working properly can be
seriously injured or killed. Have your
Acura dealer check the belt as soon
as possible.
See page 40 for additional
information about your seat belt
system and how to take care of your
belts.
6.Adjust the Steering Wheel
Adjust the steering wheel, if needed,
so that the wheel points toward your
chest, not toward your face.
Pointing the steering wheel toward
your face decreases the protective
capability of your front airbag.
See page 71 for how to adjust the
steering wheel.
7.Maintain a Proper Sitting
Position
After all occupants have adjusted
their seats and put on seat belts, it is
very important that they continue to
sit upright, well back in their seats,
with their feet on the floor, until the
car is parked and the engine is off.
Sitting improperly can increase the
chance of injury during a crash. For
example, if an occupant slouches,
lies down, turns sideways, sits
forward, leans forward or sideways,
or puts one or both feet up, the
chance of injury during a crash is
greatly increased.
In addition, an occupant who is out of
position in the front seat can be
seriously or fatally injured by
striking interior parts of the car, or
by being struck by an inflating front
airbag. Being struck by an inflating
side airbag can result in possibly
serious injuries.
Driver and Passenger Safety
Page 74

Protecting Adults
Remember, to get the best
protection from your car's airbags
and other safety features, you must
sit properly and wear your seat belt
properly.
Advice for Pregnant Women
Because protecting the mother is the
best way to protect her unborn child,
a pregnant woman should always
wear a seat belt whenever she drives
or rides in a car.
Remember to keep the lap portion of
the belt as low as possible across
your hips.
Pregnant women should also sit
upright and as far back as possible
from the steering wheel or
dashboard. This will reduce the risk
of injuries to both the mother and
her unborn child that can be caused
by a crash or an inflating airbag.
Each time you have a check-up, ask
your doctor if it's okay for you to
drive.
Driver and Passenger Safety
Sitting improperly or out of
position can result in serious
injury or death in a crash.
Always sit upright, well back in
the seat, with your feet on the
floor.
Page 75

Protecting Adults
Additional Safety Precautions
Two people should never use the
same seat belt. If they do, they
could be very seriously injured in a
crash.
Do not put any accessories on seat
belts. Devices intended to improve
occupant comfort, or reposition
the shoulder part of a seat belt,
can severely compromise the
protective capability of the seat
belts and increase the chance of
serious injury in a crash.
Do not place hard or sharp objects
between yourself and a front
airbag. Carrying hard or sharp
objects on your lap, or driving with
a pipe or other sharp object in
your mouth, can result in injuries
if your front airbag inflates.
Do not attach hard objects on or
near a front door. If a side airbag
inflates, a cup holder or other hard
object attached on or near the
door could be propelled inside the
car and hurt someone.
Keep your hands and arms away
from the airbag covers. If your
hands or arms are close to the
airbag cover in the center of the
steering wheel or on top of the
dashboard, they could be injured if
the front airbags inflate.
Driver and Passenger Safety
Page 76
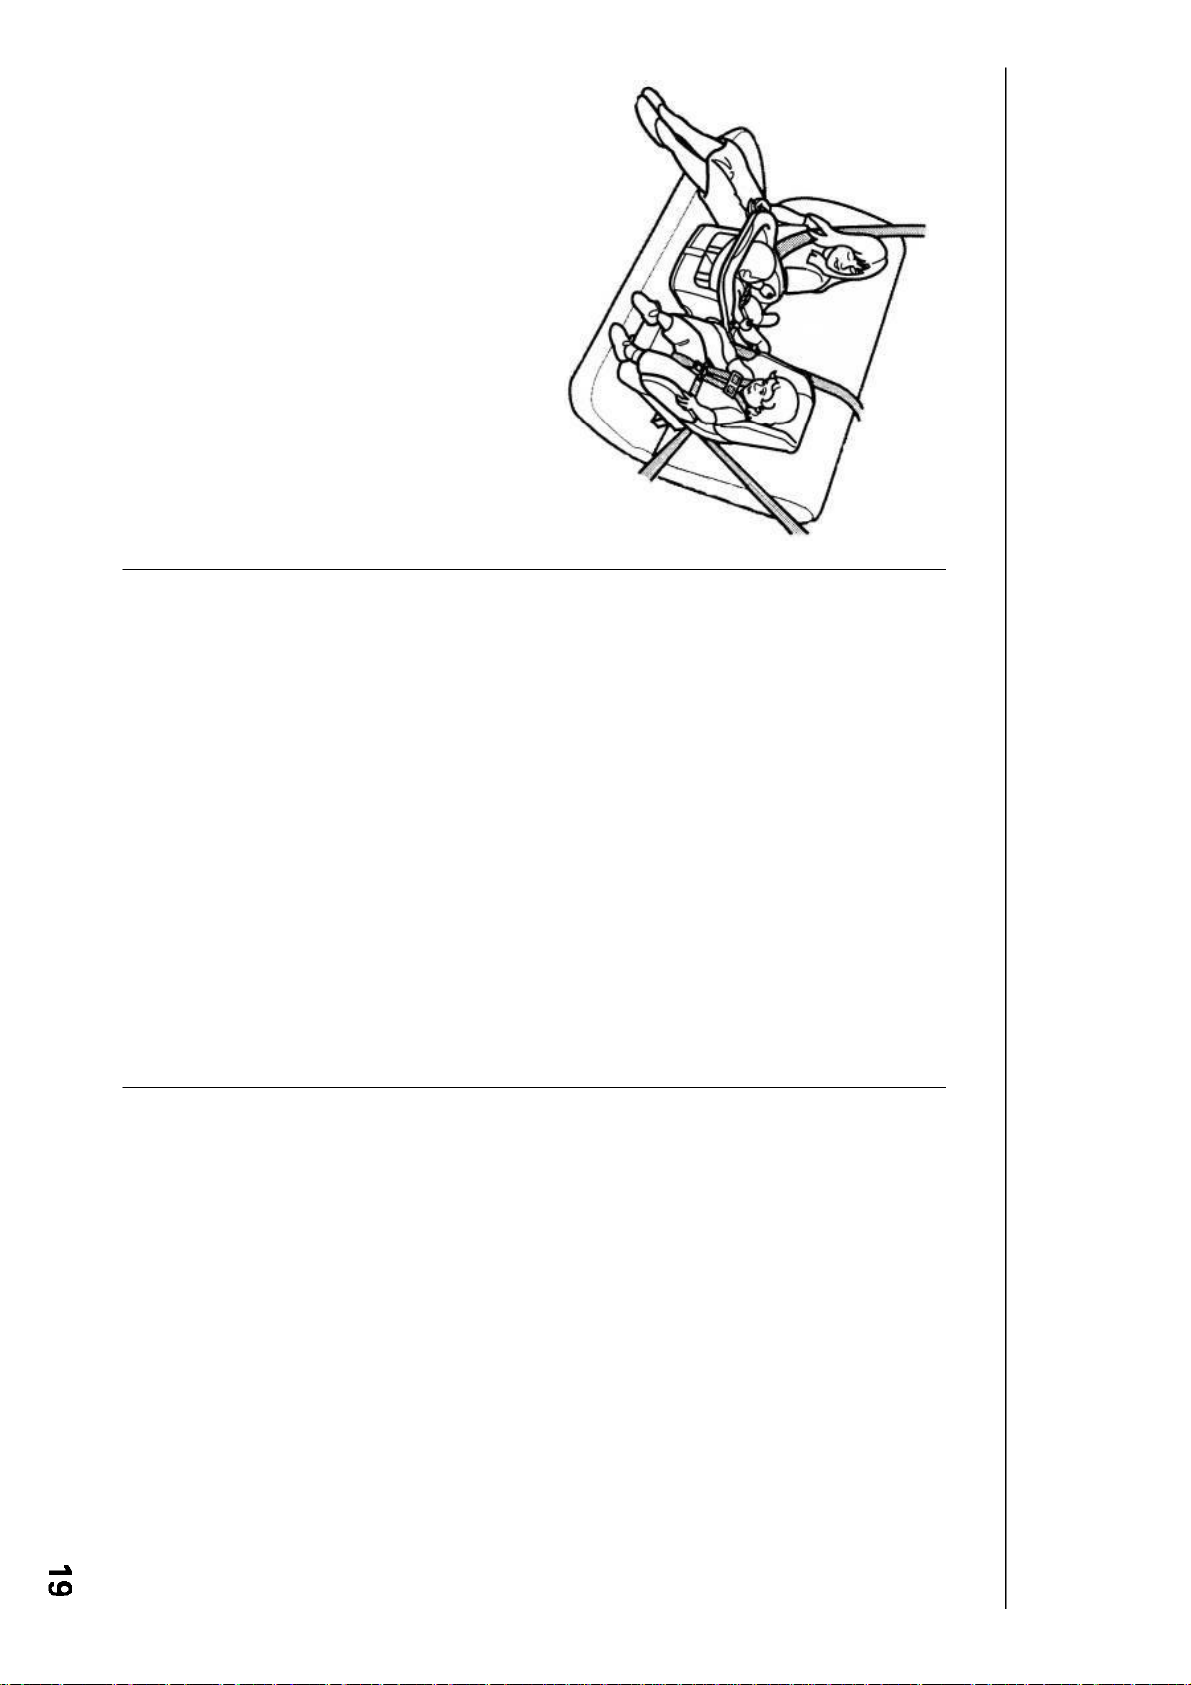
Protecting Children
Children depend on adults to protect
them. However, despite their best
intentions, many parents and other
adults may not know how to properly
protect young passengers.
So if you have children, or if you ever
need to drive with a grandchild or
other children in your car, be sure to
read this section.
All Children Must Be Restrained
Each year, many children are injured
or killed in vehicle crashes because
they are either unrestrained or not
properly restrained. In fact, vehicle
accidents are the number one cause
of death of children ages 12 and
under.
To reduce the number of child
deaths and injuries, every state and
Canadian province requires that
infants and children be restrained
whenever they ride in a vehicle.
Any child who is too small to wear a
seat belt should be properly
restrained in a child seat. (See page
23.)
A larger child should always be
restrained with a seat belt. (See page
34.)
Driver and Passenger Safety
Children who are unrestrained
or improperly restrained can be
seriously injured or killed in a
crash.
Any child too small for a seat
belt should be properly
restrained in a child seat. A
larger child should be properly
restrained with a seat belt.
Page 77

Protecting Children
Children Should Sit in the Back
Seat
According to accident statistics,
children of all ages and sizes are
safer when they are restrained in the
back seat, not the front seat. The
National Highway Traffic Safety
Administration and Transport
Canada recommend that all children
ages 12 and under be properly
restrained in the back seat.
In the back seat, children are less
likely to be injured by striking hard
interior parts during a collision or
hard braking. Also, children cannot
be injured by an inflating airbag
when they ride in the back.
The Passenger's Front Airbag
Poses Serious Risks to Children
Front airbags have been designed to
help protect adults in a moderate to
severe frontal collision. To do this,
the passenger's front airbag is quite
large, and it inflates with tremendous
speed.
Infants
Never put a rear-facing child seat in
the front seat of a vehicle equipped
with a passenger's front airbag.
If
the airbag inflates, it can hit the back
of the child seat with enough force
to kill or very seriously injure an
infant.
Small Children
Placing a forward-facing child seat in
the front seat of a vehicle equipped
with a passenger's front airbag can
be hazardous. If the vehicle seat is
too far forward, or the child's head is
thrown forward during a collision, an
inflating front airbag can strike the
child with enough force to kill or
very seriously injure a small child.
Larger Children
Children who have outgrown child
seats are also at risk of being injured
or killed by an inflating passenger's
front airbag. Whenever possible,
larger children should sit in the back
seat, properly restrained with a seat
belt. (See page 34 for important
information about protecting larger
children.)
Driver and Passenger Safety
Page 78

Protecting Children
U.S. Models
To remind you of the passenger's
front airbag hazards, and that
children must be properly restrained
in the back seat, your car has
warning labels on the dashboard and
on the driver's and front passenger's
visors. Please read and follow the
instructions on these labels.
Canadian Models
To remind you of the front airbag
hazards, your car has warning labels
on the driver's and front passenger's
visors. Please read and follow the
instructions on these labels.
Driver and Passenger Safety
CAUTION
TO AVOID SERIOUS INJURY:
FOR MAXIMUM SAFETY PROTECTION IN
ALL TYPES OF CRASHES, YOU MUST
ALWAYS WEAR YOUR SAFETY BELT.
DO NOT INSTALL REARWARD-FACING
CHILD SEATS IN ANY FRONT
PASSENGER SEAT POSITION.
DO NOT SIT OR LEAN UNNECESSARILY
CLOSE TO THE AIRBAG.
DO NOT PLACE ANY OBJECTS OVER THE
AIR BAG OR BETWEEN THE AIR BAG
AND YOURSELF.
SEE THE OWNER'S MANUAL FOR FURTHER
INFORMATION AND EXPLANATIONS.
PRECAUTION:
POUR EVITER DES BLESSURES GRAVES:
POUR PROFITER D'UNE PROTECTION
MAXIMALE LORS D'UNE COLLISION BOUCLEZ
TOUJOURS VOTRE CEINTURE DE SECURITE.
N'lNSTALLEZ JAMAIS UN SIEGE POUR
ENFANTS FAISANT FACE A L'APRIERE SUR
LE SIEGE DU PASSAGER AVANT.
NE VOUS APPUYEZ PAS ET NE VOUS ASSOYEZ
PAS PRES DU COUSSIN GONFLABLE.
NE DEPOSEZ AUCUN OBJET SUR LE COUSSIN
GONFLABLE OU ENTRE LE COUSSIN
GONFLABLE ET VOUS.
LISEZ LE GUIDE UTILISATEUR POUR DE
PULS AMPLES RENSEIGNEMENTS.
Page 79

Protecting Children
If You Must Drive with Several
Children
Your car has three seating positions
in the back seat where children can
be properly restrained.
If you ever have to carry more than
three children in your car:
Place the largest child in the front
seat, provided the child is large
enough to wear a seat belt
properly (see page 34).
Move the vehicle seat as far to the
rear as possible (see page 12).
Have the child sit upright and well
back in the seat (see page 16).
Make sure the seat belt is properly
positioned and secured (see page
14).
If a Child Requires Close
Attention
Many parents say they prefer to put
an infant or small child in the front
passenger seat so they can watch the
child, or because the child requires
attention.
Placing a child in the front seat
exposes the child to hazards from
the passenger's front airbag, and
paying close attention to a child
distracts the driver from the
important tasks of driving, placing
both of you at risk.
If a child requires physical attention
or frequent visual contact, we
strongly recommend that another
adult ride with the child in the back
seat. The back seat is far safer for a
child than the front.
Additional Safety Precautions
Use childproof door locks to
prevent children from opening the
doors. Using this feature will
prevent children from opening the
doors and accidentally falling out
(see page 85).
Use the main power window
switch to prevent children from
opening the rear windows. Using
this feature will prevent children
from playing with the windows,
which could expose them to
hazards or distract the driver (see
page 106).
Driver and Passenger Safety
Page 80

Protecting Children
Do not leave children alone in your
vehicle. Leaving children without
adult supervision is illegal in most
states and provinces, and can be
very hazardous. For example,
infants and small children left in a
vehicle on a hot day can dic from
heatstroke. And children left alone
with the key in the ignition can
accidentally set the vehicle in
motion, possibly injuring
themselves or others.
General Guidelines for Using
Child Seats
The following pages give general
guidelines for selecting and installing
child seats for infants and small
children.
Selecting a Child Seat
To provide proper protection, a child
seat should meet three
requirements:
1.
The child seat should meet safety
standards. The child seat should
meet Federal Motor Vehicle
Safety Standard 213 (FMVSS 213)
or Canadian Motor Vehicle Safety
Standard 213 (CMVSS 213). Look
for the manufacturer's statement
of compliance on the box and seat.
2.
The child seat should be of the
proper type and size to fit the child.
Infants: Children up to about one
year old should be restrained in a
rear-facing, reclining child seat. Only
a rear-facing seat provides the
proper support to protect an infant's
head, neck, and back. See page
27 for additional information on
protecting infants.
Driver and Passenger Safety
CONTINUED
Page 81

Protecting Children
Small Children: A child who is too
large for a rear-facing child seat, and
who can sit up without support,
should be restrained in a forward-
facing child seat. See page 31 for
additional information on protecting
small children.
3. The child seat should fit the
vehicle seating position (or
positions) where it will be used.
Due to variations in the design of
child seats, vehicle seats, and seat
belts, all child seats will not fit all
vehicle seating positions.
However, Acura is confident that one
or more child seat models can fit and
be properly installed in all
recommended seating positions in
your car.
Before purchasing a child seat, we
recommend that parents test the
child seat in the specific vehicle
seating position (or positions) where
they intend to use the seat. If a
previously purchased child seat does
not fit, you may need to buy a
different one that will fit.
Driver and Passenger Safety
Page 82

Protecting Children
Placing a Child Seat
This page briefly summarizes Acura's
recommendations on where to place
rear-facing and forward-facing child
seats in your car.
Front Passenger's Seat
Infants: Never in the front seat, due
to the front airbag hazard.
Small children: Not recommended,
due to the front airbag hazard. If a
small child must ride in front,
move the vehicle seat to the rear-
most position and secure a front-
facing child seat with the seat belt
(see page 31).
Back Seats
Infants: Recommended positions.
Secure a rear-facing child seat
with the seat belt (see page 27).
Small children: Recommended
positions. Secure a front-facing
child seat with the seat belt (see
page 31).
Driver and Passenger Safety
CONTINUED
Airbags Pose Serious
Risks to Children
The passenger's front airbag
inflates with enough force to kill
or seriously injure an infant in a
rear-facing child seat.
A small child in a forward-facing
child seat is also at risk. If the
vehicle seat is too far forward,
or the child's head is thrown
forward during a collision, an
inflating front airbag can kill or
seriously injure the child.
If a small child must ride in the
front, follow the instructions
provided.
Page 83

Protecting Children
Installing a Child Seat
After selecting a proper child seat,
and a good position to install the seat,
there are three main steps in
installing the seat:
1. Secure the child seat to the car
with a seat belt. All child seats
must be secured to the car with
the lap part of a lap/shoulder belt.
A child whose seat is not properly
secured to the car can be
endangered in a crash. See pages
28 and 32 for instructions on how
to secure child seats in this car.
2. Make sure the child seat is firmly
secured. After installing a child
seat, push and pull the seat
forward and from side to side to
verify that it is secure.
To provide security during normal
driving maneuvers as well as during
a collision, we recommend that
parents secure a child seat as firmly
as possible.
However, a child seat does not need
to be "rock solid." In some vehicles
or seating positions, it may be
difficult to install a child seat so that
it does not move at all. Some side-to-
side or back-and-forth movement can
be expected and should not reduce
the child seat's effectiveness.
If the child seat is not secure, try
installing it in a different seating
position, or use a different style of
child seat that can be firmly secured
in the desired seating position.
3. Secure the child in the child seat.
Make sure the child is properly
strapped in the child seat
according to the child seat maker's
instructions. A child who is not
properly secured in a child seat
can be thrown out of the seat in a
crash and seriously injured.
Storing a Child Seat
When you are not using a child seat,
either remove it and store it in a safe
place, or make sure it is properly
secured. An unsecured child seat can
be thrown around the car during a
crash or sudden stop and injure
someone.
Driver and Passenger Safety
Page 84

Protecting Children
Protecting Infants
Child Seat Type
Only a rear-facing child seat provides
proper support for a baby's head,
neck, and back. Infants up to about
one year of age must be restrained in
a rear-facing child seat.
Two types of seats may be used: a
seat designed exclusively for infants,
or a convertible seat used in the rear-
facing, reclining mode.
We recommend that an infant be
restrained in a rear-facing child seat
until the infant reaches the seat
maker's weight or height limit and is
able to sit up without support.
Rear-Facing Child Seat Placement
In this car, a rear-facing child seat
can be placed in any seating position
in the back seat, but not in the front
seat.
Never put a rear-facing child seat in
the front seat. If the passenger's
front airbag inflates, it can hit the
back of the child seat with enough
force to kill or seriously injure an
infant. If an infant must be closely
watched, we recommend that
another adult sit in the back seat
with the baby.
Do not put a rear-facing child seat in
a forward-facing position. If placed
facing forward, an infant could be
very seriously injured during a
frontal collision.
CONTINUED
Driver and Passenger Safety
Placing a rear-facing child seat
in the front seat can result in
serious injury or death if the
passenger's front airbag inflates.
Always place a rear-facing child
seat in the back seat, not the
front.
Page 85

Protecting Children
Rear-Facing Child Seat Installation
The lap/shoulder belts in the back
seats have a locking mechanism that
must be activated to secure a child
seat.
The following pages provide
instructions and tips on how to
secure a rear-facing child seat with
this type of seat belt.
1. With the child seat in the desired
back seating position, route the
belt through the child seat
according to the seat maker's
instructions, then insert the latch
plate into the buckle.
2. To activate the lockable retractor,
slowly pull the shoulder part of the
belt all the way out until it stops,
then let the belt feed back into the
retractor (you might hear a
clicking noise as the belt retracts).
3. After the belt has retracted, tug on
it. If the belt is locked, you will not
be able to pull it out. If you can pull
the belt out, it is not locked and
you will need to repeat these steps.
Driver and Passenger Safety
Page 86

Protecting Children
4. After confirming that the belt is
locked, grab the shoulder part of
the belt near the buckle and pull
up to remove any slack from the
lap part of the belt. Remember, if
the lap part of the belt is not tight,
the child seat will not be secure.
To remove slack, it may help to
put weight on the child seat, or
push on the back of the seat, while
pulling up on the belt.
5. Push and pull the child seat
forward and from side to side to
verify that it is secure enough to
stay upright during normal driving
maneuvers. If the child seat is not
secure, unlatch the belt, allow it to
retract fully, then repeat these
steps.
To deactivate the locking
mechanism and remove a child seat,
unlatch the buckle, unroute the seat
belt, and let the belt fully retract.
CONTINUED
Driver and Passenger Safety
Page 87

Protecting Children
Rear-Facing Child Seat Installation
Tips
For proper protection, an infant must
ride in a reclined, or semi-reclined
position. To determine the proper
reclining angle, check with the baby's
doctor or follow the seat maker's
recommendations.
To achieve the desired reclining
angle, it may help to put a rolled up
towel under the toe of the child seat,
as shown.
When properly installed, a rear-
facing child seat may prevent the
driver or a front-seat passenger from
moving the seat as far back as
recommended (see page 12). Or it
may prevent them from locking the
seat-back in the desired upright
position (see page 13).
In either case, we recommend that
you place the child seat directly
behind the front passenger seat,
move the front seat as far forward as
needed, and leave it unoccupied. Or
you may wish to get a smaller child
seat that allows you to safely carry a
front passenger.
Additional Precautions for Infants
Never hold an infant on your lap.
If you are not wearing a seat belt
in a crash, you could be thrown
forward into the dashboard and
crush the infant.
If you are wearing a seat belt, the
infant can be torn from your arms.
For example, if your car crashes
into a parked vehicle at 30 mph
(48 km/h), a 20-lb (9 kg) infant
will become a 600-lb (275 kg) force,
and you will not be able to hold on.
Never put a seat belt over yourself
and an infant. During a crash, the
belt could press deep into the
infant and cause very serious
injuries.
Driver and Passenger Safety
Page 88

Protecting Children
Protecting Small Children
Child Seat Type
A child who can sit up without
support, and who fits within the child
seat maker's weight and height
limits, should be restrained in a
forward-facing, upright child seat.
Of the different seats available, we
recommend those that have a five-
point harness system as shown.
We also recommend that a small
child stay in the child seat as long as
possible, until the child reaches the
weight or height limit for the seat.
Child Seat Placement
In this car, the best place to install a
forward-facing child seat is in one of
the seating positions in the back seat.
Placing a forward-facing child seat in
the front seat of a vehicle equipped
with a passenger's front airbag can
be hazardous. If the vehicle seat is
too far forward, or the child's head is
thrown forward during a collision, an
inflating front airbag can strike the
child with enough force to cause
very serious or fatal injuries. If a
small child must be closely watched,
we recommend that another adult sit
in the back seat with the child.
If it is necessary to put a forward-
facing child seat in the front, move
the vehicle seat as far to the rear as
possible, be sure the child seat is
firmly secured to the car, and that
the child is properly strapped in the
seat.
CONTINUED
Driver and Passenger Safety
Improperly placing a forward-
facing child seat in the front
seat can result in serious injury
or death if the front airbags
inflate.
If you must place a forward-
facing child seat in front, move
the vehicle seat as far back as
possible and properly restrain
the child.
Page 89

Protecting Children
Child Seat Installation
The lap/shoulder belts in the back
and front passenger seating positions
have a locking mechanism that must
be activated to secure a child seat.
The following pages provide
instructions and tips on how to
secure a forward-facing child seat
with this type of seat belt.
1. With the child seat in the desired
seating position, route the belt
through the child seat according
to the seat maker's instructions,
then insert the latch plate into the
buckle.
2. To activate the lockable retractor,
slowly pull the shoulder part of the
belt all the way out until it stops,
then let the belt feed back into the
retractor (you might hear a
clicking noise as the belt retracts).
3. After the belt has retracted, tug on
it. If the belt is locked, you will not
be able to pull it out. If you can pull
the belt out, it is not locked and
you will need to repeat these steps.
Driver and Passenger Safety
Page 90

Protecting Children
4. After confirming that the belt is
locked, grab the shoulder part of
the belt near the buckle and pull
up to remove any slack from the
lap part of the belt. Remember, if
the lap part of the belt is not tight,
the child seat will not be secure. It
may help to put weight on the
child seat, or push on the back of
the seat, while pulling up on the
belt.
5. Push and pull the child seat
forward and from side to side to
verify that it is secure enough to
stay upright during normal driving
maneuvers. If the child seat is not
secure, unlatch the belt, allow it to
retract fully, then repeat these
steps.
To deactivate the locking
mechanism and remove a child seat,
unlatch the buckle, unroute the seat
belt, and let the belt fully retract.
CONTINUED
Driver and Passenger Safety
Page 91

Protecting Children
Additional Precautions for Small
Children
Never hold a small child on your
lap. If you are not wearing a seat
belt in a crash, you could be
thrown forward into the
dashboard and crush the child.
If you are wearing a seat belt, the
child can be torn from your arms
during a crash. For example, if
your car crashes into a parked
vehicle at 30 mph (48 km/h), a
30-lb (14 kg) child will become a
900-lb (410 kg) force, and you will
not be able to hold on.
Never put a seat belt over yourself
and a child. During a crash, the
belt could press deep into the child
and cause very serious injuries.
Protecting Larger Children
When a child reaches the
recommended weight or height limit
for a forward-facing child seat, the
child should sit in the back seat and
wear a lap/shoulder belt.
If a child is too short for the shoulder
part of the belt to properly fit, we
recommend that the child use a
booster seat until they are tall
enough to use the seat belt without a
booster.
The following pages give
instructions on how to check proper
seat belt fit, what kind of booster
seat to use if one is needed, and
important precautions for children
who must sit in the front seat.
Driver and Passenger Safety
Allowing a larger child to sit
improperly in the front seat can
result in injury or death if the
passenger's front airbag inflates.
If a larger child must sit in front,
make sure the child moves the
seat as far back as possible
and wears the seat belt properly.
Page 92

Protecting Children
Checking Seat Belt Fit
To determine if a lap/shoulder belt
properly fits a child, have the child
put on the seat belt. Follow the
instructions on page 14. Then check
how the belt fits.
If the shoulder part of the belt rests
over the child's collarbone and
against the center of the chest, as
shown, the child is large enough to
wear the seat belt.
However, if the belt touches or
crosses the child's neck, the child
needs to use a booster seat.
Do not let a child wear a seat belt
across the neck. This could result in
serious neck injuries during a crash.
Do not let a child put the shoulder
part of a seat belt behind the back or
under the arm. This could cause
very serious injuries during a crash.
It also increases the chance that the
child will slide under the belt in a
crash and be injured.
Do not put any accessories on a seat
belt. Devices intended to improve
occupant comfort or reposition the
shoulder part of a seat belt, severely
compromise the protective capability
of the seat belt and increase the
chance of serious injury in a crash.
Two children should never use the
same seat belt. If they do, they could
be very seriously injured in a crash.
CONTINUED
Driver and Passenger Safety
Page 93

Protecting Children
Using a Booster Seat
If a child needs a booster seat, we
recommend choosing a style that
allows the child to use the lap/
shoulder belt directly, without a
shield, as shown.
Whichever style you select, follow
the booster seat maker's instructions.
A child may continue using a booster
seat until the tops of the ears are
even with the top of the seat-back. A
child of this height should be tall
enough to use the lap/shoulder belt
without a booster.
When Can a Larger Child Sit in Front
The National Highway Traffic Safety
Administration and Transport
Canada recommend that all children
ages 12 and under be properly
restrained in the back seat.
The back seat is the safest place for
a child of any age or size.
In addition, the passenger's front
airbag poses serious risks to children.
If the seat is too far forward, or the
child's head is thrown forward
during a collision, or the child is
unrestrained or out of position, an
inflating front airbag can kill or
seriously injure the child.
The side airbag also poses risks. If
any part of a larger child's body is in
the path of a deploying airbag, the
child could receive possibly serious
injuries.
Driver and Passenger Safety
Page 94

Protecting Children
Of course, children vary widely. And
while age may be one indicator of
when a child can safely ride in the
front, there are other important
factors you should consider.
Physical Size
Physically, a child must be large
enough for the lap/shoulder belt to
properly fit over the hips, chest, and
shoulder (see pages 13 and 32). If
the seat belt does not fit properly,
the child should not sit in the front.
Maturity
To safely ride in front, a child must
be able to follow the rules, including
sitting properly and wearing the seat
belt properly throughout a ride.
If you decide that a child can safely
ride up front, be sure to:
Carefully read the owner's manual
and make sure you understand all
seat belt instructions and all safety
information.
Move the vehicle seat to the rear-
most position.
Have the child sit up straight, back
against the seat, and feet on or
near the floor.
Check that the child's seat belt is
properly positioned and secured.
Supervise the child. Even mature
children sometimes need to be
reminded to fasten the seat belts
or sit properly.
Using Child Seats with Tethers
Your car has three attachment points
on the rear shelf for securing a
tether-style child seat to the car.
Since a tether can provide additional
security, we recommend using a
tether whenever one is required or
available. (Tethers are required in
Canada. U.S. owners may check with
the child seat maker to determine
whether a tether is available for a
particular child seat.)
CONTINUED
Driver and Passenger Safety
Page 95

Protecting Children
U.S. Models
Locate the attachment points by
looking in the trunk at the underside
of the rear shelf. Select the
attachment point you want to use.
Take a thin, pointed object, such as
an awl or ice pick, insert it into that
attachment point, and poke a marker
hole in the rear shelf fabric.
12.8 in (325 mm)
You can also use the dimensions in
the illustration to locate the
attachment point you want to use.
The inside of the attachment point
has a slit you can feel with your
finger. Then cut a 7/8 inch (22 mm)
diameter hole in the rear shelf.
To attach the tether to the car, you
need to purchase the anchor plate
and mounting hardware from your
Honda dealer (Part Number 82410-
SE3-C01).
To attach a tether to a child seat,
follow the child seat maker's
instructions.
Driver and Passenger Safety
7.9 in (200 mm)
12.8 in (325 mm)14.2 in (360 mm)
Page 96

Protecting Children
Canadian Models
Select the attachment point you want
to use and remove the plug with a
small flat-tipped screwdriver or metal
fingernail file.
Install the tether hardware that is
supplied with the car.
All Models
When installing tether hardware,
make sure the toothed washer is on
the bottom of the bolt. Tighten the
bolt to:
16 lbf
.
ft (22 N
.
m, 2.2 kgf
.
m)
If a torque wrench was not used, see
your Acura dealer as soon as
possible to verify proper installation.
To attach a tether to a child seat,
follow the child seat maker's
instructions.
If you are not sure how to install the
tether, or you need mounting
hardware, contact your Acura dealer.
Driver and Passenger Safety
Page 97

Additional Information About Your Seat Belts
Seat Belt System Components
Your seat belt system includes lap/
shoulder belts in all five seating
positions. The front seat belts are
also equipped with automatic seat
belt tensioners.
The seat belt system also
includes a light on the
instrument panel to remind you and
your passengers to fasten your belts.
If the driver's seat belt is not
fastened before the ignition is turned
ON (II), the light will come on and a
beeper will also sound. The beeper
will stop after a few seconds, but the
light will stay on until the driver's
seat belt is fastened.
Lap/Shoulder Belt
This seat, belt has a single belt that
goes over your shoulder, across your
chest and across your hips.
To fasten the belt, insert the latch
plate into the buckle, then tug on the
belt to make sure the buckle is
latched.
To unlock the belt, push the red
PRESS button on the buckle.
Guide the belt across your body to
the door pillar. After exiting the car,
be sure the belt is out of the way and
will not get closed in the door.
All seat belts have an emergency
locking retractor. In normal driving,
the retractor lets you move freely in
your seat while it keeps some
tension on the belt. During a collision
or sudden stop, the retractor
automatically locks the belt to help
restrain your body.
The seat belts in all seating positions
except the driver's have an additional
locking mechanism that must be
activated to secure a child seat. (See
pages 28 and 32 for instructions on
how to secure child seats with this
type of seat belt.)
Driver and Passenger Safety
Page 98

Additional Information About Your Seat Belts
If the shoulder part of the belt is
pulled all the way out, the locking
mechanism will activate. The belt
will retract, but it will not allow a
passenger to move freely.
To deactivate the locking
mechanism, unlatch the buckle and
let the seat belt fully retract. To
refasten the belt, pull it out only as
far as needed.
See page 14 for instructions on how
to wear the lap/shoulder belt
properly.
Automatic Seat Belt Tensioners
For added protection, the front seat
belts are equipped with automatic
seat belt tensioners. When activated,
the tensioners immediately tighten
the belts to help hold the driver and
a front passenger in place.
The tensioners are designed to
activate primarily in frontal collisions.
The tensioners are independent of
the airbag system, so they can be
activated during a collision that
might not cause the airbags to
deploy. In this case, the airbags
would not be needed but the
additional seat belt tension can be
helpful.
The tensioners will be activated in a
collision severe enough to cause the
front airbags to inflate.
When the tensioners are activated,
the seats belts will remain tight until
they are unbuckled in the normal
way.
The SRS indicator light will
come on if there is a
problem with your automatic seat
belt tensioners (see page 45).
Driver and Passenger Safety
S R S
Page 99

Additional Information About Your Seat Belts
Seat Belt Maintenance
For safety, you should check the
condition of your seat belts regularly.
Pull each belt out fully and look for
frays, cuts, burns, and wear. Check
that the latches work smoothly and
that the lap/shoulder belts retract
easily. Any belt not in good condition
or not working properly will not
provide good protection and should
be replaced as soon as possible.
U.S. Models
Acura provides a lifetime warranty
on seat belts. Acura will repair or
replace any seat belt component
that fails to function properly
during normal use.
Please see your Acura Warranty
Information booklet for details.
After a crash, you should have your
dealer inspect the seat belts. A belt
that has been worn during a crash
may not provide the same level of
protection. The dealer should also
inspect the anchors for damage and
replace them if needed.
Automatic seat belt tensioners that
deployed during a crash must be
replaced.
For information on how to clean your
seat belts, see page 264.
Driver and Passenger Safety
Not checking or maintaining
seat belts can result in serious
injury or death if the seat belts
do not work properly when
needed.
Check your seat belts regularly
and have any problem
corrected as soon as possible.
Page 100

Additional Information About Your Front Airbags
SRS Components
Your Supplemental Restraint System
(SRS) includes:
Two front airbags. The driver's
airbag is stored in the center of
the steering wheel; the front
passenger's airbag is stored in the
dashboard. Both are marked "SRS
AIRBAG."
Automatic seat belt tensioners
(see page 41).
Sensors that can detect a
moderate to severe frontal
collision.
A sophisticated electronic system
that continually monitors the
sensors, control unit, the airbag
activators, and all related wiring
when the ignition is ON (II).
An indicator light on the
instrument panel that alerts you to
a possible problem with the
system (see page 45).
Emergency backup power in case
your car's electrical system is
disconnected in a crash.
How Your Front Airbags Work
If you ever have a moderate to
severe frontal collision, the sensors
will detect the vehicle's rapid
deceleration. If the rate of
deceleration is high enough, the
control unit will instantly inflate the
front airbags.
CONTINUED
Driver and Passenger Safety
 Loading...