

Page 1
Ergo Basix
Performance Accelerator
Page 2

Table of Contents
Warning ...........................................................
Mission Statement...........................................
ERGO Basix Features............................ ...........
What's in Your Package .....................................
Operating Your ERGO Basix.............................
Attaching Your Heart Rate Monitor .................
Buttons and Functions.....................................
Modes of Operation .......................................
Time Mode .........................................................
Heart Rate Mode .................................................
Setting Your Personal Data...............................
In-Zone Goal Countdown Mode...........................
Calorie Mode .....................................................
Determining Your Exercise Factor .......................
Battery Replacement ..........................................
General Precautions .................................... ......
Technical Specifications .....................................
Technical Display Guide ....................................
Warranty.............................................................
Service & Repair ...........................................
Warning
Overexertion can cause serious injury, including heart attacks.
Some individuals cannot safely elevate their heart rate to the
levels of typically used heart rate training zones. No one
should begin an exercise program without first obtaining
medical clearance, especially if there is a personal or family
history of heart disease, high blood pressure, or if you are
over age 40, have diabetes,high cholesterol, smoke cigarettes,
are overweight or are taking certain medications. Stop
exercising and seek medical attention if you notice signs of
overexertion or heart problems, such as pain or pressure in
the left or mid-chest area or left neck area, shoulder or arm,
light-headedness, cold sweat, unusual paleness or fainting.
Also note that the signals used by this monitor may interfere
with a pacemaker or other implanted devices, consult the
manufacturer of the implant device and/or yourphysician prior
to using this monitor.
1
2
3
3
5
5
6
6
7
8
8
9
10
10
11
12
13
14
15
16
XISAB OGRE
Page 3

CONGRATULATIONS!
Welcome to the future of wireless heart rate technology!
Your purchase shows that you are serious about your
exercise and are committed to achieving your best.
Today, getting the most from your exercise do not
necessarily mean you have to spend longer periods of
time to achieve your goals. With Target Heart Rate
Training, you will increase the effectiveness of your
workout by monitoring and quantifying your results every
step of the way. For most individuals as little as 20
minutes in your target heart rate zone each session is
enough to achieve substantial health improvements.The
Acumen ERGO Basix will act as your personal coach and
guide you to your fitness goals more effectively.
MISSION STATEMENT
At Acumen we have listened to what people such as
yourself have been asking for in a heart rate monitor
and are committed to your satisfaction. We know you
will enjoy all of the added features, along with those
never found before in other heart rate monitors, and the
ease of use incorporated into our products. If you ever
have any questions, comments or suggestions, please
write or call our staff. We greatly value your feedback
and look forward to continuing to provide you with
products and support that’s second to none. Thank you
for your purchase and anticipated support.
Product Development Team
2
Page 4

ERGO BASIX FEATURES
Conductive Fabric Heart Rate Strap
Backlight with SmartLite
Shock Resistant Design
Water Resistant to 30 Meters
ECG Accurate Heart Rate
EZ-SetTargetZonePat.NO.US6345197B1Automatic
with Audible & Visual Alarm
12/24 hr. Time Display with Daily Alarm
In Zone Goal Count Down Timer (0-60minutes)
Calorie Counter
Indicators
WHAT'S IN YOUR PACKAGE
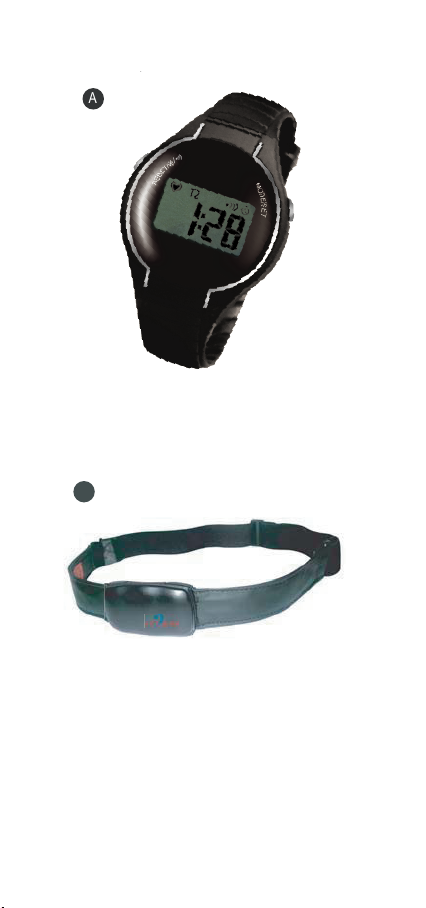
You r ER GO B asix pa ckag e in clu des:
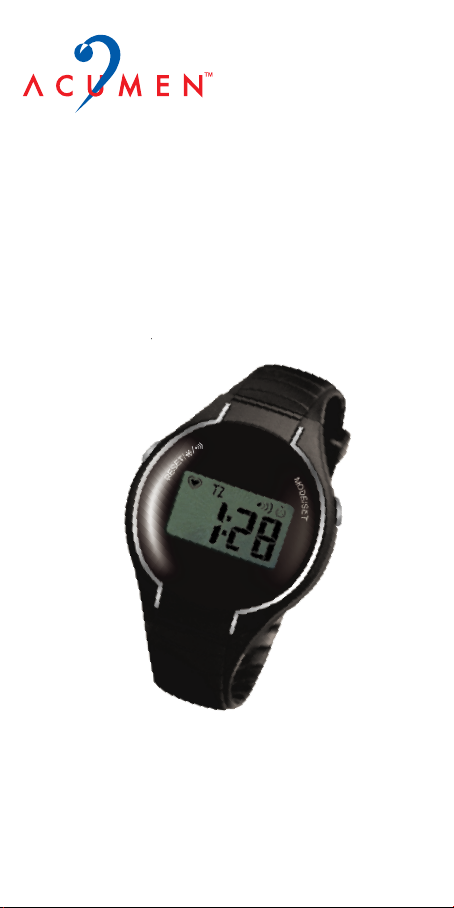
A Ergo Basix
Sleek, sporty styling with an easy to read display
and comfortable button locations.
B
Conductive Fabric Heart Rate Strap
C
Instruction Manual
Programming
3
Page 5
A
B
4
Page 6
OPER ATING YOUR ERG O BAS IX
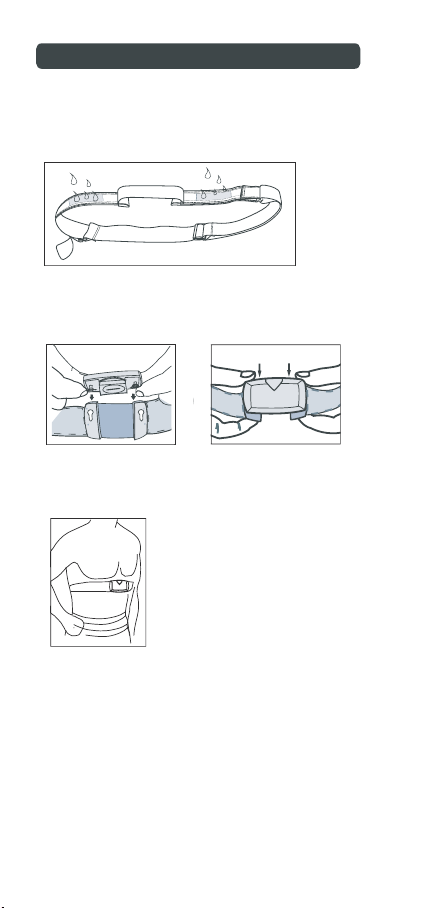
I. Attaching Your Heart Rate Monitor
1.) Attach the transmitter belt to your chest
Step 1:
Moisten each of the two conductive fabrics of the Chest
Belt.
Insert the two Pins at the back of the transmitter into the
Step 2:
two mounting holes on the Conductive Fabric Chest Belt. Push
the transmitter downwards and lock the transmitter in place.
Press Press
Step 3: Adjust the tension of the Elastic Strap and check that
theconductive fabrics are firmly against your skin.
Attach your wrist monitor. The watch does not have to be
2.)
attached to your wrist to register your heart rate, but it should
be within 3 feet of your chest.
3.) Press MODE/SET button to start your heart rate reading.
5
Page 7

Buttons and Functions
MODE / SET Button
- Press momentarily to ch an g e
RESET/
/
mode s; topr oceed t o the
next item in the setting mode.
- Press and hold to enter or exit
the setting mode
RESET/ Button
.
/
- Press momentarily to activate the night light for 3 seconds;
Press mome ntari ly to a dju st the dig its i n the
setting mode (press a nd hold to c ha ng e it fast).
- Pre ss and hold to switch al ar m sound ON/ OFF
in Tim e or Hea rt Rate Mode (ind icated by
icon displ aying on t he sc reen); to cl ear t he da ta
of calories in Calorie Mode. .
Note: All buttons produce one short beep when pressed.
Press and hold operation also produces another beep. When
the daily alarm is beeping, it can be silenced by pressing any
button.
MODE
/SET
Modes of Operation
To toggle through different modes, press MODE/SET
Button.
Press & hold
MODE / SET
Press MODE / SET Button
Heart Rate
t
ub
TES/
Press MODE / SET Button
ED
OM not
sser
Countdown
P
Press MODE / SET Button
Time
In-Zone Goal
Timer
Button
Press & hold
MODE / SET
Button
Set Time &
Daily
Alarm
Set Personal
Data
Calories
Note: If no button is pressed for 60 seconds, the watch
will automatically exit the setting mode.
6
Page 8

Time Mode
The watch firstly enter Time Mode when turned on.
Setting the time
1. From Time Mode press and
hold MODE/SET button to
ente r the settin g mod e.
2. Hour (blinking)
RESET/
- Press buton to
adjust the value.
- Press MODE/SET button to
proceed to the next item.
3. Minute (blinking)
- Press buton to
adjust the value.
- Press MODE/SET button to
proceed to the next item.
4. 12/24 Hr. Time (blinking)
- Press buton to
select 12 or 24 hour time.
- Press MODE/SET button to
proceed to the next item.
5. D ail y A lar m (b lin kin g)
- Press buton to
n the alarm ON or OFF.
tur
- Press MODE/SET button to
proceed to the next item.
6. Al arm H our ( blinki ng)
- Press buton to
adjust the value.
- Press MODE/SET button to
proceed to the next item.
7. A la rm Mi nu te (blinking)
- Press buton to
adjust the valuse.
- Press MODE/SET button to
ex it the set tin g m ode .
RESET/
RESET/
RESET/
RESET/
RESET/
/
/
/
/
/
/
7
Page 9

Heart Rate Mode
From Time Mode press MODE/SET button once to go to
Heart Rate Mode and begin your exercise.
‘‘ ’’
e icon indicates the heart rate circuit is on. If your
Th
transmitter is correctly attached, the clock icon should begin
to blink and your current heart rate in beats per minute will
come up on the display. If no heart rate or key action for
15 seconds, and for 5 minutes between two heart rates, the
heart rate circuit will switch itself off. To restart it by pressing
MODE/SET button.
Target Zone Alarm
Your Target Zone autosets based on age setting, modifying
it is optional. Your watch will provide both a visual indicator
(by flashing the heart rate digits) and an audible alarm (by
beeping with the rhythmic beating of your current heart rate)
if your heart rate is above or below your target zone. The
‘‘ ’’
TZ ‘‘ or icons will indicate that your heart
rat
e is above, within or below the target zone respectively.
TZ’’
‘‘ ’’
TZ
Setting Your Personal Data
1. F ro m Heart Rate M od e
press and hold MODE /
SET butto n to enter the
setting mode.
2. Age (blinking)
RESET/
- Press buton to
adjust the value.
-
Press MODE/ SET button to
proceed to the next item.(If
you want to use the built-in
EZ-settin
yourmax.,setonlyyour ageand
skip steps 4 & 5.)
3. Target ZoneAlarm(blinking)
- Press buton to
n the alarm to ON or OFF.
tur
- Press MODE/SET button to
proceed to the next item.
g of 65%-
RESET/
/
85% of
/
8
Page 10

4. Upper Target Zone Limit
(blinking)
RESET/
- Press buton to
adjust the value.
- Press MODE/SET button to
proceed to the next item.
5. Lower Target Zone Limit
(blinking)
- Press buton to
adjust the value.
- Press MODE/SET button to
proceed to the next item.
6. In-Zone Goal Count-down
Timer (blinking)
- Press buton to
adjust the value.
- Press MODE/SET button to
proceed to the next item.
7. Exercise Factor(blinking)
- Press buton to
adjust the value. (Refer to
page 11 to set it)
- Press MODE/SET button to
ex it the se tti ng mod e.
RESET/
RESET/
RESET/
/
/
/
/
In-Zone Goal Countdown Mode
Fro
m Time Mode, press MODE/
SET button twice to enterIn-Zone
Goal Countdown Mode.
The In-Z one Goal Countdown tim er will be activated
(indicated by blinking), the minute yourheart rate reaches
the set Target Zone.After reaching the set goal, it produces
four long beeps, the timer will be stopped and the display
shows the ‘‘In-Zone Countdown time setting’’ alternating
with ‘‘GOAL". To clear it by pressing and holding
/
but to
‘‘:”
n in the
In- Zone Countdown Mode.
RESET/
9
Page 11

Calorie Mode
From Time Mode, press MODE/
SET button 3 times toenterCalorie
Mo de. T he cal ori e coun ter
automatically(and only)
when the watch is receiving the
heart rate signals. To clear the calories , simply press and
RESET/
hold button in the Calorie Mode. If not clear, the
calories consumed in the next exercise will a dd up.
/
activates
Note: The rate of calorie consumption can vary drastically
from one individual to another. The calorie counter on this
monitor is designed to provide you with an estimate based
on standard average rates of consumption. In most cases
it? best to underestimate your calories consumed by setting
the Exercise Factor lower.
DETERMINING YOUR EXERCISE FACTOR
The Exercise Factor is one ofthe variables used bythe watch
in estimating the amount of calories burned during your
workout. The most common forms of exercise are listed in
the table below.
t a number from the table below based on how hard
Selec
you plan to exercise for a given activity and set your watch
accord ingly ( see Set ti ng I nstruct io ns on P ag e 9) .
If you do not find the particular activity you are looking for,
refer to one that is similar.
10
Page 12

able of Exercise Factor Settings
T
Exercise
Aerobics
Basketball
Bowling
Cycling
Dancing
Football
Golf
Hiking
Jumping Rope
Running
Skating (Ice/Inline)
Skiing (Cross -Country)
Skiing (Downhill/ Water)
Swimming
Stair Climbing
Ten ni s
Volleyball
Walking
Weight Training
Light
6
7
2
3-5
3
6-7
4-5
3-5
8
8-10
5
6-7
5
4
4
4-5
3
3
3-4
Intensity Level
Medium
7,8
8,9
3
6-8
4-6
8
6
5-8
9,10
11- 15
6,7
8-10
6,7
5-7
5,6
6-7
4,5
4-6
5-8
High
9
10-12
4
9,10
7,8
9,10
7
9-11
11,12
16,17
8,9
11,12
8
8-10
7,8
8,9
6
7
9,10
BATTERY REPLACEMENT
The Watch Battery Replacement
We recommend that you should take it to a local jewelry
store or an authorized Acumen service center in order to
guarantee that it will maintain its water resistance. Improper
battery replacement or service will void the warranty. If you
feel comfortable replacing your own batteries, be careful
to notice how the old battery comes out and the proper
positioning of the hold-down contacts before removing it.
Also, be careful to line up the o-ring gasket properly before
replacing the battery door cover. To insure battery water
resistance, it’s a good idea to smear a small drop of silicone
lubricant spray on the rubber o-ring.
Note: The watch will enter the shelf mode after changing
battery (i.e. blank screen). Press any button to return to
normal mode.
11
Page 13

Chest Transmitter Battery Replacement
Step 1: Remove the transmitter from the belt.(Fig.1)
Step 2: Use a coin to unlock the battery door, and then replace
the old battery inside with a new one. (Fig.2)
Step 3: Lock the battery door firmly into place making sure the
O-ring seal does not get pinched or distorted.
Fig.1
push push
Fig.2
Unlock
Lock
GENERAL PRECAUTIONS
Do not operate buttons under water. Although your
watch is water resistant, be sure that you do not operate
its buttons under water as pressure can cause them to
leak.
Dry off transmitter after use. The transmitter will
automatically shut itself off once you have disconnected
it from your chest. However, it is important to thoroughly
dry it off after every use, since moisture in the electrodes
can cause it to remain on longer.
Electrode precautions. Be sure not to excessively twist
or bend the electrode portions of the chest transmitter
(never bend backwards), especially when storing it. This
can permanently damage their conductivity and cause
mechanical damage to the internal circuit.
Global Reset. If your watch should ever get stuck or
act erratically due to dropping it, static shock or some
other unforeseen reasons, this feature will allow you to
reset the watch and return all settings back to their
internal defaults. To perform this function, press and
hold both buttons together for 3 seconds under any
mode. The watch will enter the shelf mode, which is of
the blank screen. Press any button to restart it. .
Caution: Global Reset will CLEAR UP EVERYTHING
that include your Personal Settings.
12
Page 14

TECHNICAL SPECIFICATIONS
Shock Resistance
Shock Resistant Design
Water Resistance
98 feet (or 30 meters)
Not intended for diving
Operating Temperature
32 F to 122 F (0 C to 50 C)
Battery Type
Heart Rate transmitter:
Lithium CR2032
Watch:
Lithium CR2032
Battery Life
Chest transmitter:
. 2.5 years, average use of 1 hr./day, 7 days/ week.
Approx
Watch:
Approx
. 1.5 years, averageuse of 1 hr./day,7 days/ week.
Time Default Mode
Th e watc h will au tom ati cal ly ret urn to Ti me
e if no heart rate or no key action for 5 minutes.
Mod
Global Reset
This feature will clear all memory data and user settings
an
d return all settings to the default values listed. Press
an
d hold both buttons for 3 seconds, the watch will enter
th
e shelf mode (also happens at battery replacement),
which is of the blank screen. Press any button to restart
it.
13
Page 15

TECHNICAL DISPLAY GUIDE
Display Items
Time
Alarm Time
Age
Heart Rate Display
TZ Alarm
Upper Target Zone
Limit
Lower Target Zone
Limit
Default Setting
8 AM / 12 Hr.
AM & PM indicators
*
shown only in the Setting
Mode.
8 AM/ OFF
30
OFF
162 beats per minute
124 beats per minute
Range
12/24 hr. clock
ON/OFF
7 - 99
20 - 250 bpm
ON/OFF
OFF, 20 - 250
OFF, 20 - 250
Note : Upper TZ Limit cannot be set less than
Lower TZ Limit and Lower TZ Limit cannot be set
more than Upper TZ Limit. However , they can be
set within 1 beat of each other , or either one can
be set to OFF.
In-Zone Goal
Countdown Timer
Exercise Factor
Calorie Display
0
5
0
0 -60 minutes
0 -20
0 - 9999 kcal. (rolls
over at 10000)
14
Page 16

Warranty
This product is warranted by Acumen Inc. for one year
from the date of purchase (with the exception of batteries
and elastic chest strap) against defects in workmanship
and material. During this one-yeart period, these defects
will be repaired or the product will be replaced by Acumen
Inc. at its sole discretion without charge. This warranty
covers normal consumer usage and does not cover
damage which occurs in shipment or failure which results
from accident, misuse, abuse, tampering, alteration or
disassembling of the product or improper maintenance.
This warranty is effective only if the product is purchased
and operated in the USA and does not extend to any units
which have been used in violation of written instructions
furnished by Acumen Inc. or to units which have been
altered or modified without authorization of Acumen Inc.,
or to damage to products or parts thereof which have had
the serial number removed, altered, defected or rendered
illegible. The product must be returned to an authorized
dealer for service if purchased outside of the USA.
Please return the product to local authorized
Note:
dealer for service if purchased outside of the USA.
15
Page 17

SERVIC E & REPAIR
Do not attempt to repair your product. Should the product
malfunction, please visit our website at
www.acumeninc.com for Consumer Customer Service. If
the problem cannot be resolved, return the product to the
factory for repair. Under no circumstances should you
attempt to open the housing and repair the product. Should
you do this, your warranty will be voided.
In USA, securely package and return the product pre-paid to:
Acumen Inc.,
101A Executive Dr., Suite 100,
Sterling, VA 20166 USA.
To Return for Service
a. First visit our website at
www.acumeninc.com/returnauthorization.asp to
obtain a
Return Authorization Number.
b.
Enclose your name, address and phone number.
c.
Enclose the date of purchase (or receipt as a gift).
d. An explanation of the malfunction or reason for return.
e.
Seven dollars and fifty cents ($7.50) Check or Money
Order payable to Acumen Inc. for return postage and
handling.
To ensure prompt “In warranty” service, be sure to
f.
include
proof of the date of purchase.
We recommend you take the necessary precaution of
insuring the parcel.
Outside USA, you should contact the local dealer or
Acumen distributor in your country for customer
service.
Acumen Europe BV
E-Mail: acumen@Acumeninc.com
Website: www.acumeninc.com
P/N:81-091401-00
16
 Loading...