

Page 1

Full HD Digital Satellite Receiver
Digital Innova tion Life
User's Manual
ACTUS SOLO
Page 2

Page 3

INDEX
Precautions............................................................................................................................... 5
1. Important Safety Instructions .................................................................................................... 5
2. Notice ....................................................................................................................................... 5
3. Copyright .................................................................................................................................. 6
4. Disclaimer................................................................................................................................. 6
5. Trademarks .............................................................................................................................. 6
Before You Begin ..................................................................................................................... 7
1. Main Features .......................................................................................................................... 7
2. Accessories .............................................................................................................................. 8
Hardware Description .............................................................................................................. 9
1. Front Panel Configuration ........................................................................................................ 9
2. Rear Panel Configuration ....................................................................................................... 10
3. Remote Control Unit ................................................................................................................11
Connecting diagram .............................................................................................................. 15
1. Receiver to A/C power ............................................................................................................ 15
2. Receiver to TV with Digital A/V Output ................................................................................... 15
3. Receiver to TV with Analog A/V Output .................................................................................. 16
4. Connecting to Antenna Cable ................................................................................................. 16
Guide of Functi ons ................................................................................................................ 18
1. Selecting a Service ................................................................................................................. 18
1.1 Using CH UP/DOWN buttons ............................................................................................ 18
1.2 Using Service List.............................................................................................................. 18
1.3 Using Simple Service List .................................................................................................. 18
1.4 Using Recent Service List ................................................................................................. 19
2. Information Window ................................................................................................................ 19
3. Multi-Picture Display. .............................................................................................................. 19
4. Electronic Program Guide (EPG) ........................................................................................... 19
5. Favorite Group ....................................................................................................................... 20
6. Volume Control ....................................................................................................................... 20
7. Pause ..................................................................................................................................... 20
8. Subtitle ................................................................................................................................... 21
9. Audio Control.......................................................................................................................... 21
10. Teletext ................................................................................................................................... 22
11. PIP (Picture in Picture) ........................................................................................................... 22
Page 4

PVR (Personal Video Recorder) Function........................................................................... 24
1. Recording ............................................................................................................................... 24
1.1 Recording methods ........................................................................................................... 24
1.2 Recording Edit ................................................................................................................... 26
1.3 Long Tim e recording.......................................................................................................... 26
1.4 Pause during recording ..................................................................................................... 26
2. Time Shifting........................................................................................................................... 28
3. Playback (Play List) ................................................................................................................ 29
3.1 Recorded Files .................................................................................................................. 29
3.2 Imported Files ................................................................................................................... 30
3.3 Music ................................................................................................................................. 30
3.4 Photo ................................................................................................................................. 30
4. Bookmark ............................................................................................................................... 31
5. Trick mode .............................................................................................................................. 31
Menu Map ................................................................................................................................ 32
Main Menu of G uide ............................................................................................................... 33
1. System Tools .......................................................................................................................... 33
1.1 Storage Manager ............................................................................................................... 33
1.2 Timer Settings ................................................................................................................... 34
1.3 Service List Manager......................................................................................................... 34
1.4 Data Transfer..................................................................................................................... 36
2. Configuration .......................................................................................................................... 37
2.1 Recording Option .............................................................................................................. 37
2.2 Parental Control ................................................................................................................ 38
2.3 Display Setting .................................................................................................................. 38
2.4 Time Setting ...................................................................................................................... 39
2.5 Language Setting .............................................................................................................. 39
2.6 A/V Output Setting............................................................................................................. 40
3. Installation .............................................................................................................................. 41
3.1 Dish Setting ....................................................................................................................... 41
3.2 Positioner Setting .............................................................................................................. 41
3.3 Service Search .................................................................................................................. 42
3.4 Network Setting ................................................................................................................. 43
3.5 System Recovery .............................................................................................................. 44
3.6 System Information ........................................................................................................... 45
4. Utility ...................................................................................................................................... 45
4.1 Calculator .......................................................................................................................... 45
4.2 Calendar ............................................................................................................................ 45
4.3 CAS (Conditional Access System) .................................................................................... 45
4.4 Plugin ................................................................................................................................ 46
4.5 Free TV+ ........................................................................................................................... 48
4.6 Internet TV+ ...................................................................................................................... 49
Troubleshooting ..................................................................................................................... 50
Specifications ......................................................................................................................... 51
Page 5

Precautions
1. Important Safety Instructions
l Read these ins tr uc ti o n s.
l Keep these instructions.
l Heed all warnings.
l Follow all instructions.
l Do not use this apparatus near water.
l Clean only with dry cloth.
l Do not block any ventilation openings. Install in accordance with the manufacturer’s instructions.
l Do not install near any heat sources such as radiators, heat registers, stoves, or other apparatus
(including amplifiers) that produce heat.
l Do not revers e the sa fety purpos e of th e polarized or g roundin g-type plu g. A polari zed plug h as two
blades with one wider than the other. A grounding type plug has two blades and a third grounding
prong. The w ide bla de or thir d prong is provided f or you r safety . If the provi ded plu g does n ot fit into
your outlet, consult an electrician for replacement of the obsolete outlet.
l Protect the power cord from being walked on or pinched particularly at plugs, convenience
receptacles, and the point where they exit from the apparatus.
l Only use attachments/accessories specified by the manufacturer.
l Use only with the cart, stand, tri pod, bracket , or ta ble specif ied by the manufact urer, or sol d with t he
apparatus. When a cart is used, use caution when moving the cart/apparatus combinati on to avoid
injury from tip-over.
l Unplug this apparatus during lightning storms or when unused for long periods of time.
l Refer all servicing to qualified service personnel. Servicing is required when the apparatus has been
damaged in any way, such as power-supply cord or plug is damaged, liquid has been spilled or object s
have fallen into the apparatu s, th e apparat us h as been exposed to ra in or moist ure, d oes not operat e
normally, or has been d roppe d .
WARNING : To Prevent fire or shock hazard do not expose the set to rain or moisture.
2. Notice
l These servicing instructions are for use by qualified service personnel only. To reduce the risk of
electric shock, do not perform any servicing other than that contained in the operating instructions
unless y ou a re q ualified to do so.
l The apparat us shall not be exposed t o dripping or splash ing and that no objects filled with liquids,
such as vases, shall be placed on the apparatus.
l The mains plug is used as the disconnect device. The disconnect device shall remain readily operable.
Page 6

To reduce the risk of electric shock, do not remove
the cover (or ba ck).
No user serviceable parts are inside.
Refer servicing to qualified service personnel.
The Lightning Flash with arrowhead symbol
within an equilateral triangle, is intended to
alert the user to the presence of un-insulated
"dangerous voltage" within the product
enclosure that may be of sufficient magnitude
to constitute a risk of shock to person s
The exclamation point within an
equilateral triangle is intended to alert
the user to the presence of important
operating and maintenance
(servicing) instructio ns in the
literature accompanying the product
NOTE : Contents of this manual and features/ specifications of the STB are subjected to
change without prior notice.
3. Copyright
This manual is protected by copyright laws.
Copy, use and reproduction of this manual in pa rt or whole without Manufacturer’s prior written
approval are prohibited.
4. Disclaimer
The manufacturers, distributors and agents are not liable to any kind of damage c aused by the
use of the information contained in this manual.
The instruction and descriptions which this manual contains are based on the time of this
manual's production.
The manufacturer constantly updates it with ne w functi ons and technology.
All the specifications are subject to change without prior notice.
5. Trademarks
HDMI, the HDMI logo and High-Definition Multimedia Interface are
trademarks or registered trademarks of HDMI Licensing LLC
Manufactured under license from Dolby Laboratori es.
Dolby and the double-D symbol are trademarks of Dolby Laboratorie s .
Page 7

Before You Begin
1. Main Features
ü Supports MPEG4 /MPEG2 - HD/SD and Fully DVB-S2 /DVB-S Compliant
ü Intelligent Blind Scan for both SD and HD TV & Multi-Satellit e Search
ü Multi-LNB Controlled by DiSEqC Control Version 1.0, 1.1, 1.2 and USALS
ü HDTV PVR Receiver ( H.264/ MPEG4 HD )
ü Embedded Linux OS
ü Time Shifting, Recording & Playback with External HDD (USB 2. 0)
ü Simultaneously Records upto 3 Channels and allows Viewing of 2 others (PIP) on the same
Transponder
ü Powerful Extended EPG supports Event Recording
ü Dual USB 2.0 Host ports (MP3 Player & JPEG Viewer)
ü MKV, Xvid file play back support
ü Ethernet Support
ü High Definition On-Screen Display
ü Favorite Groups
ü Powerfu l Service List Manager for Favorites, Lock, Skip, Move, Edit and Delete
ü Service Sorting by Name, Transponder and CAS
ü User Friendly & Multi-language Supported (OSD & Menu)
ü Teletext / Subtitles Supported
ü Maximum 10,000 Services(TV & Radio) Programmable
ü Picture-in-Picture (PIP) & Multi-picture Display
ü Parental Lock / Syst e m Lock / Inst allation Lock
ü HDMI Vide o & Audio Output
(576i, 576p, 720p, 1080i, 1080p)
ü CVBS(composite) Video & Audio Output via RCA
ü CVBS, RGB, Video & Au d io Output via TV SCART
ü Optica l Output for Digital Audio( SPDIF)
ü Software & Service channel Database upgrade via USB & RS-232C port
ü 1 Smart card reader and 2 Common Interface Slots
ü 1W Stand-by Power Consumption
Page 8
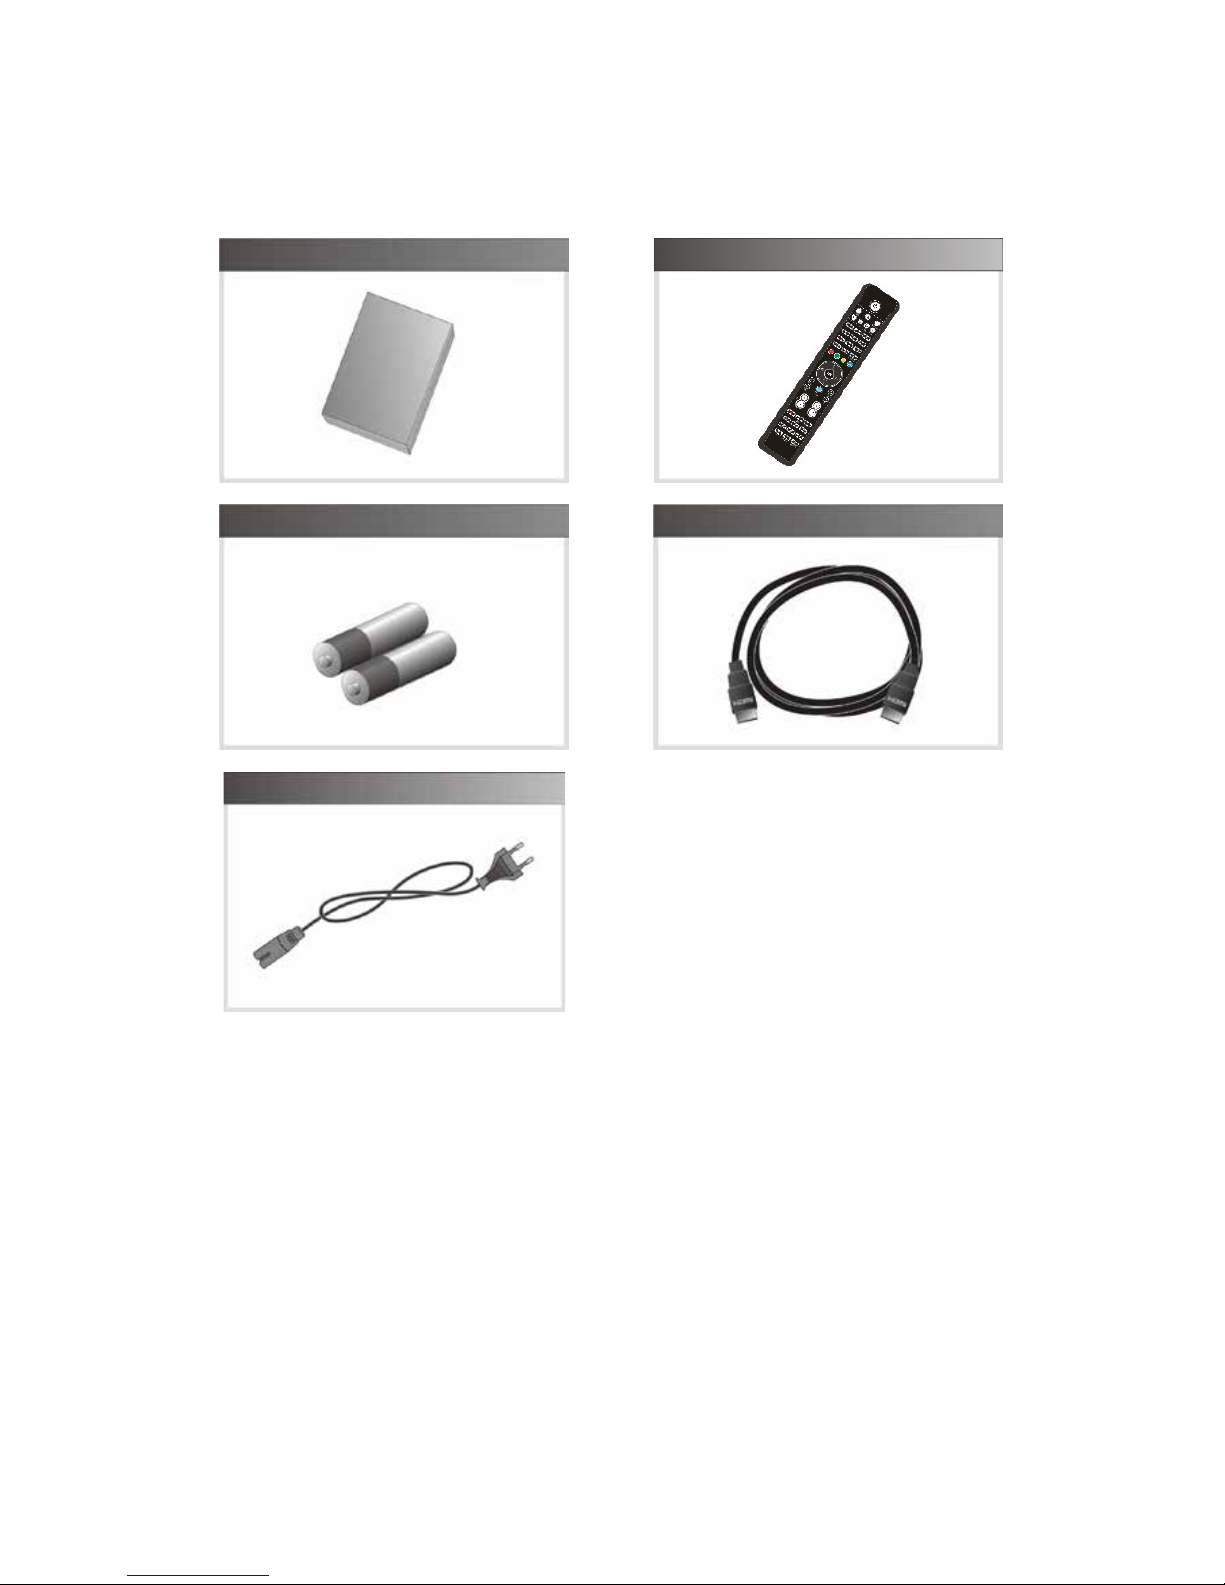
2. Accessories
NOTE : If any accessories listed above are missing, contact the sales representative where you
purchased this unit.
User's Manual
AAA size Batteries X2
AC Power Cord
Remote Control
HDMI Cable
Page 9
Hardware Description
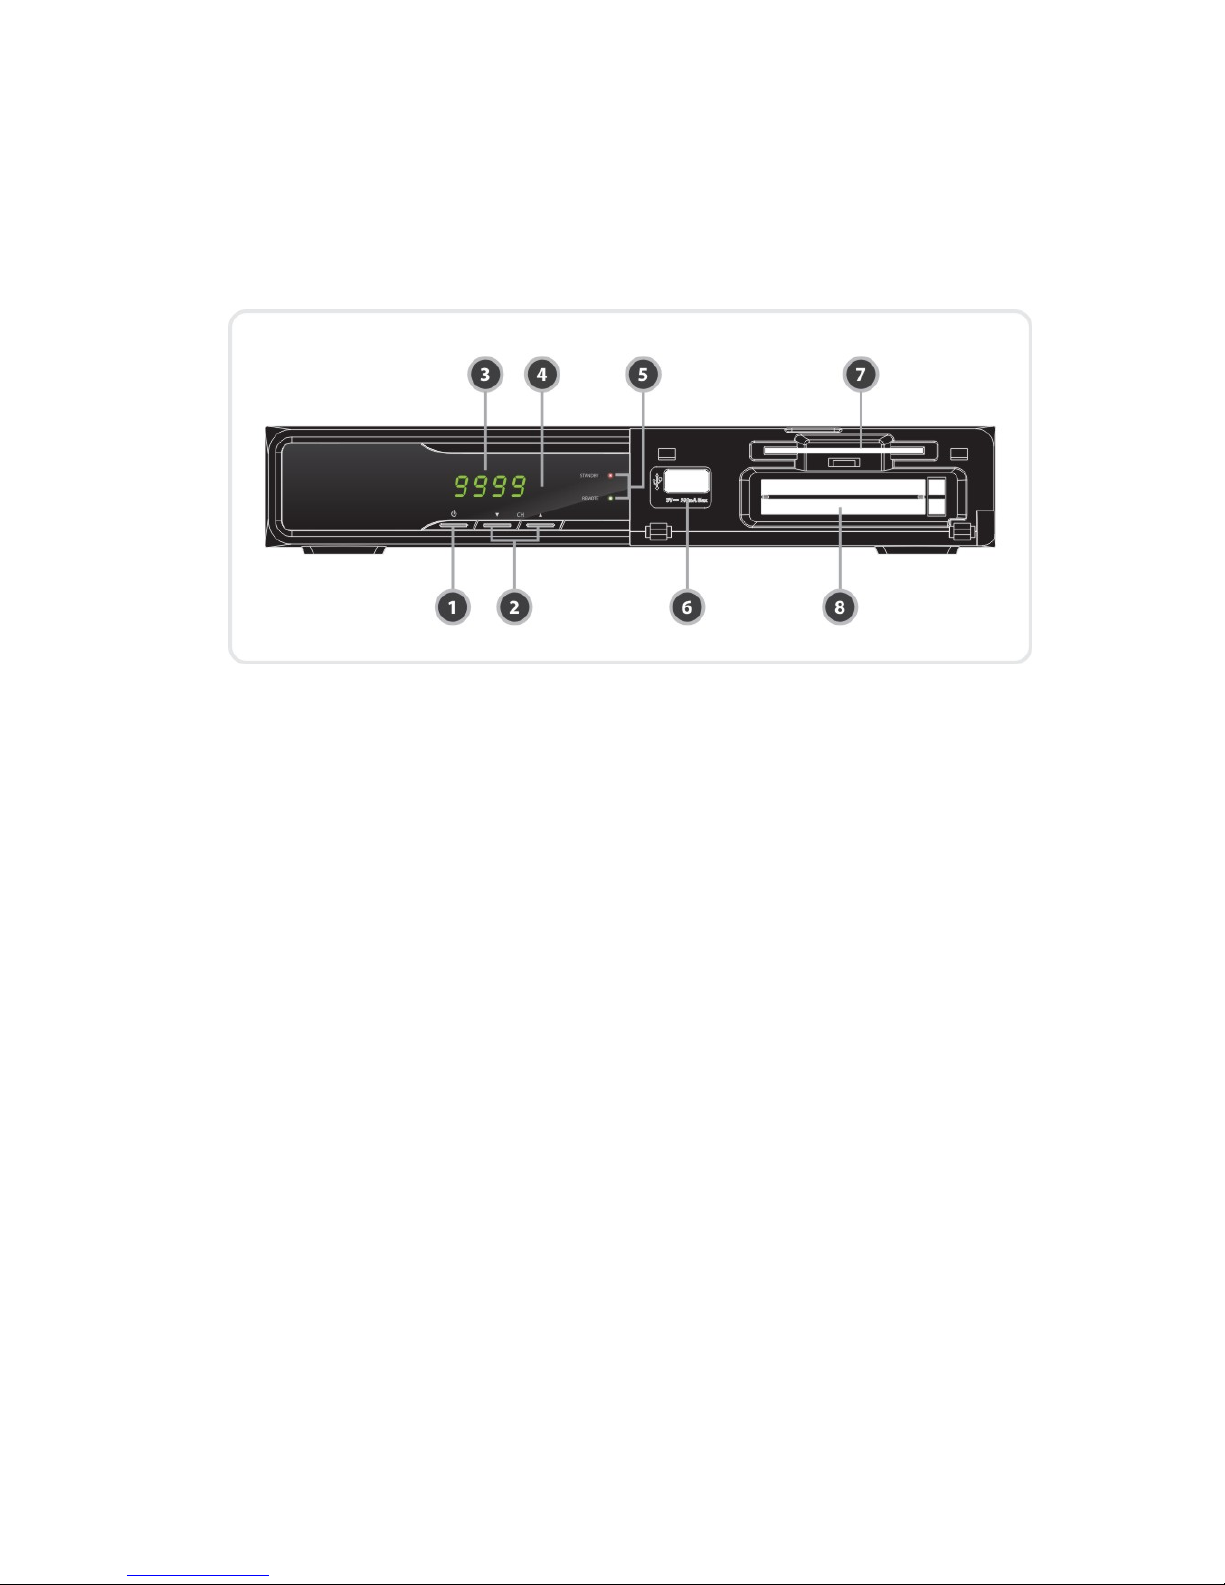
1. Front Panel Configuration
1. POWER BUTTON : Press t o s witch betwee n STANDBY and POWER ON m od e s.
2. CH Up/Do wn BUTTON : Press to change services in normal mode, or to move highlighted-bar in
menu mode.
3. Display : The 4-digit shows service number or menu state in normal mode. Show local time in
standby mode.
4. Remote Sensor : Receives signal from remote controller.
5. STANDBY Indic ation LED(RED) : The LED lights on in standby mode.
REMOTE In dication LED(GREEN) : The LED lights on when a key on the Remote Control is pressed.
6. USB (Front) : Use it when connecting to external US B storage device.
7. SMART CARD READER : Insert smart card for encrypted service access.
8. PCMCIA : To receive other pay-tv service you need a CA-Module( Viaccess, Irdeto, Nagrav ison, etc.)
and a smart card from the service provider.
Page 10
2. Rear Panel Configuration
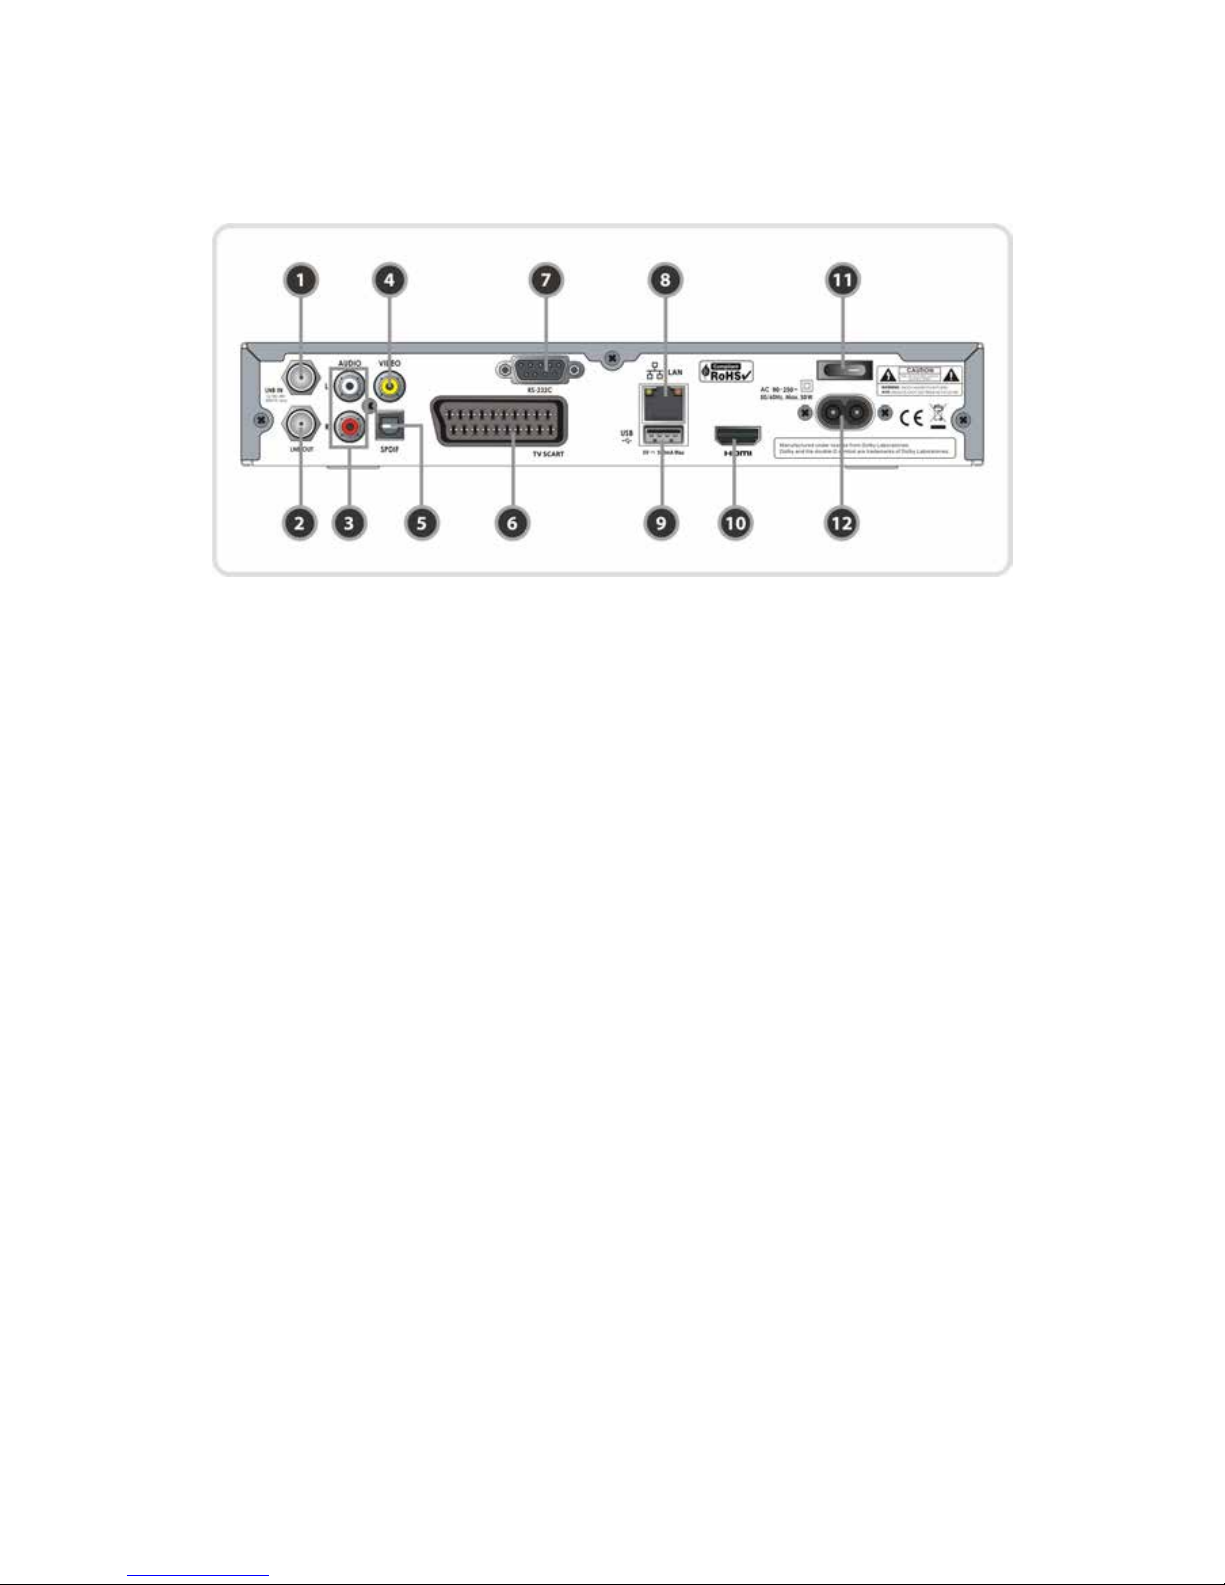
1. LNB IN: Use to connect a satellite antenna.
2. LNB OUT: Use it when connecting to another STB for loop-through.
3. AUDIO L/R : Connects to the T V or VCR using a RCA cable. (Stereo audio output / White, Red)
4. VIDEO : Connects to the TV or VCR usi ng a RCA cable. (Composite video output / Yellow)
5. SPDIF : Connects to the audio system using a S/PDIF cable. (digital audio)
6. TV SCART : Connects to the TV input using a TV SCART cable.
7. RS-232C : Serial port for firmware update and data transfer.
8. Ethernet : Local area network port for direct com puter conne ction.
9. USB : Use it when connecting to external USB storage device.
10. HDMI : Connects to the TV by using a HDMI cable for the best quality picture and audio.
11. A/C Switch : Powe r switch
12. A/C power cable socket : Conne cts to A/C power cord.
Page 11
3. Remote Control Unit
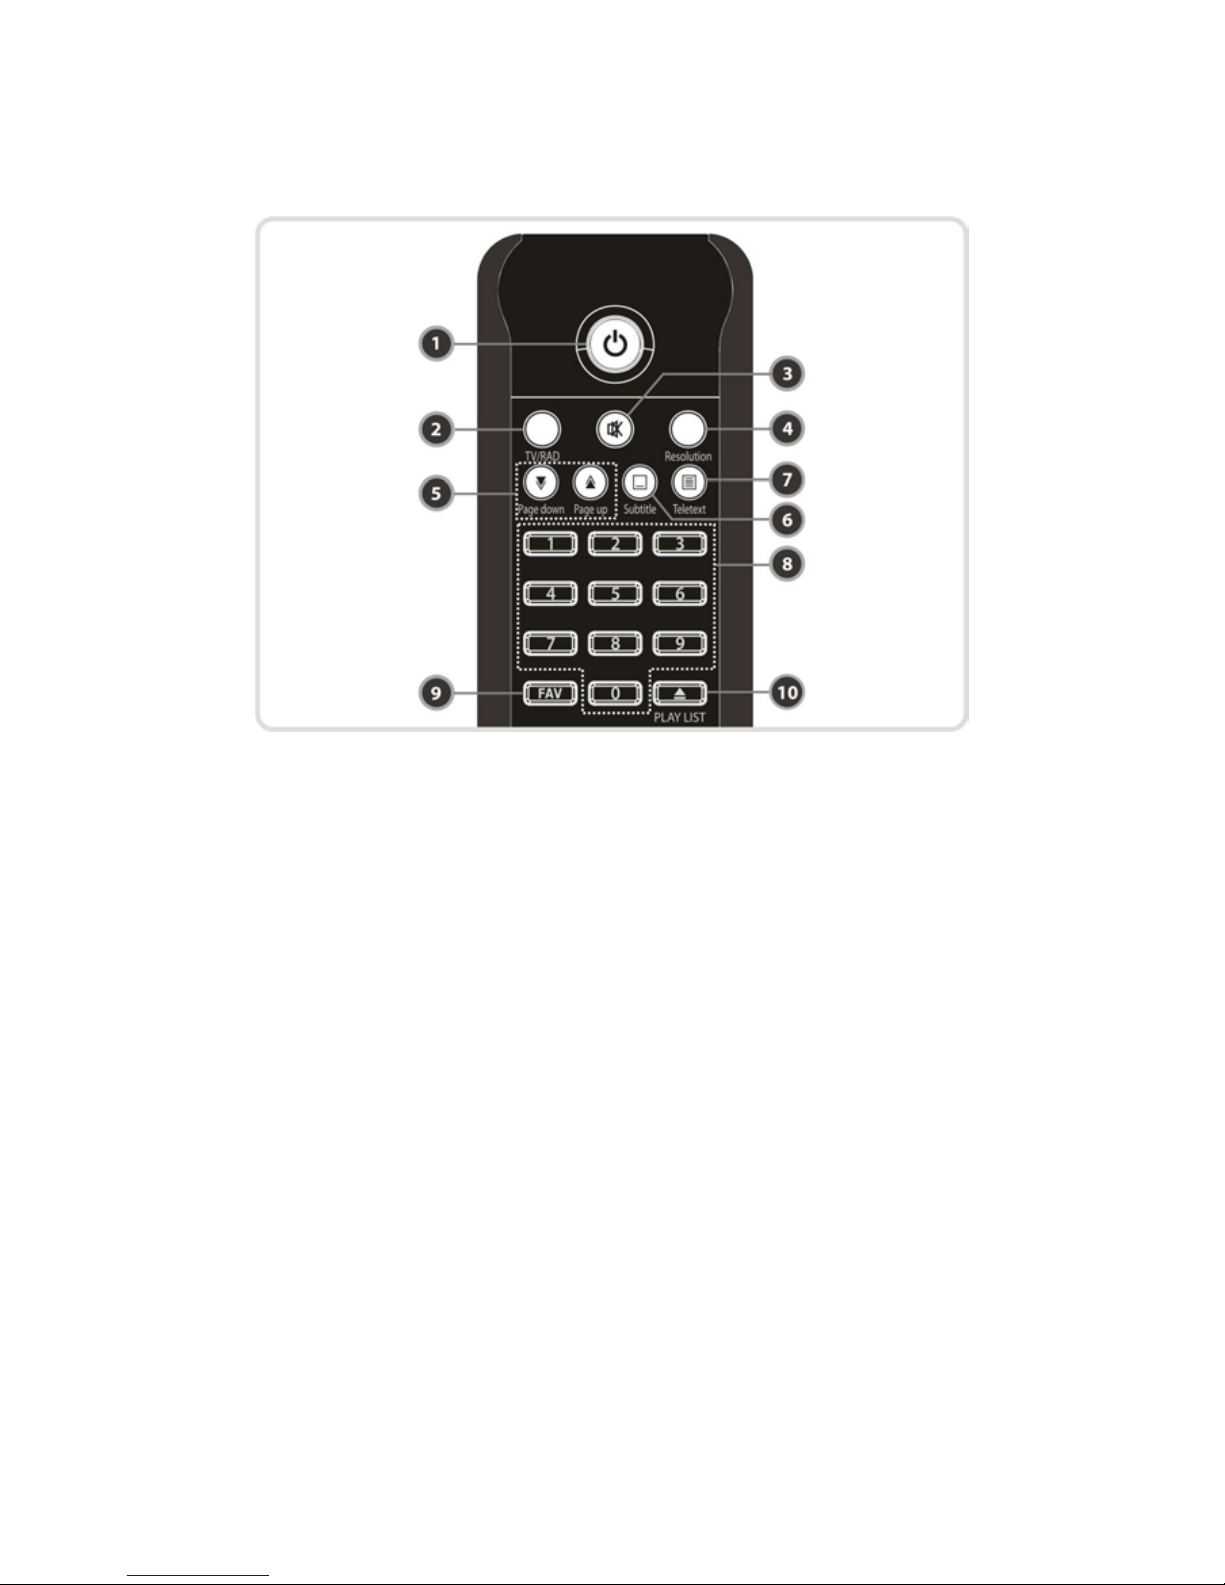
1. POWER : Turns the STB On/Off.
2. TV/RADIO : Switches between TV and Radio.
3. MUTE : Turns t he sound On/Off.
4. Resolution : To select the resolution format. Each time you press the Resolution button, the
resolution changes in the following sequence: 576i > 576p > 720p > 1080i > 1080P
5. Page Down & Up : Move to the next or previou s page if more than one page are ava ilable. Thi s but ton
also is change the location of sub picture in PIP.
6. Subtitle : To show multilingual subtitle.
7. Teletext : To show the digital teletext.
8. Numeric : Controls the numerical operation and service numbers directly.
9. Favorite : To display the satellite group and the favorite groups.
10. Play List : To show the file for USB Storage Device or the network drive.
Page 12
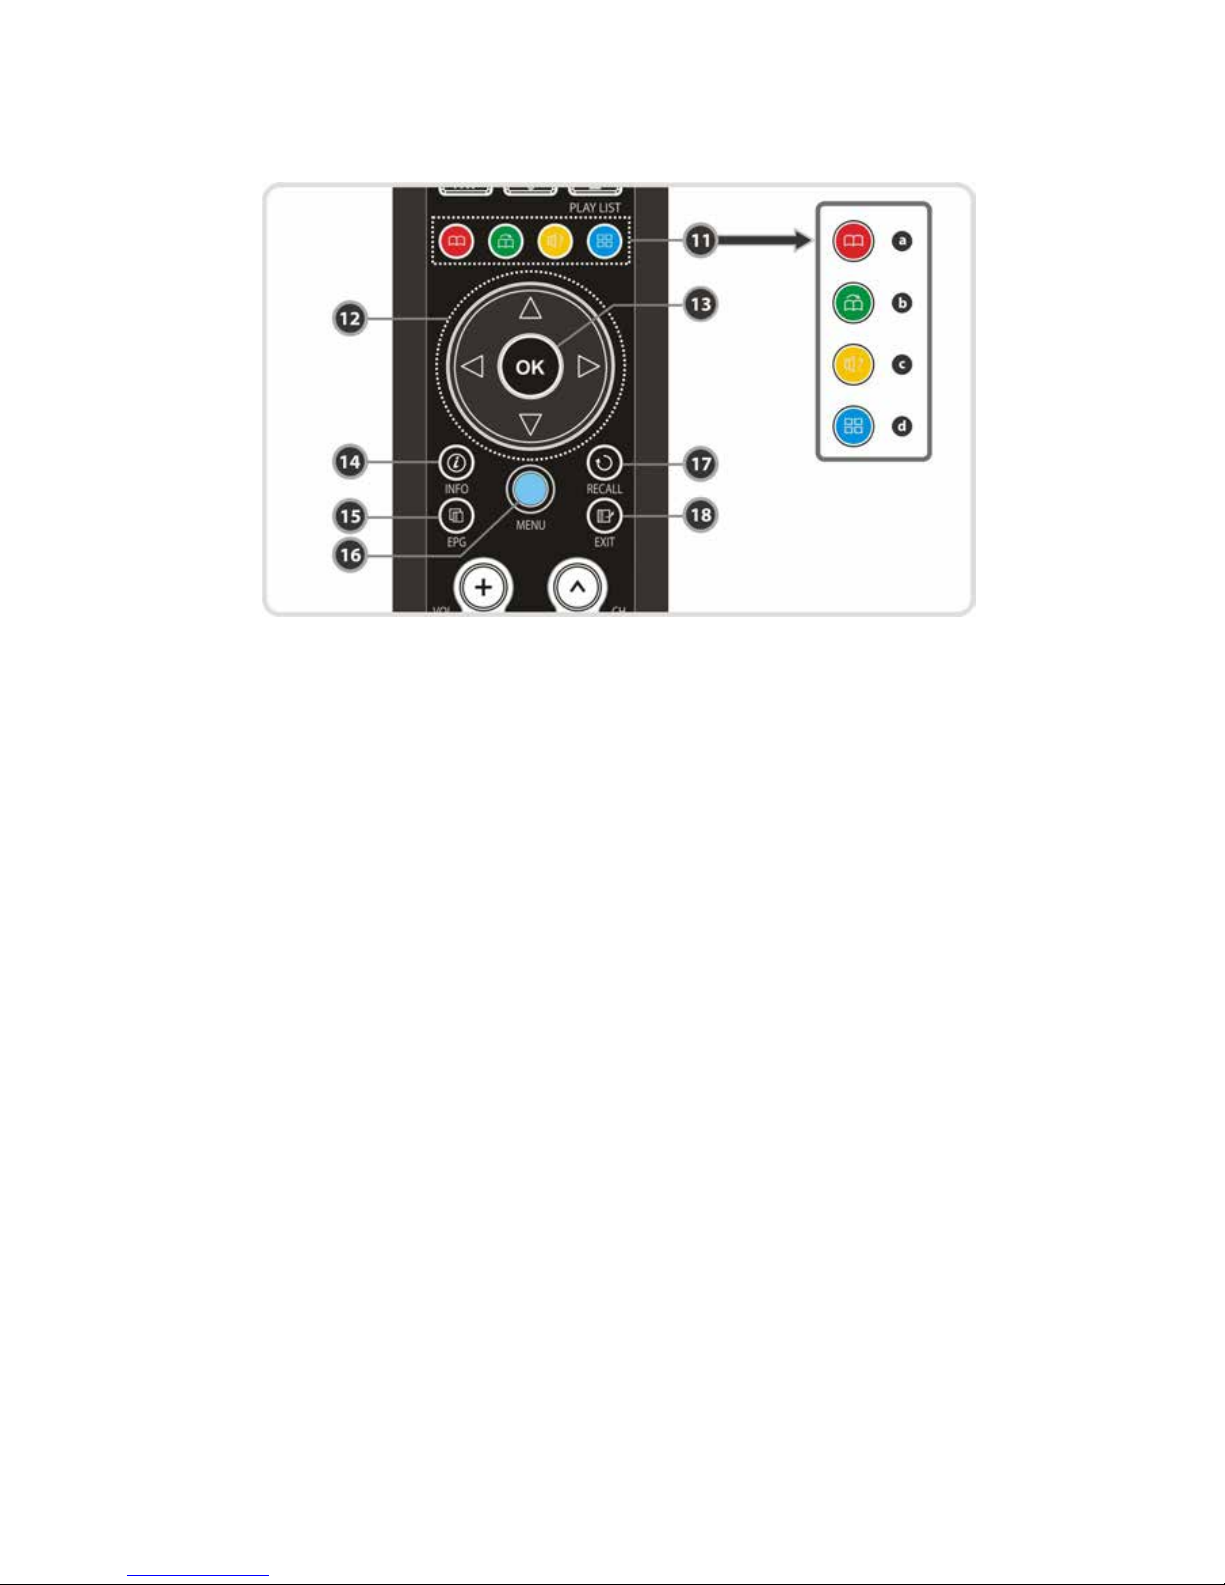
11. Color Buttons
a. RED : Used for special fun cti on i n menu . RED ke y is used to s or t li sts in ser v ice li st or go t o previ ous
day search in EPG or make/delete the current position as a bookmark.
b. GREEN : Used for special function in menu. Green key is used to set favorites setting in service list
or go to the ne xt bookmark position.
c. YELLOW : Used for special function in menu. Yellow key is used to find service in service list or
change the audio t rack.
d. BLUE : Used for special function in menu. Blue key is used to set service list option in service list or
display Multi-Picture.(*)
12. ARROW Buttons
a. Up & Down Buttons : To change the value of a selected item with preprogrammed values in menu .
b. Left & Right Buttons : To move the cursor left a nd ri g h t in menu.
13. OK or Service List : Show the service list in non-menu mode and select an item or confirm in menu
mode.
14. Information : Shows the information of the current program. If you press one more, detail
information box will be sh ow n.
15. EPG(Electronic Program Guide) : Sh ow the TV/Radi o pr og ra m guide.
16. Menu : To enter the main menu or to move t o the previous men u.
17. Recall : Moves to previous service.
18. EXIT : Exit from the menu or pop-up w indow.
NOTE : (*) This Feature(Multi-Picture) will be supported later, by new s/w version by upgrading. Please
refer to your local dealer / distributor.
Page 13
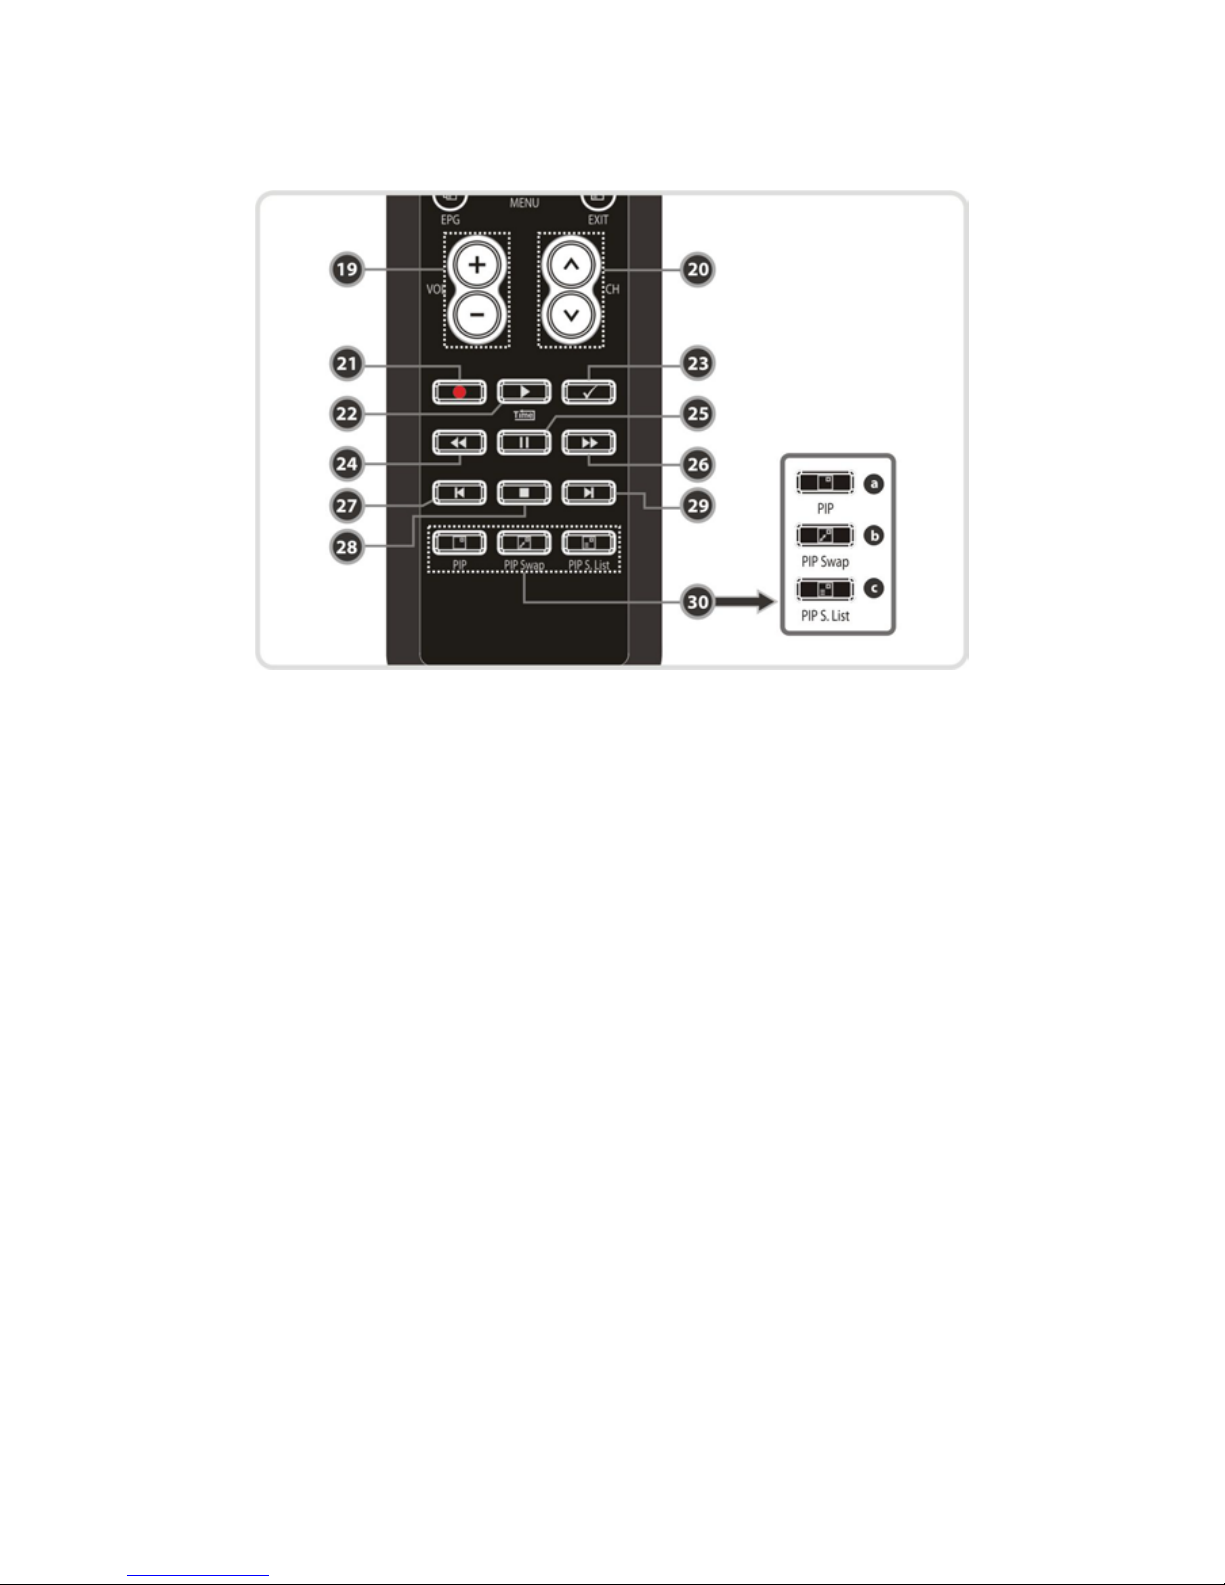
19. Volume Up & Down : T o change the Volume .
20. Channel Up & Down: To change service channel.
21. Recording : To start Recording.
22. Play / Time shift : Display the progress bar of playback when no progress bar is displayed. Start
playback wi th normal speed. Return to normal s peed from trick mode. .
23. Repetition (*): This key is used to play ba ck a recordin g re pe a tedly.
24. Rewind : Rewinds at high speed. Each time you press this button the rew in d speed is increased.
25. Pause : This key is used to pause the video. Press once more to resume the video.
26. Fast Forward : Fasts forward at hi g h s pe e d. E a ch time you press this button the speed is increased.
27. Previo us File : To pl ay the previou s MP3 file in MP3 play m ode. This but ton is also u sed to jump back
to beginni ng of recording du ring a playback.
28. STOP : To stop tim e shifting, play ba ck or re c ording.
29. Next File : To play the nex t file. This button is al so used to jump to e nd of recording dur i ng a playback .
30. PIP Buttons
a. PIP(Picture in Picture) : To open the PIP window.
b. PIP Swap : Switching between main-picture and sub-picture
c. PIP(Picture in Picture) Service List : To shown the sub-pictu re service li st.
NOTE : (*) This Feature(Repetition) will be supported later, by new s/w version by upgrading.
Please refer to your local dealer / distributor
Page 14

Page 15
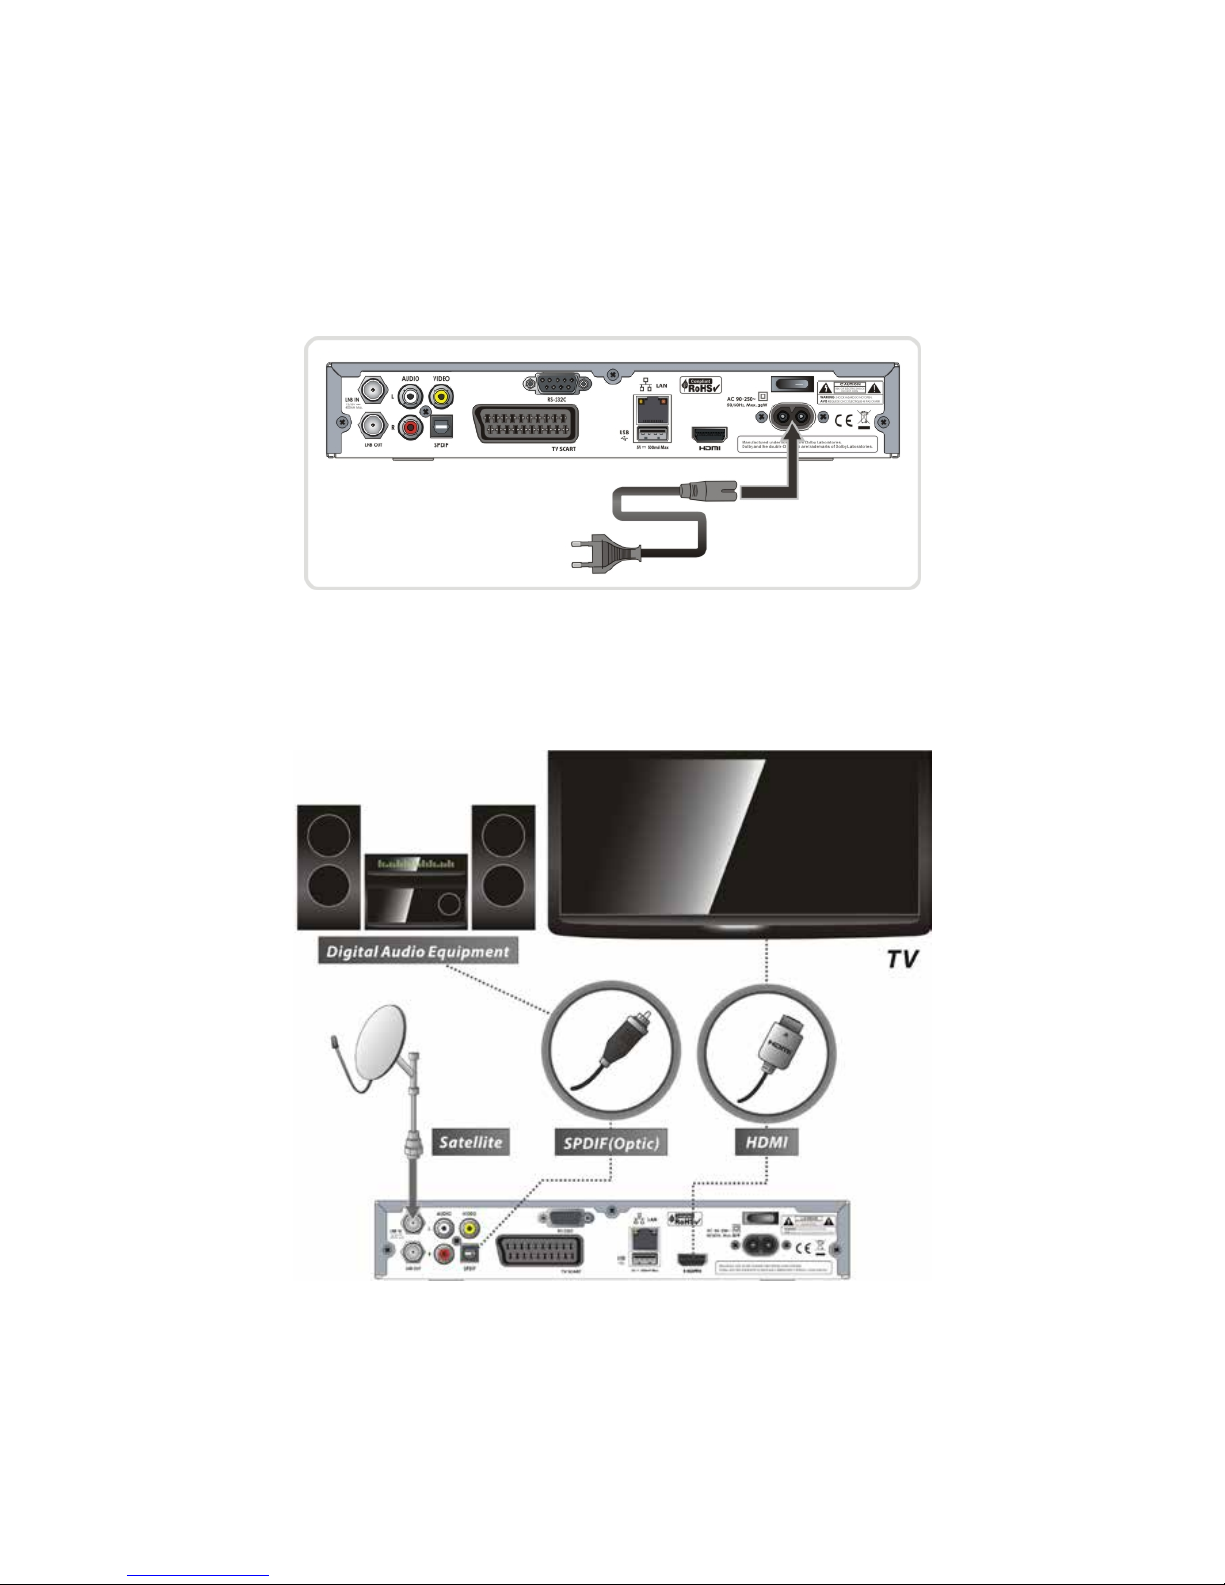
Connecting diagram
1. Receiver to A/C power
l Connect the A/C power cord between A/C power cord socket of receiver and A/C outlet.
2. Receiver to TV with Digital A/V Output
l Connect the HDMI Cabl e to the HDMI Connector of the TV.
l Connect SPDIF to Dig i tal audio input of the equipment( Digital Audio)
NOTE : Depending on the A/V equipment you own, there are various ways you can connect
the STB. To choose the best connection option, please refer to the manual of the
equipment you would like to connect to. T o get High Definition playback of High
Definition content, we recommend that you connect your high definition display
with a HDMI cable. HDMI supports standard, enhanced or high-definition video
and multichannel audio in a single cable.
Page 16
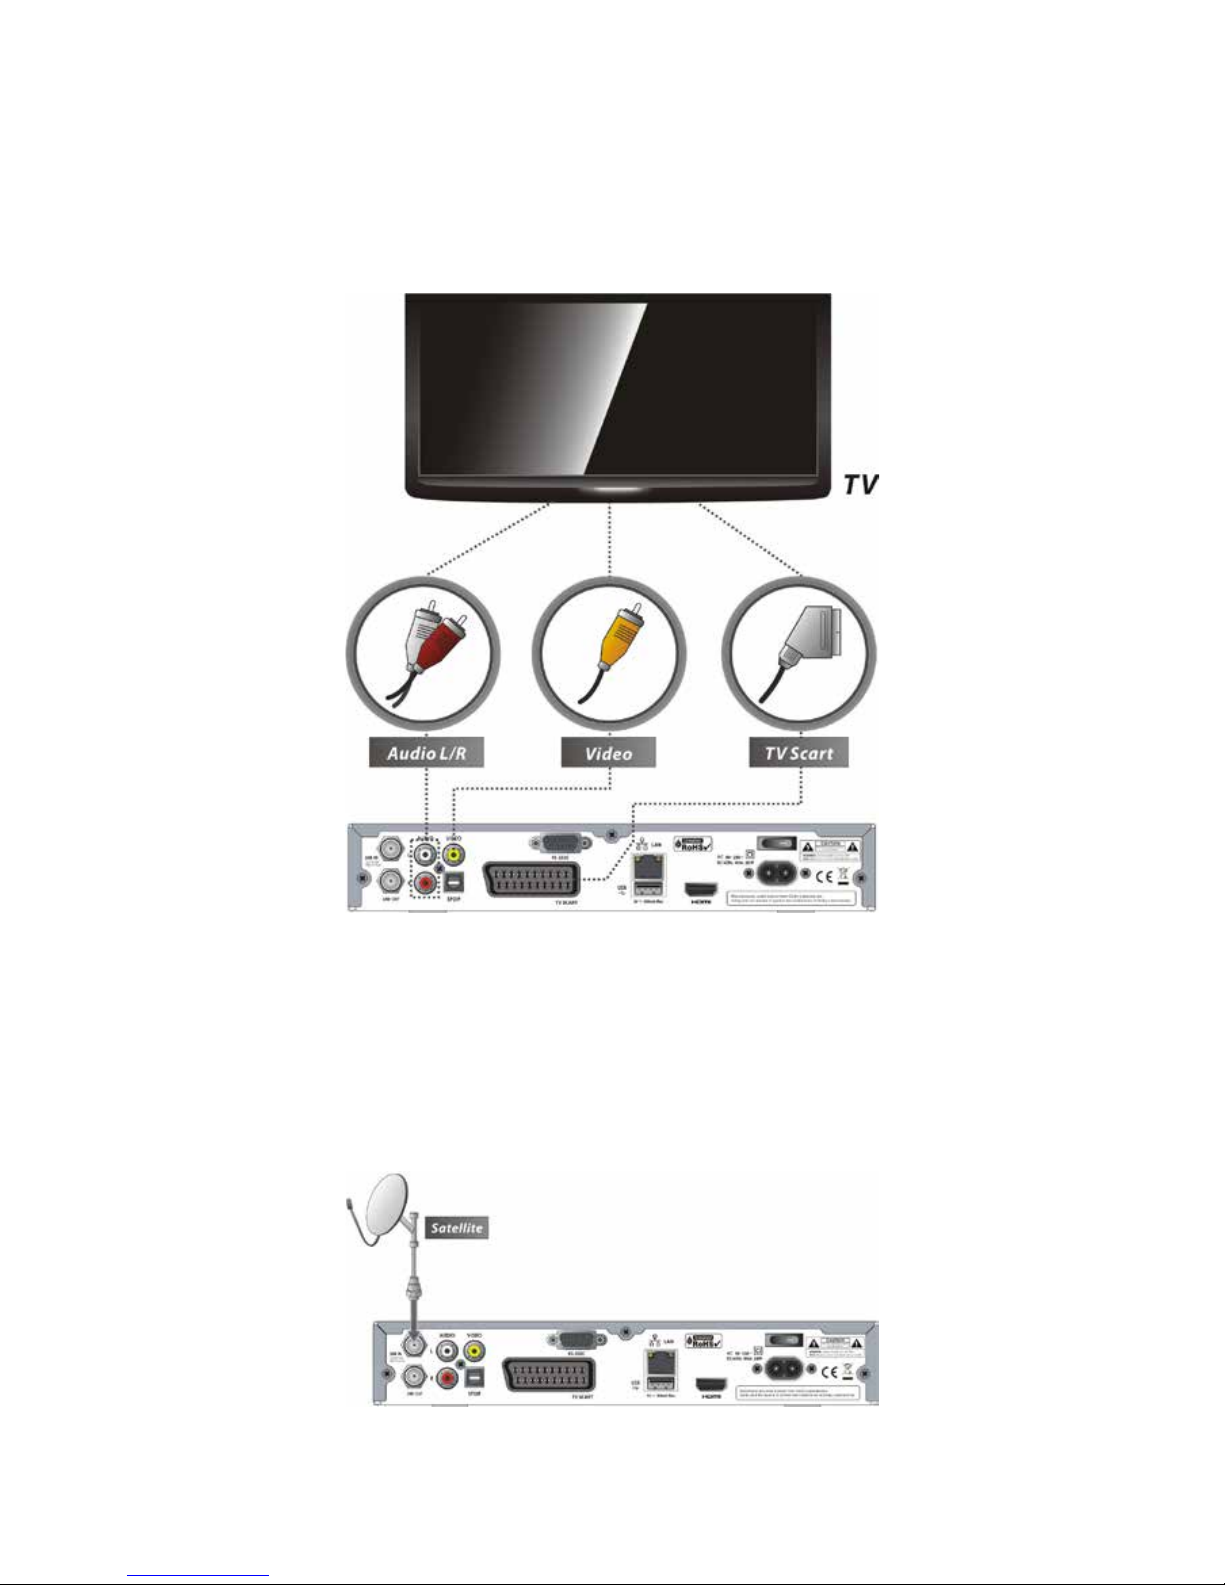
3. Receiver to TV with Analog A/V Output
l Connect the TV SCART to the SCART input of the TV.
l Connect the VIDE O and AUD IO L, R to VIDEO IN and AUDIO L , R IN of TV.
NOTE : The SCART cable connection is recommended for an alogue TV or VCR
The composite connection(RCA cable) is recommended f or analogue TV
You cannot view high definition video with the SCART and the composite video
connector.
4. Connecting to Antenna Cable
l Using Single DISH : Connect the Satellite Antenna cable to LNB IN.
Page 17
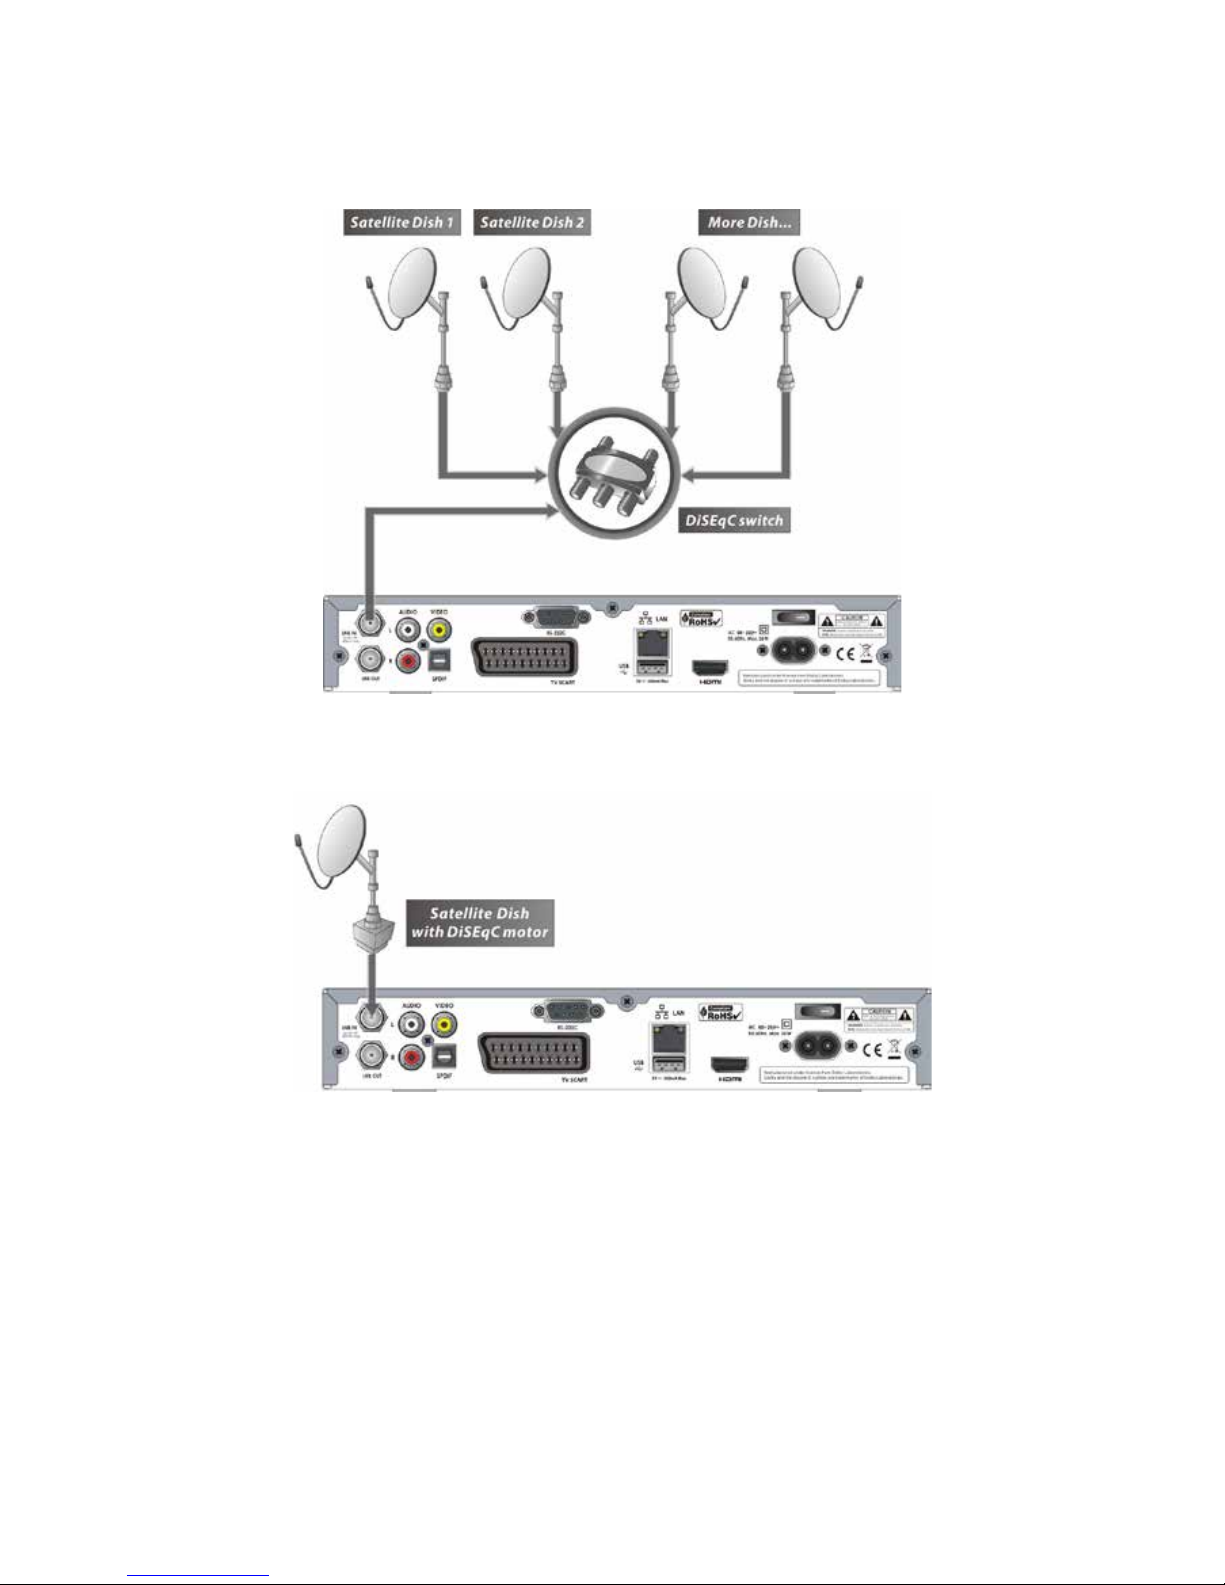
l Using DiSEqC switch : Connect the cable of DiSEqC switch to LNB IN.
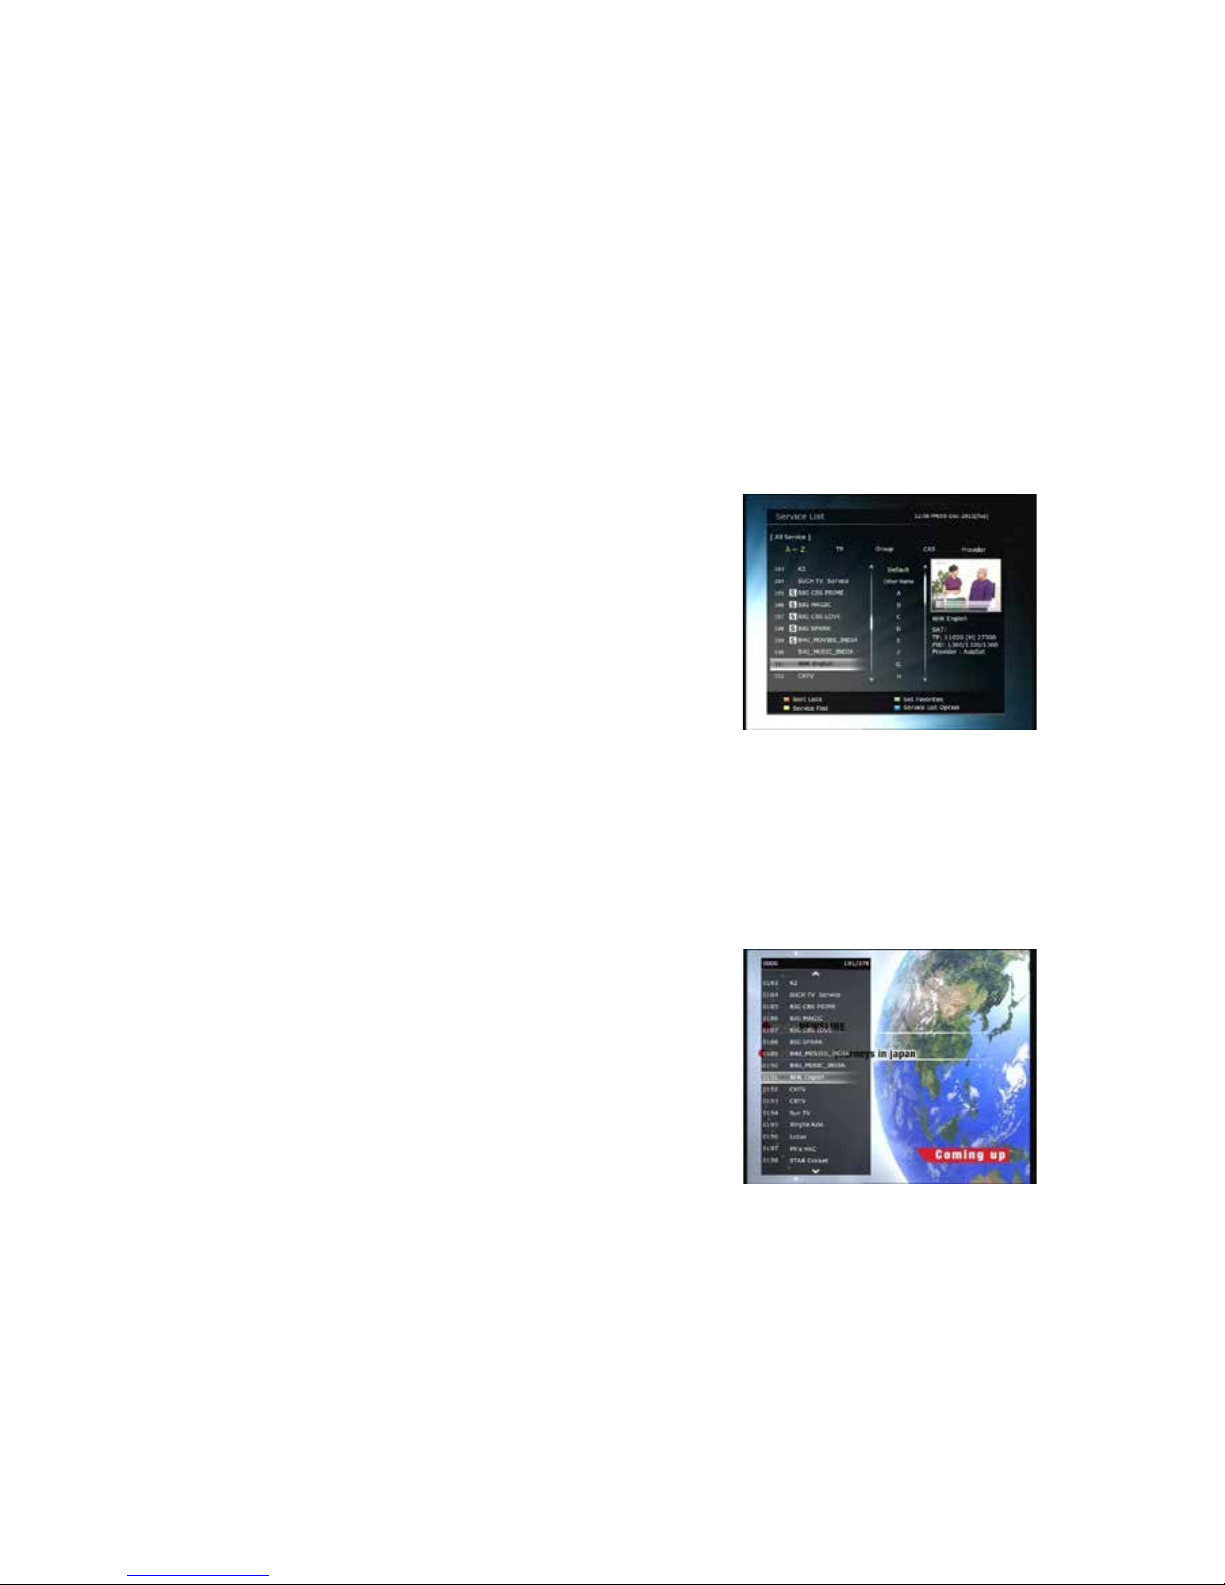
l Using DiSEqC motor : Con ne ct the cable of DiSEqC motor to LNB IN.
Page 18
Guide of Functions
1. Selecting a Service
To select the desired service (channel), please refer to the instr uc ti o ns below.
1.1 Using CH UP/DOWN buttons
You can navigate between services by pressing CH UP/DOWN buttons. Whenever you press the CH
UP(DOWN) button, current service will be changed to next/previous service. Please press CH UP or CH
DOWN button until you fine the service you want to watch.
1.2 Using Service List
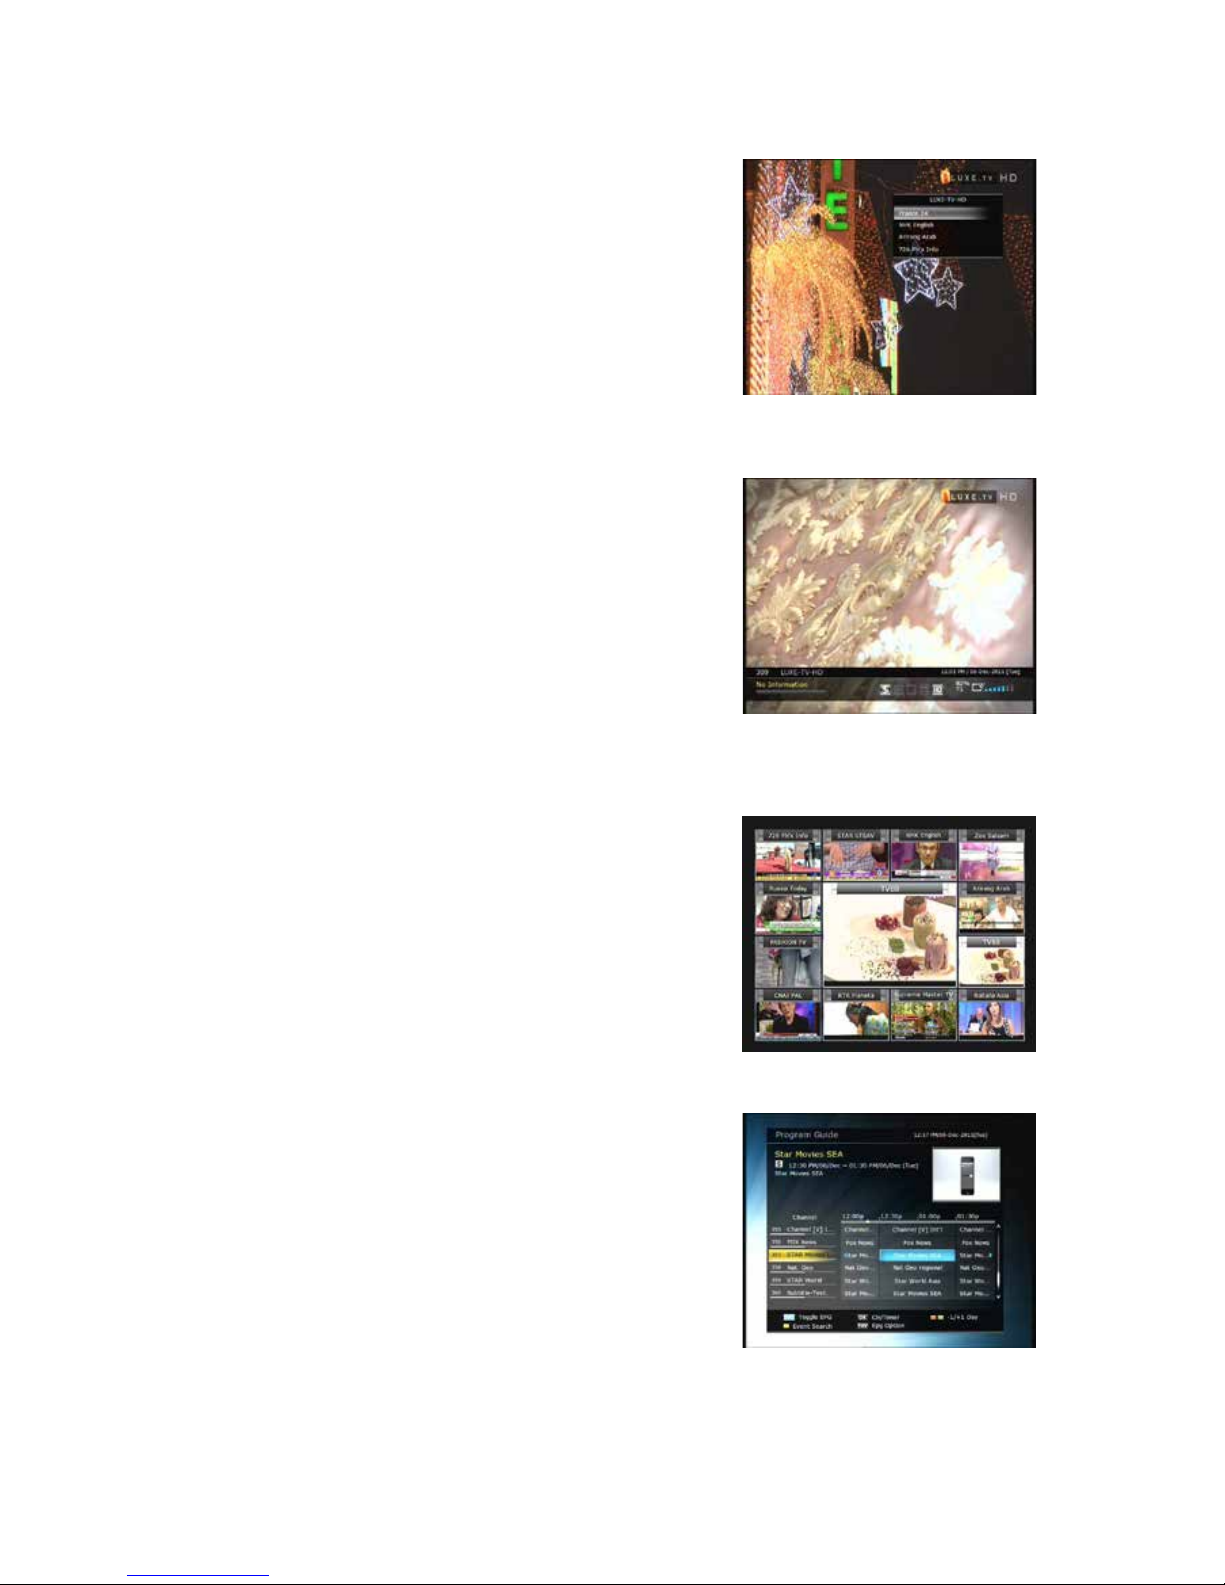
To select the desired service in the service list, you should firstly
display the service list by pressing the OK button.
Use t he ARROW buttons to select a desired service and press
the OK button.
You can see that the service is changed in the small screen on
the top-right.
To watch that service, press the OK button once more.
To watch the previous service, press the EXIT button.
In the Service List window, you can also select additional
functions with the COLOR buttons. Press the RED bu tton, and
you can s ort th e servi ces by the A lphabe t, Tran sponde r(TP), Grou p, Tuner and CAS (Conditional Access
System).
Press the GREEN button, an d you can add the services to one of 10 Fa v orite List.
Press the YELLOW button, and you can search & find the service via a virtual keyboard.
Press the BLUE button, and you can adjust serv ice list opti on .
1.3 Using Simple Service List
l
If you press NU MERIC buttons or UP/DOWN ARROW button,
instant service list will be displayed.
l Select the desired service by using the ARROW button, and
press OK button to w a tc h.
l You can also enter the service number directly by using the
NUMERIC button.
Page 19
1.4 Using Recent Service List
l
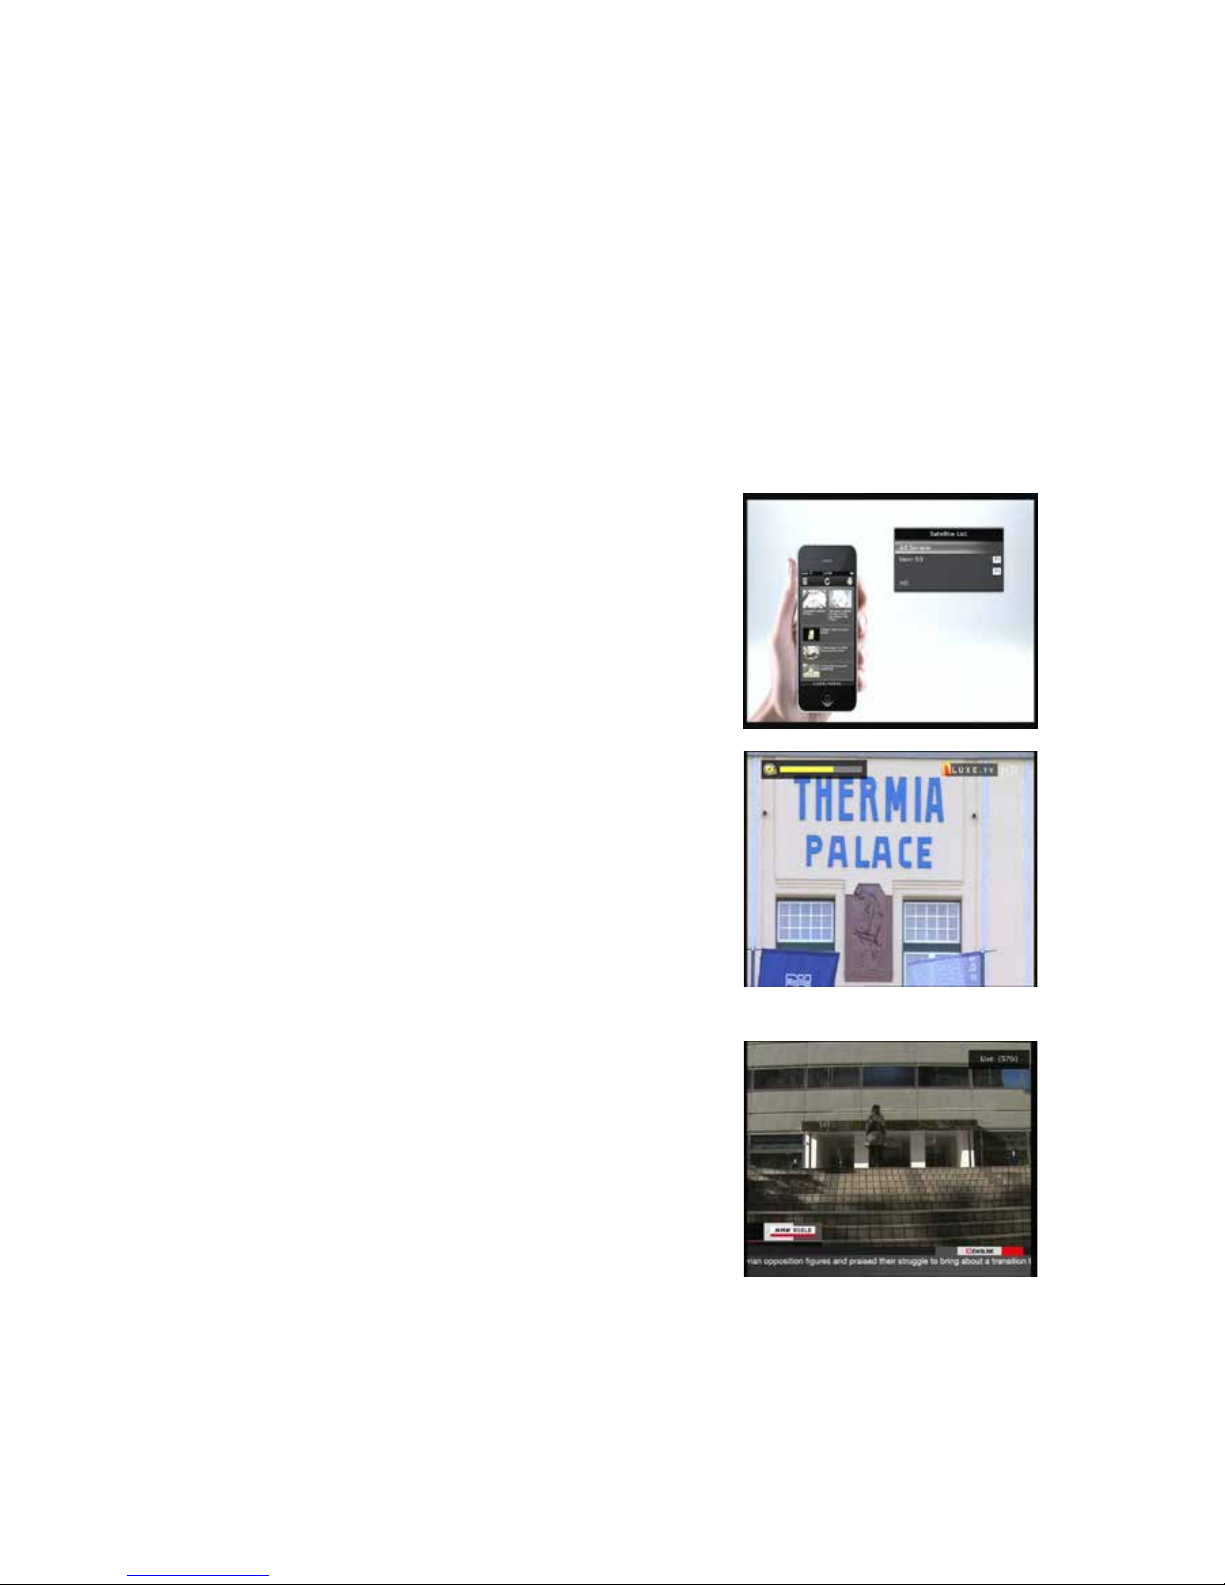
To display recent service list, press the RECALL button for a
short time.
l To return to the previous service that you were watching,
press RECALL button twice or for a l onger time.
l Choose the service from the recent service list, use the
ARROW button to select, and then press the OK button.
l Press EXIT button to exit from the recent service list.
2. Information Window
If you want to view the information of the current service that
you are watching, press INFO button. Then the Information
window will be displayed.
This Information window is automatically displayed when
changing between the services.
This window contains much useful information such as service
number, service name, scrambled types of service, teletext,
subtitl e, Au dio i ndi cati on f or Dol by Di git al, T ime du rat ion of th e
service and so on.
By pressing INFO button once aga in , you ca n get more det ail ed
information about the service.
3. Multi-Picture Display.
Press the BLUE button to display multiple pictures and use the
RED button to select the display options for 9 or 12 multiple
pictures.
4. Electronic Program Guide (EPG)
Electronic Program Guide (EPG) allows you to see program
schedule and program information from the service which
includes this data as part of their transmission. Multiple services
will be shown with a time line of programming events. The EPG
supplies additional information of channel service, such as
program listings, start/end times and detailed information a bout
the program listings for all available services. The availability and
details of information of these program details can be varied,
depending on the particular broadcasters, individual services.
Page 20
l Press the EPG button, then the EPG menu will be displayed.
l Use the ARROW buttons to move to other services or to see previous/next guide.
l Press the EPG button once to view full EPG with multi service list, and press it twice to view the
additional EPG information of a specific channel service. Keep pressing the EPG button to toggle
between the full and detailed menus of EPG.
l Press the GREEN button to view next day EPG and the RED button to view EP G for a previou s d a y.
l Select the program by using the ARROW buttons then set the event timer by pressing OK.
l You can schedule a recording with the EPG menu as follows.
- Press RECORD button to schedule the event. This schedule can be checked in the menu of Timer
Settings, in the System tool menu.
- To cancel the schedule of the recording, press the OK button for the appointed event.
- To edit the schedule of the recording, press the RECORD butt on for the appoin ted event.
5. Favorite Group
Press the FAV(Favori te) button to view all favorit e groups such as
sports, mov ie, dram a, sat ellite g roup and so on. Scroll t hroug h the
various f avorite g roup usi ng the UP/DOWN ARROW buttons, and
select the desired favorite group by pressing OK button.
6. Volume Control
l To adjust the audio volume, press the VOL UP/ DOWN
buttons.
l Audio vol ume control bar wi ll be displayed at the top of the
screen and disappear after 4 seconds.
l When necessary, press the MUTE button to turn on/off the
audio sou nd.
NOTE : The mute function remain s set whi l e you chan ge services.
7. Pause
PAUSE button is used to freeze the video. Press PAUSE button
once more to resume the video.
Page 21
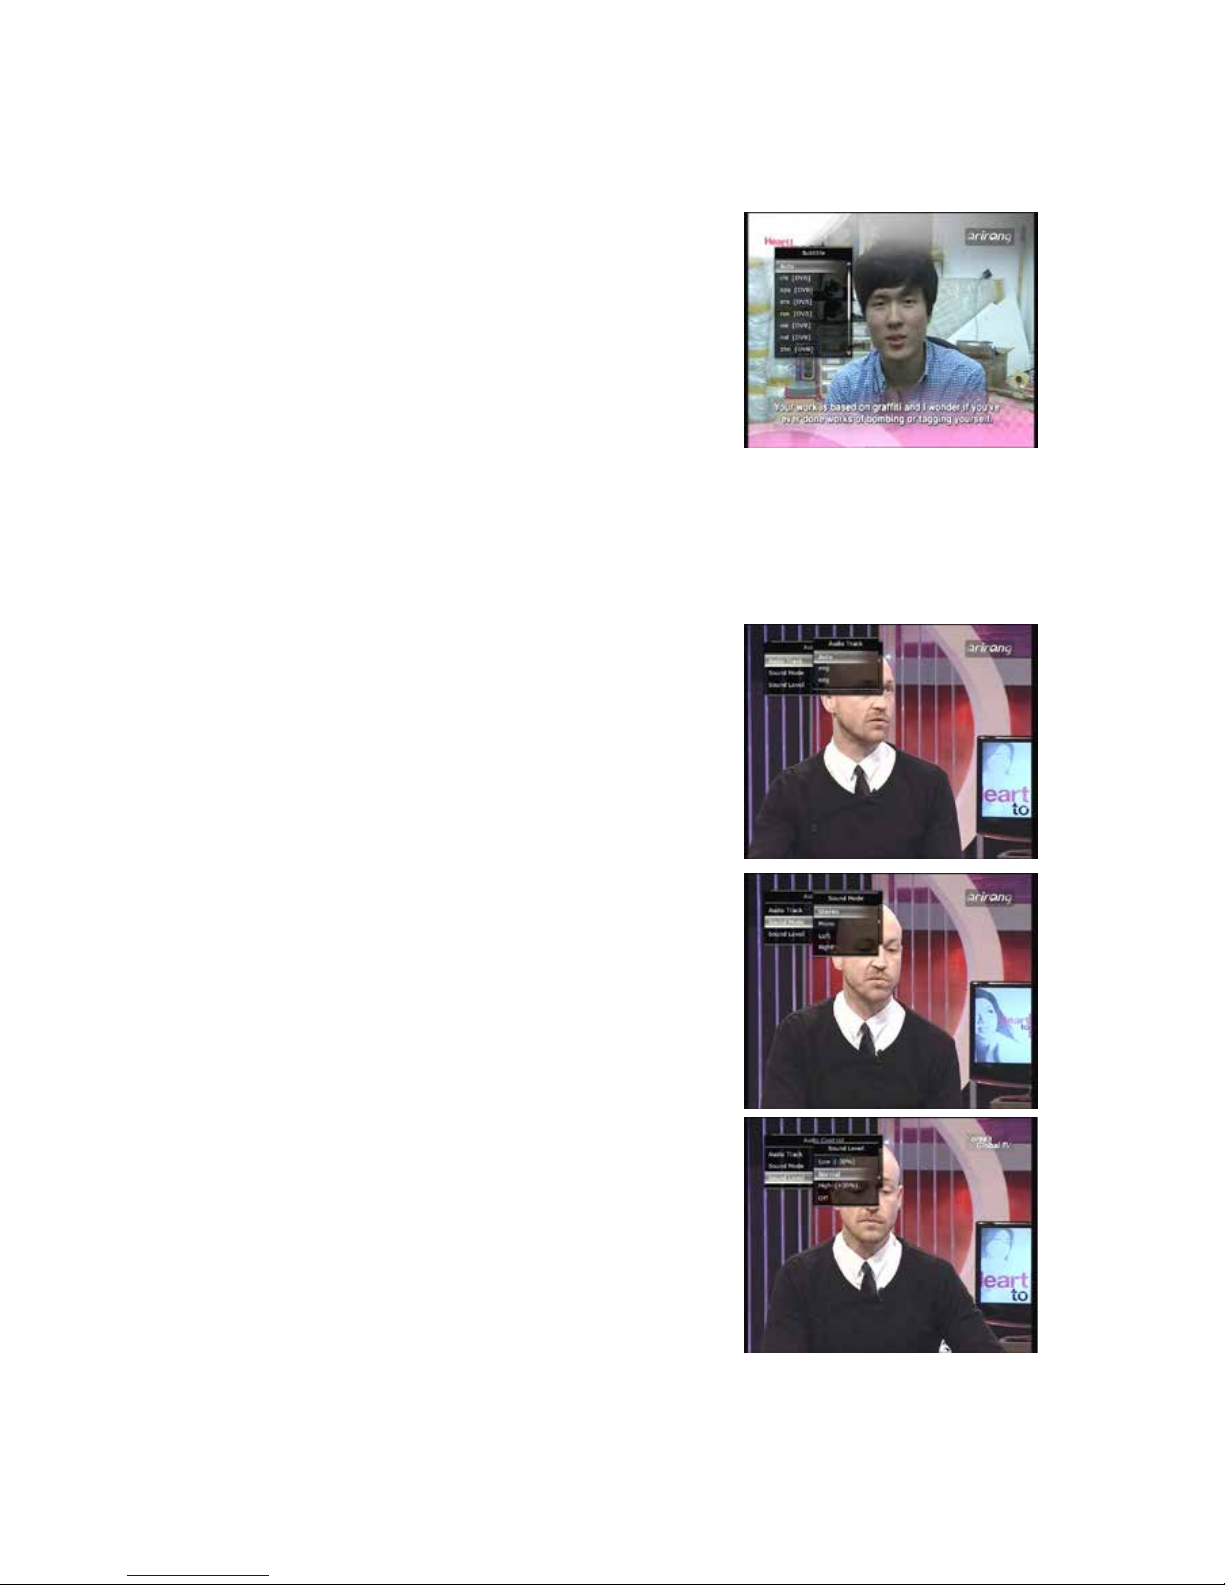
8. Subtitle
You can select the language for a Subtitle, if the program
provides subtitle information.
l Press the SUBTITLE button on your remote control unit.
l Select the desired subtitle language then press OK button.
l The subtitle will be displayed in the selected language at the
bottom of the screen.
l To turn OFF the subtitle from the screen, Select ‘Off’ f rom the
subtitle language li st.
NOTE : When program does not provide subtitle in formation,
SUBTITLE button will not be active.
9. Audio Control
Press YELLOW button on live TV service to display Audio Control menu. You can set Audio Track /
Sound Mode / Sound Level.
l Audio Track :
You can see all the audio track of the service you are watching.
Use the ARROW bu tt ons to choos e t he pref erred au di o tra ck. If
you sele ct Auto, a udio t rack wil l play as what you set for audio
language in language setting menu.
l Sound Mode :
To set soun d mode, Stereo / Mono / Left / Right.
l Sound Level :
To set sound level, Low(-30%) / Normal / High(+30%) / Off.
Page 22
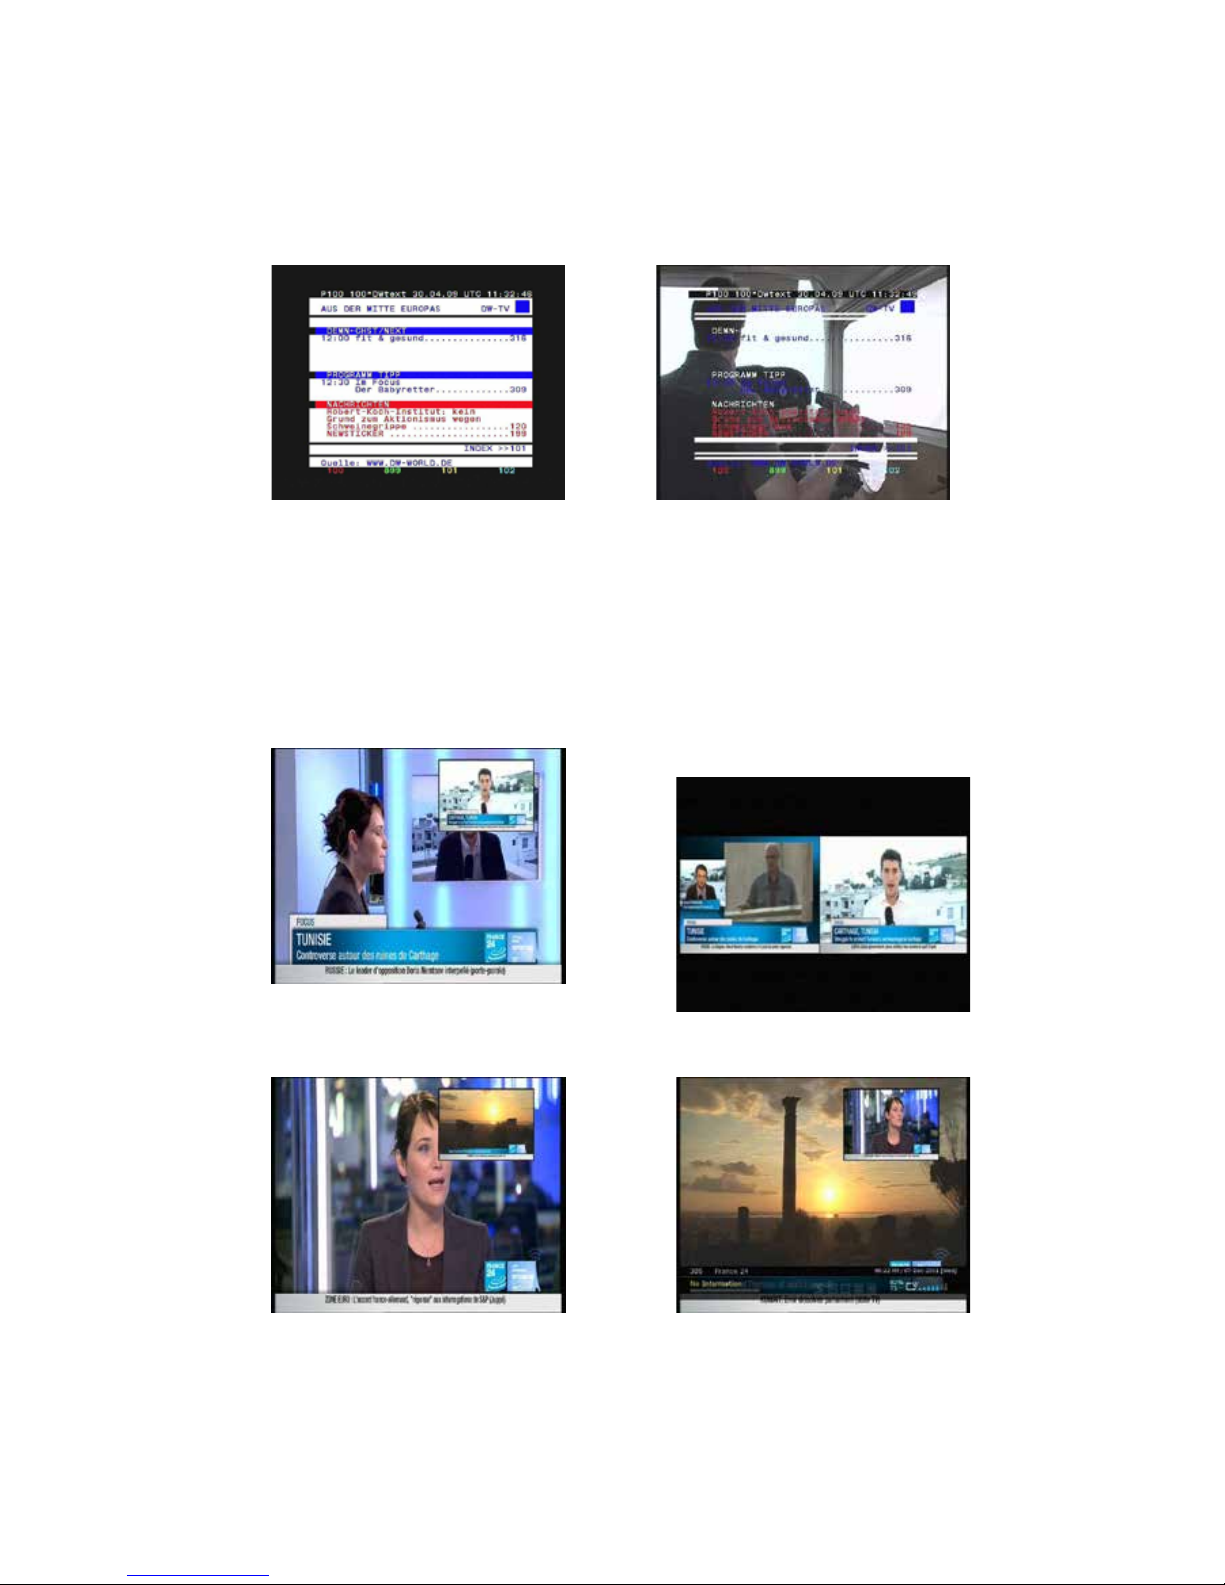
10. Teletext
When the TELETEXT icon on the IN FO Ba nner, press the TELETEXT button to view the teletext.
11. PIP (Picture in Picture)
l When you press the PIP button, a sub picture screen will appear on the main screen view.
If you press the PIP button one more time, the primary picture and the sub picture will appear
together side-by-side with the same size. The picture of the left side is the primary and the picture on
the right side is sub. If you press the PIP bu tton one more time, the sub picture will disappea r.
l In the P IP mode, you can change primary and sub with the PIP SWAP button.
Page 23
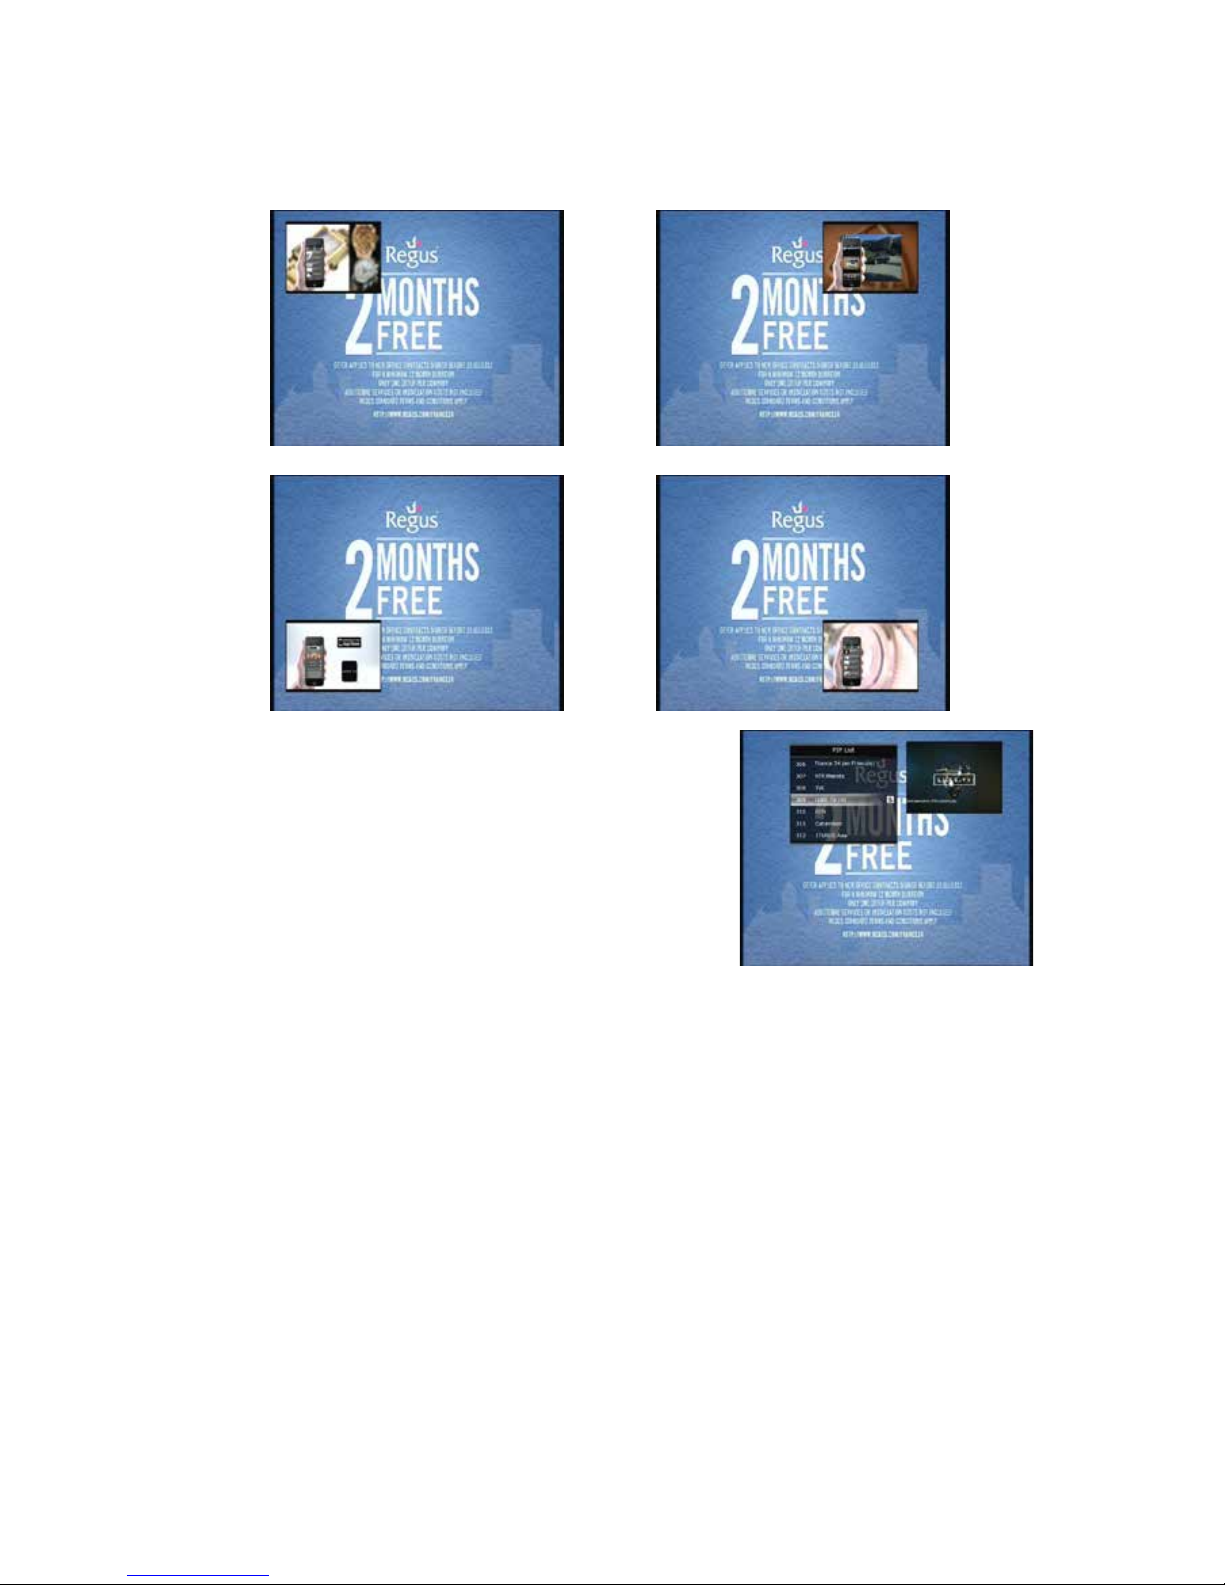
l If you press the PAGE UP/DOWN button , the location of the sub picture is changed.
l If you press the PIP SERVICE LIST button, you ca n s ee the list
of service s of sub pictu re .
You can change the service of the sub picture from the
service list shown.
NOTE : Changing services of sub the picture could be
limited by the condition of the tuner connection
or a recording event ongoing.
Page 24
PVR (Personal Video Recorder) Function
1. Recording
You can select a recording storage device with the following sequence :
Menu > Configuration > Recording Option > Record Device.
Default is set to ‘USB’.
1.1 Recording methods
There are 3 type recording methods.
(Instant Recording / Time Scheduled Recording / Event Scheduled Recording).
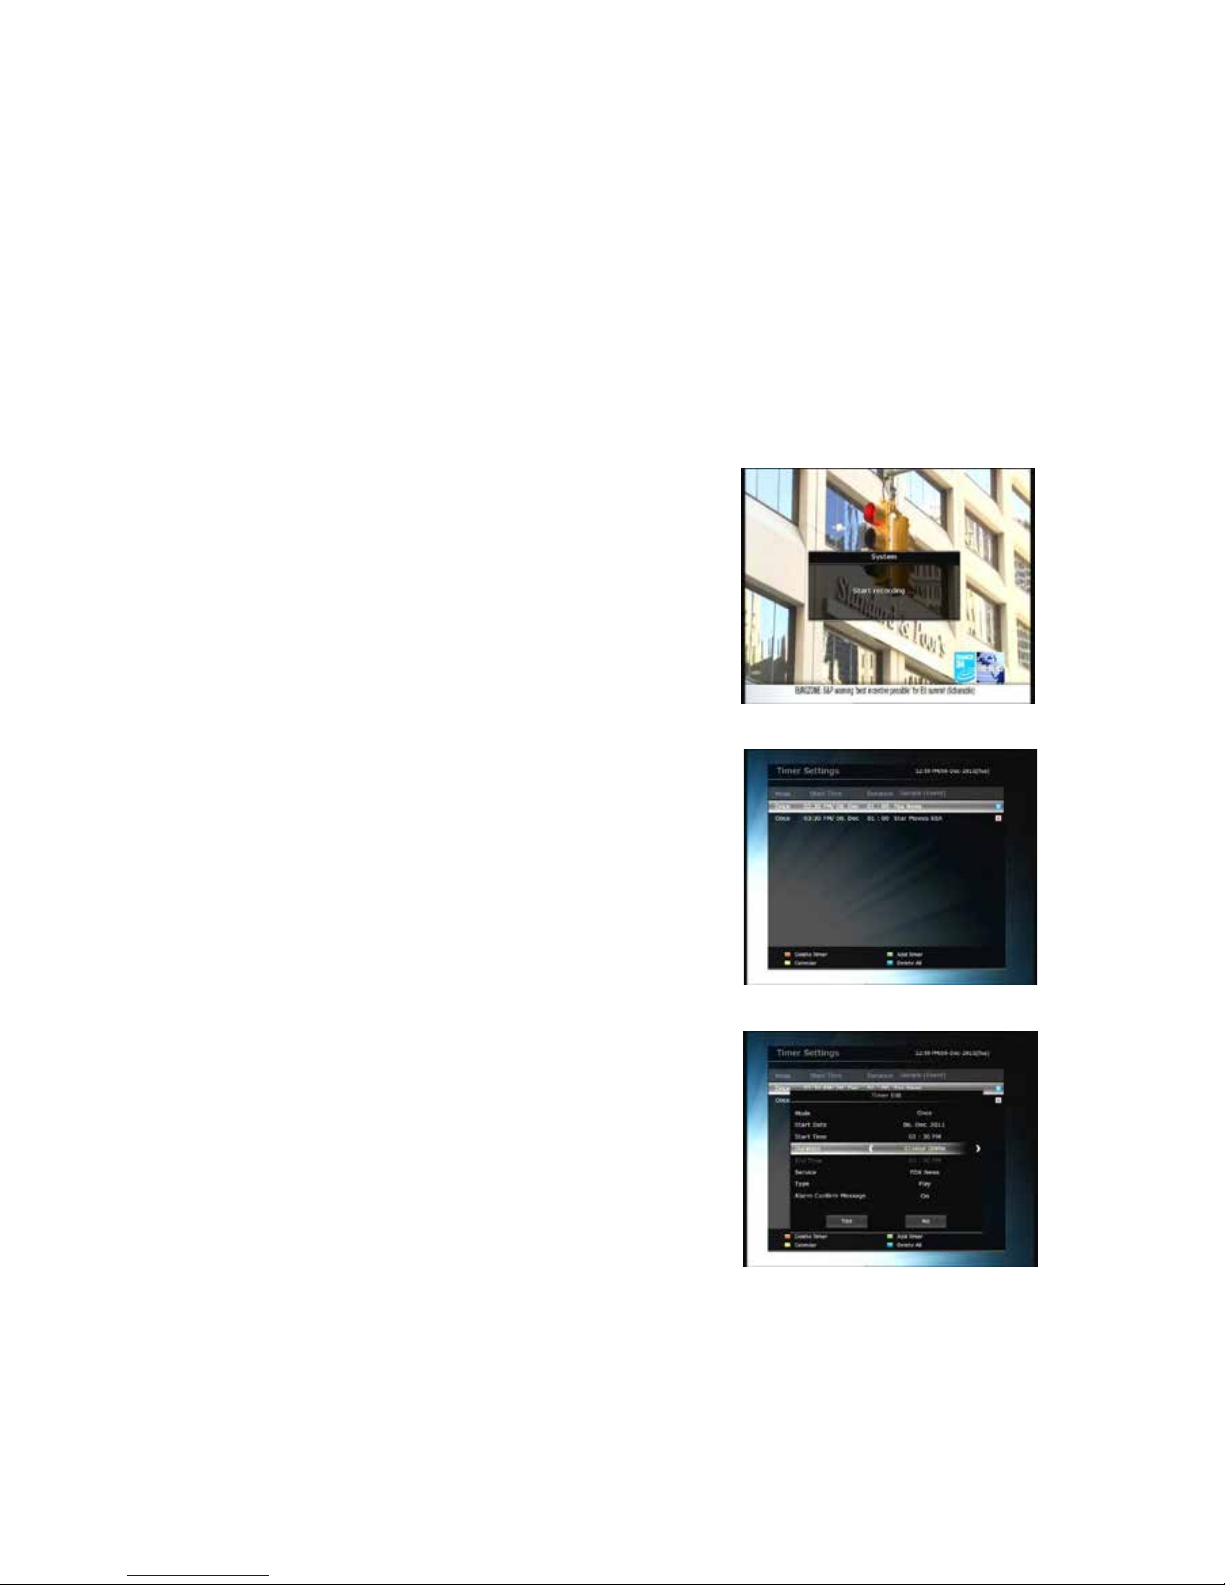
l Instant Recording :
You may press the RECORD button to start your recording
insta ntly at anytime.
l Time Scheduled Recording :
- In Timer Settings menu, you may set the time & program to
record your des ired service program.
(Go to Main Menu > System Tools > Timer Settings)
- Press the GREEN button to activate the new timer edit
screen.
- In the Timer Edit screen, you may choose start date/time,
duration, service, mode, type (Recording/Play) then simply
press the Yes button to schedule your recording event.
Please note that the minimum offset time of 3 minutes is
required from the Start time & current time for appropriate
recording pr oce s s to take pl a ce .
Page 25
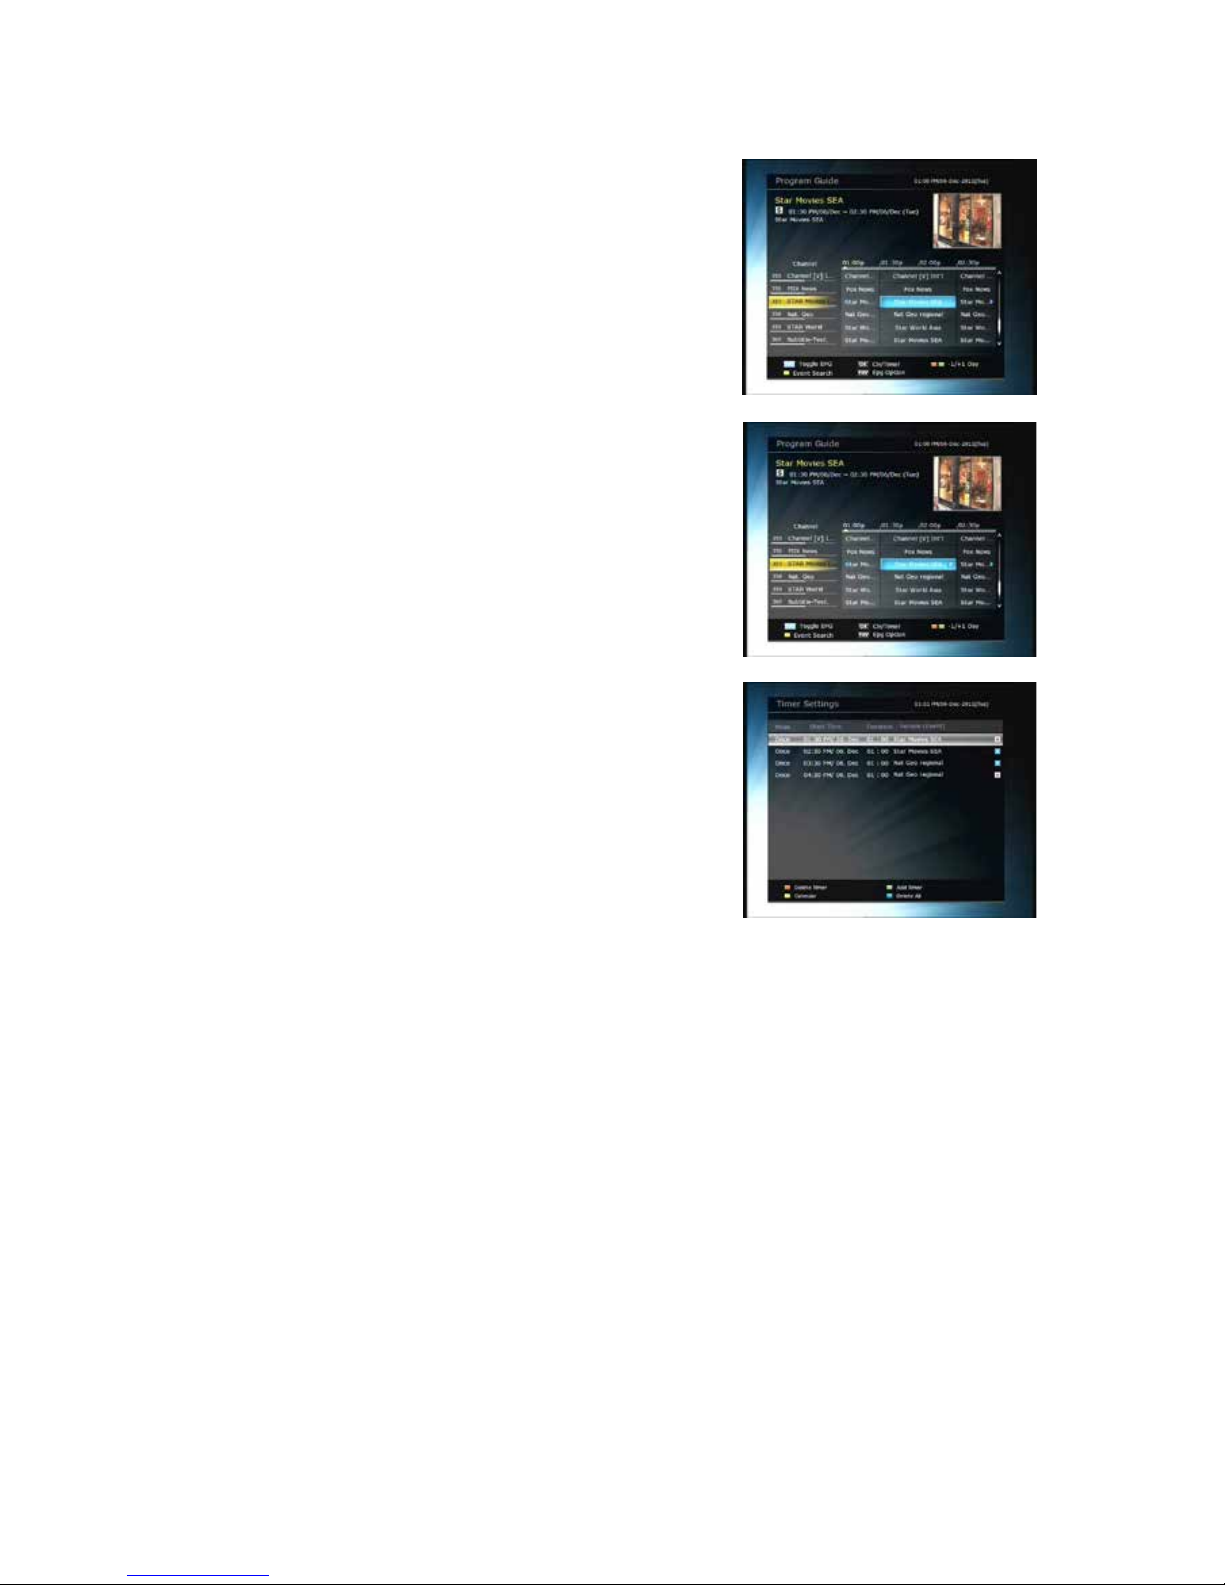
l Event Scheduled Recording via EPG :
- In the EPG menu screen, you can choose the event you wish
to schedule or record.
- While watching the LIVE TV screen, press the EPG button to
access the EPG menu screen.
- Choose the event you wish to reserve to play or record, then
press OK to view option menu. You can select Once record /
Series record / P l a y.
- Once Record : Reserve to record once.
- Series Record : Reserve to record the series.
- Play : Reserve to view live TV.
- When you set an event for scheduled recording via the EPG
menu. It automatically sets a Timer Event in the Main
Menu > System Tools > Timer Settings.
Note :
Series recording may not completely perfo rm the recording the same series according to the condition
of EPG information from the service.
Page 26
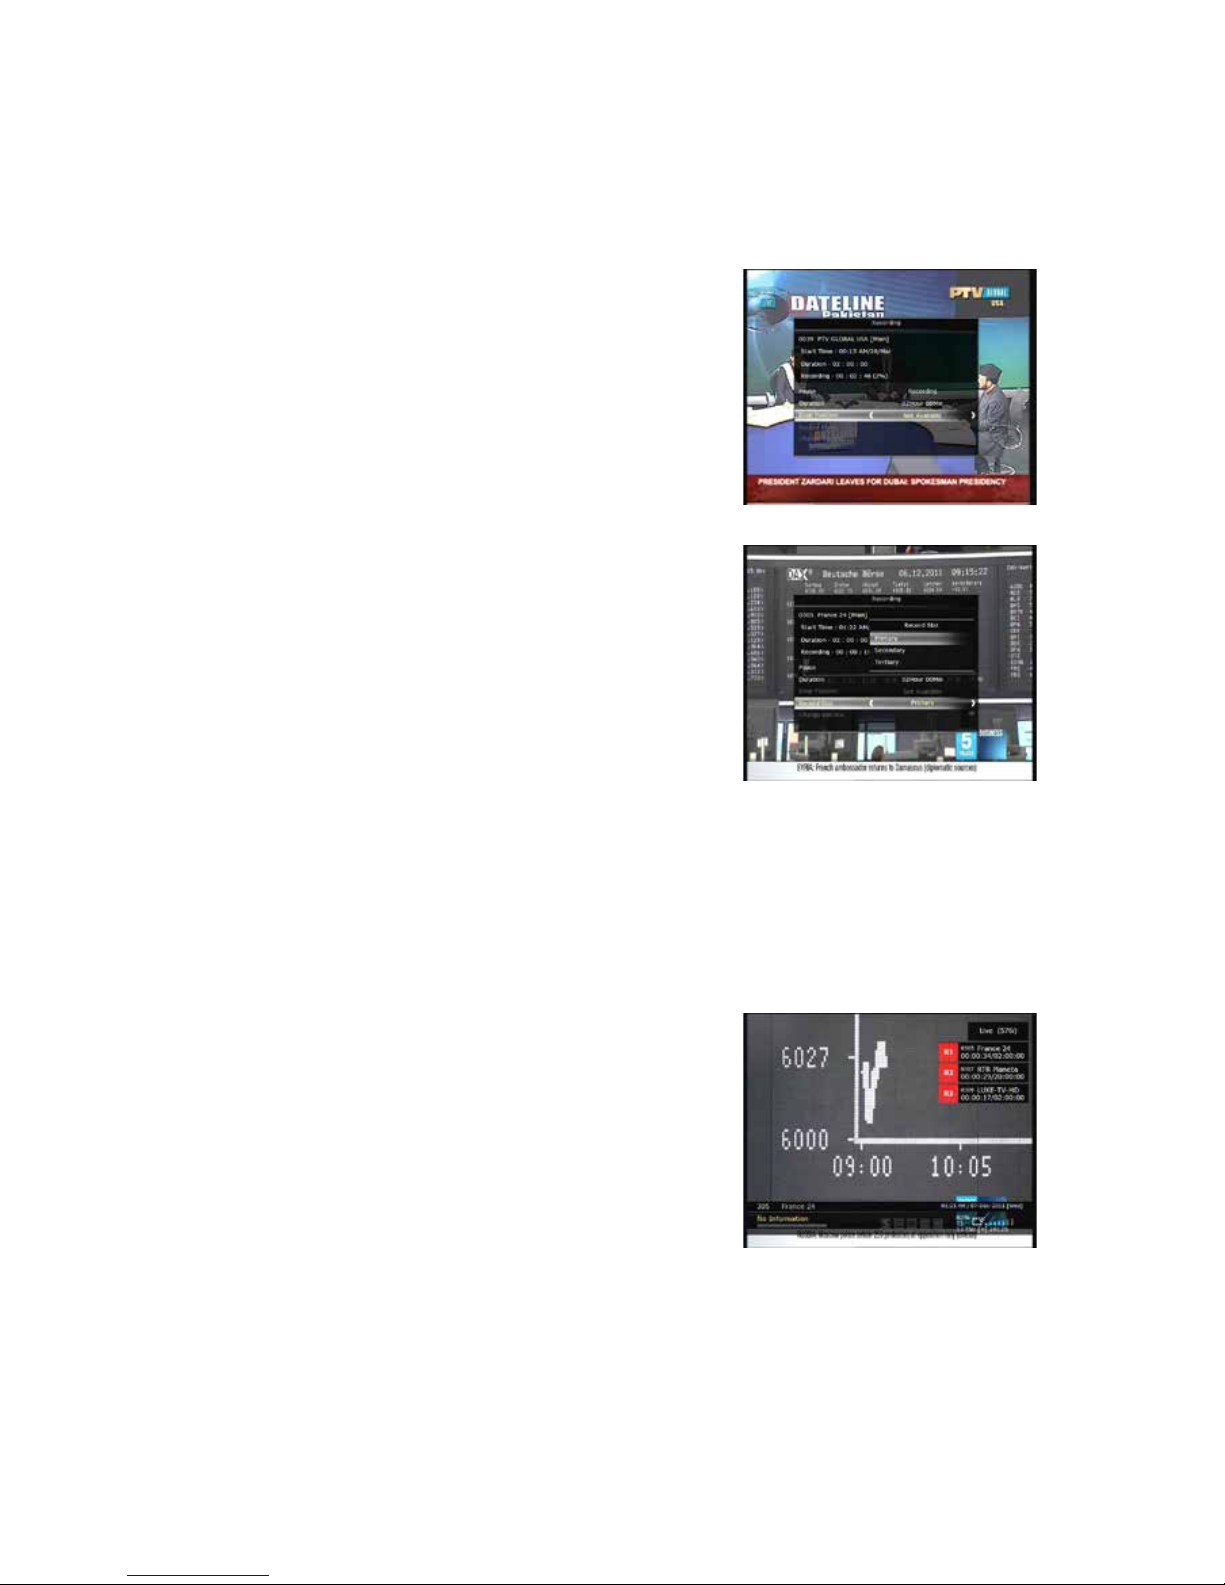
1.2 Recording Edit
Press the REC button while recording to see the recording message window.
l Pause : Select P a u se Recording t hen press OK to pause t he current recordin g process.
l Dur ati on : S e t recording duration. Pre s s LEFT/RIGHT ARROW
button to change recording duration.
l Stop Position :
Set the finishing time of recording.
- End of current event : finish recordi ng at the end of curre nt
event
- End of next event : finish recording at the end of next event.
- Not Available : E P G i s not available.
l Record Slot : When you are recording 3 services, you can
select Pri mary / Secondary / Tertiary by pressing Left/Right
Arrow button, th en go to Change Service and press OK button
to show that recording service.
1.3 Long Time recording
During lengthy time recording processes of 4GB(Giga Byte) or more, additional files may be created per
every 4GB. (For example; aaa.ts, aaa.ts1, aaa.ts2… and so on).
You must remember not to delete any of duplicated file. These files are only able to be viewed with
your PC not with the receiver (STB).
1.4 Pause during recording
l
When the PAUSE button is pressed during recor ding, only the
live video is paused, but recording is continued at the selected
recording device.
(Menu > Configuration > Recording Option > Record Device)
Page 27
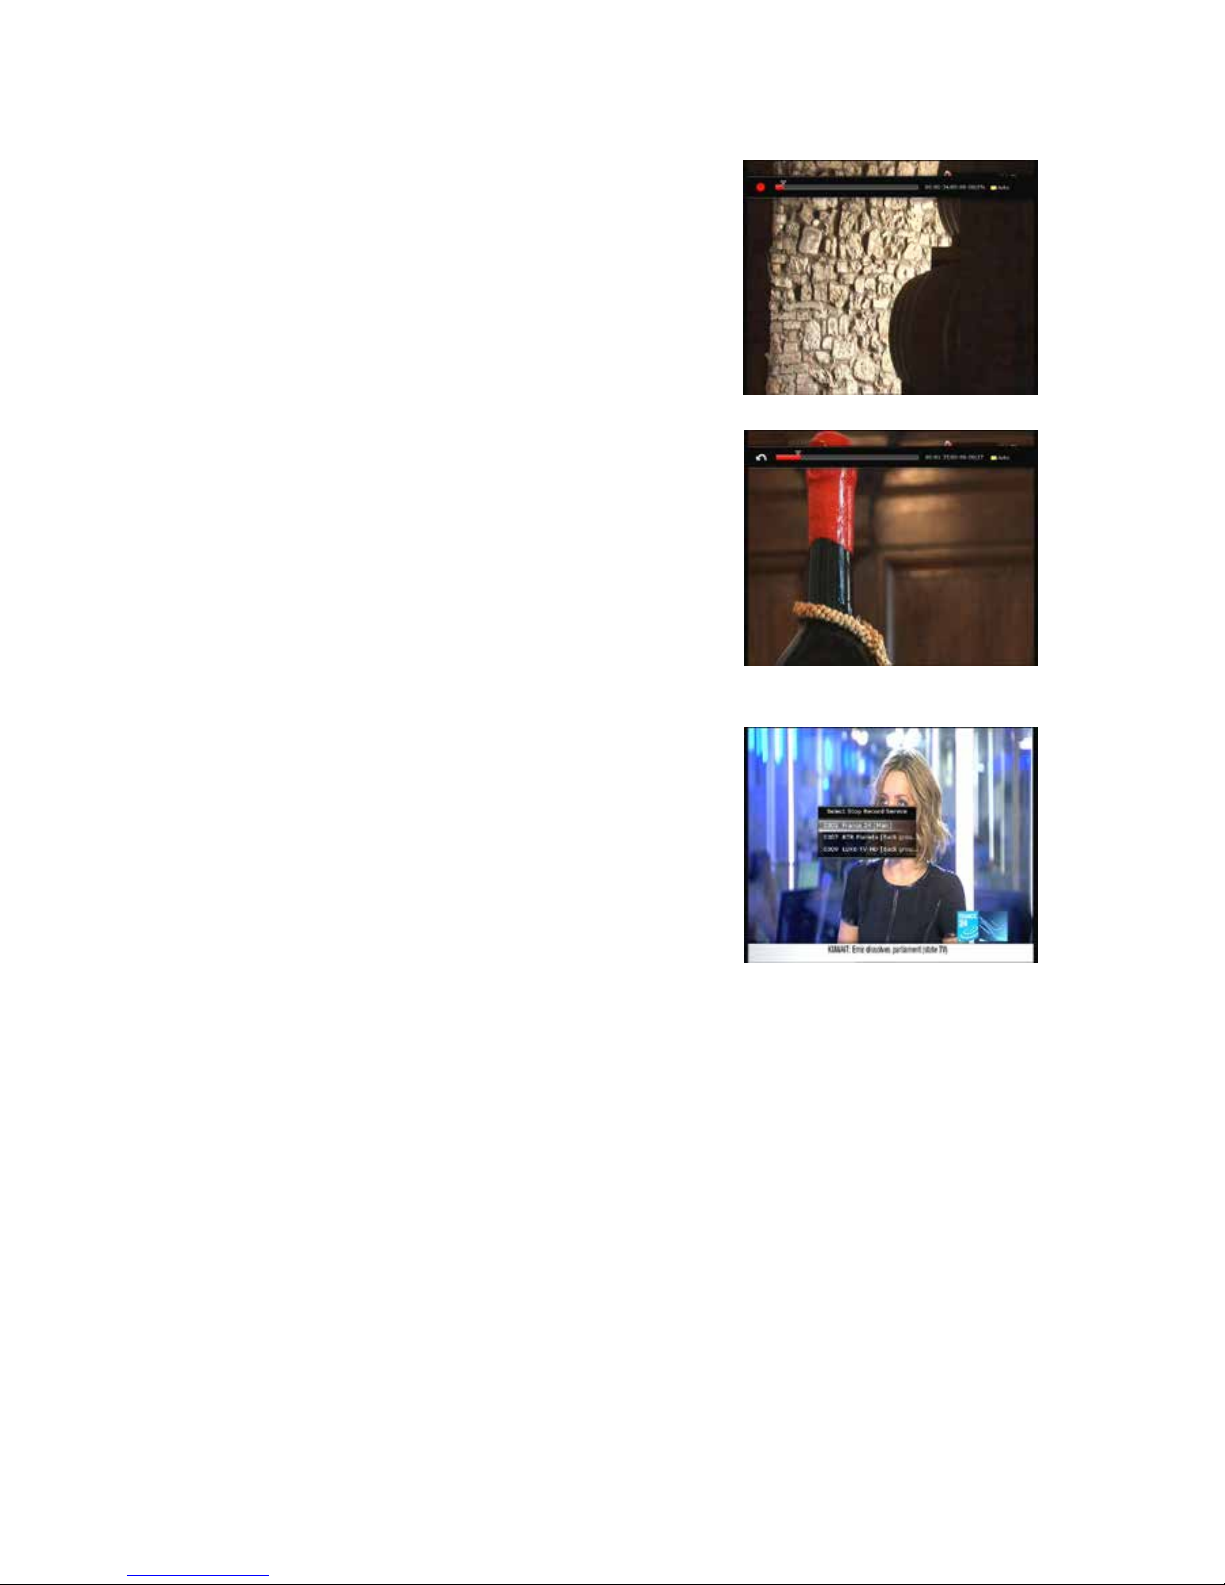
l Press PAUSE button once again and event will resume from
the pause time.
l Du rin g recording, press the PLAY/TIMESHIFT button to show
the Play bar screen.
l While the Play bar i s shown on your screen, you may u se the
LEFT/RIGHT Arrow button to move (forward & backward)
freely within recorded time.
l If you pre ss YELLOW button in the Play bar, you can set the
Position Jump time at Auto / 10sec / 30sec / 1mi n / 2min / 4min
/ 10min. Then press LEFT/RIGHT Arrow butt on to ju mp as you
set the time.
l If you press the STOP button, i t will go to LIVE and you may
press PREV FILE button to view the recorded file from the
beginning.
l STB can record up to 3 different services simultaneously.
l When recording 3 services at the same time, you can press the
STOP butt on to see a mess age window of current recording
status / information.
If you select one of the 3 or 2 recordings and press the OK
button, that recording service will be stoppe d .
If you press the STOP button during recording 1 service, a
recording stop message window will appear. Then select YES
to stop recording.
NOTE : If If you want the recording up to 3 services, please format the storage devise with
‘NTFS’ or 'Journaled(JFS)' file system.
Menu > Storage Manager > Format > File System > select ‘NTFS’ or
'Journaled(JFS)'..
Page 28
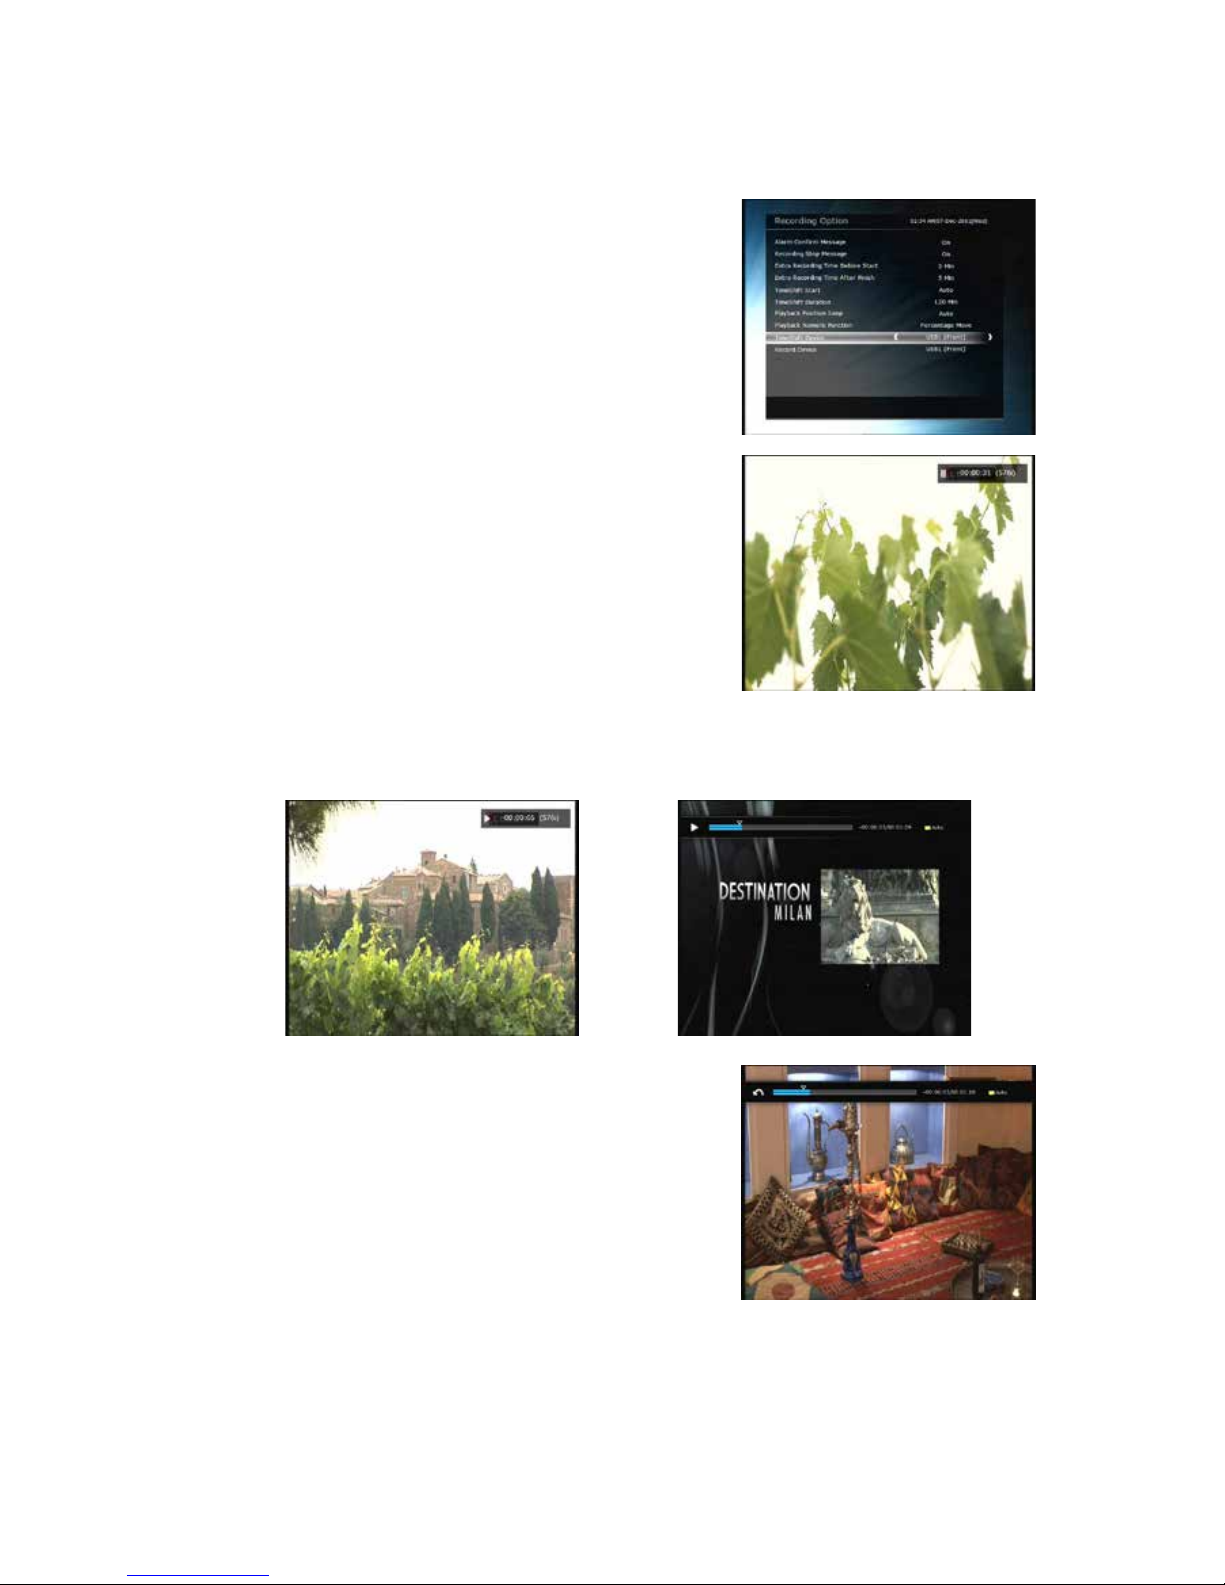
2. Time Shifting
You can select a storage device for a temporary file of the Time
shifting with the following sequence:
Menu > Configuration > Recording Option > TimeShift Device.
Default storage device is set to ‘USB’
l If pressing the PAUSE button during Time shift, the live video
is paused but the temporary recording for time shift is
continued at the selected storage device.
l Press the PAUSE button once again, then the event will resume from the paused time.
l While w at ching live TV, press the PLAY/TIMESHIFT button to show the pla y bar on your scre e n.
l When the play bar is displayed on your screen, you may use
the LEFT/RIGHT Arrow buttons to move freely through the
recorded times bar.
l If you press YELLOW button in the Play bar, you can set the
Position Jump time at Auto / 10sec / 30sec / 1min / 2min / 4min
/ 10min. Then press LEFT/RI GHT A rrow button to jum p a s you
set the time.
l If you press the STOP button while time-shifting, the screen
will be turned to a live TV channel. You can also use PREV FILE
button to move to a start locatio n of the Time-shifted file.
Page 29
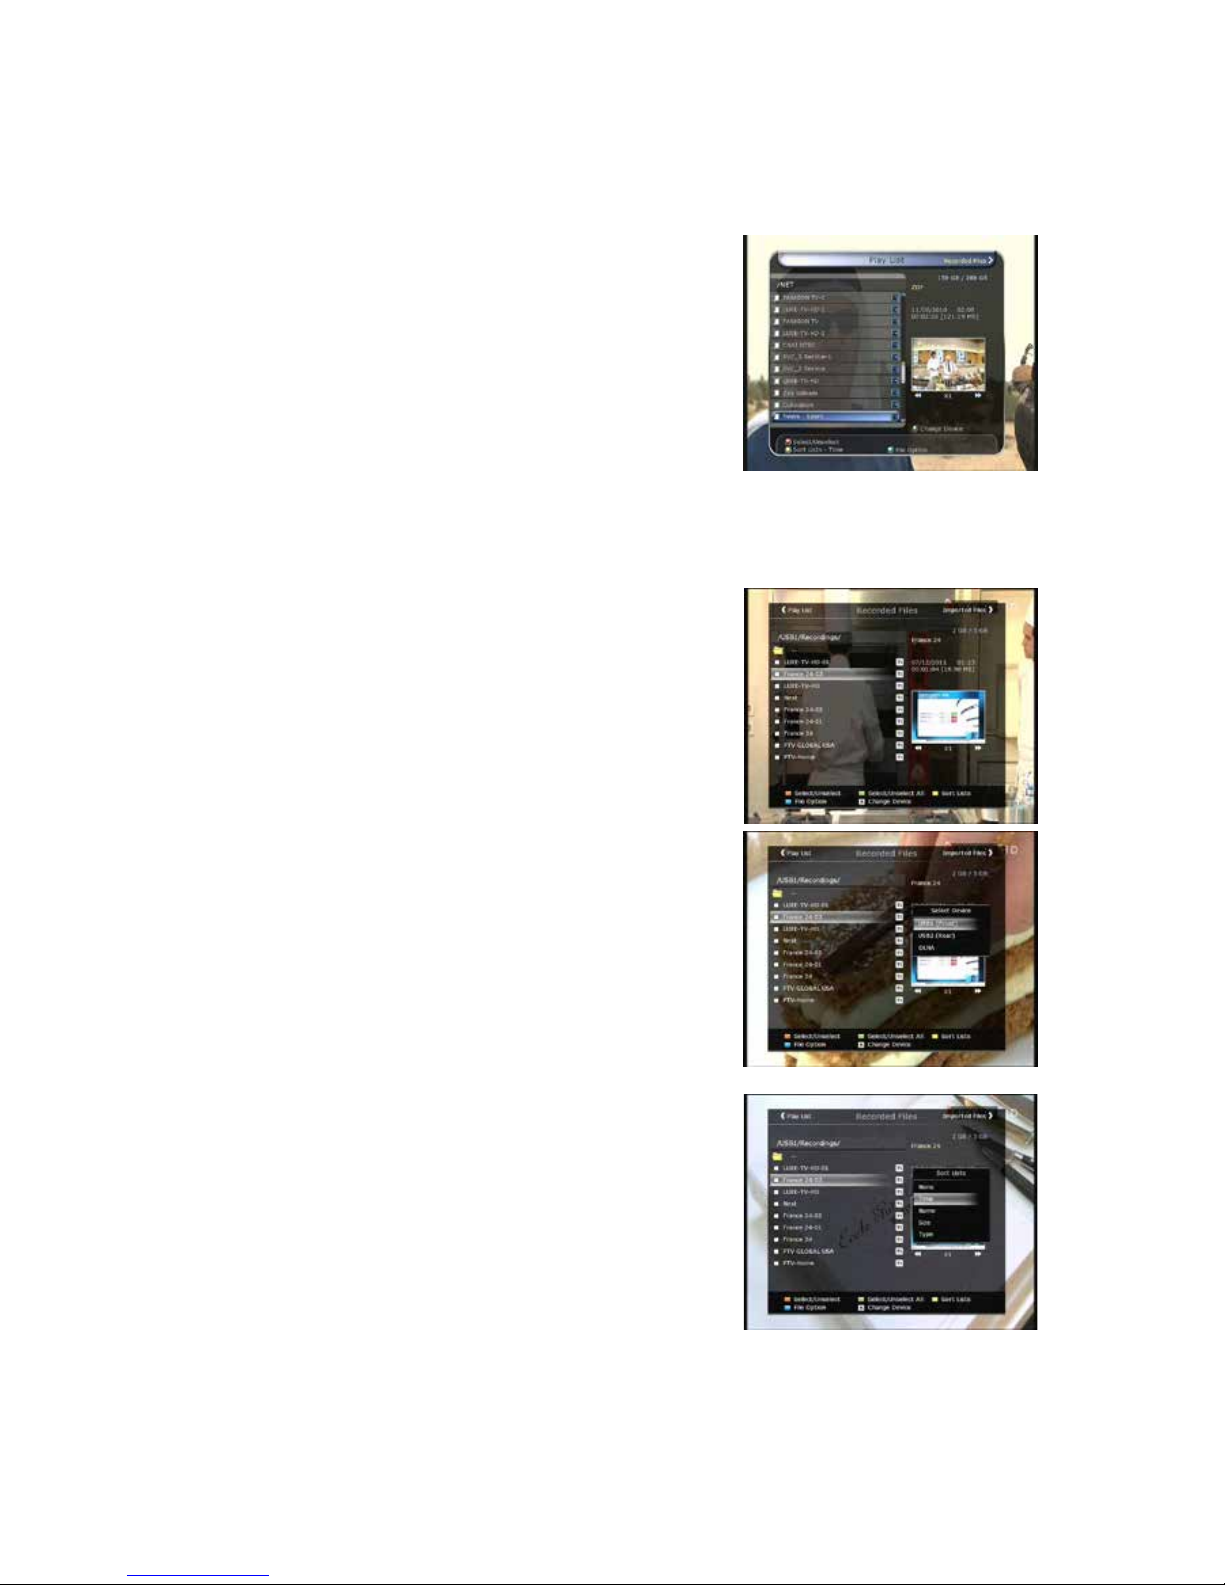
3. Playback (Play List)
You can playback many files with the Pla yli st w hich you acces s by
the PLAYLIST button.
In the Playlist, you can check and playback recorded files,
multimedia movie files, MP3 music files, and image files. With the
LEFT/RIGHT ARROW button, go to the Recorded Files, Imported
Files, Musi c and Photo cat egory a nd check & for playback files in
each category.
If press the PLAYLIST button, you can see all playable files. In
this mode, Green but ton is n ot in operat ion (not working). And
when you select the file, you will not be able to select th e different
types of fi le format files together a t once.
You can press LEFT/RIGHT Arrow button to move to Recorded Files / Imported Files / Music / Photo /
Play List menu.
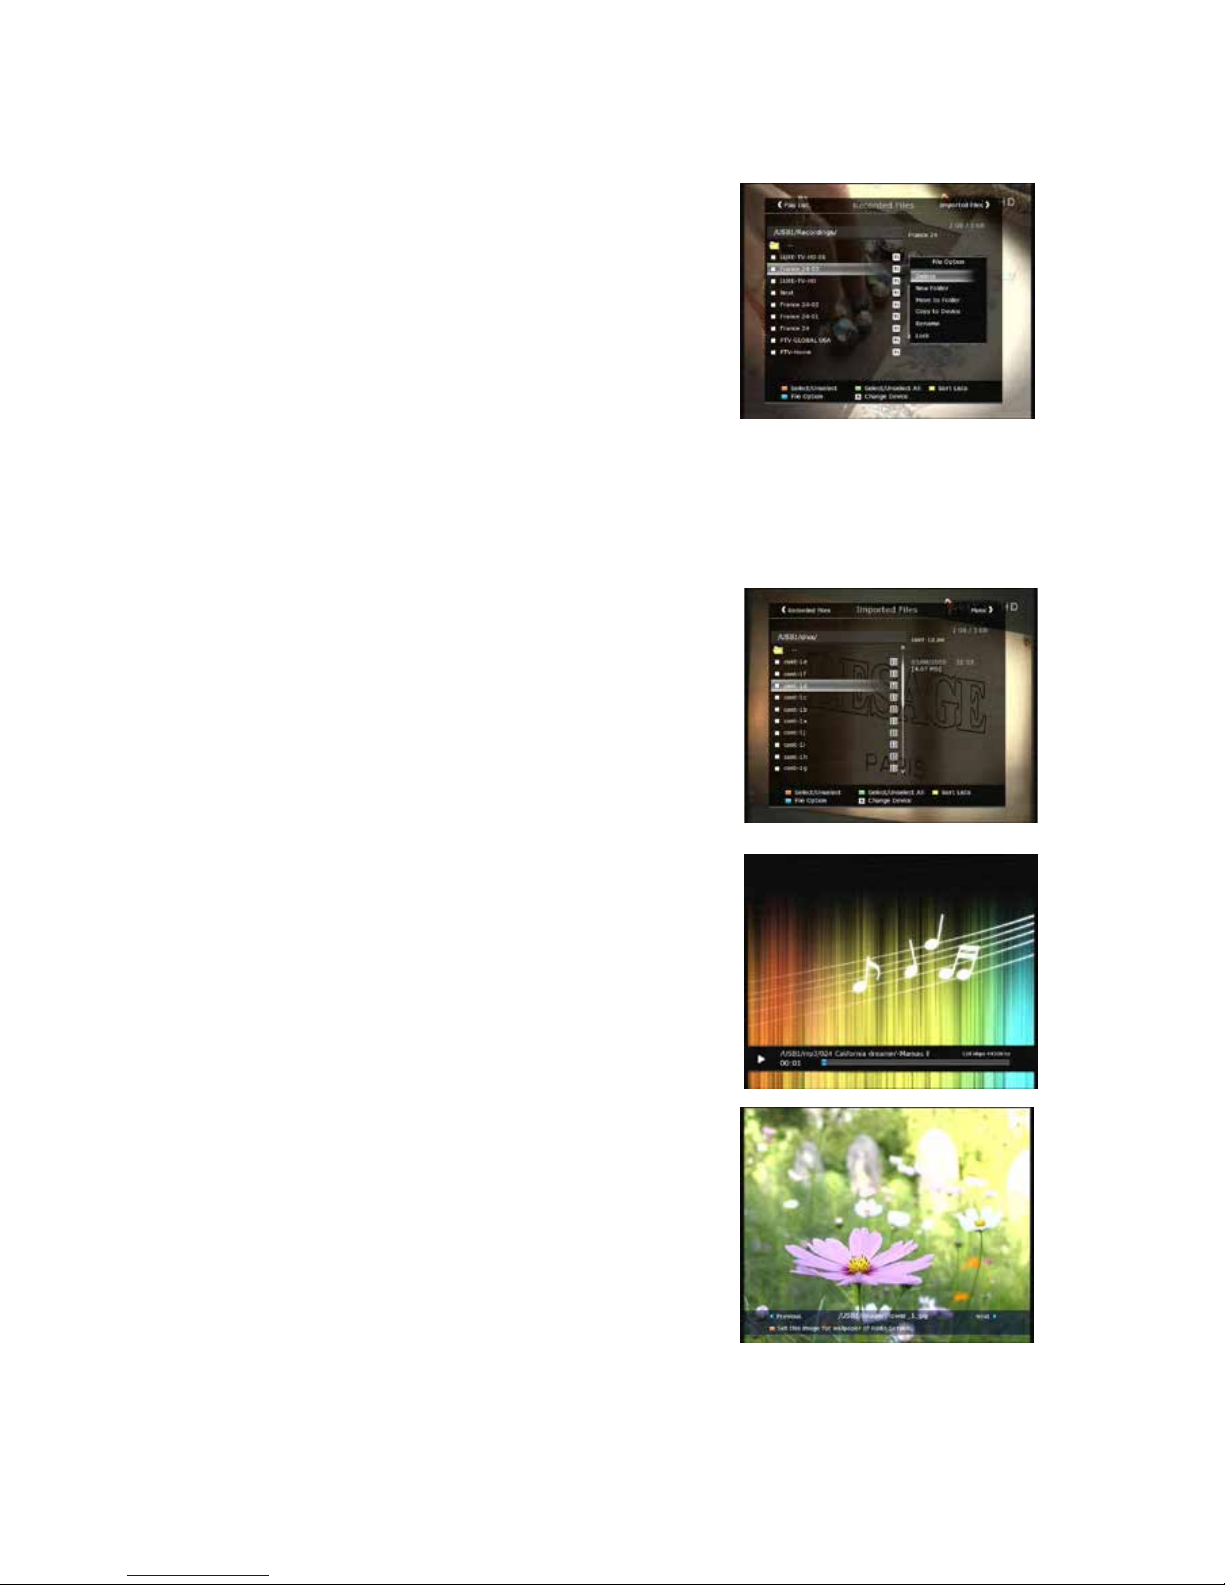
3.1 Recorded Files
l
If you press RIGHT Arrow button in Play List, you can go to
Recorded Files menu.
l Locate the recorded file(s) you wish to play with the
UP/DOWN button and press the OK button to playback the
recorded file(s).
l To choose a particular s e lection of files, select a desired file and
press the RED button. Press the OK button to begin the
selected files.
l Select Devi ce : Press PLAYLIST bu tton one more time in the
Playlist mode to see “Sel ect Device” window, and select the
device which has t he file you want to play.
NOTE : “Select Device” window shows devices which are
currently connected to the STB.
l Sorting : If you press the YELLOW button, you can sort the
files by Time / Name / Size / Type.
Page 30
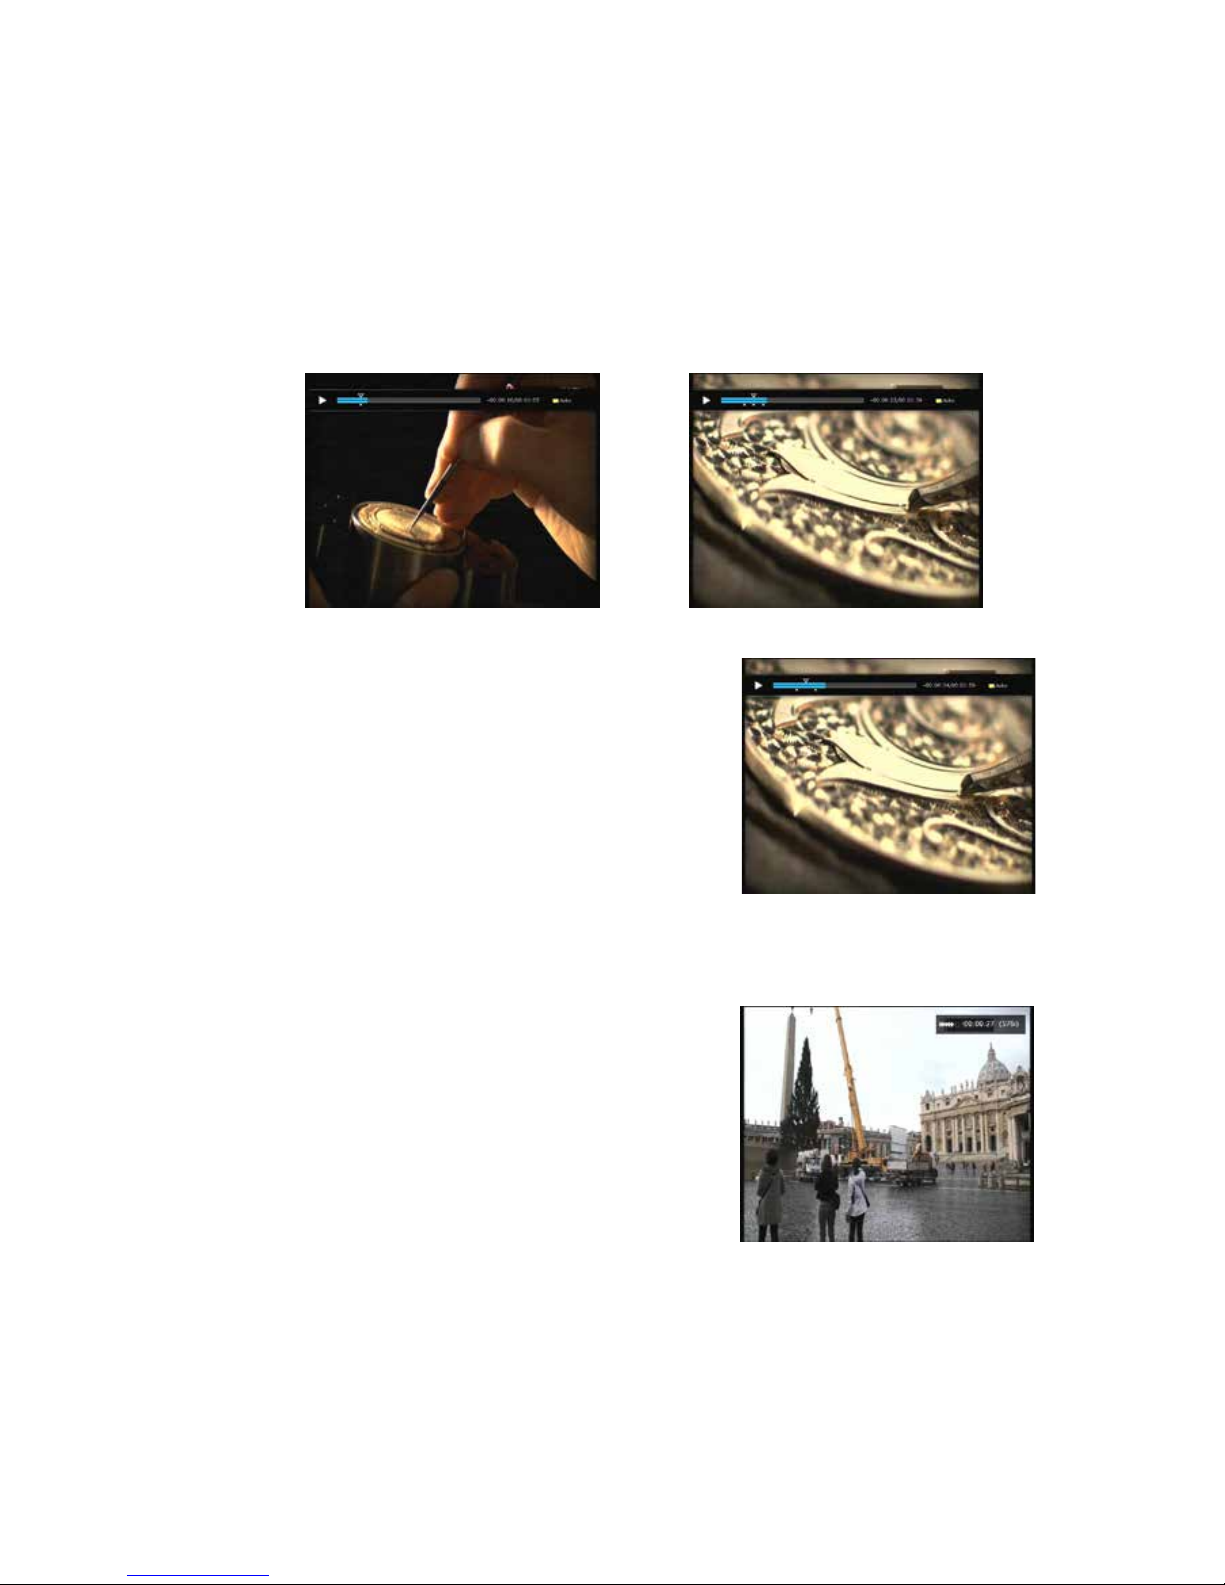
l File Option :
If you press the BLUE button, you can select a option for
Delete, New Folder, Move to Folder, Copy to Device, Rena me,
Lock/Unlock. You can select mu ltiple f i l es together and delete
or move all of them at once .
- Delete : To delete file(s)
- New Folder : To make new folder. Default name of the
folder is “Group#”.
- Move to Folder : To move the selected file(s) to a folder you
want. This option is available if there is no folder.
- Copy to Device : To copy the file(s) t o other storage device.
This opt ion is not avai lable if only one storage device is connected.
- Rename : To rename the folder or file .
- Lock / Unlock : T o lock and/or un lock the file with your PIN Code. You must select a file to do this
option.
3.2 Imported Files
l
If you pre ss RIGHT ARROW button in Recorded Files, you can
go to Import e d F ile menu.
l Locate the file(s) you wish to play with the UP/DOWN button
and press the OK button to enjoy the movie.
l To choose a particular selection of files, select a desired file and
press the RED button. Press the OK button to begin the
selected files.
l You can use the same ‘Select Device’, ‘Sorting’ and ‘File Option’
features as in the Recorded Files.
3.3 Music
l
If you pre ss the RIGHT ARROW button in Imported Fil es, you
can go to Music menu.
l If you press the RECALL button, you can enjoy music with
Shuffl e playback and repea t.
You can use the same ‘Select Device’, ‘Sorting’ and ‘File
Option’ features as in the Recorded Files.
3.4 Photo
l
If you pre ss the RIGHT ARROW button in Music, you can go
to the Image Photo menu.
l If you press the RED butt on or OK button, you can start the
slide show of image files. Pres s the EXIT button to s top slide
show.
- RED button : Auto Slide show
- OK button : Manual S l i de show
l If you pre ss the GREEN button, you can adjust the Slide Time,
Repetit ion, Title , D ow n-scale.
l You can use the same ‘Select Device’, ‘Sorting’ and ‘File
Option’ features as in the Recorded Files.
Page 31
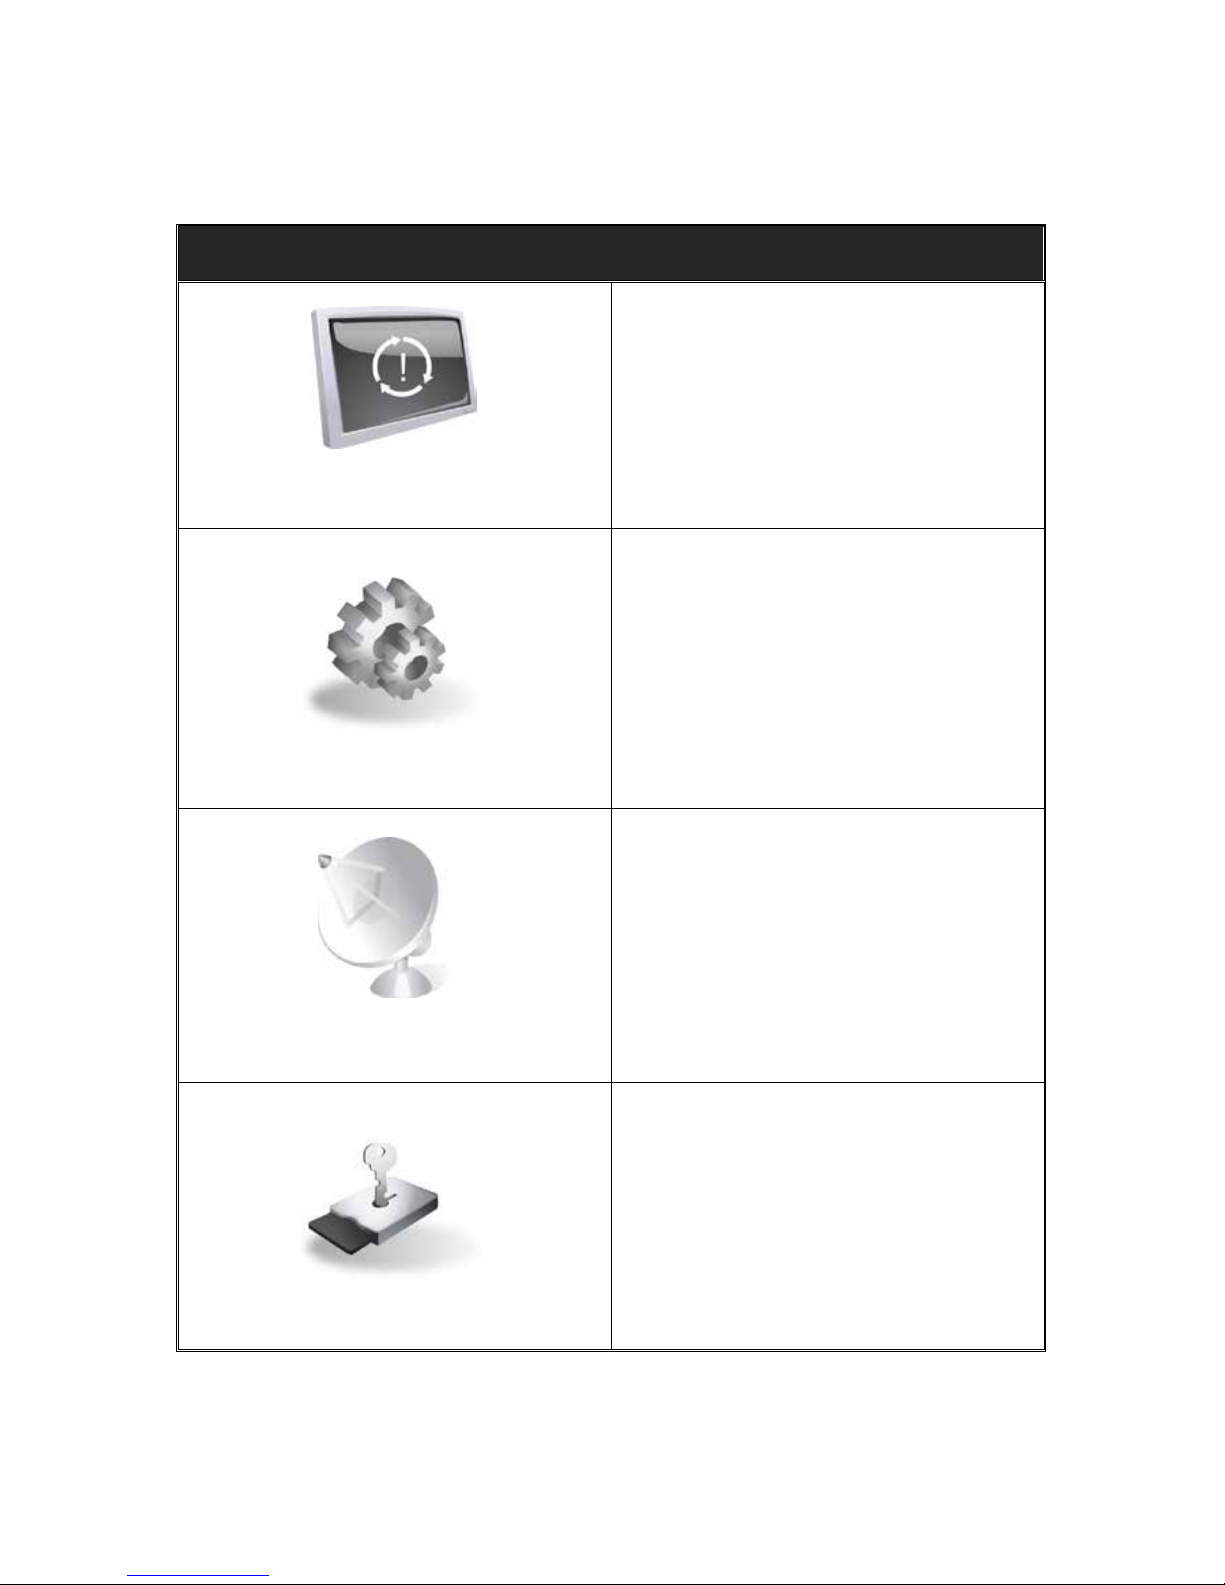
4. Bookmark
l When the Play bar is displayed, you may mo ve to desired t ime and book mark it by pressi ng the RED
button. Bookmark(s) are indi cated with a Green line on the play bar. Also, you may pres s the RED
button to activ a te the play bar to mar k your bookmark(s ).
l When the play bar is on, user can move / jump between the bookmarks by pressing the GREEN
button.
l If you wish to delete an y Bookmarks, go t o that bookmark by
pressing the GREEN button, then press the RED button to
delete t he current bookm a rks.
5. Trick mode
l The user can change the speed of a fast forward play with
FF(Fast Forward) button. Press FF button to change the
speed to x2, x4, x6, and x8. If you once again press FF
button in its x8 mode, it re turns to normal (x1) speed play.
l You can also change rewind speed with the REWIND button.
Press REWIND butt on to change the speed t o x2, x4, x6, and
x8. If you press the REWIND button again in it is at the x8
mode, it returns to normal spee d.
l You may pre ss the PAUSE button at any time to pause a pre-
recorded event. Press the PAUSE button once again to
resume play of the recorded event.
Page 32
Menu Map
Main Menu
System Tools
1. Storage Manager
2. Timer Settings
3. Service List Manager
4. Data Transfe r
Configuration
1. Recording Option
2. Parental Control
3. Display Setting
4. Time Setting
5. Language Setting
6. A/V Output Setting
Installation
1. Dish Setting
2. Positioner Setting
3. Serv ice Search
4. Network Setting
5. System Recovery
6. System Information
Utilities
1. Calculator
2. Calendar
3. CAS
4. Plugin
5. Free TV+
6. Internet TV+
Page 33
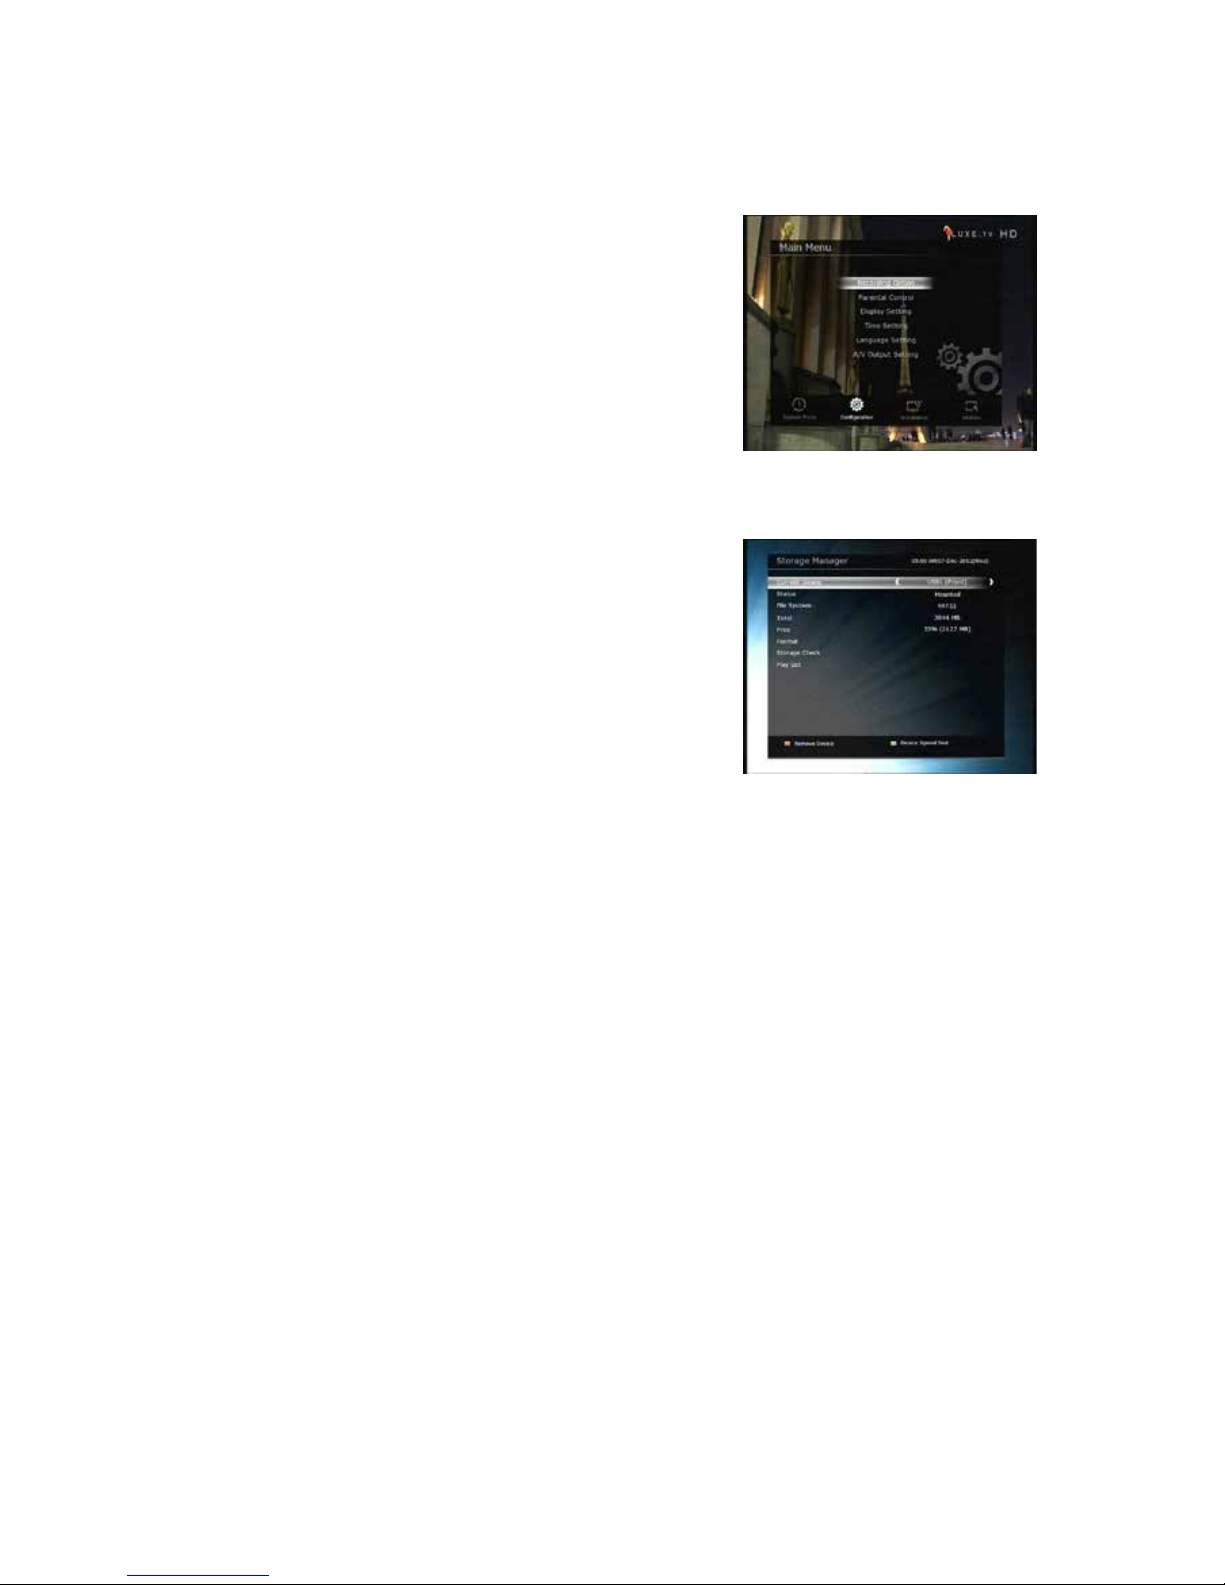
Main Menu of Guide
To display t he men u , pres s the MENU button a t an y time. You can
select the sub menus by using the ARROW buttons.
The selected sub menu becomes highlighted. After selecting
(highlighting) the sub menu you want to access, press the OK
button. If you want to return to the previous menu, press the
MENU button. And if you want to exit from the menu, press the
EXIT button.
1. System Tools
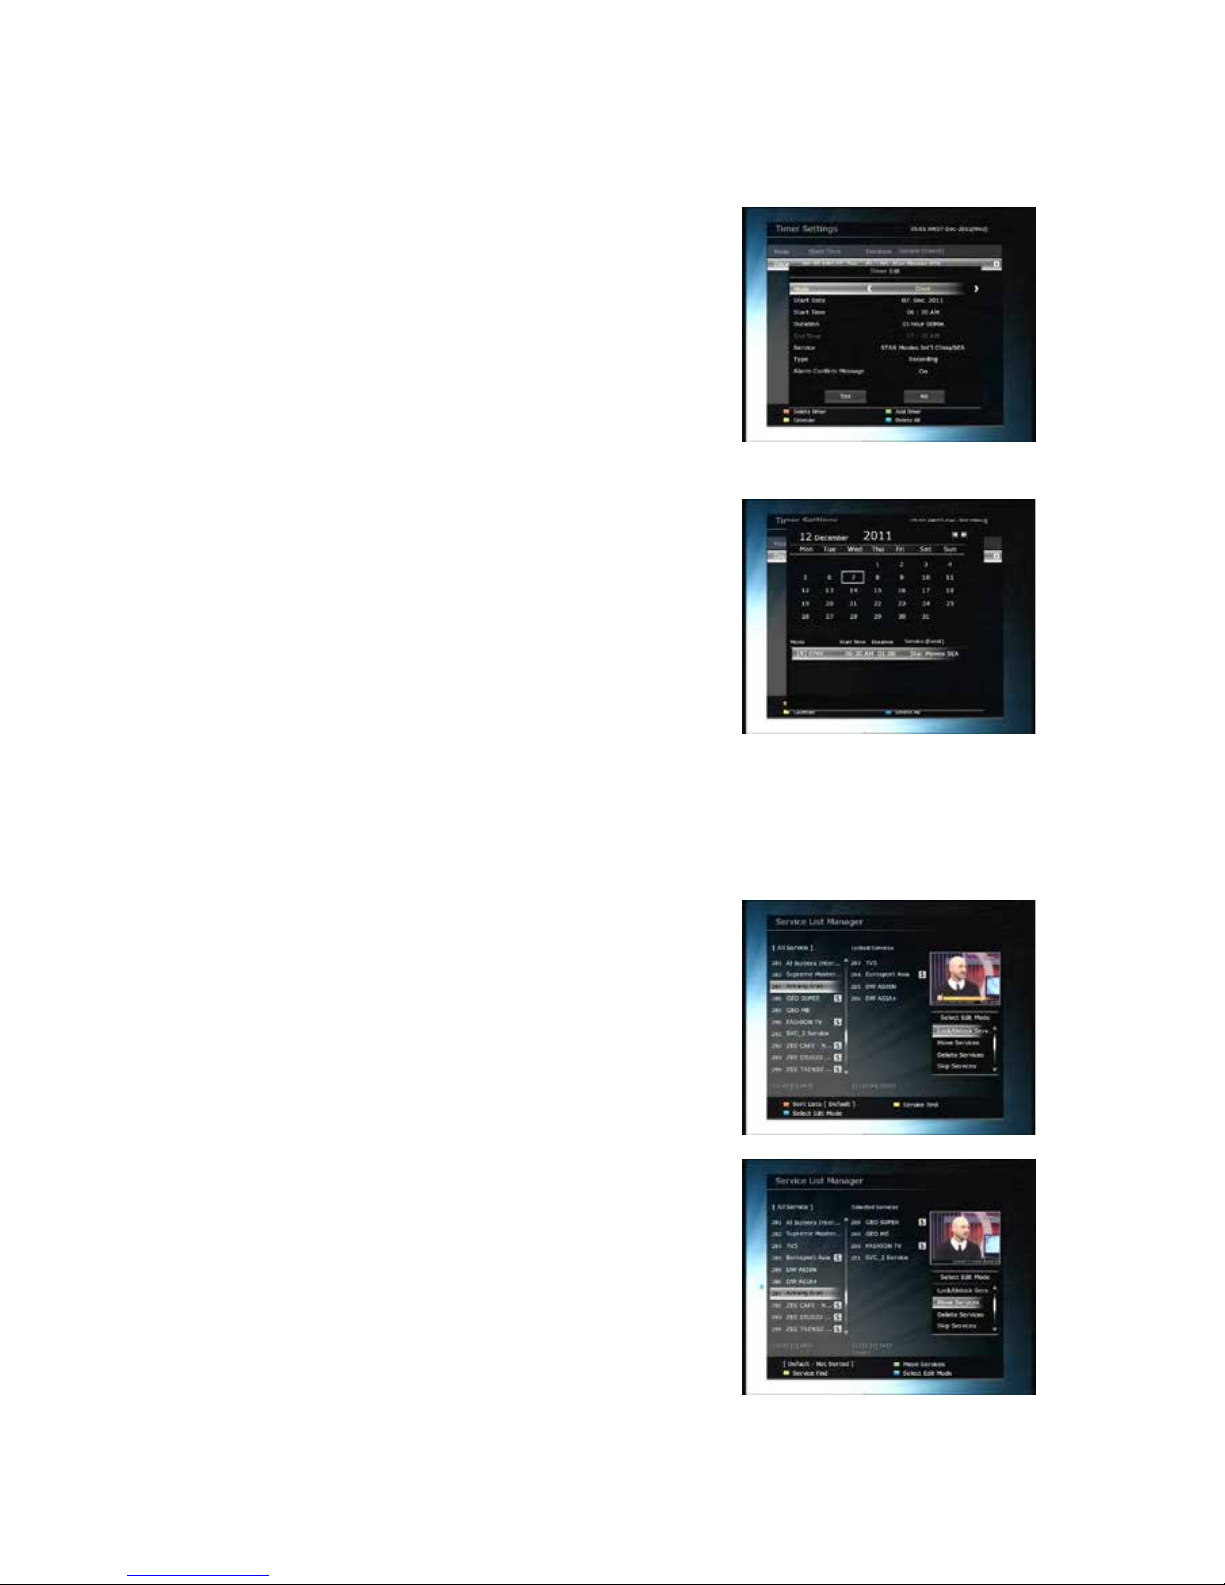
1.1 Storage Manager
The items in this menu allow you to access and control the
storage devices that you want.
l Current Device : Select the storage device you want to access
with the ARROW/OK buttons.
l Status : You can see the information of current connected
devices, such as ‘Mounted’, ‘Not Available’
l File System : It shows the file system of the current device.
You can also select desired file system that you want when you
format the device.
NOTE : NTFS is the recommended file system to format, and it will be also recognized in
Windows system
l Total : Displays total size of current device.
l Free : Displays free size of current device.
l Format : If you pres s the OK button to format current device, the device will be formatted with above
file syste m.
NOTE : When file system is ‘Unknown’, the device will be formatted with ‘NTFS’.
l Storage Check : Check the current connected device.
l Play List : Press OK button to mov e to ‘Play List’ menu directly.
Page 34
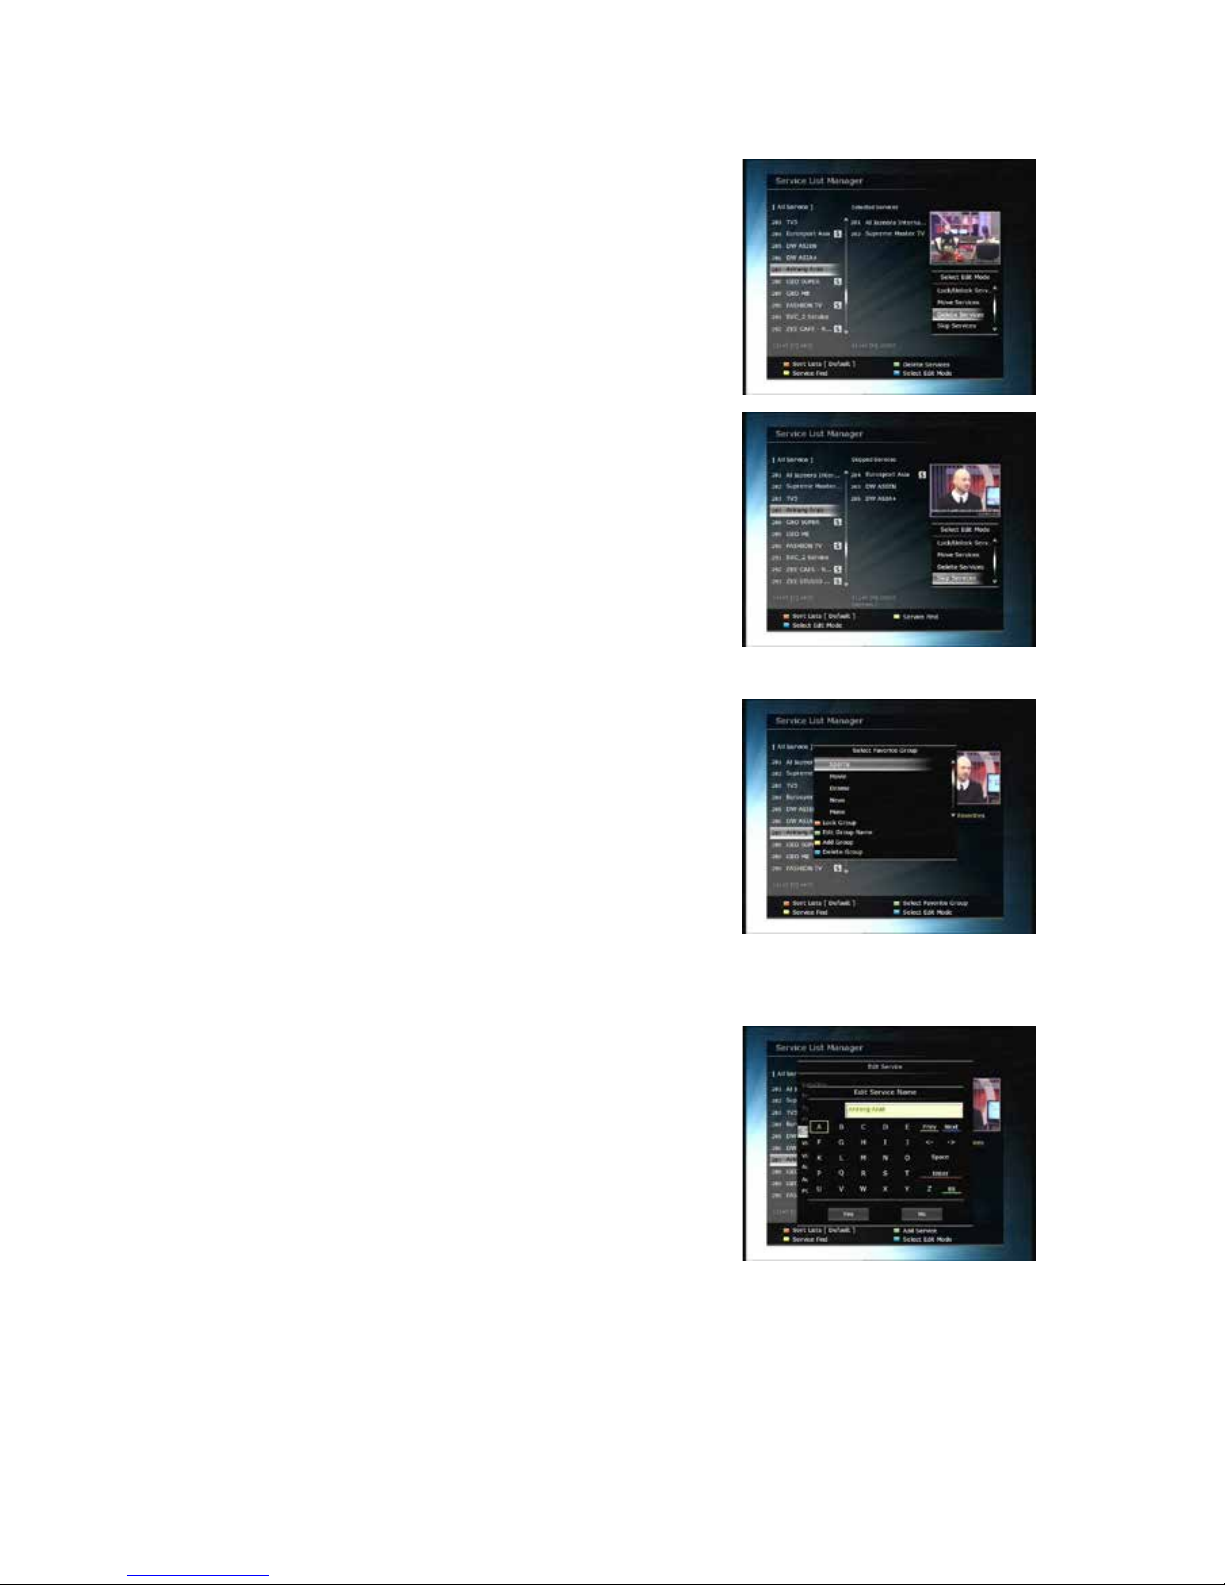
1.2 Timer Settings
Insert a new timer entry or modify an existing timer entry.
l To add new timer entry : Press the GREEN button. Ti m er E di t
window w ill popup. You can set the specific start date, t ime,
duration and service for its reservation . And you can choose
one of Tim er Mod es as 'Once' or 'Daily' or 'Weekly'. Y ou ca n
choose timer operati on type as ‘Recording’ or just to 'Play'.
- If you choose 'Recording', it will start recording at that time.
- If y ou choose 'Play', it will change and tune to the service
that you wish to watch.
- If you set Alarm Confirm Message to ‘On’, alarm message
will activate. Or choose ‘Off’ to disabl e .
l To modify existing timer en tr y : Choose the timer entry which you wish to modi fy a nd press the OK
button.
l To delete an existing timer entry : Choose the timer entry
that you want to delete and press the RED button.
l Press YELLOW button to enter to Calend a r.
l Press BLUE button if you want to delete all the event(s).
NOTE : If you reserve one or more event through the EP G
menu, the reserved event(s) will be added to Timer
Settings automatically.
1.3 Service List Manager
Service List Manager menu will appear when you press the OK
button.
You can select Edit Mode by pressing the BLUE button.
l Lock Services : All service lists will be shown on the left side
of the window, the middle will show the list of service to be
locked. By using the ARROW and OK buttons, you m ay m ove
the chosen service to th e middle window to l ock that service.
Services can also be moved back from the mi ddle to t he left
side to un-lock them.
l Move Servi ces : All service lists will be shown on left side of
the window, services to be moved will be shown on the
middle window. Move the service to the middle window by
using the ARROW and OK buttons, then the middle window
service will be moved to a specified l ocat ion w hen the desired
location is selected from the left window.
Page 35
l Delete Serv ices : All service lists will be shown on left side of
the window. By using the ARROW and OK buttons you may
select services to be deleted by placing them in the middle
window. The press the GREEN button to delete the selected
services.
l Skip Servi ces : All services will be shown on left side of the
window, t he middle window will only show the services that
are chosen to be skipped. By using the ARROW and OK
buttons you may move the selected services from the left to
middle window to s kip them.
l Set F avorite Servic es : Use the ARROW and OK buttons to
select your desired favorite group. Once, favorite group is
chosen, the left side window will show all s ervice lists and the
middle window will only show the selected services of the
favorite group selected. By using the ARROW and OK
buttons, you may ADD the desired services to a favorite g roup
or DELETE any from the favorite group. The name of the
favorite group can be edited by pressing the GREEN button.
You can go to Select Favorite Group by pressing GREEN
button. In this mode, you can select Lock Group / Edit Group
Name / Add Group / Delete Group.
l Edit Services : All services name will be shown on t he left side
of the window.
Move the highlighted bar to the service where you want to
edit its name and press the OK button for Edit Service menu.
Then move the highlighted bar which you want to edit.
You can edit Service Name, Video Stream Type, Video PID,
Audio Stream Type, Audio PID, PCR PID.
Page 36
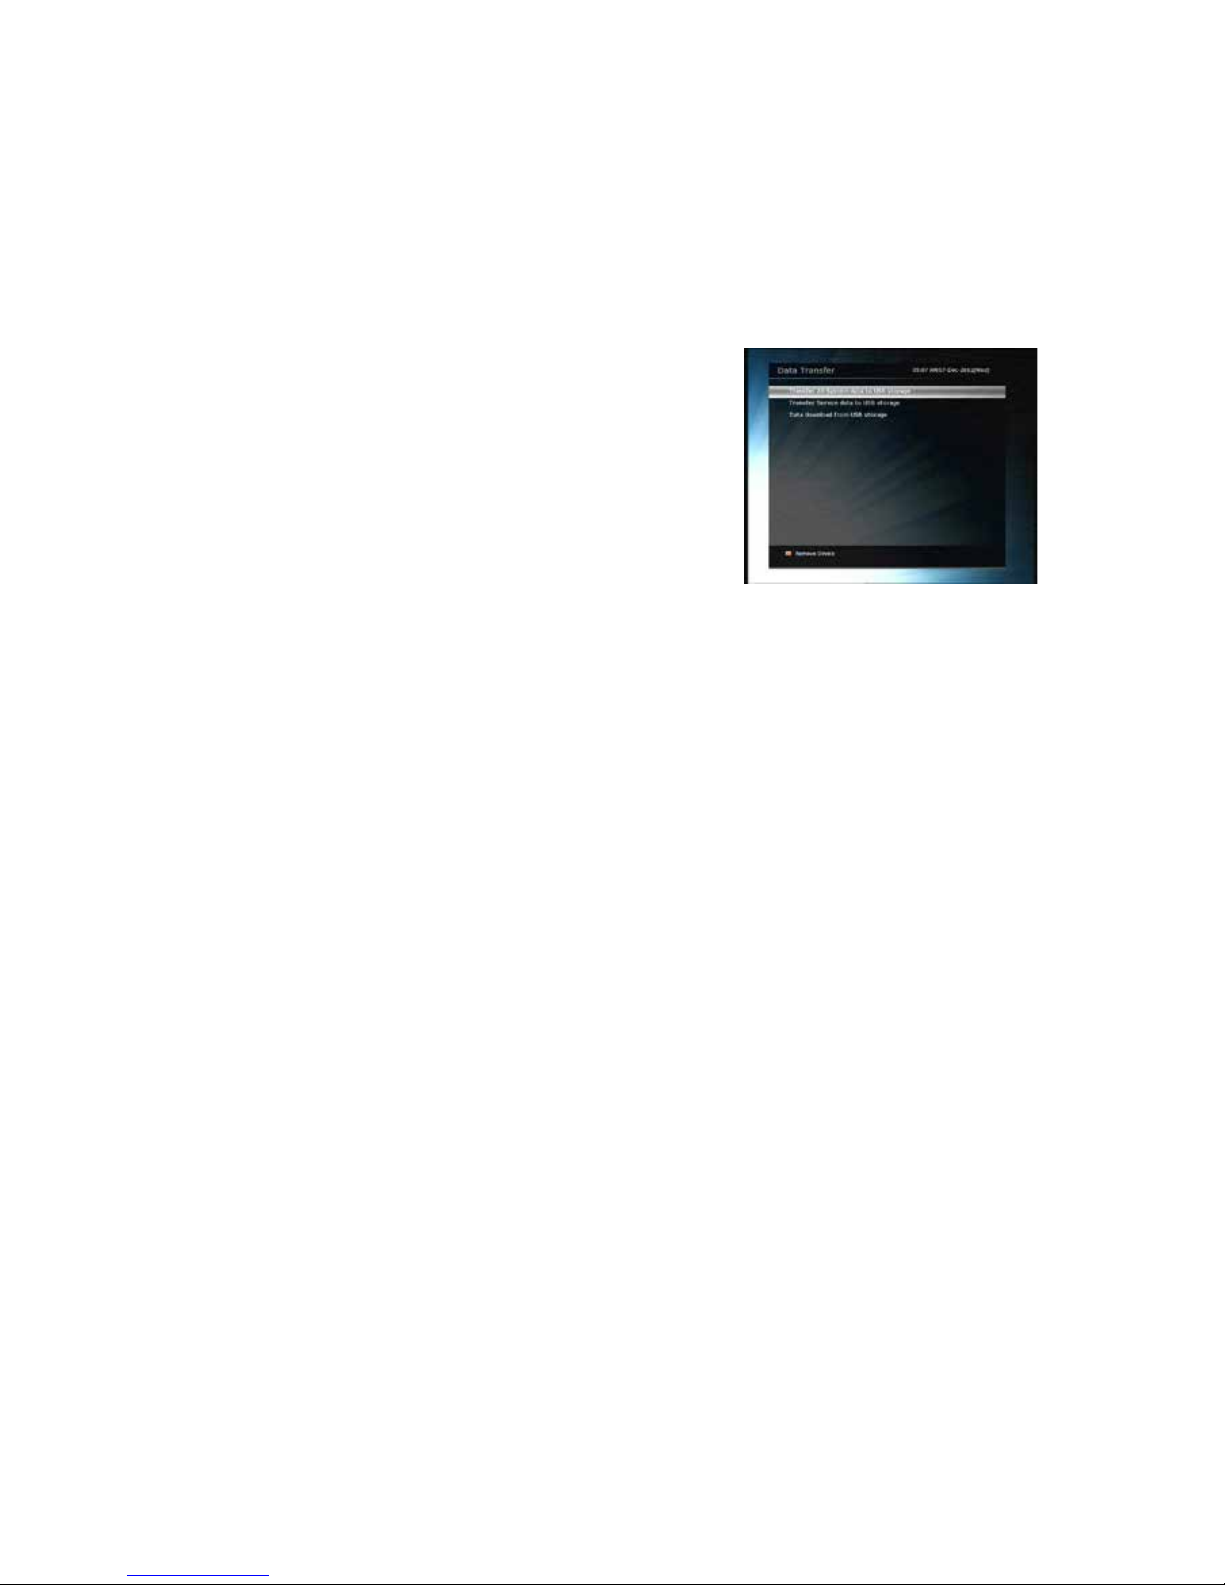
1.4 Data Transfer
When the data transfer task is i n process, the Front USB slot is set to a default device slot. But, if no
USB device is connected o n a f ron t US B s lot, then the Rear USB slot is set as a device to be used for the
data transfer process.
NOTE : If no USB device is connected on either two (Front & Rear) USB slots, then a
Menu item will not be available.
l Transfer all System data to USB storage : If you want to
transfer an d use BOTH of the cu rrent system parameters and
service data in the future, this menu will allow you to s tore all
data to your USB device. Press OK button t o store all current
data to an external USB storage.
l Transfer Service data to USB s torage : If you want to transfer
and u se ONLY the service data in the future, this menu allows
you to store current service data. Press the OK button to store
the current service data to your external USB storage. The
service data can also be viewed and edited on a PC with an appropriate editor (DrEdit ) for the file
saved.
l Data downlo ad from USB s torage device : This menu allows you to download the saved data from
the externa l USB st orag e to your STB. Press OK button to download data.
Page 37
2. Configuration
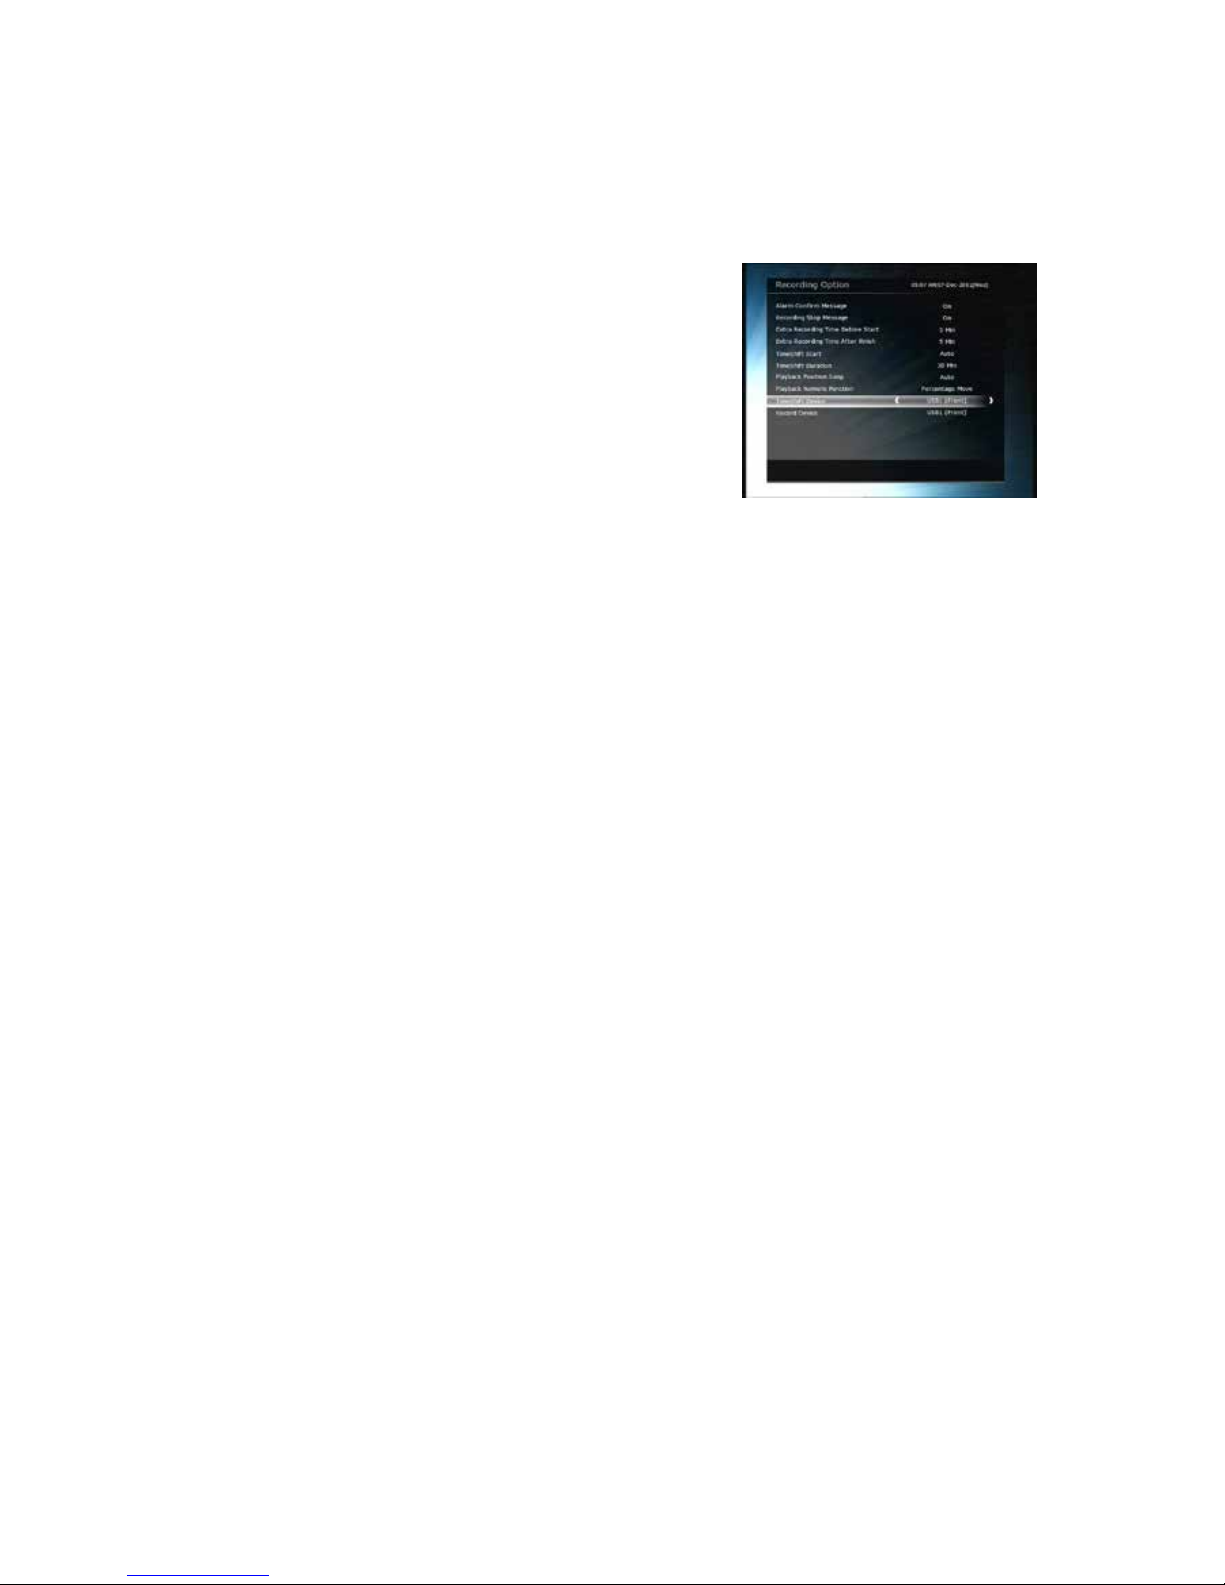
2.1 Recording Option
l Alarm Confirm Message : Turn ‘ON’ this Alarm message to
indicate and show the alert pop-up message when there is a
reserved recording event. The alert message will show 3
minutes before the starting time of the reserved recording
event.
l Recording Stop Message :
- Set ' On' : When you press the STOP bu tton whi le recordin g,
then a confirmation window is display ed.
- Set ' Off' : When you press the STOP butt on w hi le recor di ng ,
the STB will stop the recording process immediately /
instantly without asking the addit ional confirmation from the user.
l Extra Recording Time Before(Start) & After(Finish) :
- You can add an extra recording time before start / after finish (1min /2min /3min /4min /5min/
10min/ 15min/ off) to scheduled recording events. If you set an ext ra recordin g tim e by using the
ARROW and OK buttons, the scheduled recording event will have a ‘Start’ / ‘Finish’ time of
additional recording t ime added to the basic event. Th is option only w orks for real tim e events.
But, when you schedule a service recording in the Timer Settings menu, this option has no affect.
l TimeShift Start : You can choos e the met h od of TimeShift function.
- Auto : TimeShift function is automatically activated.
- Off : TimeShift function will be disabled.
- Manual : TimeShift will be activated when the Pause key is pressed.
l TimeShift Du ration : You can adjust TimeShift duration in 30 minute intervals. (Off /30min /60min
/90min /120min). This duration defines the maximum time length of the TimeShift as long as the
storage device has en ough memory space left.
l Playback Position Jump : W he n y ou use LEFT/RIGHT ARROW button to move back/forward through
the recorded time bar, You can select the time intervals. (10 Sec / 30 Sec / 1Min / 2 Min / 4 Min / 10
Min / Auto).
l Playback N umeric Function : T his selecti on of functi on defines th e operation ty pe of the NUMERIC
buttons of your remote control unit (RCU) while the ‘Playbar’ is displayed on the screen.
- Comm ercial Skip : When the NUMERIC buttons (1 to 9) are pressed the video wil l move forward
according t o t he NUMERIC buttons pressed. For exampl e ; wh en ‘1’ i s pres sed, 1 min move forw ard ,
‘5’ is press ed, 5m in mov e forward f rom cu rrent posi ti on. Wh en ‘0’ is pressed, it will move back for
1minute.
- Percentage Mov e : When the NUMERIC buttons are pressed, the video will move to the location of
that % percentage of numbers pressed. For example ; if you press ‘10’, you wi ll m ove to the 10%
location of the total video length. If you press ‘99’, you will move to the end of the video clip
recorded.
l TimeShift Device : You can select the TimeShift Device you wish to use.
- USB1(Front), USB2( R ea r), Networ k D rive.
l Record Device : You can select the Recording device you wish to use.
- USB1(Front), USB2( R ea r) , N e twork Driv e.
Page 38
2.2 Parental Control
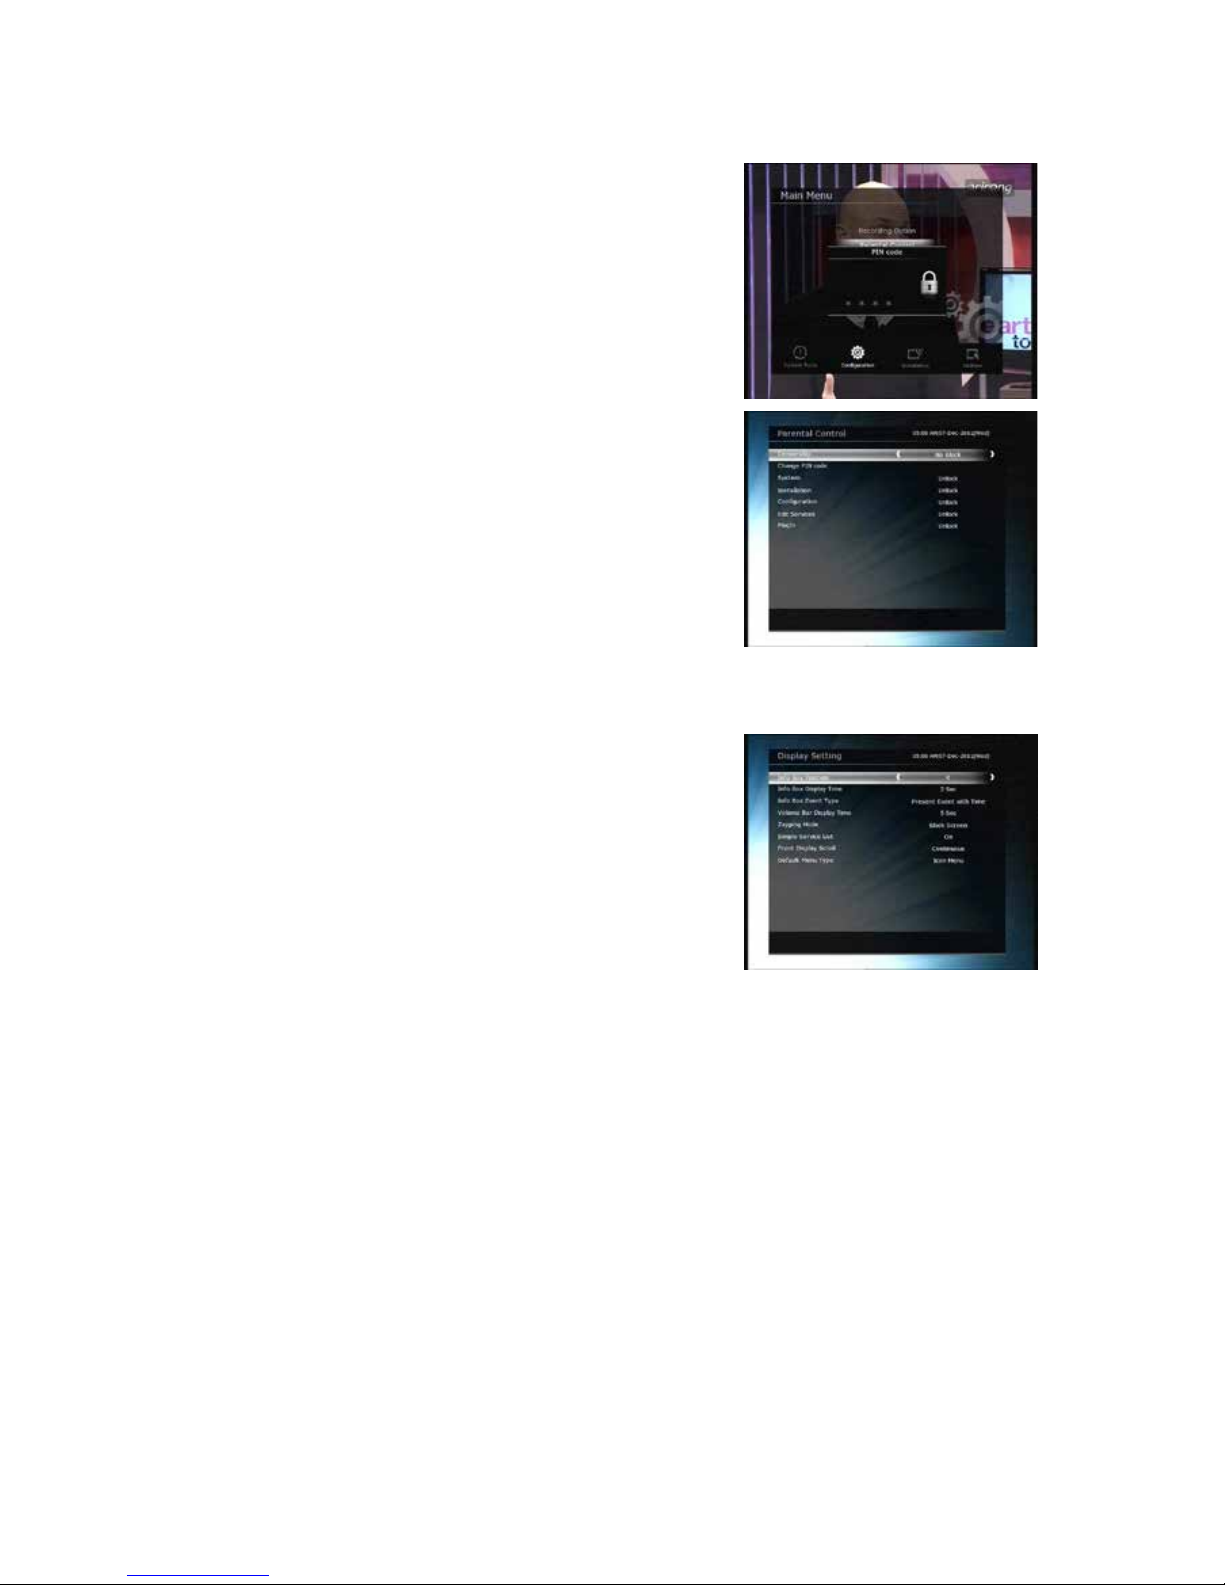
User’s access rights to a service and programs are cont rolled by
a 4-digit secret code that is defined by the user. Whenever you
attempt to access the parental cont rol menu , a pop-up wind ow
will ask you to inpu t a PIN code. (I f necessary, you can change
it.)
NOTE : The default PIN code is ‘0000’
l Censorship : S et the parental guidance rating of highlighted
censorship classification. The parental level is given as an agebased number.
l Change Pin c ode : To change your PIN code, input the new
PIN code us ing the NUMERIC buttons. To verify the new PIN
code, input the new PIN code again.
l System : Set the access rights to t he System menu.
l Installation : Set the access rights to the Installation menu .
l Configuration :
Set the ac c e s s rights to the Configuration menu.
l Edit Service : Set the access rights to the Edit me nu.
l Plugin : Plugin Set the access rights to the Plugin menu.
2.3 Display Setting
l
Info Box position : Set a position of the information window.
l Info Box Display Time : Set the time duration of the
information window being displayed on the screen after
changing services.
l Info Box E vent Type : Set the event type that display in left
bottom part of the inform a tion window.
- Present Event with Time :
Display the present event name with time. (Default)
- Present and Follow Event :
Display the present and following event name.
l Volume Bar Display Time : Set the time duration of the
volume bar being displayed on the screen after changing audio volumes.
l EPG Time scale : You can set the time scale in hours which is displayed for a program in t he EPG
window.
l Zapping Mode : You can set the zappi ng mode as follows (zapping mode is when changing services).
- Black screen : Display a black screen when changing between services.
- Freeze : Display the last still pictu re when changing services.
l Simple Service List : To set the simple service list ‘On’ to display or ‘Off ‘.
- On : Press UP/DOWN ARROW button to display the simple service list while watching live TV.
- Off : If you set Off, channel Up/Down when you press UP/DOWN ARROW button.
l Front LED Lighting Time : You can adjust the lighting time of th e front LED.
l Front LED Brightness : You can adjust brightness of the front LED with 4 steps. By setting ‘off’ this
option, wi ll turn off the front LED lighting.
Page 39
2.4 Time Setting
l
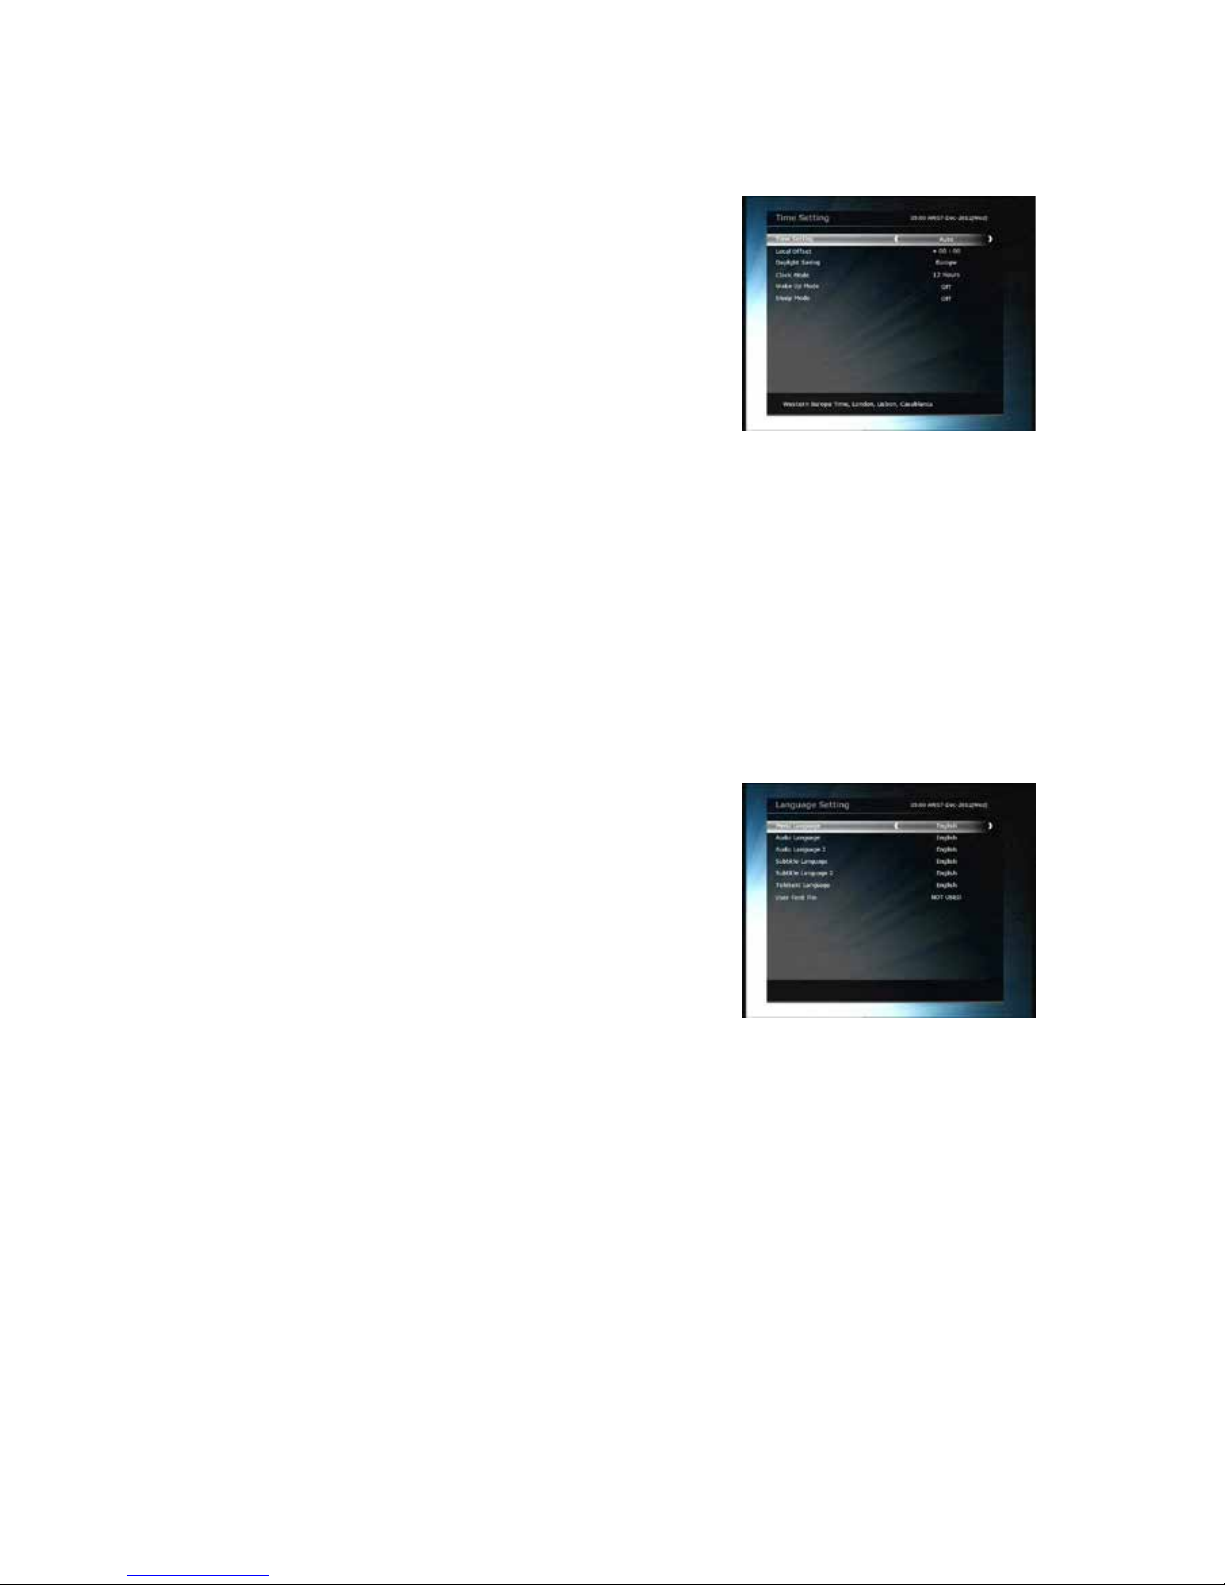
Time Setting : To set the current time, you can use two
modes; Auto or Manual.
l Local Of fset : Enter the offset value by using the standardized
informat i on of current serv i ce are a .
l Daylight Sav ing : If you want to apply daylight saving, select
the counter by using the ARROW buttons.
l Clock Mode : Select th e type of clock display (12 Hours or 24
Hours) using ARROW buttons.
l Wake Up Mode : Enter the time for the receiver to
automatically power ON. And you can choose one of Wake Up Mode as ‘off’ or ‘Once’ or ‘Daily’ or
‘Weekly’.
- Wake Up Date : Select the date when the STB is turn on . Press the OK button to display calendar.
- Wake Up Days : Select a day of the week when the STB is turn on.
- Wake Up Time : Enter the wake up time of the STB using the NUMERIC buttons.
- Wake Up S ervice : Select the service when the S TB is turn on. Press the OK butt on to display the
service list.
l Sleep Mode : Enter the time for the receiver to automatically switch OFF and go to st andby mode .
And you can choose one of the Wake Up Mode as ‘off’ or ‘Once’ or ‘Daily’ or ‘Weekly’.
- Sleep Date : Select t h e date when the STB is turn off. Press the OK button to display the calendar.
- Sleep Days : Select a day of the week when STB is turn off.
- Sleep Time : E nter the turn-off time of the STB using the NUMERIC buttons.
2.5 Language Setting
l
Menu Language : Select the desired menu language by
using the ARROW buttons.
NOTE : The menu and operation languages can be
changed depending on the country sold. Available
languages are subject to change without prior
notice.
l Audio Language : Select the default language for the audio
when changing services. If no other language is provided,
then the default language of current will be automatically
selected.
l Subtitle Language : Select the default language for subtitle when changing service.
l Teletext Language : Select the default language for Teletext.
l User Font file : Select a font you want to use.
NOTE : To show and use the User Font, please install a desired font file(*.ttf) to the
/Var/Font directory(folder) in you r P C which is connected with your receiver(STB)
by network. Then press LEFT/RIGHT button to select a font and press OK bu tton .
Page 40

2.6 A/V Output Setting
l
TV Type : Select the TV types.(PAL/NTSC/Auto) In Auto
mode, the STB is automatically selected to NTSC or PAL
accordingly to the service played.
l TV Aspect Ratio : Select the aspect ratio of TV which is
connected t o the STB (4:3/16:9). This menu must b e set prior
to selecting the Display Forma t function.
l Display Resolution : Select the Display Resolution of the
screen by using ARROW or OK bu tton. You can also chan ge
the resolution with Resolution button in the remote. Each
time you press the Resolution button, the resolution changes in the following sequence: 576i > 576p
> 720p > 1080i > 1080p.
NOTE : Please note that your TV may not show a picture depending on the Display Resolution set by
your STB as well as if set to PAL when NTSC is required or vice v ersa. If you set the Display
Resolution as HD(more than 576p), your TV cannot display anything when the TV is
connected to the Composite Video output of the STB. In case of HDMI, your TV can display a
picture for all of the resolution settings of the STB. But it is also possible that your TV may not
display a pic tur e with 576i, because some HDTV’s does not support 576i.
l Display Format : In case of a 4:3 ratio TV set, you can select Letter Box or Pan&Scan. In case of a 16:9
ratio TV set, you can select Pillar Box or Full Screen. In case of a 14:9, 16:10 ratio TV set, you can select
Pillar Box , Pan&Scan or Full Screen.
l HDMI Dolby Digital : Set the Dolby Digital mode 'On' or 'Off' in status of HDMI output.
l Dolby Di gital Defau lt : Set the Dolby Digital Default mode 'On' or 'Off'. If you set 'On', Dolby Audi o
will play on the service that support Dolby Audio.
l Sound Mode : Set the audio mode output among the RCA jack, optical SPDIF and HDMI
(Stereo/Mono/Left/Right).
l Audio Sync Delay : To adjust Audio Sync. You can adjust from 0ms to 400ms.
Page 41
3. Installation
3.1 Dish Setting
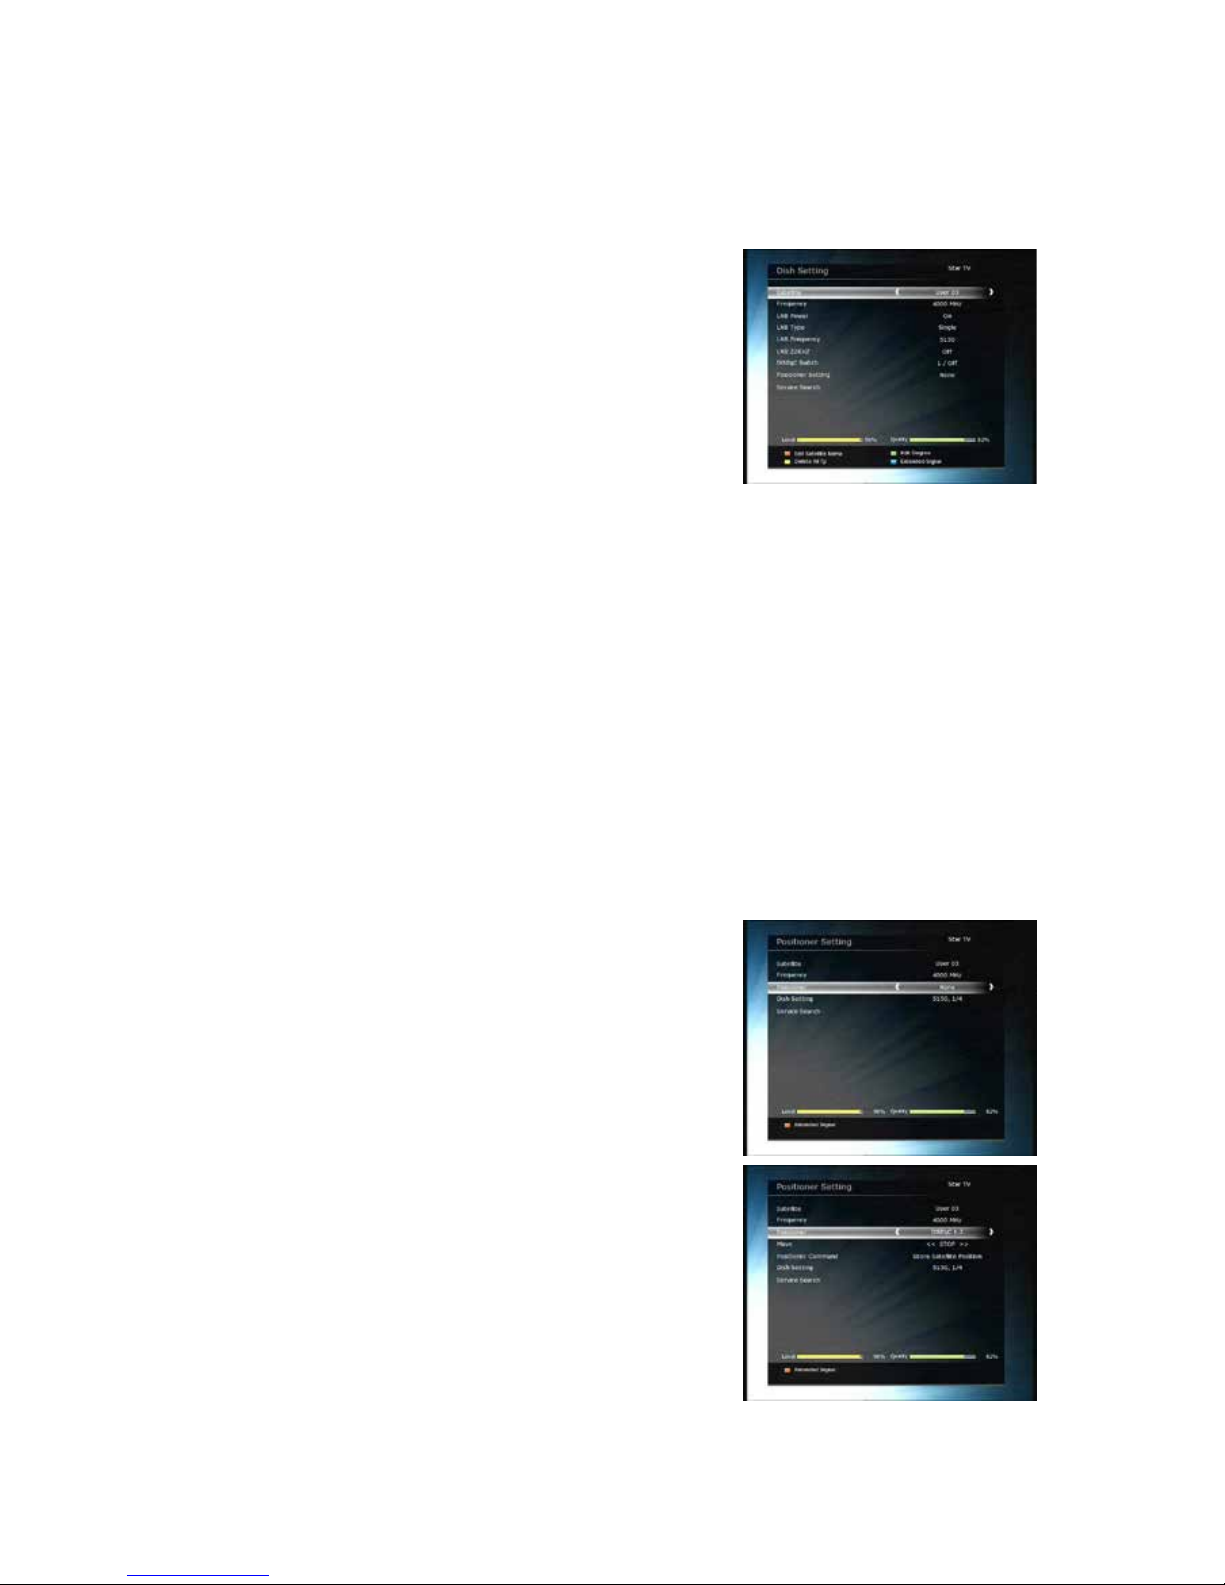
Select the satellite/antenna and LNB settings for service sear
ch. The values that are set in this menu will be available fo
r selection in other service searching menus.
l Satellite : Select the satellite which you wan t to do a search
for.
- Press the LEFT/RIGHT ARROW button to select the satellite.
- If you press the OK button, the entire satellite list will be
displayed.
- Select the desired satellite name to search.
- If the desired satellite name is not listed then select User
Defined.
l Frequency : Select the satellite frequency which you want to use for checking the signal.
l LNB Power : Select the LNB power on or off.
l LNB Type : S el ect the LNB type.
l LNB Frequency : Select the local oscillator (L.O.). frequency that is specified for the LNB used..
- Use the LEFT/RIGHT ARROW buttons to select the LNB fr e q ue nc y.
- If the requ ired LNB frequency is not listed, then enter the frequency manually using the NUMERIC
buttons.
- When you sel ect Universal LNB type, both 9750 and 10600 are supported at the same time. And
then the LNB 22KHz setting is disabled.
l LNB 22K Hz : When you use a separate coax 22 KHz tone switch box, make the 22 KHz tone switch
enabled or disabled to select the input you desire of the tone switch.
l DiSEqC Switch : If you use DiSEqC 1.0 or DiSEqC 1.1 switch, select one of the DiSEqC inpu ts.
l Service Search : Press the OK button to move to the Search Menu
3.2 Positioner Setting
l Satellite : Select the satellite which you want t o search for the
Service.
- Press the LEFT/RIGHT ARROW button to select the satellite.
- If y ou press the OK button, a complete sat ellit e li st will be
displayed.
- Select the wanted satellite name.
- If the desired satellite name is not listed then select User
Defined.
l Freq uency : Select the satellite frequency you want to use to
check for a si gnal.
l Positioner : Select the positioner.
- None : (No Positioner)
- Using DiSEqC 1.2 :
Move : To move the dish, press LEFT/RIGHT button.
Fine Move : To move the dish in smaller steps, press the
LEFT/RIGHT ARROW button.
Step : Se t to positioner movin g steps as 1, 2, 3, 4
Positioner Command : To use various positioner
commands, press the OK button. Th en, available pos itioner
commands will appear.
Page 42
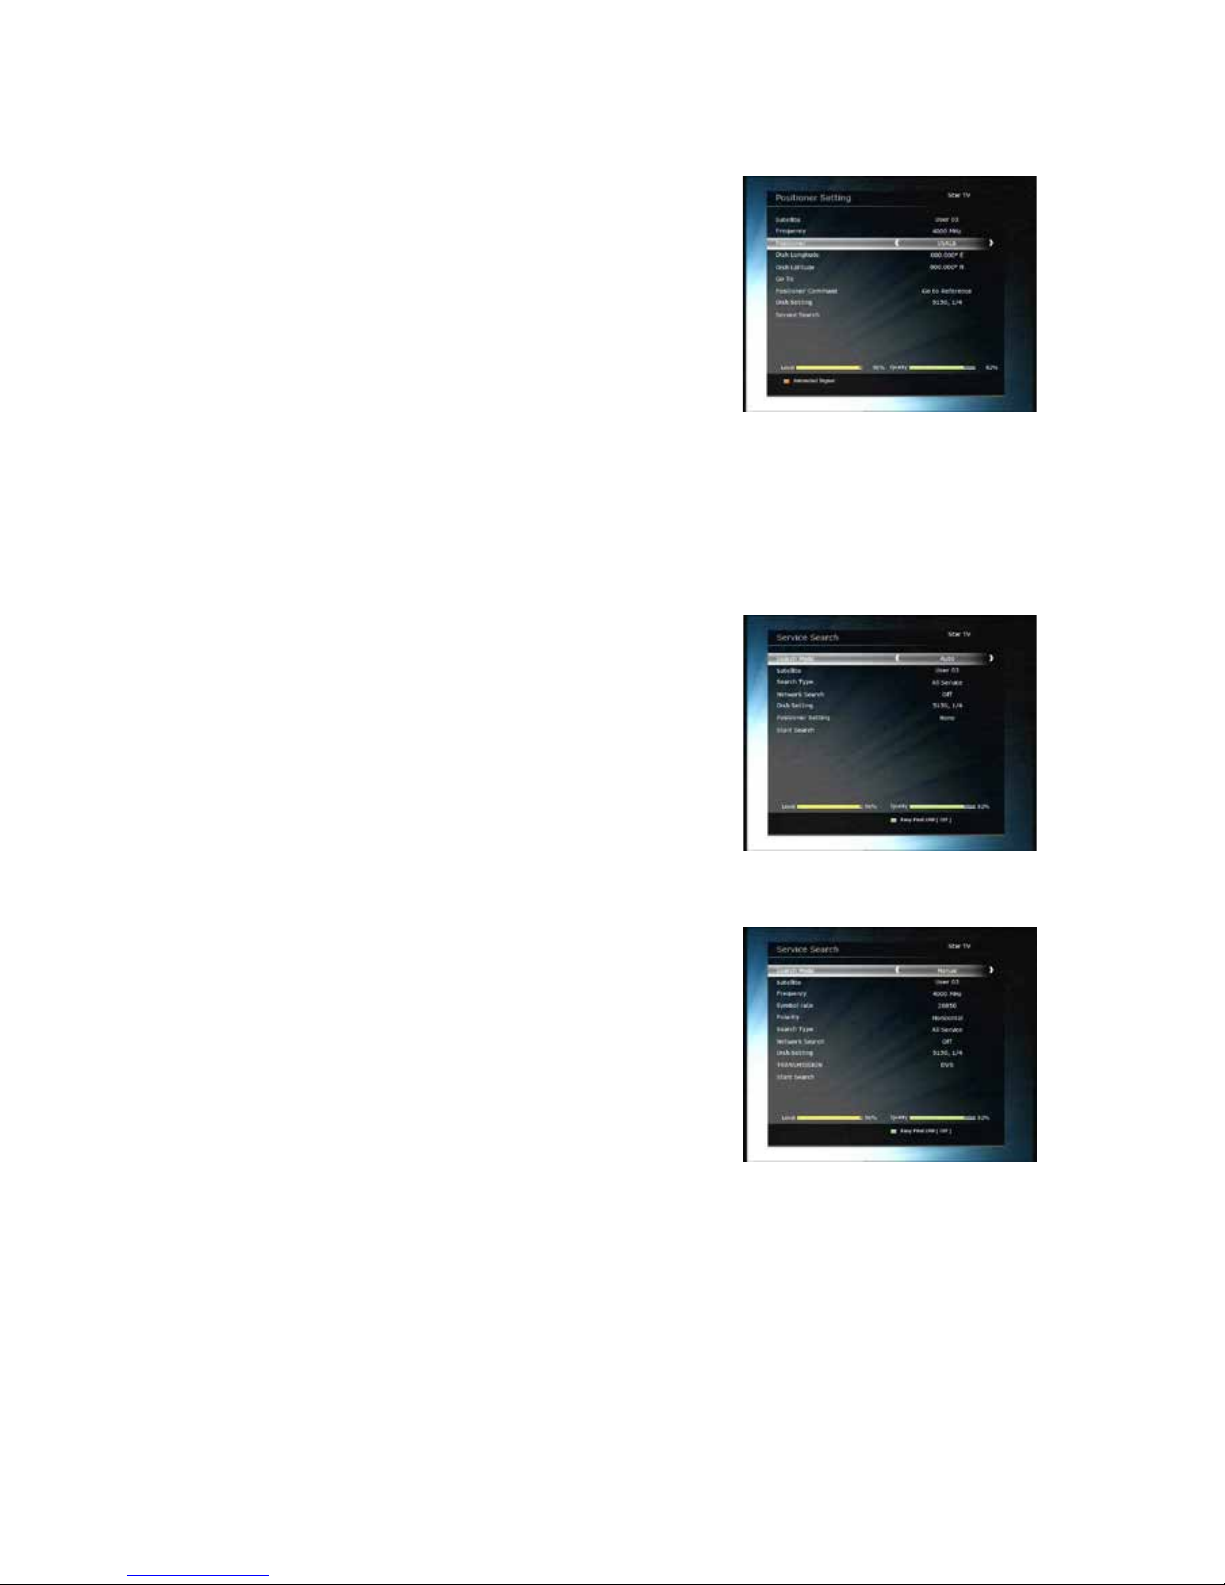
- Using USALS :
Dish Longitude : Enter the longitude position of the
antenna using the NUMERIC buttons.
Dish Latitude : Enter the latitude using the NUMERIC
buttons.
Go To : Press the OK button to rotate the dish to the
selected antenna position.
Positioner Command : To use various positioner
commands, press the OK button. Th en, available posi tioner
commands will appear.
l Dish Setting : Press the OK button to move to Dish Setting
menu directly.
l Service Search : Press the OK button to move to Service Search menu directly.
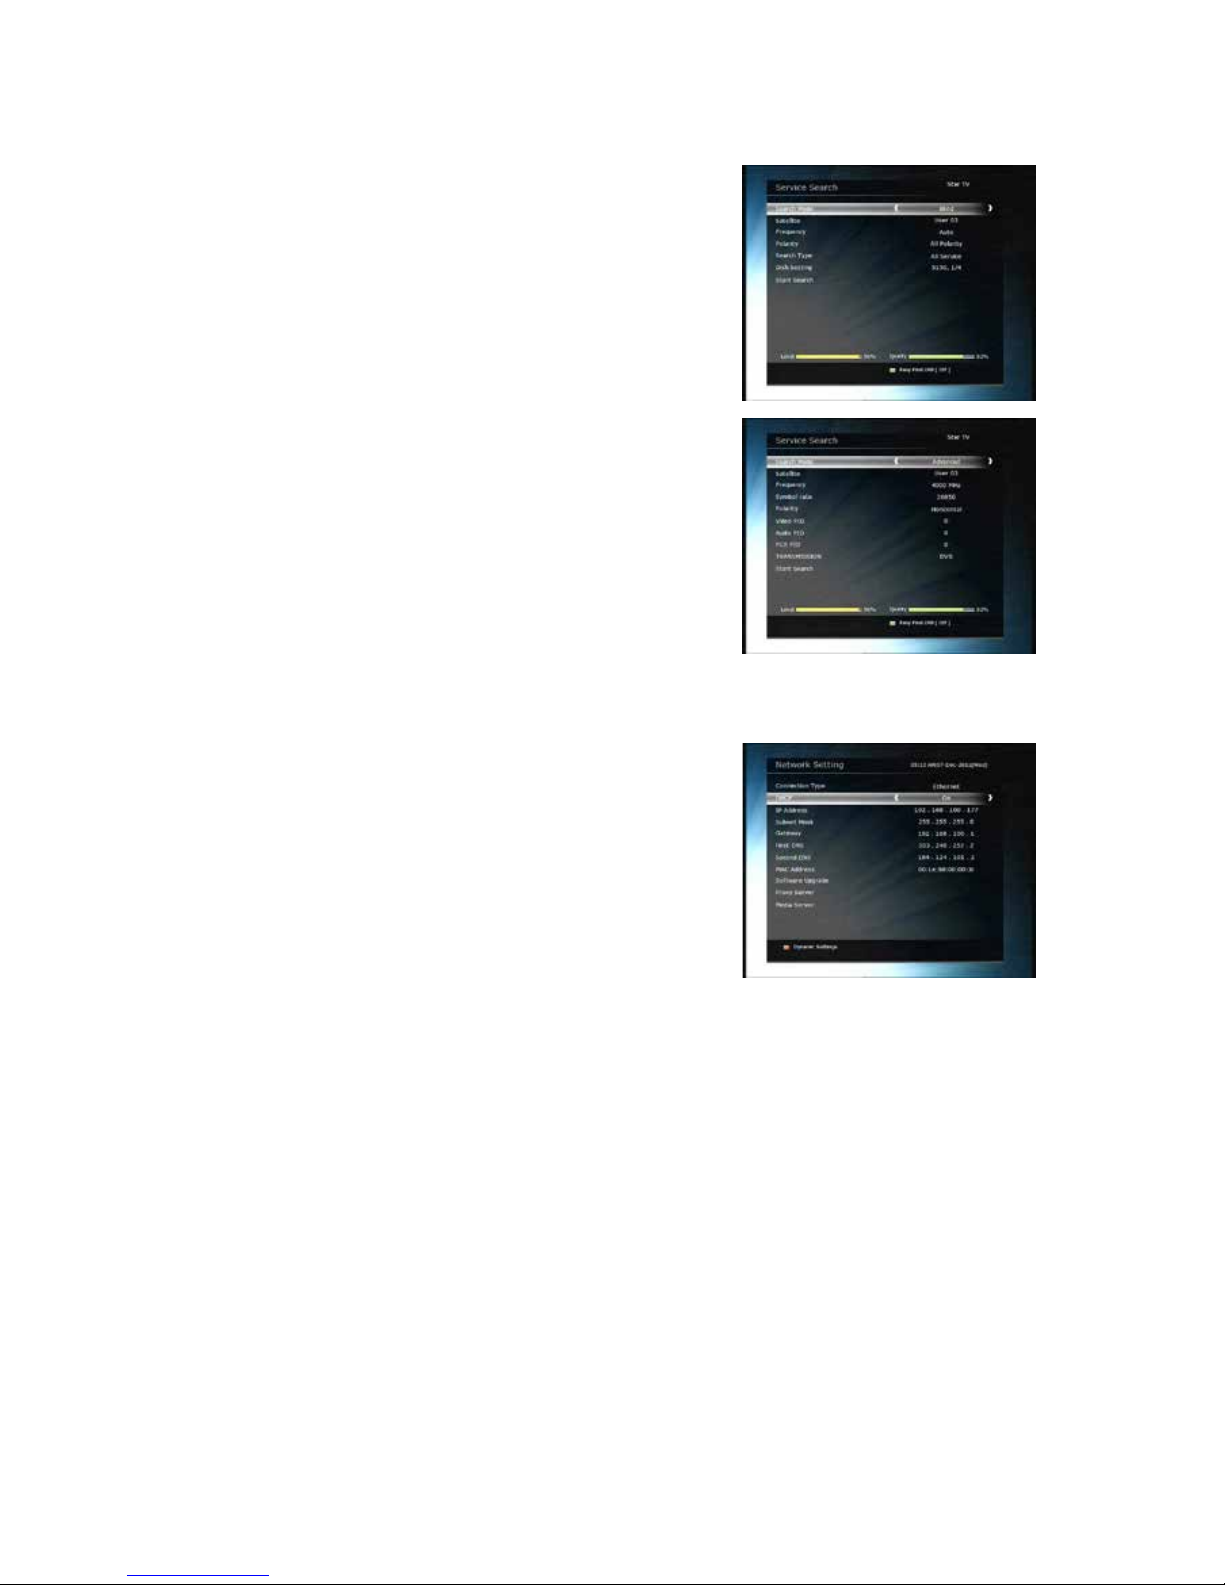
3.3 Service Search
l Auto Search Mode :
- Satellite : Press the OK butt on to select the target satellite
to be searched.
- Search Type : Sel ect the search type.
- Network Search : You can se lect Of f or On . Whe n y ou s ele ct
‘On’, you can find more transponders using the home
network. As i t refers to NIT durin g searching, if there i s the
frequency information of other transponder, it searches the
other transponder besides the transponder that the user
inputs.
- Time Ca libration : You can sel ect ‘Simple’, ‘Full’ and ‘Off’ to
get TDT(Time Data Table) from each TP
- Dish Setting : Press the OK button to move to Dish Setting menu directly.
- Positioner Setting : Press the OK button to move to the Positioner Setting menu directly.
- Start Search : Press the OK button to start search.
l Manual Search Mode :
- Satellite : Press the OK butt on to select the target satellite
for search.
- Frequency : Select the frequency from the list to search.
- Symbol rate : Enter the symbol rate using the NUMERIC
buttons.
- Polarity : Select the polar ity. (Vertical/Horizontal)
- Search Type : Sel ect the search type.
- Network Search : You can sel ect Off or On . Whe n you se le ct
‘On’, you can find more transponders using the home
network. As it refers to NIT during searching, if there is the frequency information of other
transponder, it searches the other transponder besides the transponder t hat the user inputs.
- Dish Setting : Press the OK button to move to the Dish Setting menu directly.
- Transmission : You can select ‘DVB’ and ‘DVB-S2’
- Start Search : Press the OK button to start a search
Page 43
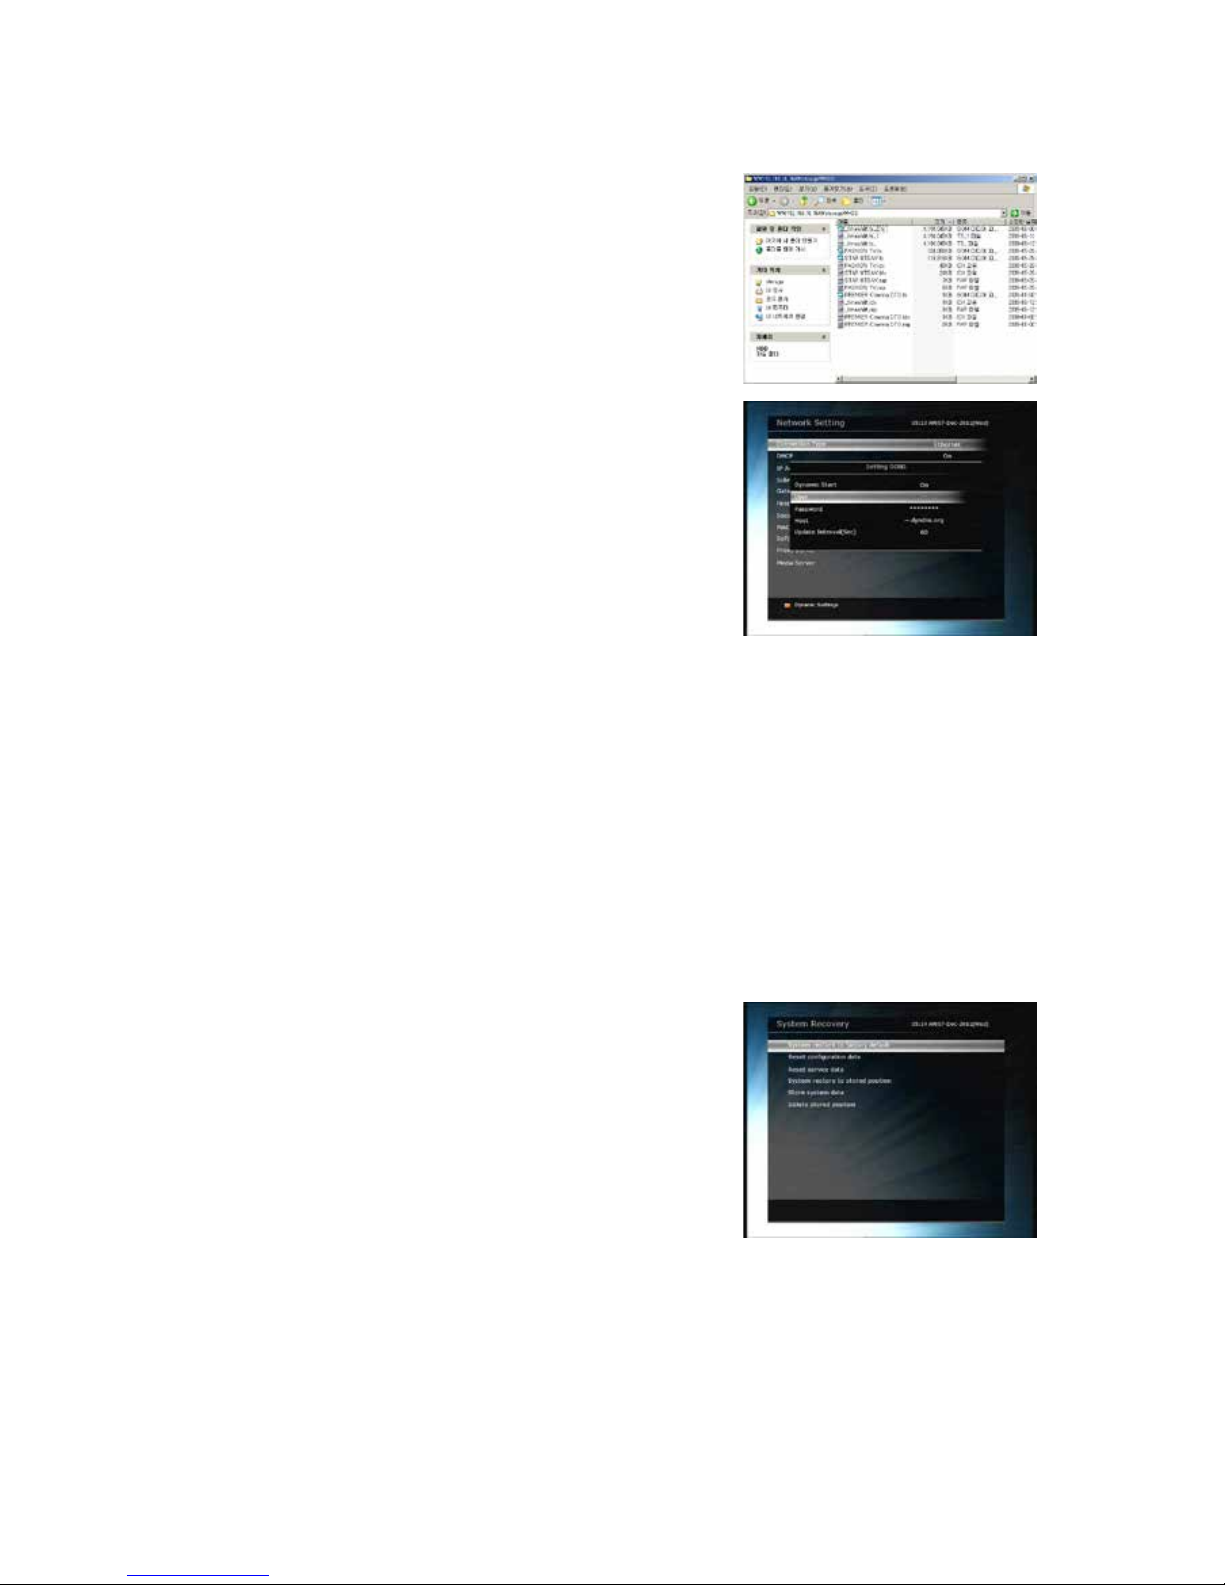
l Blind Search Mode :
- Satellite : Press the OK button to select mul tiple satellites.
- Frequency : Set Auto to search whole frequency, Set
Manual to search only desired frequency.
-
Polarity :
Select the polarity.
(
All Polarity/Vertical/Horizontal
)
- Search Type : Sel ect the search type.
- Dish Setting : Press the OK button to move to the Dish
Setting menu directly.
- Start Search : Press the OK button to start a search.
l Advanced Search Mode :
- Satellite : Press the OK button to select the target satellite
for search.
- Frequency : Select the frequency from the list to se a r ch.
- Sy mbol rate : Enter the symbol rate by using the NUMERIC
buttons.
- Polarity : Select the polar ity. (Vertical/Horizontal)
- Video PID : E nter th e video PID using the NUMERIC buttons.
- Audio PID : Enter the audio PID using the NUMERIC
buttons.
- PCR PID : Ent er the PCR PID using the NUMERIC buttons.
- Transmission : You can select ‘DVB’ and ‘DVB-S2’
- Start Search : Press the OK button to start a search.
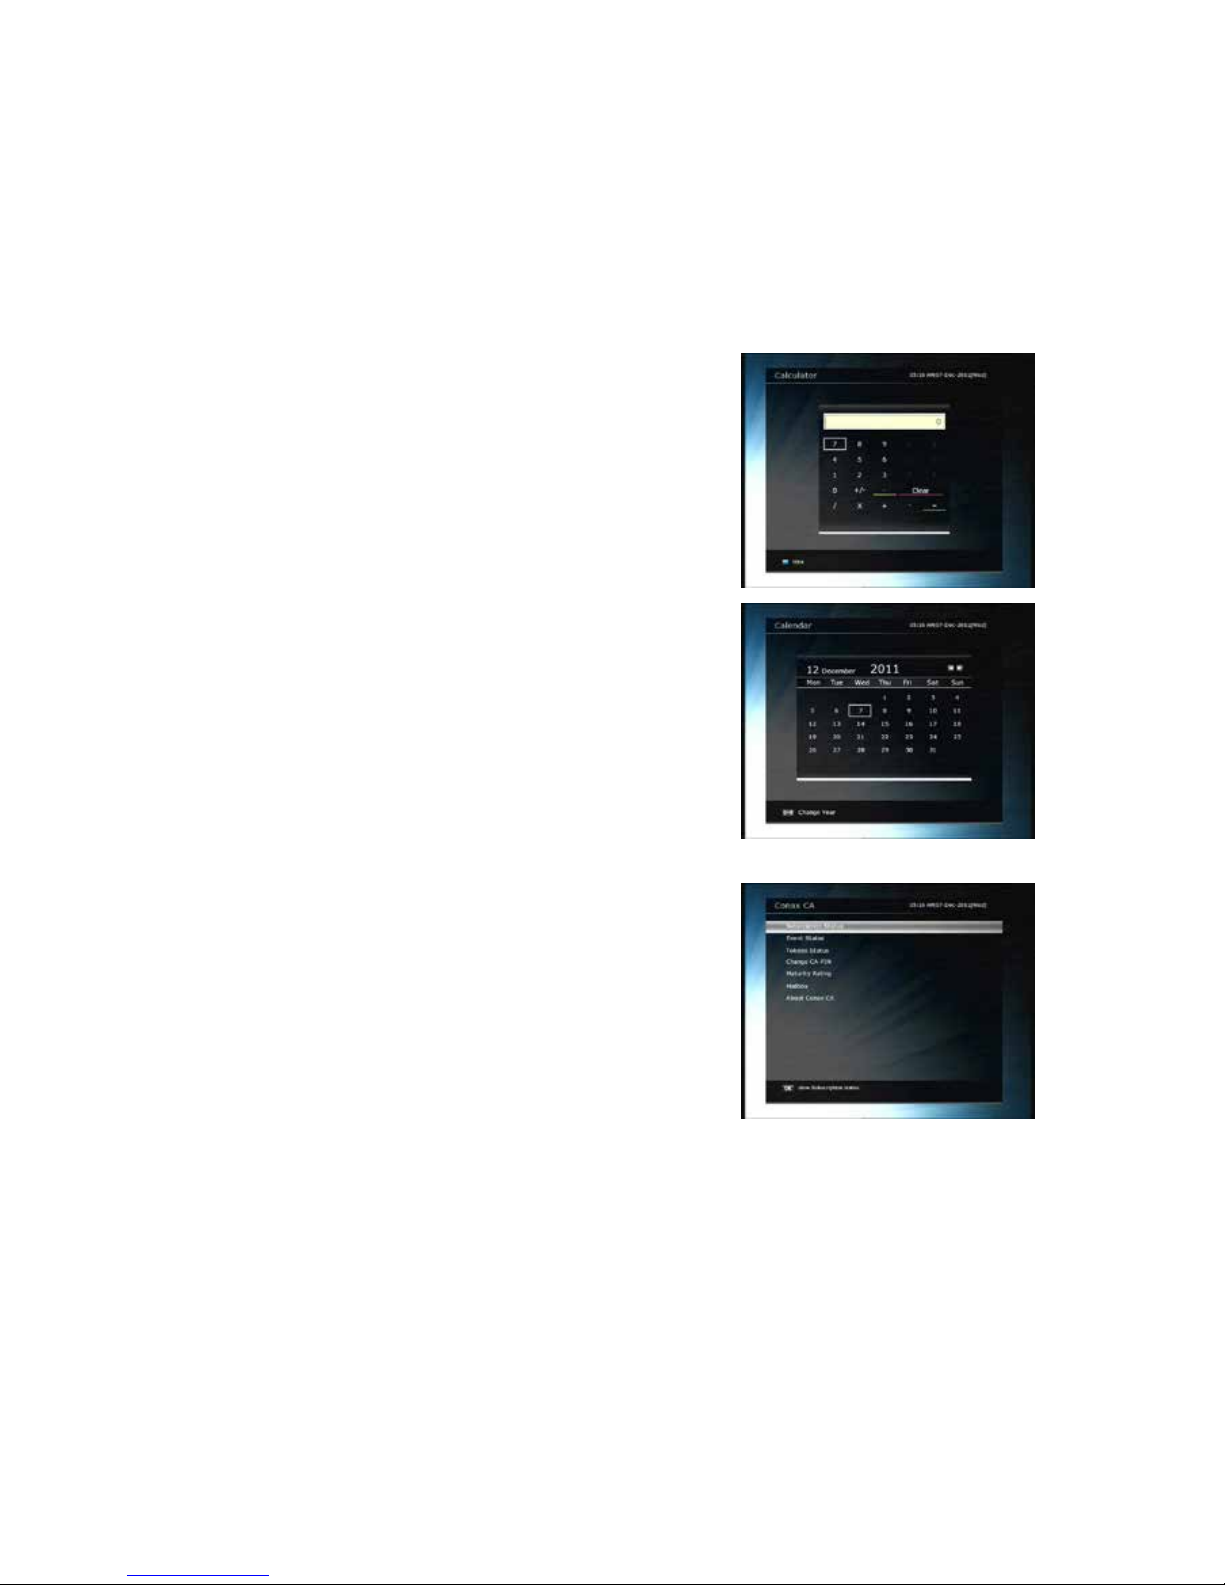
3.4 Network Setting
To use a Network connected to the STB Ethernet port, you
have to prepare the STB Network settings. When the STB and a
PC are connected via a network, you can access the files of the
STB storage device such as USB storage device.
NOTE : If you use DHCP function of router, you can set
easily network configuration.
l DHCP : You can select On/Off for the Dynamic Host
Configuration Protocol (DHCP ) to get the all configura tion from the router.
- If you s elect ‘On’ : You will obt ain the con figuration f rom network and be set up autom atically. In
this case, the remaining item (IP Address, Subnet Mask, Gateway, First DNS, Second DNS) are
automatically set and you don’t have to configure them manually.
- If you select ‘Off’ : You have to input the IP address manually together with the following data.
- IP Address, S ubnet Mask, G ateway , First DNS, Second DNS : You can input the address wit h the OK
button, NUMERIC buttons and the LEFT/RIGHT buttons. You can move to the next item of Subnet
Mast with the DOWN button and y ou can configure the following items in the same way.
l Firmware Upgrade Server : To upgrade the firmware by dow nloading f rom a in ternet server.
NOTE : Server installation and settings must be controlled by expert server manager. A storage
device must be connected with your receiver(STB) when firmware upgrade from
server.
l Proxy Server : This will allow you to access the blocked websit es indirectly (like detour path).
NOTE : However, due to the indirect method of access, the slow loading speed and
failure of data reception can happen.
l MAC Address : This will display the MAC address of the STB Ethernet interface and is a fixed
assignmen t unique to each STB.
Page 44
l Control of the files via the network and your PC :
- Check the IP Address of the STB on the Network Setting
menu.
- Pres s Enter button on you r PC, after writing IP Address on
the web browser address line. Ex.) \\168.158.10.146\storage
- You can see the folder name of USB1 and USB2 in the
Storage fol de r.
- USB1 : Fron t USB Storage Dev i ce
- USB2 : Rear USB Storage Device
- You may be able to load and retrieve data between the PC
and the STB via the browser
l Dynamic settings (RED key)
- You can make your DDNS setting in this m enu by pr essing
the RED colored button.
- For more details about your DDNS settings, please ask your
local DDNS service provider.
l Wireless LAN can be supported by using the ‘U SB to Wi-Fi’ module connected (*Option)
- By pressing the BLUE colored button, you can automatically find and do the settings for AP.
- For the details of Wireless Wi-Fi settings, please refer to the additi onal AP manual.
NOTE : The speed of Wireless LAN is slower than the Wired LAN. So, it could take much more
time when a file copy / move functions are performed.
NOTE : Inevitably, only the limited types of Wireless LAN modules are supported. So, you
MUST check for the compatible / supported types BEFORE you purchase.
Currently supported types are : RT73 series, RT3070 series, RT2870 series.
3.5 System Recovery
l
System restor e to factory default : Restore the factory set
values in case the user has encountered some problems after
changing any new parameters of service data and other
parameters which may be in error. Press the OK button to
erase all services and restore default setting.
l Reset Configuration data : Maintain the service data and
reset the configuration data.
l Reset Servi c e d ata : Main t ai n conf i gu ration dat a and reset the
service data.
l System restore to stored position : Restore the stored values
including service data and system parameters. Press the OK button to restore all data.
l Store system da ta : If you want to use system parameters and service data in the future, this menu
allows you to store current state. Press the OK button to store current state.
l Delete st o re position : Delete stored system data.
Page 45
3.6 System Information
This menu displays general information about the hardware and software version of your receiver.
4. Utility
4.1 Calculator
To use the calculator, highlight the calculator and press
the OK button.
4.2 Calendar
To display the calendar, highlight the calendar and press the
OK button. Utilize the ARROW button s to choose the date. If
you press PAGE UP/DOWN button , you can see the past/next
month of the calendar.
4.3 CAS (Conditional Access System)
l
Smart Card Slot
- Conax smart card menu :
To watch scrambled services, you need to have an
appropriate Conax smart card from the service providers.
Insert a valid smart card into smart card slot (only the
bottom slot of the two is active). The message of ‘Smart
card Initializing…’ will appear on the screen. After the
message disappears, you can watch the service you want.
- Smart card information :
You can view the current status of smart card. Select the slot
which you want to view using the ARROW buttons. And
press the OK button.
l CAM Initializing
To watch scrambled services, you need to have a Common Interface Conditional Access Module(CAM)
and an appropriate smart card f rom the provider . Insert the CAM t og e ther with a valid smart card into
CI slot (two slots available). The message of ‘CI Initializing…’ will appear on the screen. After the
message disappears, you can watch the service you want.
Page 46
l CAM information
You can view the current status of CAM. Select the slot which you want to view using the ARROW
buttons, and press the OK button. If the CAM is ava i lable, you ca n view inform a tion about each slot.
NOTE : The displayed information of each CAMs may be different depending on the CAM used.
l CI message
- On : To display t he CI message on live TV service.
- Off : To disable the CI m essage on live TV service.
4.4 Plugin
If you have the program file for Plugin, you can download the file(s) to Plugin then enjoy the program.
l Download Plugin File
- In the USB storage, please create a new folder name ‘plugin’
and in this ‘plugin’ folder, create a folder name ‘bin’.
(plugin > bin)
- St ore ( C opy) the plugin file in the ‘bin’ folder.
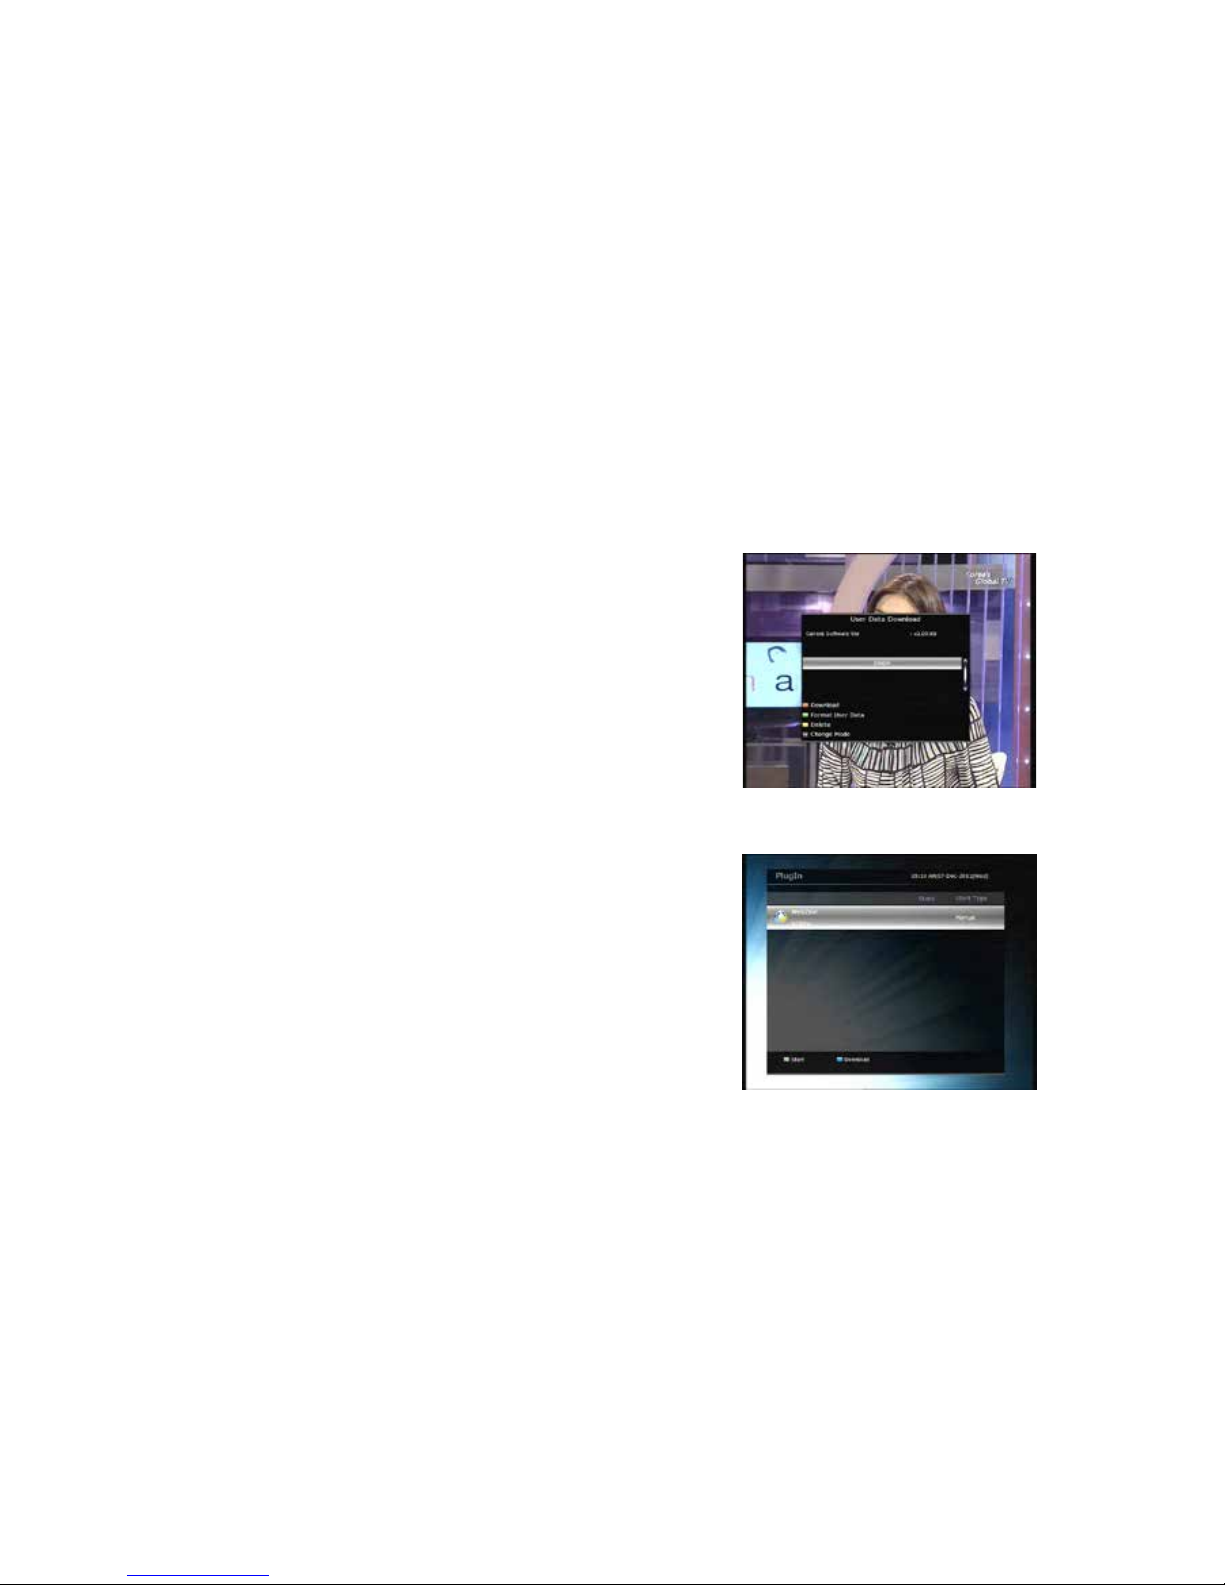
- Connect the USB storage to the receiver. When Software
Download menu is appeared, then press LEFT/RIGHT
ARROW buttons to move to User Data Download mode.
- Press RED bu tton to sta rt downl oad the plugin file tha t you
want.
NOTE : You can also download by Menu > System Tools
> Data Transfer > Data download from USB storage.
l Plugin Menu
- RED button : To set the plugin Start Type. You can select
Auto or Manual.
- GREEN button : To Start the plugin. You will see ‘Started’ in
State if the plugin is started.
- BLUE button : Press BLUE button if you want to delete the
plugin file.
l We provide a special feature called WebZeal which is for Web-
Browsing. You can simply enjoy the WebZeal when you want web surfing.
Page 47
l Executing WebZeal wit h USB Storage device
- Stored the WebZeal file to the USB storage device.
File name : ‘WebZeal-201xxxxx.mnt’.
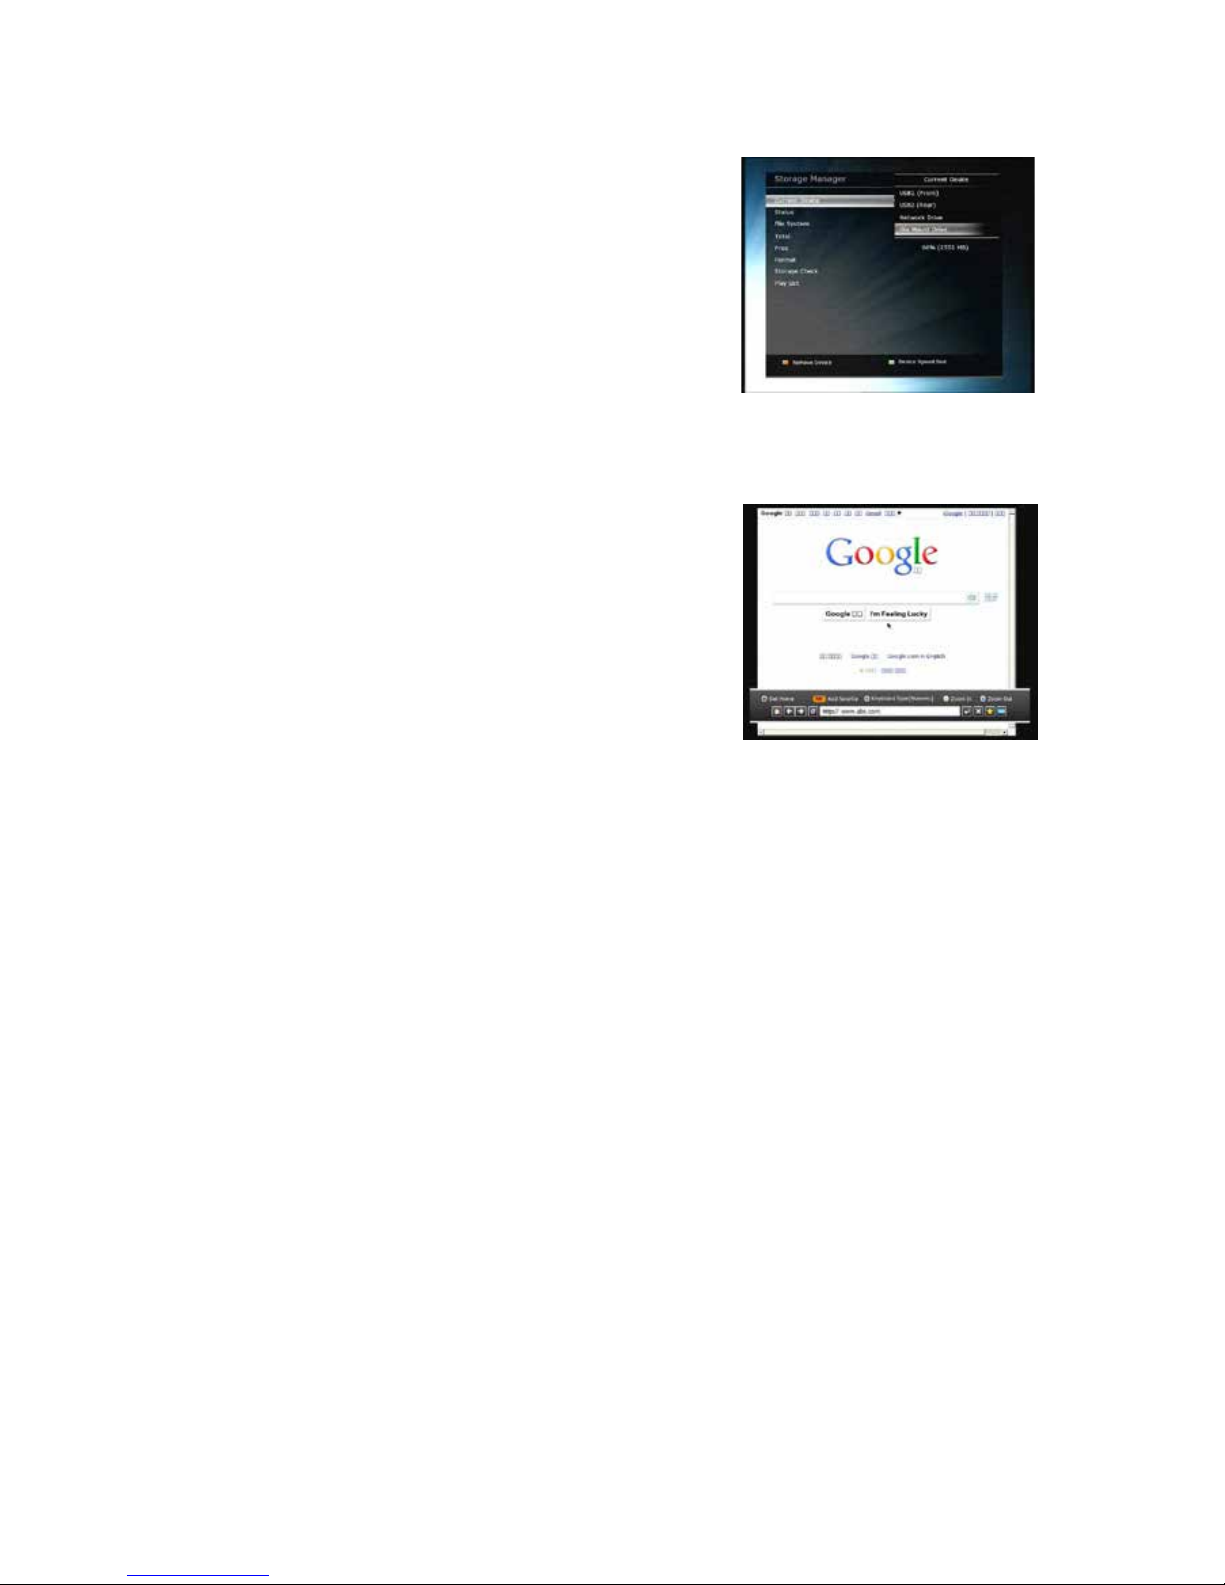
- Connect the USB storage device to your receiver then go to
Menu > System Tools > Storage Manager.
Ÿ Set the Current Device to File Mount Drive.
Ÿ Set the Mount File Name to WebZeal-201xxxxx.mnt
Ÿ Press Connect then go to Menu > Utilities > Plugin to start
the WebZeal.
NOTE : If you are using WebZeal by File Mount Drive, current USB storage device wil l not
allow to use PVR functions such as recording and time-shift. But it can be use when
WebZeal is not in use.
l WebZeal Option
- RED button : Press to set the current web page as home.
- GREEN button : Press to add the current web page to
favorite.
- YELLOW/BLUE button : Press to adjust the page Zoom In
and Zoom Ou t as you want.
- MEN U button : Press MENU button to sh ow s imple i nt ern et
menu.
Page 48
4.5 Free TV+
l
What is Free TV+?
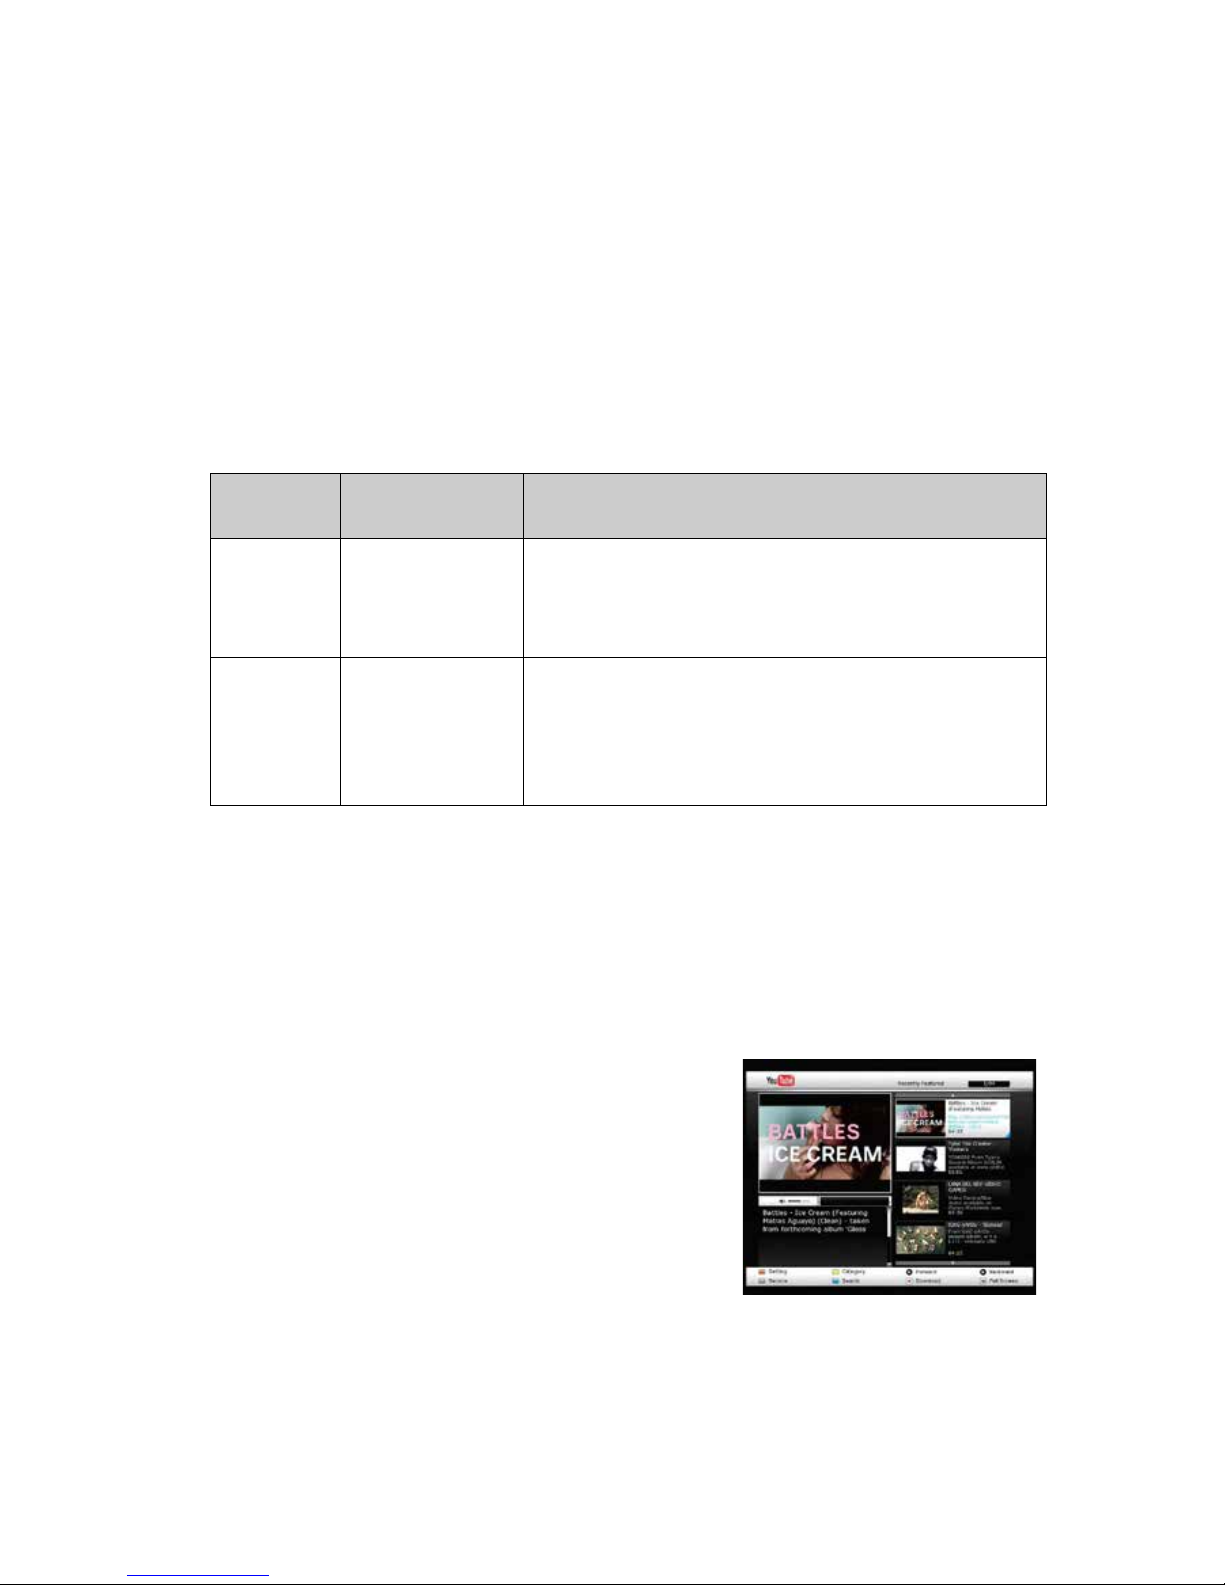
- Free TV + is a unique feature that enables you to play & enjoy FREE we b m e d ia contents like Youtube
and other free (but premium) contents from various internet websites such as documentary and
more.
So, you can enjoy watching and also downloading various free web contents with our HD receiver.
l Required settings
- To en j oy your grea t Free TV+ fe at ure, please make sure to ch e ck for the foll owing conditions.
- STB (Set-top-box) shou ld be connect ed wit h Ethernet cable, w ith proper ne twork se tti ngs. (Please
refer to the menu of “Network setting”, and its operating instructions).
- USB or H DD storage requirement
Mode
USB or HDD storage
connection
Remark
Playing Not Required
For playing function, no additional storage connection is
required.
The internal Flash memory i n the STB will be used automatically
for the bu ffering of the contents being played.
Downloading Required
The available web contents can also be downloaded to your
USB or HDD storage conne cted.
If more than one storage devices are connected with the STB at
the same time, then the Downloaded files will be saved at the
faster and bigger storage device automatically.
NOTE
a) Problems in network environment : Problems such as flickering and freezing of the screen can
occur while you are watching the YouTub e service. These kind of problems can often occur due
to the lagging and poor network status from your local internet service p rovider at home. This
may also cause the STB to be halted, then we kindly recommend you to reboot your STB by
resetting Power.
l Control part.
Ÿ Play: Select the media content you wish to play, and press
OK button .
Ÿ Settings (Red button): You can set Picture quality, Unit seek
time and Parental lock options.
- Country : You can change t he available contents area where
you would like to watch (this option is only valid for
YouTube).
- Picture Quality: High – Medium – Low
- Unit Seek Time: Set Forward and Backward seeking time
inte rval for 10 / 20 / 30 / 60 sec.
- Parental Lock: You can lock each contents and video
downloading function with password.
Ÿ Category (Yellow button) : Press this Yellow button to view the list of categories, then choose the
one you prefer to watch in the list of contents.
Ÿ Service (Green button): You can select among various free contents provided from web-site.
- Note: Each web-site is removable by pressing Green key on the list.
Page 49

Ÿ Download (Recording button): Web contents are av a ilable for download in to USB or HDD st ora ge.
- Note: If more than one storage devices are connected with the STB at the same time, then the
Downloaded files will be saved at the faster and bigger storage device automatically.
Ÿ Backward and Forward (Rewind and Fast forward button) playing
- Note: Forward and Backward seeking interval can be set for 10 / 20 / 30 / 60 sec at Settings menu.
Ÿ Full Screen: Press OK button to view in full screen size.
4.6 Internet TV+
l
What is Inter net TV + ?
- Internet TV+ feature enables you to watch the ‘Media contents’ being served from the Internet
through a specific URL. It is just like a web-browsing but wat ching TV instead of web contents.
This feature is not only supporting the streaming of the live broadcast service, but also supports
FMS (Flash Media Server) an d Wowza s erver (R T MP )
l Required settings
- All users are requ ired to do the below settings before you can enjoy the Internet TV+ feature with
your set-top-box (STB).
- STB should be connected with Ethernet cable, with proper network settings. (Please refer to the
menu of “Network setting”, and its operating instructions).
l Control part
Ÿ Play: Sel ect the service which you wish to play, and press OK button.
Ÿ Add : User can add the URL of the specific site which t hey want to watch. And they can add more
sites continuously.
- Install Type: You can define the type of URL. (default : Input URL)
- T itle : You can input the name of the media contents here.
- URL You can input the URL address that you would like to watch.
- Description : You can define the description of contents here.
- Media Ty pe : You can choose the type of Media service between the “File” and “Live”.
Note : Supported protocols are RTM P, RTMPT, HTTP only.
The codec types supp orted in t his Internet TV+ feat u re are ;
§ Video : MP1V, MP2V, MPEG4P2(MP4), H.264, VC1.
§ Audio : MP1A, MP 2 A, MP 3 A, AC3, AAC, PCM
Ÿ Edit : You can edit the existing contents that you have.
Ÿ Delete : You can delete contents you have with this function.
Ÿ Full Screen : You can watch the contents with full screen size with this function.
Page 50

Troubleshooting
Problem Solution
Does not display any message
on the front panel.
ü Check the main power cable and check that it is plugged into a
suitable power outlet.
ü Check the STB main power switch ‘ON’ at the rear of the STB.
No Picture
ü See ‘Does not display any message on the front panel’ above.
ü Check the video output por t is firmly connec ted to the TV or
VCR.
ü Check that you have selected the Video Input on your TV.
ü Press the STB button on the remote to assure you are
controlling the STB and no other device with the remote.
ü Check the brightness level of the TV.
ü Check the resolution th at your T V support s, and se t the proper
resolution with the remote Resolution button to obtain a
picture.
Poor picture quality
ü See ‘No Picture’ above.
ü Check the signal level, if this is low then tries adjusting the
alignment of your dish.
No Sound
ü See ‘No Picture’ above.
ü Check the volume level of the TV and STB.
ü Check the Mute status of the TV and STB.
Remote Control does not
operate
ü Point remote control directly towards the STB.
ü Check that the STB button lights up when you press any
button
ü Check and replace batteries.
No or Bad Signal
ü Check the LNB ; Replace the LNB if necessary.
ü Check the cable from the LNB.
ü Check the position of t he dish; realign dish if n ecessary.
ü If you are using a DiSEqC 1.0 switch, check that you have
connected and programmed the LNBs to the correct
connections on the switch.
ü Check the ‘Signal Level’ and the ‘Signal Quality’.
Page 51

Specifications
Tuner & Channel Decoder
Input Conn e ctor
Loop through ou t
Frequen cy Range
Input Impedance
Signal Level
LNB Power
22KHz Tone
DiSEqC Control
Demodulation
Input Sy mbol Rate
FEC Decoder
F-type, IEC 169-24, Female
F-type, IEC 169-24, Female
950MHz ~ 2150MHz
75Ω, unbalanced
-65 to -25dBm
13/18VDC, max.400mA
(22±2)KHz, (0.6±0.2)V
V1.0/1.2/USALS Compatible
QPSK / 8PSK
2 ~ 45 Ms/s(QPSK of DVB-S)
2 ~ 45 Ms/s(QPSK of DVB-S2)
2 ~ 35 Ms/s(8PSK of DVB-S2)
1/2, 2/3, 3/4, 5/6 and 7/8 with
Constraint Le ngth K=7(D VB -S)
1/2, 3/5, 2/3, 3/4, 4/5, 5/6, 8/9 and 9/10 (DVB-S2/QPSK)
3/5, 2/3, 3/4, 5/6, 8/9, 9/10(DVB-S2/8PSK)
MPEG T ransport Stream A/V Decoding
Transport Stream
Profile Level
Input Rate
Video Formats
Video Resolution
Audio Decoding
Audio Mode
Sampling Rate
H.264(MPEG-4 part 10, MPEG-4/AV C and H26L)
MPEG-II ISO/IEC 13818-2/11172-2
MPEG-4/AVC MP@L4, MPEG-II MP @H L
Max. 80Mbit/s
4:3 Letter Box, 4:3 PanScan, 16 : 9
720 x 576i, 720 x 576p, 720 x 480i, 720 x 480p
1280 x 720p, 1920 x 1080i, 1920 x 1080p(supports only HDMI)
Dolby Digital, MPEG-1 Layer 1,2 and 3
Stereo/Joint stereo/Mono, Dolby Digital bitstream
32KH z, 44 .1KHz and 48K Hz(According to input)
Main System
Main Processor
Memory
STi chipset
Flash-ROM : 256 Mbyte
SDRAM : 256 Mbyte
EEPROM : 256 byte
Page 52

Audio / Video & Data IN/OUT
TV SCART
RCA
OPTIC
RS-232C
USB
Ethernet
RGB, CVBS Video, Audio L, R Output
Video & Audio Output
Dolby Digital (S PDIF)
9 pin D-S UB (Ma l e ) type, Transfer rate 115Kbps
USB 2.0 H ost Front & Rear Support. (5V DC 500 mA Max.)
RJ45 connector, 100 Mbps
Front Panel
Slot
Display
Buttons
1 USB 2.0 H os t port
2 Common int erface PCMCIA slot
1 Smart Card Slot
7-Segment
3 Buttons (Standby, CH UP/DOWN)
Power Supply
Input Vo ltage
Type
Power Consumption
Standby Power
Protection
AC 100 ~ 250V, 50/60Hz
SMPS
Max. 30W
Max. 1W
Separate Internal Fuse & Lighting protection
Physical Specification
Siz e (W x H x D)
Weight (Net)
Operating Temp.
Storage T emp.
260mm X 43mm X 180mm
1.1 Kg
0°C ~ +45°C
-10°C ~ +70°C
Page 53

Page 54

V.12081(Eng)
Full HD Digital Satellite Receiver
ACTUS SOLO
 Loading...