

Page 1
www.ActiveForever.com
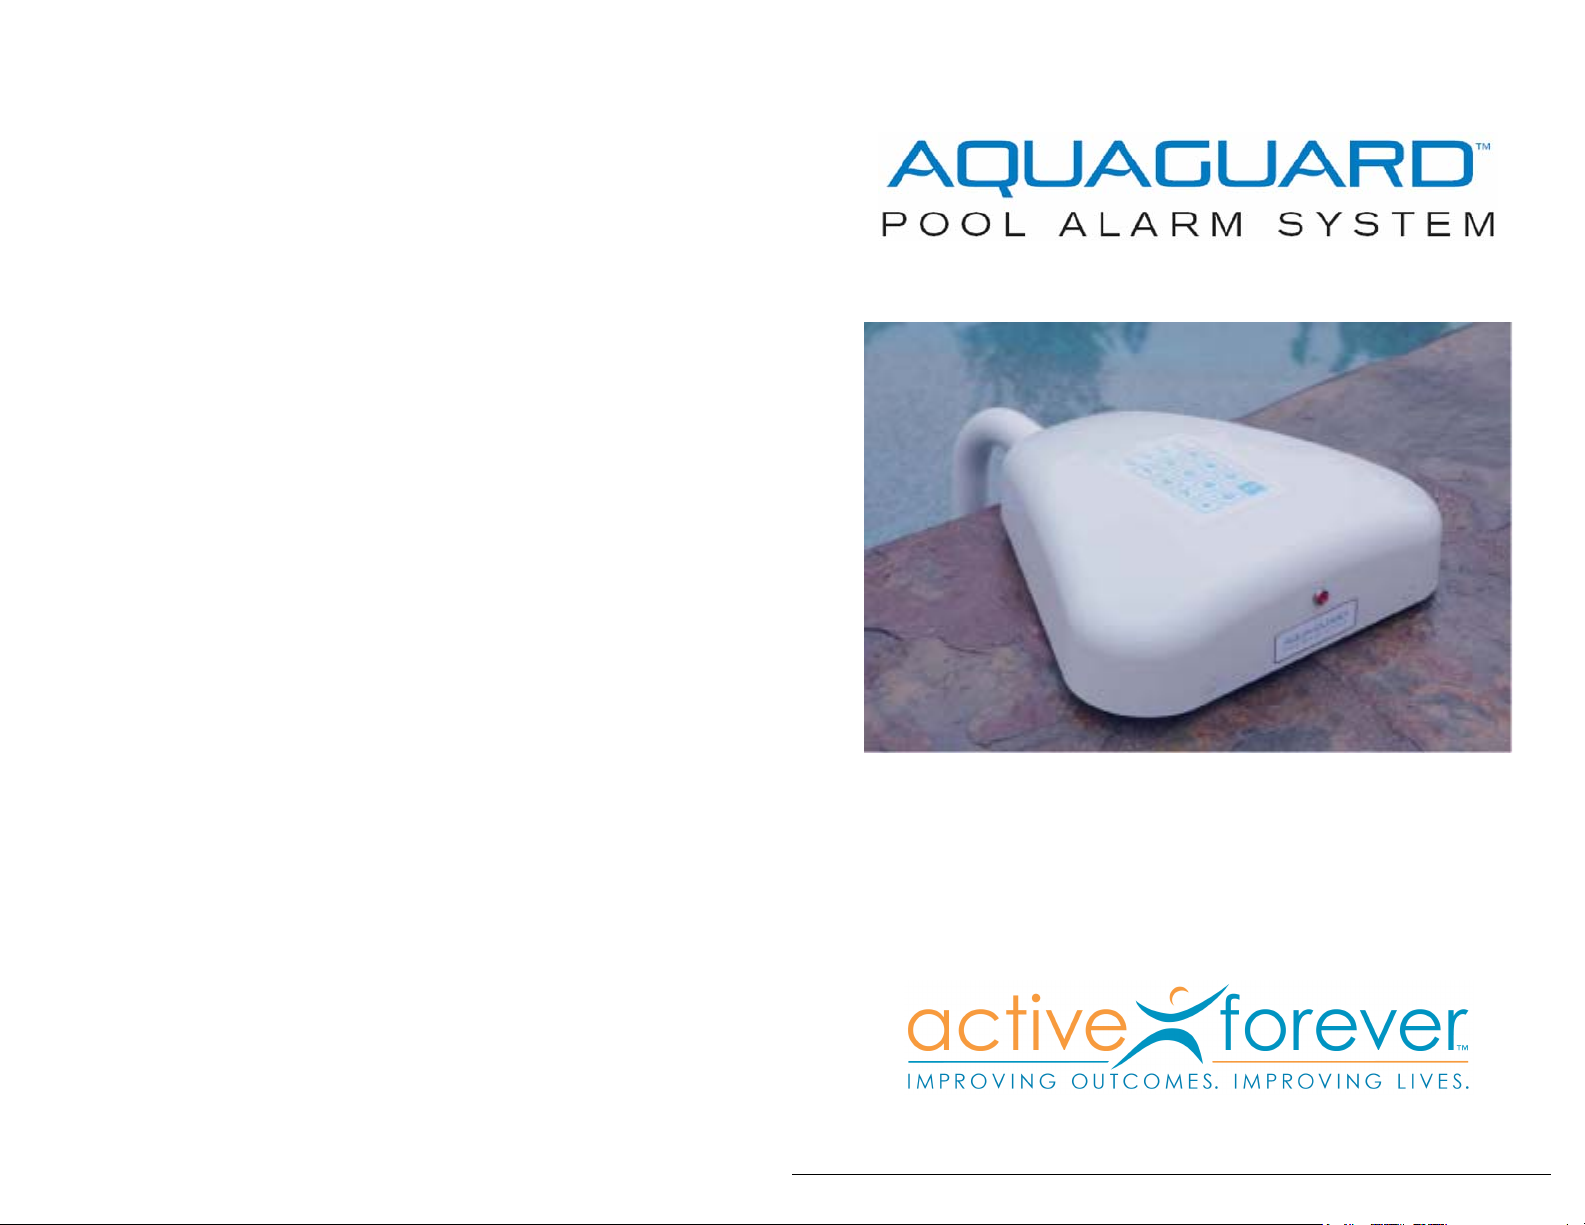
OWNER’S MANUAL
Revision 1.3
Page 2

AquaGuard Owner’s Guide RJE Technologies, Inc.
TABLE OF CONTENTS
INTRODUCTION ......................................................................................................... 1
About This Manual.................................................................................................. 1
Contacting RJE Technologies, Inc.......................................................................... 1
SAFETY PRECAUTIONS ........................................................................................... 2
General Swimming Pool Safety Guidelines ............................................................ 2
QUICK REFERENCE GUIDE...................................................................................... 3
ABOUT THE AQUAGUARD POOL ALARM SYSTEM .............................................. 4
System Components .............................................................................................. 4
Controls and Indicators........................................................................................... 4
Swimming Pool Alarm Operation ............................................................................ 4
ASSEMBLING THE AQUAGUARD SYSTEM ............................................................ 5
Installing the Batteries ............................................................................................ 5
Assembling the Detector Base Unit and Sensor Tube............................................ 6
INSTALLING THE AQUAGUARD SYSTEM............................................................... 6
Installation Considerations...................................................................................... 6
Tools Required ....................................................................................................... 7
Installation............................................................................................................... 7
Installing Two Detector Units in a Pool ................................................................. 11
OPERATING THE AQUAGUARD SYSTEM............................................................. 11
Operating the System ........................................................................................... 11
Managing the System ........................................................................................... 12
MAINTAINING THE AQUAGUARD SYSTEM .......................................................... 13
Replacing the Batteries......................................................................................... 14
Testing the System ............................................................................................... 15
Special Considerations During Winter .................................................................. 15
The Anti-Theft System .......................................................................................... 15
Changing the Access Code .................................................................................. 15
TERMS AND CONDITIONS OF WARRANTY.......................................................... 16
FCC REGULATIONS
This equipment has been tested and found to comply with the limits for a Class B digital device pursuant to
part 15 of the FCC Rules. These limits are designed to provide reasonable protection against harmful
interference in a residential installation. This equipment generates, uses and can radiate radio frequency
energy and, if not installed and used in accordance with the instructions, may cause harmful interference with
radio communications. However, there is no guarantee that interference will not occur in a particular
installation. If this equipment does cause harmful interference to radio or television reception, which can be
determined by turning the equipment off and on, the user is encouraged to try to correct the interference by
one or more of the following measures:
• Reorient or relocate the antenna.
• Increase the separation between the equipment and receiver.
• Connect the equipment into an outlet on a circuit different from that to which the receiver is connected.
• Consult the dealer or an experienced radio/TV technician for help.
This device complies with part 15 of the FCC Rules. Operation is subject to the following conditions: (1) This
device may not cause harmful interference, and (2) This device must accept any interference received,
including interference that may cause undesired operation.
Per FCC Part 15.21, any changes or modification not expressly approved by RJE Technologies, Inc. could
void the user's authority to operate the equipment.
The minimum separation distance between the antenna and any part of human bodies should be 2.5 cm.
Page 3

AquaGuard Owner’s Guide RJE Technologies, Inc.
INTRODUCTION
TERMS AND CONDITIONS OF WARRANTY
The AquaGuard™ Pool Alarm System manufactured by RJE Technologies, Inc. is warranted to be free from defects
in workmanship and materials under normal use and service when correctly installed, used and maintained. This
limited warranty is subject to the following conditions and qualifications.
Duration of the Warranty:
AquaGuard™ products are warranted for a period of
three (3) years from the date of purchase. RJE
Technologies, Inc shall, at its option, repair or
replace defective products free of charge within the
three-year period. Warranty replacements or repairs
will not extend the three-year period.
Scope of Warranty:
This limited warranty is effective on AquaGuard™
products only. It does not cover any product,
component, part or accessory, which AquaGuard™
determines to have become defective through abuse
or neglect. In addition, the limited warranty will be
voided if the equipment has been modified, altered,
or contains components, parts, or other accessory
products that are not part of the AquaGuard™
product line.
RJE Technologies, Inc shall not be responsible to
customers or any third party for loss, damage, or
injury caused by, resulting from, or in any way
attributable to the use or operation of AquaGuard™
products or any special, indirect, incidental or
consequential damages arising from the use of
AquaGuard products.
Purchaser’s sole remedy for any AquaGuard™
product found to be defective will be to have it
repaired or replaced by an AquaGuard retailer.
Please contact the AquaGuard™ Customer Service
Department for instructions or assistance.
Exclusions (That are not covered):
The above warranties do not apply to:
• Conditions resulting from a defect in a
component part which is not part of
AquaGuard™.
• Conditions resulting from failure to provide
reasonable and necessary maintenance in
accordance with AquaGuard™ Owner’s Manual.
• Conditions resulting from misuse, abuse,
negligence, accident or alteration.
• Normal discoloration, fading and minor
deterioration of exterior surfaces resulting from
exposure to the elements, except conditions that
do or will affect performance.
• Conditions resulting from improper pool
maintenance, water level, and pool equipment
usage.
• Items consumed through use.
Warranty Disclaimers and Additional
Information:
The warranty set forth above is in lieu of, and RJE
Technologies, Inc hereby disclaims and excludes, all
other warranties, express or implied, including
without limitation, any warranty of merchantability or
fitness for a particular use. RJE Technologies, Inc is
not liable for, and purchaser waives any right of
action if has or may have against RJE Technologies,
Inc for any consequential or special damages arising
out of any breach of warranty, and for any damages
purchaser may claim for damages to any property or
injury or death to any person arising out of it’s
purchase of the use, operation or maintenance of
the product. RJE Technologies, Inc will not be liable
for any damage done by unauthorized repair work,
unauthorized replacement parts, from any
misapplication of them, or from damage due to
accident, abuse, rodents, weather, conditions
creating improper pool use of maintenance, or acts
of god.
RJE Technologies, Inc will not be responsible for
damages or events from improper electrical supply.
In no event shall RJE Technologies, Inc be liable for
loss damage, or expense directly or indirectly arising
from the use of the AquaGuard™, or from any other
cause, except as expressly stated in this warranty.
Congratulations on the purchase of your AquaGuard Pool Alarm System. You have taken an
important step in creating a safer environment for your children.
At RJE Technologies, Inc., makers of AquaGuard, we have over 7 years experience providing the
world’s best pool security systems. Thank you for including AquaGuard on your swimming pool or
spa.
About This Manual
This manual will help you install and operate your AquaGuard Pool Alarm System properly.
Read this manual carefully and completely before installing and operating your AquaGuard
system.
The AquaGuard Pool Alarm System is an important safety addition to your swimming pool or spa.
However, AquaGuard by itself is not a lifesaving device and does not take the place of proper adult
supervision and intervention when the alarm sounds.
We recommend the use of multiple layers of protection.
RJE TECHNOLO
GIES, INC.
16
1
Page 4

AquaGuard Owner’s Guide RJE Technologies, Inc.
SAFETY PRECAUTIONS
• Press the OK button on the Remote Unit three times to put the Detector Unit into “swim”
mode, then press the OK button on the Remote Unit three times again to put the Detector
Unit into “armed” mode.
Important! The AquaGuard system is a pool alarm; not a life-saving device. It should be used
along with other safety equipment and precautions. It is intended to provide an additional level of
security to your pool and/or spa.
This device is not intended to replace any other safety consideration; that is, adult supervision,
lifeguards, fences, gates, pool covers, locks, and so forth, and some devices may not detect
gradual entry.
Always observe the following safety guidelines:
• DO NOT allow children to operate the AquaGuard system without adult supervision.
• This system is a protection device that sounds an alarm to indicate a potential
EMERGENCY situation. When the alarm sounds, PROMPT ACTION by a responsible adult
is essential to preventing serious injury or death.
• Be sure a RESPONSIBLE ADULT is present to observe swimming activities whenever the
AquaGuard system is turned off.
• AquaGuard is designed to detect a fall into the pool. AquaGuard may not
detect a gradual entry into the pool.
General Swimming Pool Safety Guidelines
• NEVER leave children unattended in or around the swimming pool or spa. Children under
five years of age are at the GREATEST RISK for injury or death in pool-related accidents.
• DO NOT assume that swimming pool safety devices replace the need for adult supervision.
ALWAYS have a responsible adult present to ensure safety. Give extra attention when
several people are swimming at the same time.
• Teach your children to swim at an EARLY age.
• Instruct ALL pool and spa users in the location and proper operation of safety features. BE
SURE that pool maintenance personnel understand and can properly operate the
AquaGuard system.
• Keep RESCUE EQUIPMENT (such as a rubber life preserver and/or rescue pole)
within easy reach.
• Keep a TELEPHONE close to the pool so it can be easily accessed in case of an
emergency.
• Learn child CPR (cardiopulmonary resuscitation) and other life-saving techniques.
• Keep the pool area CLEAR of toys and other obstructions. Keep the water CLEAN and
uncontaminated.
• Keep security gates CLOSED when the pool is unattended.
Testing the System
It is strongly recommended that a System Test be performed periodically using the procedure
described in Installation , STEP 5 on page 9.
Special Considerations During Winter
The AquaGuard system will not operate if the water in your pool becomes frozen. Additionally,
allowing water to freeze in the Sensor Tube can damage the system’s sensing mechanism.
If your pool is located in an area where freezing normally occurs and you do not intend to maintain
your pool in a heated state throughout the winter season, you should remove the Detector Unit
before freezing occurs. Store the unit indoors and re-install when the water has thawed.
Be sure to remove the batteries from the Detector Unit when placing the unit in storage for a
prolonged period. Corrosion may occur if the batteries are left in the unit during storage.
The Anti-Theft System
When the AquaGuard Detector Unit is installed and initialized, its internal “anti-theft” system is
enabled. Any attempt to dismantle or remove the Detector Unit without first turning the system off
will cause the alarm siren to sound. To turn off the “anti-theft” alarm, enter 1234*99 on the Detector
Unit keypad.
Be sure to turn the system “off” before removing the Detector Unit for maintenance or storage by
entering 1234*99 on the Detector Unit keypad.
Changing the Access Code
The default access code for your Detector Unit is 1234. To change it to a different access code, do
the following:
1. Enter 1234.
2. Enter * 0 1
3. Enter a new 4-digit access code.
IF AN ACCIDENT OCCURS
• Get the person out of the pool as QUICKLY as possible.
• IMMEDIATELY call for help, and follow the advice given.
• Administer CPR (cardiopulmonary resuscitation) as directed or as necessary.
• Remove wet clothes and replace with warm covers.
2
15
Page 5

AquaGuard Owner’s Guide RJE Technologies, Inc.
• Sensor Tube Check: Check the sensor tube monthly to ensure it is secure and damage-
free (no cracks, breaks, deformation, etc.). Make sure the bottom of the sensor tube is 5 - 6
inches (13 – 15 cm) below the surface of the water. Add water to the pool, or install the
Sensor Tube Extension (see System Components on page 4 for more information) if
needed.
• Storage During Winter: If the water in your pool normally freezes during the winter months,
the Detector Unit must be removed for storage before freezing occurs (see Special
Considerations During Winter on page 15 for more information).
QUICK REFERENCE GUIDE
The following is a “quick reference” guide to operating your AquaGuard Pool Alarm System. Refer
to OPERATING THE AQUAGUARD SYSTEM on page 11 of this manual for detailed instructions to
operate, monitor and maintain the system.
Quick Start Setup
Replacing the Batteries
Replace the Detector Unit or Remote Unit batteries whenever a low battery is indicated (see
Managing the System on page 12 for a description of the low battery indication).
Be sure to turn the system off whenever replacing the Detector Unit batteries. If the unit is not
turned off, the unit’s Anti-Theft System will sound the alarm (see The Anti-Theft System on page 15
for more information).
Detector Unit:
1. Press 1234*99 on the Detector Unit keypad(s) to turn the system “off.”
Note: You will not
2. Remove the two screws at the rear of the Detector Unit. Lift up slightly at the rear of the
Detector Unit housing, and slide the unit forward off of the base plate.
3. Remove the old batteries from the battery compartment. Install four “D” size batteries in the
battery compartment.
4. Place the Detector Unit housing over the base plate. Lift up slightly on the rear of the
housing. Slide the tab on the front of the base plate into the slot in the nose of the Detector
Unit housing; then lower the housing onto the base plate.
5. Re-install the two screws at the rear of the Detector Unit.
6. The system will now start the arming sequence. The Detector Unit will emit 10 short beeps,
followed by one long beep, indicating that the system is armed. The rear LED will begin
flashing.
Remote Unit:
1. Remove the four screws on the back of the Remote Unit, and remove the back cover.
2. Remove the old battery from the battery clip.
3. Install a new 9-volt battery in the battery compartment by snapping the battery clip onto the
battery posts.
4. Place the back cover onto the Remote Unit and re-install the four screws.
Re-establish the Radio Link:
• Turn the Detector Unit (at pool edge) off by pressing 1234.
• Power up the Remote Unit by plugging the AC Adapter into the wall outlet.
• Turn the Detector Unit on by entering 1234 on the keypad.
• Wait until the Detector Unit arms and observe that the green LED on the Remote Unit is
flashing.
hear a beep when you press the second 9.
Step 1 Plug AC adapter into Remote Unit at range of less than 100 feet
(30m) from detector and within line of sight (Page 10)
Step 2 Insert batteries into detector (automatically turns unit on; wait 4
to 12 minutes for unit to calibrate and arm) (Page 7)
Step 3 Attach sensor tube (page 8)
Step 4 Put detector into pool (verify proper depth for tube and pick
proper location)
Step 5 When detector arms (audio sequence of 10 beeps plus rear red
LED blinking slowly) check Remote Unit to insure that “Armed”
indicator LED (green) is blinking. (Page 11)
Step 6 Drop full 2.5 gal water jug into pool at furthest point away from
detector and insure that alarm goes off (siren in the detector
and in the Remote Unit).
Step 7 Turn off alarm by pressing any button in detector keypad or by
pressing “OK” button on Remote Unit.
14
3
Page 6

AquaGuard Owner’s Guide RJE Technologies, Inc.
ABOUT THE AQUAGUARD POOL ALARM SYSTEM
The AquaGuard Pool Alarm System is designed to detect a child, pet or object of a minimum size
falling into a pool or spa. The system monitors the movement of water caused by a fall into the pool
or spa by detecting changes in water pressure. When a change in water pressure is great enough
to indicate a fall may have occurred, a siren sounds at the Detector Unit (by the pool or spa) and at
the Remote Unit (inside the house).
AquaGuard technology has been extensively tested to the most rigorous standard in the world
for pool alarms (AFNOR) as well as the U.S. ASTM standard. What does all this mean? It means,
finally, there is a consumer-installed pool alarm system that provides excellent performance
features combined with high immunity to wind, rain and other water surface disruptions.
System Components
Your AquaGuard Pool Alarm System is shipped with the following components:
• Detector Unit (1)
• Remote Unit (1)
• AC Adapter (1)
• Sensor Tube (1)
• Sensor Tube Extension (1)
• Installation Kit (1)
• Owner’s Manual (not shown)
You will also need the following items NOT SUPPLIED with
the system:
• “D” cell batteries (4) to power the Detector Unit
• 9-volt battery (1) to power the Remote Unit when not connected to an AC source
Controls and Indicators
Each AquaGuard Pool Alarm System includes a main Detector Unit and a wireless Remote Unit
with an AC adapter. The system can be operated from either unit using the controls and indicators
described below.
Swimming Pool Alarm Operation
One AquaGuard Pool Alarm System will cover a typical 16 X 32 foot (5 X10 meter) rectangular or
kidney-shaped swimming pool. If the pool is larger, or irregularly shaped, two detectors will be
needed (consult your AquaGuard dealer or call us directly with questions). When using two
detectors, both are operated by one wireless Remote Unit.
The AquaGuard Pool Alarm System is operated using the keypad on the Detector Unit or the OK
button on the Remote Unit. An audible "beep" sounds when you press a key on the Detector Unit
keypad:
• Short "beep" for valid entry
• Long "beep" when an error is detected
The AquaGuard Pool Alarm System provides ease of use and intuitive "messaging" that lets you
know the status of the system. When you want to use the pool, press 1234 at the Detector Unit's
keypad or OK OK OK from the Remote Unit, putting the system in "swim mode". A short while
after everyone has left the pool, the system will automatically re-arm.
4
Alert and Fault Signal Indications
Indication
Condition
Fall or activity in the pool
while system is in
“ARMED” mode.
Anti-Theft alarm
activated (Detector Unit
opened without turning
unit off)
Low battery in Detector
Unit
Low battery in Remote
Unit
Loss of radio link
Detector fault or “rough”
condition in pool
(accurate detection
cannot be assured due
to disturbance in water)
General system fault Red LED flashes
Detector Unit Remote Unit
Siren sounds. Siren sounds.
Siren sounds. Siren sounds.
Audible beeps/
sound
NONE Red LED shows
Red LED shows
Rear LED rapidly
flashes (two
blinks per
second)
rapidlly and
permanently.
Red LED shows
a steady series
of two flashes
(two per second)
Audible Beeps
a steady series
of blinks (one per
second)
Audible Beeps
a steady series
of blinks (three
per second)
Both LEDs are
off
Red LED flashes
rapidly and
permanently.
• Press any key on the Detector Unit keypad;
or
Press the OK key on the Remote Unit once.
• Immediately determine whether an accident has occurred, and
provide aid as necessary.
• Enter your access code on the Detector Unit keypad.
NOTE: The Anti-Theft alarm can be cancelled only at the Detector
Unit.
• Press OK on the Detector Unit keypad to cancel the audible
beeps (BATTERY indicator will continue flashing until batteries
are replaced).
• Replace Detector Unit batteries as soon as possible to avoid an
interruption in protection (see Replacing the Batteries on page
14 for details).
• Replace Remote Unit batteries as soon as possible (see
Replacing the Batteries on page 14 for details) or connect
Remote Unit to AC power source.
• Relocate remote until link is established
• Check to see if water is agitated due to recent swimming activity
or by environmental “noise” (wind, rain, etc.). If so, allow 6 to 12
minutes for water to settle and unit to “arm.”
NOTE: In case of “rough” condition, it may be necessary to
temporarily disable the system to prevent a “false” alarm. Be sure
to monitor activity around the pool whenever the alarm is disabled.
The system will re-arm automatically when the rough condition is
no longer present
• Make sure the end of the Sensor Tube is 5 to 7 inches (13 to 18
cm) below the water surface. If necessary, add water to pool, or
install Extension Tube on Sensor Tube (see
•
• Assembling the Detector Base Unit and Sensor
page 6 for details).
• If problem cannot be corrected, contact your reseller.
• The AquaGuard system is not functional.
• Contact your reseller immediately.
Response
Tube on
MAINTAINING THE AQUAGUARD SYSTEM
Once installed, your AquaGuard system requires very little maintenance. To ensure trouble-free
system operation, perform the following maintenance functions at regular intervals:
• Battery Replacement: Replace the Detector Unit batteries (see Replacing the Batteries on
page 14 for battery replacement procedures) whenever a low battery is indicated (see
Managing the System on page 12 for a description of the low battery indication).
13
Page 7

AquaGuard Owner’s Guide RJE Technologies, Inc.
AquaGuard Operating Modes
Indication
Condition
“ARMED” Mode Red LED blinks
“SWIM” Mode
Re-arm system Red LED blinks
Alarm Condition Siren sounds. Siren sounds. When an entry or another activity in the pool is detected, the alarm
OFF Mode NONE NONE You can turn the AquaGuard system OFF to change the Detector
Detector Unit Remote Unit
once every two
seconds
Red LED is off Green LED is off;
slowly, and
audible beeps
sound for 10
seconds before
the system returns
to “ARMED” mode
Green LED shows
a steady series of
single blinks.
Red LED is off
Green LED blinks
slowly while
arming
“ARMED” Mode is the normal operating mode for the AquaGuard
system. When the AquaGuard system is in “ARMED” Mode, an alarm
sounds whenever a fall is detected (or there is similar activity in the
pool).
You must place the AquaGuard system in “SWIM” Mode whenever
you wish to use your swimming pool. When the AquaGuard system is
in “SWIM” Mode, activity in the pool will not trigger the alarm. Be sure
a RESPONSIBLE ADULT is present to observe swimming activities
whenever the system is placed in “SWIM” Mode.
To place the system in “SWIM” Mode:
• From the Detector Unit: Enter 1234 on the Detector Unit keypad.
or
• From the Remote Unit: Press the Remote Unit OK button three
times.
Once you have placed the system in “SWIM” Mode, you must enter
the pool within 4 to 5 minutes, or the system will return to “ARMED”
Mode automatically. You can also manually reactivate the alarm as
described below.
After swimming, the AquaGuard system will automatically return to
“ARMED” Mode after 4 to 5 minutes. If desired, you can manually
return the system to “ARMED” Mode when the pool is calm.
To reactivate the alarm manually:
• From the Detector Unit: Press the OK button on the keypad
twice.
• From the Remote Unit: Press the Remote Unit OK button three
times.
sounds. YOU MUST RESPOND IMMEDIATELY. Press any key on
the Detector Unit keypad or the OK button on the Remote Unit to
silence the alarm.
NOTE: The alarm will turn off automatically three minutes after
activation.
Unit batteries, or to perform other pool maintenance activities.
NOTE: Be sure a RESPONSIBLE ADULT is present to observe
swimming activities whenever the system is turned OFF.
To turn the system OFF: Enter 1234*99 on the Detector Unit keypad.
To turn the system ON: Enter 1234 on the Detector Unit keypad.
Response
Managing the System
You can use the LED indicators and alarm siren on the Detector Unit or the Remote Unit to monitor
the current state of your AquaGuard system. The following table shows a list of possible system
conditions, the indications associated with each condition, and the proper responses/remedies to
restore normal system operation.
Be sure to correct system faults promptly to avoid an interruption in protection. If a fault cannot be
corrected, contact your reseller for assistance.
Detector Keypad – A PIN code places the detector unit in
standby for swimming, arms the detector and clears an
active alarm.
Detector LED – Provides visual confirmation that the
system is armed.
Detector Unit is powered by four (4),
standard D-size batteries
Low Battery Audible beeps (press “OK” once to acknowledge)
Armed
Not Armed
Rough Mode
Slow blinking
LED off
Fast blinking
Green LED on Remote Unit – Provides visual confirmation
when the system is armed. In this mode, an alarm sounds
whenever a fall in the pool is detected.
Red LED on Remote Unit – Provides visual confirmation of
low battery in remote or detector or loss of radio link.
OK Button on Remote Unit – Places the detector in
standby for swimming and also clears an active alarm.
Low Battery Audible beeps + Red LED
Remote Unit is powered by an AC
adapter
Armed Green LED blinking
Not Armed No LED’s blinking
Loss of Radio Link Red LED blinking fast (3 times/second)
ASSEMBLING THE AQUAGUARD SYSTEM
Installing the Batteries
It is recommended that you use “long life” Alkaline batteries in
both the Detector Unit and the Remote Unit.
Detector Unit:
1. Remove the two screws at the rear of the Detector Unit.
2. Turn the unit upside down. Lift up slightly on the base
plate (see photo). Slide the base plate toward the back
of the unit, and remove the base plate from Detector
Unit housing.
3. Install four “D” size batteries in the battery compartment.
The unit is now on and is calibrating.
4. Slide the tab on the front of the base plate into the slot in
the nose of the Detector Unit housing, and then lower
the base plate into place.
5. Reinstall the two screws at the rear of the Detector Unit.
6. The Detector Unit will emit 10 short beeps, followed by one long beep, indicating that the
system is armed. The rear LED will begin flashing. This can take 5-7 minutes.
12
5
Page 8

AquaGuard Owner’s Guide RJE Technologies, Inc.
Assembling the Detector Base Unit and Sensor Tube
You must assemble the Sensor Tube and Detector Unit before installing the unit at poolside.
1. Remove the screw from the front fitting of the Detector Unit.
Make sure the o-ring is installed on the front fitting of the Detector Unit before installing the
Sensor Tube.
2. Slide the short end of the Sensor Tube onto the front
fitting of the Detector Unit. Twist the Sensor Tube back
and forth slightly while applying firm pressure to slide
the tube onto the fitting.
3. Line up the hole at the top of the Sensor Tube with the
mating hole in the front fitting of the Detector Unit; then
re-install the screw to secure the tube in place.
Depending on the installation site for the Detector Unit
(see Installation on page 7 for details), you may need to
install a Sensor Tube Extension. If so, simply slide the
Extension onto the end of the tube. The tube must
penetrate the water by 5-6 inches (13-15 cm).
Remote Unit:
Batteries are only required for optional battery-powered
backup.
1. Remove the four screws on the back of the Remote Unit, and remove the back cover.
2. Install one 9-volt battery in the battery compartment by snapping the battery clip onto the
battery posts.
3. Place the back cover onto the Remote Unit, and re-install the four screws.
The Remote Unit must always be powered by the AC adapter. The battery is for back-up
and emergency use only.
Installing Two Detector Units in a Pool
The AquaGuard Pool Alarm System can be configured with two Detector Units when required due
to pool size or to accommodate a vanishing edge (Infinity) type design, as shown on the following
page.
22 FEET
(7 METERS)
• Assemble and position the Detector Units as described in STEP 1 and STEP 2.
• Establish the Radio Link
− Turn the Detector Units (at pool edge) off by pressing 1234*99
− Power up the Remote Unit by plugging the AC Adapter into the wall outlet.
− Turn the Detector Units on by pressing 1234 on the keypad.
− Wait until the Detector Units arm and observe that the green LED on the Remote
Unit is flashing.
− Press the OK button on the Remote Unit three times to put the Detector Units into
“swim” mode, then press the OK button on the Remote Unit three times again to put
the Detector Units into “armed” mode.
OPERATING THE AQUAGUARD SYSTEM
22 FEET
(7 METERS)
INSTALLING THE AQUAGUARD SYSTEM
Installation Considerations
There are a number of features that can affect AquaGuard’s “detection” abilities. Keep the following
system limitations in mind to ensure optimum performance of your AquaGuard system:
• The AquaGuard alarm must be audible from inside your home. Be sure to verify that the
alarm can be heard inside your home when testing the system during installation. Care
should be taken to place the Remote Unit in an accessible location and in direct line of sight
of the detector. The remote should be as close to the pool as possible to insure a radio link.
• Pool cleaners (sweeps) that move around the pool, climb the pool walls, and fall back into
the pool can look like a small child to the AquaGuard system. False alarms can occur if the
pool sweep hits the Sensor Tube.
• Water movement caused by high velocity/high flow filtration systems can affect
AquaGuard’s performance.
6
Operating the System
Your AquaGuard system has five operating modes or states. This section describes the
AquaGuard modes of operation, and provides the procedures for entering and/or exiting each
mode. You can control and monitor your AquaGuard system from either the Detector Unit or the
Remote Unit. Refer to
system controls and indicators.
Controls and Indicators on page 4 for general instructions on using
11
Page 9

AquaGuard Owner’s Guide RJE Technologies, Inc.
The Detector Unit's "anti-theft" alarm will sound if the Unit is dismantled while the
system is on. Enter 1234 on the Detector unit keypad to deactivate the "anti-theft"
alarm.
STEP 6 - Mount the Detector Unit Base Plate (optional)
• Turn off the system by pressing 1234*99 before opening the detector.
• Mark the location of the Detector Unit on the pool deck. Remove the Detector Unit from the
pool.
• Remove the two screws at the rear of the Detector Unit, and slide the base plate off the
Detector Unit housing. Remove the batteries from the Detector Unit to prevent the "antitheft" alarm from activating.
• Place the base plate at the previously marked position. Use a permanent marker to
mark the locations of the three holes in the base plate. Set the base plate aside.
• Use a drill and ¼”(7 mm) masonry bit to drill three holes, ¾” (19 mm) deep, at the
marked locations.
Be sure to drill the holes straight and perpendicular to the surface of the pool deck. If the
hoes are drilled at an angle, the base plate may not secure properly.
• Install one plastic insert (provided) into each of the drilled holes.
• Place the base plate on the pool deck over the drilled holes. Secure the base plate to
the pool deck with the three screws provided.
• Re-install the batteries in the Detector Unit. Place the Detector Unit housing over the
base plate. Lift up slightly on the rear of the housing. Slide the tab on the front of the
base plate into the slot in the nose of the Detector Unit housing; then lower the housing
onto the base plate.
• Re-install the two screws at the rear of the Detector Unit.
• Extreme environmental conditions (strong wind, heavy rain) can affect AquaGuard’s
performance, or in rare cases, cause a false alarm. The time required to return to “armed”
mode under these conditions may be longer than normal.
• In order to properly detect, the AquaGuard Detector Unit must be installed within 22 feet (7
meters) of all possible fall locations. Larger pools should be equipped with an additional
Detector Unit to meet this requirement. (Maximum 2 detectors on a pool)
• Pools with perimeter overflow are not compatible with AquaGuard.
• Vanishing edge (Infinity or zero edge) pools typically require two AquaGuard Detector Units.
Tools Required
You will need the following tools and materials to install and test the AquaGuard system:
• Marking pen • Flat-head screwdriver
• Drill • 2.5 (19.5 liter) gallon water container
• ¼” (7 mm) Masonry drill bit • Rope
• Phillips-head screwdriver
Installation
Permanent installation of the Detector Unit on the pool deck (as described in STEP 6) is optional.
STEP 1 - Choose the Detector Unit Installation Site
• The Detector Unit must be installed within 22 feet (7 meters) of all possible fall locations
and must have direct view of the rest of the pool. In most cases, this location will be at
the middle of the longest side of your pool. Typical examples of installation are shown
below.
STEP 7 - Confirm the System is On and Armed
• Wait 6 to 10 minutes to allow the unit to automatically “arm.” When the water has
stabilized and the unit is “armed”, the “ARMED” LED will blink and the beep sequence
will repeat.
• Establish the radio link as described in step 4.
• Repeat the tests described in step 5.
10
22 FEET
(7 METERS)
22 FEET
(7 METERS)
22 FEET
(7 METERS)
22 FEET
(7 METERS)
• Be sure that the Detector Unit is not installed next to any pool features (jets, water
features, etc.) that may cause disturbance.
• Be sure that the Detector Unit can be accessed easily.
7
Page 10

AquaGuard Owner’s Guide RJE Technologies, Inc.
STEP 2 - Position the Detector Unit at the Chosen Site
• Place the Detector Unit at the installation site so the Sensor Tube extends into the
water.
• Make sure the bottom of the Sensor Tube is between
5 - 7 inches (13 – 18 cm) below the water’s surface.
If the Sensor Tube is too short, install a Tube
Extension on the Sensor Tube to meet the required
5 - 7 INCHES
(13 - 18 CM)
depth (see
•
Assembling the Detector Base Unit and Sensor
Tube on page 6 for details).
If the Sensor Tube is too long, it may be necessary to cut the Tube to the proper length.
BE SURE the water in the pool is at its normal level before measuring. Fill the pool if
necessary. BE SURE to measure carefully before cutting the Tube.
If the tube end is at less than 5 inches (15 cm), unwanted alarms may occur. If the tube
end is deeper than 7 inches (18 cm), the unit’s “detection” sensitivity will be decreased.
STEP 3 - Choose a Location for the Remote Unit
• The Remote Unit must be placed within 100 feet (33 meters) of the Detector Unit and in
direct line of sight.
The Selected location should have as few obstructions between the Remote Unit and
the Detector Unit as possible. Interior and exterior walls or other obstacles will reduce
the range of the Remote Unit.
• The remote must be at the same level or a level above the pool. The ideal location
would be a window overlooking the pool.
• Do not place the remote unit in an underground basement.
• Choose a location that will allow the Remote Unit alarm to be heard throughout the
house.
• Choose a location that is near an AC outlet to allow the Remote Unit to be powered by
the AC adapter.
The Remote Unit must always be powered by the AC adapter. The battery is for back-up
and emergency use only.
STEP 4 - Establish the Radio Link
The AquaGuard system uses a radio transmitter/receiver to allow communication between
the Detector Unit and the Remote Unit. You must establish the radio link to use the Remote
Unit to monitor and control your AquaGuard system. Perform the following:
• Power up the Remote Unit by plugging the AC Adapter into the wall outlet.
• Wait for remote unit to establish radio link with detector. This may take up to 5 minutes.
• Remote Unit will beep once when RF Link has been established and “Armed” LED
should be blinking if detector is armed.
• Press the OK button on the Remote Unit three times to put the Detector Unit into “swim”
mode, then press the OK button on the Remote Unit three times again to put the Detector
Unit into “armed” mode.
STEP 5 - Test the System for Detection
Prepare a Test Simulator
• Fill a 2.5-gallon (19.5 liter) water container with enough water to weigh approximately 18
pounds (8 kg).
• Tie a 6-foot (1.8 meter) length of rope to the container handle.
Perform Test One
• Make sure both the “ARMED” LED on the Detector Unit and the “green” LED on the
Remote Unit are on.
If the LEDs are not on, the system is not “armed”. Allow additional time for the water in
the pool to settle enough to allow the Detector Unit to “arm.”
• Place the test simulator on the edge of the pool, 4 - 6 feet (1.2 – 1.8 meters) from the
Detector Unit.
• Hold the rope, and roll the test simulator into the pool. Both the Detector Unit and the
Remote Unit alarms should sound.
If the alarms do not sound, it may be necessary to change the location of the Detector
Unit.
Reset the System
• Press any key on the Detector Unit keypad to turn the alarm off.
• Remove the test simulator from the pool.
• Wait 6 to 10 minutes to allow the unit to automatically “re-arm.” When the water has
stabilized and the unit is “armed”, the “ARMED” LED will blink and the beep sequence
will repeat.
Perform Test Two
• Make sure both the “ARMED” LED on the Detector Unit and the “green” LED on the
Remote Unit are on.
If the LEDs are not on, the system is not “armed”. Allow additional time for the water in
the pool to settle enough to allow the Detector Unit to “arm.”
• Place the test simulator on the edge of the pool, at the point farthest from the Detector
Unit, not to exceed 22 feet (7 meters).
• Hold the rope, and roll the test simulator into the pool. Both the Detector Unit and the
Remote Unit alarms should sound.
If the alarms do not sound, it may be necessary to change the location of the Detector
Unit.
Reset the System
• Press any key on the Detector Unit keypad to turn the alarm off.
• Remove the test simulator from the pool.
8
9
 Loading...