

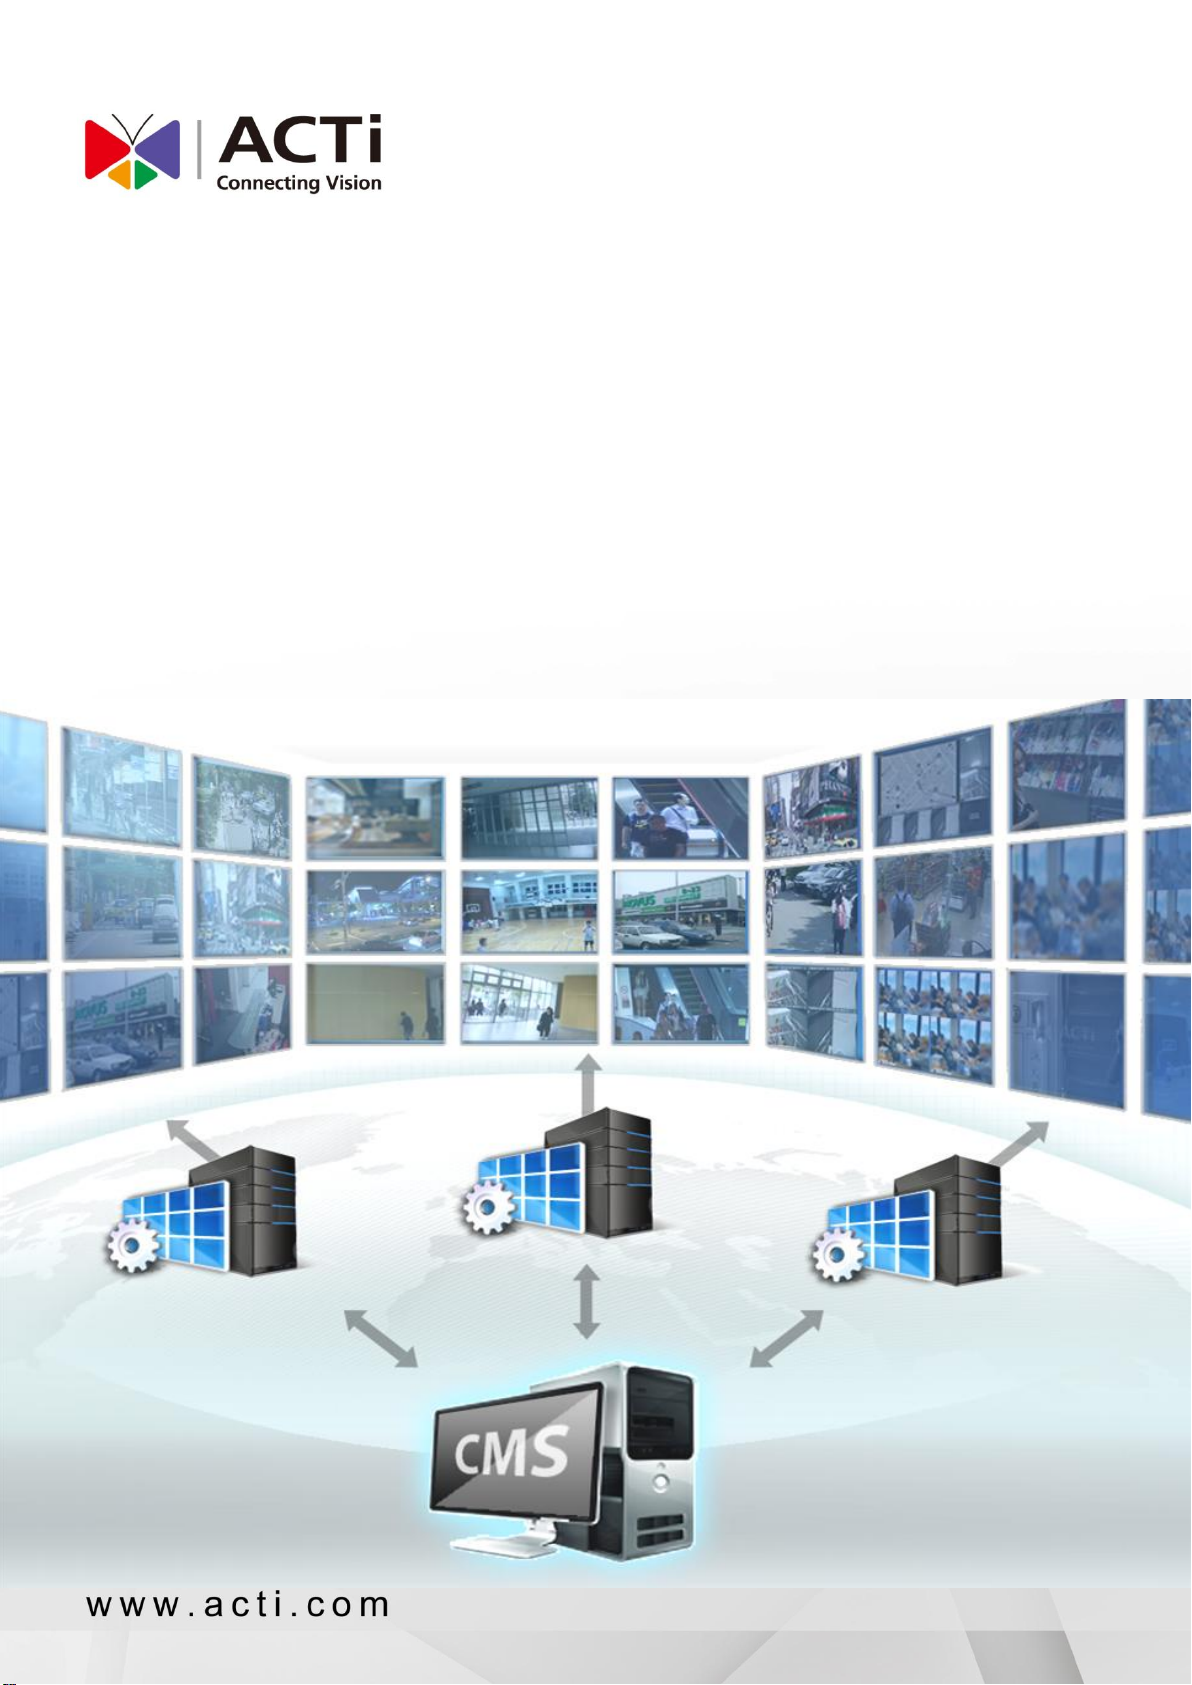
Page 1
TV Wall Server 1
System Administrator’s Manual
2014/07/03
For V1.0.05 Version
Page 2

www.acti.com
TV Wall Server 1 System Administrator’s Manual
Legal Notice
Disclaimer
The information contained in this document is intended for general information purposes.
ACTi Corporation shall not be liable for errors contained herein or for incidental or
consequential damages arising from the furnishing, performance, or use of this manual.
The information contained herein is subject to change without notice.
The English version of this document is the official one for all purpose. All the translated
versions are provided as a convenience. Any discrepancies or differences created in the
translations of any other languages are not legally binding.
Copyright
Copyright © 2003-2014 ACTi Corporation All Rights Reserved.
Trademarks
ACTi Connecting Vision and its logo are registered trademarks of ACTi
Corporation.
Microsoft® and Windows® are registered trademarks of Microsoft Corporation in the
United States and/or other countries.
Intel® is a trademark or registered trademark of Intel Corporation or its subsidiaries in the
United States and other countries.
All other product or company names mentioned in this document may be trademarks or
registered trademarks of their respective owners.
2
Page 3

www.acti.com
TV Wall Server 1 System Administrator’s Manual
About This Manual
Target Audience
This manual is intended for System Administrators who are responsible for installing and
setting up TV Wall Server Stations. The reader is expected to know the fundamentals of IP
surveillance system integration and the skills of setting up the multi-monitor environment, as
well as to own the administrative privileges of CMS server in order to access the TV Wall
Server settings and layout arrangements.
You may also check ACTi Download Center for updates and documents:
http://www.acti.com/DownloadCenter/
Technical Support
If you have any questions during system installation, please feel free to contact our engineers
via our Customer Help Desk platform http://www.acti.com/CHD.
3
Page 4

www.acti.com
TV Wall Server 1 System Administrator’s Manual
Table of Contents
1 Legal Notice 2
Disclaimer 2
Copyright 2
Trademarks ............................................................................................ 2
2 About This Manual 3
Target Audience .................................................................................... 3
Technical Support .................................................................................. 3
3 Table of Contents 4
4 Introduction 6
Product Overview .................................................................................. 6
System Architecture .............................................................................. 7
System Requirement ............................................................................. 8
5 Installation 10
Connect the Monitors ......................................................................... 11
Adjust the Display Settings ................................................................. 12
Install TV Wall Server Program ........................................................... 14
Activate TV Wall License ..................................................................... 15
Online Activation 15
Offline Activation 15
Step-by-step Online License Activation ....................................... 16
Step-by-step Offline License Activation ....................................... 18
Start TV Wall Service ........................................................................... 20
Bring up the Views ....................................................................... 20
Configure OSD Settings of Monitors ........................................... 21
Disable Windows Screen Saver and Monitor Sleep ............................ 22
4
Page 5

www.acti.com
TV Wall Server 1 System Administrator’s Manual
Disable Windows Screen Saver ................................................... 22
Windows 7 22
Windows 8 22
Make the Monitors Always Stay Awake ....................................... 22
Windows 7 22
Windows 8 22
6 Configure TV Wall Monitor Views 23
Add TV Wall Servers ............................................................................ 23
Create TV Wall Views .......................................................................... 24
Step One: Create a TV Wall Views Group (Optional) .................. 24
Step Two: Copy Existing Views (Optional) ................................... 25
Step Three: Edit Views (Optional) ................................................ 26
Step Four: Create a View to Display TV Wall Controller .............. 27
Assign Views to Monitors .................................................................... 31
Step One: Create a View Set ....................................................... 32
Step Two: Assign Views to this View Set ..................................... 33
Step Three: Save This View Set .................................................. 35
5
Page 6

www.acti.com
TV Wall Server 1 System Administrator’s Manual
Introduction
Product Overview
In a video surveillance deployment, especially with hundreds or thousands of cameras
monitoring vast areas, it is ideal for the control center to employ a TV Wall display system.
As the TV Wall system offers multiple screens to display good picture clarity and
distinguished details of numerous channels, the security personnel is benefitted a lot when
monitoring unusual activities and analyzing video data. With the adoption of large screens, it
also allows a group of viewers to watch simultaneously, which is not likely to be carried out on
a single normal-sized monitor.
To ensure that your central management system is compatible with future-proof display
deployment, ACTi TV Wall, an add-on feature of CMS server, enables multiple CMS preset
views to be displayed on different monitors at the same time. A system operator no more
needs to switch between layouts on the same screen with the help of ACTi TV Wall, which
indeed brings more operational efficiency and gets the viewer more awareness of occurring
incidents.
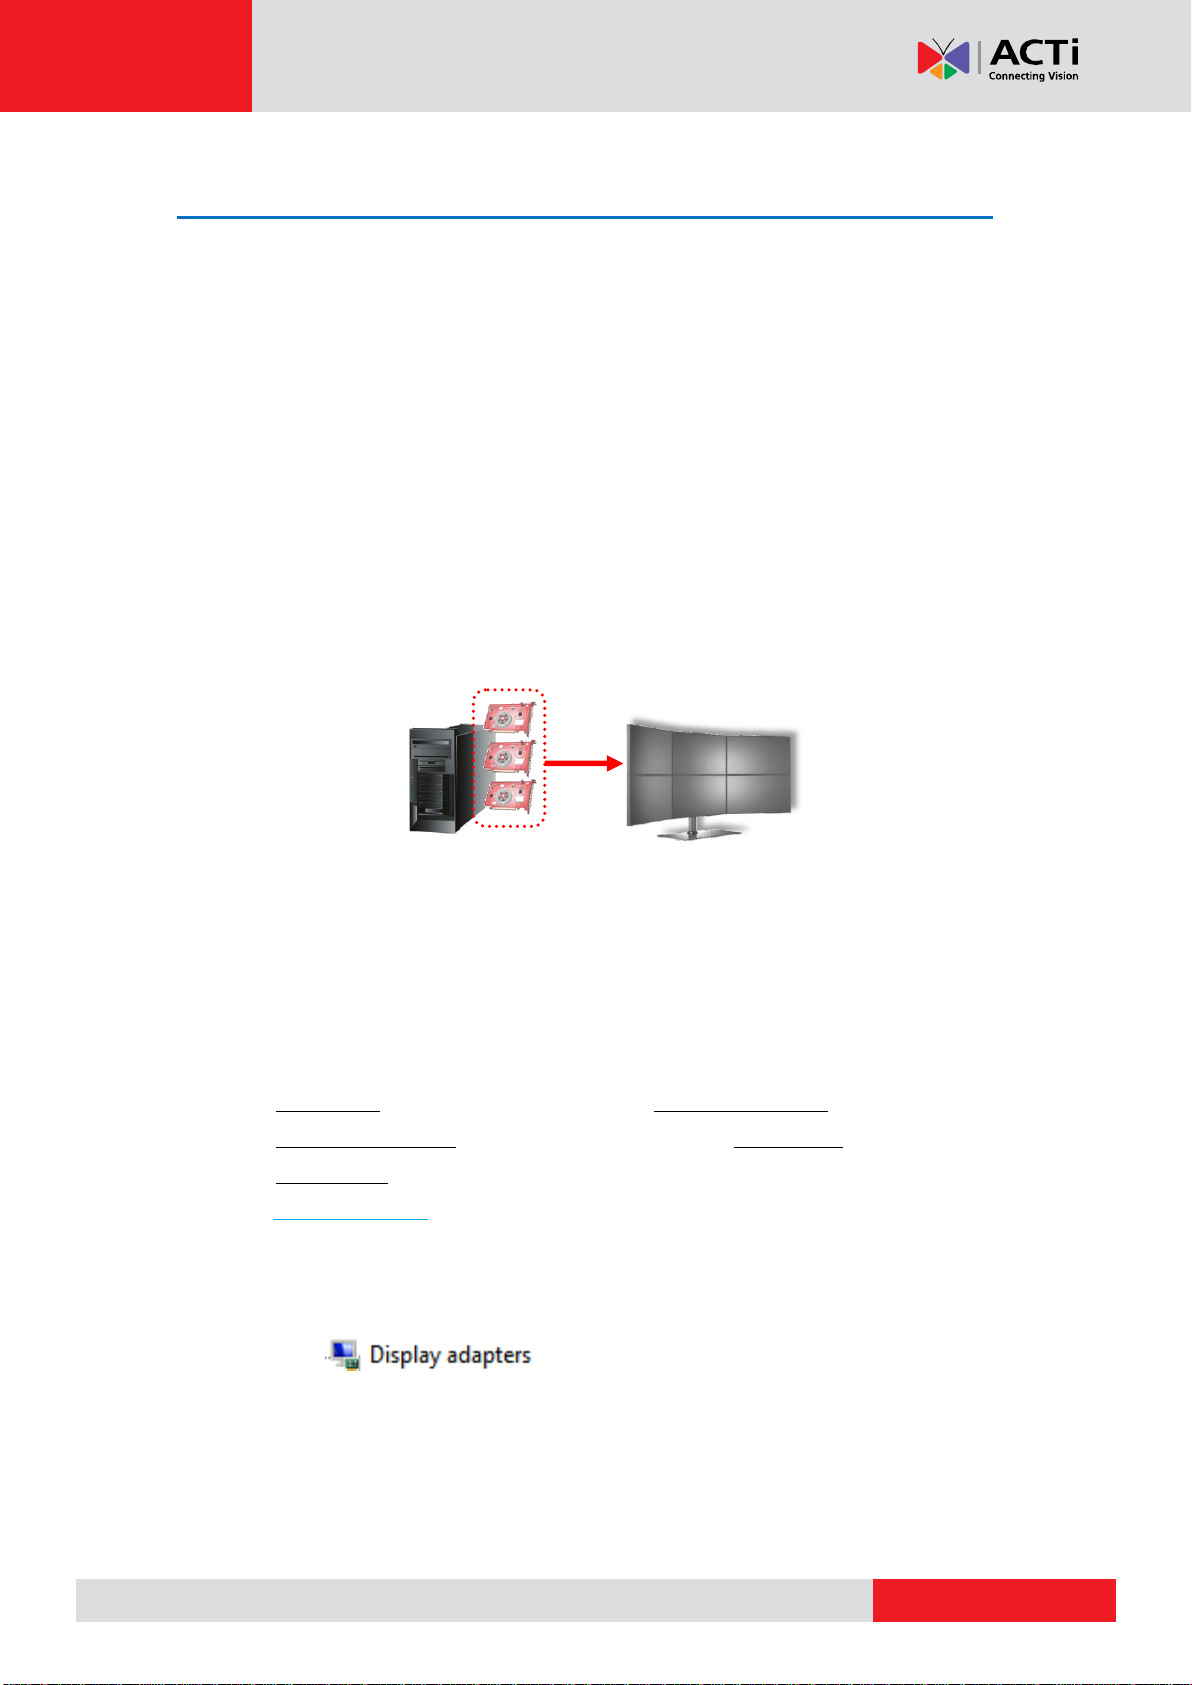
Installed on a separate server computer, ACTi TV Wall application is scalable and flexible
due to its hardware independency. In other words, the number, types, as well as
configurations of the monitors are totally up to the installer’s decision and installation budget
for the project’s display needs.
.
6
Page 7
www.acti.com
TV Wall Server 1 System Administrator’s Manual
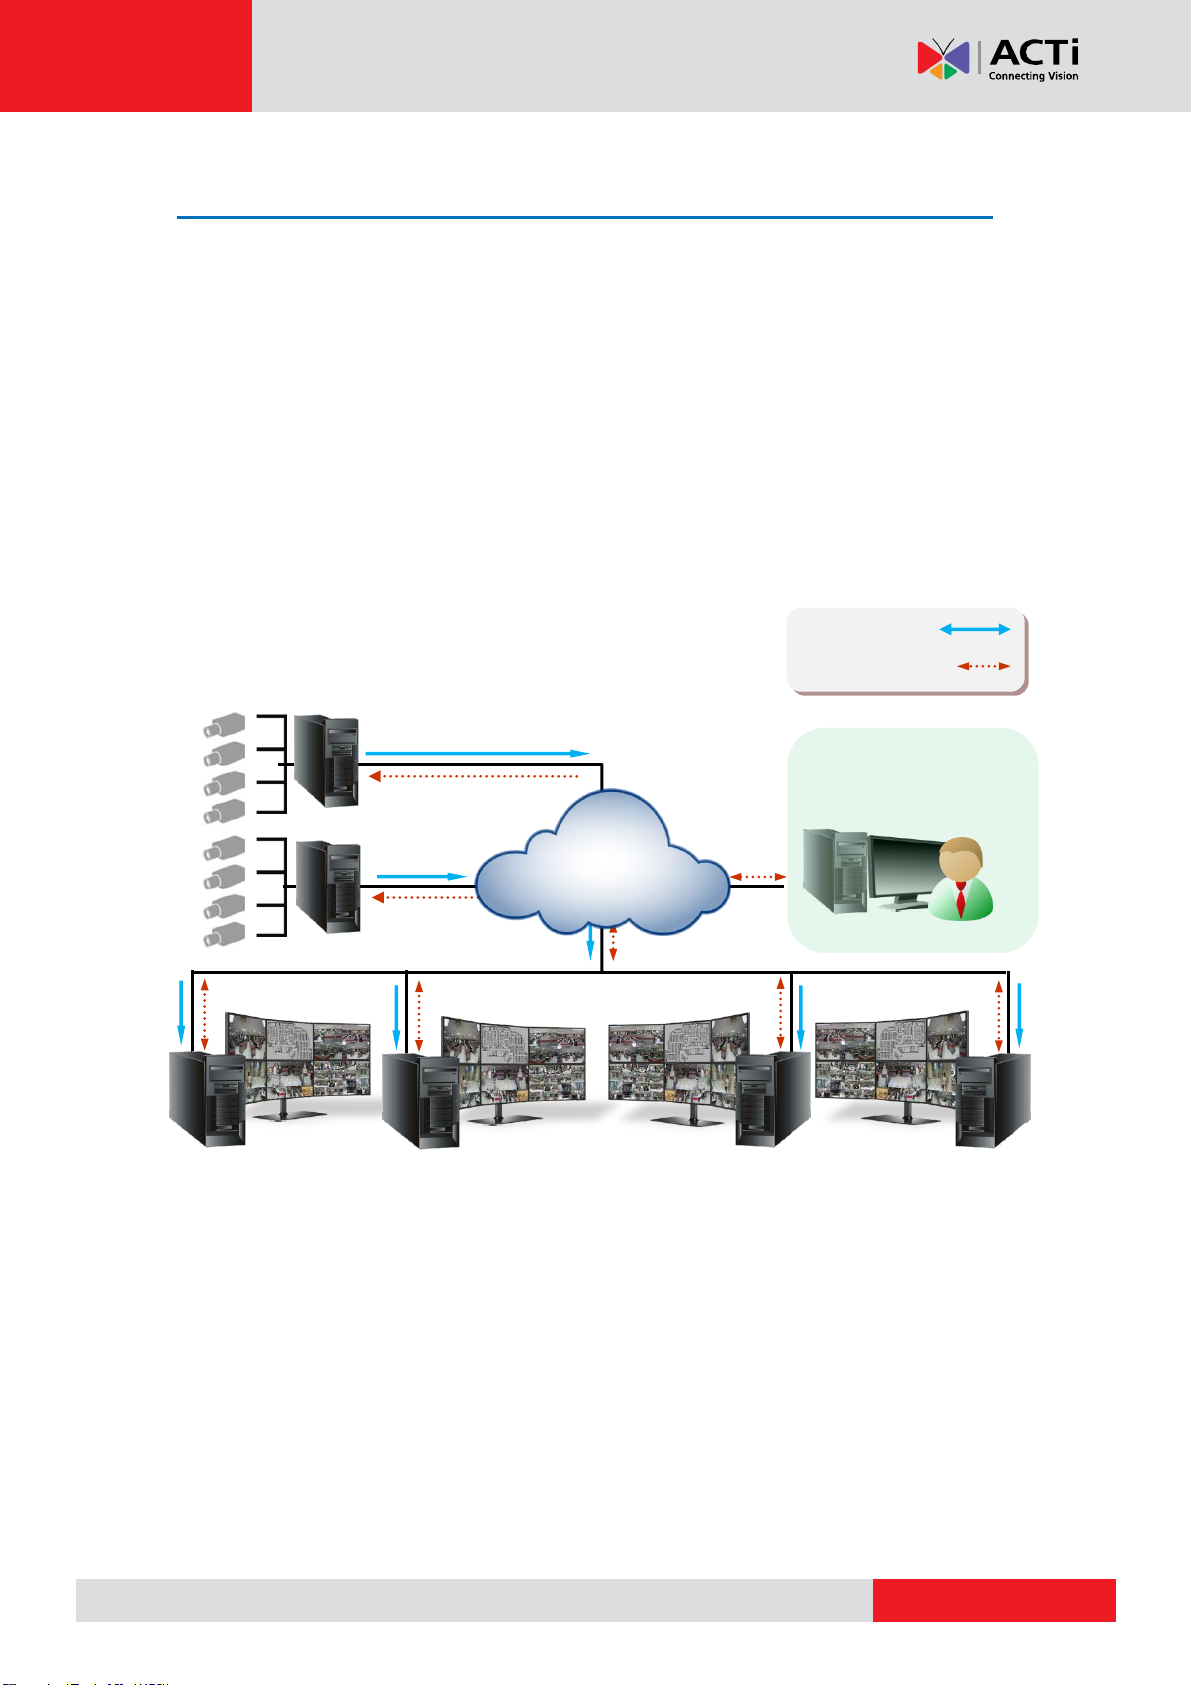
TV Wall Servers
TV Wall
System Control
NVR
Video Stream
Communication
CMS
System Architecture
Within CMS system, a TV Wall Station acts as a CMS Client, it consists of a TV Wall Server
computer (where TV Wall server program is installed) and multiple monitors. As the TV Wall
service starts up, NVR Servers will be requested by CMS Server to stream video to TV Wall
Station.
However, with the purpose of pure real-time monitoring, a TV Wall Station is more like a
video recipient, for only live video and motion alerts are presented on TV Wall monitors; while
other operations such as video playback or PTZ control are performed via genuine CMS
Client interface (as Web Client or Workstation Client).
7
Page 8
www.acti.com
TV Wall Server 1 System Administrator’s Manual
Minimum
PC Spec
Live Channel
Number(*3)
Standard(*2)
Advanced(*2)
CPU
<100
Intel Core 2 Quad 2.4 GHz
Intel Core i5 2.4 GHz
100-200
Intel Core i5 2.4 GHz
Intel Core i7-920 2.67 GHz
>200
Intel Core i7-920 2.67 GHz
Intel Core i7-3970X 3.5 GHz
RAM
1-400
4GB
>400
8GB (*4)
Operating
System
Windows 7, Windows 8, Windows Server 2008, Windows Server 2012 (*5)
Network
Ethernet 1000 Base-T
System Requirement
The performance of TV Wall display quality is largely determined by the computer hardware
capability and number of live channels. The table below provides basic guidelines for
selecting proper hardware for TV Wall Server computer (1*).
*1 These specifications are based on following camera settings:
1280x1024, 3Mbps, 18fps, MPEG-4
*2 In some cases, the dropping of frames on live view is done purposely to avoid system
instability caused by CPU overload. TV Wall Server program will automatically activate
“Decode I Frame Only” mechanism for all live channels when the server‘s CPU loading is
over 80%. The computer system at Standard level may occasionally switch to “Decode I
Frame Only” mode, which provides fewer frames per second but still enough to tell
significant movements and original image resolution; while an Advanced-level computer
allows live channels to display at original video frame rate at all times due to its more
powerful CPU.
*3 The total concurrently displayed channels of all monitors. For example, a station of 6
monitors whose layout is using the arrangement below will have 1x1 + 2x9 + 3x16
= total 67 live channels
1 monitor displaying 1x1 layout
2 monitors each displaying 3x3 layout
3 monitors each displaying 4x4 layout
*4 Please use 64-bit Windows operating system if your TV Wall Server computer has more
than 4GB RAM.
Microsoft Windows Operating System has limits on memory and address space,
regardless of the real or virtual memory available on a particular computer. Take Windows 7
8
Page 9

www.acti.com
TV Wall Server 1 System Administrator’s Manual
Professional for example, the maximum physical memory for a 32-bit(X86) system can
address is 3.5 GB even though 16 GM of RAM has been installed on this computer.
Therefore, if you consider increasing the computer’s multi-tasking capability by adding more
RAM, you'll need a 64-bit version of Windows to take advantage of it all.
Please visit the link below
http://msdn.microsoft.com/en-us/library/aa366778%28VS.85%29.aspx#physical_memory_
limits_windows_7 for more memory limitations on various Windows platforms.
Besides the limitation mentioned above, you may find the usable memory displayed on
Computer Properties is still less than actual installed memory.
This is a common symptoms of all Windows platforms, please find explanations and
solutions in this Windows official support document
http://support.microsoft.com/kb/978610/en-us ;
http://windows.microsoft.com/en-us/windows7/taking-the-mystery-out-of-64-bit-windows
*5 Please make sure your operating system is fully patched with the latest service packs.
9
Page 10
www.acti.com
TV Wall Server 1 System Administrator’s Manual
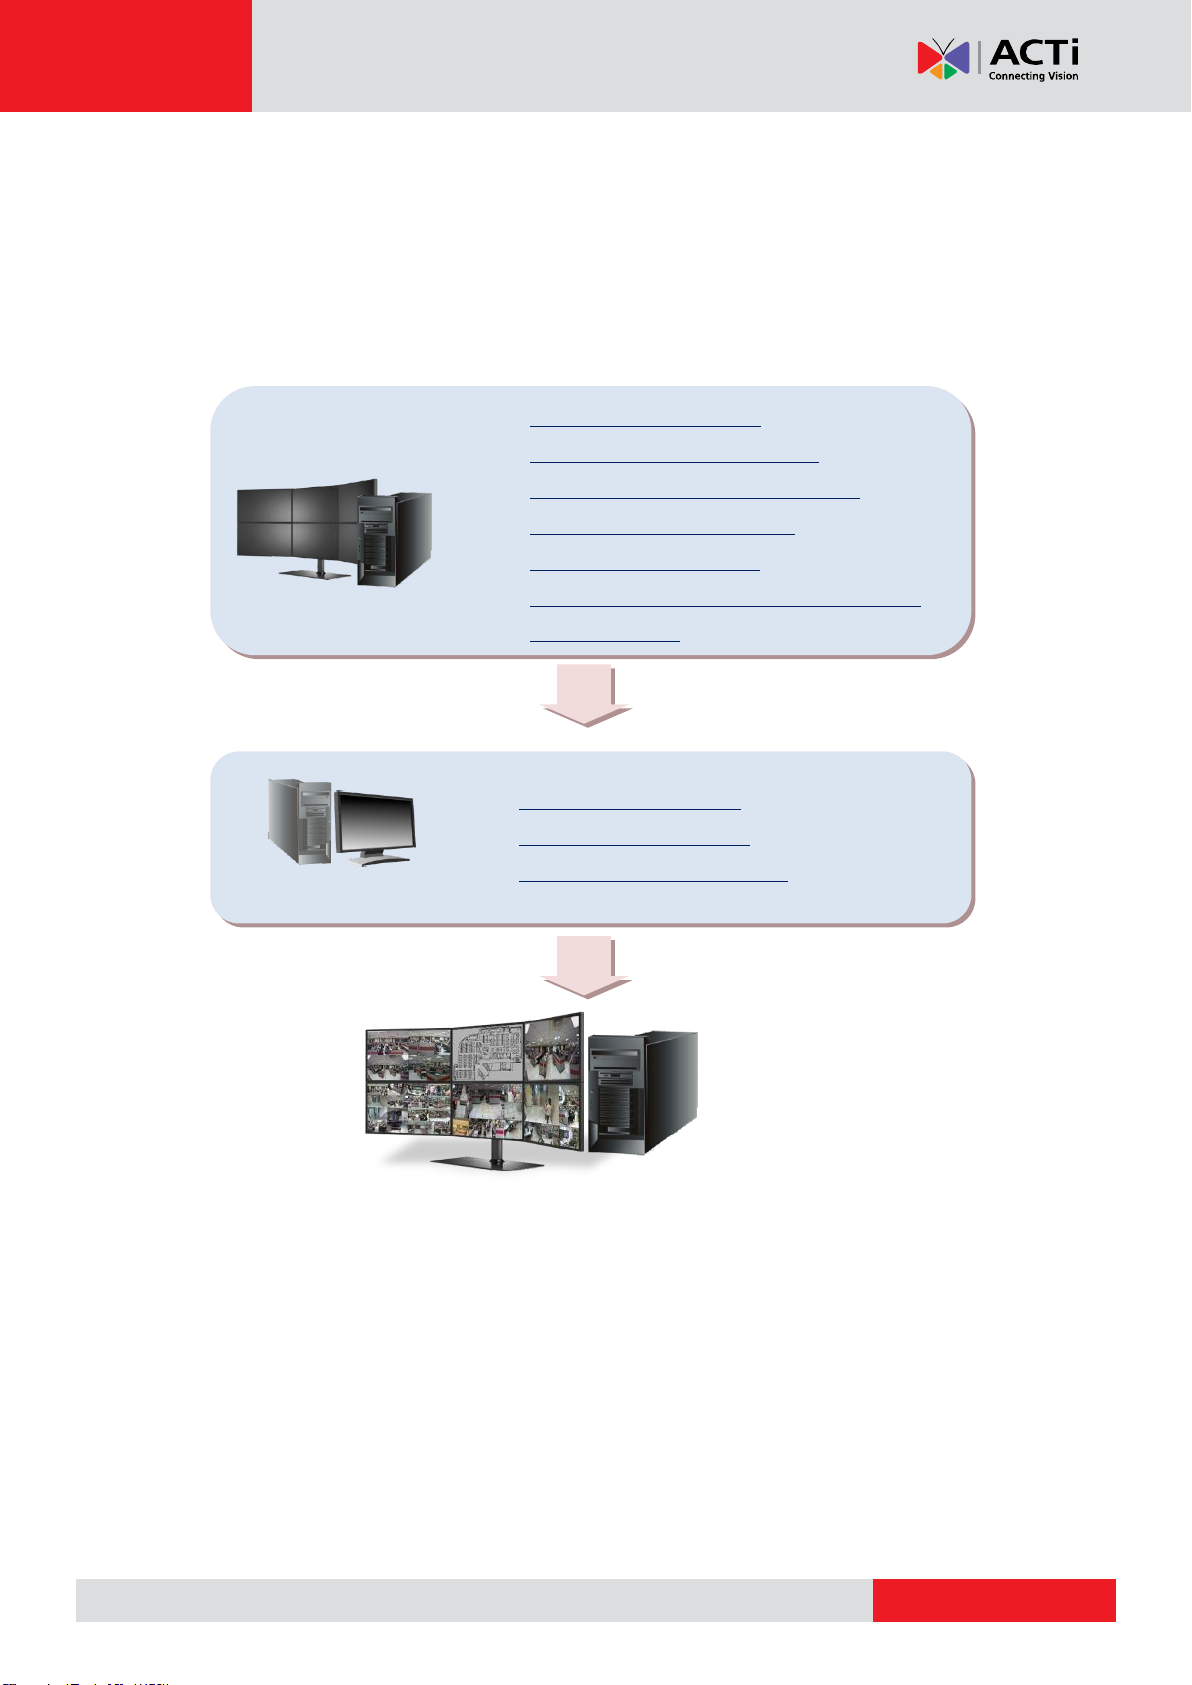
1. Connect the Monitors
2. Adjust the Display Settings
3. Install TV Wall Server Program
4. Activate TV Wall License
5. Start TV Wall Service
6. Disable Windows Screen Saver and
Monitor Sleep
1. Add TV Wall Servers
2. Create TV Wall Views
3. Assign Views to Monitors
TV Wall Station
CMS Client
Installation
The installation process involves two phases – setting up TV Wall Station and configuring TV
Wall Views.
10
Page 11
www.acti.com
TV Wall Server 1 System Administrator’s Manual
Connect the Monitors
The setup of multiple monitors involves several different sources – hardware, software and
configurations; hence, there is no real limit to the scale of a TV Wall Station. With the
employment of dedicated appliances, a professional personnel can even implement a
high-end video wall in CMS system.
To leave the most flexibility and scalability to multi-monitor installation, ACTi TV Wall
application is designed as a seamless solution to go with any level of TV Wall Station. With
the ACTi TV Wall server program installed, a windows computer can turn into the TV Wall
Server, without extra adjustments made on the computer itself.
In general, the key factor determining how many video outputs a TV Wall server computer
supports are the number and capabilities of graphic card (on-board or external).
Please make sure your equipments can fulfill the required number of monitors, and
consider the following suggestions to have all your components work smoothly together:
1. The computer’s motherboard supports your required number of graphic cards. It is
recommended that you use the same model of graphic cards to avoid problems caused
by mixing different models. For example, a TV Wall Station of 6 monitors requires all
the following items:
a. A computer whose motherboard supports three graphic cards.
b. Three graphic cards, each capable of outputting to two displays concurrently.
c. Six monitors whose video inputs match the graphic cards’ output port types.
2. Go to Microsoft Update to install any related hardware updates and operating system
device packs.
3. Visit the manufacturer's website to update the graphic cards’ drivers to the latest. By
now, your computer should have recognized all the connected graphic cards and show
them under on Windows Device Manager.
4. Power on all the monitors, and connect them well with the computer.
11
Page 12

www.acti.com
TV Wall Server 1 System Administrator’s Manual
1
1
1
2
2
2
3
3
3
4
4
4
1 2 3
Adjust the Display Settings
After connecting the monitors, have your computer identify them and arrange them to fit
your display needs.
The instructions below will give you the fundamentals of how to adjust Windows display
settings on the TV Wall Server computer. Despite the fact that the demonstration of settings
shown here is for Windows 7, all the mentioned settings are available for other Windows
operating systems.
1. Right-click on the Desktop and select “Screen
resolution”.
2. On “Screen Resolution” panel, click “Identify” to match the physical monitors against
their identity numbers. The monitor IDs will appear on physical screens for a while.
3. Select “Extend desktop to this display”, this will enable each monitor to become a
separate display unit.
12
Page 13

www.acti.com
TV Wall Server 1 System Administrator’s Manual
4
5
4. In the displays arrangement area, drag and drop the monitors to fit their actual position.
When arranging the position, please put the order of monitor IDs into consideration, for
this order determines how the mouse move between the monitors. You may also adjust
the screen orientation and dimension by modifying Orientation and Resolution
properties.
5. Click “Apply” to save the settings. You may click Advanced settings to modify
advanced monitor configurations.
You may visit these links for articles about adjusting display settings for multiple monitors
on different Windows operating systems:
Windows 7
http://windows.microsoft.com/en-us/windows7/work-and-play-better-with-multiple-monitors
Windows 8
http://windows.microsoft.com/en-US/windows-8/how-connect-multiple-monitors
13
Page 14

www.acti.com
TV Wall Server 1 System Administrator’s Manual
Install TV Wall Server Program
Execute the install shield on the TV
Wall server computer.
Select “Complete” for Setup Type,
and then “Next” to proceed.
Click “Finish” when the installation
is complete.
After a successful installation, the TV
Wall Administrator Tool icon will
appear on your Windows Status Bar.
14
Page 15

www.acti.com
TV Wall Server 1 System Administrator’s Manual
Purchase licenses
from ACTi, get the
L
L
L
I
I
I
C
C
C
E
E
E
N
N
N
S
S
S
E
E
E
K
K
K
E
E
E
Y
YY
On TV Wall server, input the
L
L
L
I
I
I
C
C
C
E
E
E
N
N
N
S
S
S
E
E
E
K
K
K
E
E
E
Y
Y
Y
to activate the
license directly.
1
2
TV Wall server
(Internet access)
Purchase licenses
from ACTi, get the
L
L
L
I
I
I
C
C
C
E
E
E
N
N
N
S
S
S
E
E
E
K
K
K
E
E
E
Y
YY
On another computer, access
ACTi website to activate the
licenses using the
L
L
L
I
I
I
C
C
C
E
E
E
N
N
N
S
S
S
E
E
E
K
K
K
E
E
E
Y
Y
Y
1
2
Load the
A
A
A
C
C
C
T
T
T
I
I
I
V
V
V
A
A
A
T
T
T
I
I
I
O
O
O
N
N
N
F
F
F
I
I
I
L
L
L
E
EE
into TV Wall server
3
TV Wall server
Computer
(Internet access)
Activate TV Wall License
TV Wall Server requires a license for this single TV Wall Server computer. The license is
matched against the MAC address of the Network Interface Card (NIC) on this server
computer. Once this license key is used, it cannot be activated with another MAC.
Contact the ACTi sales representatives to purchase the license and obtain the License Key.
Upon the activation of license with the License Key, TV Wall server will automatically start.
Please note, for a TV Wall Station
● Only one TV Wall license can be activated on a single server.
● This license allows unlimited number of monitors.
● This license allows unlimited number of concurrently displayed channels.
There are two ways to activate TV Wall license depending on your network condition:
Online Activation
If there is available Internet access your TV Wall Server computer, choose online activation.
Offline Activation
Offline activation does not require Internet access for TV Wall Server. It is used when TV Wall
Server computer is located in network not connected to public Internet (e.g. in a military base).
You will need to get an activation file from another computer and transfer it to TV Wall Server
computer.
15
Page 16

www.acti.com
TV Wall Server 1 System Administrator’s Manual
Step-by-step Online License Activation
1.
Membership ID in ACTi Member Center is required for activation. Register one for free at
http://member.acti.com/
2.
On Windows Status Bar, double-click the icon to bring up TV Wall Administrator
Tool panel. On Service tab, click “Register”.
16
Page 17

www.acti.com
TV Wall Server 1 System Administrator’s Manual
3.
After choosing “Online Registration”, select a MAC Address, fill in the License Key
information and Account/Password of your ACTi member account, and then click
“Apply”.
17
Page 18

www.acti.com
TV Wall Server 1 System Administrator’s Manual
Step-by-step Offline License Activation
1.
Membership ID in ACTi Member Center is required for activation. Register one for free at
http://member.acti.com/
2.
Access http://www.acti.com/support/LicenseMgt/TVW_registration.asp, enter the
License Key and the MAC address of TV Wall server computer, click “Submit”. An
E-mail with activation code file (.lic) will be sent to your registered E-mail account.
18
Page 19

www.acti.com
TV Wall Server 1 System Administrator’s Manual
3.
On Windows Status Bar, double-click t he icon to bring up TV Wall Administrator
Tool panel. On Service tab, click “Register”.
4.
Choose “Offline Registration”. Click “Import” and upload the license file(.lic), and then
“Apply” to activate this license.
19
Page 20

www.acti.com
TV Wall Server 1 System Administrator’s Manual
Service has stopped Service is running
Start TV Wall Service
Upon a successful license activation, the TV Wall server will automatically start the service
using local host IP 0.0.0.0 and default Port 80. If the server cannot start, it might be that the
current port for TV Wall server to communicate with CMS server has been occupied by
another application,
and you will have to
define a new port in
Port field, and then
click “Apply”.
The service will
start right away.
Bring up the Views
After the TV Wall Server starts its service, you have to bring up the Views.
On Windows Status Bar, right click TV Wall Server icon to open the quick menu.
By selecting “Start Up Monitor Clients”, all
your monitors will display the Views in full
screen.
To close the TV Wall display windows
temporarily, you may press “esc” on the
keyboard or select “Close down Monitor
Clients”.
20
Page 21

www.acti.com
TV Wall Server 1 System Administrator’s Manual
NVR ID + NVR Name
Device ID + Device Name
Configure OSD Settings of Monitors
You can remove the text overlaying on channels or change the position.
On Windows Taskbar, double-click the to bring up TV Wall Administrative Tool, and
click “Setting”. Check the information you want to show or change its position, and then click
“Apply”.
21
Page 22

www.acti.com
TV Wall Server 1 System Administrator’s Manual
Disable Windows Screen Saver and Monitor Sleep
To have the monitors display Views constantly, you have to make sure the screen saver has
been disabled, and that the Display will never turn off when your system goes idle.
Disable Windows Screen Saver
Windows 7
1. Go to Control Panel”Appearance and Personalization” “Change screen saver”.
2. Select “None” from Screen saver dropdown list and click “Apply”.
Windows 8
1. Go to Control Panel, type “screen saver” in the search box and select
“Turn screen saver on or off” .
2. Select “None” from Screen saver drop down list and click “Apply”.
Make the Monitors Always Stay Awake
Windows 7
1. Go to Control Panel ”Power Options”.
2. Select a Plan and click “Change plan settings”, change all the dropdown list to “Never”
and click ”Save changes”.
Windows 8
1. Go to Control Panel, type “Power Options” in the search box.
2. Double click Power Options, select a Plan and click “Change plan settings”, change all
the dropdown list to “Never” and click “Save changes”.
22
Page 23

www.acti.com
TV Wall Server 1 System Administrator’s Manual
1 2 3
Configure TV Wall Monitor Views
Before adding a TV Wall Server to CMS system, make sure (1) your CMS server program has
been updated to the latest version and (2) this TV Wall Server has started its services.
Add TV Wall Servers
1. Access CMS server , go to Setup page TV Wall, Click “Add TV Wall”.
2. Input a Name of TV Wall server and its connection properties – Host, Port, Account and
Password. (Default account: Admin password: 123456)
3. Click “Apply” to save this server.
After applying the settings, CMS will detect the display arrangement of this station.
If you apply new display settings on TV Wall Server later, CMS will be synchronized
simultaneously. Repeat Step 1~3 to add another TV Wall Server, all the added servers will be
listed in All TV Wall category.
23
Page 24

www.acti.com
TV Wall Server 1 System Administrator’s Manual
1 2 3 4 5
Create TV Wall Views
A single TV Wall monitor is nothing more than a pure CMS live view client, it displays a View
you assign via CMS interface. After the TV Wall Servers are added to CMS system, you
may now start preparing the Views to be displayed on TV Wall monitors.
For convenience, you may assign existing CMS preset views to TV Wall monitors. However, it
is suggested that, however, you should separately manage the TV Wall Views.
This chapter will provide instructions on how to (1) create a specific group for TV Wall monitor
views, (2) copy existing CMS Views to the new TV Wall Views group, (3) edit the Views, (4)
create a TV Wall controller View. If you plan to have TV Wall monitors and CMS clients
share the same CMS view layouts, you may skip Step 1~3.
Step One: Create a TV Wall Views Group (Optional)
1. On CMS Live View screen, click View Manager.
2. On View Manager window, click to add a new group, input the group Name and click
“Apply”.
24
Page 25

www.acti.com
TV Wall Server 1 System Administrator’s Manual
1
2 4 3
6
5
6
Duplicate
Views
Step Two: Copy Existing Views (Optional)
To save time and effort, you may copy existing CMS views to the TV Wall Views group
created, and modify them later.
1. On CMS Live View screen, click View Manager.
2. On View Manager window, select a view group or a view you want to copy, click and
then the destination - TV Wall Views group, and click “Apply”.
3. On View list, you may see the duplicated views in TV Wall Views group.
25
Page 26

www.acti.com
TV Wall Server 1 System Administrator’s Manual
VViieeww TToooollbbaarr
1 3 2
4
Step Three: Edit Views (Optional)
Modify the Views to fulfill the needs of TV Wall station by using the buttons on CMS View
Toolbar.
After selecting a View from View list:
(1) On View Toolbar, click to enter edit mode.
(2) Select a layout style.
(3) ● To add a camera view:
Pull a device from Device list to a channel.
● To add a map view:
Select a channel and click , upload the map, drag the lower right corner
to adjust map size.
(4) On View Toolbar, click to save the view.
26
Page 27

www.acti.com
TV Wall Server 1 System Administrator’s Manual
1
2
Step Four: Create a View to Display TV Wall Controller
The views arrangement of each TV Wall station is manipulated by TV Wall Controller. CMS
Server will perform real-time synchronization between TV Wall Controller and the display of
TV Wall station, so that every change made via the controller will immediately be applied to
TV Wall monitors.
On CMS Live View, you may choose any channel in a View to place these controllers, so that
the surveillance operators can arrange the TV Wall Views at ease while monitoring other
Views.
To start real-time handling of the TV Wall monitors via CMS interface, you need to first create
a view on CMS Live View screen, which will act like a deck dedicated for TV Wall Controller.
1. Click on View Toolbar and fill in the View properties. It is recommended to name
this View “TV Wall Controller” and put it into the dedicated View group.
27
Page 28

www.acti.com
TV Wall Server 1 System Administrator’s Manual
3 4 5
6
2. Highlight this View, click to enter View edit mode and select a proper layout.
In View edit mode, make sure the target channel window
is empty. You may right-click and select “Remove” on the
quick menu.
3. On this blank channel window, click “Create TV Wall Controller”.
28
Page 29

www.acti.com
TV Wall Server 1 System Administrator’s Manual
7 8 9
Drag and drop
4. As this channel shows blue “TV Wall Controller” background, click to save this
View.
5. Double-click the TV Wall Controller View and drag TV Wall Station sources onto the
controller from TV Wall panel. You may place multiple TV Wall Stations here as many as
you want.
29
Page 30

www.acti.com
TV Wall Server 1 System Administrator’s Manual
10
6. After a Controller is placed, you may adjust its dimension by dragging the bottom right
corner.
When the settings are done, click on Toolbar to save this View.
30
Page 31

www.acti.com
TV Wall Server 1 System Administrator’s Manual
View Set 2
A B C
View Set 1
D E F
TV Wall Controller View
Assign Views to Monitors
Each TV Wall Station can possess numerous View Sets. For example, you can assign Views
A, B, and C for this station of three monitors, and save this combination as View Set 1; if
necessary, you may also create View Set 2 that has Views D, E, and F. The TV Wall
Controller makes it easy for you manage these layout combinations.
On CMS Live View, you can select the TV Wall
Controller view on Views list to start managing TV
Wall Views.
The icon of a view that contains TV Wall Controller
channel windows looks different from that of a
normal View.
31
Page 32

www.acti.com
TV Wall Server 1 System Administrator’s Manual
1
2
Controller Toolbar
By clicking on a TV Wall source on the Controller, the Controller Toolbar on top of the window
will become enabled.
Step One: Create a View Set
On Controller Toolbar, click and input the name of this View Set.
32
Page 33

www.acti.com
TV Wall Server 1 System Administrator’s Manual
Actual Monitor Display
Step Two: Assign Views to this View Set
The Controller Toolbar will display the name of this new View Set.
Drag a desired View from View list to a monitor.
Continue to drag another View to the next monitor in the same View set. The monitors at TV
Wall Station will immediately display the Views you just placed.
33
Page 34

www.acti.com
TV Wall Server 1 System Administrator’s Manual
Change Layout
When arranging the Views, you may still change the View Layout on Controller.
On a mionitor panel, right-click to bring up the menu and selct “Change View Layout”. You
are provided with the most used 14 layouts to select form.
Assing a Single Camera Channel
You may also drag a camera from Device list to the View.
Or you may select a live channel on CMS Live View, right-click “Send to TV Wall” to send this
live stream to a specific channel on a TV Wall monitor.
34
Page 35

www.acti.com
TV Wall Server 1 System Administrator’s Manual
Click on the View Set to rename it
Clear all Channels
To clear all the channels, click on Controller Tool Bar.
Step Three: Save This View Set
Click Controller Toolbar to save this View Set. You may select any other View Sets
from the drop-down list after you have created many of them.
The saved View Sets can be renamed or deleted. On Controller Tool Bar, click to open
the TV Wall View Manager.
Congratulations! Your TV Wall Station now has multiple View Sets. You may easily switch to
a desired View Set via CMS interface on any computer, which will be updated to the actual TV
Wall monitors in real time!
35
 Loading...