

Page 1
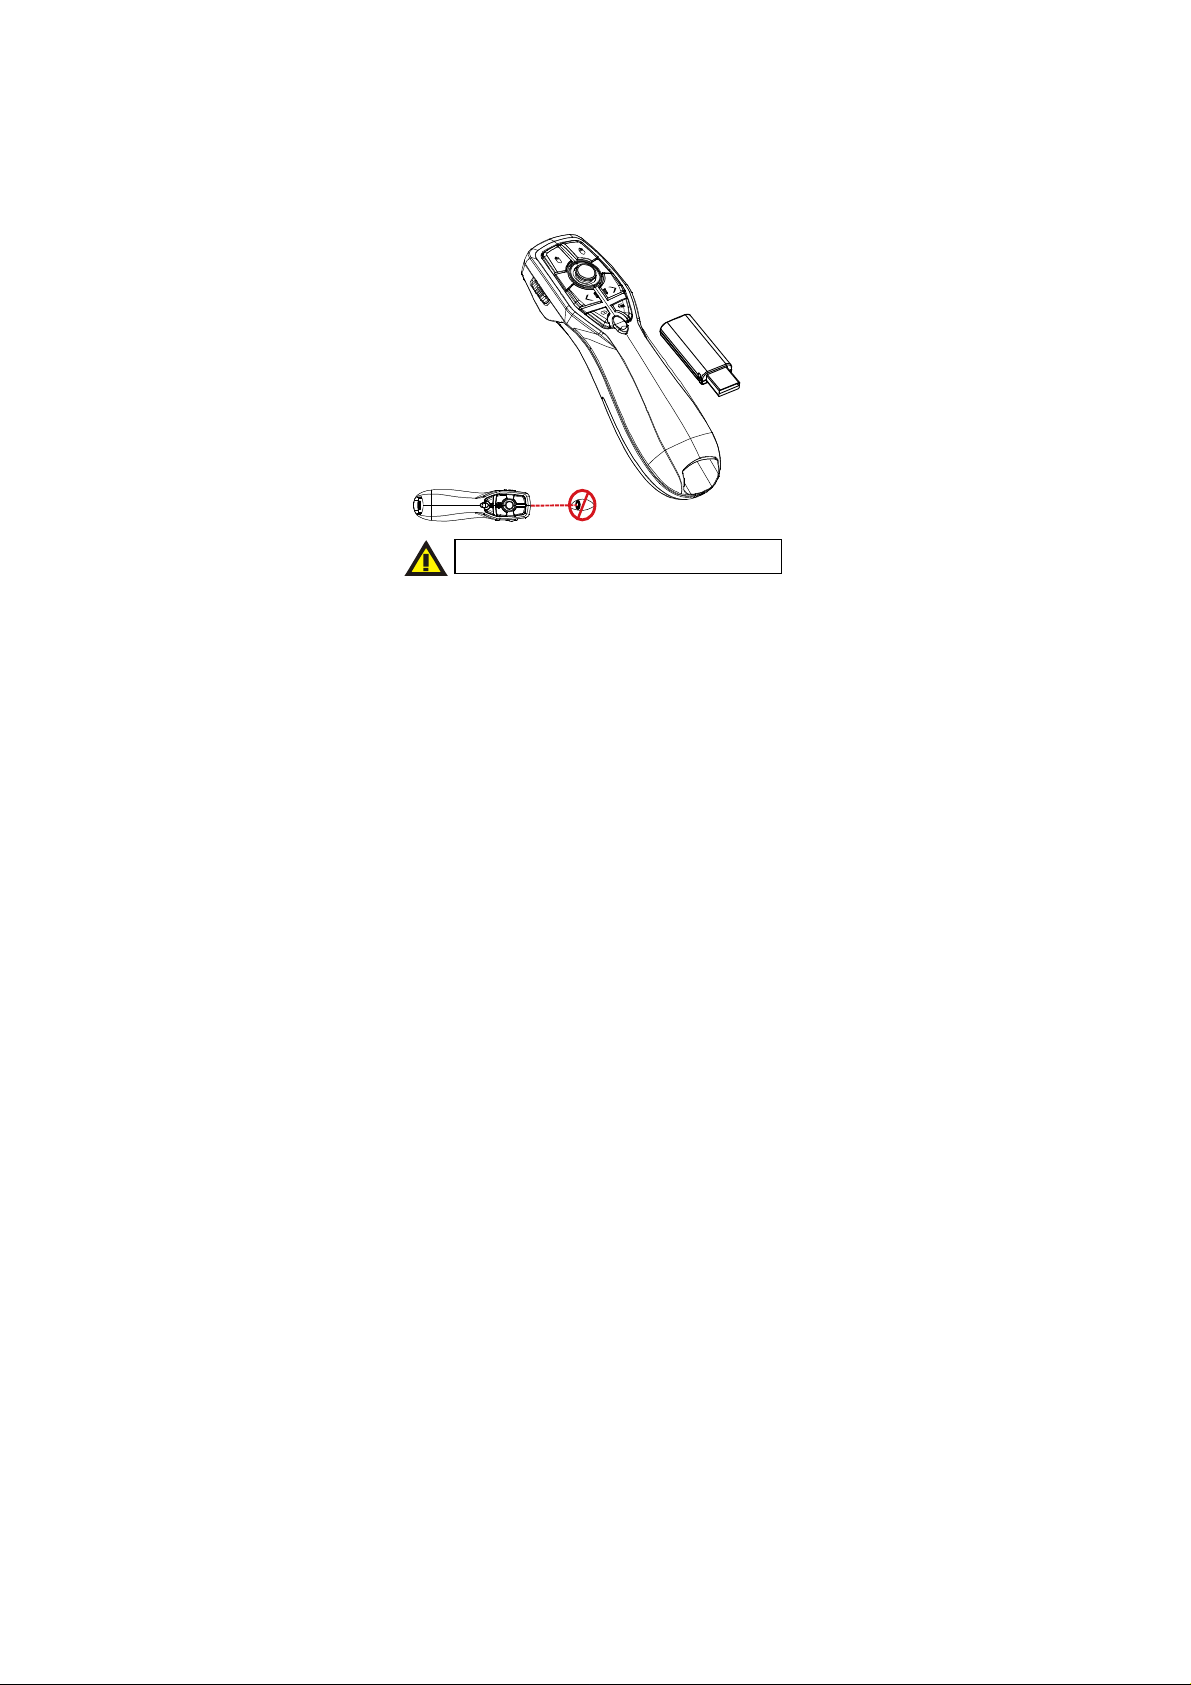
Model No: PRB / PRC
2.4G Hall Presenter
USER'S GUIDE
Ver.:1.00
Please DO NOT direct the laser beam at anyone’s eye.
CAUTION: To use this product properly, please read the user’s
manual before installation
Page 2

Regulatory Compliance
This device complies with Part 15 of the FCC Rules.
Operation is subject to the following two conditions: (1)
This device may not cause harmful interference, and (2)
This device must accept any interference received,
including interference that may cause undesired operation.
FCC Certification
This equipment has been tested and found to comply with
the limits for a Class B digital device, pursuant to Part 15 of
the FCC rules. These limits are designed to provide
reasonable protection against harmful interference when
the equipment is operated in a residential installation. This
equipment generates, uses and can radiate radio
frequency energy and, if not installed and used in
accordance with the instructions, may cause harmful
interference to radio communications. However, there is
no guarantee that interference will not occur in a particular
installation. If this equipment does cause harmful
interference to radio or television reception, which can be
determined by turning the equipment off and on, the user is
encouraged to try to correct the interference by one or
more of the following measures:
Reorient or relocate the receiving antenna.
Increase the separation between the equipment and
receiver.
Connect the equipment into an outlet on a circuit
different from that to which the receiver is connected.
Consult the dealer or an experienced radio/TV
technician for help.
Notice: Any changes or modifications not expressly approved by the
party responsible for compliance could void the user’s authority to
operate the equipment. Extension cables are not recommended, if
used, they must be shielded in order to comply with the emission
limits.
1
Page 3
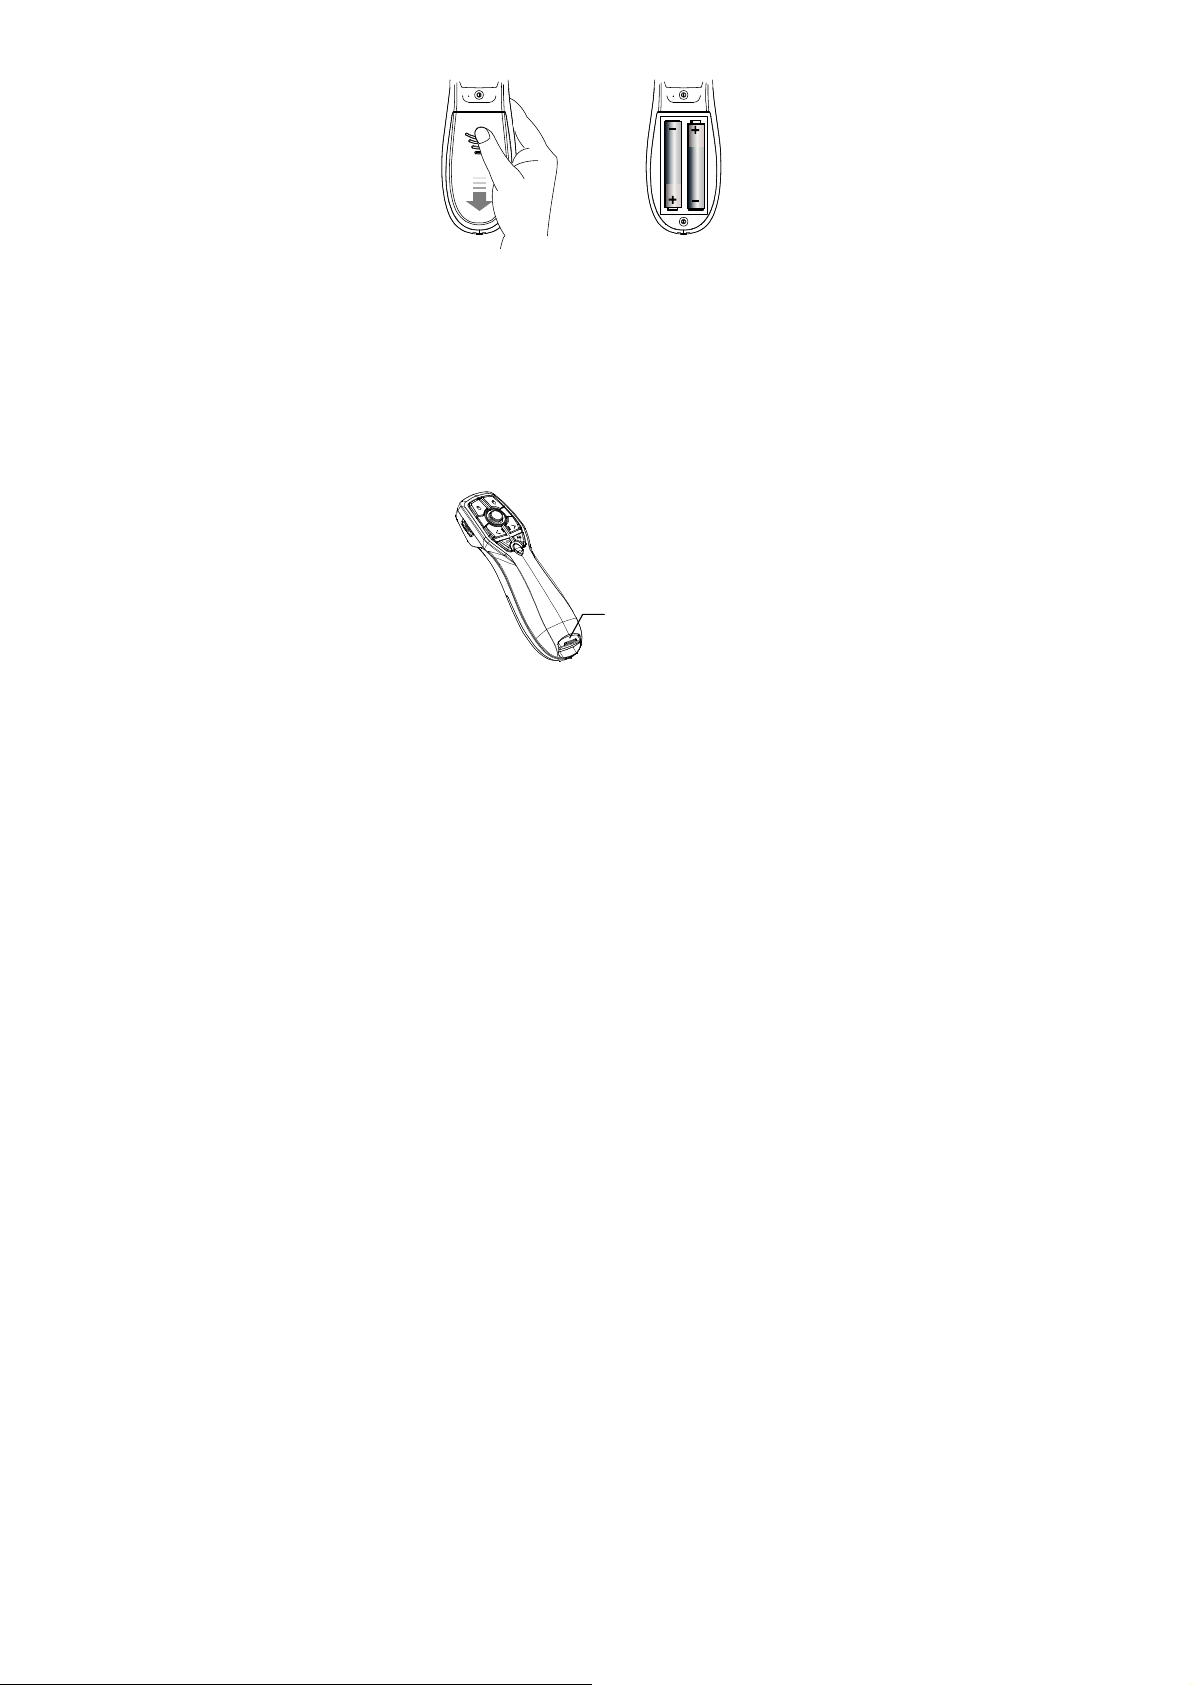
Installing the Batteries (Supplied)
*Sliding the battery cover off
˙Open the battery compartment by pressing down the
cover latch and sliding the door off the presenter.
˙Insert the two supplied AAA batteries (included in the
package) to the battery slots. Make sure the positive (+)
and negative (-) ends of the batteries match the polarity
markings inside the battery compartment.
˙Close the battery cover back into position.
*Insert batteries to the
Connecting the Presenter to the Computer
˙Retrieve the USB receiver dongle from the built-in
storage located.
USB Receiver
2
Page 4

˙Connect the USB receiver dongle to an available
USB port on your computer. Wait for the computer to go
through its default process of recognizing the new
hardware and installing the built-in native driver. You
don’t need to do anything while your computer is going
through the installation of a new device.
˙Power on the presenter by sliding the on/off switch to
ON position
On/off Switch
˙The radio frequency (RF) codes are factory preset for
*Power switch on the presenter
your convenience; the presenter should be functional at
this point.
˙Pairing: Re-plug the receiver into the USB port of your
computer, then press the connect button on the
Presenter. If the Presenter does not work after 10
seconds, pair them again. (The receiver has auto pairing
function).
3
Page 5
F
or pairing,
please press
Mouse L
eft &
Mouse R
ight button
for 4 sec
onds.
Laser Beam
Laser Beam Sw
itch
3. Laser Beam Indicator
Mouse Left Key
Mouse Right Key
*
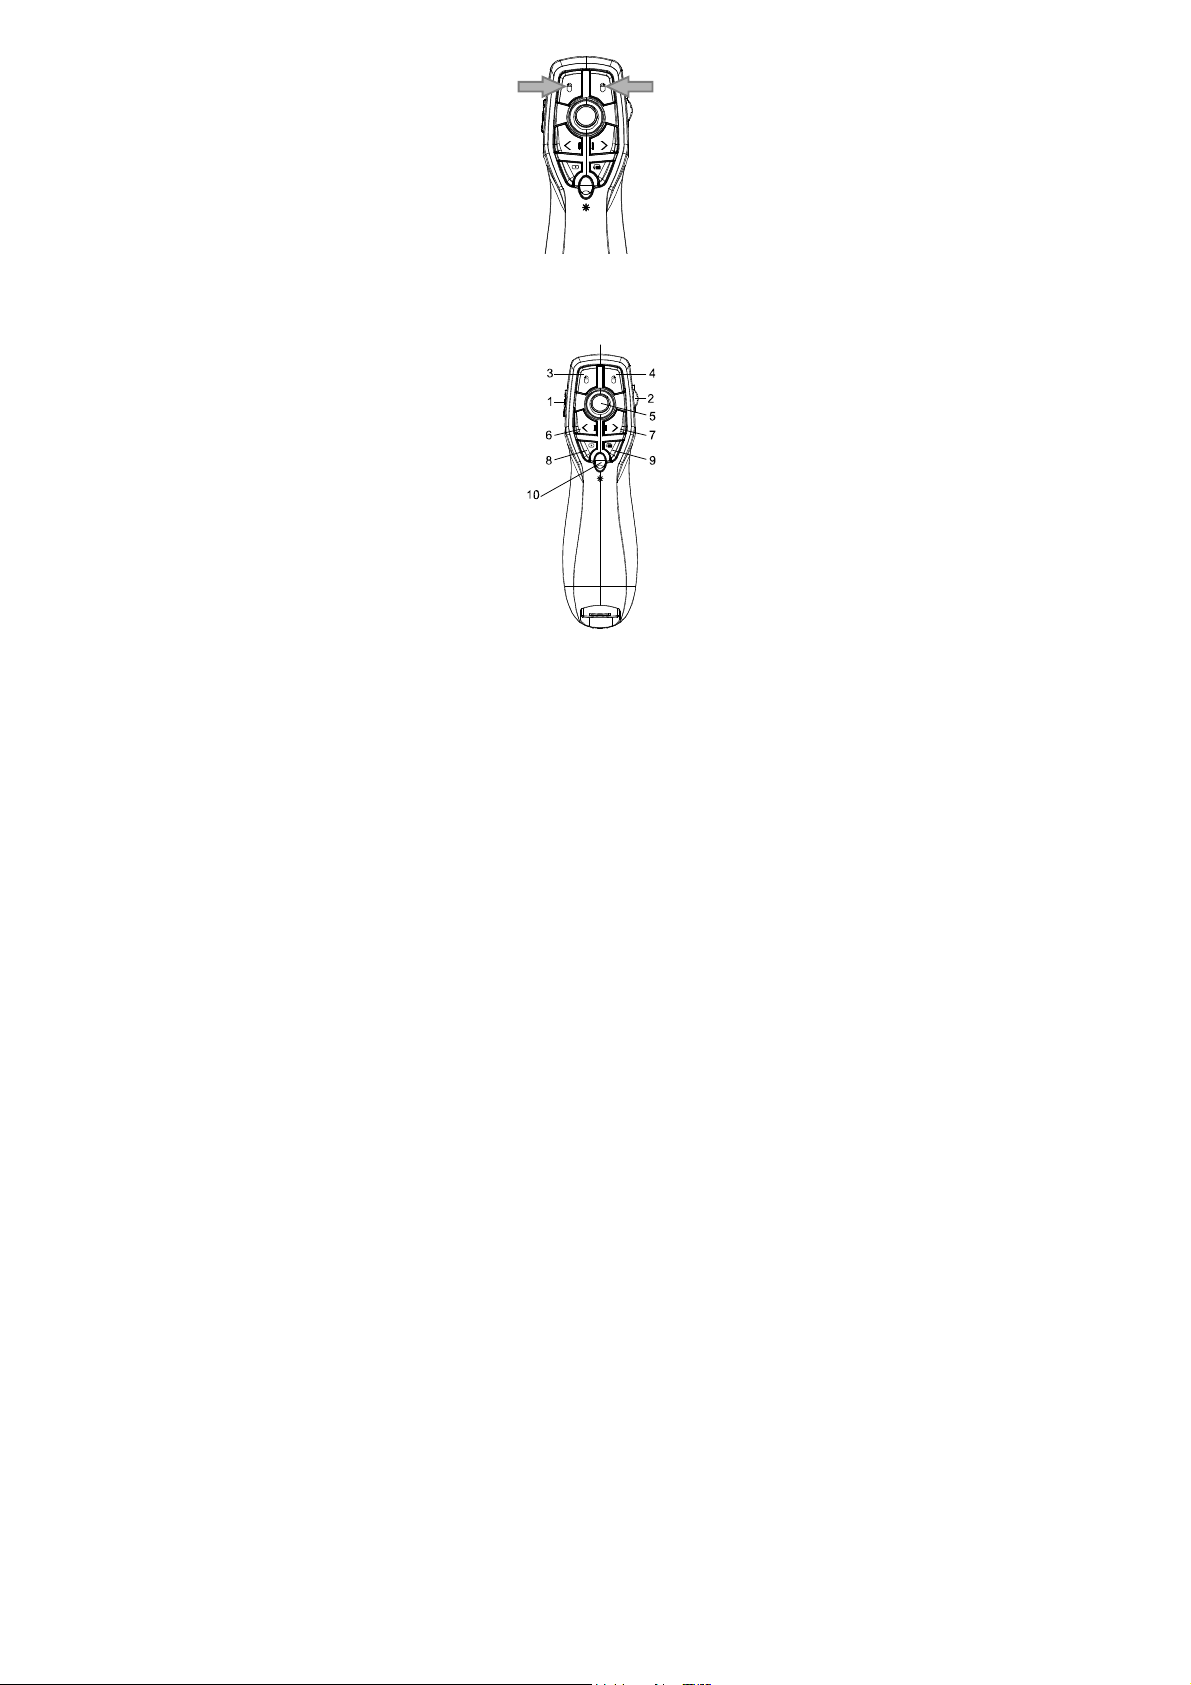
Using the Presenter
Mouse Left Key Mouse Right Key
ON/OFF Switch
Backward Forward
Esc/F5 Dark Screen
1. Pairing LED Indicator
2. Low Batter Indicator
4
Cursor
Hall Point
Page 6

Function keys Description
No. Items Description
1
2
5
Power On/OFF Main power switch
Scroll up/down Scroll up/down/Middle
Mouse Left key Mouse Left key
3
4
Mouse right key Mouse right key
Hall Point Mouse cursor control
Pre. Page Backward
6
Next Page Forward
7
ESC/F5 ESC/F5
8
Dark Screen Dark screen/ "B"
9
10
Laser pointer
Laser pointer ON/OFF
switch (LED inside)
Presenter Indicator
Power ON: LED IS ON FOR 3 sec
Pairing: LED IS ON FOR 10Sec
Low Battery Alarm
The LED light flashing in red indicates battery power is
low please change the batteries as soon as possible.
5
Page 7

Low Battery : LED will Blink once per second.
6
 Loading...