

Page 1

TABLE OF CONTENTS
FEATURE DESCRIPTIONS------------------------------------ 2
PACKAGE CONTENTS ----------------------------------------- 2
SYSTEM REQUIREMENTS ------------------------------------ 2
CONNECTING YOUR MOUSE-------------------------------- 3
INSTALLING THE SOFTWARE ------------------------------ 5
MOUSE FUNCTIONS -------------------------------------------- 7
MOUSE SETTINGS ---------------------------------------------- 9
Page 2

FEATURE DESCRIPTIONS
•
Eliminates the clutter of tangled cords
•
Provides pinpoint precision on most surfaces and won’t wear out
•
Goes to sleep when idle for a long time to extend battery life
•
Illuminates scroll wheel when the battery is low
•
Compatible with any PS/2 or USB port
PACKAGE CONTENTS
•
Wireless Optical Mouse
•
USB Receiver
•
USB to PS/2 Adapter
•
Two AA Batteries
•
CD with the mouse software
•
User’s Manual
SYSTEM REQUIREMENTS
•
Pentium 133 MHz or higher processor
•
Windows® or Mac compatible
•
For Windows® 95, 98: minimum of 32 MB of RAM recommended
•
For Windows® NT, 2000, ME, XP: minimum of 64 MB of RAM
recommended
•
Minimum of 4MB of available hard disk space
•
CD-ROM drive
•
USB or PS/2 Port
2
Page 3
CONNECTING YOUR MOUSE
y
1. If you are currently using a PS/2 mouse, turn off the power to
your computer. (You must Shut down and turn off your
computer before connecting or disconnecting any PS/2 device.
Failure to do so could damage your computer.) This is not
necessary if you are currently using a USB mouse.
2. Disconnect the existing mouse.
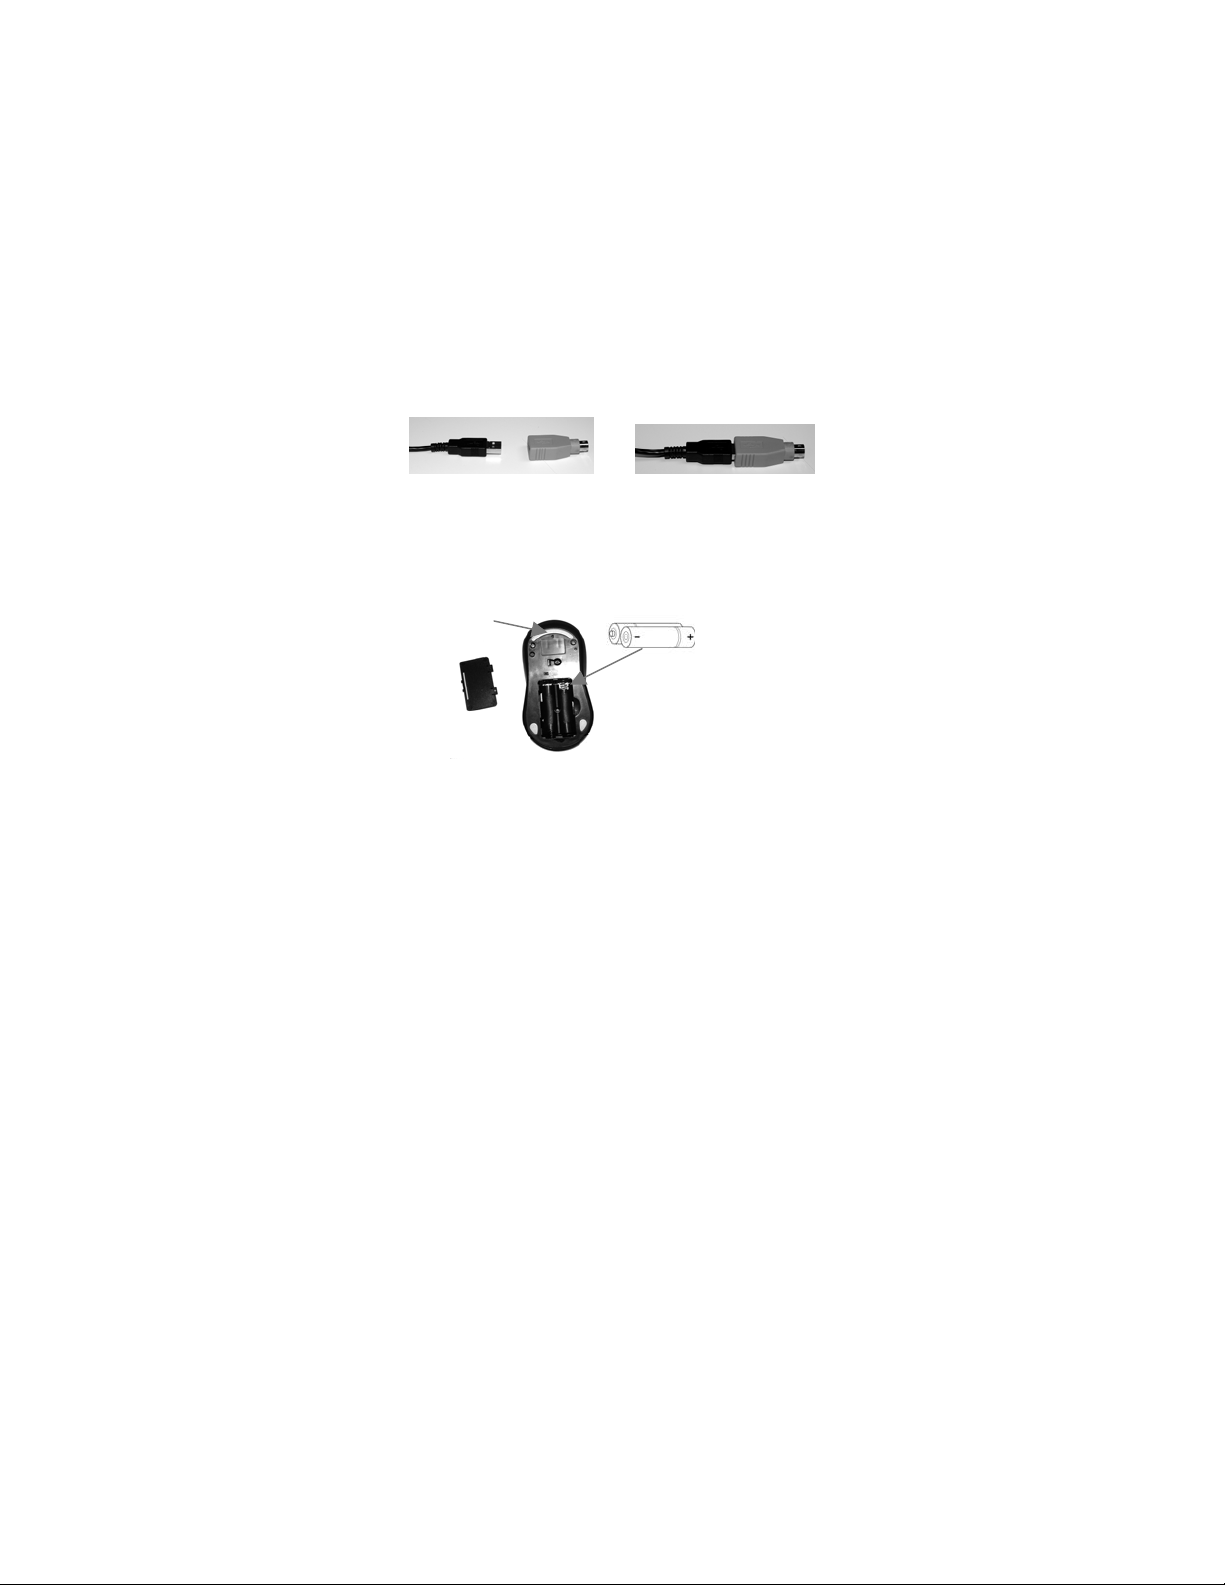
3. Connect the receiver to your computer
a. USB: Connect the receiver’s USB plug to the USB Port on
your computer.
b. PS/2: Connect the receiver’s USB plug into the green USB
to PS/2 adapter. Then plug the other end of the green PS/2
adapter into the mouse PS/2 port on your PC.
4. Place the receiver 8” (20cm) from any other electronic device
Æ
such as your computer and monitor.
5. Install the included 2 AA batteries into the battery compartment
located on the bottom of your mouse. Position the batteries
according to the diagram in the battery compartment.
Low Batter
LED
2 AA Batteries
3
Page 4

6. Turn on your computer and start your Operating System.
7. Place your Wireless Optical Mouse within 3 feet (approximately 1
meter) of the receiver for optimal communication.
8. Move the mouse to ensure there is a good connection.
Note 1: After a period of inactivity, the Wireless Optical Mouse goes
into sleep mode to save batteries. To wake the mouse, press any
mouse button.
Note 2: The low battery LED will illuminate when the batteries are
low and need to be changed.
Note 3: Optical mice do not work well on glass or highly reflective
surfaces. If your mouse does not work properly, try a different
surface such as a plain white piece of paper.
4
Page 5

INSTALLING THE SOFTWARE
o
In order to take advantage of the optional features of your Wireless
Optical Mouse, you must install the software.
1. Close all open applications.
2. Uninstall any existing third-party mouse software from your
computer using “Add/Remove Programs” in the Control Panel.
You may need to restart your computer when this is finished.
(Note: Do not remove the standard Microsoft® mouse drivers.)
3. Insert the included CD into your CD-ROM drive.
4. If the CD does not auto run, open My Computer. Double-click on
your CD drive. Double-click on Setup.exe.
5. Follow the on-screen instructions to install the software for your
Wireless Optical Mouse.
a. Select your desired language. Click “Next”. On the Welcome
screen click “Next”.
b. The Destination Directory will direct where the driver and
software information will be stored on your hard drive. The
Program Folder will direct where the mouse folder is placed
in the Start Menu. It is recommended that you accept the
default destinations for both. Click “Next” on each screen to
continue.
M
5
Page 6

c. Click “Next” to copy the files to your computer. On the final
screen you may decide to restart your computer now or later.
If you select to do so now, your computer will automatically
restart. Make sure you have closed all open applications.
You must restart your computer in order to complete the
installation.
6. When the software is properly installed, a mouse icon (
appear in the system tray located in the lower right hand corner of
the screen. Double click on the mouse icon to open the Mouse
Settings menu.
) will
6
Page 7

MOUSE FUNCTIONS
Left Button (1)
Web Navigation
Buttons (4 & 5)
Scroll Wheel Button (3)
Right Button (2)
1. Standard Left Mouse Button – In any supporting application,
click once to select files or programs or double click to open
selected applications. This button cannot be programmed.
2. Standard Right Mouse Button – In any supporting application,
right click to select item and display a pop-up menu of common
commands. This button cannot be programmed.
7
Page 8

3. Scroll Wheel Button – In any supporting application, roll the
scroll wheel to move up or down. The scroll wheel also doubles
as a third button. By default, this button activates or deactivates
scroll lock. This feature allows any movement of the mouse to
scroll through your document. This button can be programmed.
4. Back Web Navigation Button –In any supporting application
press this button to go back to the previous screen. This button
can be programmed.
5. Forward Web Navigation Button – In any supporting application
press this button to go to the next screen. Note: this function
typically works only if you have used the “back” function to
return to the current screen. This button can be programmed.
Note 1: After a period of inactivity, the Wireless Optical Mouse goes into
sleep mode to save batteries. To wake the mouse, press any mouse button.
Note 2: The low battery LED will illuminate when the batteries are low and
need to be changed.
Note 3: Optical mice do not work well on glass or highly reflective surfaces.
If your mouse does not work properly, try a different surface.
8
Page 9

MOUSE SETTINGS
Scroll Settings
This allows you to select how many lines are scrolled through with each
turn of the scroll wheel. With “Enhanced Scroll Mode” these settings are
more exact.
Button Programming
Program any of the programmable buttons by selecting the desired function
from the drop down menu. Button 3 is the scroll wheel. Buttons 4 and 5 are
the silver buttons on the left side of the mouse.
Click Apply after selecting the desired function. Select OK to close the
dialogue box and save your changes. Click Cancel at any time to close the
dialogue box without saving the setting changes.
9
Page 10

 Loading...