

Page 1
K3L Tables Sleeve case
with Bluetooth Scissor Keyboard
USER'S GUIDE
Ver.:1.00
Page 2

Federal Communication Commission Interference Statement
This equipment has been tested and found to comply with the limits for a Class B digital device, pursuant to
Part 15 of the FCC Rules. These limits are designed to provide reasonable protection against harmful
interference in a residential installation. This equipment generates, uses and can radiate radio frequency
energy and, if not installed and used in accordance with the instructions, may cause harmful interference to
radio communications. However, there is no guarantee that interference will not occur in a particular
installation. If this equipment does cause harmful interference to radio or television reception, which can
be determined by turning the equipment off and on, the user is encouraged to try to correct the interference
by one of the following measures:
- Reorient or relocate the receiving antenna.
- Increase the separation between the equipment and receiver.
- Connect the equipment into an outlet on a circuit different from
that to which the receiver is connected.
- Consult the dealer or an experienced radio/TV technician for help.
FCC Caution: Any changes or modifications not expressly approved by the party responsible for compliance
could void the user's authority to operate this equipment.
This device complies with Part 15 of the FCC Rules. Operation is subject to the following two conditions: (1)
This device may not cause harmful interference, and (2) this device must accept any interference received,
including interference that may cause undesired operation.
IMPORTANT NOTE:
Radiation Exposure Statement:
This equipment complies with FCC radiation exposure limits set forth for an uncontrolled environment. This
equipment should be installed and operated with minimum distance 20cm between the radiator & your body.
This transmitter must not be co-located or operating in conjunction with any other antenna or transmitter.
Country Code selection feature to be disabled for products marketed to the US/CANADA
Bluetooth Keyboard
Thank you for your purchasing Bluetooth keyboard .Before you use this product, please read this manual
thoroughly and use this product correctly. After you read this manual, please keep it in place and refer to it
when necessary.
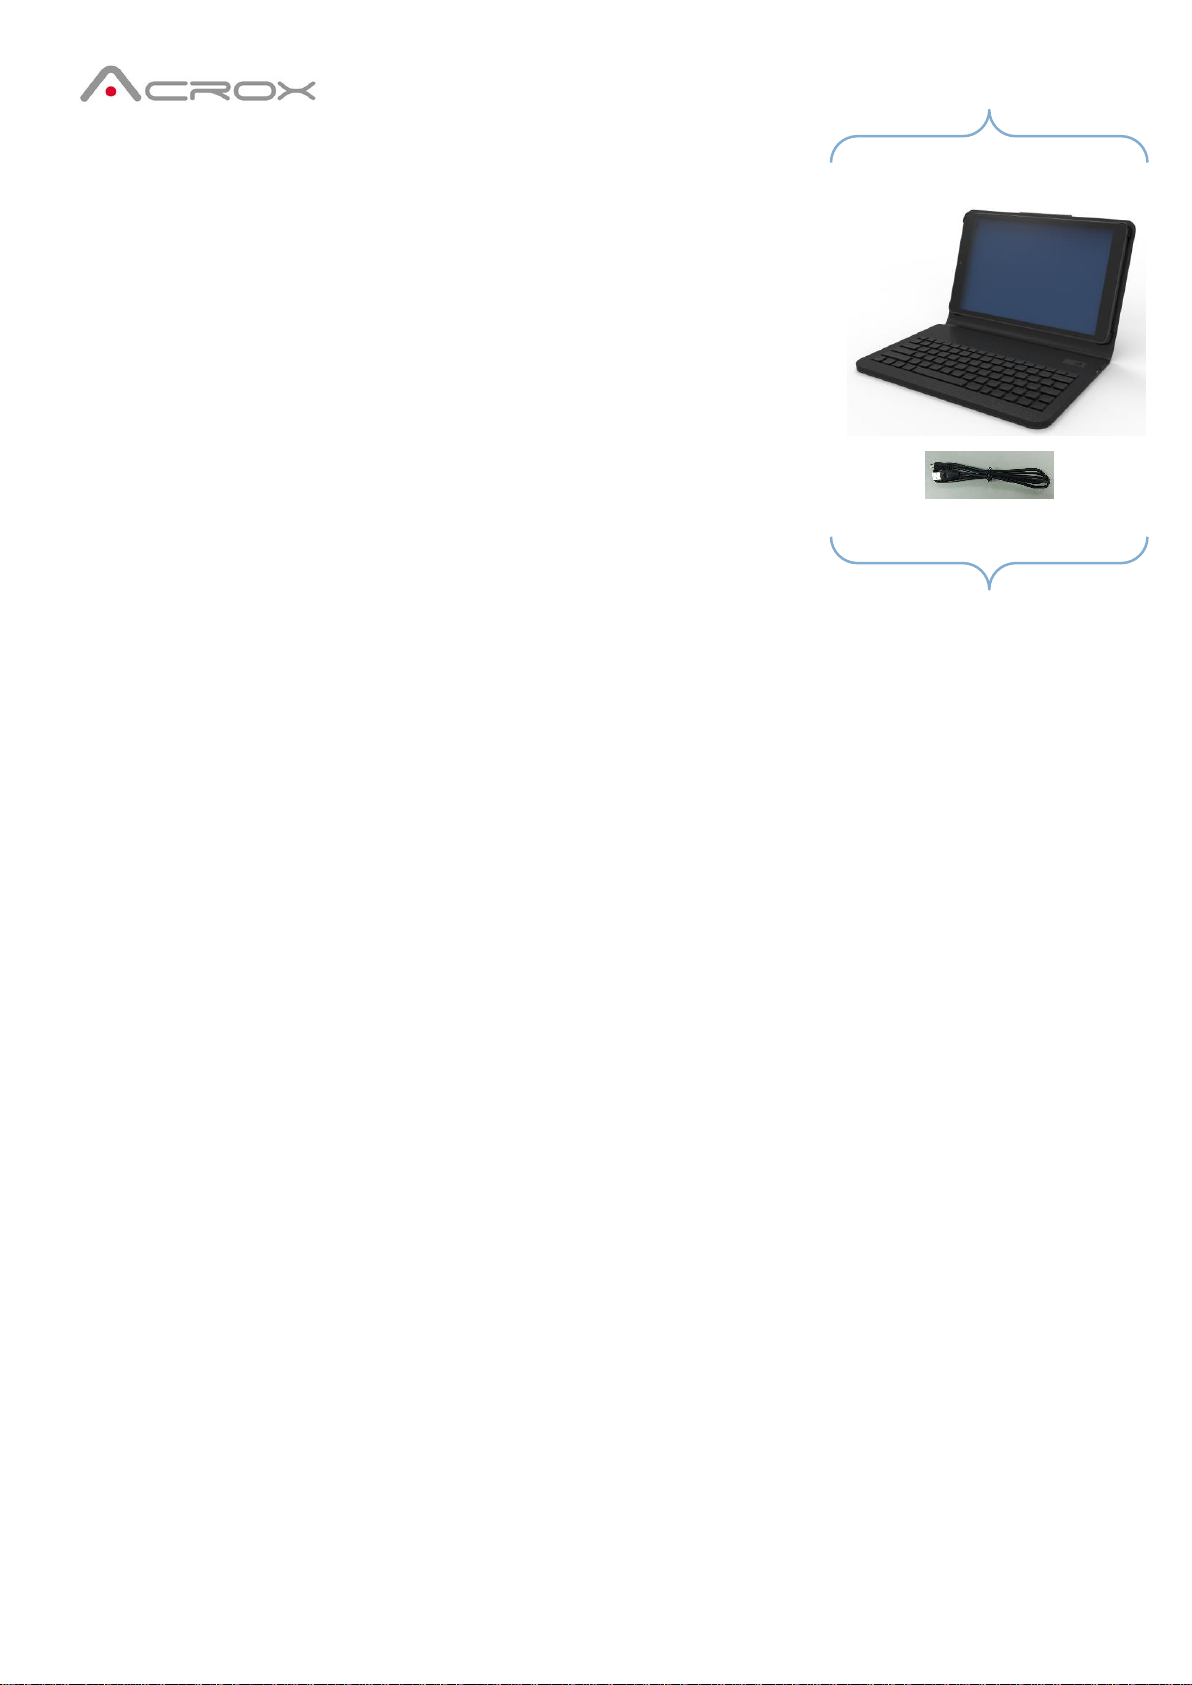
Supplied with the product:
The following items are included in the package. Please make sure all items are included as you open the
package. If there is any item missing or damaged, please contact the reseller who sold you this product, or
our support center.
- Bluetooth Keyboard
- User’s Guide
- Micro USB Charging cable
System Requirements:
-Android 4.2 (or later)
-Running Bluetooth® 4.0 ,3.0, 2.1, 2.0 & 1.1 wireless technology
Page 3

Functional Introduction
Definition
Indicator
Description
Charge with USB cable
Blue
No
LED solid on
When full charged, LED off
Turn on power
(no USB cable attached)
Blue
LED on after 3 seconds LED off
Bluetooth pairing
Blue
LED blinking (1 time/per sec for 2 mins)
Low power(=3.4v)
Blue
No
When key in, LED blink
When no action, LED off
No power
No
LED off
By accident protect for
Keyboard
No
When the key press and hold after 15sec, the
keyboard will stop send scan code.
Installing Hardware
Step1: Turn the Tables power to ON, then place keyboard power switch to ON
Step2: Start your device’s Bluetooth set up function to search for this Bluetooth keyboard.
Step3:Select SETTINGS > WIRELESS & NETWORKS > BLUETOOTH >ON
Step4: Press the Fn and Pair button on your keyboard. A blue LED light will flash until your device and the
keyboard are paired.
Step5: Your device should find the “HP Bluetooth Keyboard T1000” and then list it as an available device.
If it doesn’t, simply touch Search for devices and it will scan again.
Step6: When the “HP Bluetooth Keyboard T1000” shows in your list of available devices, touch it to
complete pairing.
Charge
The LED keep flashing in your working, the keyboard is short of power. It is time to charge the keyboard.
Step1: Use the USB charging cable plug into outlet, put one end of the plug into keyboard USB charging
cable.
Step2: A Blue light will illuminate to indicate the keyboard is charging. Wait until this light turns off,
indicating a full charge. It usually takes 2-4 hours to completely charge your keyboard.
LED Indicator:
Page 4
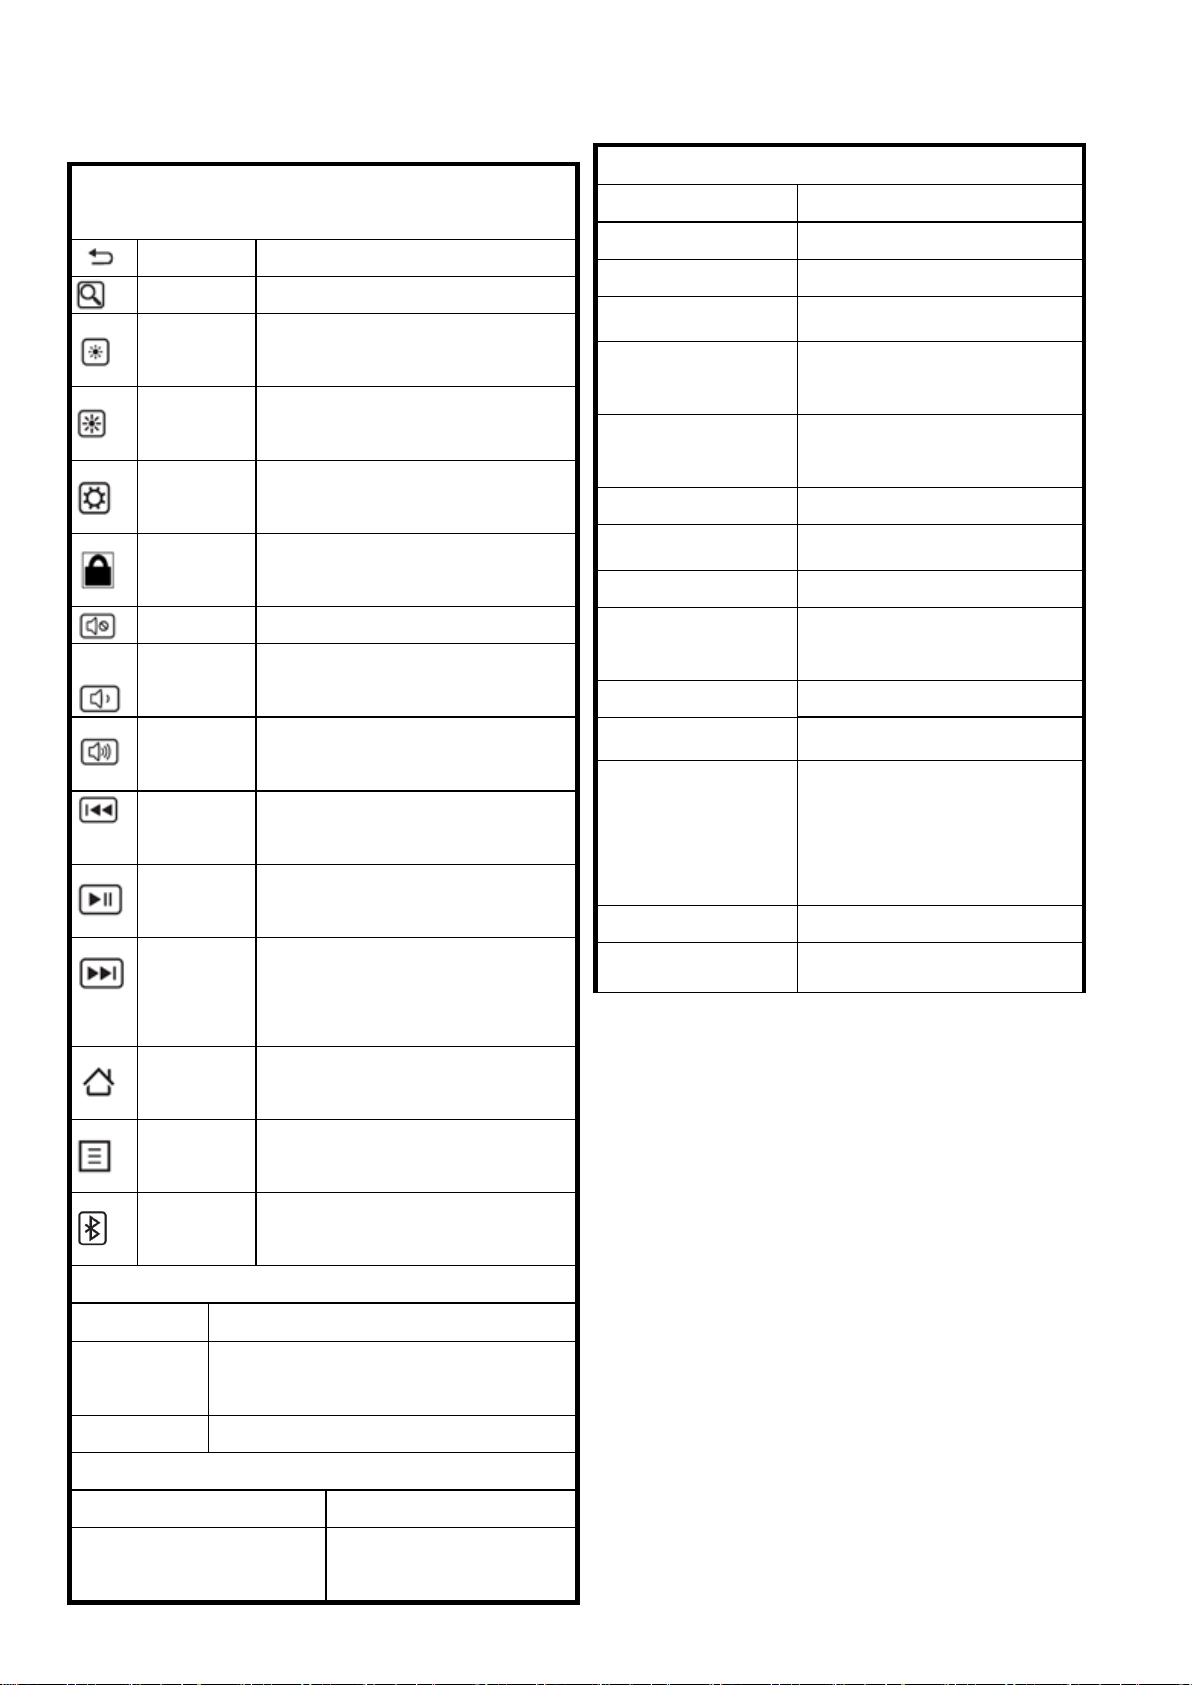
Hot Keys Function
( * compound key, Press with Fn key)
*Back/ESC
Keyboard ESCAPE
*Search
Search
*Brightness
Decrement
Keyboard F2
*Brightness
Increment
Keyboard F3
*System
Setting
Keyboard F4
*Lock
screen
System Sleep for Android 4.0 or
above
*Mute
Turns off the tablet sound
*Volume
Decrement
Decrease the tablet sound
volume.
*Volume
Increment
Increase the tablet sound
volume.
*Scan Next
Track
Switch to the next track
*Play/Pause
Switch between Play and Pause
*Scan
Previous
Track
Switches to the previous track
Home
Home
Left GUI
Keyboard Left GUI
Bluetoot
h
Bluetooth pairing
System Requirement
Hardware
Android Tablet PC
Support
OS
Android 4.2 or later
Interface
Bluetooth 3.0
Operating
Operating Humidity
10%~90%
Operating
Temperature
-20℃~55℃
Keyboard Specification
Key Layout
82 Keys
Hot Keys
12 Hot keys
Key switch type
scissor-structure type
Press Keys travel
2.25 ± 0.30 mm (Max)
Key operating
force
62 ± 20 g
Hardware
Bluetooth IC
Broadcom 20730
PCB Material
FR4
LED indicator
1 (Paring / Battery low)
Charger type
Micro USB cable
Battery type
Li-Polymer 300 mAh with
NTC/PTC
Battery Life
120 hrs (operation)
Keystroke life
10 Millions
Power
consumption
DC 3.7V +/-5%,
Operation : 3mA (Max.)
Standby : 0.8 mA (Max.)
Sleep : 400uA (Max.)
Recharge current
300 mA (Max.)
Recharging time
less than 4 hours
Keyboard specification and hotkey function:
Page 5

Note:
This device complies with part 15 of the FCC Rules.
Operation is subject to the following two conditions: (1) This device may not cause harmful interference,
and (2) this device must accept any interference received, including interference that may cause undesired
operation.
Now, enjoy and have fun!
Trouble Shooting Guide
If your device does not respond to your keyboard there may be a
simple explanation such as a dead battery or an unsuccessful
pairing. Please use the following to help troubleshoot your situation.
• Make sure the Power Switch at the top of the keyboard is set to ON.
• Restart your device and re-pair your keyboard
• Turn your Universal off and back on. You should see the LED status lights illuminate briefly, if not,
charge your keyboard.
• Forget and re-pair your Universal. If your device gives you an error message during pairing, repeat the
pairing process.
 Loading...