

Page 1
Quick Start Reference Guide
Refer to Product Safety Manual for Safety Statements
Complete Owner’s Manual available online
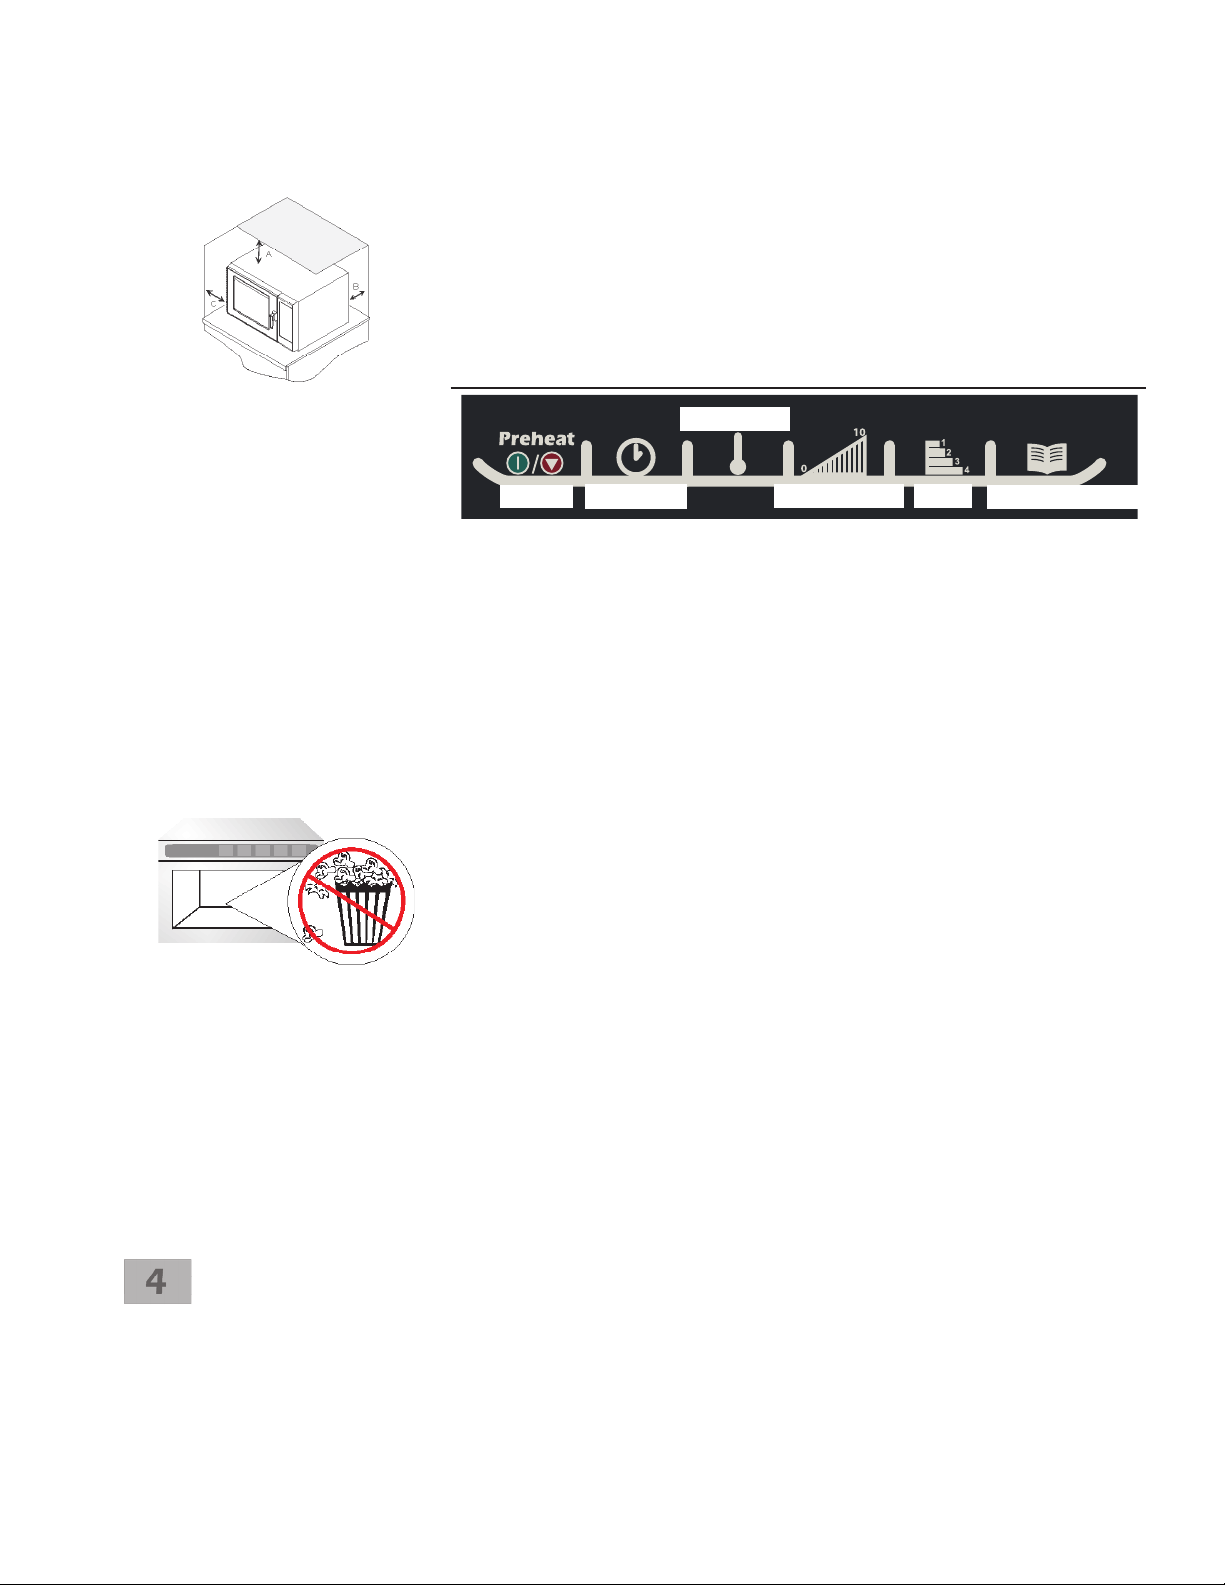
Oven Wall Clearances
A—For North American (UL/CSA) models, allow at least 2” (5.1 cm) of clearance around top of oven.
For International (50 Hz) models, allow at least 7” (17,8 cm) of clearance around top of oven.
Proper air ow around oven cools electrical components. With restricted air ow, oven may not
operate properly and life of electrical parts is reduced.
B—Allow at least 2 9/16” (6,5 cm) between air discharge on back of oven and back wall.
C—Allow at least 1 1/4” (3 cm) of clearance around sides of oven.
So...how do I use it?
The switching operation of this
microwave oven can cause voltage
uctuations on the supply line. The
operation of this oven under unfavor-
able voltage supply conditions can
have adverse effects. This device
is intended for the connection to a
power supply system with a maximum
permissible system impedance Zmax of
1.1 Ohm at the interface point of
the user’s supply. The user has to
ensure that this device is connected
only to a power supply system which
fullls the requirement above. If
necessary, the user can ask the public
power supply company for the system
impedance at the interface point.
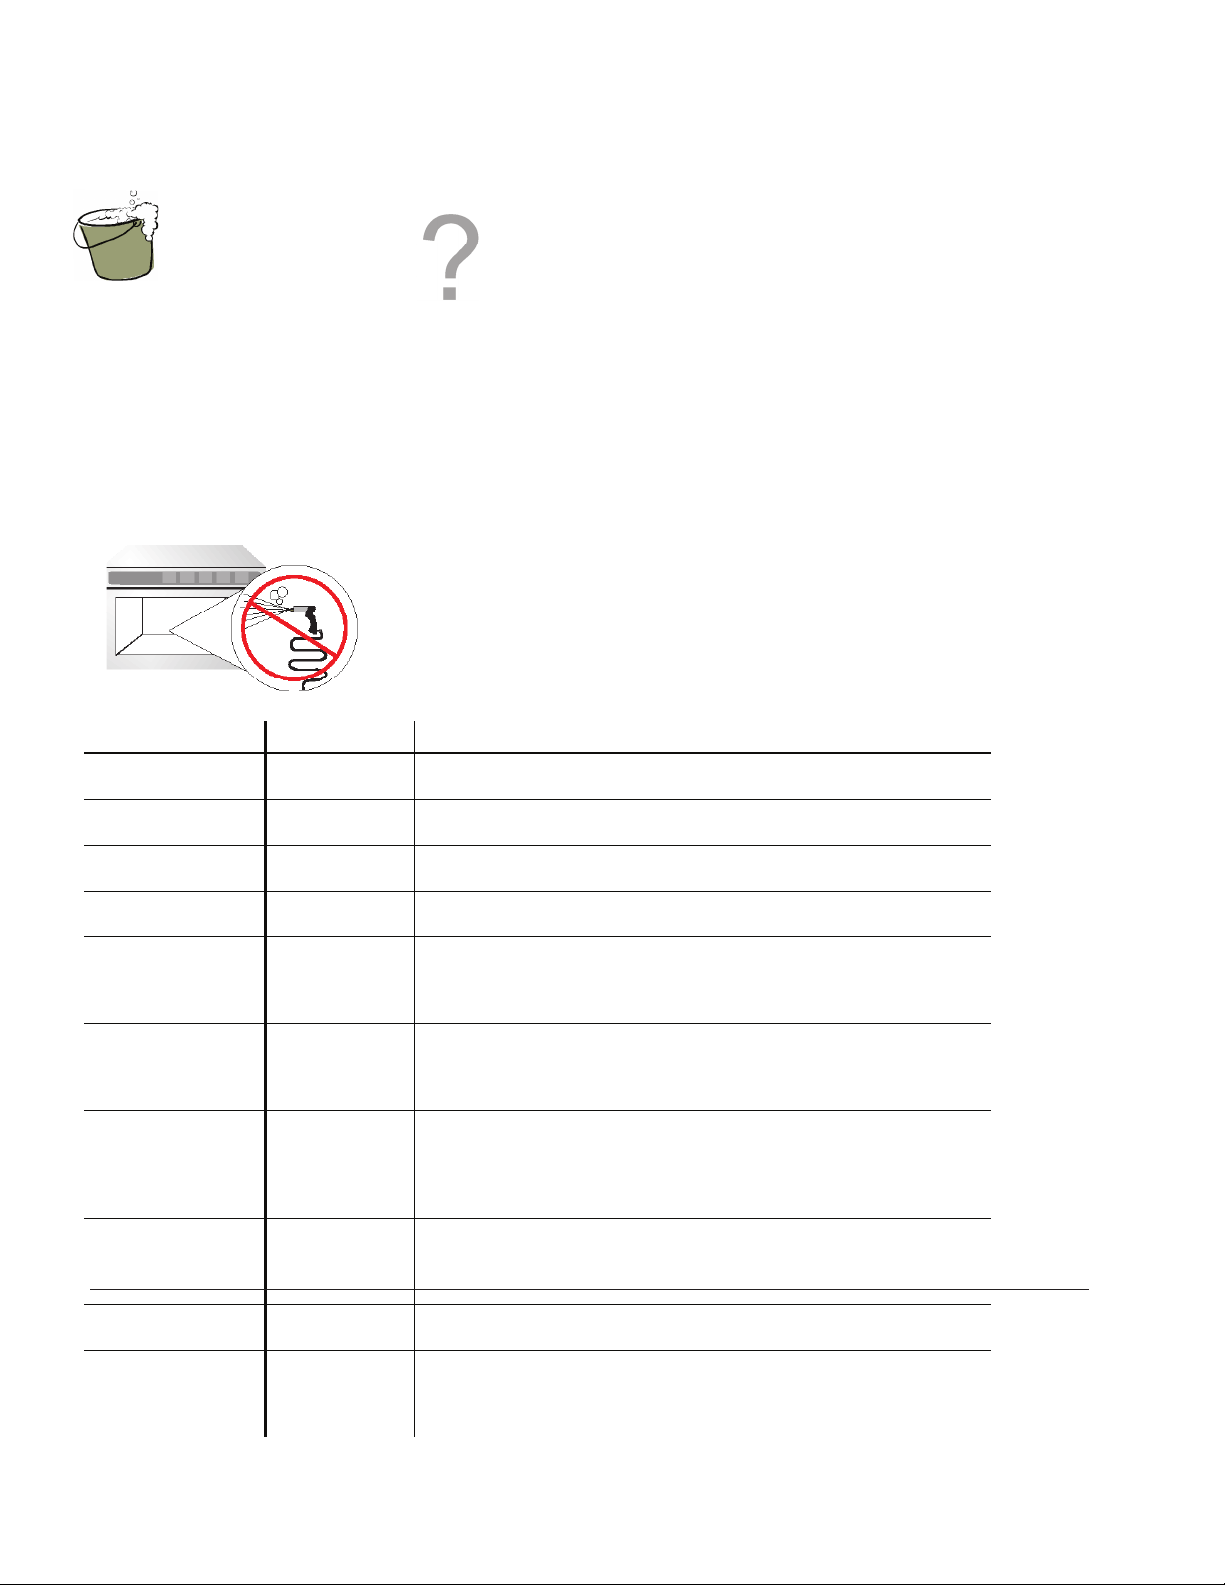
No popcorn
Programming
Preheat Setting
The factory default preheat setting
is 450°F (230°C). To program the
preheat setting oven must be ON:
1. Press Program Save pad.
2. Press Temp Entry pad.
3. Enter desired temperature by using
the numeric key pads.
4. Preheat temperature is changed.
Preprogrammed
Pads
To cook food using
preprogrammed cooking sequences.
1. Open oven door and place food
in oven. Close door.
2. Press desired pad.
3. Oven begins to cook.
4. At end of cooking cycle oven beeps
and shuts off.
TEMP ENTRY
ON/OFF
TIME ENTRY
POWER LEVEL STAGE
PROGRAM SAVE
Manual Operation
To cook food using a specic entered time and power level.
1. Press Preheat On/Off pad to start the oven.
• Oven Preheating 450°F displays with Oven Preheating ashing.
(example of 450°F shown)
2. Oven reaches preheat temperature.
• Signal sounds and Ready 450°F displays. (example of 450°F shown)
3. Place food in the oven.
4. Press Time Entry pad.
• Enter desired cooking time by using numeric keypad.
5. Press Temp Entry pad if cooking temperature differs from preheat temperature.
• Enter the new temperature.
6. Press Power Level pad.
• Press numeric key pad for desired level. Press numeric key pad again to
set power level to 100%.
• For a lower microwave power, press pads 1 (for 10%) through 9 (for 90%).
0 turns off the microwave power and cooking is by convection only.
7. If stage cooking is desired, press STAGE pad and repeat steps 3, 4, and 5.
• Up to 4 different stages can be programmed.
8. Press the Start pad to begin the cooking cycle.
Programming Items
1. Oven must be ON.
• Press Preheat On/Off.
• Oven Preheating 450°F displays with Oven Preheating ashing. (example
of 450°F shown)
2. Oven reaches preheat temperature.
• Signal sounds and Ready 450°F displays with Ready ashing.
(example of 450°F shown)
3. Press Program Save pad.
4. Press pad to be programmed or reprogrammed.
5. Press Time Entry pad to program amount of cooking time.
• The total microwave cooking time (all stages combined) is 20 minutes.
6. Press Temp Entry pad to program the cooking temperature.
• Enter desired temperature by using numeric pads.
7. Press Power Level pad to program level of microwave power.
• Press numeric key pad for desired level. Press numeric key pad again to
set power level to 100%.
• For a lower microwave power, press pads 1 (for 10%) through 9 (for 90%).
0 turns off the microwave power and cooking is by convection only.
8. Press Stage pad.
• Enter cook time, temp and power level as in steps 4. 5 and 6.
• To enter another cooking stage for that pad, press Stage pad again. Up to
four different stages can be programmed.
9. Press the Program Save pad to save the program and changes.
NOTE: To discard changes, press Stop/Reset pad before pressing Program
Save pad.
Page 2
Quick Start Reference Guide
Refer to Product Safety Manual for Safety Statements
Cleaning Oven
Cavity
• Wear protective
rubber gloves when
cleaning oven.
• Use only a plastic utensil or nylon
scouring pad to aid in removing soil or
build-up from the oven interior.
• Do not use knife, metal utensil, or
steel wool pad to remove baked
on material.
• We recommend using ACP Oven
Cleaner (Item CL10) and Oven
Shield (Item SH10)
Complete Owner’s Manual available online
Can I change an option?
Options such as single or double pad programming, beep volume,
and maximum cooking time can be changed to suit individual
preferences.
To change options oven STANDBY must display:
1. Press hidden pad.
• Pad is unmarked and located to the direct left of Preheat On/Off pad.
• Nothing will be displayed when hidden pad is pressed.
2. Press Program Save pad.
• The rst user option will display. Oven is now in options mode.
3. Press number pad that controls option to be changed.
• See table below for options.
• Current option will display.
4. Press numeric pad again to change the option.
• Each time pad is pressed, option will change.
• Match code displayed with code for desired option.
5. Press Program Save pad to save changes.
• To change additional options, repeat steps 3 and 4.
• Changes take affect after Program Save pad is pressed.
• Press Stop/Reset to return to STANDBY, or open and close oven door.
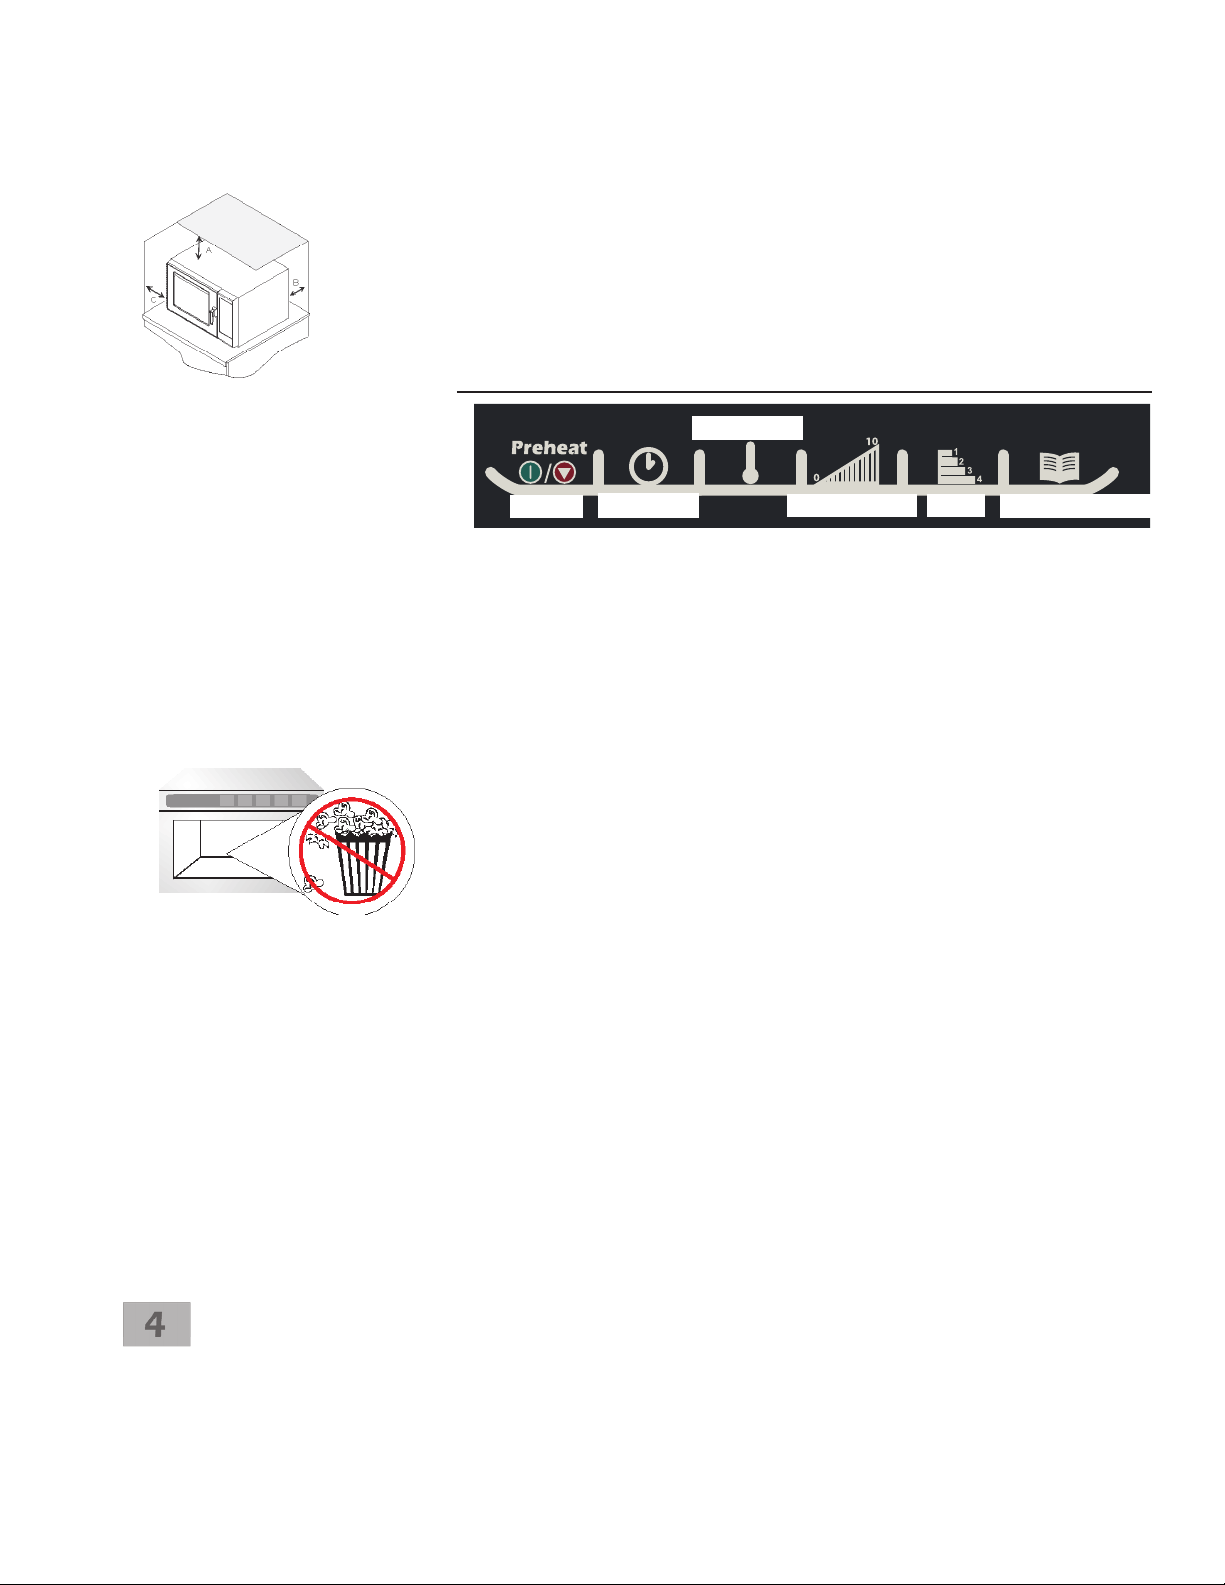
DO NOT power spray
Numbered Pads Display Options (Factory Settings in Bold)
1
Double Digit Entry
2
Manual Time Entry
3
Reset on Door Open
4
Keybeep
5
Keybeep Volume
6
End of Cook Signal
7
Keypad Active
8
Preheat Warnings
TEMP PAD
Temperature Scale
STAGE PAD
CLEAN FILTER
Message Frequency
Disabled
Enabled
Disabled
Enabled
Disabled
Enabled
Disabled
Enabled
OFF
LOW
MEDIUM
HIGH
Solid Beep
3 Second Beep
4 Beeps Once
4 Beeps Repeating
15 SECONDS
30 SECONDS
60 SECONDS
120 SECONDS
ALWAYS
Disabled
Program Temp
Cavity Temp
Both
Degrees F
Degrees C
Disabled
Weekly
Monthly
Quarterly
Allows 10 (0-9) preprogrammed pads.
Allows 100 (00-99) preprogrammed pads.
Manual time entry/cooking not allowed
Manual time entry/cooking allowed
Opening oven door does not reset oven back to ready mode
Opening oven door resets the oven back to ready mode
Keys do not beep when pressed (keybeep off)
Keys beep when pressed (keybeep on)
Keybeep volume OFF
Keybeep volume LOW
Keybeep volume MEDIUM
Keybeep volume HIGH
Food done signal is a continuous beep until reset by user
Food done signal is a three second beep
Food done signal is four beeps, continuously
Food done signal is four beeps, four times
Keypad time entry window is 15 seconds
Keypad time entry window is 30 seconds
Keypad time entry window is one minute
Keypad time entry window is two minutes
Keypad time entry window is always active
Both temperature warnings off
Warning only when preheat temperature does not match preprogrammed temperature
Warning only when actual oven cavity temperature is not to preheat temperature
Both temperature warnings on
Temperatures are displayed in °F for 60 Hz models
Temperatures are displayed in °C for 50 Hz models
Oven will not display Clean Filter
Oven will display Clean Filter every seven (7) days
Oven will display Clean Filter every thirty (30) days
Oven will display Clean Filter every ninety (90) days
Part No. 13092805
Printed in U.S.A. 1/11
For full product documentation visit:
www.acpsolutions.com
2011 ACP, Inc.
Cedar Rapids, IA 52404
Page 3
Guía de Consulta Rápida para el Arranque
Consulte las Normas de Seguridad en el Manual de Seguridad del Producto
Manual del Propietario completo disponible en línea
Espacio Libre Alrededor de las Paredes del Horno
A—Para los modelos de América del Norte (UL/CSA), deje al menos 5,1 cm (2 pulg.) de espacio libre alrededor de
la parte superior del horno. Para modelos Internacionales (50 Hz), deje al menos 17,8 cm (7 pulg.) de espacio
libre alrededor de la parte superior del horno. La circulación de aire adecuada alrededor del horno enfría sus
componentes eléctricos. Si se restringe la circulación de aire, posiblemente no funcione correctamente el horno y
se reduzca la duración de las piezas eléctricas.
B—Deje al menos 6,5 cm (2 9/16 pulg.) entre la salida de aire, en la parte posterior del horno, y la pared de fondo.
C—Deje al menos 3 cm (1 1/4 pulg.) de espacio libre por los lados del horno.
Y entonces... ¿cómo lo uso?
El funcionamiento intermitente de este
horno microondas puede ocasionar
uctuaciones de voltaje en la línea de
alimentación. Si la tensión de alimentación
es inadecuada, el funcionamiento de este
horno microondas puede tener efectos
perjudiciales. Este aparato ha sido
diseñado para conectarse a un sistema de
alimentación cuya impedancia admisible
máxima Zmax sea de 1,1 ohmios en el
punto de interconexión de la fuente del
usuario. El usuario debe garantizar que
este dispositivo se conecte sólo a un
sistema de alimentación que cumpla con
este requisito. Si es necesario, el usuario
puede pedirle a la empresa de energía
eléctrica información sobre la impedancia
del sistema en el punto de interconexión.
No use para hacer
palomitas de maíz
Cómo programar el ajuste
de precalentamiento
El ajuste de precalentamiento de fábrica es
230°C (450°F). Para programar el ajuste
de precalentamiento el horno debe estar
ENCENDIDO:
1. Oprima la tecla Program Save (Guardar
programa).
2. Oprima la tecla Temp Entry (Ingresar
temperatura).
3. Ingrese la temperatura deseada mediante
las teclas numéricas.
4. Ha cambiado la temperatura de
precalentamiento.
Teclas
Preprogramadas
Para cocinar alimentos mediante
secuencias de cocción preprogramadas.
1. Abra la puerta del horno e introduzca
los alimentos. Cierre la puerta.
2. Oprima la tecla deseada.
3. El horno empieza a cocinar los alimentos.
4. Al terminar el ciclo de cocción, el
horno emite un pitido y se apaga.
ON/OFF
TIME ENTRY
Funcionamiento Manual
Para cocinar alimentos en un tiempo y a un nivel de potencia especícos de su elección.
1. Oprima la tecla Preheat On/Off (Precalentamiento Activado/Desactivado) para encender
el horno.
• Horno precalentando 450°F aparece con el término Horno precalentando
parpadeando. (aparece ejemplo de 450°F)
2. El horno alcanza la temperatura de precalentamiento.
• La señal del horno suena y se muestra Ready 450°F (Listo 450°F). (aparece ejemplo de
450°F)
3. Oprima la tecla Time Entry (Ingresar tiempo).
• Ingrese el lapso de cocción deseado mediante el teclado numérico.
4. Oprima la tecla Temp Entry (Ingresar temperatura) si la temperatura de cocción no es igual a la
temperatura de calentamiento.
• Ingrese la nueva temperatura.
5. Oprima la tecla Power Level (Nivel de potencia).
• Oprima la tecla numérica para el nivel deseado. Oprima la tecla numérica para establecer el
nivel de potencia a 100%.
• Para reducir la potencia de microondas, oprima las teclas 1 (10%) a la 9 (90%). 0 apaga la
potencia del microondas y la cocción se lleva a cabo sólo mediante convección.
6. Si desea cocinar por etapas, oprima la tecla STAGE (ETAPA) y repita los pasos 3, 4 y 5.
• Se puede programar hasta 4 etapas distintas.
7. Oprima la tecla Start (Arrancar) para comenzar el ciclo de cocción.
Programación
1. El horno deber estar en la posición ON (ENCENDIDO).
• Oprima Preheat On/Off (Precalentamiento Activado/Desactivado).
• Horno precalentando 450°F aparece con el término Horno precalentando
parpadeando. (aparece ejemplo de 450°F)
2. El horno alcanza la temperatura de precalentamiento.
• La señal del horno suena y se muestra Ready 450°F (Listo 450°F) con el término Ready
(Listo) parpadeando. (aparece ejemplo de 450°F)
3. Oprima la tecla Program Save (Guardar programa).
4. Oprima la tecla que desea programar o reprogramar.
5. Oprima la tecla Time Entry (Ingresar tiempo) para programar el lapso de cocción.
• El lapso de cocción de microondas total (todas las etapas combinadas) es de 20 minutos.
6. Oprima la tecla Temp Entry (Ingresar temperatura) para programar la temperatura de cocción.
• Ingrese la temperatura deseada mediante las teclas numéricas.
7. Oprima la tecla Power Level (Nivel de potencia) para programar el nivel de potencia de
microondas.
• Oprima la tecla numérica para el nivel deseado. Oprima la tecla numérica para establecer el
nivel de potencia a 100%.
• Para reducir la potencia de microondas, oprima las teclas 1 (10%) a la 9 (90%). 0 apaga la
potencia del microondas y la cocción se lleva a cabo sólo mediante convección.
8. Oprima la tecla Stage (Etapa).
• Ingrese el tiempo de cocción, temperatura y el nivel de potencia como lo hizo en los pasos 4,
5 y 6.
• Para programar otra etapa de cocción en esa tecla, oprima de nuevo la tecla Stage (Etapa).
Se puede programar hasta cuatro etapas distintas.
9. Oprima la tecla Program Save (Guardar programa) para guardar los cambios que hizo
al programa.
NOTA: Para anular los cambios, oprima la tecla Stop/Reset (Parar/Restaurar) antes de
oprimir la tecla Program Save (Guardar programa).
TEMP ENTRY
POWER LEVEL STAGE
PROGRAM SAVE
Page 4

Guía de Consulta Rápida para el Arranque
Consulte las Normas de Seguridad en el Manual de Seguridad del Producto
Manual del Propietario completo disponible en línea
Puedo modicar una opción?
Limpieza
• Utilice guantes
protectores de caucho cuando
limpie el horno.
utensilio de plástico o una almohadilla
abrasiva de nylon para ayudarle a eliminar
la suciedad o la acumulación del interior del
horno.
• No utilice cuchillos, utensilios de metal,
o almohadillas de lana de acero para
desprender los residuos de material.
• Utilice únicamente un
NO rocíe con pistola
Teclas Numéricas Pantalla
1
Teclas Preprogramadas
2
Ingreso de Tiempo Manual
3
Reajustar al modo
READY (Listo)
4
Pitido de las Teclas
5
Volumen del Pitido
de las Teclas
OP:10
OP:11
OP:20
OP:21
OP:30
OP:31
OP:40
OP:41
OP:50
OP:51
OP:52
OP:53
1. Oprima la tecla oculta.
• La tecla no tiene rótulo y está ubicada justo a la izquierda de la tecla (Precalentamiento
• La pantalla no indica ningún mensaje cuando se oprime la tecla oculta.
2. Oprima la tecla Program Save (Guardar programa).
• Aparecerá la primera opción del usuario. Ahora el horno está en la modalidad
3. Oprima la tecla numérica que controla la opción que desea modicar.
• Consulte las opciones en el cuadro a continuación.
• La pantalla indica la opción actual.
4. Oprima de nuevo la tecla numérica para modicar la opción.
• Cada vez que oprima la tecla, cambiará la opción.
• Haga corresponder el código en pantalla con el código correspondiente a la opción
5. Oprima la tecla Program Save (Guardar programa) para guardar los cambios.
• Para modicar otras opciones, repita los pasos 3 y 4.
• Los cambios entrarán en efecto luego de oprimirse la tecla Program Save (Guardar
• Oprima Stop/Reset (Parar/Restablecer) para volver a STANDBY (ESPERA), o abra
Opciones (Ajustes de Fábrica en Negritas)
(Las opciones para el usuario pueden variar según los diferentes
modelos)
Permite 10 teclas preprogramadas (0-9).
Permite 100 teclas preprogramadas (00-99).
No se permite ingreso de tiempo manual/cocción
Se permite ingreso de tiempo manual/cocción
Abrir la puerta del horno no vuelve a reajustar el horno al modo Listo
Abrir la puerta del horno vuelve a reajustar el horno al modo Listo
Las teclas no emiten un pitido cuando están oprimidas (pitido de las teclas desactivado)
Las teclas emiten un pitido cuando están oprimidas (pitido de las teclas activado)
Volumen del pitido de las teclas OFF (desactivado)
Volumen del pitido de las teclas bajo
Volumen del pitido de las teclas mediano
Volumen del pitido de las teclas alto
Las opciones de programación de tecla simple o doble, volumen del pitido y tiempo
de cocción máximo se pueden modicar para ajustarlas a preferencias personales.
La pantalla debe indicar STANDBY (ESPERA) para poder modicar las
opciones del horno:
Activado/Desactivado).
de opciones.
deseada.
programa).
y cierre la puerta del horno.
6
Señal de Alimentos Listos
7
Ingreso de Tiempo a
través del Teclado Nu-
mérico
8
Advertencia de Tempera-
tura
TECLA TEMP
(Temperatura)
Escala de Temperatura
Nro. de pieza 13092805
Impreso en EE.UU. 1/11
OP:60
OP:61
OP:62
OP:63
OP:70
OP:71
OP:72
OP:73
OP:80
OP:81
OP:82
OP:83
OP:bo
OP:b1
La señal de alimentos listos es un pitido continuo hasta que el usuario lo reajuste
La señal de alimentos listos es un pitido que dura tres segundos
La señal de alimentos listos emite cuatro pitidos, continuamente
La señal de alimentos listos emite cuatro pitidos, cuatro veces
La ventana de ingreso de tiempo a través del teclado numérico es de 15 segundos
La ventana de ingreso de tiempo a través del teclado numérico es de 30 segundos
La ventana de ingreso de tiempo a través del teclado numérico es de un minuto
La ventana de ingreso de tiempo a través del teclado numérico es de dos minutos
Ambas advertencias de temperatura están desactivadas
Advertencia únicamente cuando la temperatura de precalentamiento no corresponde con
la temperatura preprogramada
Advertencia únicamente cuando la temperatura real de la cavidad del horno no es la
temperatura de precalentamiento
Ambas advertencias de temperatura están activadas
Las temperaturas se muestran en °F para los modelos de 60 Hz
Las temperaturas se muestran en °C para los modelos de 50 Hz
Para la documentación completa del producto, visite:
www.acpsolutions.com
Cedar Rapids, Iowa 52404 EE.UU.
2011 ACP, Inc.
Page 5

Guide de démarrage rapide
Consulter le Manuel sur la sécurité des produits pour les énoncés de sécurité
Dégagement du four par rapport au mur
A—Pour les modèles d’Amérique du Nord (UL/CSA), laisser au moins 5,1 cm (2 po) de dégagement sur le dessus
du four. Pour les modèles internationaux de 50 Hz, laisser au moins 17,8 cm (7 po) sur le dessus
du four. Une circulation d’air adéquate autour du four permet de refroidir les composants électriques. Si
la circulation d’air est restreinte, le four pourrait mal fonctionner et réduire ainsi la durée de vie utile des
composants électriques.
B—Laisser au moins 6,5 cm (2-9/16 po) entre le mur et l’évacuation d’air à l’arrière du four.
C—Laisser un dégagement d’au moins 3 cm (1-1/4 po) sur les côtés du four.
L’opération de commutation de ce four à
micro-ondes peut produire des variations de
tension au niveau de la ligne d’alimenta-tion.
L’utilisation de ce four dans des conditions
d’alimentation de tension défavorables
peut entraîner des effets indésirables.
Cet appareil est conçu pour être branché
à un système d’alimentation électrique
d’impédance minimale Zmax de 1,1 ohm
au point d’interface de l’alimenta-tion de
l’utilisateur. L’utilisateur doit s’assurer que
cet appareil est branché à un système
de source d’alimentation conforme aux
exigences indiquées ci-dessus. Le cas
échéant, l’utilisateur peut s’informer auprès
du fournisseur public d’électricité pour
connaître l’impédance du système au
point d’interface.
Pas de maïs soufé
Programmation de
préchauffage
Le réglage usine de préchauffage est de 230
°C (450 °F). Pour programmer le réglage
de préchauffage, le four doit être allumé
(ON) :
1. Appuyer sur la touche Program Save.
2. Appuyer sur la touche Temp Entry.
3. Entrer la température voulue en
utilisant les touches numériques.
4. La température de préchauffage
est modiée.
Touches
préprogrammées
Pour cuire des aliments en
utilisant des séquences de cuisson
préprogrammées.
1. Ouvrir la porte du four et y placer la
nourriture. Fermer la porte.
2. Appuyer sur la touche voulue.
3. Le four commence la cuisson.
4. A la n du cycle de cuisson, le four
émet des bips sonores et s’éteint.
L’intégralité du manuel est disponible en ligne
Alors…comment utiliser l’appareil ?
TEMP ENTRY
ON/OFF
TIME ENTRY
POWER LEVEL STAGE
Utilisation manuelle
Pour cuire des aliments en programmant un temps et un niveau de puissance spéciques :
1. Appuyer sur Preheat ON/OFF pour démarrer le four.
• Le préchauffage du four à 450 °F et Oven Preheating est afché en clignotant. (Exemple
de 450 °F illustré.)
2. Le four atteint la température de préchauffage.
• Un signal sonore est émis et Ready 450°F est afché. (Exemple de 450 °F illustré.)
3. Appuyer sur la touche Time Entry.
• Entrer le temps de cuisson désiré en utilisant les touches numériques.
4. Appuyer sur Temp Entry si la température de cuisson varie par rapport à la température
de préchauffage.
• Entrer la nouvelle température.
5. Appuyer sur la touche Power Level.
• Appuyer sur le clavier numérique pour entrer le niveau désiré. Appuyer encore une
fois sur le clavier numérique pour régler le niveau de puissance à 100 %.
• Pour un niveau de puissance inférieur du four à micro-ondes, appuyer sur les touches 1 (pour
10 %) à 9 (pour 90 %). 0 éteint l’alimentation du four à micro-ondes et la cuisson se fait
par convexion seulement.
6. Si on désire cuire par étapes, appuyer sur la touche STAGE et répéter les étapes 3, 4 et 5.
• On peut programmer jusqu’à quatre (4) étapes différentes.
7. Appuyer sur la touche Start pour lancer le cycle de cuisson.
Programmation de cuisson
1. Le four doit être ALLUME.
• Appuyer sur Preheat On/Off.
• Le préchauffage du four à 450 °F et Oven Preheating est afché en clignotant. (Exemple
de 450 °F illustré.)
2. Le four atteint la température de préchauffage.
• Un signal sonore est émis et Ready 450 °F est afché en clignotant. (Exemple de
450 °F illustré.)
3. Appuyer sur la touche Program Save.
4. Appuyer sur la touche à programmer ou reprogrammer.
5. Appuyer sur Time Entry pour programmer le temps de cuisson.
• Le temps total de cuisson par micro-ondes (toutes les étapes combinées) est de 20 minutes.
6. Appuyer sur la touche Time Entry pour programmer la température de cuisson.
• Entrer la température voulue en utilisant les touches numériques.
7. Appuyer sur Power Level pour programmer le niveau de puissance du four à micro-ondes.
• Appuyer sur le clavier numérique pour entrer le niveau désiré. Appuyer encore une fois sur le
clavier numérique pour régler le niveau de puissance à 100 %.
• Pour un niveau de puissance inférieur du four à micro-ondes, appuyer sur les touches 1 (pour
10 %) à 9 (pour 90 %). 0 éteint l’alimentation du four à micro-ondes et la cuisson se fait
par convexion seulement.
8. Appuyer sur la touche Stage.
• Entrer un temps de cuisson et un niveau de puissance, comme pour les étapes 4, 5 et 6.
• Pour entrer un autre temps de cuisson pour cette touche, appuyer encore une fois sur Stage.
Vous pouvez programmer jusqu’à quatre étapes différentes.
9. Appuyer sur la touche Program Save pour sauvegarder la programmation et les changements.
REMARQUE : Pour supprimer les modications, appuyer sur Stop/Reset avant d’appuyer
sur Program Save.
PROGRAM SAVE
Page 6

Guide de démarrage rapide
Consulter le Manuel sur la sécurité des produits pour les énoncés de sécurité
L’intégralité du manuel est disponible en ligne
Nettoyage
• Porter des gants
protecteurs en caoutchouc pour
nettoyer le four.
• N’utiliser que des ustensiles en
plastique ou un tampon à récurer en
nylon pour aider à enlever l’huile ou
les accumulations à l’intérieur du four.
• Ne pas utiliser de couteau, d’ustensile en
métal ou de la laine d’acier pour enlever de
la nourriture cuite au four.
NE PAS nettoyer avec un
pulvérisateur à moteur
Touches
numérotées Afchage
1
Touches préprogrammées
OP:10
OP:11
Puis-je modier une option ?
Vous pouvez modier les options de programmation à une ou deux touches,
le volume du bip sonore et le temps maximum de cuisson, pour les adapter
à vos préférences personnelles.
Pour modier des options du four, STANDBY doit être afché :
1. Appuyer sur la touche cachée.
• Cette touche n’est pas marquée ; elle est située juste à gauche de la touche
Preheat On/Off.
• Rien n’est afché lorsque la touche cachée est enfoncée.
2. Appuyer sur la touche Program Save.
• La première option utilisateur est afchée. Le four est alors en mode d’options.
3. Appuyer sur la touche numérique qui commande les options à modier.
• Voir le tableau ci-dessous pour connaître les options.
• L’option en cours est afchée.
4. Appuyer encore une fois sur une touche numérique pour modier l’option.
• Chaque nouvelle pression sur la touche modie l’option.
• Faire correspondre le code afché avec le code de l’option désirée.
5. Appuyer sur la touche Program Save pour sauvegarder les modications.
• Pour modier des options supplémentaires, répéter les étapes 3 à 4.
• Les modications sont activées après une pression sur la touche Program Save.
• Pour revenir à STANDBY, appuyer sur Stop/Reset ou ouvrir et refermer la porte du four.
Options (Réglages d’usine en gras)
(Les options utilisateurs peuvent varier en fonction des modèles)
Permet d’utiliser 10 touches préprogrammées (0 à 9).
Permet d’utiliser 100 touches préprogrammées (00 à 99).
2
Entrée manuelle de la durée
3
Restaurer le mode READY
4
Signal sonore des touches
5
Volume du signal sonore
des touches
6
Signal de n de cuisson
7
Entrée de l’heure par
touches
8
Avertissements
température
TOUCHE TEMP
Echelle de températures
N° de pièce 13092805
Imprimé aux E-U 1/11
OP:20
OP:21
OP:30
OP:31
OP:40
OP:41
OP:50
OP:51
OP:52
OP:53
OP:60
OP:61
OP:62
OP:63
OP:70
OP:71
OP:72
OP:73
OP:80
OP:81
OP:82
OP:83
OP:bo
OP:b1
Entrée manuelle de la durée/cuisson non autorisée.
Entrée manuelle de la durée/cuisson autorisée.
L’ouverture de la porte du four ne restaure pas le mode ‘ready’ (Prêt).
L’ouverture de la porte du four restaure le mode ‘ready’ (Prêt).
Pas de signal sonore à la pression (bip désactivé).
Signal sonore à la pression (bip activé).
Signal sonore des touches désactivé.
Signal sonore des touches faible.
Signal sonore des touches moyen.
Signal sonore des touches fort.
Signal continu jusqu’à réinitialisation par l’utilisateur.
Signal continu durant 3 secondes.
Quatre bips, exécutés une seule fois.
Quatre bips, exécutés quatre fois.
Fenêtre d’entrée de l’heure par touches = 15 sec.
Fenêtre d’entrée de l’heure par touches = 30 sec.
Fenêtre d’entrée de l’heure par touches = 1 min.
Fenêtre d’entrée de l’heure par touches = 2 min.
Les 2 avertissements de températures désactivés.
Avertissement uniquement si la température de préchauffage ne correspond pas à la température
préprogrammée.
Avertissement uniquement si la température réelle à l’intérieur du four n’est pas égale à la
température de préchauffage.
Les 2 avertissements de températures activés.
Les températures sont afchées en °F sur les modèles 60 Hz°C
Les températures sont afchées en °C sur les modèles 50 Hz
Pour obtenir la documentation complète sur le produit visiter :
www.acpsolutions.com
Cedar Rapids, Iowa 52404 E-U
2011 ACP, Inc.
Page 7

Kurzanleitung
Sicherheitshinweise dem Handbuch zur Produktsicherheit entnehmen
Die komplette Bedienungsanleitung ist online verfügbar
Einbauabstände zur Wand
A—Bei Modellen für den nordamerikanischen Markt (UL/CSA) an der Oberseite des Geräts mindestens 5,1 cm
(2”) Abstand einhalten. Bei internationalen Modellen (50 Hz) an der Oberseite des Geräts mindestens 17,8 cm
(7”) Abstand einhalten, um eine ordnungsgemäße Luftzirkulation um das Gerät zur Kühlung der elektrischen
Komponenten zu gewährleisten. Andernfalls kann die Funktion des Geräts bzw. die Lebensdauer der elektrischen
Bauteile beeinträchtigt werden.
B—An der Rückseite des Geräts mindestens 6,5 cm (2 9/16”) Abstand zwischen dem Luftaustritt und der Rückwand
einhalten.
C—An den Seiten des Geräts mindestens 3 cm (1 1/4”) Abstand einhalten.
Verwendung des Geräts?
Der Schaltvorgang dieses Mikrowellengeräts kann auf der Speiseleitung
Spannungsschwankungen verursachen.
Unerwünschte Versorgungsspannungsbedingungen können den Betrieb dieses
Geräts beeinträchtigen. Dieses Gerät ist für
den Anschluss an ein Stromversorgungssystem mit einer maximal
zulässigen Systemimpedanz (Zmax)
von 1,1 Ohm am Anschlusspunkt der
Stromversorgung des Anwenders
vorgesehen. Der Anwender muss
sicherstellen, dass dieses Gerät
nur an ein Stromversorgungssystem
angeschlossen wird, das diese
Anforderung erfüllt. Hierfür muss der
Anwender ggf. das örtliche Stromversorgungsunternehmen bzgl. der Systemimpedanz am Anschlusspunkt konsultieren.
Kein Popcorn
Programmieren der
Vorheizeinstellung
Die werkseitige Standard-Vorheizeinstellung
ist 230°C. Zum Programmieren der
Vorheizeinstellung muss das
Gerät EINGESCHALTET sein:
1. Die Taste Program Save drücken.
2. Die Taste Temp Entry drücken.
3. Die gewünschte Temperatur über
die Zifferntasten eingeben.
4. Die Vorheiztemperatur wurde geändert.
Vorprogrammierte
Tasten
Aufwärmen des Essens über
vorprogrammierte Einstellungen.
1. Die Gerätetür öffnen und die Speisen
in das Gerät stellen. Die Tür schließen.
2. Die gewünschte Taste drücken.
3. Das Gerät beginnt den Betrieb.
4. Am Ende des Kochvorgangs ertönt ein
Signal und das Gerät schaltet sich ab.
TEMP ENTRY
ON/OFF
TIME ENTRY
POWER LEVEL STAGE
PROGRAM SAVE
Manueller Betrieb
Kochen mit einer eingegebenen Zeit und Leistungsstufe.
1. Zum Starten des Geräts Preheat On/Off drücken.
• Das Gerät zeigt Oven Preheating 230°C an. Die Worte Oven Preheating blinken dabei.
(Beispiel von 230°C gezeigt)
2. Die Vorheiztemperatur wird erreicht.
• Ein Signal ertönt und die Meldung Ready 230°C wird angezeigt. (Beispiel von 230°C
gezeigt)
3. Die Taste Time Entry (Zeiteingabe) drücken.
• Die gewünschte Einschaltdauer über die Zifferntasten eingeben.
4. Die Taste Temp Entry drücken wenn eine andere Kochtemperatur als die Vorheiztemperatur
gewünscht ist.
• Die neue Temperatur eingeben.
5. Die Taste Power Level drücken.
• Die gewünschte Leistungsstufe über die Zifferntasten eingeben. Die Zifferntasten erneut
drücken, um die Leistungsstufe auf 100% einzustellen.
• Für eine niedrigere Leistungsstufe Tasten 1 (für 10%) bis 9 (für 90%) drücken. Die Taste 0
schaltet die Mikrowellenleistung aus und es kann nur mit Heißluft gekocht werden.
6. Wenn Kochen in Intervallen gewünscht ist, die Taste STAGE drücken und die Schritte
3, 4 und 5 wiederholen.
• Es können bis zu vier verschiedene Intervalle programmiert werden.
7. Die Taste Start drücken, um den Kochvorgang zu beginnen.
Programmieroptionen
1. Das Gerät muss EINGESCHALTET sein.
• Preheat On/Off drücken.
• Das Gerät zeigt Oven Preheating 230°C an. Die Worte Oven Preheating blinken dabei.
(Beispiel von 230°C gezeigt)
2. Die Vorheiztemperatur wird erreicht.
• Ein Signal ertönt und die Meldung Ready 230°C wird angezeigt. Dabei blinkt das Wort
Ready. (Beispiel von 230°C gezeigt)
3. Die Taste Program Save drücken.
4. Die zu programmierende bzw. umzuprogrammierende Taste drücken.
5. Die Taste Time Entry drücken, um die Einschaltdauer zu programmieren.
• Die Gesamteinschaltdauer des Mikrowellengeräts (alle Intervalle zusammen) beträgt
20 Minuten.
6. Die Taste Temp Entry drücken, um die Kochtemperatur zu programmieren.
• Die gewünschte Temperatur über die Zifferntasten eingeben.
7. Die Taste Power Level drücken, um die Leistungsstufe des Mikrowellengeräts zu
programmieren.
• Die gewünschte Leistungsstufe über die Zifferntasten eingeben. Die Zifferntasten erneut
drücken, um die Leistungsstufe auf 100% einzustellen.
• Für eine niedrigere Leistungsstufe Tasten 1 (für 10%) bis 9 (für 90%) drücken. Die Taste 0
schaltet die Mikrowellenleistung aus und es kann nur mit Heißluft gekocht werden.
8. Die Taste Stage drücken.
• Einschaltdauer, Temperatur und Leistungsstufe entsprechend der Beschreibung in Schritten
4, 5 und 6 oben eingeben.
• Zum Eingeben eines anderen Kochintervalls für diese Taste die Taste Stage erneut drücken.
Es können bis zu vier verschiedene Intervalle programmiert werden.
9. Zum Speichern des Programms und der Änderungen die Taste Program Save drücken.
HINWEIS: Zum Verwerfen der Änderungen die Taste Stop/Reset vor Drücken der Taste Program
Save drücken.
Page 8

Kurzanleitung
Sicherheitshinweise dem Handbuch zur Produktsicherheit entnehmen
Die komplette Bedienungsanleitung ist online verfügbar
Kurzanleitung
• Bei der Reinigung des
Geräts Gummihandschuhe tragen.
• Nur ein Plastikutensil oder einen
Scheuerschwamm aus Nylon verwenden,
um Verschmutzung oder Ablagerungen
im Innenraum des Geräts zu entfernen.
• Kein Messer, Metallutensil oder
einen Schwamm aus Stahlwolle
zur Entfernung von Verkrustungen
verwenden.
KEINEN Hochdruckreiniger
verwenden
Zifferntaste Anzeige
1
Vorprogrammierte Tasten
OP:10
OP:11
Ändern von Einstellungen?
Optionen wie ein- oder zweistellige Tastenprogrammierung, Signalton-Lautstärke
und maximale Einschaltdauer können individuell eingestellt werden.
Zum Ändern der Einstellungen muss STANDBY angezeigt werden:
1. Die „versteckte“ Taste drücken.
• Die Taste ist nicht markiert und bendet sich direkt links der Taste Preheat On/Off.
• Wenn die „versteckte“ Taste gedrückt wird, erscheint nichts auf der Anzeige.
2. Die Taste Program Save drücken.
• Die erste Benutzereinstellung wird angezeigt. Das Gerät bendet sich nun im
Optionsmodus.
3. Die der zu ändernden Einstellung zugeordnete Zifferntaste drücken.
• Die einzelnen Einstellungen sind in der folgenden Tabelle aufgeführt.
• Die aktuelle Einstellung wird angezeigt.
4. Die Zifferntaste erneut drücken, um die Einstellung zu ändern.
• Die Einstellung wird mit jedem Tastendruck geändert.
• Den angezeigten Code entsprechend der gewünschten Einstellung wählen.
5. Die Taste Program Save drücken, um die Änderungen zu speichern.
• Zum Ändern weiterer Einstellungen die Schritte 3 und 4 wiederholen.
• Die Änderungen treten nach Drücken der Taste Program Save in Kraft.
• Stop/Reset drücken, um in den STANDBY-Modus zurückzukehren, bzw. die
Gerätetür öffnen und wieder schließen.
Einstellung (Einstellungen des Herstellers fett gedruckt)
(Je nach Modell sind Benutzeroptionen eventuell verschieden)
Erlaubt 10 (0-9) vorprogrammierte Tasten.
Erlaubt 100 (00-99) vorprogrammierte Tasten.
2
Manuelle Zeiteingabe
3
Zurücksetzen in den Bere-
itschaftszustand (READY)
4
Tastenton
5
Tastentonlautstärke
6
Signal am Ende eines
Kochvorgangs
7
Zeitfenster für
Tasteneingabe
8
Temperaturwarntöne
OP:20
OP:21
OP:30
OP:31
OP:40
OP:41
OP:50
OP:51
OP:52
OP:53
OP:60
OP:61
OP:62
OP:63
OP:70
OP:71
OP:72
OP:73
OP:80
OP:81
OP:82
OP:83
Manuelle Zeiteingabe/manuelles Kochen nicht möglich
Manuelle Zeiteingabe/manuelles Kochen möglich
Öffnen der Tür setzt Gerät nicht in den Bereitschaftszustand (Ready) zurück
Öffnen der Tür setzt Gerät in den Bereitschaftszustand (Ready) zurück
Kein Signal bei Tastendruck (Tastenton aus)
Signal bei Tastendruck (Tastenton ein)
Tastenton AUS
Niedrige Tastentonlautstärke
Mittlere Tastentonlautstärke
Tastentonlautstärke hoch
Abschluss-Signal ist Dauerton, bis vom Benutzer zurückgesetzt.
Abschluss-Signal ertönt 3 Sekunden
Abschluss-Signal ist 1 Intervall von 4 Tönen
Abschluss-Signal ist 4 Intervalle von 4 Tönen
Zeitfenster für Tasteneingabe 15 Sekunden aktiv.
Zeitfenster für Tasteneingabe 30 Sekunden aktiv.
Zeitfenster für Tasteneingabe 1 Minute aktiv.
Zeitfenster für Tasteneingabe 2 Minuten aktiv.
Beide Temperaturwarntöne aus
Nur Warnton, wenn Vorwärmtemperatur nicht vorprogrammierter Temperatur entspricht
Nur Warnton, wenn tatsächliche Temperatur im Garraum nicht der Vorwärmtemperatur entspricht
Beide Temperaturwarntöne ein
TEMP-Taste Temperaturan-
zeige
Teile-Nr. 13092805
Gedruckt in den USA 1/11
OP:bo
OP:b1
Bei 60 Hz Modellen werden Temperaturen in °F angezeigt
Bei 50 Hz Modellen werden Temperaturen in °C angezeigt
Komplette Produktdokumentation unter:
www.acpsolutions.com
Cedar Rapids, Iowa 52404 U.S.A.
2011 ACP, Inc.
 Loading...