

Page 1
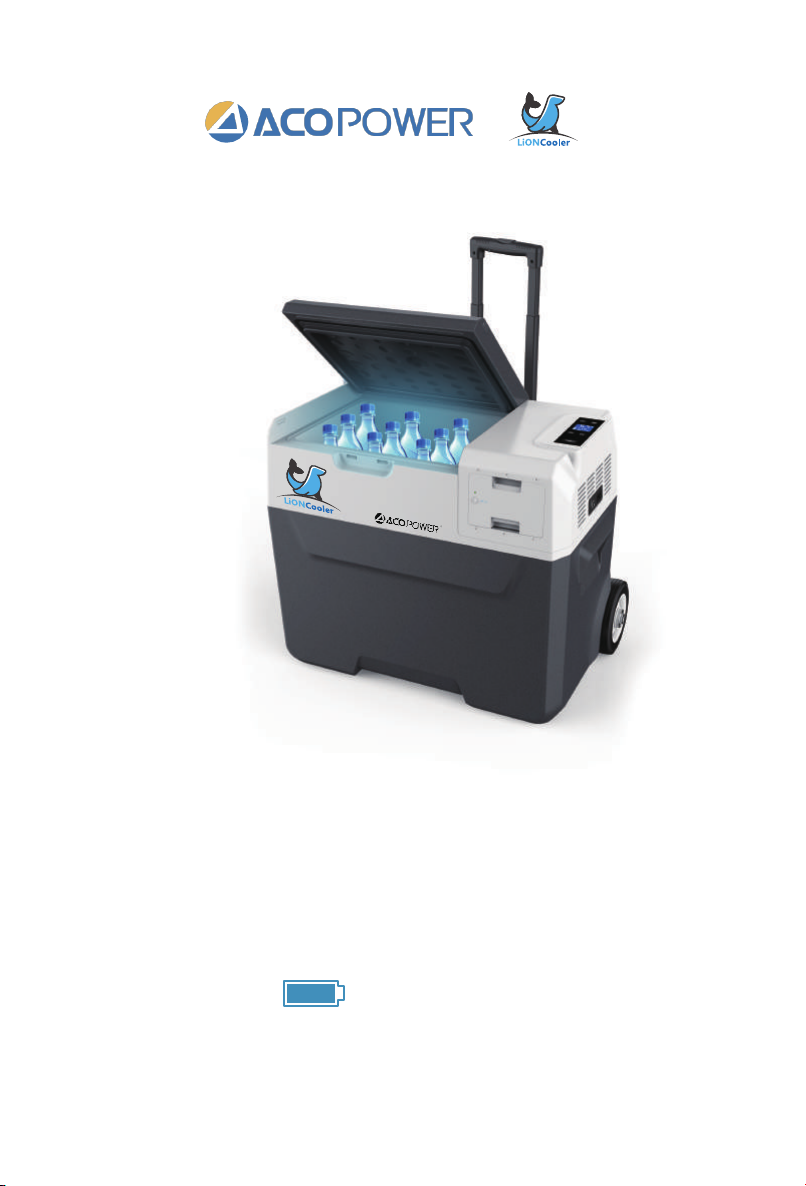
30/40/50L Rechargeable SolarFridge Freezer
Thank you for choosing our Rechargeable Fridge Freezer
Please Read This Manual Carefully Before Using Your Unit.
User Manual
Model: X30A/X40A/X50A
173Wh/11.1V
Note: Please check if your product model includes a battery.
X30A/X40A/X50A must buy additional battery accessories.
Page 2

CONTENTS
1.Features ...............................................................................1
2.Safety instructions ................................................................1
3.The Function and Operation Setting.....................................2
4.Power Supply and Charging.................................................4
5.Battery Power Operation ......................................................9
6.FAQ .....................................................................................10
7.Food Storage .......................................................................11
8.Defrosting ............................................................................12
9.Care and Cleaning ..............................................................12
10. Following Situations are Normal ......................................13
11. Technical Specification .....................................................13
12.Guidelines for protection of the environment ....................14
13. Packing List .....................................................................15
14. Warranty ..........................................................................15
Page 3

1. Features
• High efficiency DC compressor and conversion module with high reliability and
long life; compressor delay protection
• Quick cooling to -15°C (based on 25°C ambient temperature), lowest to -20°C
• Built-in 15600mA/11.1V Lithium Ion battery 18650, 173Wh total.
• Battery recharging with solar panel (12v-50v), 12VDC and 100~240VAC power
adapter, allows charging with solar panel, car cigarette or wall outlet
• Intelligent car battery protection system
• Portable design with trolley and wheels, removeable lid
• USB output +5VDC /2.1A for charging cell phone or iPad
• Fluoride-free insulation with good heat preservation performance and low
energy consumption, 45w DC/AC power only
• Wide range electronic temperature control, LCD display
2. Safety Instructions
Make sure the voltage is within the correct range for the socket and cable
•
being used. See technical data label on the side of the unit for voltage ranges.
The unit must be placed in a dry and well-ventilated place far from heat
•
sources (such as stove, fuel), Place the unit in a well shaded area. Prevent
exposure to blazing summer sunlight as this will cause overheating in the
electronic compartment and product will be subject to failure. If compartment
reaches an unsafe temperature, the LCD display will read error ‘F8’ and
further instructions listed in section 6.FAQ of the user manual should be
followed. Protection of the compressor is important to keep the product
working at ideal conditions.
Warning: Do not attempt or continue to operate your unit if electrical
•
compartment is wet. The installation of the DC power source in a boat should
be handled by qualified personnel.
•
Your unit requires good ventilation; allow the following free space for air
circulation: back 200mm and side 100mm.
1
Page 4
•
It is recommended to operate the unit on a flat surface. Maximum operation
angle is 35°. During transportation, tilt less than 45° and handle carefully.
•
No electrical devices should be placed inside the refrigerator, as they may be
damaged.
The inner tank allows water filling, but do not pour water out by inverting the
•
unit. Keep the shells of the unit dry after rains. Do not submerge unit under
water.
•
Although the units have been cleaned before leaving the factory, we strongly
recommend using a soft cloth dampened with warm water and a little neutral
detergent to clean it again, then wipe with a dry soft cloth. (Warning: Electrical
parts should be wiped by dry cloth only).
Warning: Do not allow children to play games with the refrigerator such as
•
climbing or standing in the refrigerator. They could damage the refrigerator and
seriously injure themselves.
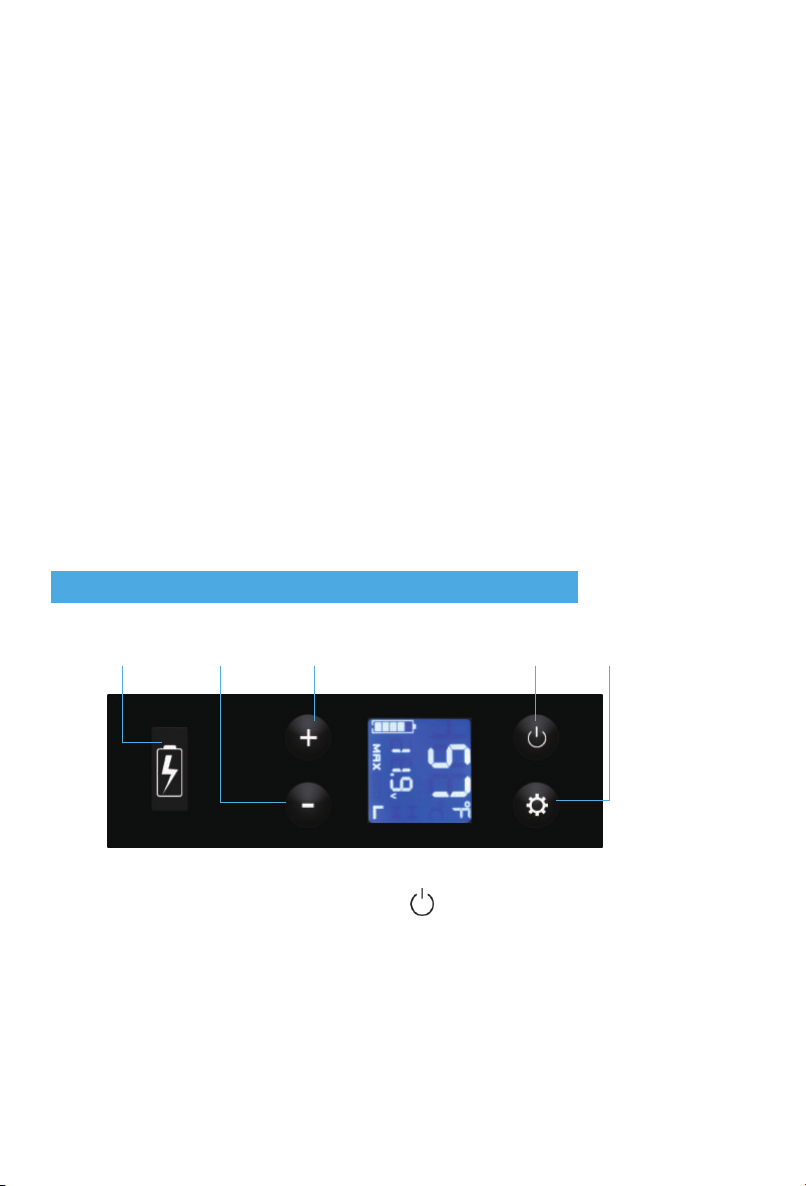
3. The Function and Operation Setting
USB
Temperature
Down
Temperature
UP
Power Button “SET”Button
• Power On/Off: Press the Power Button to turn the unit on/off
2
Page 5

•
Temperature Setting: Can be adjusted by the “+” button up to 20℃ (Max) and
down to -20℃ (Max) by the “- “button; Default temperature is Celsius degree (F).
If you would like to change to degrees Fahrenheit (F), turn off the fridge, then
press and hold the SET button over 3 seconds. E1 should be displayed on screen
and begin flashing;
continue to press the SET button until E5 shows up, then press + or -, select
desired units: F or C.
The compressor will cool down the temperature from 10℃ to -10 ℃ in 20 mins.
However, this reflects the change in temperature within the insulated walls of the
fridge/freezer. Allow an additional hour or more time, depending on the food load,
to reach a refrigerating temperature around 1-6 degrees Celsius. To reach
freezing temperatures with food or beverage inside the unit will take
approximately 8 hours. Therefore, if you want frozen or chilling temperatures
inside, we suggest you turn on the compressor 10 hours ahead of time while
keeping the temperature setting at -15℃ or lower.
•
Cooling Mode Control: Press the “ ” button to select control mode. Short
Presses will switch between MAX (Quick cooling mode) and ECO (Energy-saving
mode)
(tip: Max mode is recommended to begin initial cool down). After desired
temperature has been attained, it is recommended to switch to ECO mode to
conserve energy cooling mode.
•
Battery Protection: Selecting the H, M, L positions, you can choose different
levels for car battery protection. When the unit is on and working, press the “ ”
button over 3 seconds, then the LCD will display as below:
o L: Low power protection 9.6V (factory default)
o M: Middle power 10.8V
o H: High power protection 11.3 V
When the unit is connected to the car, we suggest setting the car battery
protection to H level. L is suggested when the unit is powered with freezer battery
or auxiliary backup battery.
USB Output: +5VDC /2.1A for cell phone, tablet, WIFI speaker, etc.
•
Note: Don’t change settings on E1-E4, which is only for factory maintenance.
3
Page 6
4. Power Supply and Charging
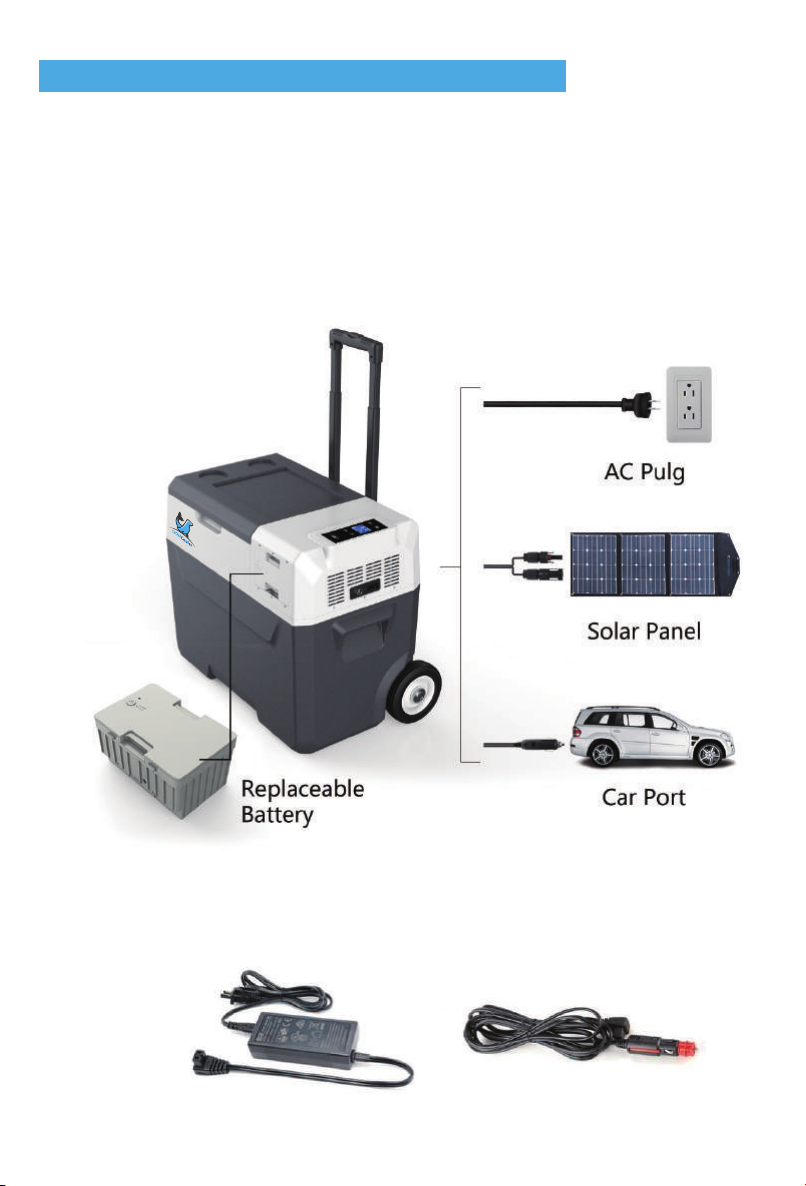
•
Power Supply: The refrigerator is powered with 12VDC power
•
100~240V AC (adapter included) or backup Lithium battery if there is no
connection of DC/AC power. The connected DC/AC power will operate the
refrigerator directly and charge battery simultaneously.
Battery Charging: The refrigerator allows three kinds of charging methods.
•
12VDC power, 100~240V AC with Adapter or solar panel (12V-50V).
o DC/AC power connection: Car port and wall outlet cable included.
4
Page 7
•
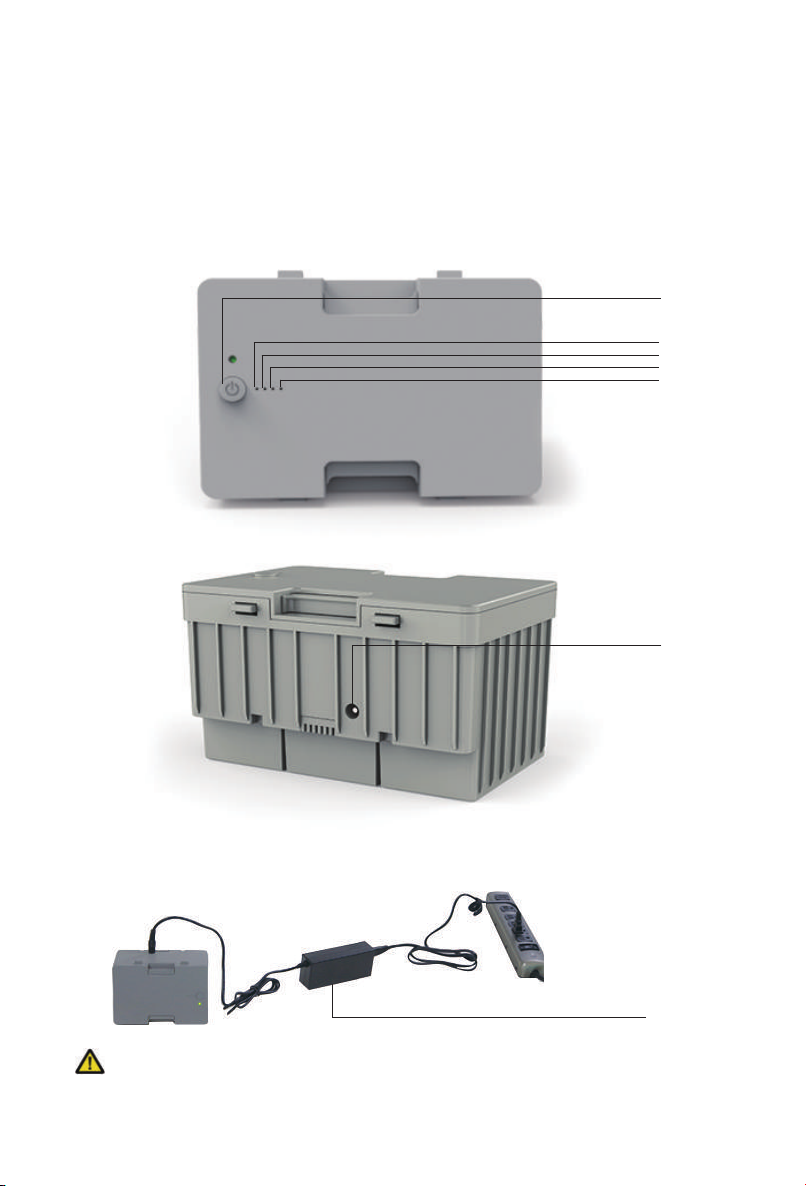
Battery bank:
Model No:X200
Lithium Ion Rechargeable Battery:18650/15600mAh/173.16Wh
Nominal Voltage:11.1V
Limited Charging Voltage:12.6V
Limited Charging Current:3A
Power switch
Battery bank Independent charge:
Battery Indicator
Charging Input
25%
50%
75%
100%
Charge Controller
:When charging the battery bank separately, please use a special
charger controller , or please contact us for details.
For non-professionals, please do not open the battery.
5
Page 8
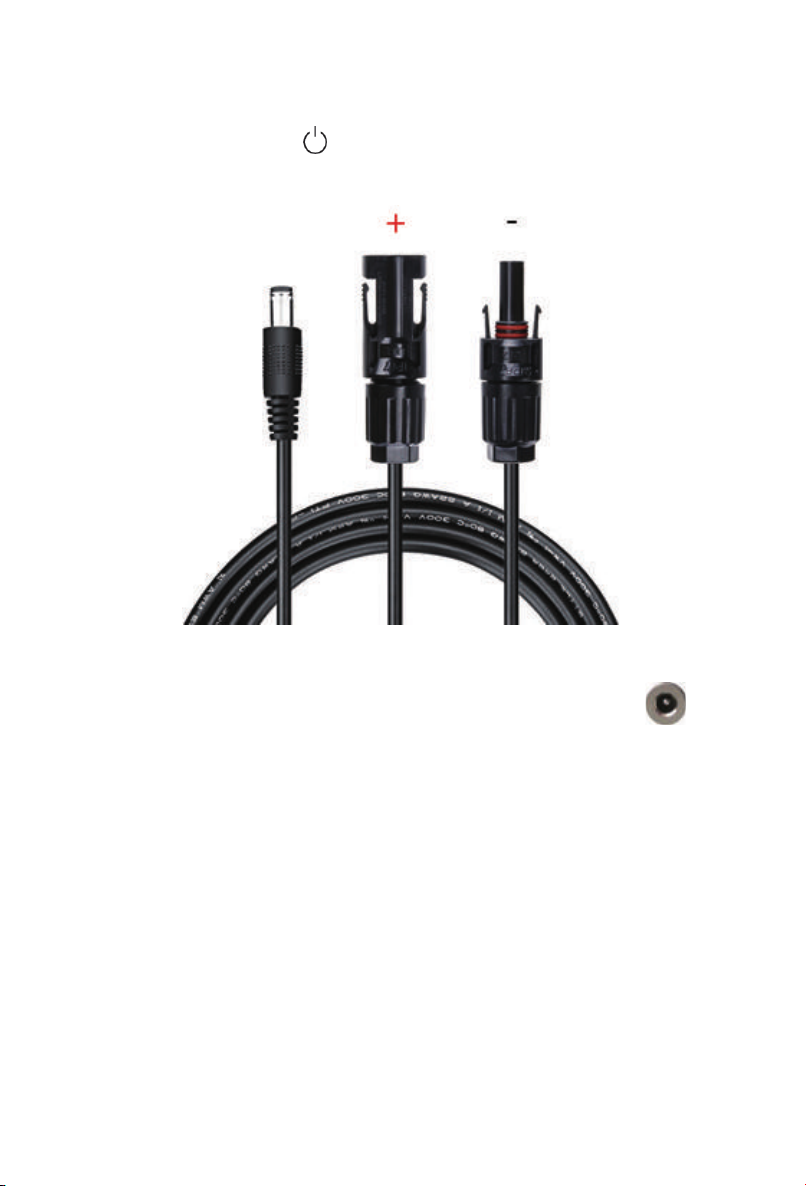
•
Solar panel (PV) charge connection:
NOTE:Note: Battery bank switch must be used when charging with solar panel.
Hold battery bank switch “ ” for 3Sec,LED indicator turn on
Solar panel (PV) charge connection: Solar charge cable included (20ft Long)
Insert the solar charge cable into the refrigerator’s “PV” terminal
Max Solar input Voltage:50V
Max Solar input Current:10A
6
Page 9
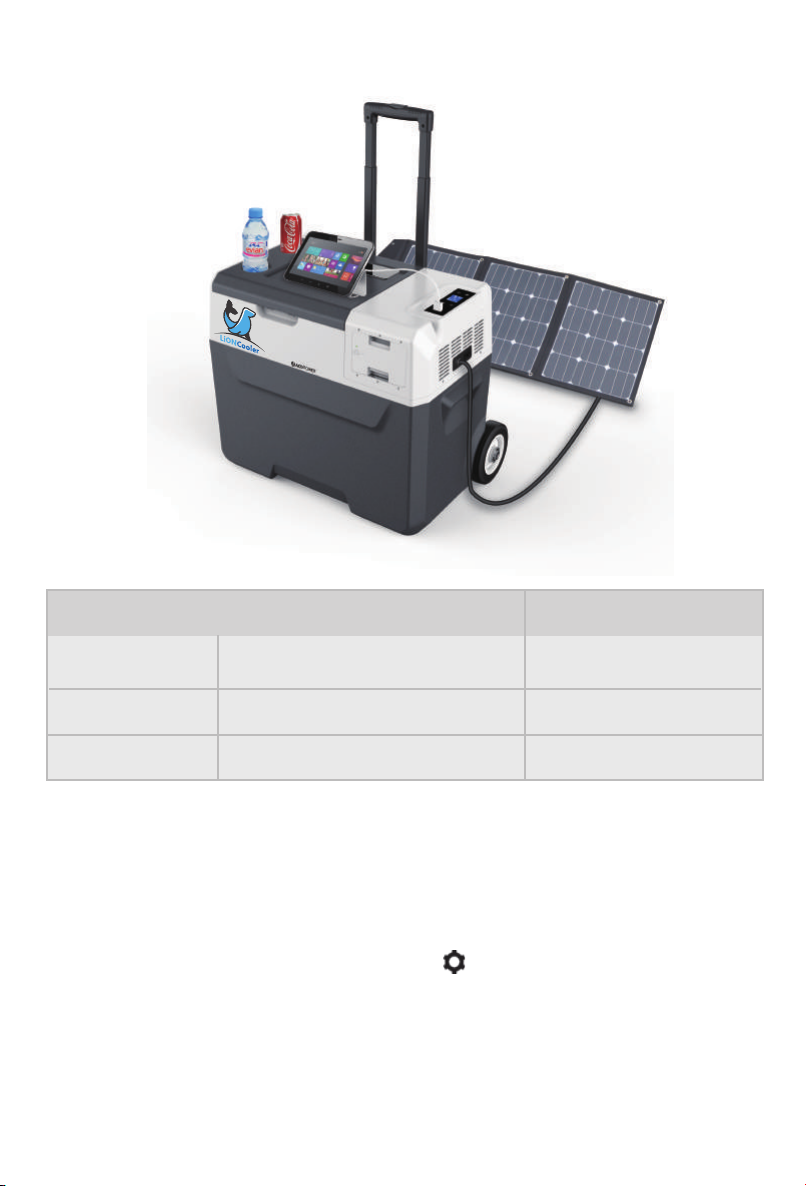
Charge Way, 173Wh Lithium Time
AC Wall Charger (112W) 4 hours
DC Car Charger (48W) 4 hours
Solar Panel Solar Charger (105W) About 4 hours
Checking Charge Ctatus: When the refrigerator is powered ON and DC/AC
o
power is connected, the battery icon on display screen will flash to show
charging. To charge the fridge/freezer battery without running the compressor,
simply connect the adapters without powering ‘ON’ the unit. To view charging
status please press and hold SET button “ ” for 3 seconds. The unit’s
battery status and voltage will be displayed. When the voltage reaches 12.6V
and the battery icon stops flashing, the unit has been fully charged and wiring
should be disconnected to prevent internal component damage.
7
Page 10

o
Warning!!: Do not charge fridge/freezer with DC12V and Solar Panel at the
same time! The unit may be seriously damaged and pose a potential hazard
to you.
• o AC Charging Management
o
AC charging is always the first choice if AC power supply is available. Check
AC voltage range and use AC adapter to connect with AC power outlet.
o
We suggest charging the refrigerator battery to full using AC adapter before
you leave for a trip or outdoor activity.
o
If the fridge has not been in use for a long time the battery may have over
discharged and unit will not power on. Please use AC adapter to charge unit
to working mode. After unit has received up to 30% charge other charging
methods may be used.
Car Port Charging Management
•
o
Engine Turned-on: You can choose anyone of H, M or L mode (see Battery
Production in Chapter 5) and use car port power to operate the freezer.
Different cars may have different power output voltages. If the voltage
protection causes F1 error showed in the LCD, just set the battery protection
from H to M or L. If the F1 error is still present, please charge the unit with
the adapter for few minutes and normal operation will resume.
Engine Turned-off: Charging using car battery: Most cars will stop power
supply if engine is stopped, but some cars will continue power supply even
when engine is stopped. You should adjust the battery protection to H,
otherwise, the power of your car battery may run out and it may not have
enough power to start car. You can also unplug the car port charger and run
the fridge/freezer using its internal battery. If you don’t want to use car battery
it is recommended to disconnect the car charger from the fridge and set
Battery Protection to L mode. This will allow the refrigerator battery to work
for a longer time in a safe and independent condition.
8
Page 11

• Solar Charging Management
o
When charging by solar panel, turn on unit to verify charging is in effect. Once
confirmed, unit may be turned off. Press and hold SET “ ”button over 3
seconds to show the battery status and voltage.
o
When using solar panel to charge the freezer use the extension cable and keep
the fridge in shade to avoid overheat and failure of refrigerator.
o
When the refrigerator is powered ON and solar panel is connected to charge,
the battery icon on display screen will flash to show charging status. Charging
input wattage should be higher than refrigerator working wattage (about
40-45w), otherwise the battery will keep static. To ensure that solar charging
power is higher than refrigerator operating power, a 100-Watt solar panel is
advised.
5.Battery Power Operation
Backup Power: The lithium battery is back up power as UPS power which
•
keeps refrigerator operating while staying off grid.
•
When charging the battery or using battery power, please follow the instructions
to turn on the battery bank switch.(hold for 3 Sec)
When not using the battery power or Freezer for a long time, please turn off the
•
battery output. (Hold for 3 Sec)/Reduce battery power drain)
•
Discharge Time:
Discharge time ( ECO and L mode)
Refrigeration About 10 hrs
Freezing About 5 hrs
9
Page 12

•
Maintain Battery Charged:
Home/Hotel: Use AC adapter to charge unit from AC outlet.
o
Car/Boat: Use DC port to operate the unit and charge the battery.
o
Outdoor: Bring solar panel to charge the battery. Portable power station/ solar
o
generator with AC outlet will be good companion of power supply.
Saving Battery Power:
•
o
Cool down before leaving: It is always suggested to charge freezer and turn on
the unit to cool down in advance with wall/car outlet before the trip. To prepare
for off-grid freezer, place food and beverage inside unit and let cool to
appropriate temperature. This will allow off-grid battery to last longer while
saving energy during outdoor activities.
Operated at ECO and L mode: set the unit at ECO and L mode
o
Battery Disconnection: Battery can be removed or disconnected with side button
o
(for some production). This will prevent the self discharge. The product will work
with AC adapter or car outlet without battery connection.
Note: Please charge fully before storage longer than 1 month.
6. FAQ
• The appliance is not working:
o Check that the battery bank switch is turn on
o Check the power supply connection
o Check the plug and the socket connection.
o Check for burnt fuse.
o Ensure unit has been properly powered to ‘ON’ mode.
o Compressor may be in delay start protection.
10
Page 13

• The food inside is frozen: The setting temperature is too low.
• Hear water from the inside of fridge: It is normal, due to the flow of refrigerant.
• Display F1 code: Low power protection: setting the protection from H to M or L
• Display F2 code: Fan overload protection: turn off unit and restart the unit after
30 minutes
• Display F3 code: The compressor protection is activated: please turn off the unit
and restart the unit after 30 minutes.
• Display F5 code: Compressor controller module protection is activated: please
turn off the unit, keep it in a well-ventilated location and restart the unit after 30
minutes.
• Display F7/F8 code: Temperature sensor error: please move the unit in regular
temperature area for a while, then restart the unit.
If you still have the error, please contact us for support.
7. Food Storage
• Freezer (-20 °C~0°C):
o Meat should be cut and wrapped tightly, and then averagely placed inside. After
buying frozen food, put it in the freezer at frozen condition.
o Do not put the fresh food and frozen food together.
o Do not put the fruit and vegetable in the freezer to avoid freeze-drying.
o Do not put the glass container or other container with sealed liquid in freezer. Or
there is a possibility of explosion.
• Refrigerator (0°C ~10°C):
o Eggs, butter, milk and bottled drink can be put in refrigerator.
o Fruit and vegetable should be put in bags for moisture retaining.
o Hot food should be cooled down before it’s placed to save power.
o Food must be packed into bags. Leaving space between packaged foods to
keep the circulation of cool air
11
Page 14

8. Defrosting
• After the refrigerator has been on for a period, frost could be seen on surfaces in
the freezer, which reduces refrigerating effect and increases power consumption.
In this case, you need to defrost it.
• Unplug the refrigerator and open the doors, take the food in the refrigerator to a
cool place. Use defrosting shovel to remove ice and frost (also can just let the door
open, then ice and frost will be thawed by the raising temperature). Then use
dishtowel to wipe off the ice water. After that, place the food back to the refrigerator
and plug in.
Note: Do not use sharp metal tools to defrost which will damage the refrigerator.
9. Care and Cleaning
Unplug the refrigerator before cleaning!
• Use soft cloth dampened with warm water to wipe the inner surfaces and external
appearance of the refrigerator.
• Use neutral detergent to clean the heavy stains, and dry with clean soft cloth.
• For long vacation or absences, remove food and unplug the refrigerator. Clean the
refrigerator and leave the doors open a little. Then place the refrigerator in
ventilated place.
• Do not use cleansers containing corrosive and deliquescent material (such as
scouring powder, bleach, soap powder, alkaline cleansers, benzene, gasoline, acid,
water, etc.) to clean the appearance panels, door gaskets and parts.
NOTE: Do not sprinkle water on the refrigerator during cleaning because that would
reduce the insulating property of electrical components and erode the metal parts.
12
Page 15

10. The Following Situations are Normal
•
The flow of refrigerant through the evaporator may create a boiling or gurgling
sound.
•
In the rain and high humidity weather, moisture may form on the outside of
refrigerator or door gaskets. You can wipe damp surfaces with dry cloth.
•
The temperature on the back panel may be high (particularly in summer) due to
the heat emission of the condenser.
•
The temperature on external surfaces of the compressor may be high when the
compressor is working.
•
The compressor may cause a high hum or pulsating sound when it is at starting
or stopping.
•
It's normal to hear metal clanking noises from the compressor when the
refrigerator is bumped.
•
There may be a slight smell coming from the rubber wheels. This is harmless for
health.
11. Technical Specification
MODEL
CLIMATIC CATEGORY
PROTECTIVE CLASSIFICATION OF
ELECTRIC SHOCK RESISTANCE
RATED VOLTAGE DC (V)
DC FUSE (A)
TOTAL INPUT POWER (W)
RATED CURRENT FOR DC(A)
REFRIGERANT (g)
N.W (kg)
13
X30A/X40A/X50A
T/ST/N/SN
III
12V/24V
15A
45W
3.75A/1.875A
32g/R134A
13.4kg/14.9kg/15.4kg
Page 16

12. Guidelines for Protection of the Environment
DISPOSAL: Do not dispose this product as unsorted municipal waste.
Separate collection of such waste is necessary for special treatment and
disposal.
Meaning of crossed-out wheeled dustbin: Do not dispose of electrical
appliances as unsorted municipal waste. Use separate collection
facilities. Contact your local government for information regarding the collection
systems available. If electrical appliances are disposed of in landfills or dumps,
hazardous substances can leak into the groundwater and get into the food chain,
damaging your health and well-being.
14
Page 17
Danger!
Do not put the portable power pack into water or get it wet.
•
Do not charge or store near fire or under extreme heat, especially when
•
leakage happens.
Do not mix up positive electrode and negative electrode.
•
Do not connect directly to AC power source.
•
Do not transport or store with necklace or other metal material, this may cause
•
short circuit.
Do not puncture or open, stamp, or impale.
•
The terminals cannot be welded directly.
•
Cannot be decomposed.
•
Do not place in microwave ovens or pressured vessels.
•
Do not combine with a one-shot battery or battery with different capacity, model
•
or type.
Do not use if abnormalities are noticed such as smoke, excessive heat, etc.
•
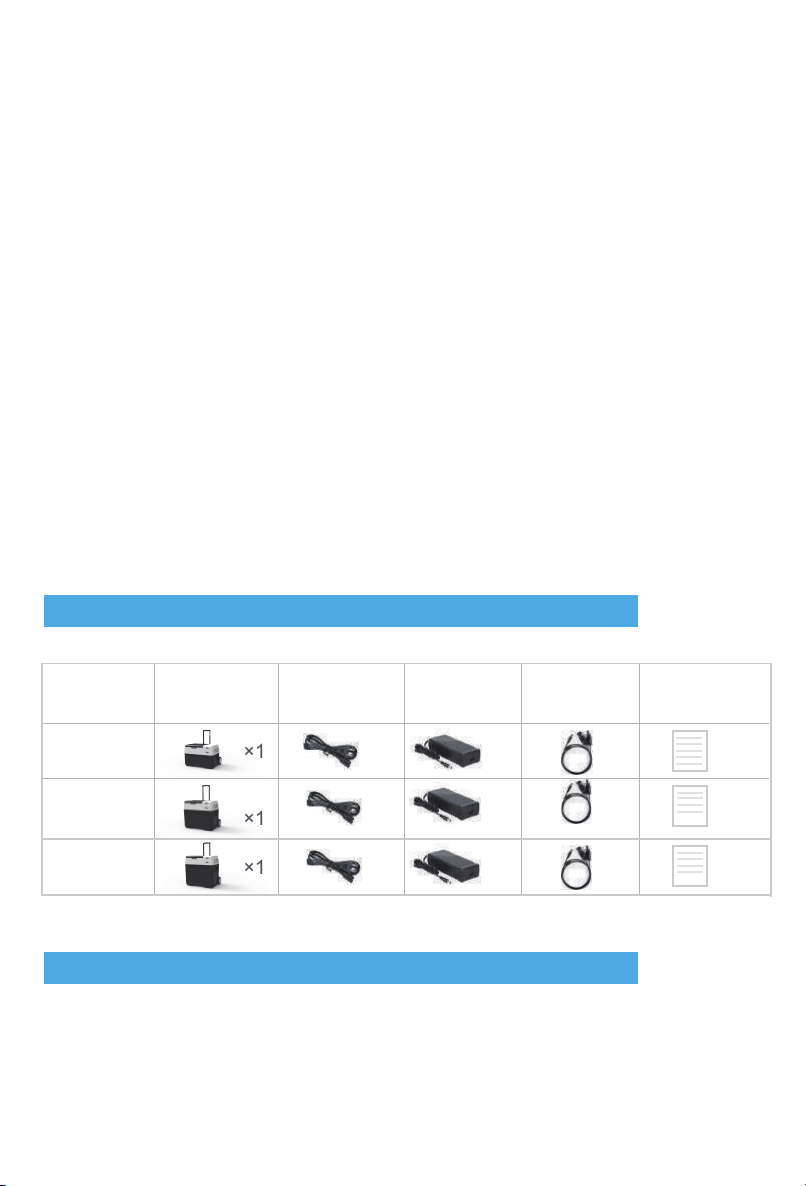
13. Pack List
ltem Model
30L
40L
50L
Refrigerator
×1
×1
×1 ×1 ×1 ×1 ×1
DC power cord
×1 ×1
×1
AC adaptor
×1
Solar charge
cable
×1
×1
User's manual
×1
×1
14. Warranty
One-year warranty for unit. Please visit our website and make warranty
•
registration: https://www.acopower.com/productwarranty/register
15
Page 18
Power Your Green Life!
Thanks for choosing ACOPOWER
Tel: +1- 626-575 7722 Email: [email protected]
www.ACOPOWER.com
Add: 4120 Valley Blvd, Walnut, CA 91789, USA
 Loading...