

Page 1

PUSHBUTTON
BACKUP
USER’S GUIDE
™
Page 2

IMPORTANT
Before reading this guide, set up your AcomData
External Hard Drive according to the instructions
in your Hard Drive User’s Guide.
If you want to use your Drive for backups please
read this guide carefully; it contains important
information that will help you create the backup
strategy that best suits your needs.
If you do NOT want to use your PushButton™equipped AcomData Drive for backups, you do
not need to read this guide or install the supplied
software.
Page 3

CONTENTS
AcomData Contact Information ...................................................................... 4
INTRODUCTION .........................................................................5
What is PushButton™ Backup? ...........................................................................................................5
How PushButton™ Backup Works .....................................................................................................5
Duplicates vs. Backups .......................................................................................................................... 5
PUSHBUTTON™ BACKUP FOR WINDOWS PCS ..................................7
System Requirements ...................................................................................... 7
Software Installation ........................................................................................ 7
Installing Retrospect® Express ............................................................................................................7
Installing AcomData PushButton™ Manager ................................................................................ 9
Setting up PushButton™ Backup ................................................................... 11
Customizing the Button Backup Script ......................................................... 14
PUSHBUTTON™ BACKUP FOR MAC ............................................ 19
System Requirements .................................................................................... 19
Software Installation ..................................................................................... 20
Installing Retrospect® Express ......................................................................................................... 20
Installing AcomData PushButton™ Manager ............................................................................. 22
Setting up the Button Backup Script ............................................................ 25
Customizing the Button Backup Script ......................................................... 28
Install Retrospect Express 5.1
(Mac OS 9 & pre-OS 10.1.5)
.................................. 34
APPENDIX ............................................................................ 35
Frequently Asked Questions ......................................................................... 35
Troubleshooting ............................................................................................. 37
Glossary ........................................................................................................... 38
One Year Limited Warranty ............................................................................ 40
Obtaining Service for Your AcomData Product ............................................ 40
Notices ............................................................................................................. 41
Page 4
AcomData
Contact Information
Address:
3410 Pomona Blvd.
Pomona, CA 91768
Telephone:
(909) 348-0680
Fax:
(909) 598-8663
Web Site:
www.acomdata.com
Customer Service:
customerservice@acomdata.com
Technical Support:
techsupport@acomdata.com
Pre-Sales Questions:
sales@acomdata.com
– 4 –
Page 5

INTRODUCTION
What is PushButton™ Backup?
PushButton™ Backup is an easy and convenient way to routinely backup your important files simply by pressing the PushButton™ on the front of your Drive. Not only
does PushButton™ Backup make backups easier and more convenient, but since
you’re backing up your data to a hi-performance hard drive, as opposed to say, tape
or optical media, backups are also much faster.
How PushButton™ Backup Works
Along with special hardware and firmware components, (inside the Drive) PushButton™
Backup uses a special version of Retrospect Express and the AcomData PushButton™
Manager software (on the included CD) that work together to initiate and run backups
whenever you press the PushButton™.
Retrospect Express is the software that actually performs the data backup function.
The Retrospect Express software bundled with your AcomData Drive was specially
configured to work with PushButton™ Backup. The primary function of the AcomData
PushButton™ Manager is to enable the PushButton™ on the Drive to initiate a backup
when pressed.
The first time you use PushButton™ Backup, the Retrospect Button Backup wizard will
launch and help you quickly setup a Duplicate script that specifies the volume (drive)
you want to backup and the types of files you want to include in your routine backups.
After setup is complete, each subsequent time you press the PushButton™, Retrospect
Express will automatically launch and perform an incremental Duplicate, saving the
files to your AcomData Drive.
You only need to set up the script once. If you happen to delete the script, the next
time you initiate a PushButton™ Backup, Retrospect Express will run the Button Backup
wizard.
Duplicates vs. Backups
There are three types of backup operations available: Duplicates; Backups, and;
Archives. By default, PushButton™ Backup performs Duplicates. However, after you set
up PushButton™ Backup you can change the Button Backup script to perform Backups
or Archives instead. (The Archive operation is not discussed in this guide. For information
– 5 –
Page 6

on Archives see the Help menu in Retrospect Express.)
Duplicates and Backups are the most common operations used for data backup; they
are described below.
About Duplicates
The Duplicate operation is essentially a “smart” copying process. Files and folders
from the source volume (e.g. your computer’s internal hard drive) are copied to your
AcomData Drive. Duplicated files and folders can be viewed and utilized just like the
original source file because a duplicate is a straight copy of the source file.
The Duplicate process saves space by overwriting old versions of duplicated files with
the latest versions from the source volume. It also saves time by copying only files that
are new or that have been changed since the last backup.
If you erase a file or folder on the source volume, the duplicated file or folder on your
AcomData Drive will also be erased the next time you press the PushButton™. In this
way, the backup is always an exact duplicate of the source. You can restore duplicated
files simply by dragging and dropping them back onto your computer’s hard drive.
The Duplicate operation is best suited for users who need quick access to their backed
up files and who do not need to backup their operating system or application files.
About Backups
The Backup process “packages” backed up files into a Backup Set. Files in a Backup
Set are not accessible via the desktop. They are only accessible via the Retrospect
user interface. To retrieve a file in a Backup Set, you need to “restore” the file using
Retrospect’s Restore function.
Instead of overwriting previously backed up files with the latest versions, with
Backups all previous versions of backed up files are saved, which allows you to restore
multiple versions of the same file as it has changed over time.
As well as backing up your files, Backups can also save other types of data, including
user settings, applications and their settings, and the operating system and its settings (including the registry). This information is invaluable if you need to perform
disaster recovery on a computer that has become unresponsive. Backup Sets can be
compressed to save space, and encrypted for added security.
The Backup operation is best suited for users who want to backup their entire startup
disk.
– 6 –
Page 7
PUSHBUTTON™ BACKUP
FOR WINDOWS PCS
System Requirements
The following system requirements are for PushButton™ Backup only. The system requirements for your specific AcomData Drive can be found in your Drive’s User’s Guide.
• Minimum 233 MHz processor (Pentium, Celeron, AMD, etc.)
• Windows 98SE, Me, 2000, or XP
• 128 MB of RAM
Software Installation
While we highly recommend backing up your files using the PushButton™ for its
ease and simplicity, it is possible to run backups, and any other Retrospect Express
operation, directly from the Retrospect Express user interface. If you want to run
backups without using the PushButton™ you do not need to install the AcomData
PushButton™ Manager. You only need to install Retrospect Express.
Installing Retrospect® Express
1. Save all work you are currently working on and
then restart your computer.
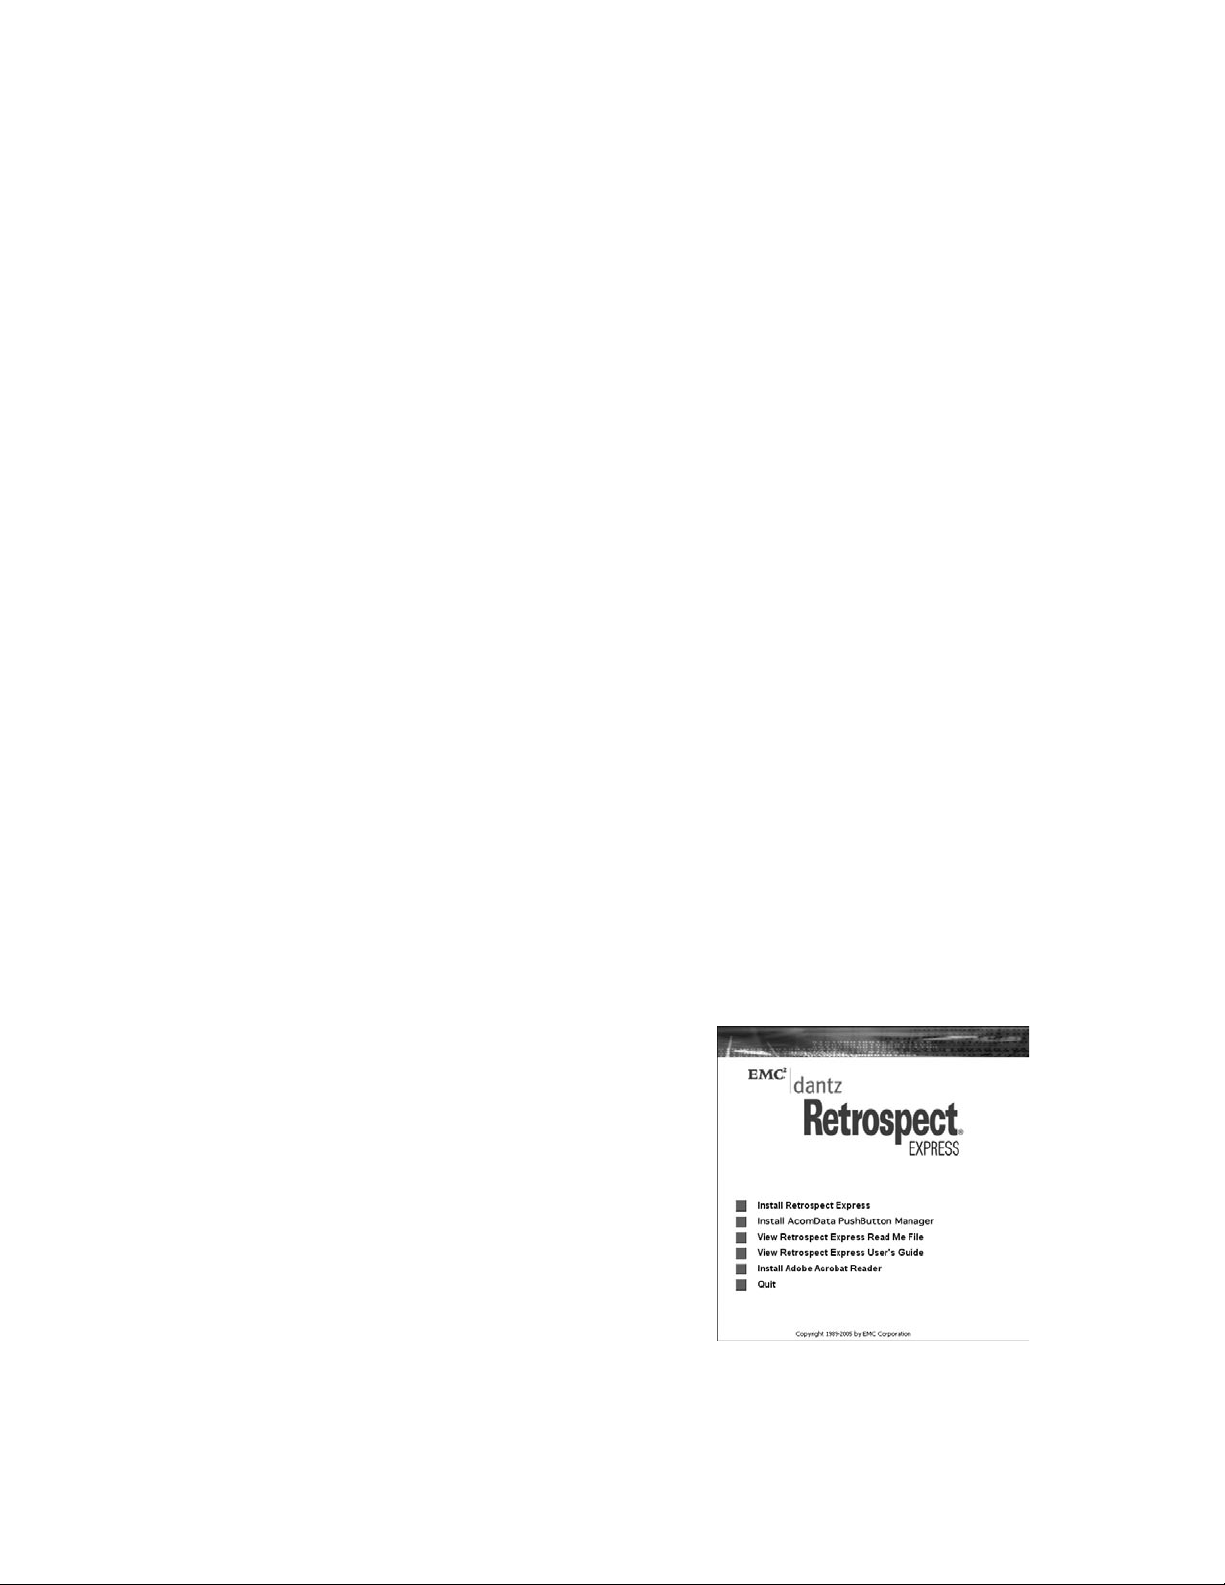
2. Insert the AcomData Software CD into your
CD drive. The CD will launch automatically
and you will see the Retrospect Express start
screen (Figure 1). If the CD is already in the
drive, locate the CD icon in My Computer.
Right-click the icon and select AutoPlay.
3. In the Retrospect Express start screen, select
“Install Retrospect Express.”
– 7 –
FIGURE 1
Page 8
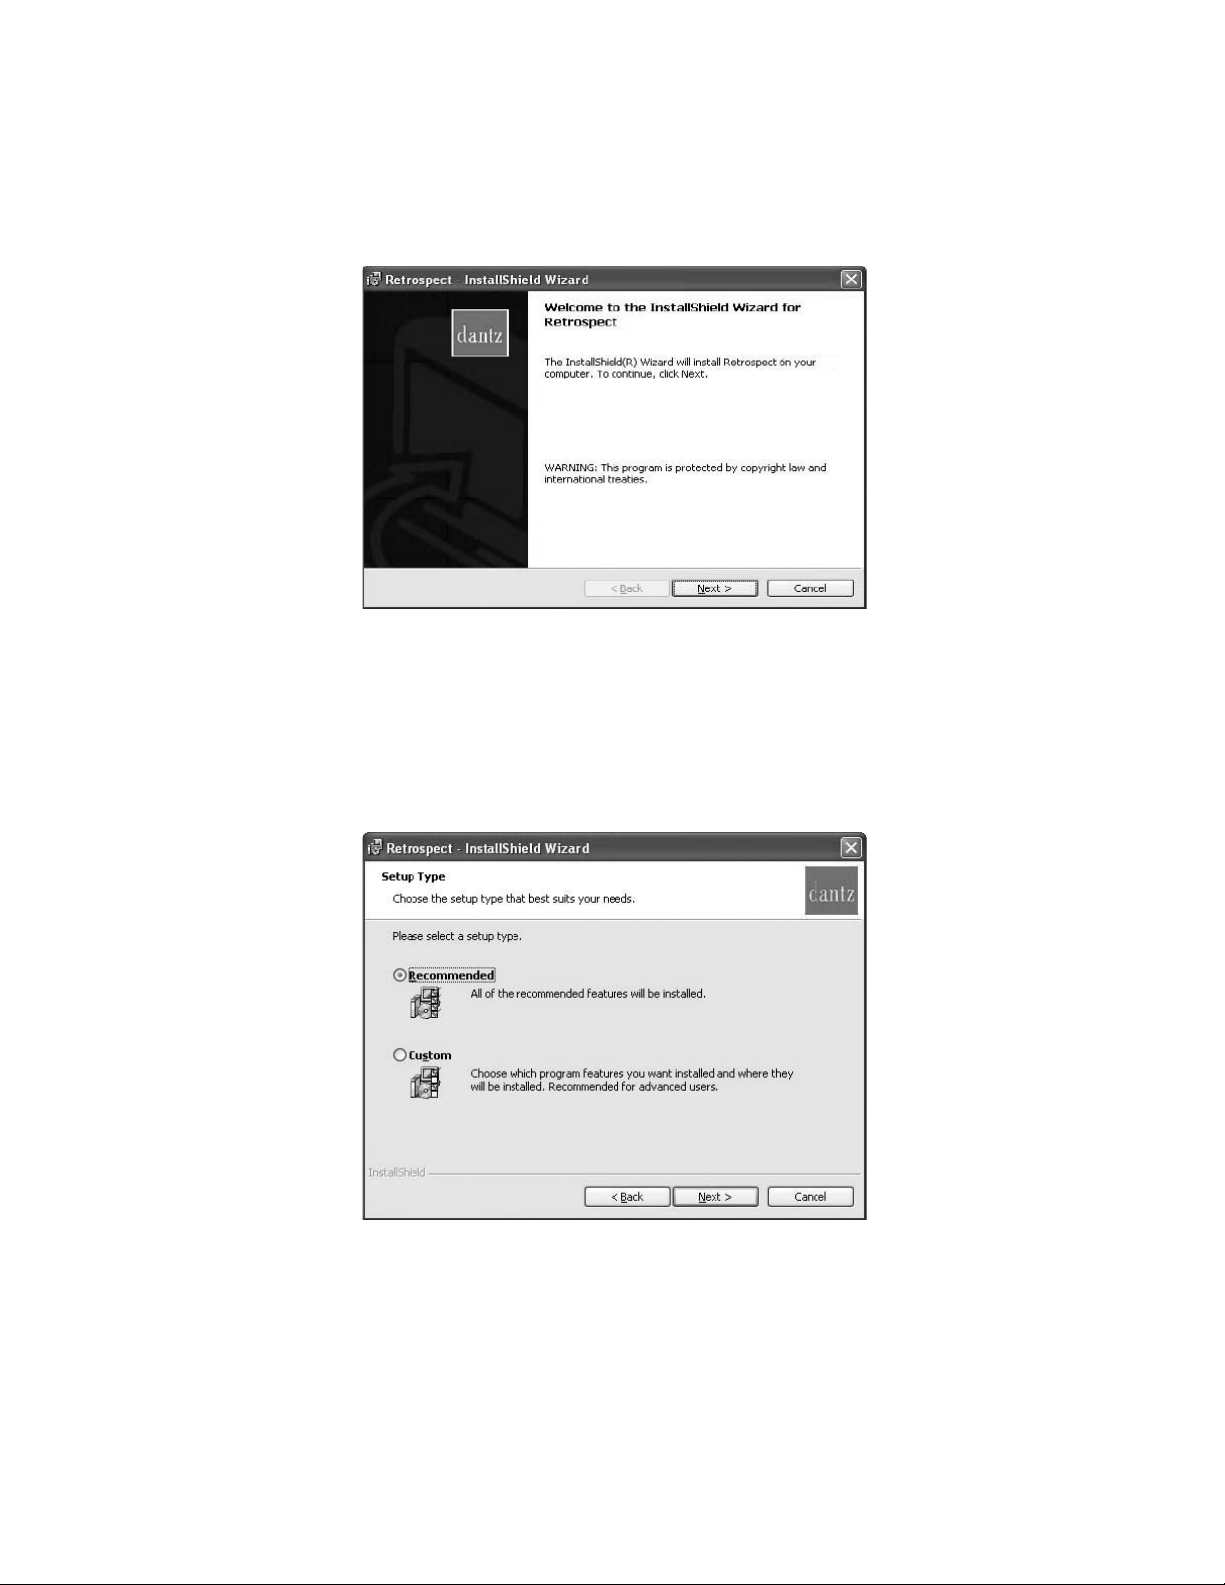
4. In the Retrospect InstallShield Wizard (Figure 2), click Next.
FIGURE 2
5. Next you will see the License Agreement screen. If you accept the terms, select “I
accept the terms in the license agreement” and click Next.
6. Complete the Customer Information screen (optional) and click Next.
7. In the Setup Type screen (Figure 3), there are two options: “Recommended” and
“Custom.” If it’s not already selected, select “Recommended” and click Next.
FIGURE 3
8. In the Ready to Install the Program screen, click Install.
9. The Installing Retrospect screen will appear. Please wait while InstallShield Wizard
installs Retrospect.
– 8 –
Page 9

10. Once the InstallShield Wizard has successfully installed Retrospect, click Finish.
If you wish to install the AcomData PushButton™ Manager to run backups via the PushButton™, proceed to the next section: “Installing the AcomData PushButton™ Manager.” Otherwise, restart the computer and Retrospect Express will be ready to use. For
information on how to use Retrospect Express see the Help menu in Retrospect Express.
Installing AcomData PushButton™ Manager
If you have just installed Retrospect Express, the Retrospect Express start screen
should still be up. If you do not see the Retrospect Express start screen, but the CD
is still in the CD drive, go to My Computer and double-click on the CD drive icon. The
Retrospect Express start screen will appear. If the CD is not in the drive, insert it. The
CD will launch and the Retrospect Express start screen will appear automatically.
1. In the Retrospect Express start screen click on “Install AcomData PushButton™
Manager.”
2. The Welcome to the AcomData PushButton™ Manager Setup Wizard will appear
(Figure 4). Click Next.
FIGURE 4
– 9 –
Page 10

3. In the Select Installation Folder screen (Figure 5), select the destination folder. We
recommend using the default location shown in the Folder field. Click Next.
FIGURE 5
4. The Confirm Installation screen will appear. Click Next.
5. When the Installation Complete screen appears, click Close.
6. In the Retrospect Express start screen, click Quit.
7. Restart your computer. After the computer boots up, you should see the AcomData
PushButton™ Manager icon on your System Tray (Figure 6).
FIGURE 6
Proceed to the next section: “Setting up PushButton™ Backup.”
– 10 –
Page 11

Setting up PushButton™ Backup
When you set up PushButton™ Backup, the Button Backup script that is created is set to
run Duplicates by default. If you want run Backups instead of Duplicates, first complete
this section, then go to the next section: “Customizing the Button Backup Script.”
1. Press the PushButton™ on the Drive. Retrospect Express will launch. In the Welcome
to Retrospect! window (Figure 7) the license code field will display the correct
license code. You do not need to enter a license code. Click OK.
FIGURE 7
2. Next, the display will ask you to register your copy of Retrospect Express. To register, click Register Now and complete the Retrospect Express Registration form.
3. In the Retrospect Button Backup wizard click Next.
4. In Step 1 (Figure 8) you will be asked which volume you want to backup (for example, C drive). Click Next.
FIGURE 8
– 11 –
Page 12

5. In Step 2 (Figure 9) you will be asked what files you want to backup. Select Entire
volume to backup and entire disk, or select Documents only. Click Next.
FIGURE 9
6. In Step 3 (Figure 10) you will be asked where you want to save your backup. Select the
AcomData Drive and click Next.
FIGURE 10
7. In the next window (Figure 11) you will have the option to click Start Now or click
Finish to exit the wizard.
FIGURE 11
– 12 –
Page 13

If you wish to change the script in order to run Backups instead of Duplicates, click
Finish and proceed to the next section: “Customizing the Button Backup Script.”
If you wish to start running Duplicates now, click Start Now. The Duplicate operation
will run, and when it is complete Retrospect Express will quit. From then on, whenever you want to run a backup, simply press the PushButton™. Retrospect Express will
launch, automatically perform an incremental Duplicate operation, and then quit.
– 13 –
Page 14

Customizing the Button Backup Script
This section shows you how to change the Button Backup script to perform Backups
rather than Duplicates. You can also set the script to perform Archives. (The Archive
operation is not discussed in this guide. For information on the Archive operation, see
the Help menu in Retrospect Express.)
If you change the Button Backup script to perform another type of operation, the old
script will be overwritten and no longer available.
1. Launch Retrospect Express by clicking the Retrospect Express icon––do not press
the PushButton™. Click Automate in the navigation bar and choose Manage Scripts
(Figure 12).
FIGURE 12
2. Select the Retrospect Button Backup (Duplicate) script and click the Delete icon on
the toolbar in the Scripts screen (Figure 13).
FIGURE 13
– 14 –
Page 15

3. On the Scripts screen, click New. A window will appear giving you the option to set
up the script using EasyScript. Click No.
4. You will be asked what kind of script you wish to create. Choose Backup and click
OK. In the text field (Figure 14), type in the exact name: Retrospect Button Backup.
You must type the name correctly or PushButton™ Backup will not recognize this
script. Click New.
FIGURE 14
5. In the Backup: Retrospect Button Backup window (Figure 15), click Sources to specify
drives or folders. After you finish specifying drives and folders, click OK. You might
find the following suggestions helpful:
• To specify multiple drives on your computer, in the Volume Selection window hold the
Control key while you click the drive names.
• To specify folders, in the Volume Selection window highlight a drive and click
Subvolume to view and choose a folder within that drive. Then, in the Defining
Subvolume window, click Define. In the Volume Selection window, click one of the
defined folders to select it, or hold the Control key while you click to select multiple folders.
• To remove a drive or folder, select it in the Volume Selection window and click Forget
in the toolbar.
FIGURE 15
– 15 –
Page 16

6. To add additional folders or drives as described in the previous step, click Add in the
Sources window. After you finish adding folders and drives, click OK.
7. In the Backup: Retrospect Button Backup window, click Destinations. To create a new
location, in the Backup Set Selection window, click Create New to launch the Create
New Backup Set wizard.
8. In the Create New Backup Set wizard, click Next. Select Disk (Figure 16) as the Backup
Media and click Next.
FIGURE 16
9. Enter a name for the Backup Set or use the default name (Figure 17). In this example, the Backup Set is named Custom Backup. Click Select.
FIGURE 17
– 16 –
Page 17

10. In the Select a Disk window, choose the AcomData Drive as the location for the
Backup Set (Figure 18) and click OK.
FIGURE 18
11. Verify the Backup Set name; make sure the AcomData Drive is selected as the destination, and click Next.
12. Keep Backup Set Security set at None and click Next (Figure 19).
FIGURE 19
– 17 –
Page 18

13. Click Next to save the Retrospect Catalog File for this Backup Set in the default
location: My Documents\Retrospect Catalog Files (Figure 20). Retrospect uses the
catalog to keep track of the files in the Backup Set.
FIGURE 20
14. Click Finish to close the Backup Set Creation wizard.
15. Select the Backup Set in the Destination selection window and click OK.
16. Select the Backup Set in the Retrospect Button Backup: Destinations window and
click OK.
17. In the Backup summary window, Retrospect Express confirms the source and destination that you selected. The Selecting category lists the file selection criteria that
Retrospect Express uses with this script. By default Retrospect Express uses the All
Files criteria, which means that Retrospect Express will back up all your files the first
time it performs a backup, but will back up only new and changed files with each
following backup. If you want to use the Selecting button to choose file selection
criteria other than the All Files default, see the Help menu in Retrospect Express.
18. To add software compression to allow for more backups to the AcomData Drive,
click on Options in the Backup summary window. Check “Data compression (in soft-
ware)” and click OK to return to the Backup summary window.
19. After making sure that the backup script is correct, click OK to save your changes.
20. To use your new script, quit Retrospect Express and press the PushButton™ on
your AcomData Drive.
– 18 –
Page 19

PUSHBUTTON™ BACKUP
FOR MAC
System Requirements
The following system requirements are for PushButton™ Backup only. The system requirements for your specific AcomData Drive can be found in your Drive’s User’s Guide.
• Power Macintosh (G5, G4, G3, iBook or iMac)
• Mac OS X v.10.2 or later
• 128 MB RAM
Mac OS X v.10.2 + Users:
While we highly recommend using PushButton™ Backup for its ease and simplicity, it
is possible to run backups from the Retrospect Express user interface. If you want to
run backups without using the PushButton™, you do not need to install the AcomData
PushButton™ Manager. You only need to install Retrospect Express.
Mac OS X v.10.1.5 Users:
You can use the same version of Retrospect Express that is supplied for PushButton™
Backups, except you cannot run backups from the PushButton™. Rather you would
run backups via the Retrospect Express user interface.
Mac OS 9 and pre-OS 10.1.5 Users:
We have included Retrospect Express v. 5.1, which will allow you to run backups via the
Retrospect Express user interface. Go to “Install Retrospect 5.1.”
– 19 –
Page 20

Software Installation
Installing Retrospect® Express
1. Before installing the software, we recommend that you save any files you may be
currently working on, and restart your computer.
2. Insert the AcomData Software CD into your CD drive. An icon labeled “AcomData
PushButton™ Backup” will appear on your desktop and a window displaying the
contents of the CD will open automatically. If the window does not open, doubleclick on the CD icon.
3. Inside the AcomData PushButton™ Backup window, double-click on the Install
Retrospect Express icon (Figure 21).
FIGURE 21
4. The Authenticate window will appear with the message: “Install Retrospect Express
requires that you type your password.” This is the password you use to log on to your
computer. Type in your password and click OK .
– 20 –
Page 21

5. When the Retrospect Express splash screen appears (Figure 22), click Continue.
FIGURE 22
6. Read the license agreement and then click Accept to accept the terms of the agreement and continue with the installation.
7. In the Install Retrospect Express window (Figure 23) the default installation type in
the pop-up menu is Easy Install. Under Install Location, the default location is the
main Applications folder on your startup disk. Do not change the default settings.
Click Install.
FIGURE 23
– 21 –
Page 22

8. Once installation is complete you will see an alert with the message: “Installation
was successful…” (Figure 24) Click Quit.
FIGURE 24
If you wish to install the AcomData PushButton™ Manager to run backups via the
PushButton™, proceed to the next section: “Installing the AcomData PushButton™
Manager.” Otherwise, restart the computer and Retrospect Express will be ready
to use. For information on how to use Retrospect Express see the Help menu in
Retrospect Express.
Installing AcomData PushButton™ Manager
1. In the AcomData PushButton™ Backup CD window, double-click the DMBtMgr_
Install icon.
2. You will see the message displayed in Figure 25. Installation of the DMBtMgr cannot run from the CD because the installer needs to write data back to itself during
installation. Click Continue. Once the DMBtMgr file has been copied, a new win-
dow containing the copied file will open. Double-click the DMBtMgr icon in that
window.
FIGURE 25
3. The Authenticate window will appear with the message “Install Retrospect Express
requires that you type your password.” This is the password you use to log on to your
computer. Type in your password and click OK.
– 22 –
Page 23

4. The DMBtMgr_Install window will appear (Figure 26). In the Select Destination
screen, the default location should be your computer’s hard drive. If not, select your
computer’s hard drive and then click Continue.
FIGURE 26
5. In the Installation Type screen (Figure 27), the default installation type is Easy Install.
Leave it as is and click Continue.
FIGURE 27
– 23 –
Page 24

6. Next, you will see the message: “The installer has all the files necessary to complete
the chosen install.” (Figure 28) Click Install.
FIGURE 28
7. Once the files have been installed, in the Finish Up screen you will see the message:
“Installation was successful…” Click Quit.
Proceed to the next section: “Setting up the Button Backup Script.”
– 24 –
Page 25

Setting up the Button Backup Script
Before you can use PushButton™ Backup, you will need to set up the Button Backup
script.
1. Press the PushButton™ on the front of the Drive. You will see the alert below (Figure
29). Click Open.
FIGURE 29
2. You will be asked to type in your administrator password. This is the password you
use to log in to your computer. Do so, then click OK.
3. You will see the Retrospect license code on the window. Click OK.
4. Next, the display will ask you to register your copy of Retrospect Express. To register, click Register Now and complete the registration form that appears.
5. The Retrospect Button Backup wizard should appear (Figure 30). If it does not,
press the PushButton™. In the Retrospect Button Backup wizard, click Next. You
will be taken through three easy steps to setup the script.
FIGURE 30
– 25 –
Page 26

6. In Step 1 (Figure 31), Retrospect Button Backup will ask you to select the volume
(drive) you want to backup from a list of available volumes. Make your selection
and click Next.
FIGURE 31
7. In Step 2 (Figure 32), the wizard will ask what types of files you want to backup.
Make your selection and click Next.
FIGURE 32
– 26 –
Page 27

8. In Step 3 (Figure 33), the wizard will ask where you want to save your backup. Select
the AcomData Drive. Click Next.
FIGURE 33
9. The next screen (Figure 34) will inform you that the Retrospect Button Backup feature is ready to use.
FIGURE 34
If you wish to change the script in order to run Backups instead of Duplicates, click
Finish and proceed to the next section: “Customizing the Button Backup Script.”
If you wish to start running Duplicates now, click Start Now. The Duplicate operation
will run; when it is complete Retrospect Express will quit. From then on, whenever you
want to run a backup simply press the PushButton™. Retrospect Express will launch,
automatically perform an incremental Duplicate operation, and then quit.
– 27 –
Page 28

Customizing the Button Backup Script
This section shows you how to change the Button Backup script to perform Backups
rather than Duplicates. You can also set the script to perform Archives. (The Archive
operation is not discussed in this guide. For information on the Archive operation, see the
Help menu in Retrospect Express.)
If you change the Button Backup script to perform another type of operation, the old
script will be overwritten and no longer available.
1. If Retrospect Express is not running, launch the program by double-clicking the
Retrospect Express application icon in your Applications folder––do not press the
PushButton™.
2. In the Retrospect Express Directory window (Figure 35), click on the Configure tab,
and then click Preferences.
FIGURE 35
– 28 –
Page 29

3. In the Preferences window (Figure 36), highlight Media Handling in the list on the
left, and then select “Use FireWire/USB hard drives as removable disks.” Click OK.
FIGURE 36
4. In the Retrospect Express Directory window, click on the Automate tab. In the
Automate screen, click on the Scripts button. In the Scripts window (Figure 37) you
will see the script Retrospect Button Backup (Duplicate).
FIGURE 37
5. Highlight the script. In the Scripts pull-down menu at the top of your screen, select
Forget… You will see an alert asking “Really forget Script…?” Click OK.
6. In the Scripts window, click New… You will see a new window asking: “Use EasyScript
to prepare backup strategy?” Click No. (EasyScript is used for the creation of scheduled
backups and is not compatible with PushButton™ Backup.)
– 29 –
Page 30

7. A new window will appear asking you what kind of script you want to create (Figure 38).
Your choices will be Duplicate, Backup and Archive. Select Backup and click OK.
FIGURE 38
8. Next, you will be asked to name the script (Figure 39). Type in the exact name:
Retrospect Button Backup. You must type the name correctly or PushButton™
Backup will not recognize this script. Click New.
FIGURE 39
9. A new window will appear titled Backup: Retrospect Button Backup (Figure 40). Click
Sources. In the Volume Selection window (Figure 41, next page), select the source
volume (e.g.: your computer’s main hard drive), then click OK.
FIGURE 40
– 30 –
Page 31

FIGURE 41
10. In the Retrospect Button Backup: Sources window, click OK.
11. In the Backup: Retrospect Button Backup window, click Destinations
12. In the Backup Set Creation window (Figure 42), select Removable Disk from the
Backup set type pull-down menu.
FIGURE 42
13. If you wish to set up a password that will be required every time you perform a
backup, click the Secure… button and follow the instructions. When you’re done,
you will be taken back to the Backup Set Creation window.
14. In the Name field, type in a name for this Backup Set. The default name is “Backup
Set A.” You can use the default name or create your own. The name you use will later
on be assigned to the AcomData Drive. For example, if you name the Backup Set “My
Backups”, the name of your AcomData Drive will be “1-My Backups.” The “1” indicates
that the Drive is the first disk in the Backup Set. If you were to add additional disks to
this Backup Set they would be named “2-My Backups”, “3-My Backups” etc.
15. Click New… You will then see the Choose a folder widow, asking you to select a
location where Retrospect Express will save the catalog file for your Backup Set. The
catalog file is the file that Retrospect Express uses to keep track of the files in the
– 31 –
Page 32

Backup Set. The default location is the Documents folder inside the Home folder on
your computer’s startup disk. Click Save.
16. In the Backup Set Selection window, click OK. In the Retrospect Button Backup:
Destinations window, click OK.
17. In the Backup: Retrospect Button Backup window, the default for Selecting is All
Files. If you wish to modify this, click on the Selecting button. The Retrospect Button
Backup: Selecting window will appear. Select the types of files you wish to backup
from the pull-down menu.
18. In the Backup: Retrospect Button Backup window, select Options to open the
Retrospect Button Backup: Options window and view or change the Verification and
Data compression options (Figure 43). Click OK.
FIGURE 43
19. Close the Backup: Retrospect Button Backup window, and when prompted click
Save to save the script.
20. In the Scripts window you will now see the script Retrospect Button Backup
(Backup). Close the Scripts window. The script is now ready to use.
21. Press the PushButton™ on the AcomData Drive. If this is the first time performing this Backup operation, Retrospect Express will ask you to select a disk for the
Backup Set. A window will appear with a list of available drives. If the listing simply
says “Removable Disk” expand the selection by clicking on the arrow to the left
of the listing, and you will see the name of the volume. Make sure you select the
AcomData Drive, then click Proceed.
– 32 –
Page 33

22. You will get an alert asking “Really erase the disk?”
WHEN PREPARING A DISK THAT IS TO BE INCLUDED IN A BACKUP SET,
RETROSPECT FIRST ERASES THE DISK. FOR THIS REASON IT IS VERY IMPORTANT
THAT YOU SELECT THE CORRECT DISK.
Click OK. You will receive a second warning. Click Erase. The disk will be erased and
prepared for use by Retrospect Express.
Once the Drive is erased, Retrospect Express will perform the Backup operation. When
the Backup is complete, Retrospect Express will quit automatically.
From now on, whenever you want to run a backup simply press the PushButton™.
Retrospect Express will launch, automatically perform a Backup, and then quit.
– 33 –
Page 34

Install Retrospect Express 5.1 (Mac OS 9 & pre-OS 10.1.5)
1. Save all work you are currently working on and restart your computer.
2. Insert the AcomData Software CD disk into your CD drive.
3. If the CD does not open automatically, double-click on the CD icon.
4. In the CD window, double-click on the Retrospect Express 5.1 folder.
5. In the Retrospect Express 5.1 folder, double click on the Install Retrospect Express
icon.
6. The Retrospect Express splash screen will appear. Click Continue.
7. Click Accept on the Retrospect Licensing agreement to accept the terms and continue with the installation.
8. Retrospect Express will install the software application to the default location.
9. Click Install.
10. Once the Retrospect software is successfully installed, click Restart to restart your
computer.
For information on how to use the Retrospect Express, see the Help menu in
Retrospect Express.
– 34 –
Page 35

APPENDIX
Frequently Asked Questions
Q: Can I use more than one Drive with PushButton™ Backup on the same computer?
A: While you can connect more than one PushButton™-enabled Drive to a computer,
you can only use the PushButton™ on the first Drive you installed. However, if the
Button Backup Script is set to run Backups, and you need additional storage capacity
for your backups, you can add additional Drives (whether they have a PushButton™ or
not) to the Backup Set and continue to run the backups via the PushButton™ on the
first Drive.
Q: What’s the difference between Retrospect Express and other versions of
Retrospect?
A: The Retrospect Express software bundled with your AcomData Drive offers the
same powerful features as other versions of Retrospect, except its use is limited to
one desktop or laptop computer. Furthermore, the Retrospect Express software bundled with your AcomData Drive was specially designed for AcomData PushButton™
Backup. The PushButton™ Backup function will not work with other versions of
Retrospect.
Q: Do I have to install Retrospect Express or the AcomData PushButton™ Manager
to use my AcomData Drive?
A: You only need to install Retrospect Express and the AcomData PushButton™
Manager if you want to use PushButton™ Backups. You can also perform backups
the traditional way (without PushButton™) by installing Retrospect Express but not
the AcomData PushButton™ Manager. In this case, to run backups you would launch
Retrospect Express from your desktop and use the on-screen interface.
Q: I already had Retrospect installed on my computer before I purchased my
AcomData Drive. Can I use this version rather than the version bundled with the
Drive to perform backups?
A: PushButton™ Backup will only work with the Retrospect Express bundled with your
AcomData Drive. This is because the software was specially configured to work spe-
– 35 –
Page 36

cifically with PushButton™ Backup. However, you can use a previously installed version of Retrospect to back up data to your AcomData drive using the Retrospect user
interface rather than the PushButton™. If you plan to keep using your previous version
of Retrospect, do not install the Retrospect Express or PushButton™ Backup software
bundled with the AcomData Drive.
Q: Will the Retrospect Express bundled with the AcomData Drive recognize
Backup Sets that were created with an earlier version of Retrospect?
A: The Retrospect Express software bundled with your Drive will be able to utilize
Backup Sets that were created with other versions of Retrospect. There is one exception: Retrospect Express 6.0 for Mac will be able to read Backup Sets created on
Retrospect version 5.1 on the Mac but it will not be able to write to these Backup Sets.
– 36 –
Page 37

Troubleshooting
If you experience a technical problem, the first thing you should do is make sure you
properly followed the instructions in this guide.
If the problem is related to the AcomData PushButton™ Manager or to the function of
the Drive itself (for example: nothing happens when you press the PushButton™) and
you followed the instructions properly, please contact AcomData Technical support.
How to reach AcomData Technical Support:
a) submit a Technical Support form, which can be accessed in the Customer Support
section at www.acomdata.com;
b) e-mail techsupport@acomdata.com;
c) call (909) 348-0680
If the problem is related specifically to Retrospect Express, the first thing you should
do is check the Help menu in Retrospect Express. The solutions for most issues can be
found there. If you cannot resolve the issue that way, we recommend that you go to
the Dantz Support page at http://www.dantz.com/en/support/index.dtml and select
one of the support options.
– 37 –
Page 38

Glossary
Bit - The smallest unit of digital data. In binary code, a bit is represented logically as a
either a 1 or a 0.
Buffer – RAM cache that temporarily stores data so it can be delivered to a device as it
is needed.
Bus – An electronic link that can transmit data between digital devices, such as computers and computer peripherals.
Byte – A unit of digital data, usually made up of eight bits.
Capacity – The amount of data that can be stored on a hard drive or other storage
device.
Daisy chain – A hardware configuration in which peripheral devices are connected to
each other in a series. The FireWire interface, for example, supports a daisy chain of up
to 62 drives.
Data Transfer Rate – The speed at which data transfers to and from the drive.
Device Driver – A software program that enables a computer to communicate with
peripheral devices, such as hard drives and CD-ROM drives. Each type of device
requires a different driver.
External Hard Drive – A external peripheral device containing a hard drive mechanism connected to a computer via a data communication interface.
FAT32 – A file system that organizes files on a disk. This file system is standard for
Windows 98SE and Me, and is supported under Windows 2000 and XP. A single file is
limited in size to 4 GB.
Format – Sets up a file system for storing and retrieving files on a disk. Referred to as
initialization on Mac.
Gigabyte – 1,024 megabytes (binary); 1,000 megabytes (decimal), or approximately
one billion bytes.
Hard Drive – An electromechanical device used for information storage and retrieval,
incorporating one or more rotating disks (platters) on which data is recorded, stored,
and read magnetically.
Hardware – Physical components of a computer system.
Hot-Pluggable – The ability to connect and disconnect external devices while the
computer is running.
Hub – A device which links peripherals together onto the same data bus.
Interface – Junction between two items of hardware or software for the exchange of
data.
Mb (Megabit) – One million bits.
– 38 –
Page 39

Mbps (Megabits per second) – A data transmission speed of one million bits per second. Data transmissions are measured in bits (kilobits, megabits etc) per second.
MB (Megabyte) – 1,048,576 bytes (binary); 1,000,000 bytes (decimal).
NTFS – The primary file system for Windows 2000 and XP operating system that orga-
nizes files on your computer. Supports large capacity hard drives up to 2 TB.
Operating System (OS) – Software that controls the assignment and use of hardware
and software resources.
Partition – A way to logically divide a hard drive so that an operating system treats
each partition as if it were a separate hard drive. Each partition is assigned a unique
drive letter in Windows or icon in the Mac OS.
Peripheral – A generic term for hard drives, printers, scanners and other discrete
devices that add functionality to a computer.
Port – A connection which enables compatible devices to send and receive data. A
port can be either hardware-based or software based.
Software – A set of instructions that enable a computer to perform pre-programmed
functions in the order specified by the user.
Startup Disk – The disk from which a computer loads its operating system at startup.
Volume – A fixed amount of storage on a hard drive. The term volume is often used as
a synonym for the drive itself, but it is possible for a single drive to contain more than
one volume or for a volume to span more than one drive.
– 39 –
Page 40

One Year Limited Warranty
See your Hard Drive User’s Guide for the terms and conditions of the One Year Limited
Warranty.
Obtaining Service for Your AcomData Product
If you experience a problem with your Acomdata product, please contact Technical
Support at techsupport@acomdata.com, or call (909) 348-0680.
A knowledgeable AcomData Technical Support Specialist (TSS) will be able to help
you solve most problems. If the problem cannot be resolved by Tech Support, your
TSS will assist you in arranging for service. Please read the One Year Limited Warranty
for terms and conditions.
What you need in order to obtain warranty service:
1) A copy of the bill of sale from the purchase of your AcomData product;
2) A Returned Merchandise Authorization (RMA) number that is assigned to your
product by your TSS. An RMA can only be generated if the product has been registered online at www.acomdata.com. If your AcomData product is not registered at
the time you need service, you must register the product online or your Technical
Support Specialist can register it for you. Your TSS will then walk you through the
process to ensure you receive prompt service.
Do not send a product in for service without first contacting AcomData Technical Support and following the instructions from your TSS. AcomData will not accept returned
products that have not been assigned an RMA number.
– 40 –
Page 41

Notices
COPYRIGHTS
Copyright © 2005 AcomData. All rights reserved. No part of this publication may be
reproduced stored in a retrieval system, or transmitted in any form or by any means,
electronic, mechanical photocopying, recording or otherwise, without the prior
written consent of AcomData.
TRADEMARKS
The AcomData name and its logos are registered trademarks of AcomData. Retrospect
is a registered trademark of EMC corporation. Other trademarks mentioned or appearing in this document are the property of their respective owners.
CHANGES
The material in this document is for information only and subject to change without
notice. While reasonable efforts have been made in the preparation of this document to assure its accuracy, AcomData assumes no liability resulting from errors or
omissions in this document, or from the use of the information contained herein.
AcomData reserves the right to make changes or revisions in the product design or
the product manual without reservation and without obligation to notify any person
of such revisions and changes.
FEDERAL COMMUNICATIONS COMMISSION (FCC)
RADIO FREQUENCY INTERFERENCE STATEMENT
This equipment has been tested and found to comply with the limits for a Class B digital device, pursuant to Part 15 of the FCC Rules.
CANADA COMPLIANCE STATEMENT
This Class A digital apparatus meets all requirements of the Canadian InterferenceCausing Equipment Regulations.
– 41 –
 Loading...