

Page 1
external
hard drives
User’s Guide
E5
Hi-Performance Hard Drives
Hi-Performance Hard Drives with PushButton™ Backup
Page 2

IMPORTANT
1) Retain the bill of sale from the purchase of your AcomData
product. A copy of the bill of sale is needed in the event
that you require warranty service.
2) Please write the Model and Serial numbers of your
AcomData product in the spaces provided below.
(The Model and Serial numbers are printed on the UPC label
affixed to the bottom of the box. They are also printed on the label
affixed to the underside of the Drive’s stand.)
You will need the Model and Serial numbers when you
register your AcomData product, and in the event that the
product requires service. (See “Obtaining Service for Your
AcomData Product” for more information.)
Product Name: AcomData E5 External Hard Drive
Model Number: ____________________________
Serial Number: _____________________________
Date of Purchase:____________________________
Name of Reseller:____________________________
Page 3

Contents
Important ............................................................................ 1
AcomData Contact Information ........................................ 4
Welcome! ............................................................................. 5
Product Registration for Warranty Coverage ................... 7
Online Registration ......................................................................................... 7
Mail-in Registration ......................................................................................... 7
Precautions ......................................................................... 8
Package Contents ............................................................... 9
System Requirements for PC ........................................... 10
System Requirements for Mac ......................................... 11
AcomData E5 Drives at a Glance (Front View) ................ 12
AcomData E5 Drives at a Glance (Back Panel) ................ 13
AcomData E5 Features Explored .....................................14
FireWire (FireWire-equipped Drives only) ............................................14
Hi-Speed USB 2.0 (USB 2.0-equipped Drives only) ............................ 16
Mac & PC Ready .............................................................................................17
Hot-Pluggable ................................................................................................17
Fanless Design ................................................................................................18
Technical Specifications ................................................... 19
Setting up the Drive ......................................................... 21
Choosing an Orientation (Vertical or Horizontal) ..............................21
Vertical Placement ........................................................................................22
Horizontal Placement ..................................................................................23
Removing the stand .....................................................................................23
Affixing the rubber feet to the Drive case ............................................23
Connecting the Drive to Your Computer ......................... 24
USB Users: .........................................................................................................24
Mounting a FireWire-Connected Drive ........................... 26
Mac Users: ........................................................................................................26
Windows 2000/XP Users: ............................................................................26
Windows 98SE and Me Users: ...................................................................27
Mounting a USB-Connected Drive .................................. 28
Mac Users: ........................................................................................................28
Windows 2000/XP Users: ............................................................................28
Windows Me Users: .......................................................................................28
Windows 98SE Users with PushButton Drives: ...................................28
Windows 98SE Users with non-PushButton Drives: ..........................32
Naming Your Drive ............................................................ 33
Mac Users: ........................................................................................................33
PC Users: ...........................................................................................................33
Re-Formatting the Drive .................................................. 34
Formatting the Drive in Windows 2000 or XP .....................................36
Formatting the Drive in Windows 98SE or Me ....................................37
Formatting the Drive in Mac OS X ...........................................................38
Formatting the Drive in Mac OS 9 ...........................................................39
Using Your Drive for Routine Tasks ................................. 40
How to Safely Dismount & Turn Off the Drive ................ 41
PC Users ............................................................................................................41
Mac Users .........................................................................................................41
Stacking Drives ................................................................. 42
Maintaining Your Drive & Safeguarding Your Data ....... 43
Backup Your Data ..........................................................................................43
Defragmenting and Optimizing a Hard Drive .....................................43
Examining and Repairing a Hard Drive .................................................44
Protect Your Data from Viruses .................................................................45
Cleaning the Drive Case ..............................................................................45
Frequently Asked Questions ........................................... 46
Troubleshooting ...............................................................50
Troubleshooting for PC Users ...................................................................50
Troubleshooting for Mac users .................................................................52
Glossary .............................................................................55
One Year Limited Warranty .............................................. 57
Obtaining Service for Your AcomData Product .............. 58
How to Purchase Accessories ........................................... 59
Notices ...............................................................................60
Page 4
AcomData
Welcome!
Contact Information
Address:
3410 Pomona Blvd.
Pomona, CA 91768
Telephone:
(909) 348-0680
Fax:
(909) 598-8663
Web Site:
www.acomdata.com
Customer Service:
customerservice@acomdata.com
Technical Support:
techsupport@acomdata.com
Pre-Sales Questions:
sales@acomdata.com
Welcome, and thank you
for choosing an AcomData
E5 External Hard Drive. Your
AcomData E5 Drive features highquality construction, advanced
engineering, and state-of-the-art data
storage technology, designed to provide
years of reliable performance.
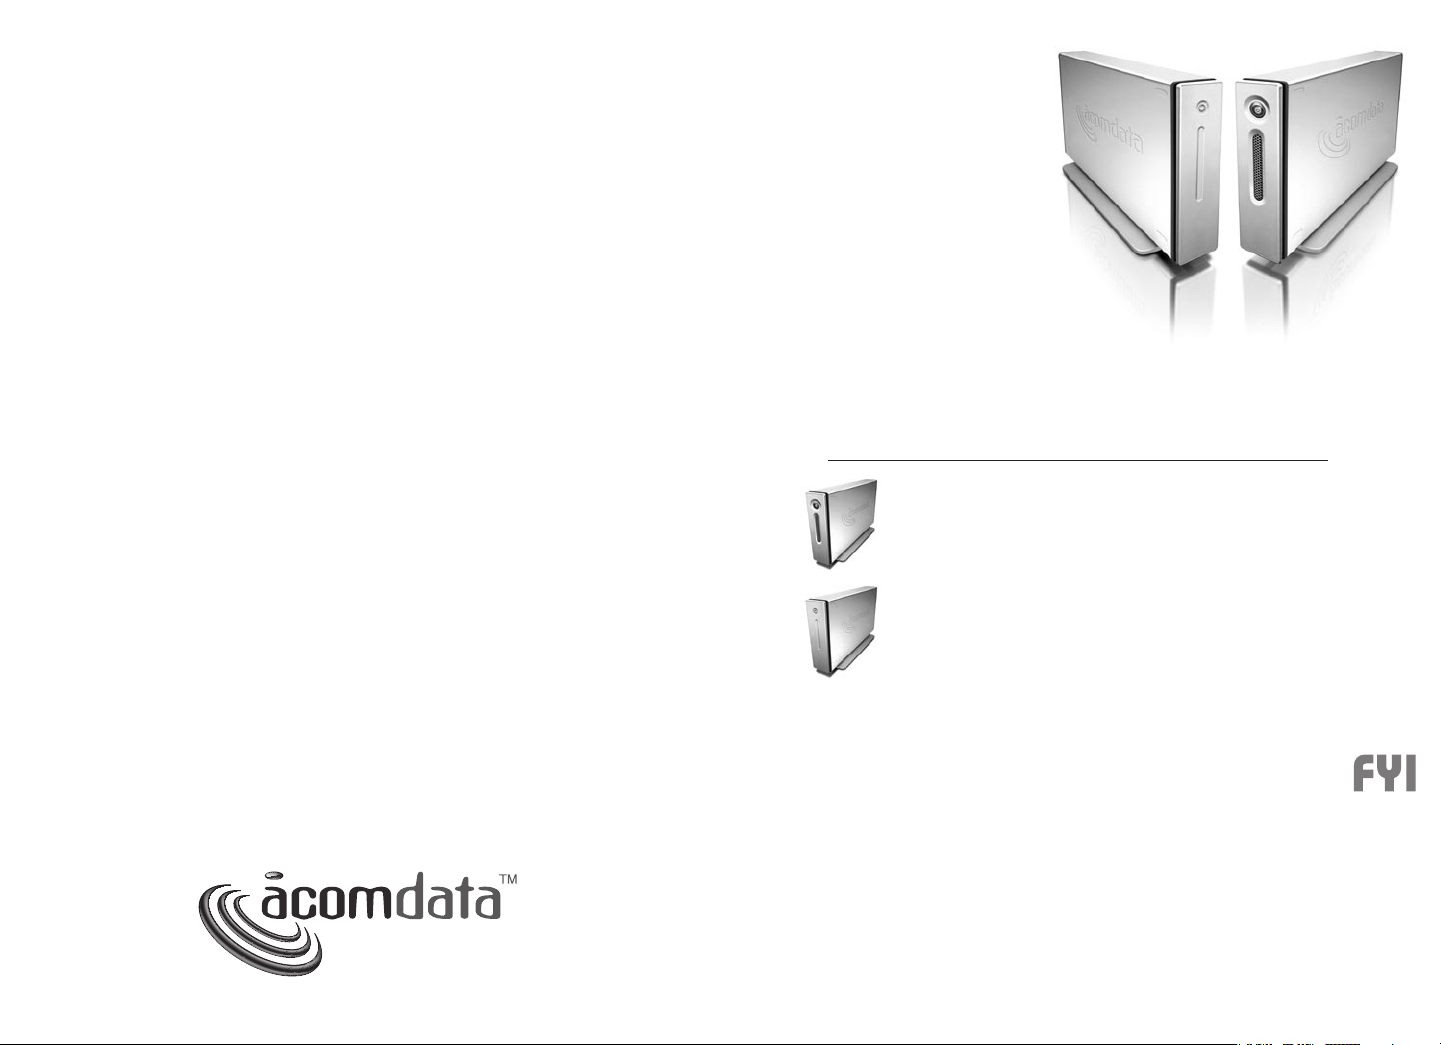
The information in this guide pertains to the following
AcomData E5 Drive models:
Description Model#
Drives with PushButton Backup
• USB 2.0 ........................................................... HDxxxUPE5-72
• USB 2.0 & FireWire 400 (Combo A) ................ HDxxxUFAPE5-72
• USB 2.0 & FireWire 800/400 (Combo B) ......... HDxxxUFBPE5-72
Drives without PushButton Backup
• USB 2.0 ........................................................... HDxxxUE5-72
• FireWire .......................................................... HDxxxFE5-72
The “xxx” in the model numbers refers to capacity. For example, a 250 GB FireWire Drive has model #: HD250FE5-72.
The model number of your Drive is printed on the UPC label
affixed to the bottom of the box, and on the label affixed to
the underside of the Drive’s stand.
This guide contains important information for the proper
installation, use, and care of your AcomData Drive. Please
read this guide carefully and retain it for future reference.
– 5 –
Page 5

If you have a Drive with PushButton Backup…
Please follow the instructions in this guide first. Then refer
to the PushButton Backup User’s Guide for information on
setting up and using PushButton Backup.
Symbols used in this guide:
Product Registration for Warranty Coverage
Registration is required in the event that your product needs
servicing. (See “Obtaining Service for Your AcomData Product”
for details.)
THIS SYMBOL ALERTS THE READER TO
A WARNING OR TO SOME VERY IMPOR-
TANT INFORMATION.
THIS SYMBOL ALERTS THE READER TO
HELPFUL TIPS AND OTHER INFORMATION
THAT MAY BE USEFUL.
THE WINDOWS LOGO ALERTS THE
READER TO IMPORTANT INFORMATION
SPECIFIC TO WINDOWS USERS.
THE APPLE LOGO ALERTS THE READER
TO IMPORTANT INFORMATION SPECIFIC
TO MAC USERS.
THE USB 2.0 LOGO ALERTS THE
READER TO IMPORTANT INFORMATION
SPECIFIC TO USB 2.0 USERS.
THE FIREWIRE LOGO ALERTS THE
READER TO IMPORTANT INFORMATION
SPECIFIC TO FIREWIRE USERS.
A word about using two-button mice
When following the instructions in this guide, PC users will
need to use both the left and right mouse buttons. While
some users may reverse the functions of the buttons, in this
guide “click” means pressing the left-side button; “right-click”
means pressing the right-side button.
Although Mac OS X supports two-button mice, this guide
assumes all Mac users are using a conventional, one-button
mouse.
Online Registration
You can register online at www.acomdata.com. Once you
enter the site, click on the Product Registration button and
follow the instructions on screen.
Advantages of Online Registration:
1. It’s fast, free, and your product is registered immediately;
2. Free unlimited online technical support;
3. You get your own personalized support page:
• download software updates
• access all online support services
• view all of your registered AcomData products
• manage your personal profile;
4. If you need warranty service, arranging product returns is
faster and easier if you registered online.
Mail-in Registration
You may also register via mail by filling out and returning
the Registration Card included in the package.
When registering your AcomData product you will need the
Model number and Serial number. Both of these are printed on
the UPC label affixed to the bottom of the box, and on the label
affixed to the underside of the Drive’s stand.
– 6 – – 7 –
Page 6
Precautions
Failure to follow the precautions below may result in damage to
the device, loss of data, and voiding of the warranty.
• If using your AcomData product as a general-purpose
storage device (as opposed to a backup device) AcomData
strongly recommends that you backup the files stored on
the device. AcomData is not responsible for data loss or
corruption; nor will AcomData perform recovery of lost
data or files.
• Do not open the device or attempt to disassemble or modify
it. If the device is malfunctioning, contact AcomData
Technical Support via the Customer Support page at www.
acomdata.com or call (909) 348-0680 (Pacific Time) during
regular business hours.
• Do not expose the device to rain or use it in damp or wet
conditions.
• Never place containers of liquids on the device. This can
damage the device and increase the risk of electric shock,
short-circuiting, fire, or personal injury.
• Make sure that the computer and the device are electrically
grounded. (If the device has a three-prong plug, never
plug the device into a two-prong outlet.)
• Do not expose the device to temperatures outside the
range of 5° C to 55° C (41° F to 131° F).
• Do not use a third-party AC adapter/power cord.
• Do not bump, jar or drop the device.
• Do not try to stand the device in a way not described in
this guide.
• Do not disconnect any cables, while the device is powered
on, without first dismounting the device.
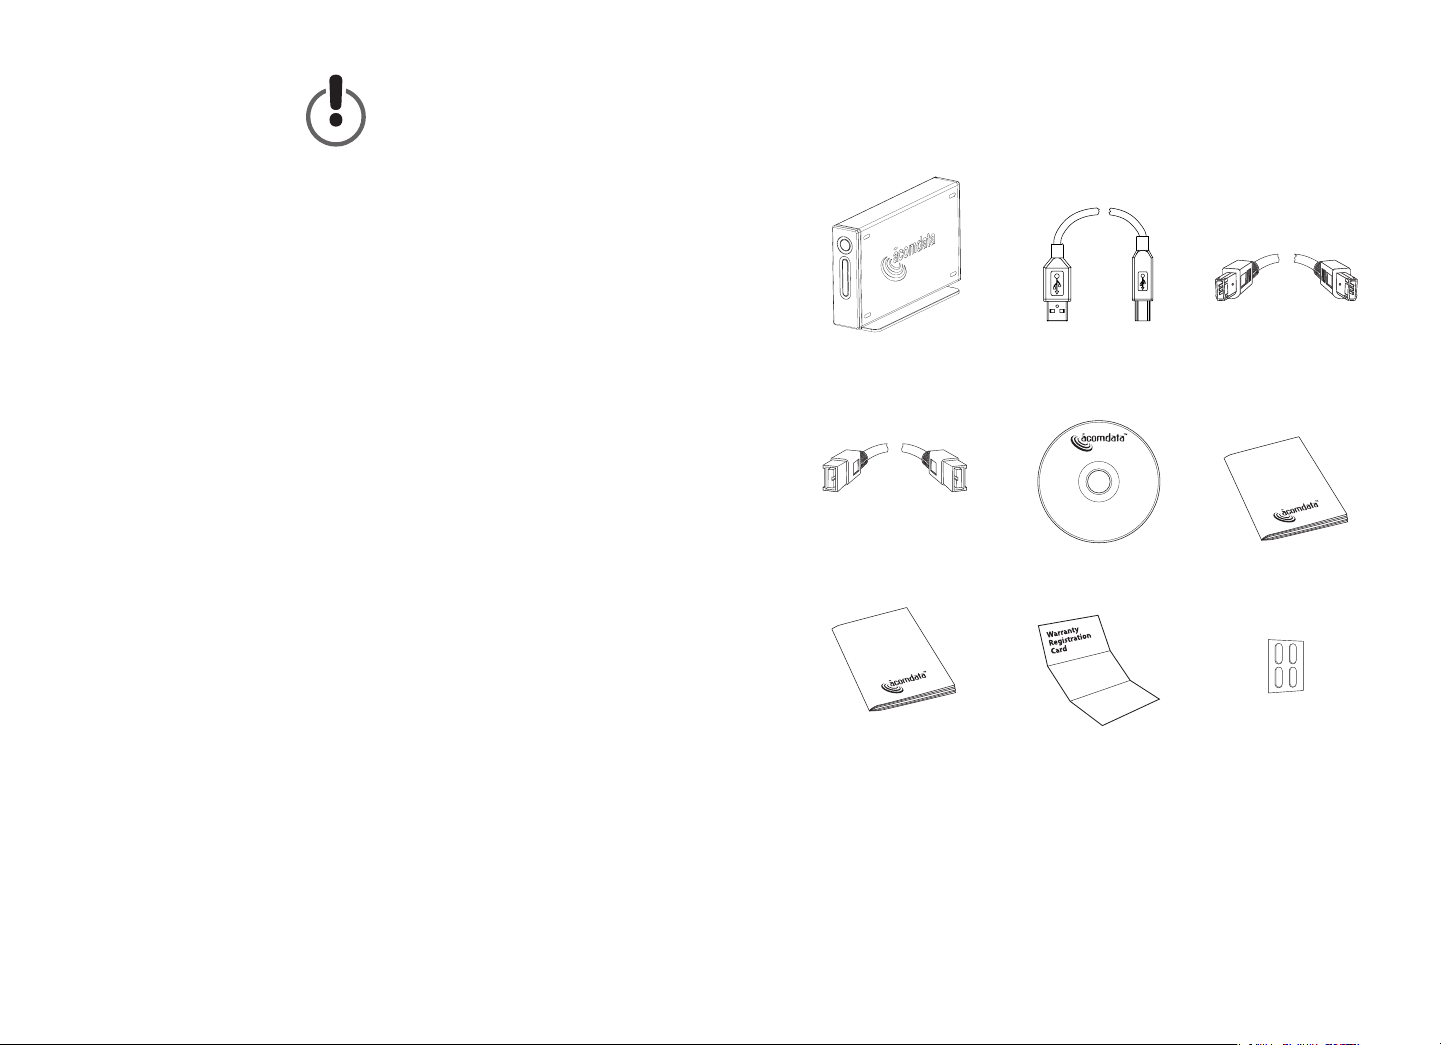
Package Contents
6-pin to 6-pin
AcomData E5
Drive & Stand
9-pin to 9-pin
FireWire cable
(Combo B models only)
PushButton Backup
User’s Guide
(PushButton models only)
If you are missing any item listed above, please contact
Customer Service at customerservice@acomdata.com, or call
800-470-4495.
USB cable
(USB 2.0-equipped
models only)
Software CD User’s Guide
Mail-In
Registration Card Rubber Feet
FireWire cable
(FireWire and Combo
models only)
– 8 – – 9 –
Page 7

System Requirements for PC
System Requirements for Mac
• Minimum 233 MHz processor
• Windows 98SE, Me, 2000, or XP
• Available data port:
- USB 2.0 users: USB port
- FireWire 400 users: 6-pin FireWire port
- FireWire 800 users: 9-pin FireWire port
• PushButton Backup requires 128 MB of RAM
Windows XP/USB 2.0 users:
You must have Windows XP Service Pack 1 or later or the
Drive will operate at USB 1.x speeds. Go to www.microsoft.
com and click on the Windows Update link.
Windows 2000 users:
In order to use the USB 2.0 or the FireWire connection, you
must have Windows 2000 Service Pack 4 or later. Go to
www.microsoft.com and click on the Windows Update link.
Windows Me/USB 2.0 users:
You may need to update your Windows Me. We strongly
recommend getting the latest updates: go to www.microsoft.com and click on the Windows Update link.
Windows 98SE users:
• In order to use the USB 2.0 connection you must install the
USB 2.0 driver included on the supplied Software CD. (See
“Mounting a USB-Connected Drive” for instructions.)
• In order to use the FireWire connection, you need
Windows 98 Second Edition 1394 Storage Supplement.
You can download it at http://www.microsoft.com/windows98/downloads/default.asp.
(Pentium, Celeron, AMD, etc.)
• Power Macintosh (G5, G4, G3, iBook, PowerBook or iMac)
• Mac OS 9 or Mac OS X
• Available data port:
- USB 2.0 users: USB port
- FireWire 400 users: 6-pin FireWire port
- FireWire 800 users: 9-pin FireWire port
• PushButton Backup:
- Mac OS x v.10.2 or later
- 128 MB of RAM
Mac OS 9 Users:
• Mac OS 9 does not support USB 2.0. If using the USB 2.0
interface on Mac OS 9, the Drive will operate at USB 1.x
speeds.
• For FireWire connectivity, Mac OS 9 requires FireWire software version 2.7 or later from Apple. If you have Mac OS
9.1 or later you already have FireWire 2.7 or later. Mac OS 9
updates are available at http://docs.info.apple.com/article.
html?artnum=75288.
USB 1.x compatibility:
This device is backward compatible with USB 1.x. However, if
you connect this device to a USB 1.x port, it will operate at
USB 1.x speeds (up to 12 Mbps).
FireWire users with laptops:
If your laptop has a 4-pin FireWire port, you will need a
FireWire cable with a 4-pin connector at one end. See “How
to Purchase Accessories.”
– 10 – – 11 –
Page 8
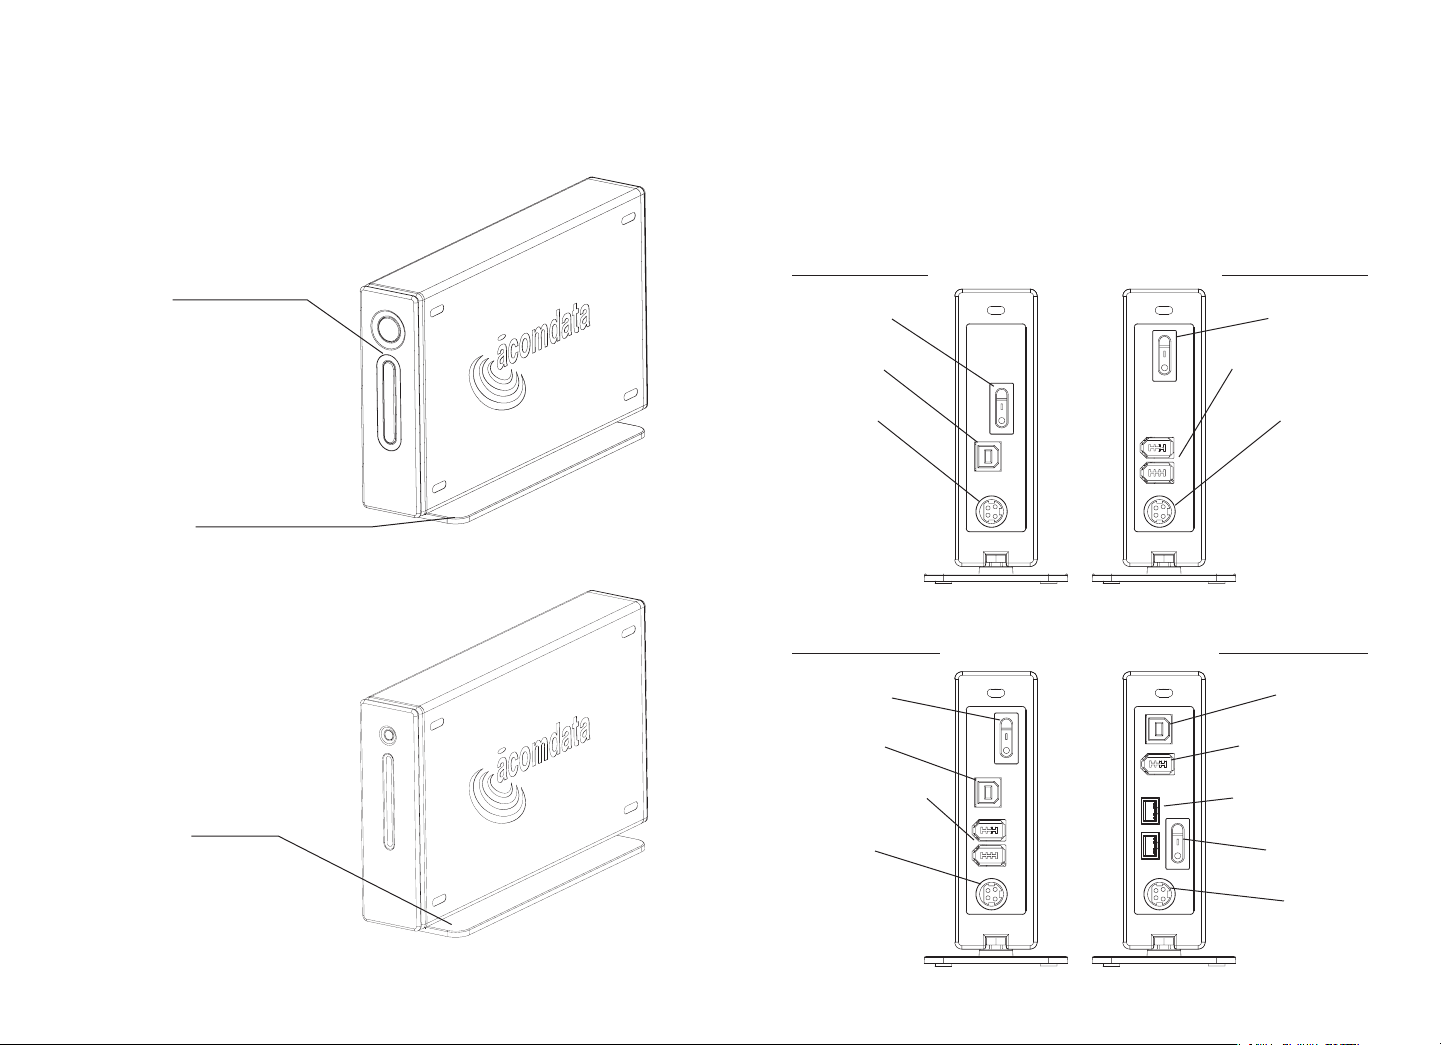
AcomData E5 Drives
AcomData E5 Drives at a Glance
at a Glance (Front View)
PushButton Drives
PushButton
Lights up blue when the Drive is powered on. Flashes red when reading or
writing data. Press to run a PushButton
Backup (Requires installation of the
PushButton Backup software. See the
PushButton Backup User’s Guide for
details.)
Zinc Alloy Stand
Can be removed for horizontal placement or stacking of Drives.
Non-PushButton Drives
Power-Data Light
Lights up blue when
the Drive is powered on. Flashes red
when reading or writing data.
Actual layout may not be exactly as shown.
USB 2.0 Drives
Power Switch
USB 2.0 Port
Power Port
Combo A Drives
Power Switch
USB 2.0 Port
FireWire 400 Ports
(Back Panel)
FireWire Drives
Power Switch
FireWire 400 Ports
Power Port
Combo B Drives
USB 2.0 Port
FireWire 400 Port
FireWire 800 Ports
Zinc Alloy Stand
Can be removed for horizontal placement or stacking of Drives.
Power Port
– 12 – – 13 –
Power Switch
Power Port
Page 9

AcomData E5 Features Explored
If you have a PushButton Drive, refer to the PushButton
Backup User’s Guide for a description of PushButton Backup.
FireWire (FireWire-equipped Drives only)
FireWire is a serial data input/output technology developed
by Apple Computer and Texas Instruments. The first FireWire
standard was approved by the Institute of Electrical and
Electronic Engineers (IEEE) in 1995.
Data transfers at up to 800 Mbps (100 MB/s)
FireWire 400 can transmit data at up to 400 Mbps (50 MB/s).
FireWire 800 can transmit data at up to 800 Mbps (100 MB/s).
FireWire supports both isochronous and asynchronous data
transfers. Isochronous mode provides guaranteed transmission of data at defined intervals; it’s used when delayed
or out-of-order data frames are unacceptable, such as for
capturing digital video. In asynchronous mode the intervals
between transmissions can vary, and data can be resent if
missed. Asynchronous mode is typically used for routine data
transfers.
Supports up to 63 devices
FireWire devices can be linked in a daisy-chain, where the
devices are connected to each other in series. A hub is only
required when a very large number of devices will share the
same FireWire bus. With the use of FireWire hubs, up to 63
devices can be linked on a single FireWire bus.
Peer-to-peer architecture
FireWire devices are host-independent, meaning data
transmissions between FireWire devices on the same bus
can take place without the need for input from the host
computer. This lack of dependence on the host is one of the
reasons FireWire devices are on average faster than USB 2.0
devices in routine day-to-day use, even though the rated
maximum data transfer is lower than that for USB 2.0.
Cable length up to 4.5 m
Standard FireWire 400 cables use 6-pin connectors at both
ends. FireWire 800 cables use 9-pin connectors. Cables with
4-pin connectors are also available for connecting FireWire
devices to laptop/notebook computers and other devices
that have 4-pin ports.
On-bus power up to 45 watts
FireWire can supply up to 45 W of electrical power, making it
possible to use many low-power-consumption devices without a dedicated electrical connection. (FireWire cables with
4-pin connectors cannot transmit electrical power.) When
a device is powered via FireWire, power is delivered only
when actually needed.
Plug & Play
You do not need to install drivers, assign unique ID numbers,
or connect terminators.
Hot Pluggable
FireWire devices can be connected to or disconnected from
the computer while the computer is running. Always dismount a hard drive before turning off and disconnecting it.
– 14 – – 15 –
Page 10

Hi-Speed USB 2.0 (USB 2.0-equipped Drives only)
USB (Universal Serial Bus) is an interface technology for the
serial transmission of digital data. The original standard
(USB 1) could transmit data at speeds of up to 12 Mbps.
USB 2.0 has a maximum throughput of 480 Mbps (60
Megabytes/s) –– that’s up to 40 times faster than USB 1. USB
is a host-dependent technology, meaning USB devices need
the computer to facilitate and manage communications
between devices.
Plug & Play
You do not need to assign ID numbers, or connect terminators. On most operating system you do not need to install
drivers. Your AcomData E5 Drive comes with USB 2.0 driver
software for Windows 98SE users.
Hot-Pluggable
Devices can be added/removed while the computer is running. Always dismount a hard drive before turning if off/disconnecting it.
Data transfer rates up to 480 Mbps
480 Mbps is equivalent to 60 Megabytes per second. Put
another way, it is possible to transfer a full gigabyte of data
in just under 18 seconds. However, 480 Mbps is the maximum speed; data transfer rates will vary depending on a
number of factors, including available CPU resources.
Supports up to 127 devices
Connecting more than one or two USB devices to a computer
typically requires the use of one or more USB-equipped
hubs; a hub can typically accommodate several USB devices.
Master-slave architecture
The computer (the master) dictates data flow to, from, and
between attached USB devices (the slaves).
Cable length up to 5 m
On-bus power up to 2.5 W
USB can supply up to 2.5 W of electrical power, making it
possible to use many low-power-consumption devices without a dedicated electrical connection.
Mac & PC Ready
Your AcomData E5 Drive is ready to use on either a Mac or
a PC right out of the box––no formatting is required. The
Drive was formatted at the factory using the FAT32 file system, which makes the Drive compatible with all supported
operating systems. That said, you may want to consider
re-formatting the Drive using one of the other file systems
that may be available with your operating system. For more
information and formatting instructions, see “Re-Formatting
the Drive.”
Hot-Pluggable
You can connect or disconnect the AcomData Drive while
your computer is running. This makes portability much
easier and saves you the time and hassle of shutting down
and restarting your comp
on and off while your computer is running. Let’s say you use
your AcomData Drive solely for data backups––so the Drive
only needs to run a few minutes every day––but your computer is on all day. If the Drive was not hot-pluggable, you
uter.
You can also turn the Drive
– 16 – – 17 –
Page 11

would either have to shut down your computer every time
you wanted to turn the Drive on or off, or you would have
to leave the Drive running all day unnecessarily.
mount the Drive or turn off your computer before turning off and
disconnecting the Drive.
Always dis-
Fanless Design
All hard drives generate some heat as a result of normal
operation. Heat generation can be an issue with some hard
drives, which is why hard drives often have big, noisy fans.
The E5 was engineered to be more efficient and to generate so little heat that it does not need a fan, allowing us to
make the drive as compact and lightweight––and quiet––as
possible.
Technical Specifications
Model #:
USB 2.0 .........................................................................HDxxxUE5-72
USB 2.0 (w/PushButton) ..................................... HDxxxUPE5-72
FireWire .........................................................................HDxxxFE5-72
Combo A (w/PushButton) ............................. HDxxxUFAPE5-72
Combo B (w/PushButton) ............................. HDxxxUFBPE5-72
Physical (without stand)
Dimensions:
(inches) ................................................................4.6” X 1.37” X 8.13”
(mm) ....................................................................... 117 X 35 x 206.5
Weight (Kg/lbs.) ........................................................................1.09/2.4
Configuration
Interface(s):
USB 2.0 Drives ....................................................................... USB 2.0
FireWire 400 Drives .................................................... FireWire 400
Combo A Drives ......................................... USB 2.0, FireWire 400
Combo B Drives ............................ USB 2.0, FireWire 800 & 400
Recording zone .................................................................................... 31
Max areal density (Gbits/sq. inch) .............................................. 29.7
Max recording density (BPI) ..........................................................547
Track density ......................................................................................... 54
Chassis (approved/recognized) .................................... FCC/CE/UL
Performance
Interface transfer rate (max Mbps)
USB 2.0 .............................................................................................480
FireWire 400 ................................................................................... 400
– 18 – – 19 –
Page 12

FireWire 800 ................................................................................... 800
Data buffer (MB) .............................2 (@< 250 GB), 8 (@≥ 250 GB)
Rotational speed (rpm) ................................................................ 7200
Latency (average ms) ......................................................................4.17
Seek time (read typical, ms) ...........................................................8.5
Error rate (nonrecoverable) ............................................. 1 in 10E13
Start/Stops (at 40º C) .......................................................................40K
Power
Requirement ...........................+5VDC (+/- 5%) +12VDC (+/- 5%)
Startup current (max A) ........................................................2.0 (12V)
Idle (W) ................................................................................................... 4.9
Efficiency (W/MB). ......................................................................... 0.114
External Power Supply ...................... 40W switching UL/CSA/CE
AC Input .................................................... 100-240V~, 50/60Hz 1.2A
DC output .......................................................... 12V@1.2A ; 5V@2.0A
Environmental characteristics (operating)
Ambient temperature ........................................................ 5ºC – 55ºC
Relative humidity (non-condensing) ............................ 8% – 90%
Maximum wet bulb (non-condensing) ............................... 29.4ºC
Shock (half sine wave) .........................................................55 G/2ms
Vibration (random [RMS]) ....... 0.67 (horizontal), 0.56 (vertical)
Setting up the Drive
This section contains detailed instructions for:
• Setting up your Drive for vertical/horizontal placement;
• Connecting the Drive to your computer and mounting it to
your operating system;
• Re-formatting the Drive for optimum performance;
• Performing basic tasks;
• Stacking Drives.
If you have a PushButton Drive, follow all of the instructions
in this section before setting up your Drive for PushButton
Backup.
Choosing an Orientation (Vertical or Horizontal)
Your AcomData E5 Drive can
be placed on your desktop in
either the vertical or horizontal
position. If you do not plan to
stack on additional AcomData
E5 Drives, we recommend the
vertical position, as this orientation takes up the minimum amount of desktop space.
Also, the Power-Data Light or PushButton will be higher up,
so there is less chance it will get obstructed by other items
on your desk.
Do not place the Drive on your desk in any way other than
what is described in this guide or the Drive may get damaged.
– 20 – – 21 –
Page 13

Vertical Placement
Most likely, your Drive was packaged with the zinc alloy
stand attached to the Drive case, so you can place the Drive
on your desktop vertically right out of the box. However, if
the stand was not already attached, follow the steps below:
Horizontal Placement
Do not discard the stand. Your Drive’s Model and Serial numbers are printed on the label affixed to the underside of the
stand. In the event that you need warranty service, you will
need to send us the stand along with the Drive itself.
1. If the screws and nuts are not already affixed to the stand,
insert the two screws through the two holes from the
underside of the stand. Screw a nut onto the end of each
screw just far enough to hold the nut to the screw. Do
not tighten the nuts.
2. With both screws and nuts in place, push down on each
screw head to make sure the screws extend through the
holes as far as they will go.
3. Attach the stand to the Drive case by sliding the nuts
through the groove in the Drive case, entering from the
backside of the case. You cannot slide the stand in from
the front of the case. The stand is symmetrical so it does
not matter which end you insert first. Once the nuts are
in the groove,
position the stand
so that it is centered with the
Drive case.
3. While holding the stand in place with one hand, use a
screwdriver with the proper type and size head to tighten
the screws. Make sure the stand is firmly secured to the
Drive case.
Removing the stand
Use a screw driver with the proper type and size head to
loosen the two screws located on the underside of the
stand. Loosen the screws just enough so that you can easily
slide the stand out of the groove. Keep the nuts attached to
the screws. Store the stand in a safe place.
Affixing the rubber feet to the Drive case
It is highly recommended you use the supplied rubber feet
for horizontal placement and stacking of Drives. The feet
help keep the Drive securely in place, and they also prevent
the Drive case from possibly scuffing your desktop.
1. Decide wether you want the Power-Data Light/
PushButton to be located on the left or right side when
the Drive is in the horizontal position, and select the
appropriate side on which to affix the feet.
2. Remove one of the rubber feet from the
paper backing and carefully position the
foot inside one of the four oblong
indentations, with the adhesive
side down. Once the foot is
properly positioned, press
down firmly to secure it in
place. Repeat for the other
three feet.
– 22 – – 23 –
Page 14

Connecting
the Drive
to Your
Computer
Windows 98SE Users
with PushButton Drives
You will need your Windows 98SE CD-ROM and the AcomData Software CD, which contains the USB 2.0 driver. Before
connecting the Drive, insert the AcomData Software CD into
your CD drive. The CD will launch automatically and you will
see the Retrospect Express start screen. Click Quit to exit the
screen, but leave the CD in the drive.
FireWire Users:
• FireWire plugs are shaped so they
can only be inserted one way. Be
sure to insert the plugs properly or
you may damage the Drive and void the
warranty.
• FireWire-equipped Drives have at
least two FireWire ports for daisychaining other FireWire devices. You
can use either port to connect the
Drive to your computer.
Before you install the Drive, we recommend that you restart
your computer or shut it down and connect the Drive with
the computer turned off.
6-pin to 6-pin cable
9-pin to 9-pin cable
USB Users:
• We recommend that when you install the Drive, you connect it to a USB port on your computer rather than to a
USB hub. Once the installation has been successfully completed, you can then connect the Drive to a USB hub if you
so choose. We recommend this approach because if you
experience a problem during installation, it will be easier
to troubleshoot if a USB hub is not used.
• Each end of the USB cable has different
connectors called 'A' and 'B'. The 'A' connector plugs into your computer or USB
hub. The 'B' connector plugs into the
Drive. Be sure to correctly insert the connectors, or you may damage the Drive
and void the warranty.
1. The pins of the small AC adapter plug are arranged in a
pattern such that the plug can be inserted into the Drive’s
Power Port only one way. Orient the plug correctly and
insert the plug into the Power Port. The plug should not
require much effort to insert. If the plug will not go in,
check that the orientation is correct and try again. Do not
force the plug or you may damage it and/or the Drive.
2. Plug the power cord into the socket in the AC adapter.
Plug the other end into a three-prong (grounded) outlet.
3. Connect the USB 2.0 or FireWire cable.
4. Press the power switch located on the back of the Drive.
If you are using a FireWire connection proceed to the section
“Mounting a FireWire-Connected Drive.”
If you are using a USB connection proceed to the section
“Mounting a USB-Connected Drive.”
– 24 – – 25 –
Page 15

Mounting a FireWireConnected Drive
Mac Users:
Once the Drive has been properly connected and powered
on, it should mount to your Desktop.
Windows 2000/XP Users:
Once the Drive has been properly connected and powered
on, you should see a new hard drive icon with a new drive
letter in My Computer/Windows Explorer. If your computer
displays the Found New Hardware Wizard, follow the steps
below.
1. In the Found New Hardware Wizard, under “Can Windows
connect to Windows Update…”, select “Yes, now and
every time I connect a device.” Then click Next (Figure 1).
2. On the next screen (Figure 2), select “Install the software
automatically (Recommended).” Click Next.
FIGURE 2
3. When the installation is complete, click Finish. You should
now see a new hard drive icon with a new drive letter in
My Computer/Windows Explorer.
FIGURE 1
Windows 98SE and Me Users:
Once the Drive has been properly connected and powered
on, you should see a new hard drive icon with a new drive
letter in My Computer/Windows Explorer. If your computer
cannot detect the Drive, you may need to manually search
for and install the driver named GPIO98.SYS. If you have
Windows 98 Second Edition 1394 Storage Supplement, this
file should be located at C:\WINDOWS/SYSTEM\IOSUBSYS\
GPIO98.SYS.
– 26 – – 27 –
Page 16

Mounting a USB-Connected Drive
Mac Users:
Once the Drive has been properly connected and powered
on, it should mount to your Desktop.
Windows 2000/XP Users:
Once the Drive has been properly connected and powered
on, you should see a new hard drive icon with a new drive
letter in My Computer/Windows Explorer.
Windows Me Users:
Once the Drive has been properly connected and powered
on, you should see a new hard drive icon with a new drive
letter in My Computer/Windows Explorer. If this is not the
case, you will need to update your Windows Me. To get the
latest update, go to www.microsoft.com and click on the
Windows Update link.
Windows 98SE Users with PushButton Drives:
You need to install the USB 2.0 driver
before you will be able to use the Drive.
FIGURE 3
1. Once the Drive has been properly
connected and powered on, the Add
New Hardware Wizard should appear with the message:
“This wizard searches for new drivers for: USB Composite
Device” (Figure 3). Click Next
2. Next you will see the message: “What do you want Windows
to do?” Select “Search for the best driver for your device
(Recommended)” (Figure 4). Then click Next.
– 28 – – 29 –
FIGURE 4
Page 17

4. In the next screen, select “Specify a location” and in the
text field type: C:\ and then click Next (Figure 5).
11. In the next screen, select “Specify a location” and in the
text field type: C:\ and then click Next.
12. You will then see the message: “Windows is now ready
to install the best driver for the USB Human Interface
Device…” Click Next.
13. You will be prompted to insert your Windows 98 Second
Edition CD (Figure 6). Insert your Windows 98SE CD into
the CD drive, and then click Next.
FIGURE 6
FIGURE 5
5. In the next screen, you will see the message: “Windows
is now ready to install the best driver for the USB
Composite Device…” Click Next.
8. Once the installation is complete, you will see the message: “Windows has finished installing the software…”
Click Finish.
9. The wizard will then detect another new hardware device
and you will see the message: “This wizard searches for
new drivers for: USB Human Interface Device.” Click Next.
10. Next you will see the message: “What do you want
Windows to do?” with two options. Select “Search for the
best driver for your device (Recommended).” Then click
Next.
– 30 – – 31 –
14. Once the installation is complete, in the Add New
Hardware Wizard you see the message “Windows has finished installing the software…” Click Finish.
15. Your computer should detect the Drive and you should
see a new hard drive icon with a new drive letter under
My Computer/Windows Explorer.
Page 18

Windows 98SE Users with non-PushButton Drives:
1. After the Drive has been properly
connected and turned on, the Add
New Hardware Wizard should
appear with the message: “Found
New Hardware --> USB 2.0 Storage Adapter.” Click Next.
2. You will then see the message: “What do you want
Windows to do?” with two options. Select “Search for the
best driver for your device (Recommended).” Click Next.
3. In the next window that appears, check the box labeled
CD-ROM drive and insert the USB 2.0 Installation CD into
your CD drive. Click Next.
4. You will then see the message: “Windows is now ready to
install the best driver for this device…” Click Next.
5. Once the software installation is complete, you will see
the message “Windows has finished installing the software that your new hardware device requires.” Click Finish
and then eject the CD. You should now see a new icon (a
gray box with a green arrow) next to the time display on
your System Tray.
Naming Your Drive
Now that your Drive has been connected and mounted to
your operating system, you may want to give it a name to
distinguish it from other storage devices connected to your
computer. If you are going to re-format the Drive, go to “ReFormatting the Drive” now; you will have the opportunity to
name the Drive during the formatting setup process.
Mac Users:
1. Locate the Drive icon on your computer’s Desktop.
2. Click and hold the mouse button on the icon’s label until
it is highlighted.
3. Type in a name and press Return/Enter.
PC Users:
1. Double-click on My Computer.
2. In the My Computer window click on the Drive icon.
3. In the File menu, select Properties.
4. Under the General tab of the Properties window, type a
name in the text field beside the Drive icon.
– 32 – – 33 –
Page 19

Re-Formatting the Drive
FORMATTING A HARD DRIVE ERASES ALL DATA
STORED ON THE DRIVE! BEFORE YOU FORMAT THE
DRIVE, BE SURE TO SAVE A COPY OF ANY FILES YOU
WISH TO KEEP TO ANOTHER STORAGE DEVICE.
Your AcomData E5 Drive was formatted at the factory with
the FAT32 file system. This makes the Drive both PC and Mac
compatible right out of the box, and allows you to share
files between platforms.
If you plan to use your Drive only on a Mac or only on a PC,
you should consider re-formatting the Drive with one of the
more advanced file systems that may be available to you.
Formatting Options for PC Users
If you are running Windows 2000 or XP and you do not plan
to use the Drive on a Mac or Windows 95 or Me, consider
re-formatting your Drive with the NTFS file system. NTFS
provides several advantages over FAT32, including better
security and support for files larger than 4 GB. NTFS is not
compatible with Windows 98SE and Me.
2. Format the Drive on Mac OS X v.10.3 with the MS-DOS
file system. The MS-DOS files system is the equivalent of
FAT32 on the PC.
Mac OS 10.2 Users:
Hard drives or drive partitions that are larger than 128 GB
and formatted with the FAT32/MS DOS file system will not
mount on Mac OS 10.2 through 10.2.8. If your Drive is larger
than 128 GB, and you are using Mac OS 10.2, you have several
options to deal with this issue:
1) Re-format the Drive using the Mac OS Extended file system;
2) Partition the Drive so that no single partition is larger
than 128 GB;
3) Upgrade to Mac OS 10.3. For more information, go to
http://docs.info.apple.com/article.html?artnum=107483
on the Apple web site.
Mac OS X v.10.3 Users:
If you connect an NTFS-formatted disk to a Mac running Mac
OS X v.10.3, the computer will be able to read the Mac-compatible files, but you will not be able to save any data to the
disk.
Formatting Options for Mac Users
If you plan to use the Drive only on a Mac, consider re-formatting your Drive with the Mac OS Extended file system.
Formatting Options
for Cross-Platform Compatibility
If you ever need to re-format your Drive and you need both
PC and Mac compatibility, you have two options:
1. Format the Drive on a PC with the FAT32 file system.
– 34 – – 35 –
Page 20

Formatting the Drive in Windows 2000 or XP
1. Disable any anti-virus software you may have running in
the background.
2. Double-click on My Computer/Explorer. In the My
Computer/Explorer window you should see the icon and
drive letter for the AcomData Drive. (If you are not sure
which drive letter represents the AcomData Drive, turn it
off and see which one of the icons disappears. Then turn
on the Drive and wait for the drive letter to reappear.)
3. Right-click on the drive letter and select Format… in the
pop-up menu. The Format dialog box will appear.
4. Under Capacity, verify the Drive capacity. It should be
close to the stated capacity of your Drive in gigabytes.
5. In the File System pop-up menu, select NTFS. Do not
select FAT32 as you cannot format the Drive using the
FAT32 file system on Windows 2000 or XP.
6. In the Allocation unit size pop up, select “Default allocation size.”
6. In the Volume label field, type in a name for the Drive. You
should give the drive a unique name that will allow you
to easily distinguish it from other hard drives or storage
devices.
7. The default formatting option is Full format, however
under Format options you can select Quick Format. A
Full format will take about 30-90 minutes. A Quick format
will take just a few minutes, but will do less verifying of
the Drive than a Full format will. Do not check Enable
Compression.
8. Click Start. Once the format process is complete, the Drive
will be ready to use.
Formatting the Drive in Windows 98SE or Me
1. Disable any anti-virus software you may have running in
the background.
2. Double-click on the My Computer icon. In the My
Computer window you should see an icon and drive letter for the AcomData Drive. (If you are not sure which
icon represents the External Hard Drive, turn off the Drive
and see which icon disappears. Then turn the Drive back
on and wait for the icon to reappear.)
3. Right-click on the drive letter and select Format. In the
Format window, verify the Drive’s capacity; it should be
close to the stated capacity of your Drive in megabytes.
4. Under Format type, select Full; everything else should be
left at the default setting. In the Label field under Other
options you may assign a name to the Drive. You should
give the drive a unique name that will allow you to easily
distinguish it from other hard drives or storage devices.
(The name you assign is limited to 8 characters and no
symbols are allowed.)
5. Click Start. The following warning message will appear:
“This device is either a hard disk or a large removable
disk. Formatting it will destroy all files currently on the
drive. Are you sure you want to format this drive?” If no
data was previously written to the Drive or you already
backed up the data you wish to keep, click OK.
6. If you see a warning from an antivirus program, click
Exclude.
7. When formatting is complete, you will be asked to run a
thorough Scandisk. Periodically running Scandisk is a part
of regular hard drive maintenance. If you do not wish to
run Scandisk at this time, close the Format window.
– 36 – – 37 –
Page 21

Formatting the Drive in Mac OS X
1. Disable any anti-virus software you may have running in
the background.
2. Launch the Disk Utility application (Applications folder >
Utilities folder > Disk Utility). The Disk Utility window will
open with a small window at left and a larger window
with a series of tabs at the top.
3. You should see the Drive listed in the left window. Click
on the Drive to highlight it. Information about the Drive
will appear in the Information window.
4. Click on the Erase tab. In the Erase window you will see a
Volume Format pop-up menu and a Name field.
5. From the Volume Format pop-up, select Mac OS
Extended. (With Mac OS 10.3.x, you have the option of
selecting Mac OS Extended (Journaled). (Journaling is a
feature that helps protect the file system against power
outages or hardware failures, reducing the need for
repairs. We recommend using journaling, if available.)
6. In the Name field, type in a name for the Drive. You
should give the drive a unique name that will allow you
to easily distinguish it from other hard drives or storage
devices.
7. Click Erase. You should see an alert pop up with the message: “Erasing a disk will destroy all information on all of
the volumes of the disk…” Click Erase.
Once initializing is complete, you should see the Drive listed
in the left window of the Disk Utility screen with whatever name you assigned. Quit Disk Utility. You should now
see the Drive icon on the Desktop.
Formatting the Drive in Mac OS 9
Before you can re-format the Drive you will need to restart
your computer from the Mac OS 9 System Software CD that
come with your computer or which you purchased as an
upgrade.
1. Disable any anti-virus software you may have running in
the background.
2. Insert the System Software CD into your CD drive.
3. With your AcomData Drive connected and powered on,
restart the computer and hold down the C key while the
computer is starting up.
4. You will see the alert message: “This disk is unreadable by
this computer. Do you want to initialize this disk?” Click
OK.
5. In the Name field, type in a name for your Drive. You
should give the drive a unique name that will allow you
to easily distinguish it from other hard drives or storage
devices.
6. From the Format menu, select Mac OS Extended.
7. Click Initialize. You should then get the alert message:
“Initializing will erase all information on this disk.” Click
Continue. Once initializing is complete, you should see
the Drive mounted on your Desktop with the name you
assigned.
8. Restart your computer and eject the Mac OS 9 CD, or go
to Control Panels--> Startup Disk and select the computer’s startup disk. Restart the computer.
– 38 – – 39 –
Page 22

Using Your Drive
How to Safely Dismount
for Routine Tasks
Opening files and folders (All Users)
1. Double-click on the Drive icon. A window showing the
files and folders stored on the Drive will appear.
2. Double-click on the file or folder that you want to open.
Copying files and folders to your Drive
PC Users
1. Click the file or folder that you want to copy in order to
highlight it.
2. Go to “Edit --> Copy.”
3. Double-click the Drive icon to open it.
4. If you want to copy the file or folder to a specific folder on
the Drive, double-click that folder to open it.
5. Go to “Edit --> Paste.” The file or folder will copy over.
Mac Users
1. Highlight the file or folder that you want to copy by clicking on it, but do not release the mouse button.
2. While keeping the mouse button pressed, drag the highlighted file or folder to the Drive icon or to a specific
folder on the Drive.
3. Release the mouse button. The file or folder will copy
over.
& Turn Off the Drive
NEVER TURN OFF A HARD DRIVE WITHOUT DISMOUNTING
IT FIRST. YOU MAY LOSE DATA OR DAMAGE THE DRIVE.
When a device, such as a hard drive, is “mounted” to a computer, that means the computer has detected the device
and established a communications link with it. When you
dismount a device, the communications link is severed and
the computer can no longer access it.
PC Users
1. In the system tray at the bottom of your screen, click the
safely remove/icon (the icon with the green arrow)…
On Windows 98SE and Me a rectangle will appear with
the name of the Drive followed by the drive letter.
On Windows 2000 and XP you will see the alert message
“Safely Remove…” or “Stop…” followed by the drive letter.
2. Select the AcomData Drive. After a few seconds, Windows
will give you a message that it is safe to remove the device.
3. Click OK. The Drive will dismount. You can then safely turn
it off.
Mac Users
Drag the Drive’s icon to the Trash. The Drive will dismount
and you can then safely turn it off.
Whether you are using a Mac or PC…
When you shut down your computer, the Drive will dismount automatically. After your computer has turned off,
you can turn off the Drive and disconnect the cables.
– 40 – – 41 –
Page 23

Stacking Drives
Maintaining Your Drive
Even with the large storage capacities offered by AcomData
External Hard Drives, as your storage needs grow, one Drive
may not be enough. We designed our E5 Drives to be stackable so that you can add more hi-performance data storage
without taking up any more desktop space.
For this section we assume that you already have an E5
Drive installed on your system, and that the Drive is placed
in the horizontal position.
1. Follow the steps in the section “Horizontal Placement” to
properly prepare a Drive for stacking.
2. Place one Drive onto the other, making sure the feet of
the second drive are properly seated in the foot indentations of the first drive.
3. Follow the instructions in the section “Connecting the
Drive to Your Computer.”
& Safeguarding Your Data
A hard drive is a very sophisticated and sensitive device that
requires proper care and maintenance to ensure the longest
possible life, reliable operation, and most of all, the integrity
of your stored data.
Backup Your Data
The single most important action you can take to safeguard
your valuable data is to backup the data to another storage
device. There are many reasons why data stored on a hard
drive can become corrupted or lost. One of the most common causes of data loss is human error, such as mistakenly
erasing or overwriting a file.
You should backup your data on a regular basis using a
quality data backup utility. How often depends on how
frequently you save or transfer data to the Drive. If you save
and transfer data to the Drive on a daily basis, then you
should backup your data daily.
Defragmenting and Optimizing a Hard Drive
A hard drive stores data on disks called platters. Each platter
surface is divided into concentric tracks. Each track is divided into sections called sectors. A group of sectors, called a
cluster, is the smallest unit of data storage space on a platter.
When data is saved to a new drive, it is written contiguously,
one cluster after another. As old files are erased, clusters
that were previously occupied become available for new
data. However, there may not be enough space for the drive
– 42 – – 43 –
Page 24

to write a new file in a contiguous set of clusters. The drive
uses the clusters it can, and if more are needed, the drive
uses other clusters in other locations. The result is a fragmented file that is scattered in several places on the disk.
Over time, as more and more files are erased and new files
are added, the data on the drive becomes increasingly fragmented. The more fragmented a disk becomes, the longer it
takes to read and write data because the drive’s read/write
mechanism spends more time moving back and forth over
the platter searching for fragmented data or free clusters.
We recommend using defragmentation and optimization
software to maximize the storage efficiency and optimize
the performance of your hard drive. Optimization software
re-organizes files so that the files you use most often can be
accessed more quickly. Defragmentation software consolidates file fragments that are scattered on your hard drive
into more efficient contiguous clusters.
Quite often, defragging and optimization functions will be
included in one software package, such that both operations are performed at the same time.
Examining and Repairing a Hard Drive
There are a number of reasons why a hard drive may
become damaged or the data may become corrupted.
Regular examination of your disk with a quality disk examination and repair utility is the best way to prevent irreparable disk damage and avoid data loss.
There are several software packages available that offer a
suite of disk management utilities, including defragmentation, optimization, repair, erased file recovery and more.
How often you should perform maintenance operations
depends on how much you use the drive. Generally speak-
ing, it’s a good idea to examine a disk for damage at least
once a month.
Some maintenance and repair operations can take quite
some time, so it is wise to schedule these operations for those
times when you don’t need to use your computer. The good
news is that, for the most part, you won’t need to tend to
the computer while the software performs these operations.
Protect Your Data from Viruses
One of the greatest threats to your data comes from viruses.
These nasty-sounding creatures are insidious programs created by malefactors. Some viruses are designed to render
your computer inoperable; others will erase files. The worst
part is you may not be aware that your system has been
infected until it’s too late.
The most common way computers catch viruses is by
downloading and sharing infected files via e-mail and other
Internet services. You can protect your data against viruses
by using ant-virus software. These programs are designed to
seek out and eradicate viruses before they can cause damage. There are a number of good anti-virus programs on the
market for both PC and Mac.
Cleaning the Drive Case
Always unplug all cables from the Drive before cleaning
it. Clean the Drive using a soft, dry cloth. For tough dirt,
dampen a soft cloth with some neutral detergent diluted in
5 to 6 parts water; wipe off the dirt, then wipe off the Drive
with a dry cloth. Do not use alcohol, paint thinner, or other
chemicals; they may damage the case surface.
– 44 – – 45 –
Page 25

Frequently Asked Questions
Q: Can I use my Drive on two computers at the same time?
A: No. The Drive can only be used with one computer at a time.
If you connect the Drive to two computers at the same time, you
may damage the Drive and the computers.
Q: Do I have to format my AcomData Drive prior to using it?
A: No. All AcomData Drives are formatted at the factory with the
FAT32 file system, making them compatible with all supported
platforms right out of the box. You can re-format the Drive if you
wish to use a file system other than FAT32.
Q: Can I format the AcomData Drive for use on multiple operating systems?
A: All AcomData Drives are formatted at the factory with the FAT32
file system, making them compatible with all supported operating
systems right out of the box.
Q: What is the difference between FAT32 and NTFS?
A: FAT32 is an older and more compatible file system but it has
certain limitations, such as file size (maximum 4 GB). NTFS is more
secure and has fewer limitations. The NTFS file system can only be
used on Windows 2000 and XP. If you plan to use your AcomData
Drive on Windows 2000 and/or XP only, consider re-formatting the
Drive using the NTFS file system. If you plan to use the Drive on a
Mac OS only, consider re-formatting the Drive using the Mac OS
Extended file system.
Q: Does the AcomData Drive work on Windows XP Media
Center Edition?
A: At this time, it is not supported.
Q; Where are the drivers for XP, 200 and Me?
A: They are built into the operating system. However, you may
need to upgrade your Windows OS.
Q: Can I use both the USB 2.0 and FireWire interfaces of my
Drive at the same time?
A: No. If you do, you may lose data, damage the Drive, and damage
your computer.
Q: Can I connect an AcomData Drive to a USB or FireWire
expansion card?
A: Yes, but you may need to update the software/firmware for the
card. We recommend you check with the card’s manufacturer for
the latest updates.
Q: Is the AcomData Drive compatible with Windows 95, 98
(First Edition) or Windows NT 4.0?
A: No.
Q: What’s faster, USB 2.0 or FireWire 400?
A: USB 2.0 and FireWire are very similar in many respects, but there
are definite differences.
At first glance it would appear that USB 2.0 (480 Mbps) is indeed
faster than FireWire 400 (400 Mbps). However, this is only true
under ideal conditions. While 480 Mbps is the maximum speed
achievable, USB 2.0 cannot guarantee a specified data transfer rate.
This is mainly because USB 2.0 is a master-slave, host-dependent
technology, meaning it relies on your computer’s CPU to facilitate
and manage data transfers.
FireWire, on the other hand, is a peer-to-peer technology that
does not require CPU resources to facilitate data transfers between
FireWire devices. Moreover, FireWire devices can guarantee realtime delivery of data at a specific rate. Real time data delivery is
necessary for certain applications, such as digital video streaming
where dropped or delayed data packets is unacceptable. This is
why devices like digital camcorders have 1394 interfaces, and why
FireWire is the interface of choice for digital video editing applications.
For day-to-day hard drive use, USB 2.0 and FireWire 400 will have
comparable performance though FireWire 400 will probably have
a slight performance edge, which can make a difference if you
– 46 – – 47 –
Page 26

are performing tasks that require large, frequent data transfers.
FireWire 800 is significantly faster than both USB 2.0 and FireWire
400.
Q: Why doesn’t the FireWire cable fit my FireWire port?
A: The supplied FireWire cable uses either 6-pin or 9-pin connectors at both ends, but many laptops have a 4-pin FireWire port.
In order to connect the Drive to your laptop via FireWire, you will
need to purchase a cable with a 4-pin connector at one end.
Q: What is the cache size on my AcomData Drive?
A: All drives under 250 GB have 2MB buffers; drives that are 250 GB
or larger have 8MB buffers.
Q: Can you make an AcomData Drive bootable?
A: It is possible to use an AcomData Drive as a boot volume on
Mac OS 9 and Mac OS X. Follow the instructions in your Mac OS
manual for the proper installation of the Mac OS. If you wish to
use your AcomData Drive as a boot volume, make sure you install
the Mac OS on the Drive before saving any data to the Drive. On
Windows operating systems it is not possible to use an external
hard drive as a boot volume.
Q: Why doesn’t the Drive need a fan?
A: All hard drives generate some heat during normal operation.
Heat generation can be an issue with some hard drives, which is
why hard drives often have big, noisy fans. The E5 was engineered
to be more efficient and to generate so little heat that it does not
need a fan, allowing us to make the drive as compact and lightweight––and quiet––as possible.
Q: Why is the capacity of my drive as shown in Windows or
Mac OS lower than the Drive’s actual stated capacity?
A: The difference is mostly due to the different way in which
Windows and Mac operating systems typically measure hard
drive capacity, as compared to the method used by hard drive
manufacturers. Hard drive manufacturers have always used the
decimal (base 10) method, where 1GB = 1,000 MB = 1,000,000 KB =
1,000,000,000 bytes. Windows and Mac operating systems use the
binary (base 2) method, where 1GB = 1,024 MB = 1,048,576 KB =
1,073,741,824 bytes. Example: A hard drive with a capacity of 120
GB will show up on Windows and Mac with a capacity of, say,111.8
GB. The actual number of available bytes is 120,044,335,923, which
is just over 120 GB (decimal).
Hard drive manufacturers use the decimal method because it is
simpler and less confusing to consumers who may not be familiar
with the base 2 number system. Manufacturers of operating systems do not need to concern themselves with this issue, so they
typically use the more traditional binary method. As long as the
drive displays the correct number of bytes (approximately), you are
getting the drive’s full capacity. The reason we say that the number
of bytes will be approximate is because operating systems reserve
a small amount of disk space for their own purposes. The actual
amount may vary depending on the operating system.
Q: Can I use my AcomData Drive to copy an operating system
from one computer to another?
A: You cannot transfer an installed operating system to another
computer or hard drive simply by copying the operating system’s
files. In order to install an operating system, you’ll need to follow
the manufacturer’s installation procedure. If you wish to transfer
the contents of one startup disk to another, you will first need to
properly install the operating system on the target drive. You can
then use your AcomData Drive to copy over your files (except the
operating system).
If you use your AcomData drive as a backup device, and you use
the Backup operation in Retrospect Express, it is possible to backup the entire contents of your computer’s startup disk, including
the operating system and all associated files. If your computer’s
startup disk becomes unresponsive, you can restore the entire
disk from your AcomData Drive. See the Help menu in Retrospect
Express for more information (if available).
Q: Does AcomData provide data recovery services?
A: AcomData does not provide data recovery services.
– 48 – – 49 –
Page 27

Troubleshooting
If you experience a problem with your AcomData product,
you should take the following actions in the order specified:
1. Make sure you followed all of the instructions in this
guide properly.
2. Consult the Troubleshooting sections of this guide.
3. If the issue you are having is still not resolved, please
contact Technical Support using one of the following
options:
a) via the online Technical Support form at our web site,
www.acomdata.com;
b) via e-mail at techsupport@acomdata.com;
c) by telephone at (909) 348-0680
Troubleshooting for PC Users
The power will not go on when I turn on the Drive.
A: Make sure your connections are secure.
My computer does not recognize the Drive.
A: Make sure all of your connections are secure. If you have
an add-on card, make sure it is working properly and/or
update the driver. Also, make sure you have all the latest
updates for your operating system.
My AcomData Drive feels warm when it’s powered on. Is
this dangerous?
A: When in operation, the Drive may feel quite warm to the
touch. This is normal.
The Drive gives me a “Device cannot start. Code (10).”
A: This is a power issue. Make sure your connections are
secure. The other possibility is that the Drive has malfunctioned and requires service.
I don’t see my AcomData Drive in My Computer, but it does
appear in Device Manager. (Windows XP & 2000 only)
A: Right-click on My Computer. Select Manage in the
pop-up menu. In the Computer Management window,
select Storage, then select Disk Management. In the Disk
Management window, you should see a list of available storage devices. Look for the Disk that has a capacity closest to
your AcomData Drive. Right-click on the right-hand box; in
the pop-up menu select Delete Partition. Once you do this,
it will say “Online” & “Unallocated.” Right-click on the box
and select Create New Partition in the pop-up menu. When
the Partition Wizard appears, select Primary Partition and
click on Next. You will see a default value for the AcomData
Drive; click Next. You will then see a drive letter (you can
change this drive letter if you wish); click Next. You will then
be asked to format the AcomData Drive.
When I leave my computer idle for a while and come
back, my AcomData Drive won’t work properly.
A: The most likely cause is that your computer is going
into Sleep mode. The immediate solution is to restart your
computer. To prevent this problem from reoccurring, go
into your Power Settings/Energy Saver and set it to where it
never goes into Sleep mode.
– 50 – – 51 –
When I try to format my Drive in Windows 2000/XP I get
the message: “Could not complete format.”
A: This problem can occur if you are using an expansion
card to connect the AcomData Drive. Plug the Drive into a
data port on your computer and try the format again.
You may also come across this error if you are using
Windows 2000 or XP and you try to format the AcomData
Page 28

Drive using the FAT32 file system. If reformatting the
AcomData Drive and you do not need Mac compatibility,
Windows 2000/XP users should use the NTFS files system.
If the driver listed is “USB Authoring Support” or “Toast
USB Support”, disable this Extension(s) in the Extensions
Manager, as they can cause a conflict with the Drive.
After I connected the Drive to my PC, I got the following
alert message: “Hi-Speed USB device plugged into nonHi-Speed USB Hub.” What does this mean?
A: Windows 2000 and XP users will get this alert message if
you plugged the AcomData Drive into a USB port that only
support USB 1.x. This is fine, except your AcomData Drive
will operate USB 1.x speeds (up to 12 Mbps).
When using a USB 2.0 connection, the Drive seems to be
operating slower than the rated 480 Mbps.
A: First, In order to reach USB 2.0 speeds, you need a connection that supports USB 2.0. If the connection only supports USB 1.x the Drive will operate at USB 1.x speeds (up to
12 Mbps). The Drive will auto-sense the speed of your USB
port and adjust between USB 1.x and USB 2.0 speed.
Second, 480 Mbps is the maximum speed of USB 2.0 devices.
Actual data transfer rates will vary depending on a number
of factors, including available CPU resources.
Troubleshooting for Mac users
The power will not go on when I plug in the Drive.
A: Make sure your connections are secure.
My computer does not recognize the Drive.
A: First, make sure the connections are secure. Second, check
if your AcomData Drive is listed in the Apple System Profiler.
When I leave my computer idle for a while and come
back, my AcomData Drive won’t work properly.
A: The most likely cause is that your computer is going to
sleep. The immediate solution is to restart your computer.
To prevent this problem from recurring, go into your Energy
Saver preferences and set it to never go into Sleep mode.
My AcomData Drive feels warm when it’s powered on. Is
this dangerous?
A: When in operation, the Drive may feel quire warm to the
touch. This is normal.
When using a USB 2.0 connection, the Drive seems to be
operating slower than the rated 480 Mbps.
A: First, In order to reach USB 2.0 speeds, you must have a
computer or host adapter card that supports USB 2.0. If the
connection only supports USB 1.x the Drive will operate at
USB 1.x speeds (up to 12 Mbps).
Second, 480 Mbps is the maximum speed that USB 2.0
devices can reach. Actual data transfer rates will vary
depending on a number of factors, including available CPU
resources.
When I connected the Drive to my computer, I got the
following alert message: “Please insert disk ‘untitled’.”
A: If you get this alert message, your Mac is not recognizing
your AcomData Drive and the mouse cursor may actually
freeze on screen. If this happens, hold down the Apple/
Control key and press the Period “.” key. You should regain
control of your mouse. Restart your computer and rebuild
– 52 – – 53 –
Page 29

the Desktop. (Refer to the manual that came with your Mac
for instructions on how to rebuild the Desktop. It is good
practice to periodically rebuilt the Desktop anyway.) After
your Mac reboots, the AcomData Drive should mount normally and you should not have this problem again.
I set up my AcomData Drive on Mac OS 9 and it was
working fine. Then when I upgraded to Mac OS X my
computer asked me to re-initialize the Drive.
A: If this message appears, you have no choice but to reinitialize (re-format) the AcomData Drive in order to use it
on Mac OS X. You will need to copy the data stored on your
Drive to another storage device before upgrading to Mac
OS X. After the upgrade is complete, re-initialize the Drive
on Mac OS X, and then copy the data back to it.
Why is my AcomData Drive asking me to initialize it? It
was already formatted and it contains data.
A: On Mac OS 9, you may need to initialize a hard drive the
first time you connect it to your computer, even though the
hard drive may have already been formatted.
Another reason is that the file system might have become
corrupted, in which case it needs to be repaired. Use disk
utility software, such as Norton Utilities, to repair the disk.
Periodic testing of a hard drive is recommended to keep it
in good working order.
I can’t transfer files larger than 2 GB.
A: This is a limitation of the FAT32 file system. If you plan to
use the AcomData Drive on a Mac OS only, and you do not
need Windows compatibility, consider re-formatting the
AcomData Drive using the Mac OS Extended file system.
Glossary
Bit - The smallest unit of digital data. In binary code, a bit is represented logically as a either a 1 or a 0.
Buffer – RAM cache that temporarily stores data so it can be delivered to a device as it is needed.
Bus – An electronic link that can transmit data between digital
devices, such as computers and computer peripherals.
Byte – A unit of digital data, usually made up of eight bits.
Capacity – The amount of data that can be stored on a hard drive
or other storage device.
Daisy chain – A hardware configuration in which peripheral devices are connected to each other in a series. The FireWire interface,
for example, supports a daisy chain of up to 62 drives.
Data Transfer Rate – The speed at which data transfers to and
from the drive.
Device Driver – A software program that enables a computer to
communicate with peripheral devices, such as hard drives and
CD-ROM drives. Each type of device requires a different driver.
External Hard Drive – A external peripheral device containing a
hard drive mechanism connected to a computer via a data communication interface.
FAT32 – A file system that organizes files on a disk. This file system
is standard for Windows 98SE and Me, and is supported under
Windows 2000 and XP. A single file is limited in size to 4 GB.
Format – Sets up a file system for storing and retrieving files on a
disk. Referred to as initialization on Mac.
Gigabyte – 1,024 megabytes (binary); 1,000 megabytes (decimal),
or approximately one billion bytes.
Hard Drive – An electromechanical device used for information
storage and retrieval, incorporating one or more rotating disks
(platters) on which data is recorded, stored, and read magnetically.
Hardware – Physical components of a computer system.
Hot-Pluggable – The ability to connect and disconnect external
– 54 – – 55 –
Page 30

devices while the computer is running.
Hub – A device which links peripherals together onto the same
data bus.
Interface – Junction between two items of hardware or software
for the exchange of data.
Mb (Megabit) – One million bits.
Mbps (Megabits per second) – A data transmission speed of one
million bits per second. Data transmissions are measured in bits
(kilobits, megabits etc) per second.
MB (Megabyte) – 1,048,576 bytes (binary); 1,000,000 bytes (decimal).
NTFS – The primary file system for Windows 2000 and XP operating system that organizes files on your computer. Supports large
capacity hard drives up to 2 TB.
Operating System (OS) – Software that controls the assignment
and use of hardware and software resources.
Partition – A way to logically divide a hard drive so that an operating system treats each partition as if it were a separate hard drive.
Each partition is assigned a unique drive letter in Windows or icon
in the Mac OS.
Peripheral – A generic term for hard drives, printers, scanners and
other discrete devices that add functionality to a computer.
Port – A connection which enables compatible devices to send
and receive data. A port can be either hardware-based or software
based.
Software – A set of instructions that enable a computer to perform
pre-programmed functions in the order specified by the user.
Startup Disk – The disk from which a computer loads its operating system at startup.
Volume – A fixed amount of storage on a hard drive. The term
volume is often used as a synonym for the drive itself, but it is
possible for a single drive to contain more than one volume or for
a volume to span more than one drive.
One Year Limited Warranty
AcomData warrants this product (the “Product”) against defects in material
or workmanship as follows:
1. LABOR: For a period of one (1) year from the original date of purchase from
AcomData or its local representative supplier, AcomData will repair defective
Product (or, at its option, replace with a new or recertified product) at no
charge. After this 1 year period, you must pay for all labor charges.
2. PARTS: For a period of one (1) year from the original date of purchase from
AcomData or its local representative supplier, AcomData will supply, at no
charge, new or rebuilt replacement parts in exchange for defective parts
of this Product. Any replacement parts will be warranted for the remainder
of the original warranty period or ninety (90) days from installation by
AcomData. All exchanged parts replaced under this warranty will become
the property of AcomData.
This warranty only covers the hardware components packaged with the
Product. This warranty does not cover: (1) any software contained in, or
included with, the Product; any such software is provided “as is.” Please refer
to any documentation included with the software for your rights and obligations with respect to the software; (2) any consumables (such as batteries)
supplied with this product; (3) cosmetic damages; (4) damage to or loss of
any software programs, data or removable storage media; (5) damage due
to the Product such as, but not limited to, excessive heat or humidity, or
modifications of this Product.
This Warranty does not apply if the malfunction results from: (1) the use of
this Product in conjunction with accessories, products or ancillary or peripheral equipment, or where it is determined by AcomData that there is no fault
with this Product itself; (2) improper installation, operation, testing or maintenance of this Product; (3) power failure or connection to improper voltage
supply; or; (4) attempted repair by any party other than AcomData.
This Limited Warranty is invalid if the factory applied serial number has been
altered or removed from the Product.
Repair or replacement, as provided under this warranty, is the exclusive
remedy of the consumer. AcomData shall not be liable for any incidental
or consequential damages for breach of any expressed or implied warranty, breach of contract, negligence, strict liability, or any other legal theory
related to this product. Such damages include, but are not limited to: loss of
profits; loss of data; loss of use of the product or any associated equipment;
– 56 – – 57 –
Page 31

down time and purchaser’s time.
This warranty extends only to you, the original purchaser. It is not transferable to any one who subsequently purchases the Product from you. Proof of
purchase in the form of a bill of sale (which is evidence that the Product is
within the warranty period) must be presented to obtain warranty service.
When sending an AcomData Product in for service you must take the
Product, or deliver the Product (freight prepaid) to AcomData, in either its
original packaging or in a package that provides the Product with a degree
of protection equivalent to that of the original packaging. AcomData is not
responsible for any damage to, or loss of, any programs, data, or other information stored on any media or any part of any product serviced hereunder.
Be sure to remove all features, parts, options, alterations, and attachments
not under warranty prior to returning the Product to AcomData. AcomData
is not liable for any loss or damage to these items.
Except to the extend prohibited by applicable law, any implied warranty of
merchantability or fitness for a particular purpose on this product is limited in
duration of this warranty.
Some states do not allow the exclusion or limitation of incidental or consequential damages, or allow limitations on how long on implied warranty
lasts, so the above limitation or exclusions may not apply to you. This warranty gives you specific rights; you may have other rights which vary from
state to state.
What you need in order to obtain warranty service:
1) A copy of the bill of sale from the purchase of your
AcomData product;
2) A Returned Merchandise Authorization (RMA) number
that is assigned to your product by your TSS. An RMA
can only be generated if the product has been registered
online at www.acomdata.com. If your AcomData product
is not registered at the time you need service, you must
register the product online or your Technical Support
Specialist can register it for you. Your TSS will then walk
you through the process to ensure you receive prompt
service.
Do not send a product in for service without first contacting
AcomData Technical Support and following the instructions
from your TSS. AcomData will not accept returned products
that have not been assigned an RMA number.
How to Purchase Accessories
Obtaining Service for Your AcomData Product
If you experience a problem with your Acomdata
product, please contact Technical Support at
techsupport@acomdata.com, or call (909) 348-0680.
A knowledgeable AcomData Technical Support Specialist
(TSS) will be able to help you solve most problems. If the
problem cannot be resolved by Tech Support, your TSS will
assist you in arranging for service. Please read the One Year
Limited Warranty for terms and conditions.
– 58 – – 59 –
You can purchase accessories by contacting Customer
Service at customerservice@acomdata.com.
In your e-mail, please include:
• your name;
• phone number;
• mailing address;
• model number or description of item (e.g. 6-pin to 4-pin
FireWire cable);
• quantity per item.
A Customer Service agent will contact you to complete the
transaction.
Page 32

Notices
COPYRIGHTS
Copyright © 2005 AcomData. All rights reserved. No part of
this publication may be reproduced stored in a retrieval system, or transmitted in any form or by any means, electronic,
mechanical photocopying, recording or otherwise, without
the prior written consent of AcomData.
TRADEMARKS
The AcomData name and its logos are registered trademarks
of AcomData. Retrospect is a registered trademark of EMC
corporation. Other trademarks mentioned or appearing in
this document are the property of their respective owners.
CHANGES
The material in this document is for information only and
subject to change without notice. While reasonable efforts
have been made in the preparation of this document to
assure its accuracy, AcomData assumes no liability resulting
from errors or omissions in this document, or from the use
of the information contained herein. AcomData reserves the
right to make changes or revisions in the product design or
the product manual without reservation and without obligation to notify any person of such revisions and changes.
FEDERAL COMMUNICATIONS COMMISSION (FCC)
RADIO FREQUENCY INTERFERENCE STATEMENT
This equipment has been tested and found to comply with
the limits for a Class B digital device, pursuant to Part 15 of
the FCC Rules.
CANADA COMPLIANCE STATEMENT
This Class A digital apparatus meets all requirements of the
Canadian Interference-Causing Equipment Regulations.
– 60 –
Page 33

Windows
Microsoft
Copyright © 2005 AcomData. All rights reserved. The AcomData name and its logos are registered trademarks of AcomData.
Retrosp ect is a registere d trademark of EMC corpo ration. Other trademarks mentioned or appearing in this document are the
property of their respective owners. P rices and spec ifications are subject to change with out notice.
 Loading...