

ACI-Automation Components CONNECTING MIDI HINGED SPLIT-CORE CTs TO A LOAD Instruction Sheet
Page 1
STEP-BY-STEP GUIDE
TO CONNECTING MIDI HINGED
SPLIT-CORE CTs TO A LOAD
ALL WORK SHOULD BE
PERFORMED BY A QUALIFIED
ELECTRICIAN USING PROPER
SAFETY EQUIPMENT
Equipment is protected throughout by
double insulation (IEC 536 Class III)
1. Open the CT by undoing the latch with a
small screwdriver and swinging the leg of
the CT open.
2. Connect CT around the load conductor to
be measured. Make sure the maximum
current of the conductor does not exceed
CTs rating. The arrow on the CT points
towards the load.
3. Re-connect the latch--you will hear it click
when it is properly closed. The conductor
should be in the inside of the CT window.
(See Photos 2 & 3.)
4. Repeat Steps 1-3 if you are using more
than one CT.
5. [Optional] Use two zip ties to secure the
CT to the conductor by wrapping one zip
tie around each of the CT's mounting
brackets. This will ensure the CT does not
slide on the conductor once installed.
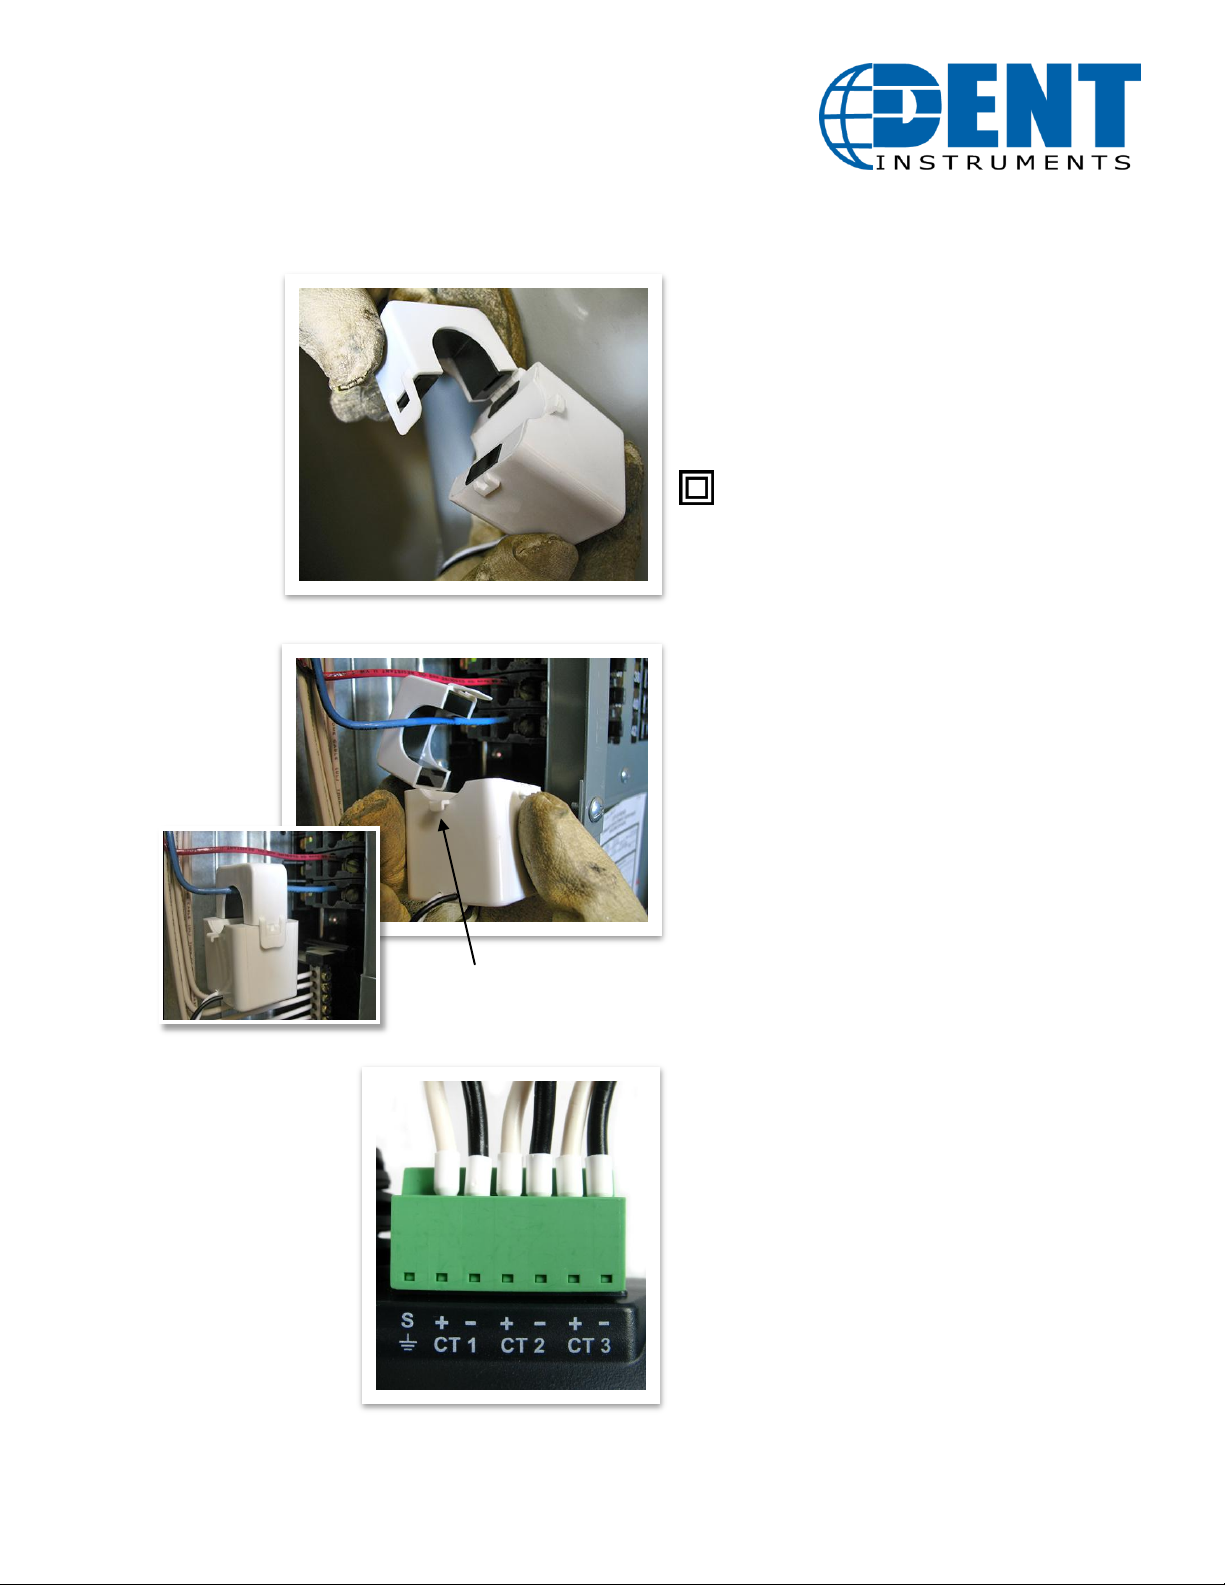
6. Connect the white wire on the CT to the
positive terminal on the measuring device.
(See Photo 4.)
7. Connect the black wire on the CT to the
negative terminal on the measuring
device. (See Photo 4.)
8. You are now ready to begin your
monitoring session.
Photo 1: Pull
CT Apart.
Photos 2 & 3:
Install CT
Around
Conductor.
Photo 4: Connect White Wire
to Positive Terminal. Connect
Black Wire to Negative
Terminal.
Mounting bracket
 Loading...